You might have asked yourself how it is that some phones charge up faster than others. Maybe the same phone charges at different speed when you’re using a different cable or power supply. It even might not charge at all.
There is some very complicated trickery in place to make those cables and power supplies do things in combination with the active devices like phones. Many of this is implemented by standards like “Quick Charge”:
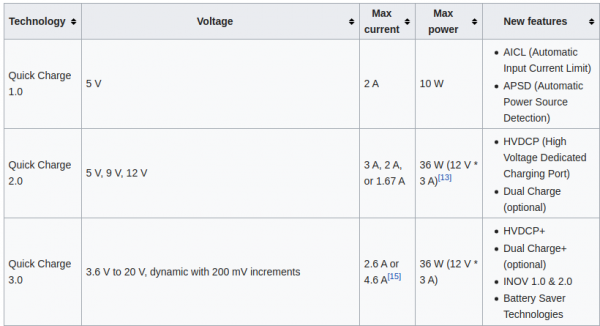
Quick Charge is a technology found in QualcommSoCs, used in devices such as mobile phones, for managing power delivered over USB. It offers more power and thus charges batteries in devices faster than standard USB rates allow. Quick Charge 2 onwards technology is primarily used for wall adaptors, but it is also implemented in car chargers and powerbanks (For both input and output power delivery).
So in a nutshell: If you are able to speak the quick charge protocol, and with the right cable and power supply, you are able to get anything between 3.6 and 20V out of such a combination by just telling the power supply to do so.
This is great for maker projects in need of more power. There’s lots of things to consider and be cautious about.
We’ve got several quite big fish tanks in our house. Mainly used by freshwater turtles.
say Hi! to Wilma.
These turtles need to be fed every once in a while. And while this is not an issue normally it’s an issue if you leave the house for travel for an extended period of time.
Of course there are humans checking on everything in the house regularly but as much as can be automated should and will be automated in our household. So the requirement wa to have the turtle feeding automated.
To achieve this is would be necessary to have a fixed amount of turtle food be dispensed into the tanks on a plan and with some checks in the background (like water quality and such).
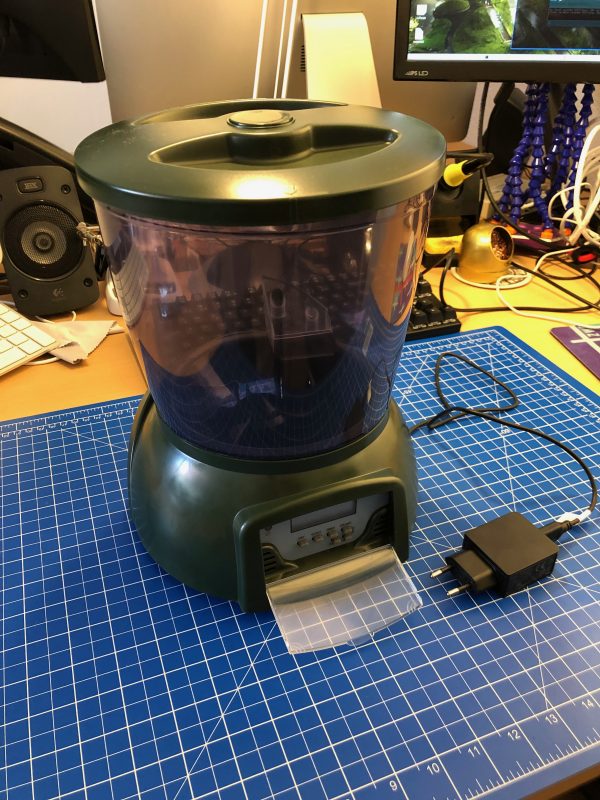
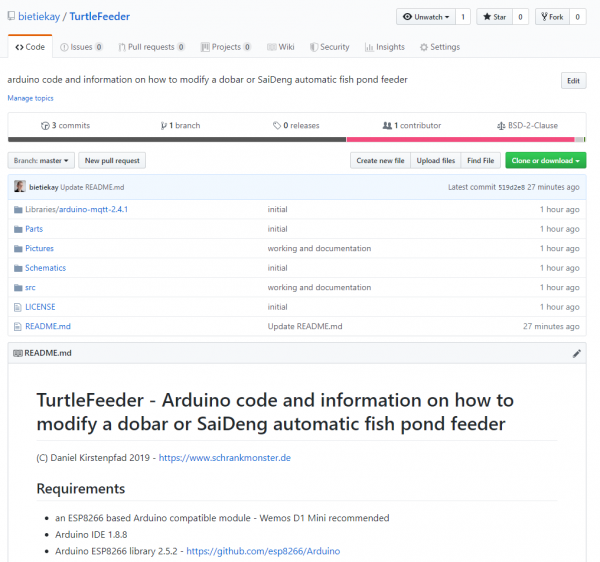
It’s been quite a hassle to come up with a plan how the hardware should look like and work. And ultimately i’ve settled on retrofitting an off-the-shelf fish pond feeder to become controllable through MQTT.
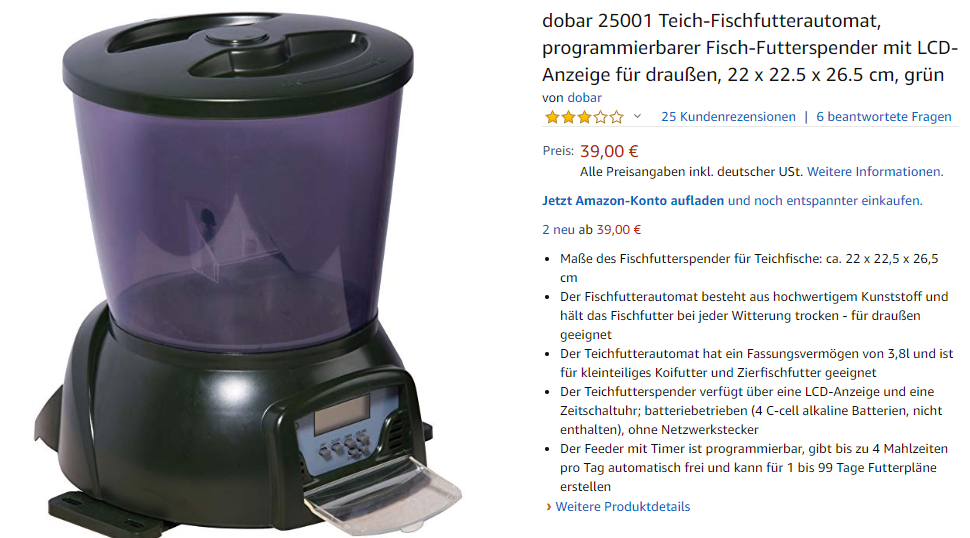
The pond feeder I’ve found and used is this one:
It’s not really worth linking to a specific product detail page as this sort of feeder is available under hundreds of different names. It always looks the same and is priced right around the same.
If you want to build this yourself, you want one that looks like the above. I’ve bought 3 of them and they all seem to come out of the same factory somewhere in China.
Anyway. If you got one you can easily open it up and start modifying it.
Hardware
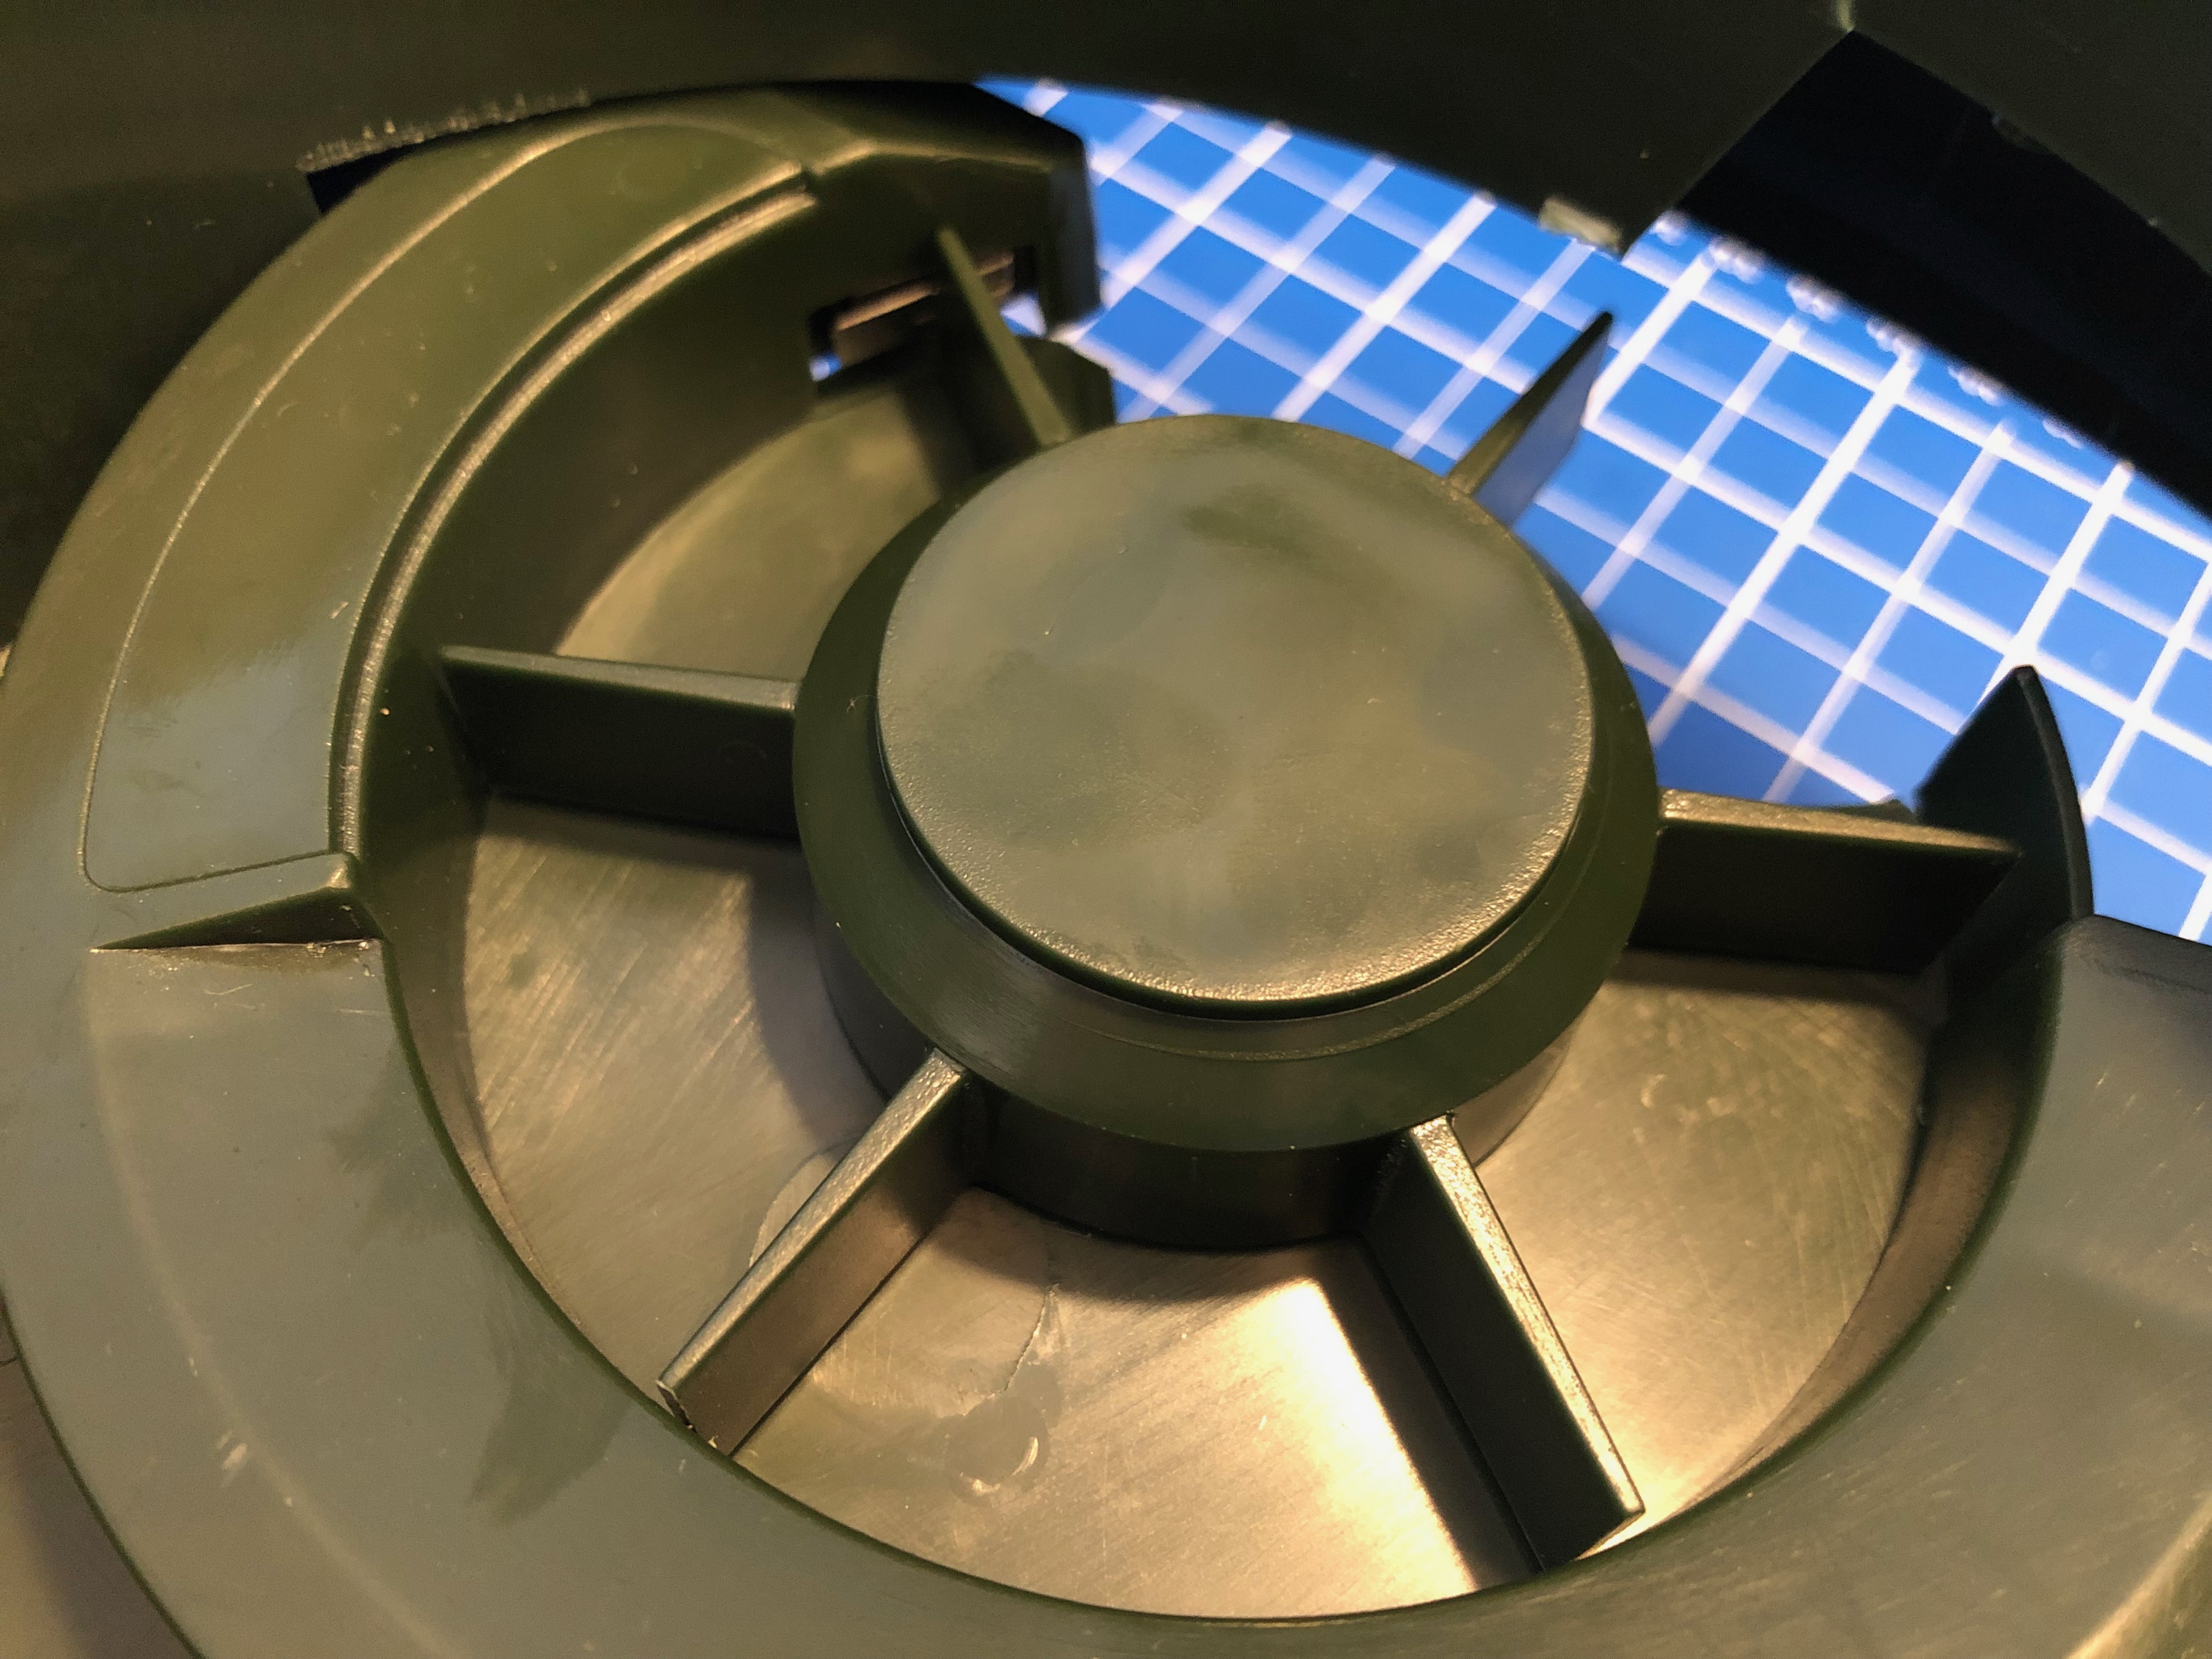
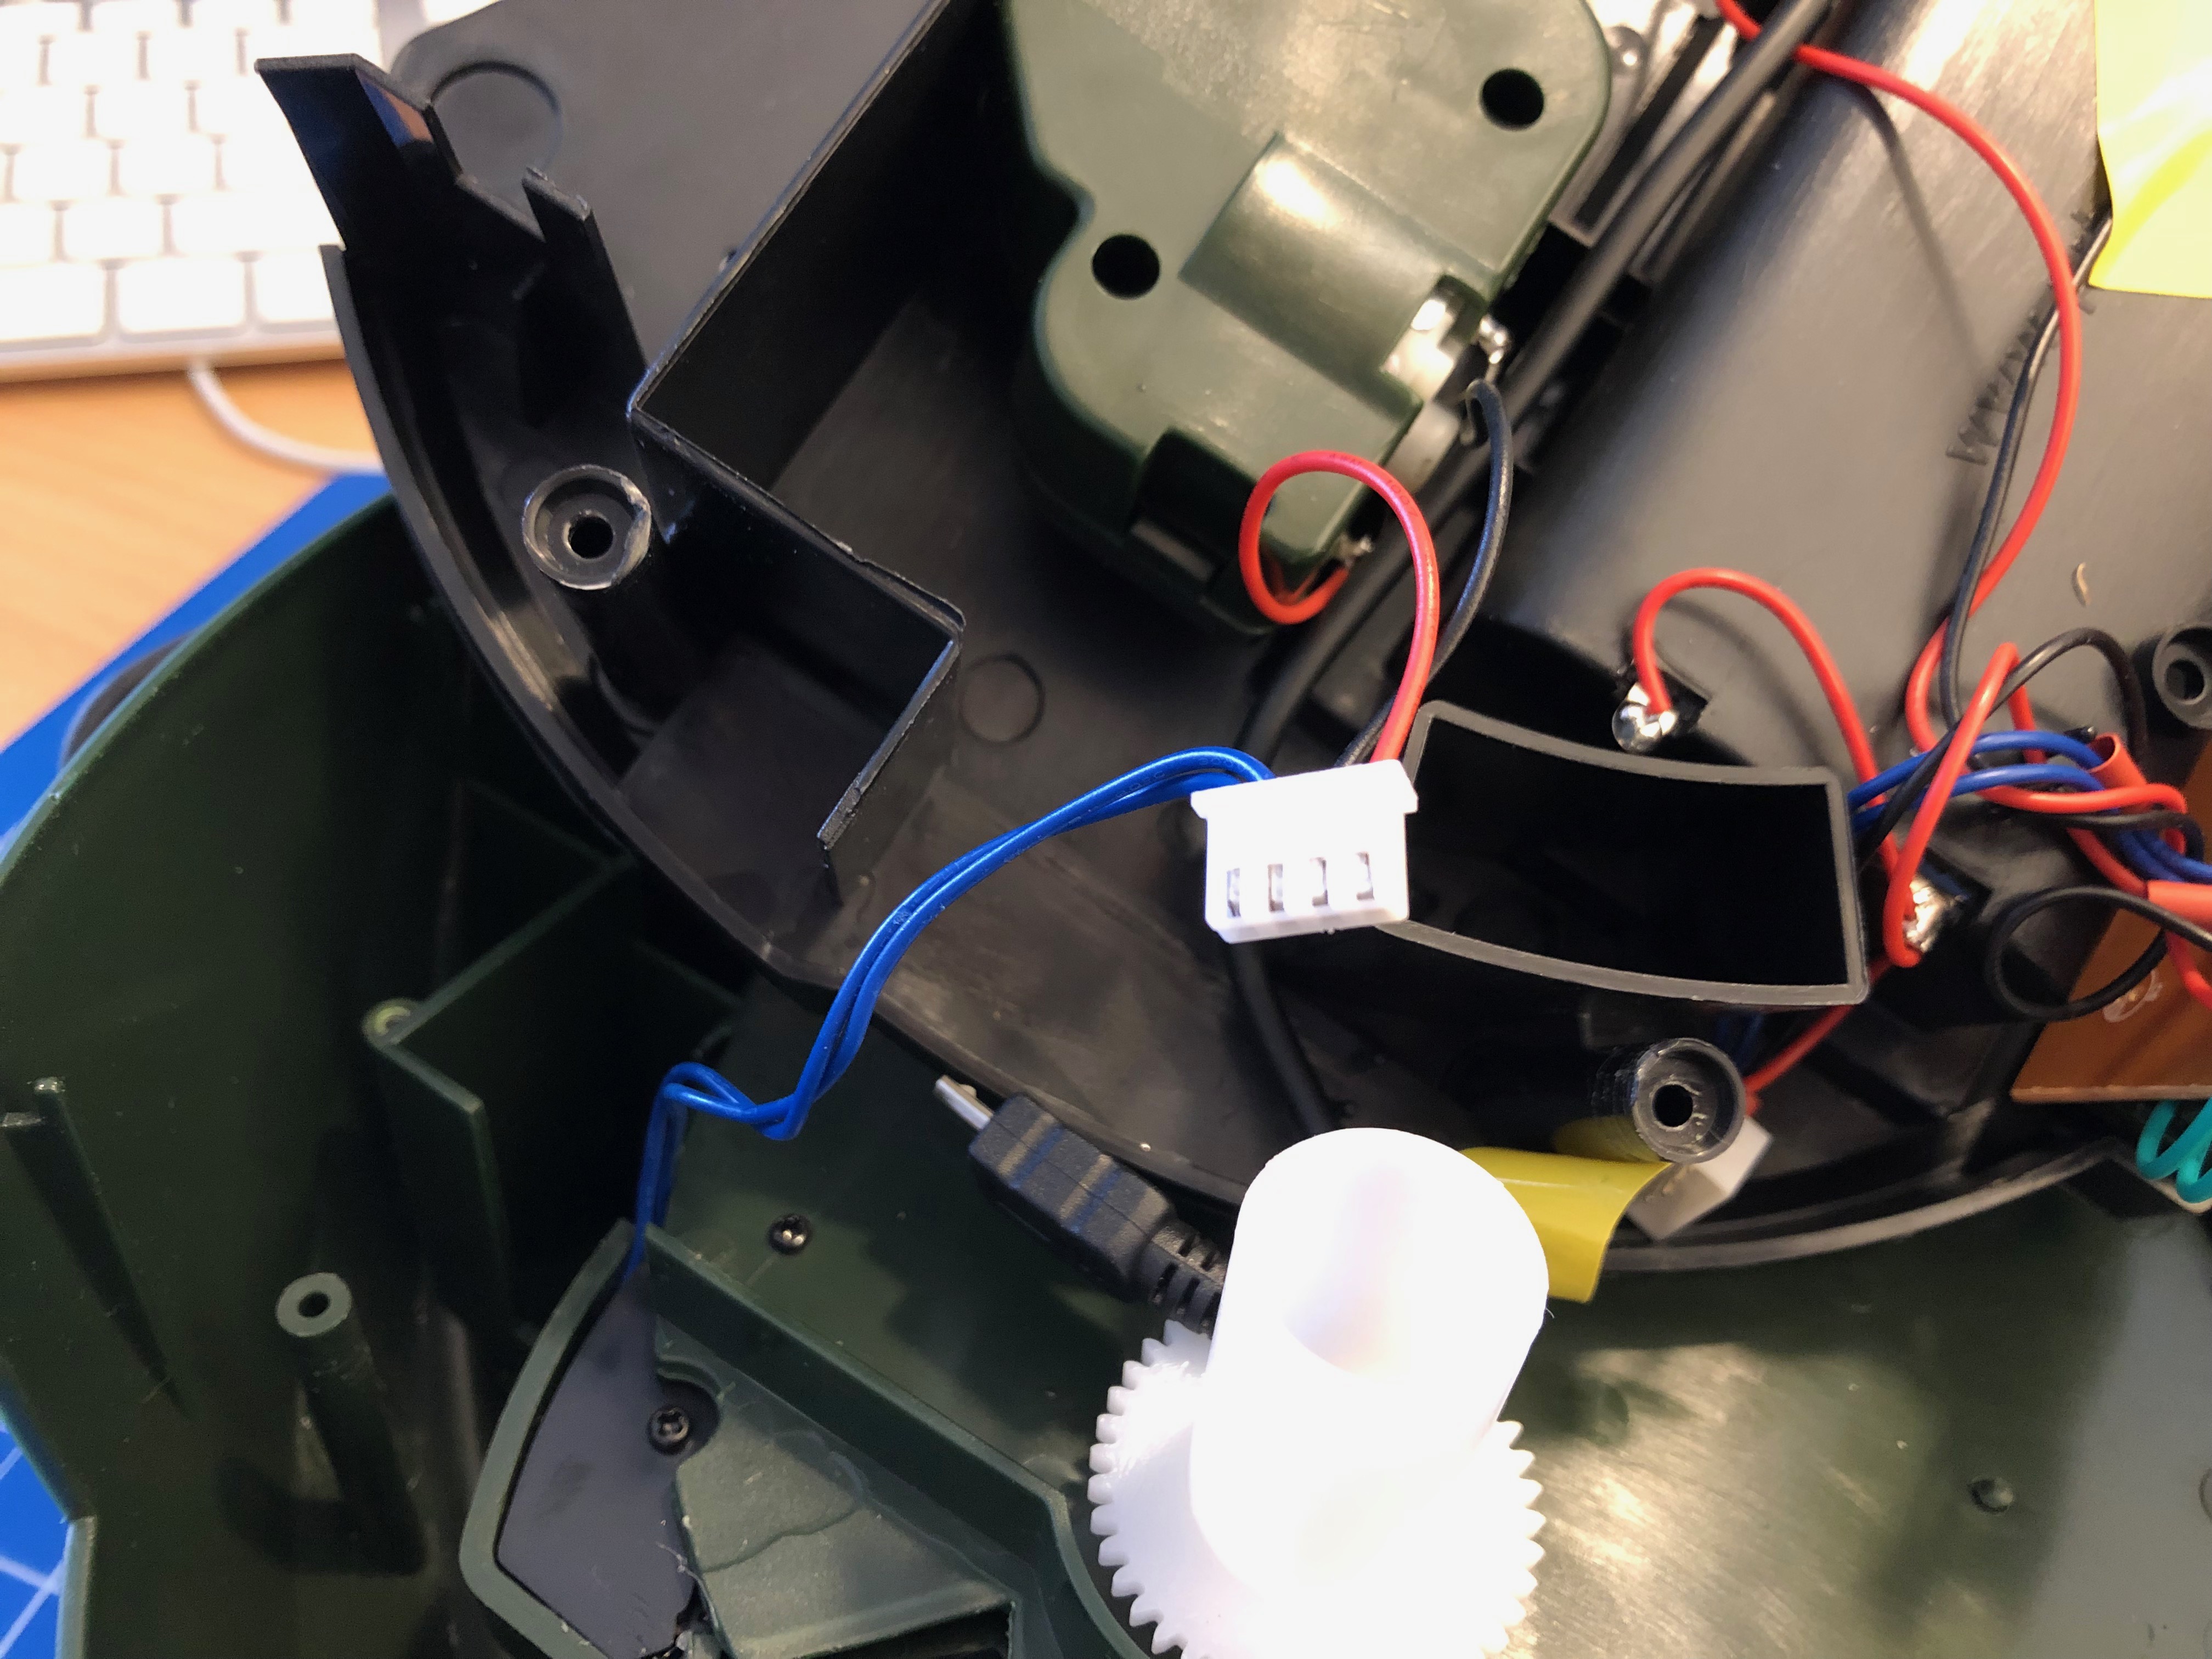
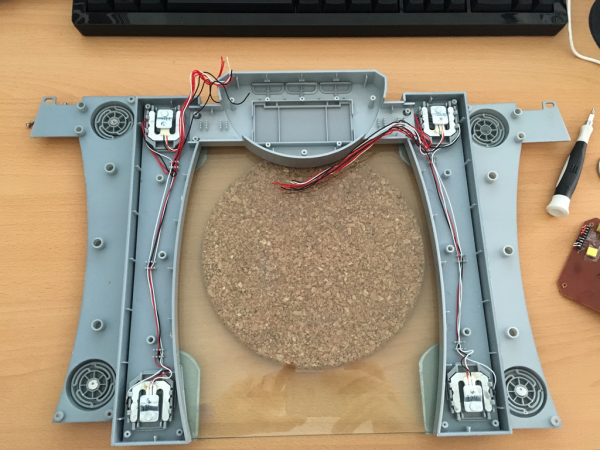
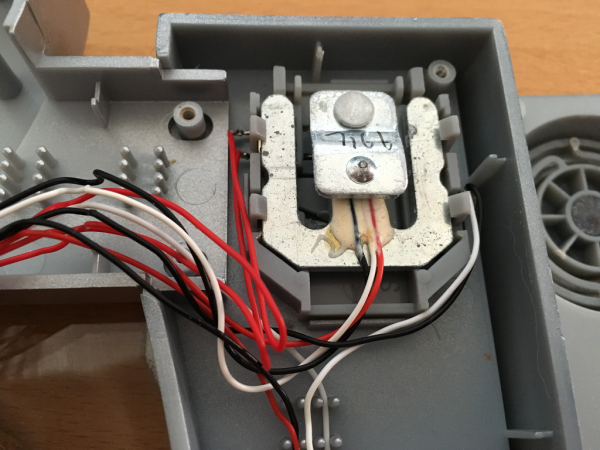
the wheel is turned by a DC motor and the switch is triggered by the wheels fins
I’ve added a connector to the switch and the motor cables for quick connect
The functional principle of the feeder is rather simple:
turn the feeder wheel
take the micro-switch status in account – when it’s pressed down the wheel must be pushing against it
turn it until the micro-switch is not pressed anymore
turn some more until it’s pressed again
Simple. Since the switch-status is not known on power loss / reboot a calibration run is necessary (even with the factory electronics) every time it boots up.
After opening the feeder I’ve cut the two cables going to the motor as well as the micro-switch cables. I’ve added a 4-Pin JST-XH connector to both ends. So I can reconnect it to original state if desired.
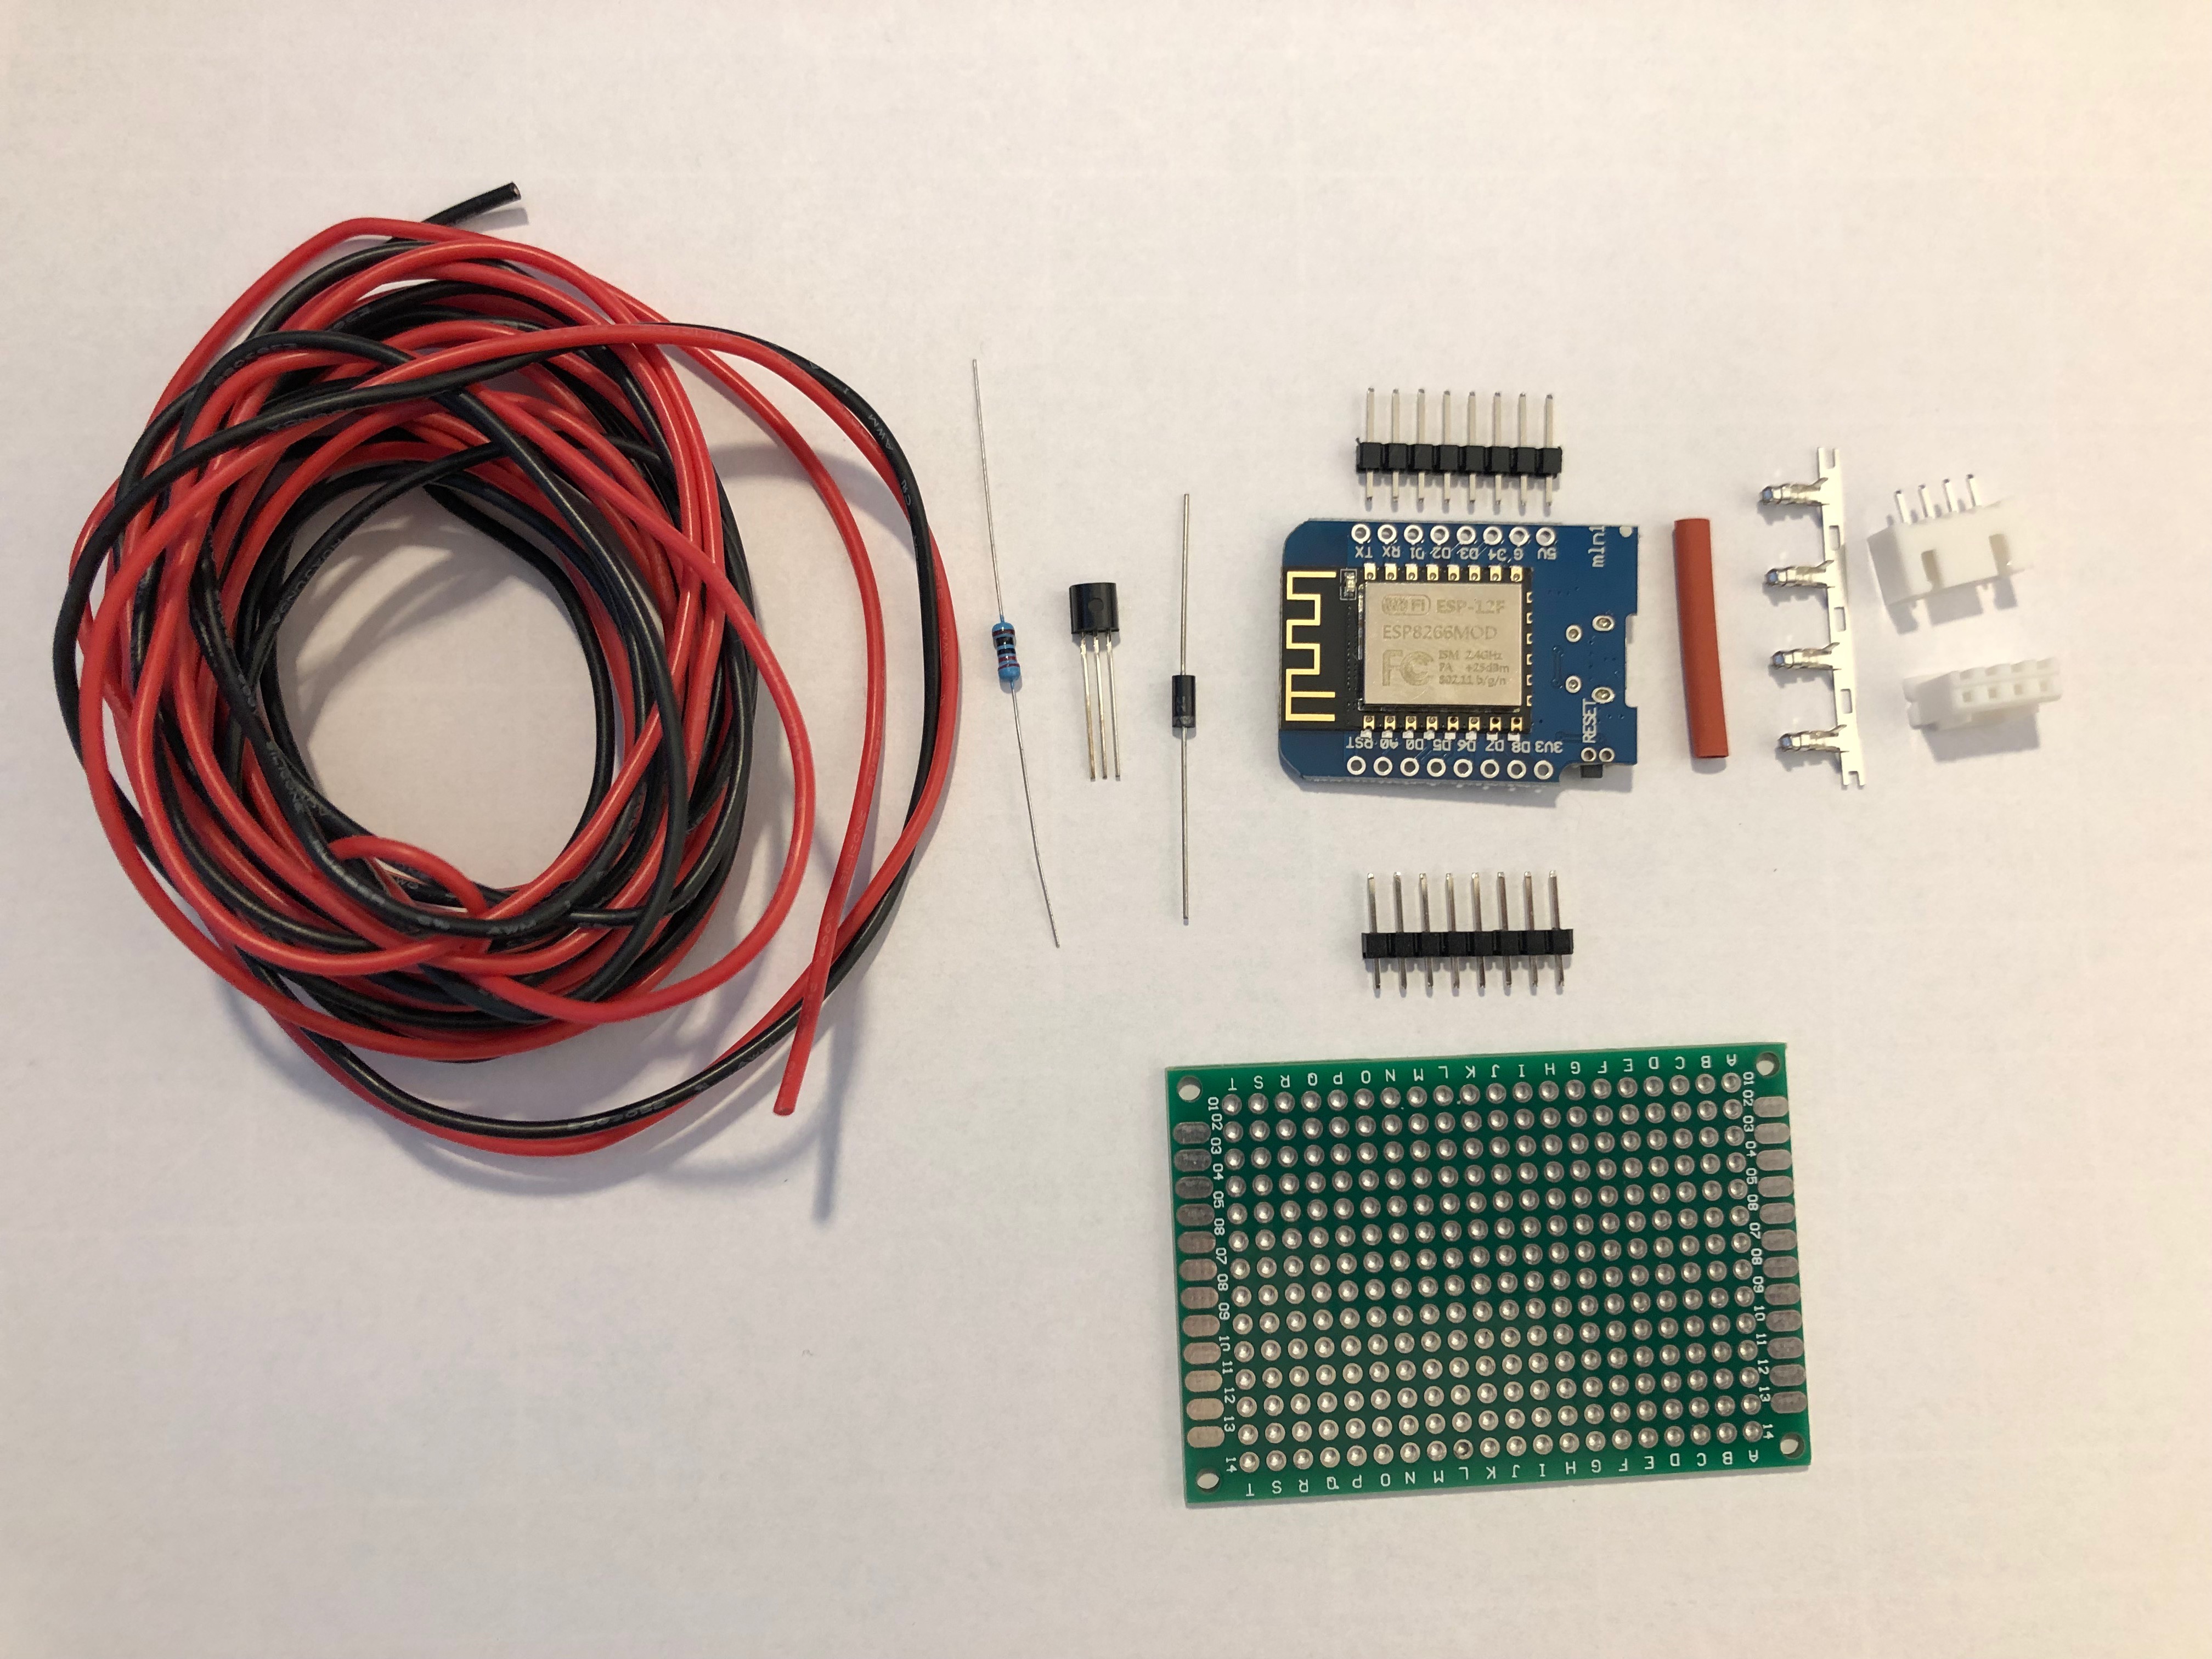
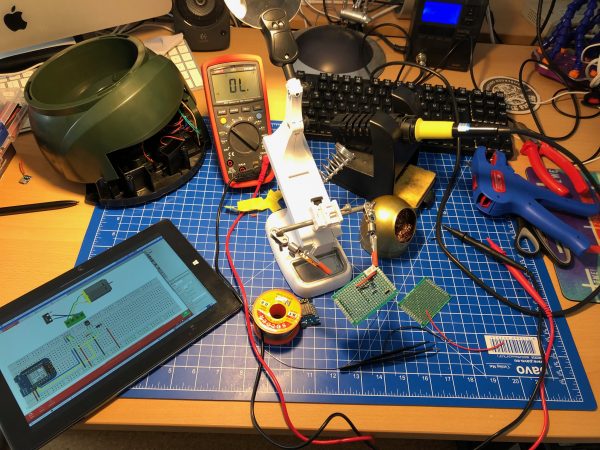
These are all the parts needed:
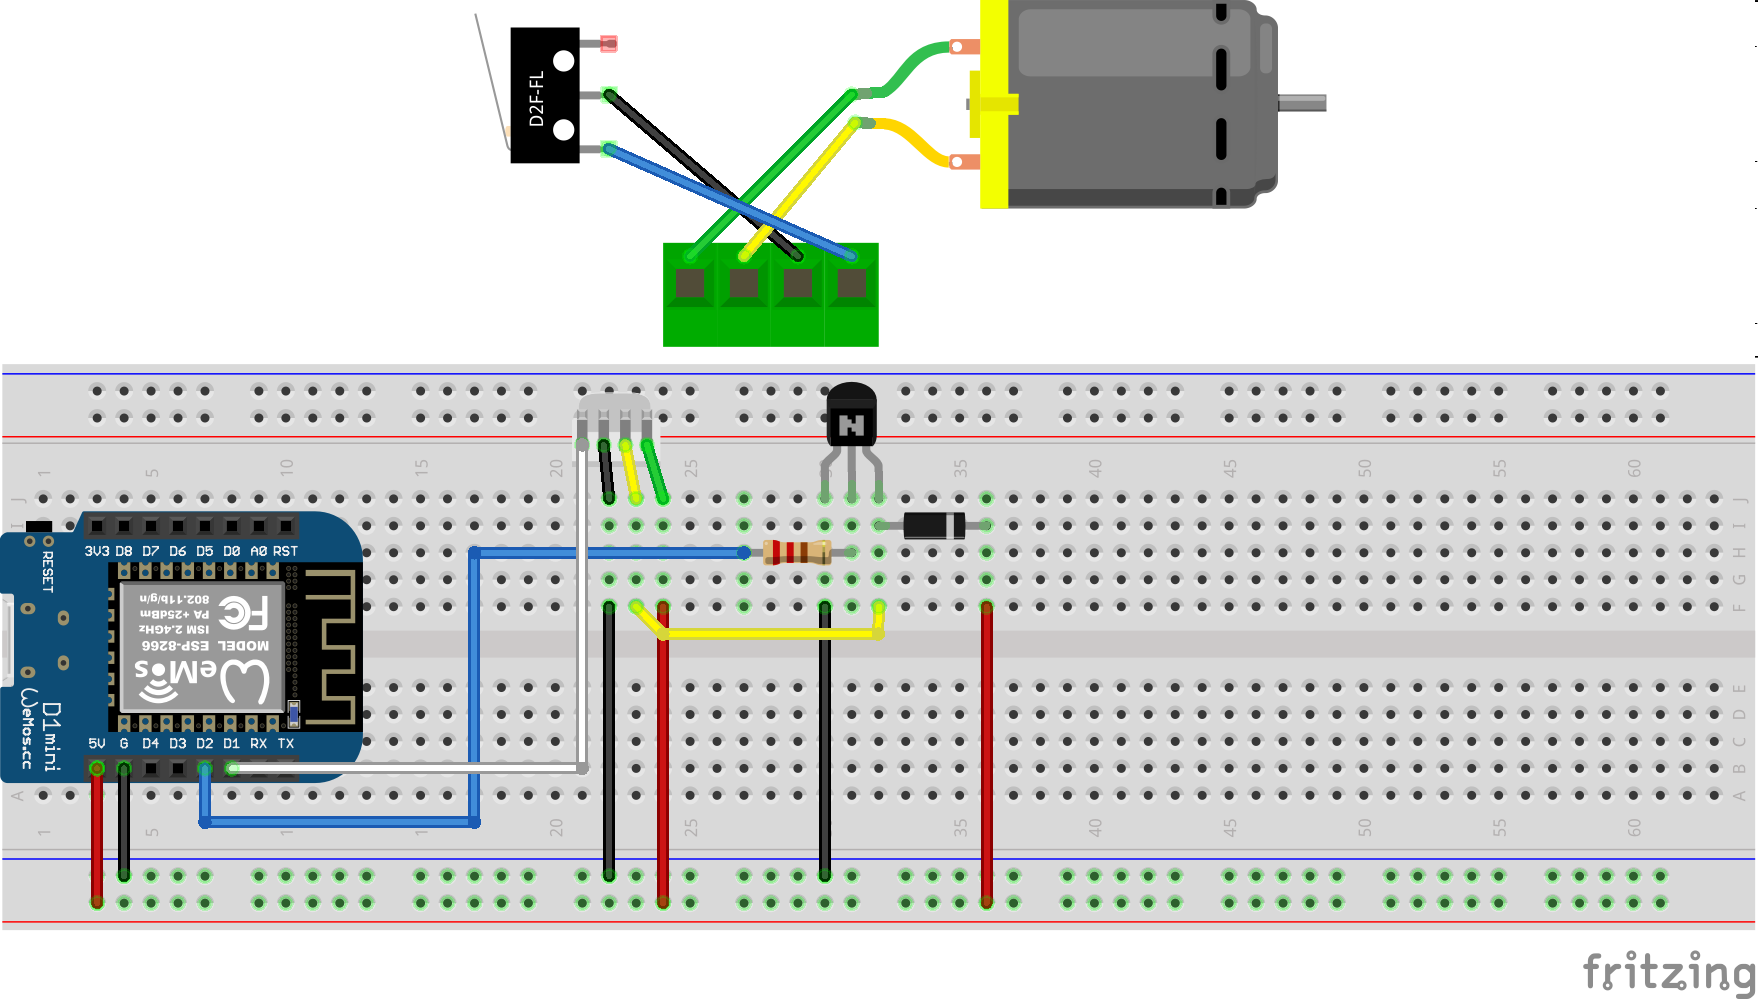
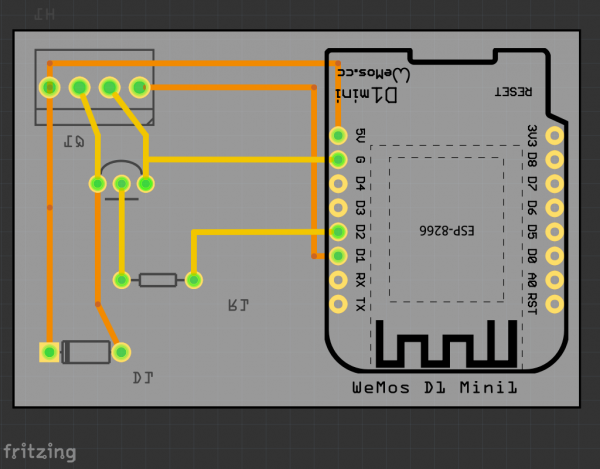
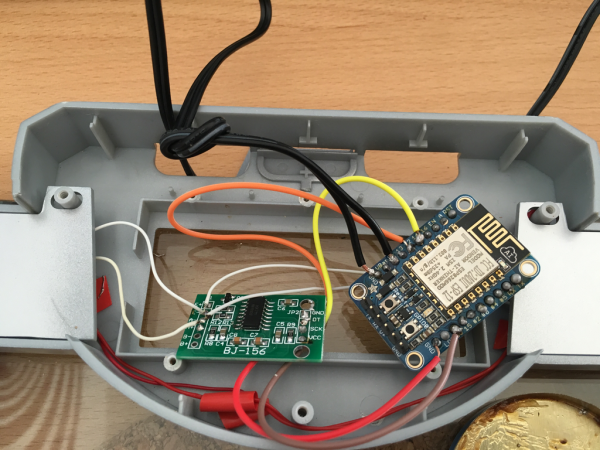
I am using a Wemos D1 Mini and a couple of additional components apart from the prototype board:
A PN2222 NPN transistor, a rectifier diode 1N4007 and a 220 Ohm resistor.
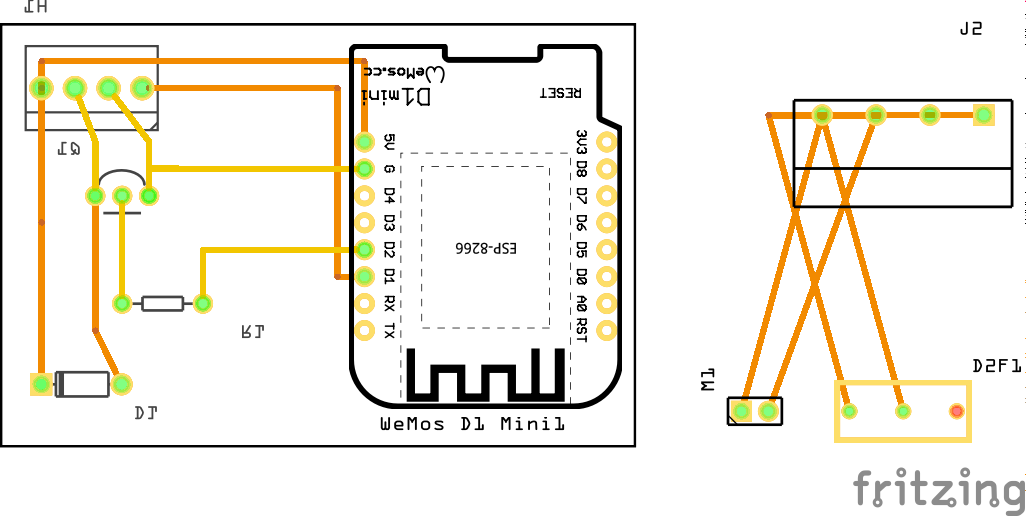
I’ve connected everything according to this schematic I’ve drawn with Fritzing:
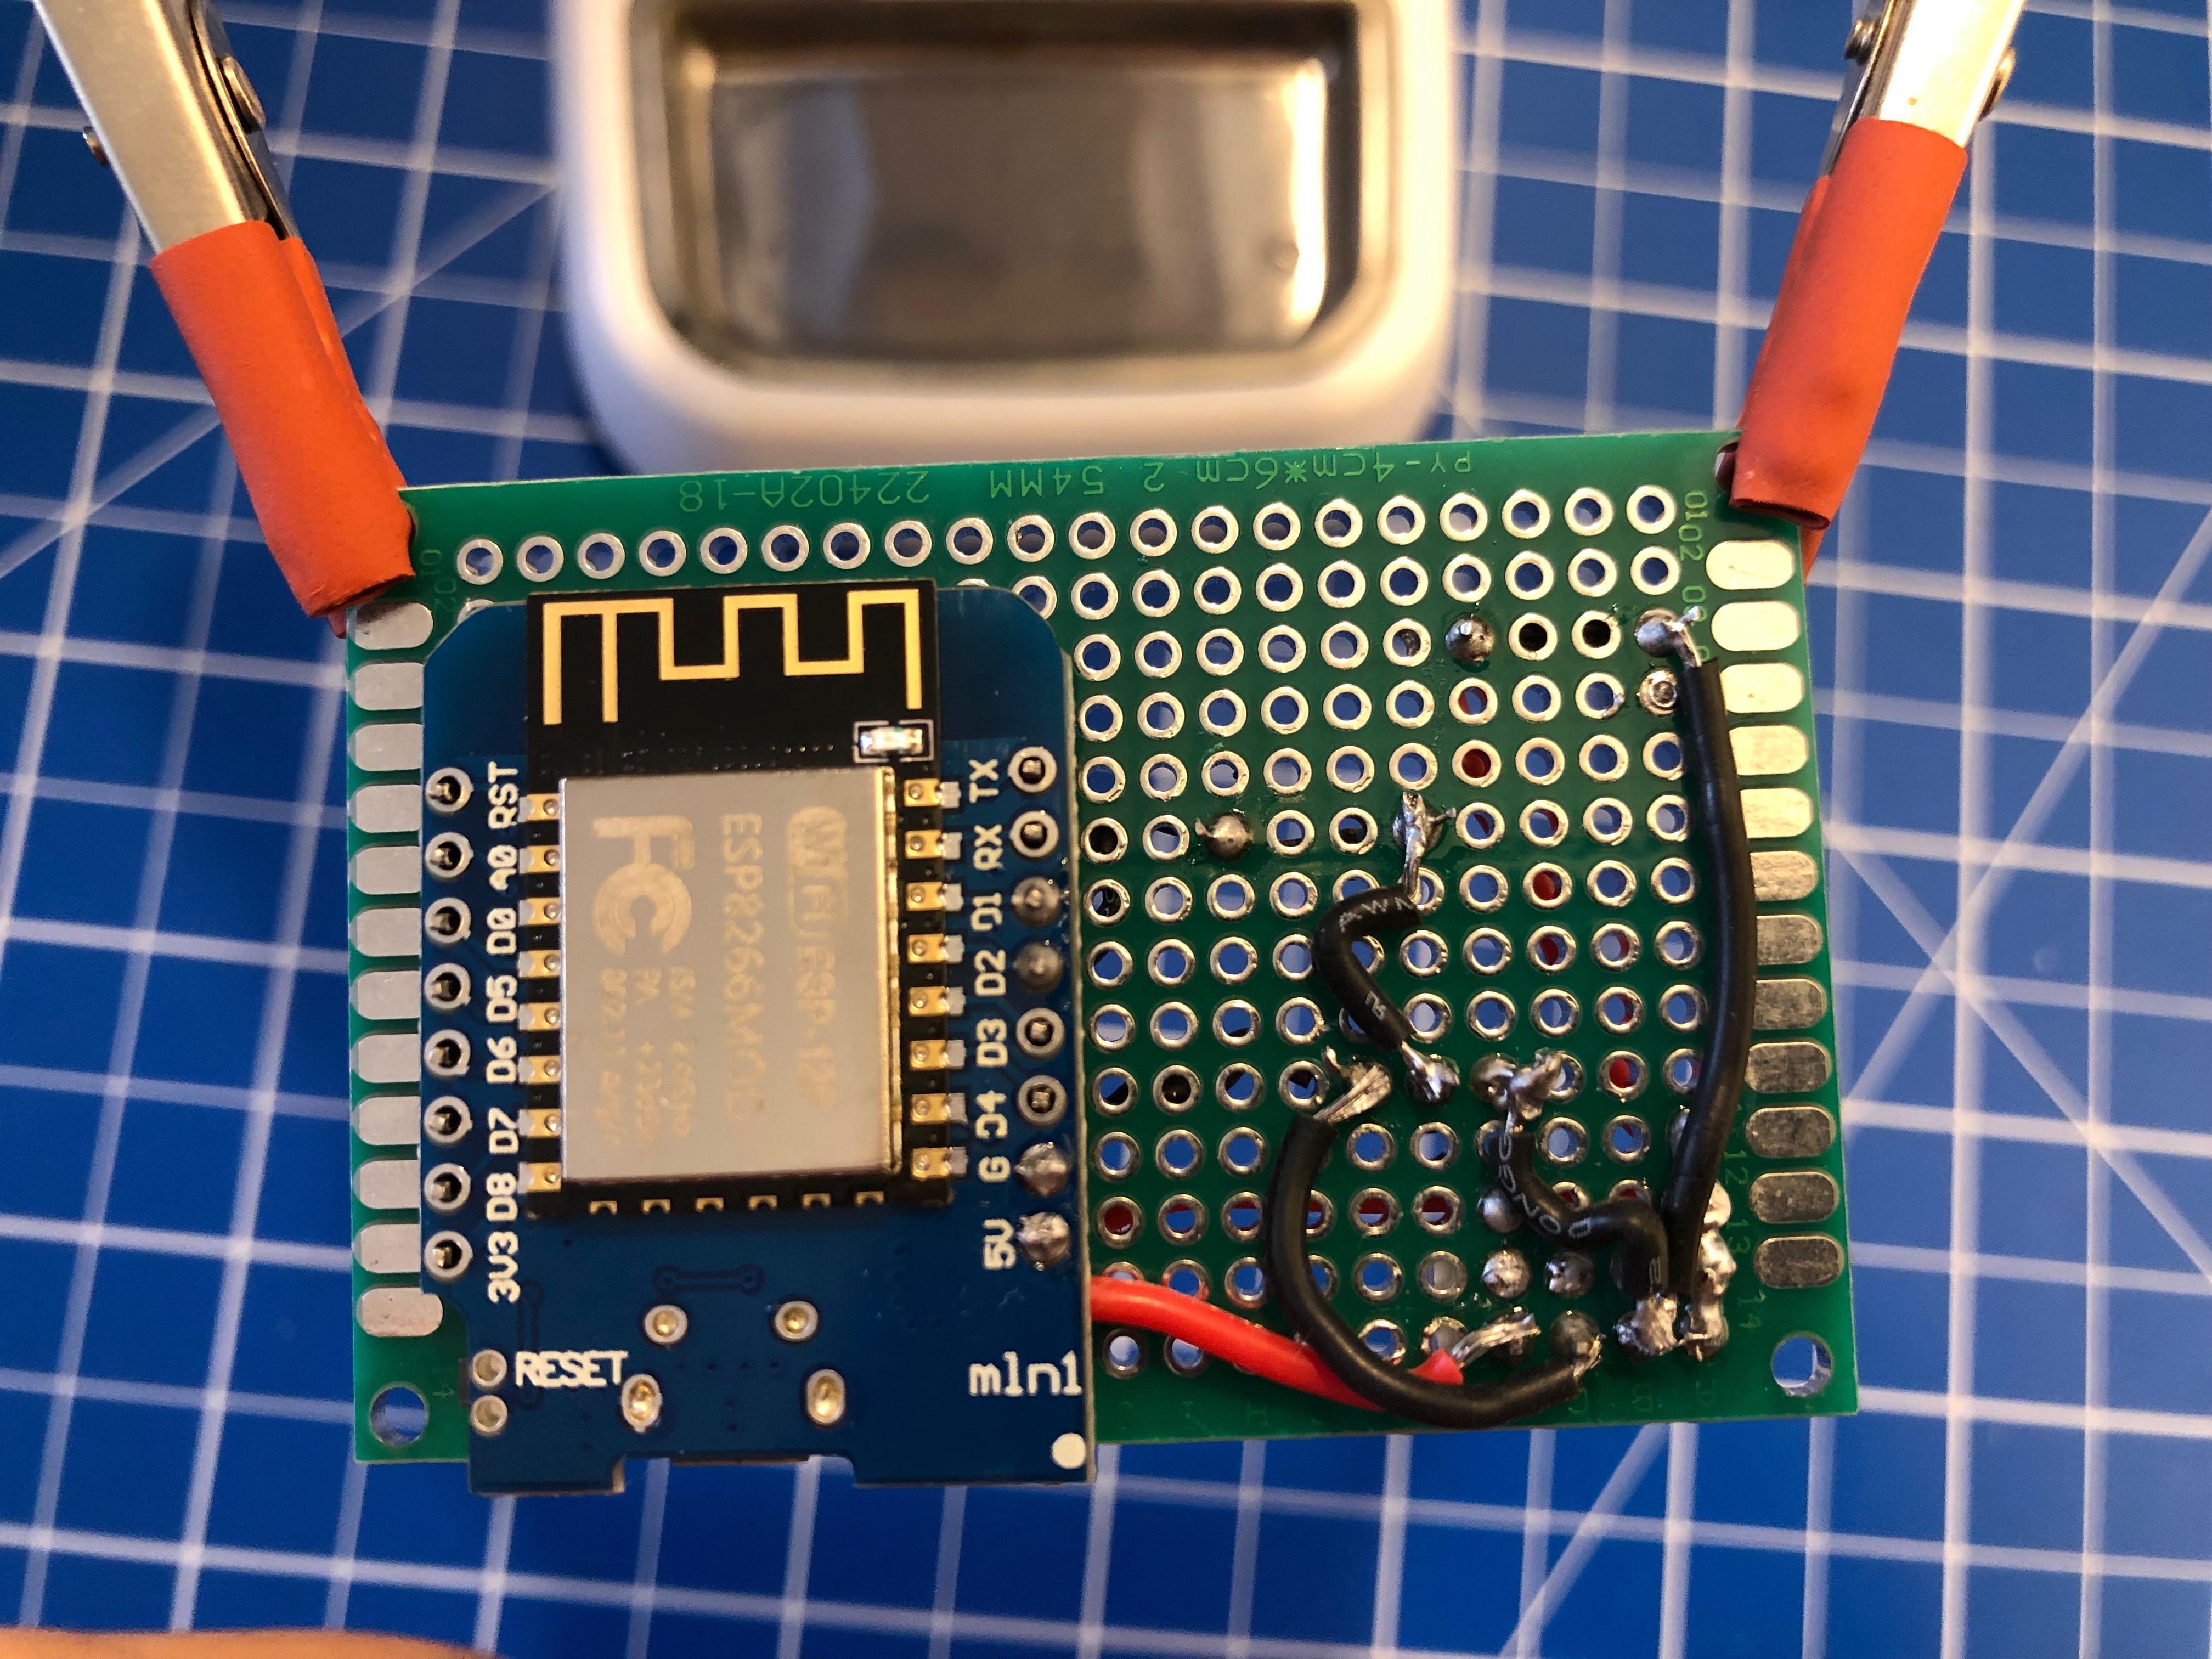
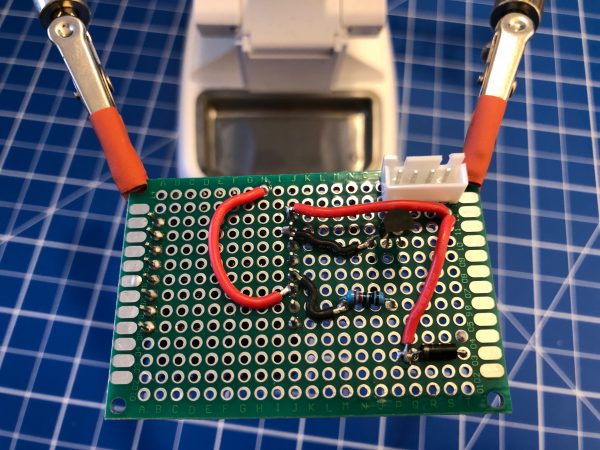
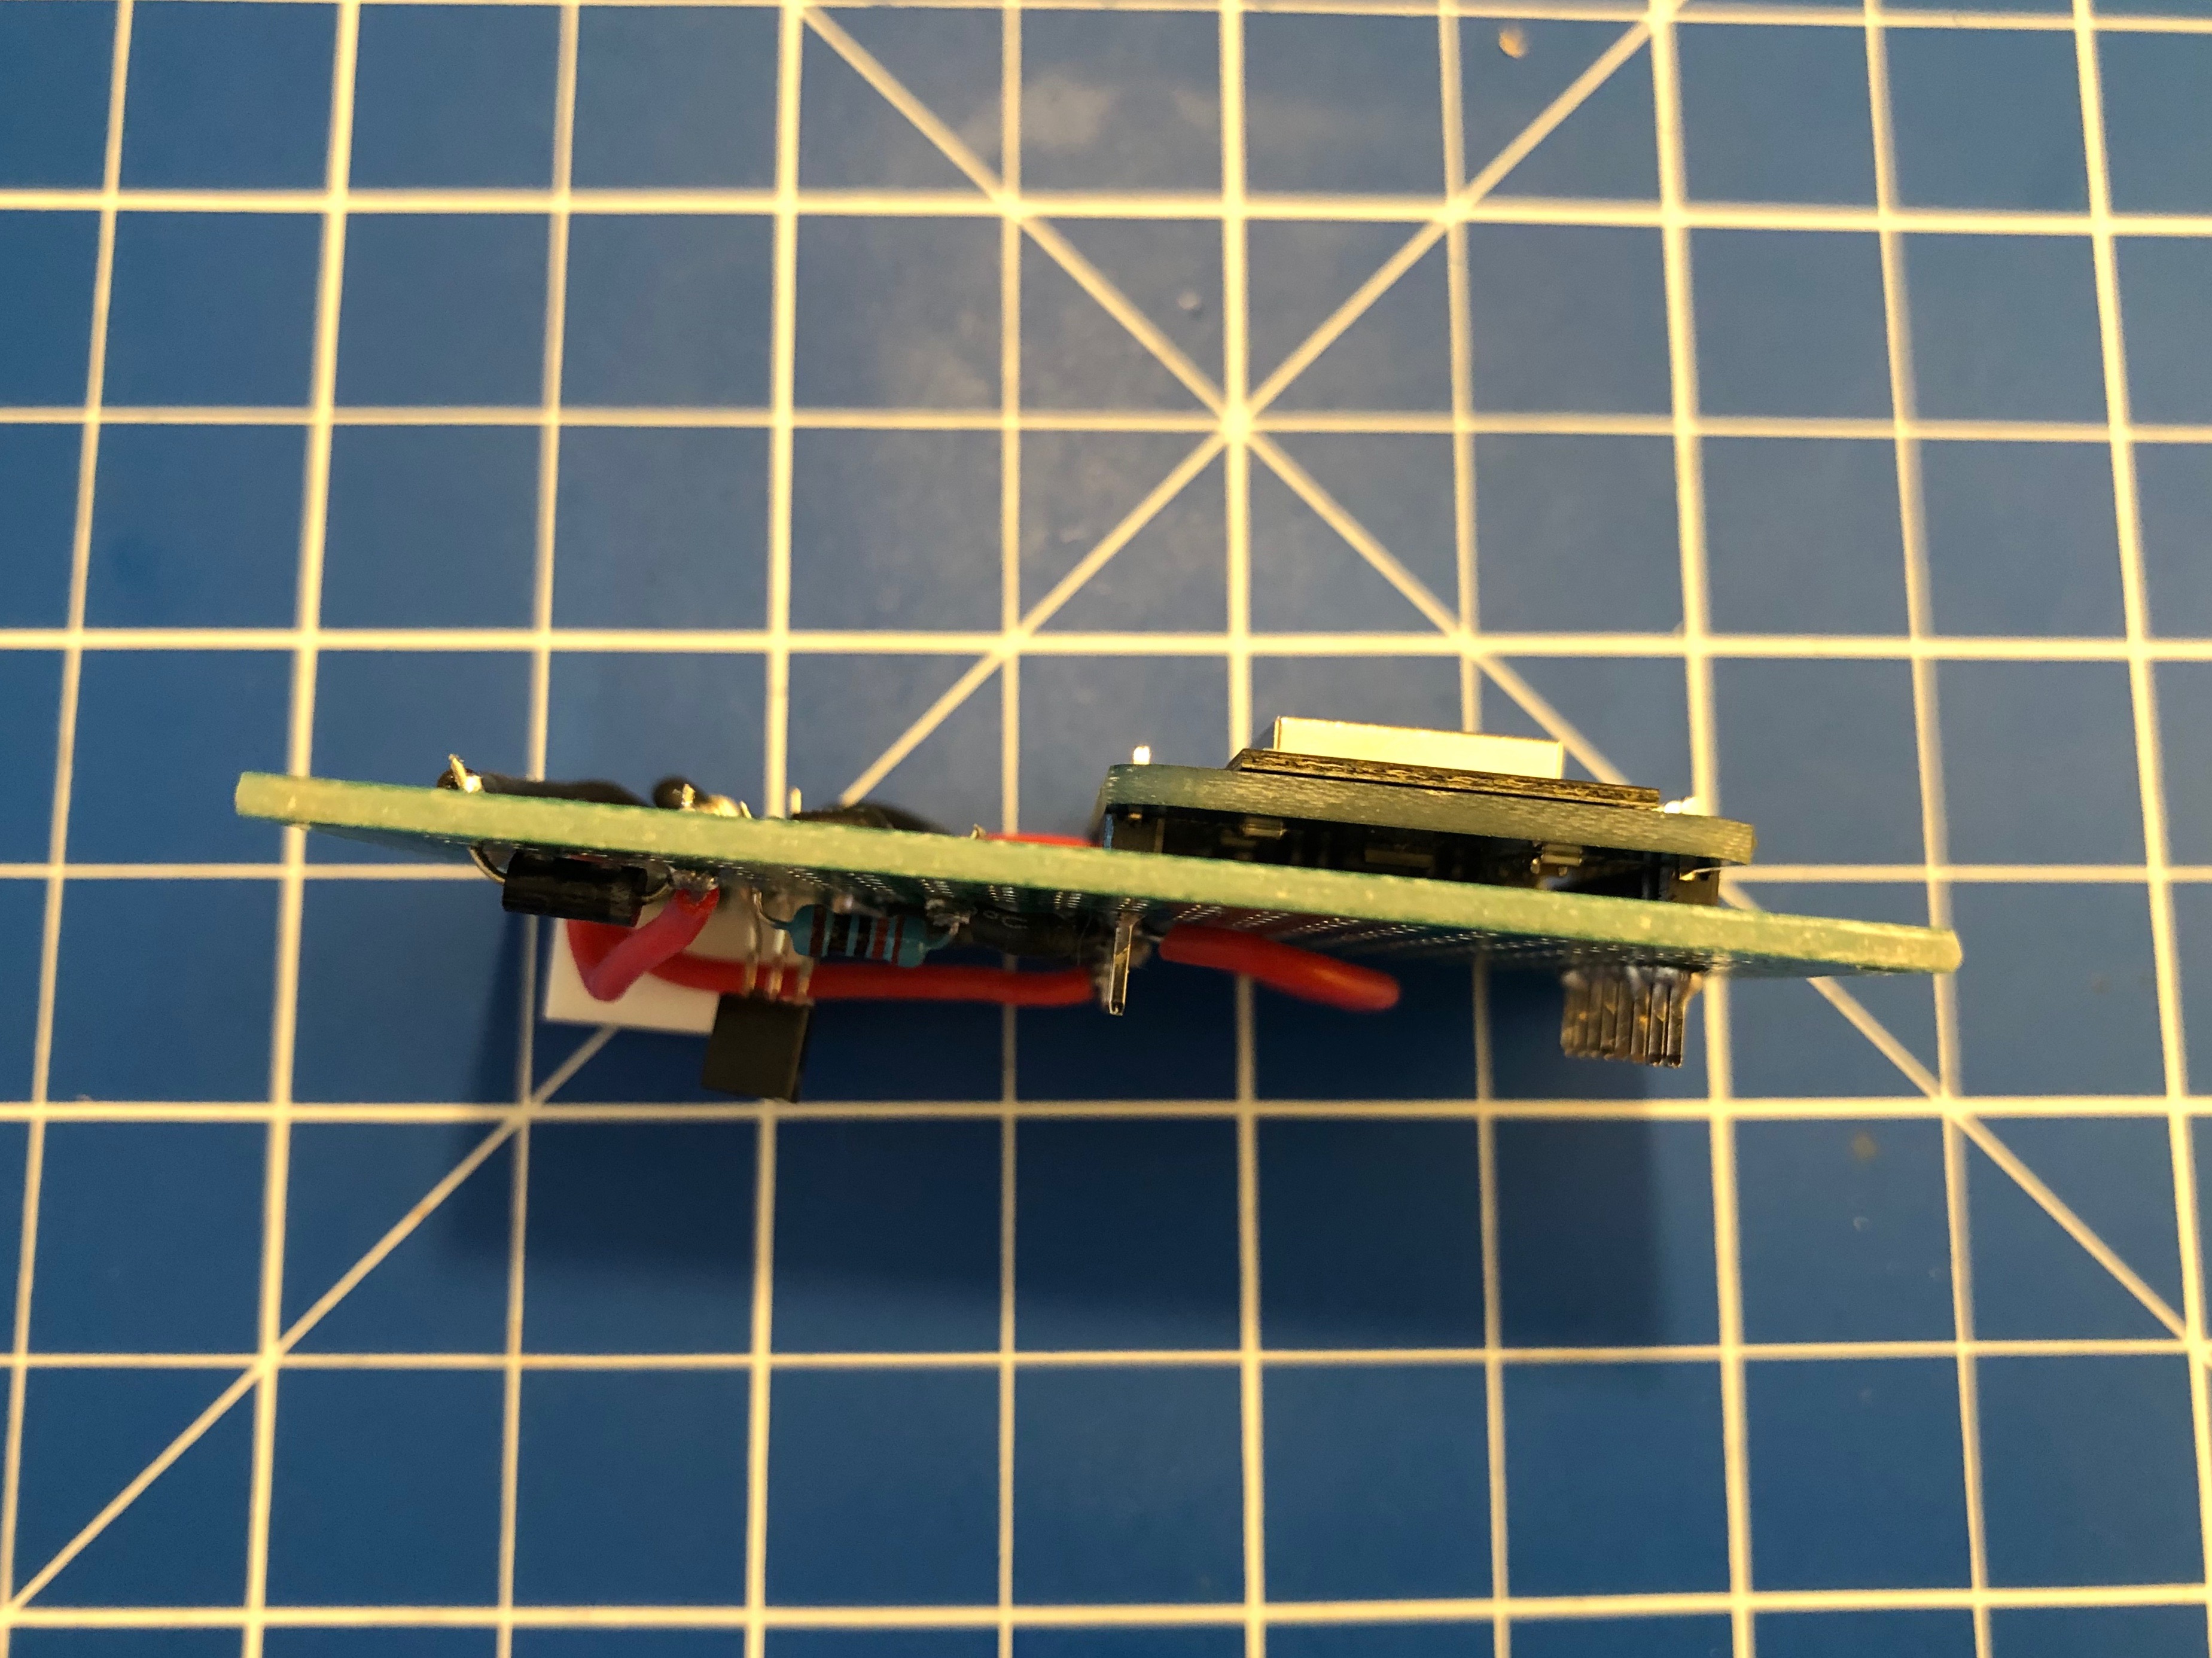
I’ve then prototyped away and put everything on the PCB. Of course with very limited solderig skill:
As you can see the JST-XH connector on Motor+Switch can now be connected easily to the PCB with all the parts.
Make sure you check polarity and that you did correctly hook up the motor and switch.
When done correctly the PCB (I’ve used 40mm x 60mm prototype pcb) and all cables will fit into the case. There’s plenty of room and I’ve put it to the side of it. I’ve also directly connected an USB cable to the USB port of the Wemos D1 Mini. As long as you put at least 1A into it it will all work.
Software
Since the Wemos D1 Mini sports an ESP8266 and is well supported by Arduino it was clear to me to use Arduino IDE for the software portion of this project.
To get everything running you need to modify the .ino file in the src folder like so:
Configuration
What you need to configure:
the output pins you have chosen – D1+D2 are pre-configured
WiFi SSID + PASS
MQTT Server (IP(+Username+PW))
MQTT Topic prefix
Commands that can be sent through mqtt to the /feed topic.
MQTT topics and control
There are overall two MQTT topics:
$prefix/feeder-$chipid/state This topic will hold the current state of the feeder. It will show a number starting from 0 up. When the feeder is ready it will be 0. When it’s currently feeding it will be 1 and up – counting down for every successfull turn done. There is an safety cut-off for the motor. If the motor is longer active than configured in the MaximumMotorRuntime variable it will shut-off by itself and set the state to -1.
$prefix/feeder-$chipid/feed This topic acts as the command topic to start / control the feeding process. If you want to start the process you would send the number of turns you want to happen. So 1 to 5 seems reasonable. The feeder will show the progress in the /state topic. You can update the amount any time to shorten / lengthen the process. On the very first feed request after initial power-up / reboot the feeder will do a calibration run. This is to make sure that all the wheels are in the right position to work flawlessly.
All in all there are 3 of these going to be running in our household and the feeding is going to be controlled either by Alexa voice commands or through Node-Red automation.
Created a custom case for my hackintosh, it resembles a minified Power Mac G5. I have uploaded the parts to Thingiverse in case you’d like to make one of your own.
A Hackintosh (a portmanteau of “Hack” and “Macintosh”), is a computer that runs macOS on a device not authorized by Apple, or one that no longer receives official software updates.
I am running most of my in-house infrastructure based on Docker these days…
Docker is a set of platform-as-a-service (PaaS) products that use operating-system-level virtualization to deliver software in packages called containers.Containers are isolated from one another and bundle their own software, libraries and configuration files; they can communicate with each other through well-defined channels.
All containers are run by a single operating-system kernel and are thus more lightweight than virtual machines.
And given the above definition it’s fairly easy to create and run containers of things like command-line tools and background servers/services. But due to the nature of Docker being “terminal only” by default it’s quite hard to do anything UI related.
But there is a way. By using the VNC protocol to get access to the graphical user interface we can set-up a container running a fully-fledge Linux Desktop and we can connect directly to this container.
I am using something I call “throw-away linux desktop containers” all day every day for various needs and uses. Everytime I start such a container this container is brand-new and ready to be used.
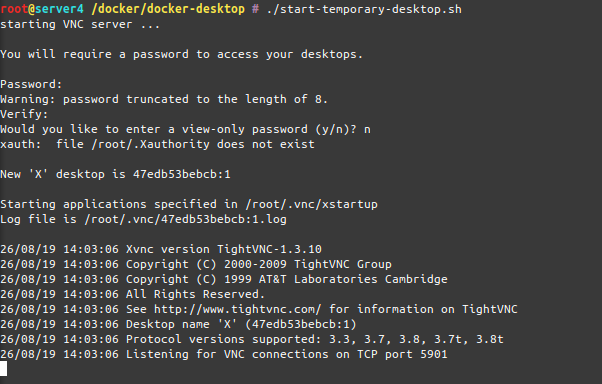
Actually when I start it the process looks like this:
As you can see when the container starts-up it asks for a password to be set. This is the password needed to be entered when the VNC client connects to the container.
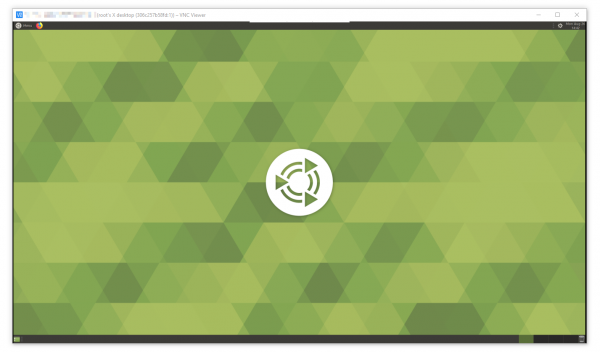
And when you are connected, this is what you get:
this is what you see after connecting to the desktop container by VNC
I am sharing my scripts and Dockerfile with you so you can use it yourself. If you put a bit more time into it you can even customize it to your specific needs. At this point it’s based on Ubuntu 18.04 and starts-up a ubuntu-mate desktop environment in it’s default configuration.
When you log into the container it will log you in as root – but effectively you won’t be able to really screw around with the host machine as the container is still isolating you from the host. Nevertheless be aware that the container has some quirks and is run in extended privileges mode.
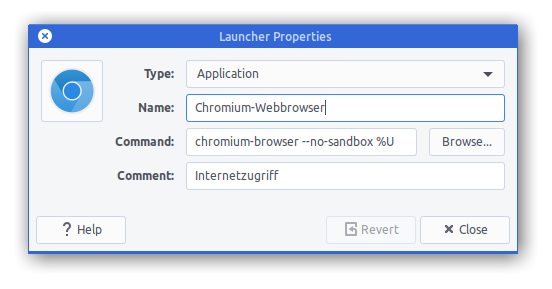
Chromium will be pre-installed as a browser but you will find that it won’t start up. That’s because Chromium won’t start up if you attempt a start as root user.
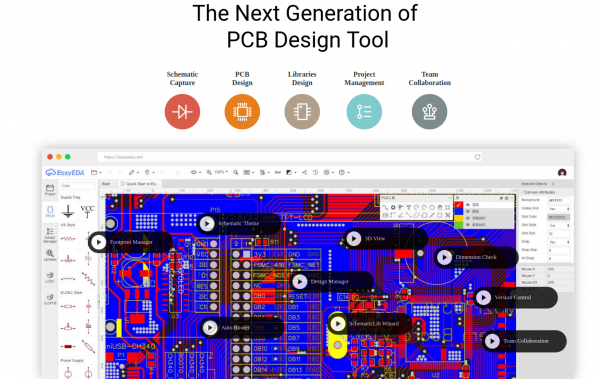
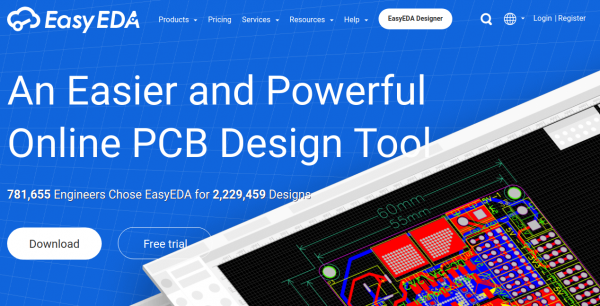
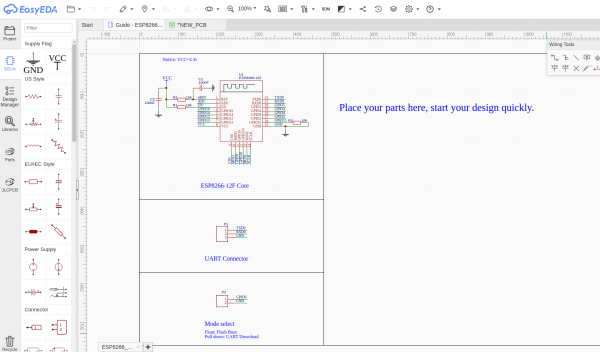
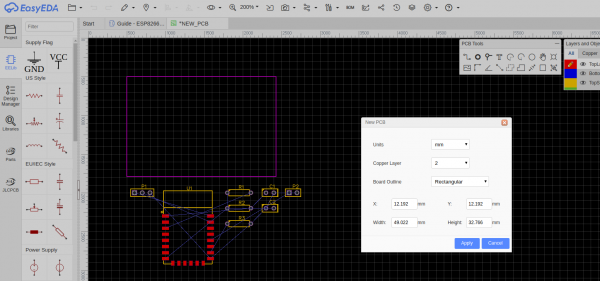
Maybe you want to give EasyEDA a try as it’s in-browser experience is better than anything I had come across so far. Granted I am not doing PCBs regularly but nevertheless – whenever I tried with the programs I’ve got recommended it wasn’t as straight forward as it is with this tool.
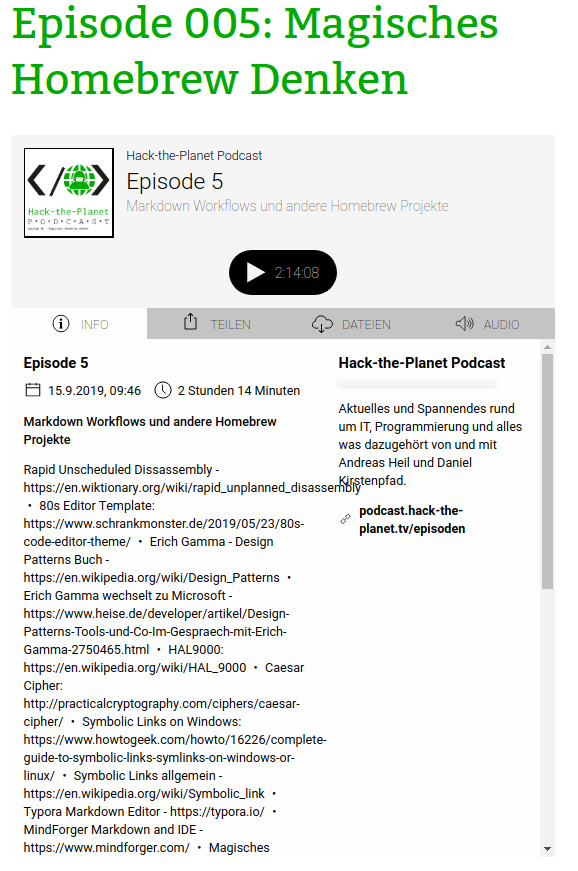
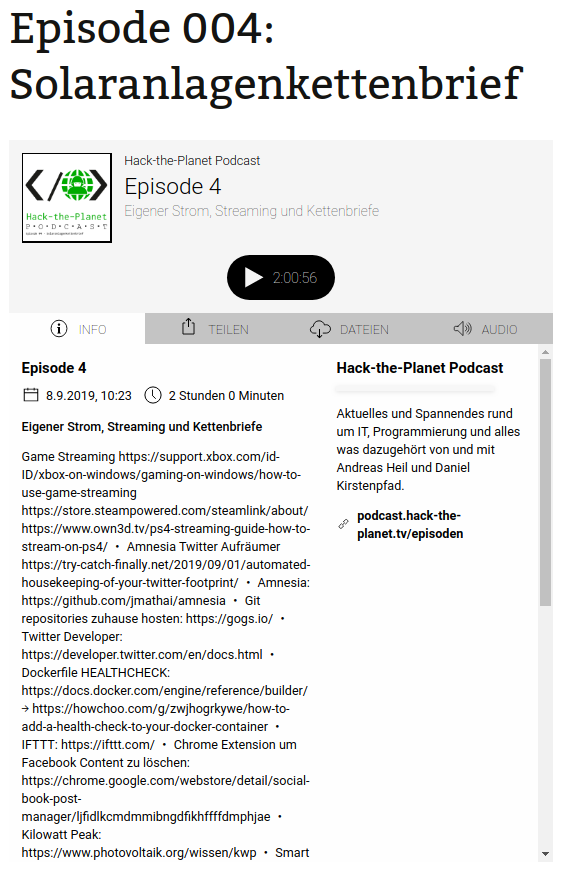
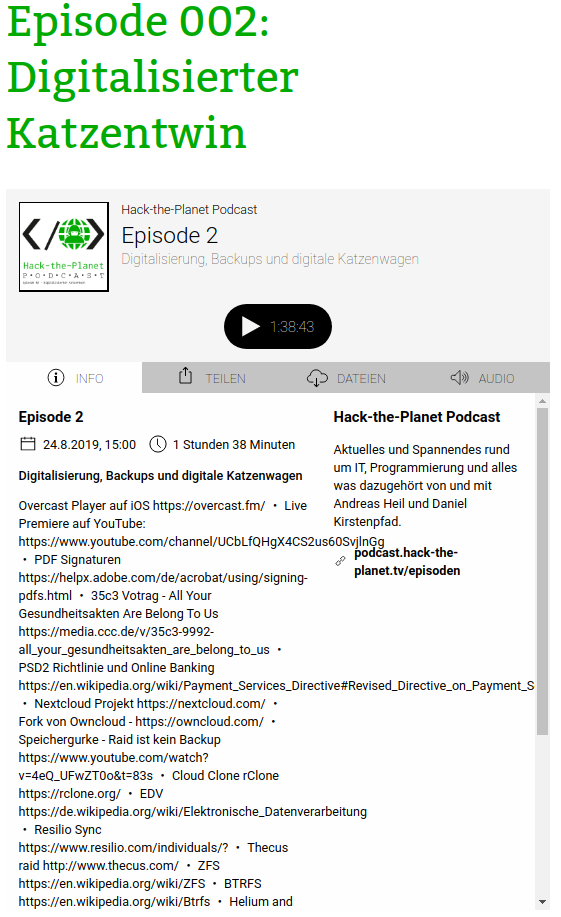
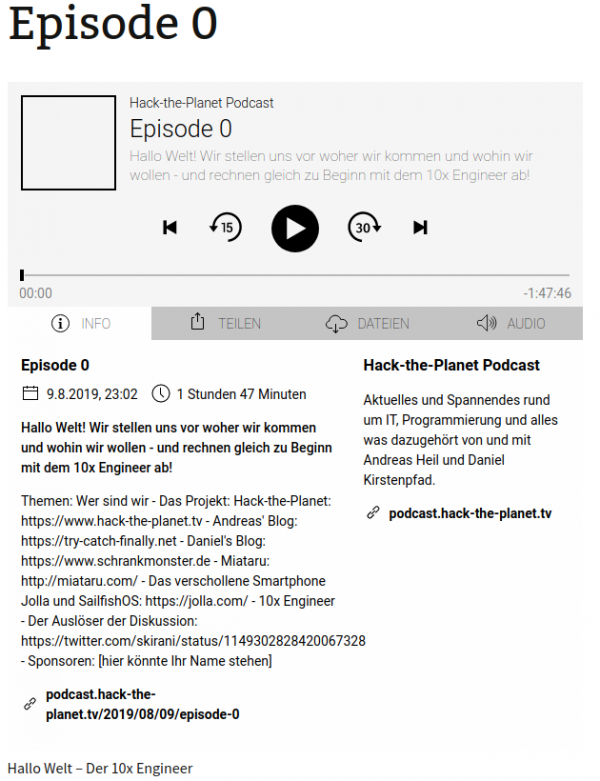
A friend of mine started something and I have the honor to be part of it. The world now has one additional podcast to listen to. It’s in german though. For now at least.
We are still working on the website, the feed and the audio mixing and recording quality. So bear with us.
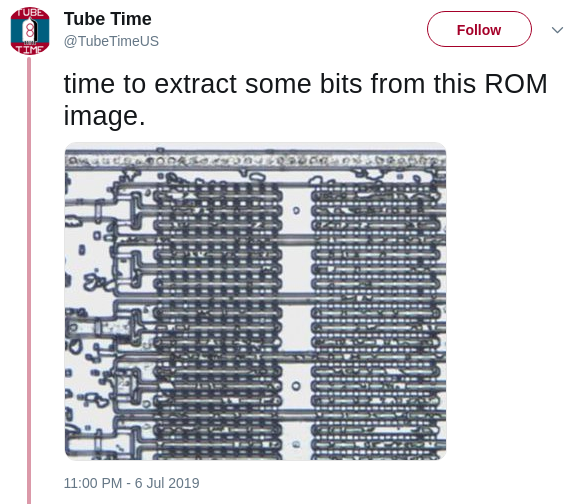
Tube Time is apparently on the job to extract actual data from ROM images extracted out of chips which seemingly are those of a Creative Labs Sound Blaster 1.0 card.
In addition to this excavation work there’s a growing documentation of the inner workings of mentioned Sound Blaster card.
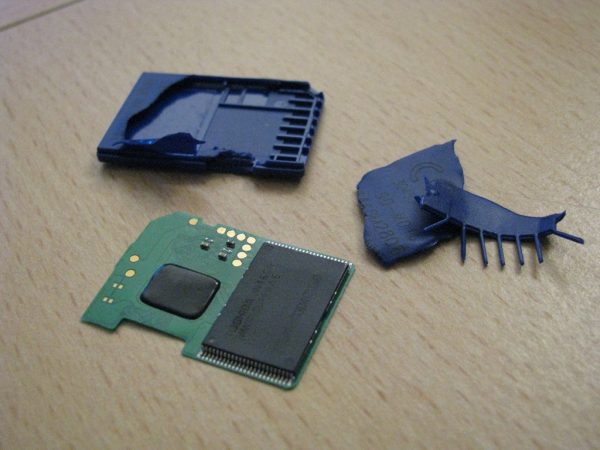
Mass storage hardware breaks all the time. Sometimes it’s hardware that breaks, but sometimes it’s the software that breaks. If it’s the software (or own talent) that made the data go boom, TestDisk is a tool you should know about.
DISCLAIMER: If the data you are trying so recover is actually worth anything you might want to reserve to a professional data recovery service rather than trying to train-on-the-job.
TestDisk is powerful free data recovery software! It was primarily designed to help recover lost partitions and/or make non-booting disks bootable againwhen these symptoms are caused by faulty software: certain types of viruses or human error (such as accidentally deleting a Partition Table). Partition table recovery using TestDisk is really easy.
TestDisk can
Fix partition table, recover deleted partition
Recover FAT32 boot sector from its backup
Rebuild FAT12/FAT16/FAT32 boot sector
Fix FAT tables
Rebuild NTFS boot sector
Recover NTFS boot sector from its backup
Fix MFT using MFT mirror
Locate ext2/ext3/ext4 Backup SuperBlock
Undelete files from FAT, exFAT, NTFS and ext2 filesystem
Copy files from deleted FAT, exFAT, NTFS and ext2/ext3/ext4 partitions.
TestDisk has features for both novices and experts. For those who know little or nothing about data recovery techniques, TestDisk can be used to collect detailed information about a non-booting drive which can then be sent to a tech for further analysis. Those more familiar with such procedures should find TestDisk a handy tool in performing onsite recovery.
And if you give up, think about writing an article of you actually digging deeper:
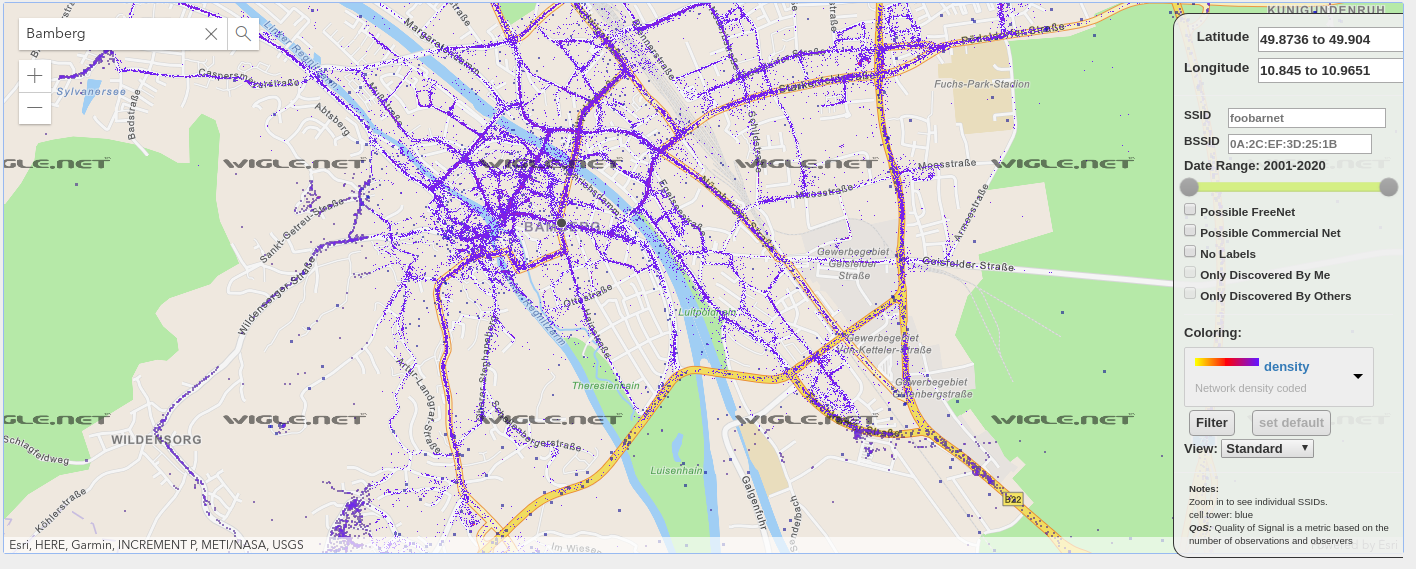
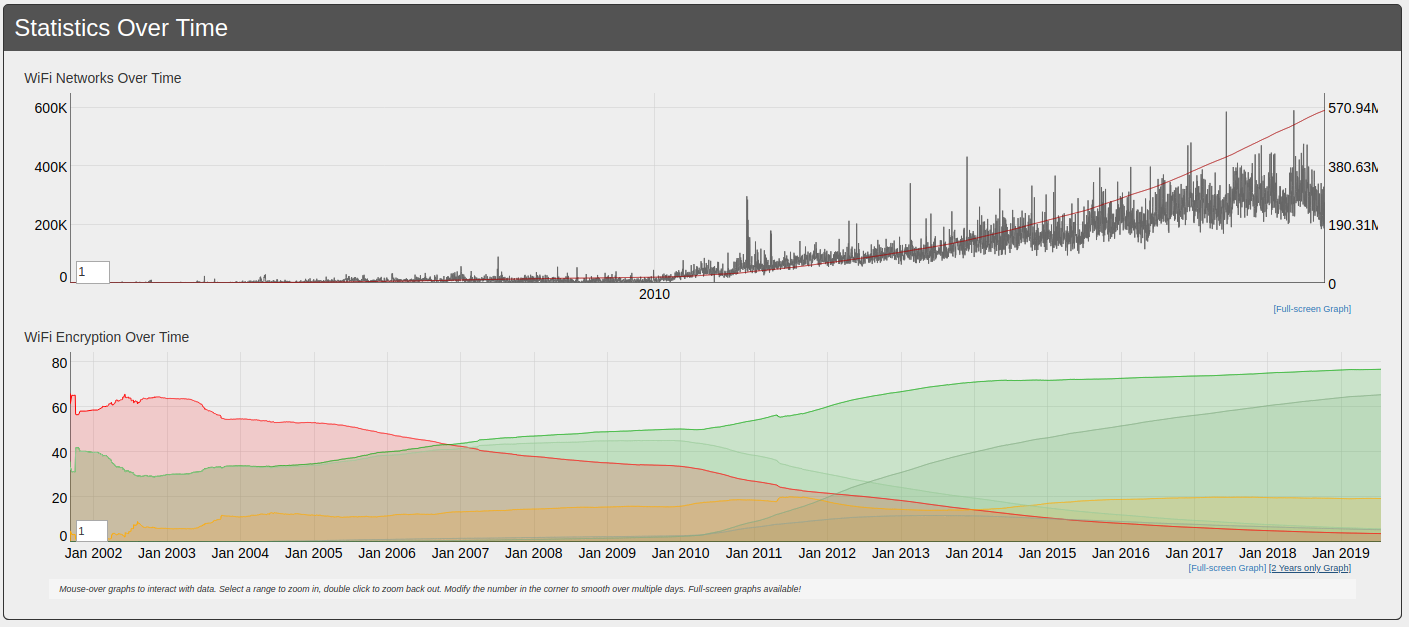
When you work with wireless networks and you do programming and mobile app development that works with things like user location you might find this useful.
Take thousands of users and you’ve got the worlds wifi networks mapped…
WiGGLE (Wireless Geographic Logging Engine) is a project which takes wireless network data + location and puts it into a big database. On top of storage it’s giving you access to that data.
We consolidate location and information of wireless networks world-wide to a central database, and have user-friendly desktop and web applications that can map, query and update the database via the web.
So what’s my use-case? Apart from the obvious I will make use of this by finding out more about those fellow travelers around me. Many people probably to the same as me: Travel with a small wifi / 4g access point. Whenever this accesspoints shows up in scans the path will be traceable.
I am curious to see which access point around me is in the million-mile club yet…
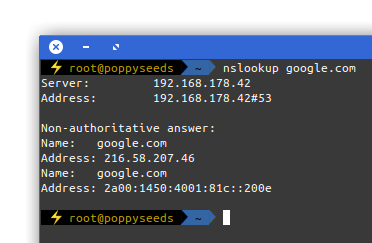
Picture yourself in this situation. You connect to a network and nothing works. Except for this:
It is quite common to have DNS working in networks while everything else is not. Sometimes the network requires a log-in to give you access to a small portion of the internet.
Now, with the help of a tool called iodine, you can get access to the full internet with only DNS working in your current network:
iodine lets you tunnel IPv4 data through a DNS server. This can be usable in different situations where internet access is firewalled, but DNS queries are allowed.
It runs on Linux, Mac OS X, FreeBSD, NetBSD, OpenBSD and Windows and needs a TUN/TAP device. The bandwidth is asymmetrical with limited upstream and up to 1 Mbit/s downstream.
Setting it up is a bit of work but given that you are anyway having access to a well connected server on the free portion of the internet it can be easily done.
In the interesting field of IoT a lot of buzz is made around the predictive maintenance use cases. What is predictive maintenance?
The main promise of predictive maintenance is to allow convenient scheduling of corrective maintenance, and to prevent unexpected equipment failures.
The key is “the right information in the right time”. By knowing which equipment needs maintenance, maintenance work can be better planned (spare parts, people, etc.) and what would have been “unplanned stops” are transformed to shorter and fewer “planned stops”, thus increasing plant availability. Other potential advantages include increased equipment lifetime, increased plant safety, fewer accidents with negative impact on environment, and optimized spare parts handling.
So in simpler terms: If you can predict that something will break you can repair it before it breaks. This improvse reliability and save costs, even though you repaired something that did not yet need repairs. At least you would be able to reduce inconveniences by repairing/maintaining when it still is easy to be done rather than under stress.
You would probably agree with me that these are a very industry-specific use cases. It’s easy to understand when it is tied to an actual case that happened.
Let me tell you a case that happened here last week. It happened to Leela – a 10 year old white British short hair lady cat with gorgeous blue eyes:
Ever since her sister had developed a severe kidney issue we started to unobtrusively monitor their behavior and vital signs. Simple things like weight, food intake, water intake, movement, regularities (how often x/y/z).
I’ve built hardware to allow us to do that in the most simple and automated way. In the case of getting to know their weight we would simply put the kitty litter box on a heavily modified persons scale. I wrote about that already back int 2016.
When Leela now visits her litter box she is automatically weighed and it’s taken note that she actually used it.
A lot of data is aggregated on this and a lot of things are being done to that data to generate indications of issues and alerts.
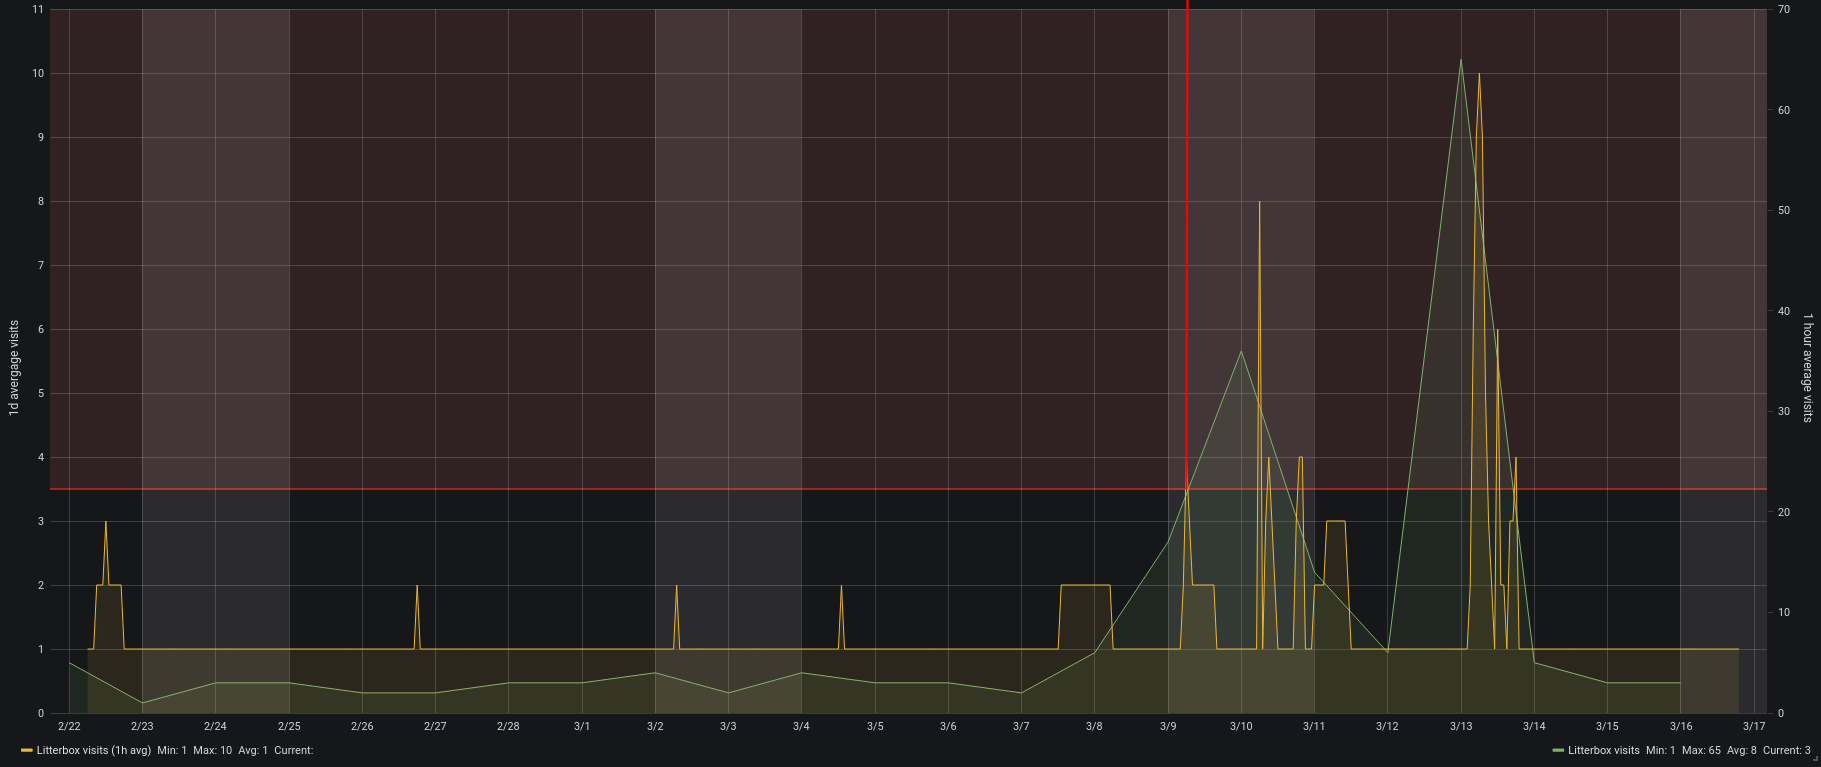
This alerted us last weekend that there could be an issue with Leelas health as she was suddenly visiting the litter box a lot more often across the day.
We did not notice anything with Leela. She behaved as she would everyday, but the monitoring did detect something was not right.
What had happened?
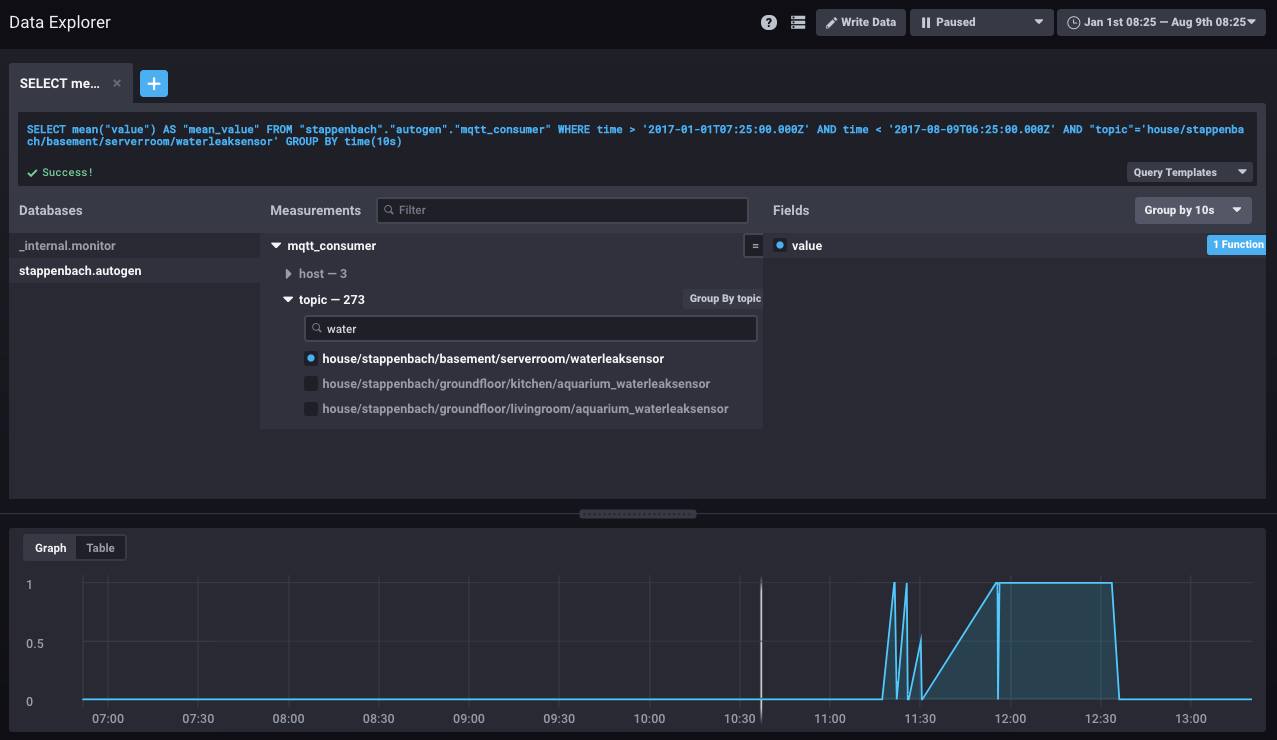
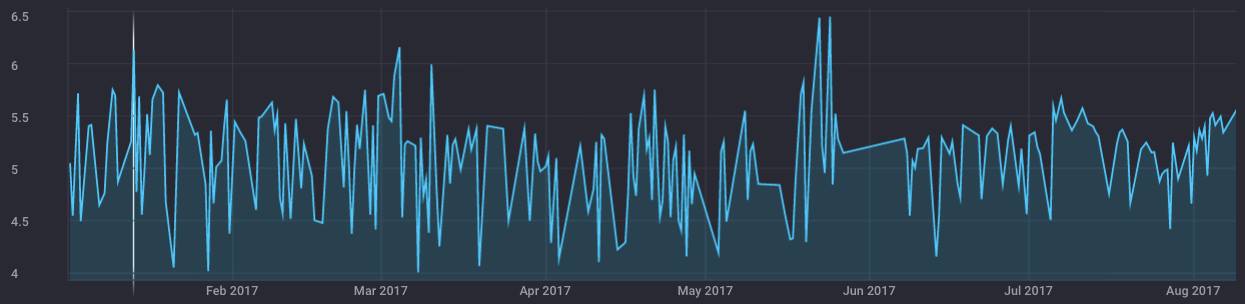
The chart shows the hourly average and daily total visits to the litterbox.
On the morning of March 9th Leela already had been to the litter box above average. So much above average that it tripped the alerting system. You can see the faded read area in the top of the graph above showing the alert threshold. The red vertical line was drawn in by me because this was when we got alerted.
Now what? She behaved totally normal just that she went a lot more to the litter box. We where concerned as it matched her sisters behavior so we went through all the checklists with her on what the issue could be.
We monitored her closely and increased the water supplied as well as changed her food so she could fight a potential bladder infection (or worse).
By Monday she did still not behave different to a degree that anyone would have been suspicious. Nevertheless my wife took her to the vet. And of course a bladder infection was diagnosed after all tests run.
She got antibiotics and around Wednesday (13th March) she actually started to behave much like a sick cat would. By then she already was on day 3 of antibiotics and after just one day of presumable pain she was back to fully normal.
Interestingly all of this can be followed up with the monitoring. Even that she must have felt worse on the 13th.
With everything back to normal now it seems that this monitoring has really lead us to a case of “predictive cat maintenance”. We hopefully could prevent a lot of pain with acting quick. Which only was possible through the monitoring in place.
Monitoring pets is seemingly becoming a thing – which lead to my rather funky post title declaration of the “Internet of Pets”. I know about a certain Volker Weber who even wrote in the current c’t magazine about him monitoring his dogs location.
Health is a huge topic for the future of devices and gadgets. Everyone will casually start to have more and more devices in their daily lifes. Unfortunately most of those won’t be under your own control if you do not insist on being in control.
You do not have to build stuff yourself like I did. You only need to make the right purchase decisions according to things important to you. And one of these things on that checklist should be: “am I in full control of the data flow and data storage”.
If you are not. Do not buy!
By coincidence the idea of having the owner of the data in full control of the data itself is central to my current job at MindSphere. With all the buzz and whistles around the Industry IoT platform it all breaks down to keep the actual owner of the data in control and in charge. A story for another post!
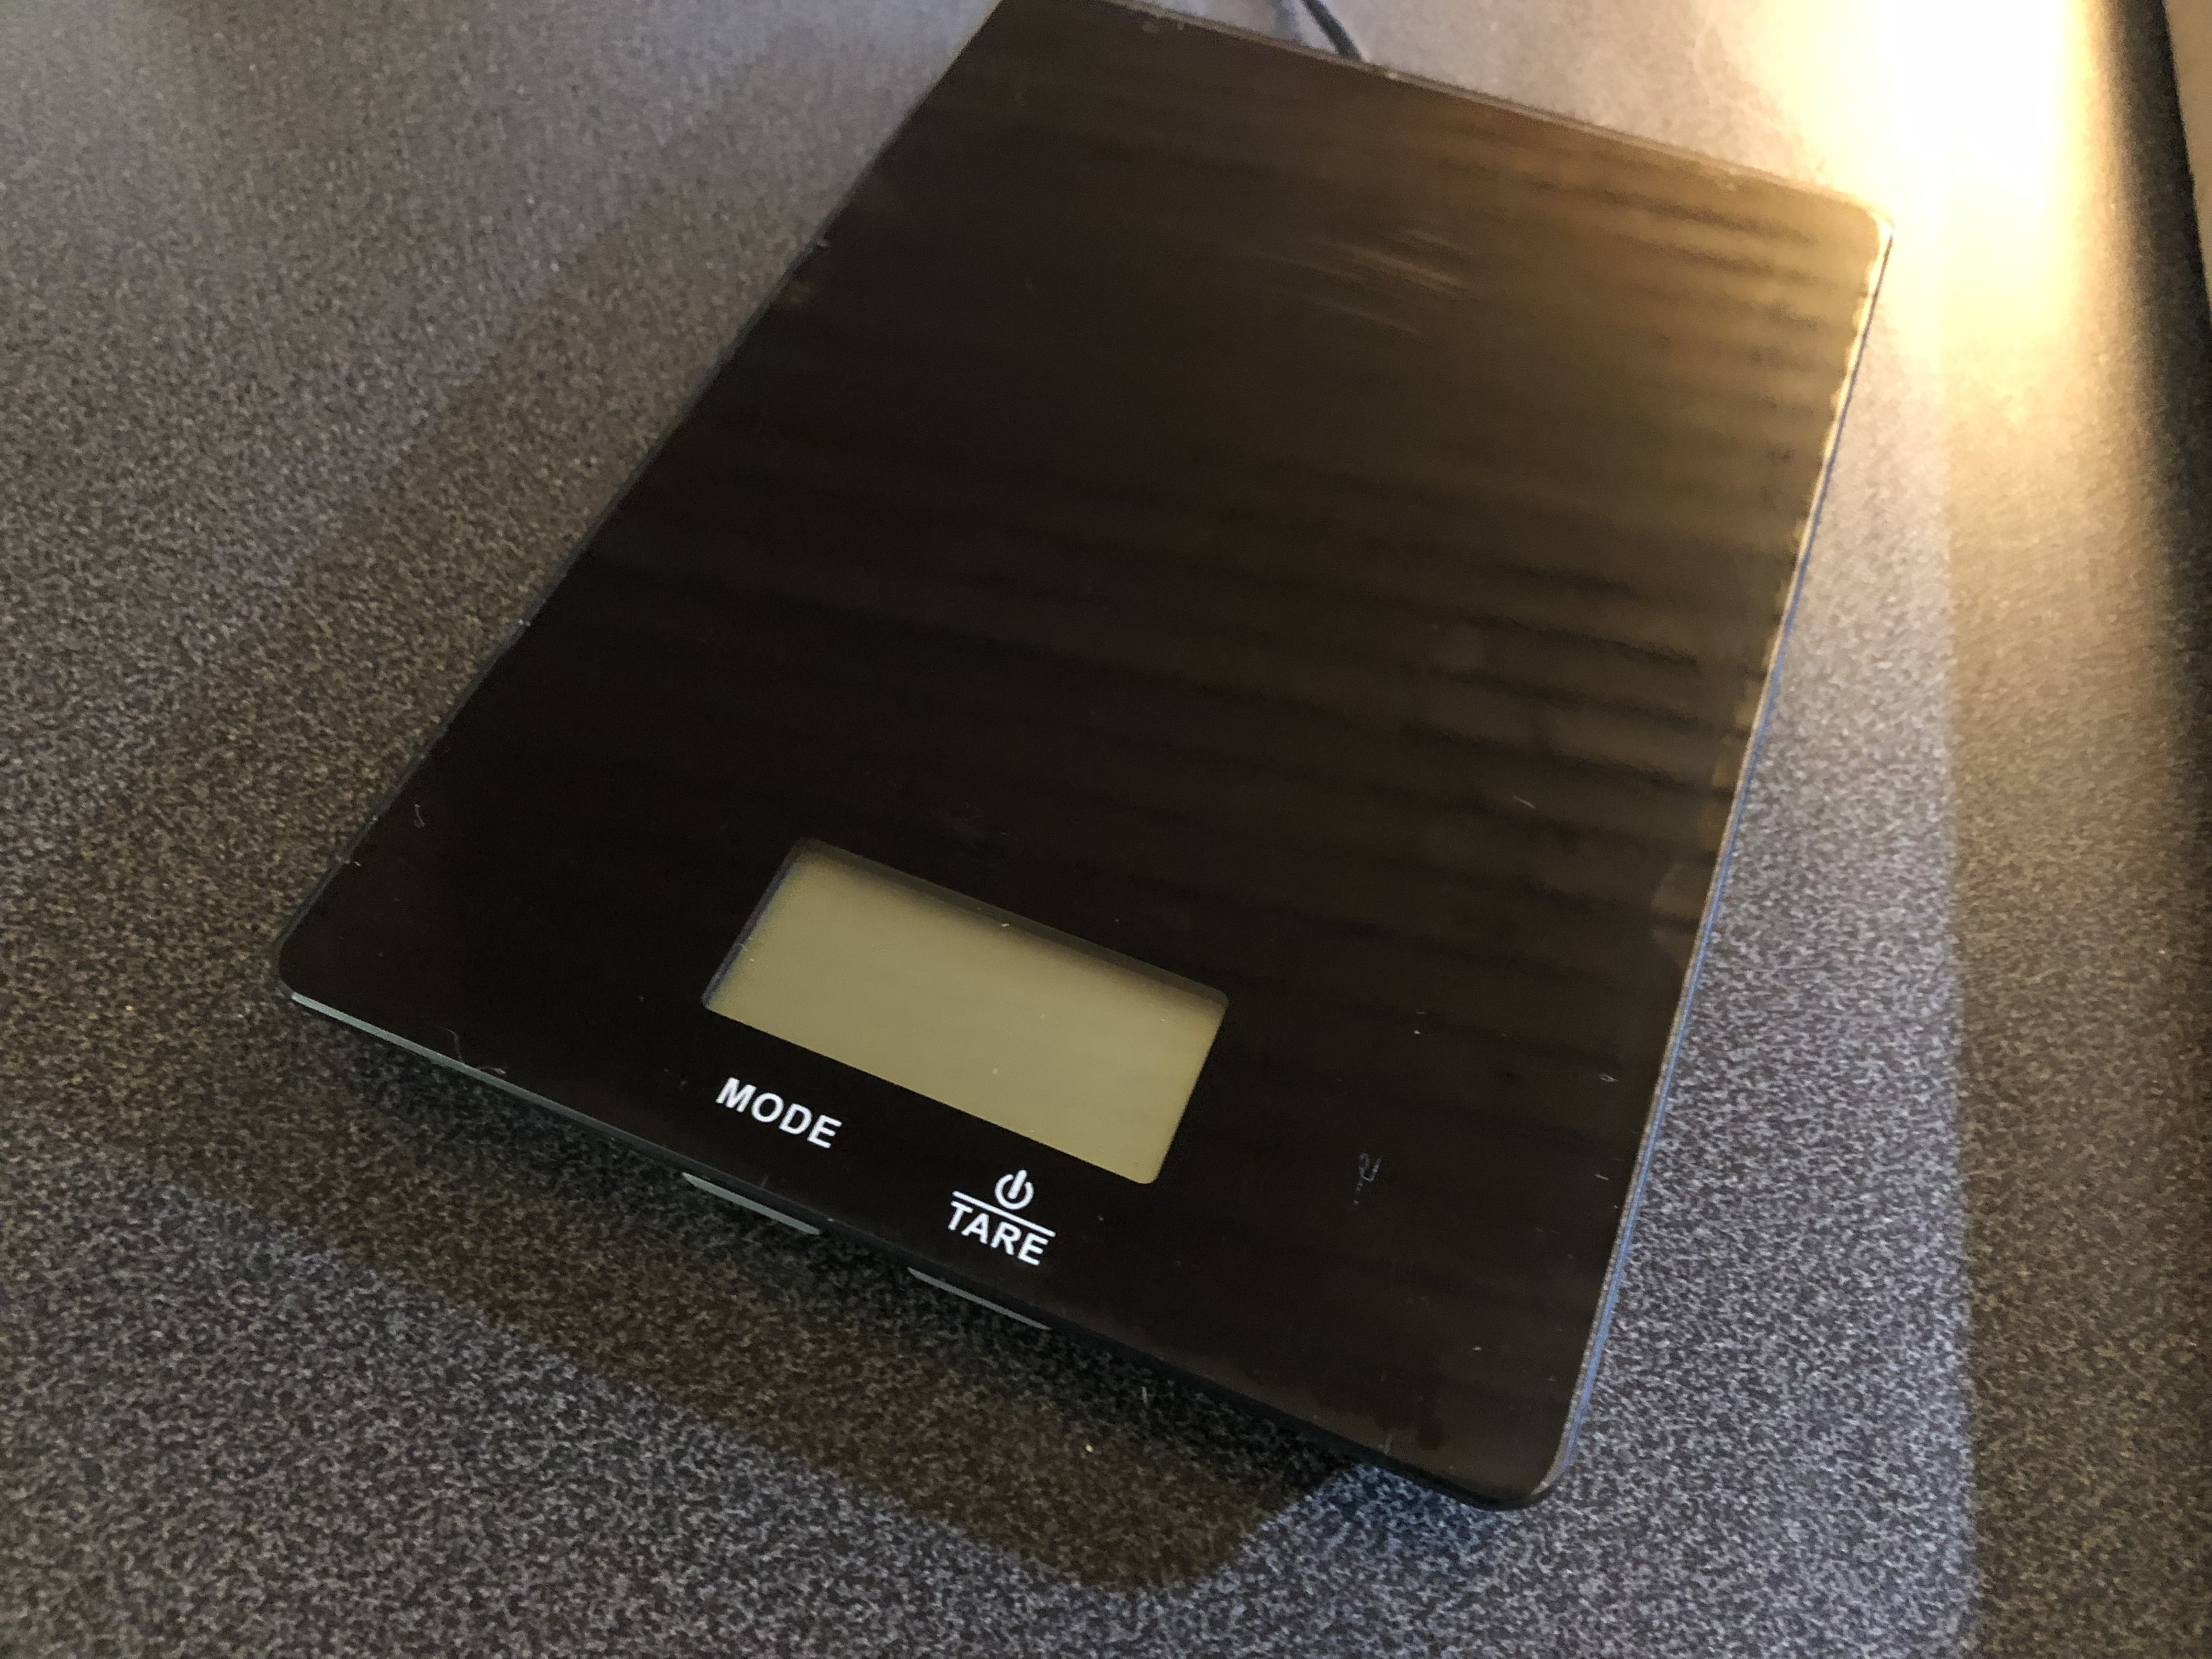
Ever since we had changed our daily diet we started to weigh everything we eat or cook. Like everything.
Quickly we found that those kitchen scale you can cheaply buy are either not offering the convenience we are looking for or regularly running out of power and need battery replacements.
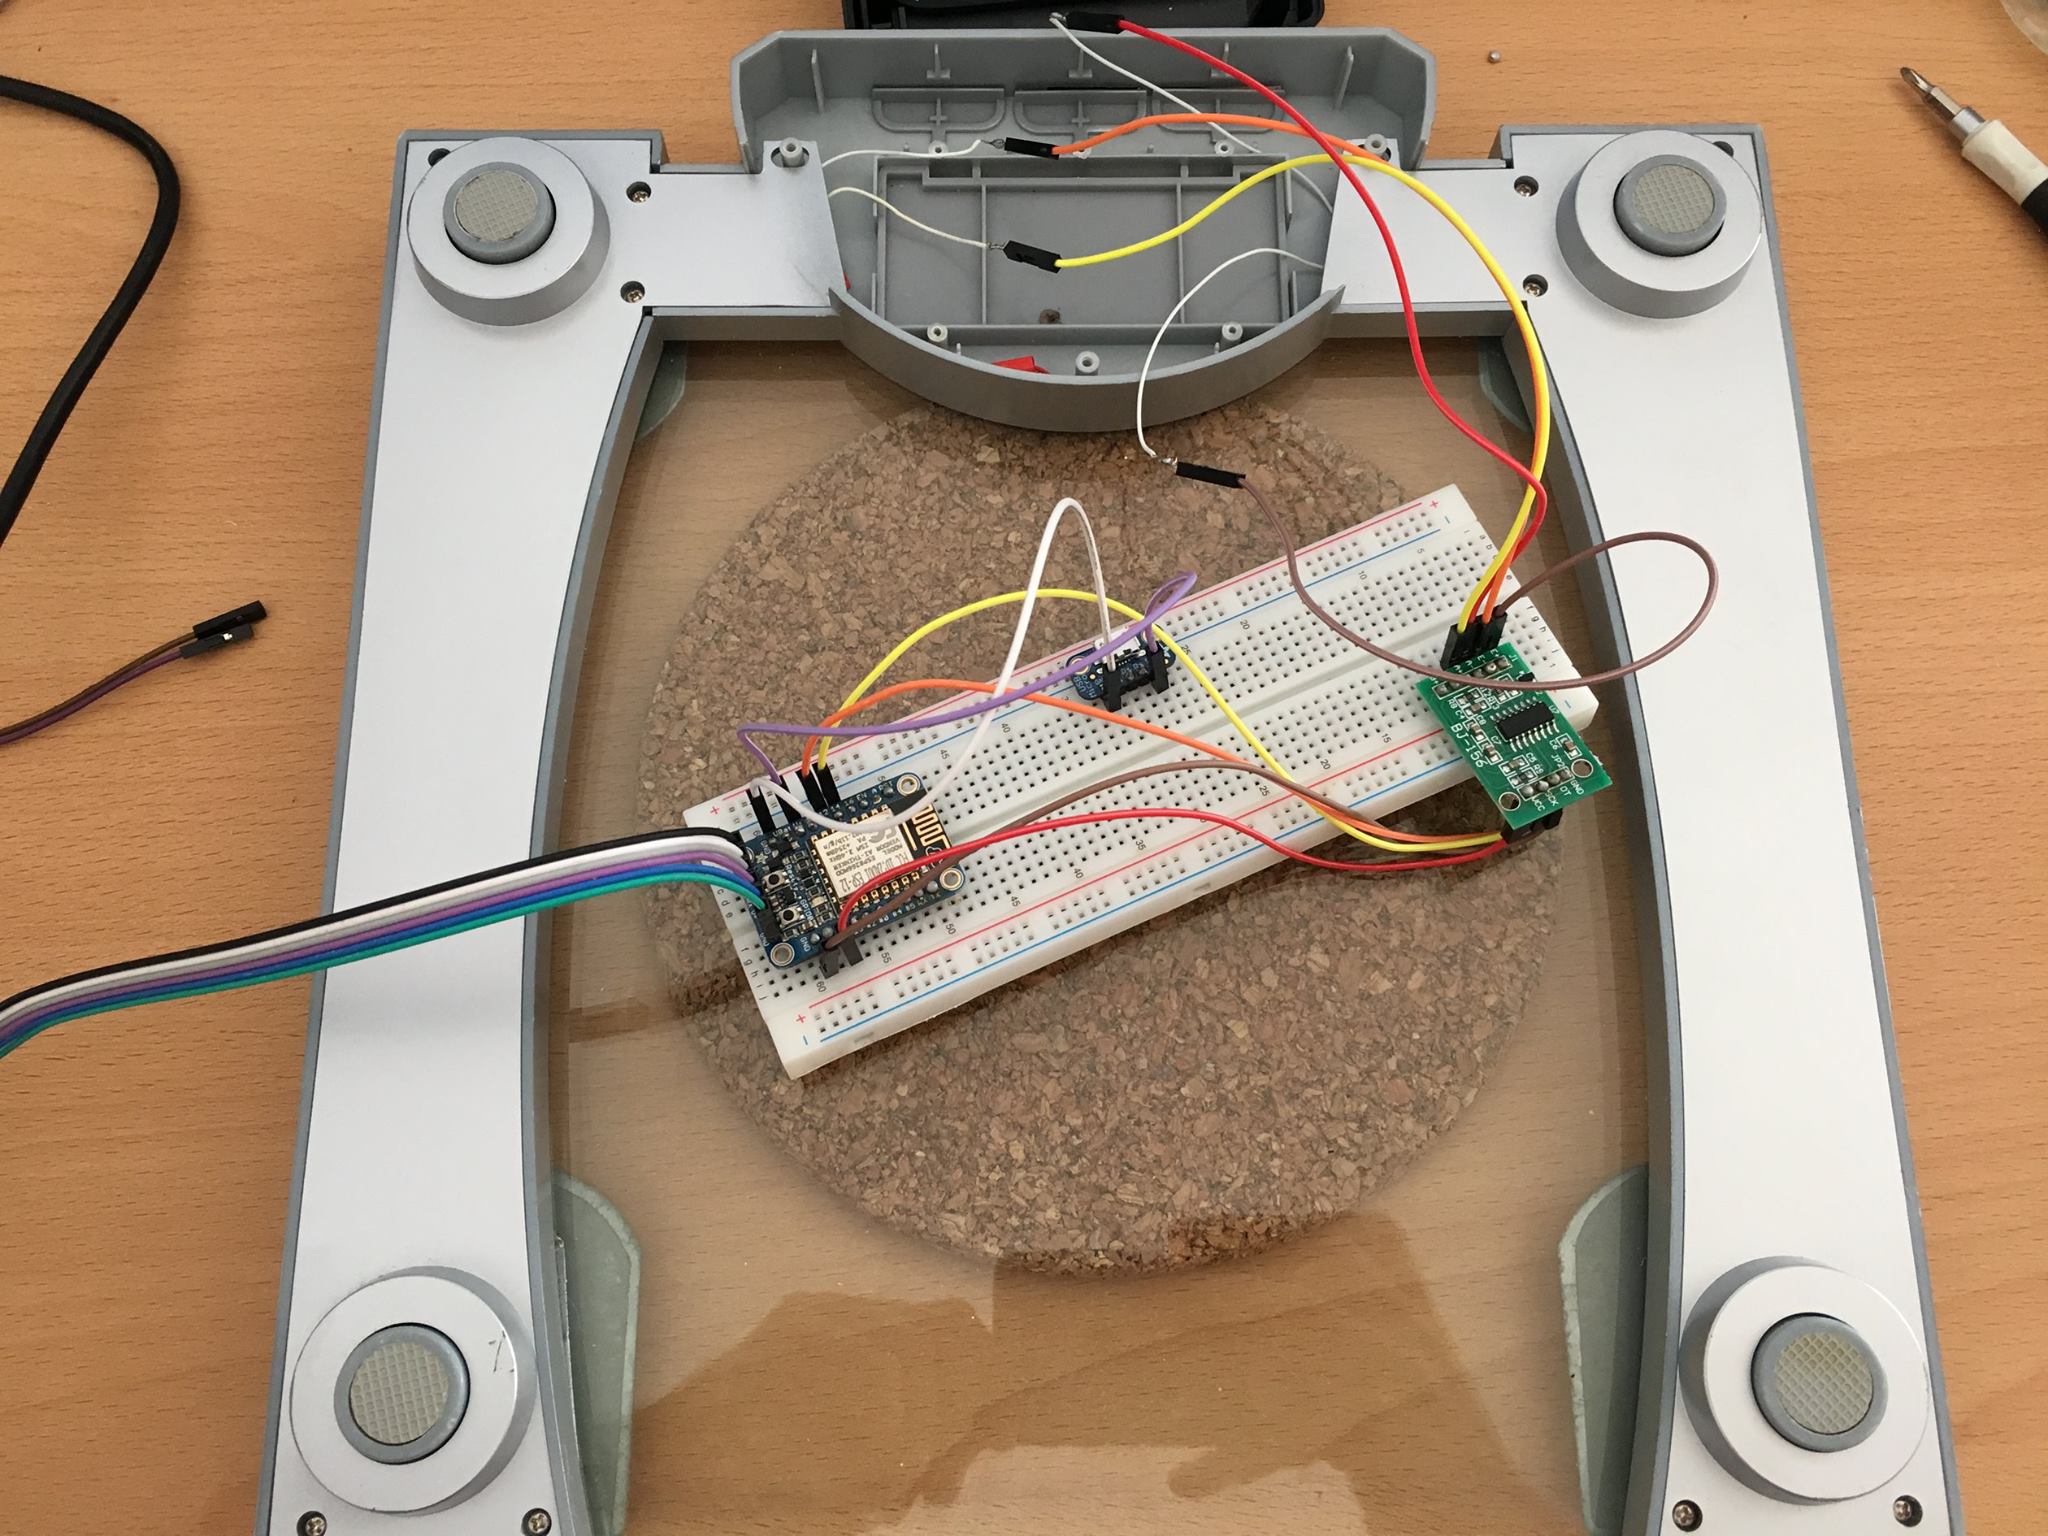
As we already have all sorts of home automation in place anyway the idea was born to integrate en ESP8266 into two of those cheap scales and – while ripping out most of their electronics – base the new scale functionality on the load cells already in the cheap scale.
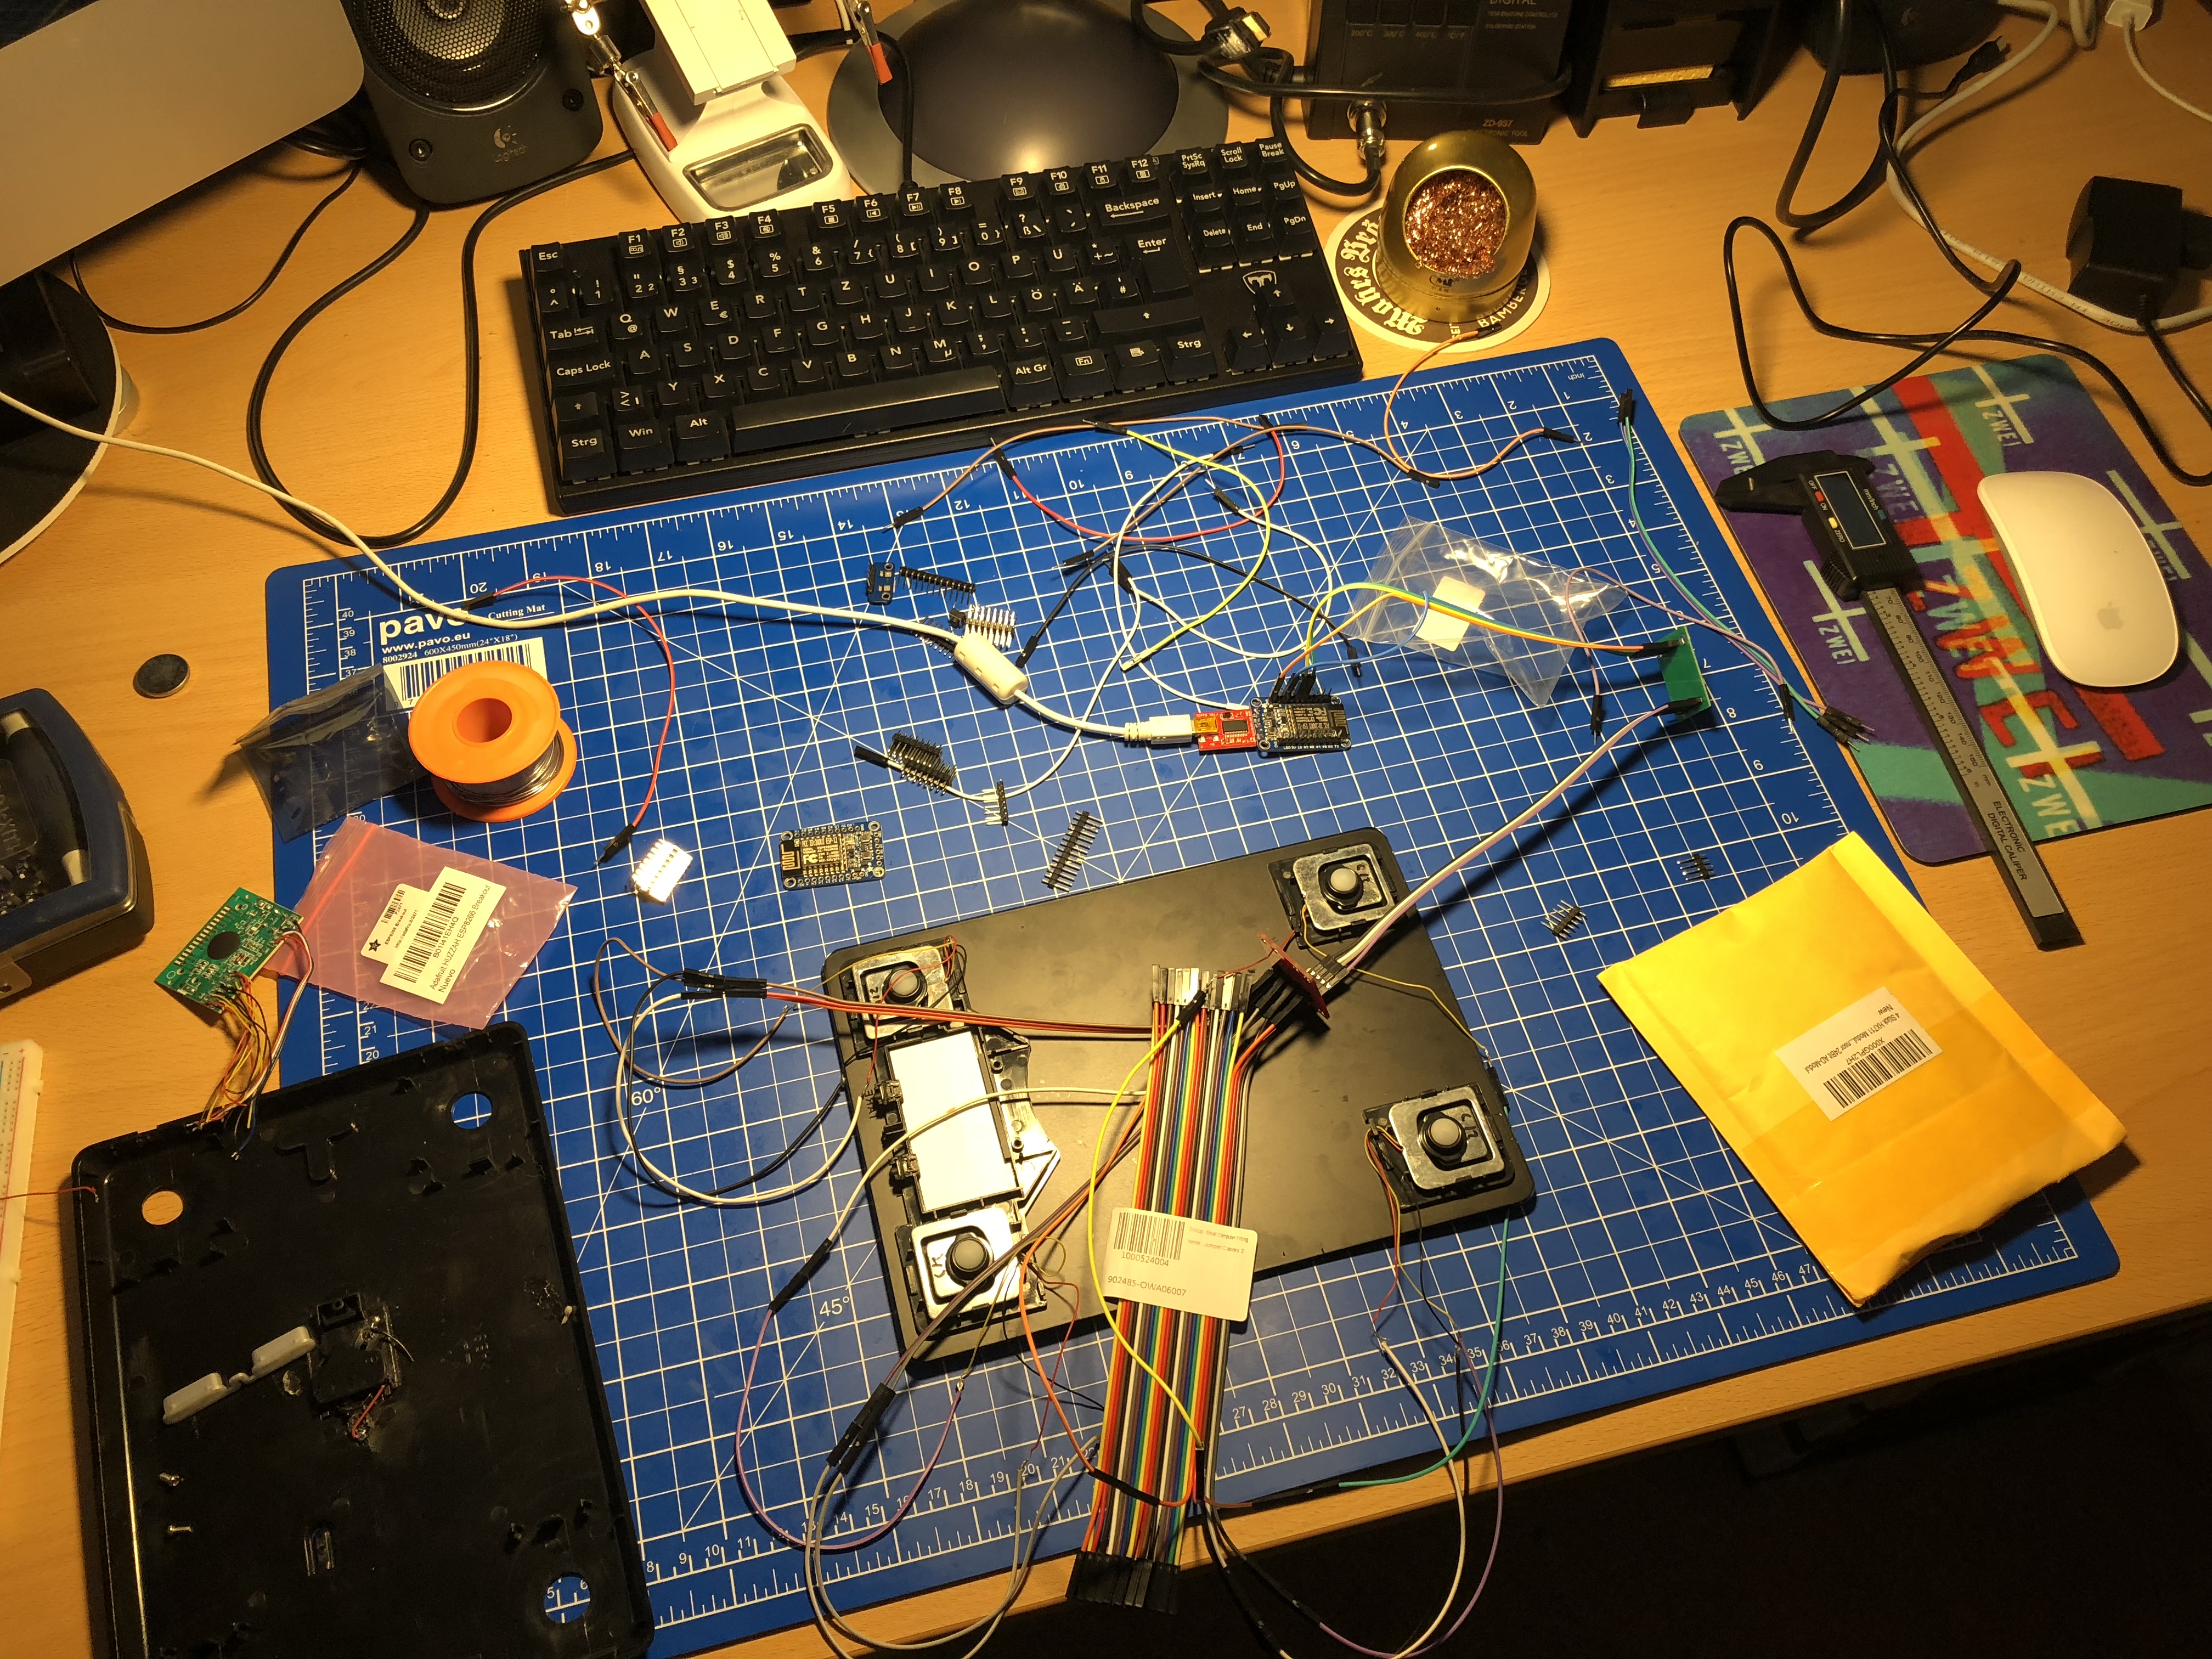
So one afternoon in January 2018 I sat down and put all the parts together:
ESP8266 + HX711 + 4 Load Cells
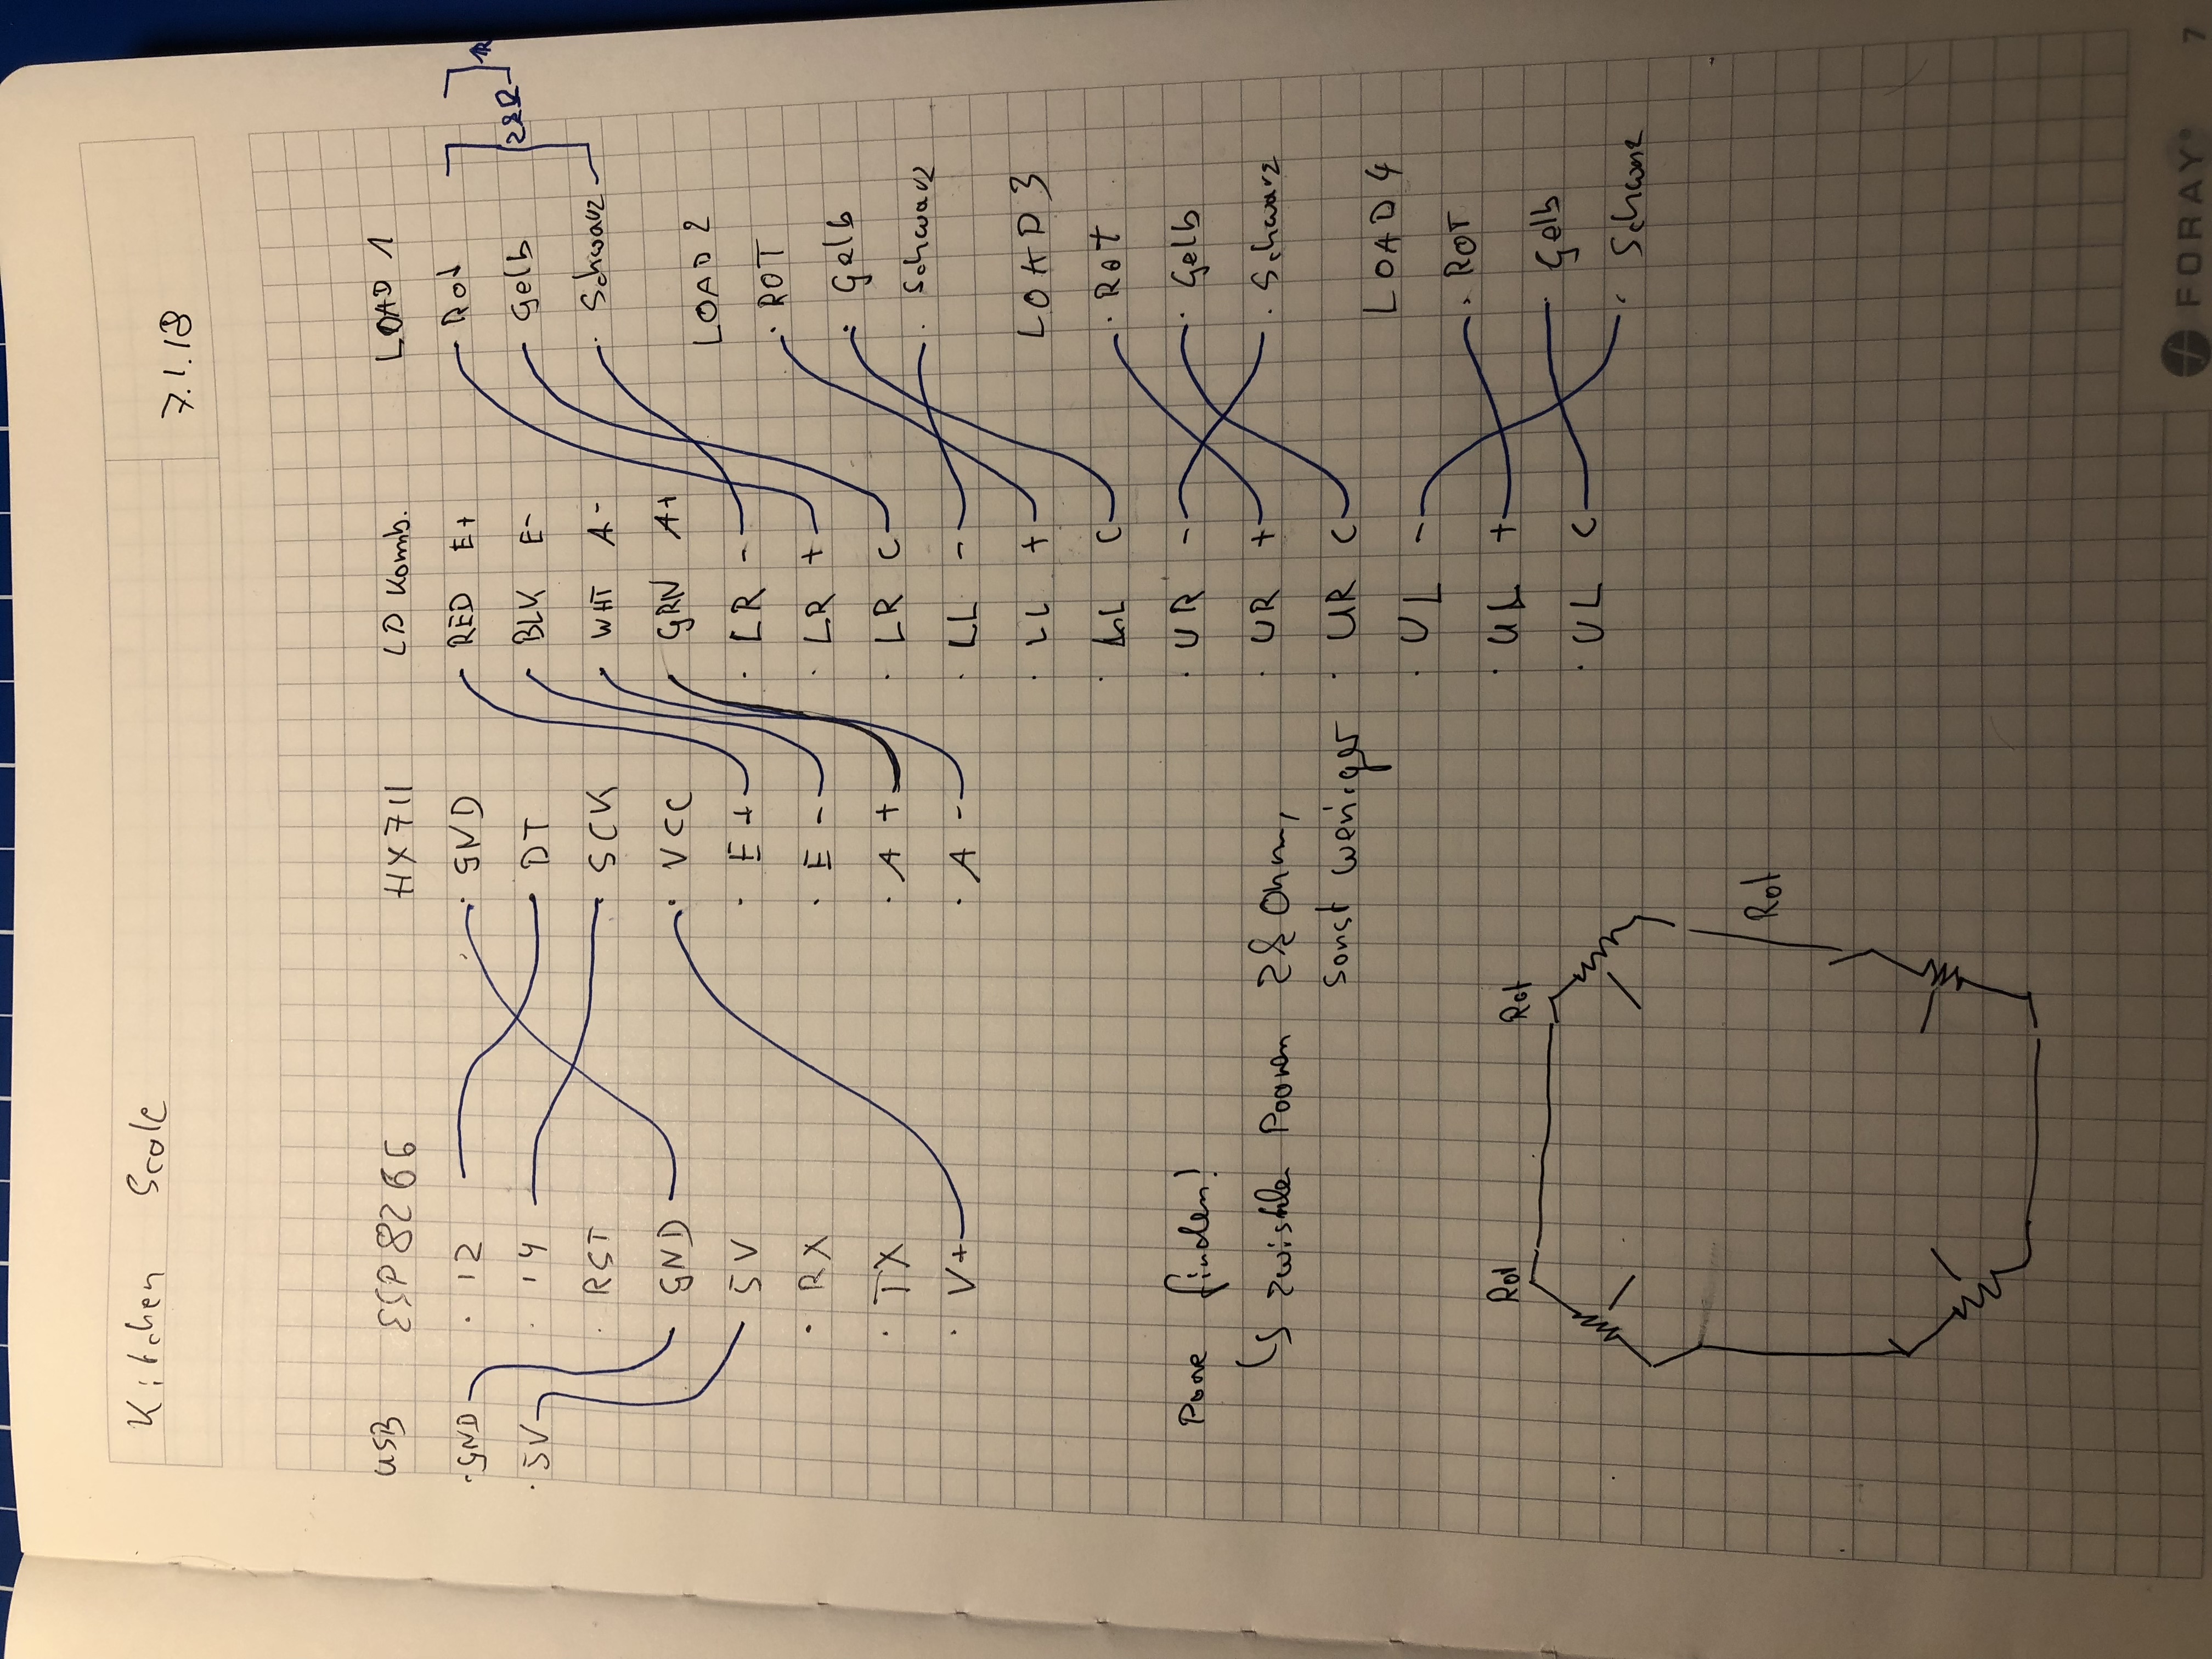
my notes of the wiring… this might be different for your load cells…
After the hardware portion I sat down and programmed the firmware of the ESP8266. The simple idea: It should connect to wifi and to the house MQTT broker.
It would then send it’s measures into a /raw topic as well as receive commands (tare, calibration) over a /cmd topic.
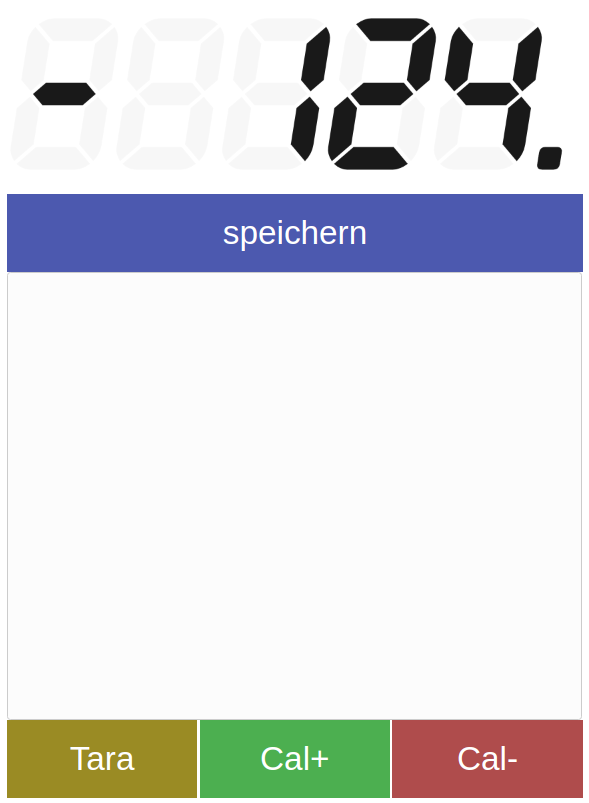
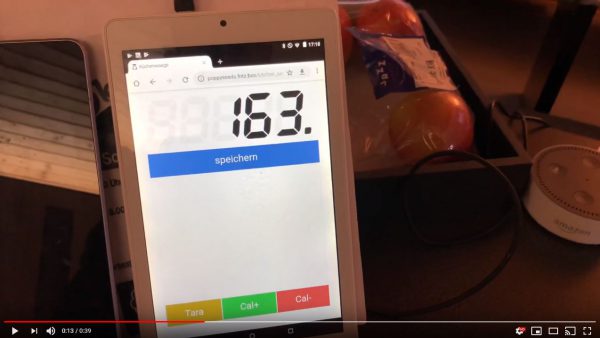
Now the next step was to get the display of the measured weights sorted. The idea for this: write a web application that would connect to the MQTT brokers websocket and receive the stream of measurements. It would then add some additional logic like a “tare” button in the web interface as well as a list of recent measurements that can be stored for later use.
An additional automation would be that if the tare button is pressed and the weight is bigger than 10g the weight would automatically be added to the measurements list in the web app – no matter which of the tare buttons where used. The tare button in the web app or the physical button on the actual scale. Very practical!
Here’s a short demo of the logic, the scale and the web app in a video:
We’ve got a couple of SONOS based multi-room-audio zones in our house and with the newest generation of SONOS speakers you can get Apple Airplay. Fancy!
But the older hardware does not support Apple Airplay due to it’s limiting hardware. This is too bad.
So once again Docker and OpenSource + Reverse-Engineering come to the rescue.
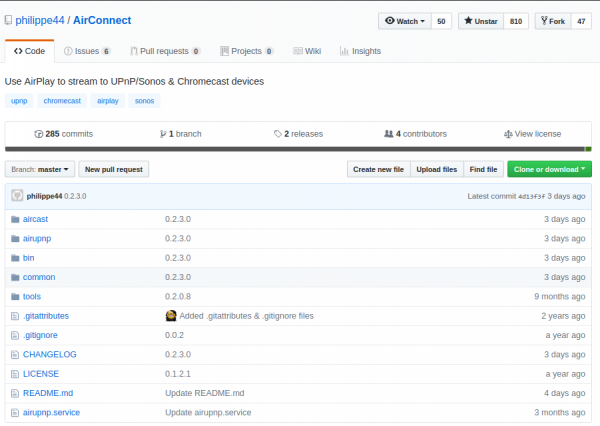
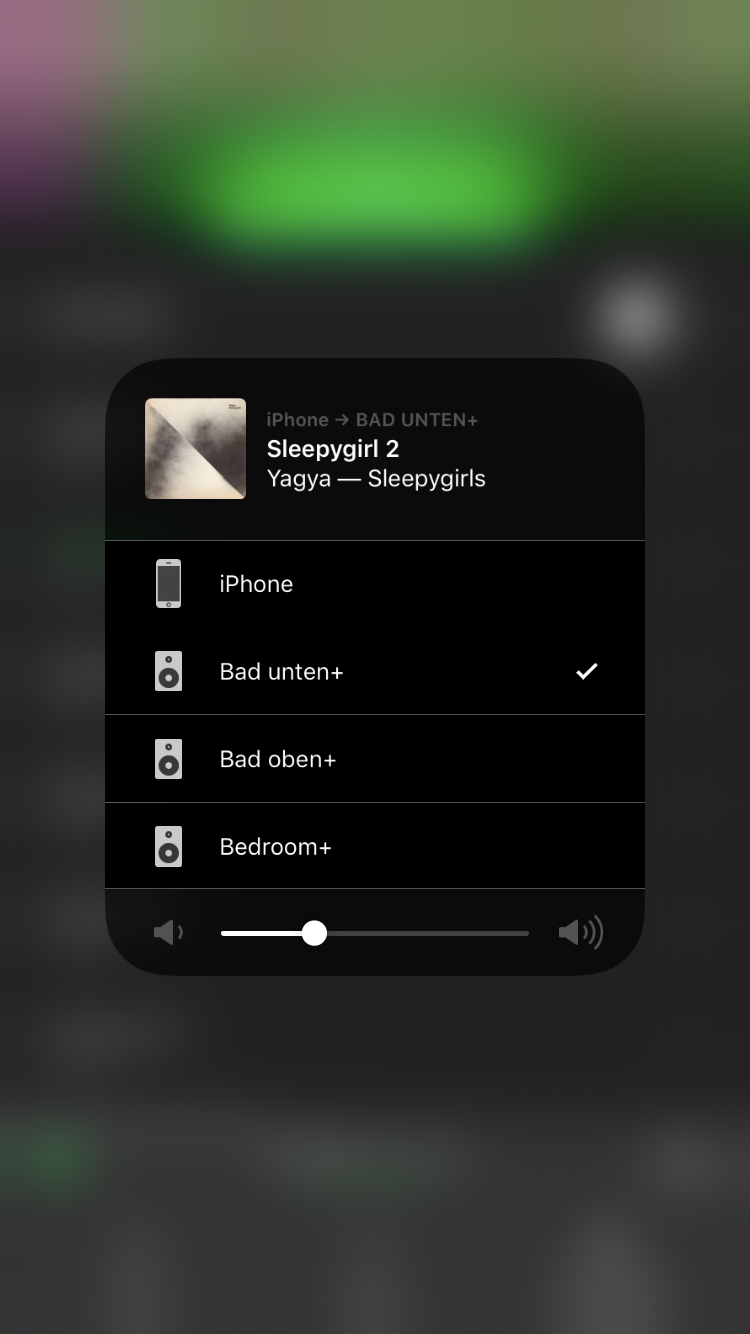
AirConnect is a small but fancy tool that bridges SONOS and Chromecast to Airplay effortlessly. Just start and be done.
It works a treat and all of a sudden all those SONOS zones become Airplay devices.
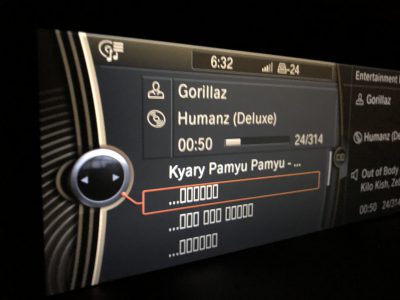
I had this strange problem that my car was not able to display japanese characters when confronted with them. Oh the marvels of inserting a USB stick into a car from 2009.
stupid BMW media player without proper font
Now there’s no real option I know of without risking to brick the car / entertainment system of the car to get it to display the characters right.
Needless so say that my wifes car does the trick easily – of course it’s an asian car!
Anyway. I wrote a command line tool using some awesome pre-made libraries to convert Hiragana-Katakana characters to their romaji counterpart.
GIST: I am looking for interested hackers who want to help me implement a neural network that improves the accuracy of bluetooth low energy based indoor location tracking.
Longer version:
I am currently applying the last finishing touched to a house wide bluetooth low energy based location tracking system. (All of which will be opensourced)
The system consists of 10+ ESP-32 Arduino compatible WiFi/Bluetooth system-on-a-chip. At least one per room of a house.
These modules are very low powered and have one task: They scan for BLE advertisements and send the mac and manufacturer data + the RSSI (signal strength) over WiFi into specific MQTT topics.
There is currently a server component that takes this data and calculates a probable location of a seen bluetooth low energy device (like the apple watch I am wearing…). It currently is using a calibration phase to level in on a minimum accuracy. And then simple calculation matrices to identify the most probable location.
This all is very nice but since I got interested in neural networks and KI development – and I think many others might as well – I am asking here for also interested parties to join the effort.
I do have an existing set-up as well as gigabytes of log data.
Did you know how dangerous Lithium-Polymer batteries can be? Well, if not treated well they literally burst in flames spontaneously.
So it’s quite important to follow a couple of guidelines to not burn down the house.
Since I am just about to start getting into the hobby of FPV quadcopter racing I’ve tried follow those guidelines and found that the smart house can help me tracking things.
Unfortunately there are not a lot of LiPo chargers available at reasonable price with computer interfaces to be monitored while charging/discharging the batteries. But there are a couple of workarounds I’ve found useful.
a proper case. I’ve got myself one of those “Bat-Safe” boxes that fit a couple of battery packs and help me store them safely. Even if one or many burst into flames the case is going to contain any heat and fire as good as possible and with the air / pressure filter it’ll hopefully get rid of most of the very nasty smoke (I hear). Cables go into it, so the actual charging process takes place with everything closed and latched.
the obvious smoke detector which is on it’s own connected to the overall fire alarm is mounted on top, like literally on top. It’ll send out the alert to all other smoke alarms in the house making them go beep as well as sending out high priority push notifications to everyone.
an actual camera is monitoring the box all the time calling on alerts if something is fishy (like making sound, smoke, movement of any sort). When charging is done the charger will beep – this is being caught by the cameras microphones and alerts are sent out.
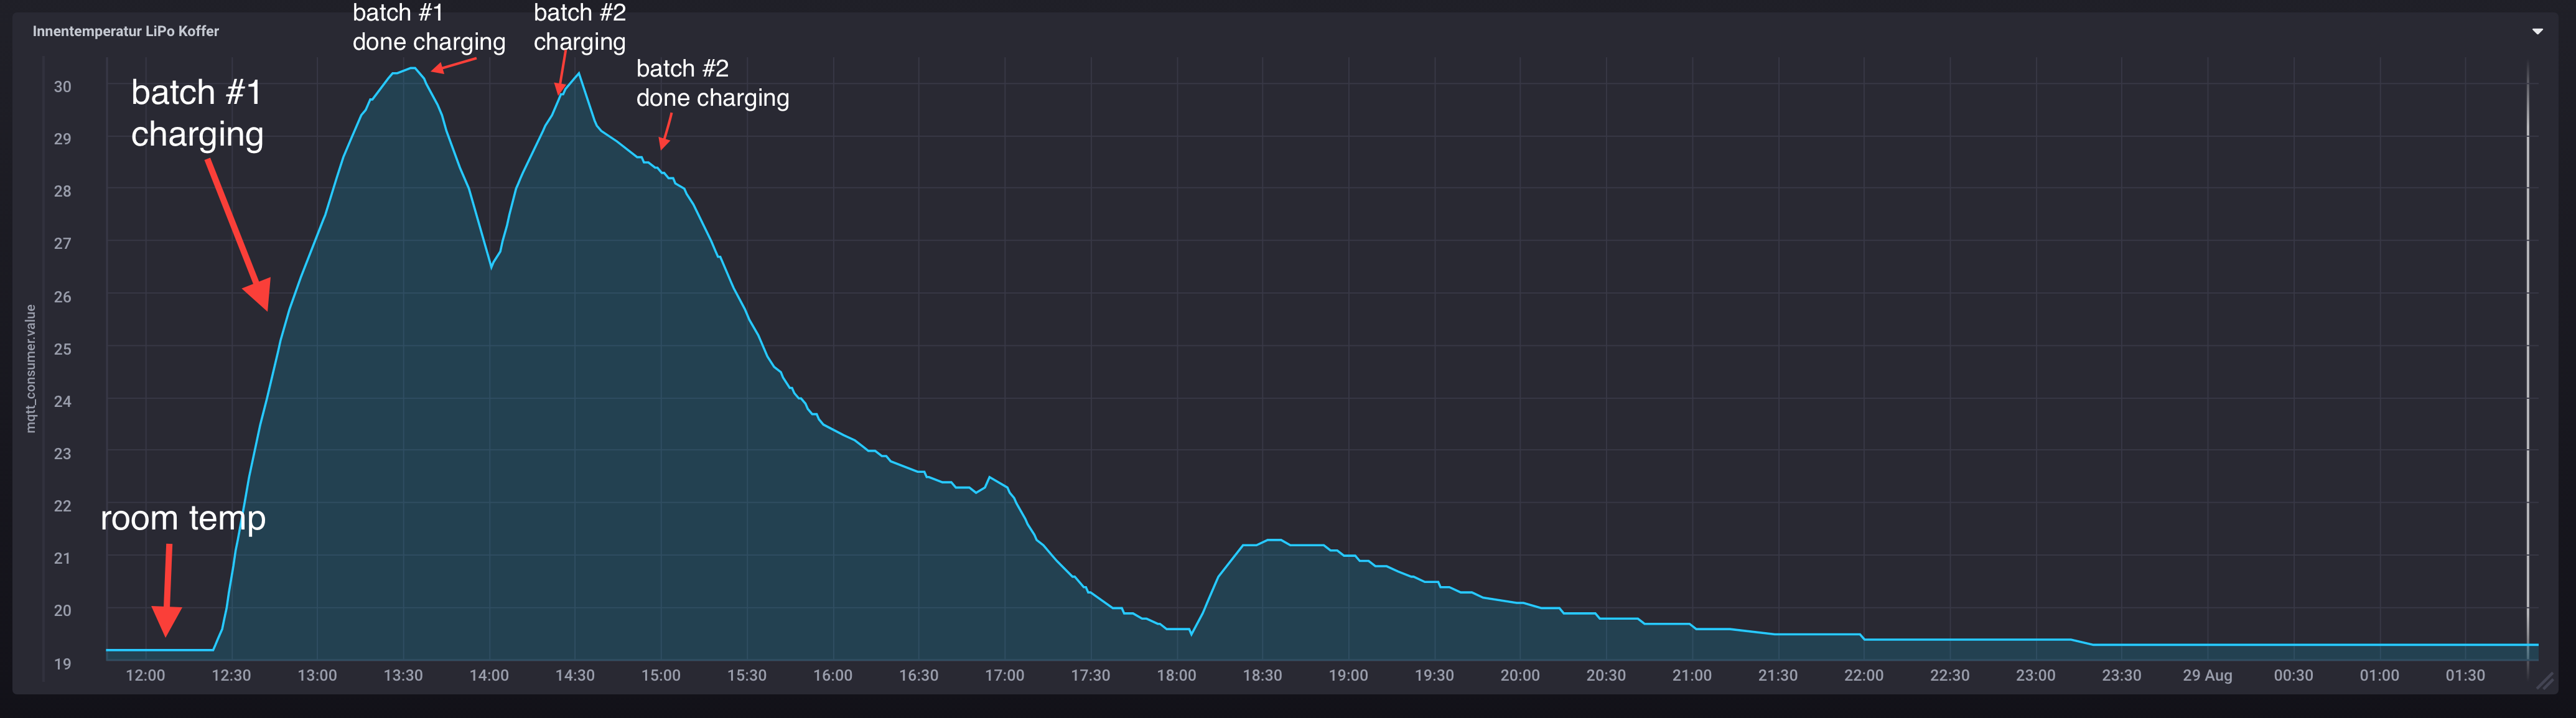
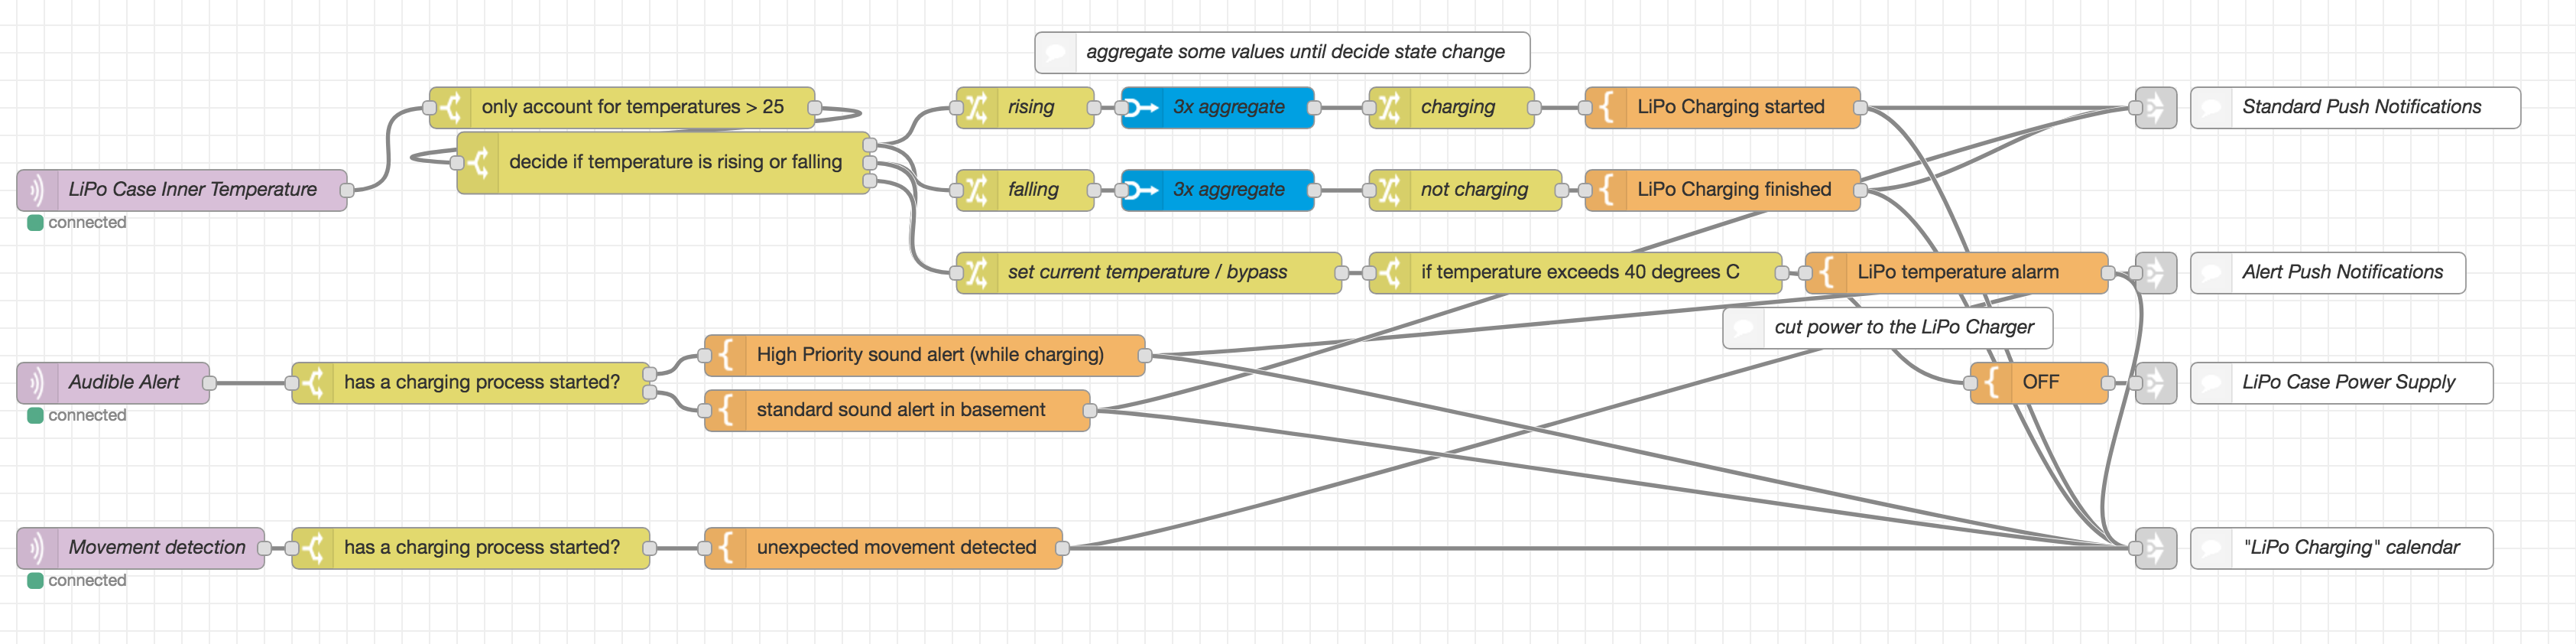
the temperature inside the case is monitored all the time. The surrounding temperatures are usually pretty stable as this case is stored in my basement and as the charging goes on the temperatures inside the case will climb up and eventually level out and fall when charging / discharging is done. Now the system basically will look at the temperatures, decide wether it’s rising of falling and alerting appropriately.
There’s a couple more things to it, like keeping track of charging processes in a calendar as you can see in the flowchart behind all the above.
There are a lot of things that happen in the smart house that are connected somehow.
And the smart house knows about those events happening and might suggest, or even act upon the knowledge of them.
A simple example:
In our living room we’ve got a nice big aquarium which, depending on the time of the day and season, it is simulating it’s very own little dusk-till-dawn lightshow for the pleasure of the inhabitants.
Additionally the waterquality is improved by an air-pump generating nice bubbles and enriching the water with oxygen. But that comes a cost: When you are in the room those bubbles and the hissing sound of the inverter for the “sun” produces sounds that are distracting and disturbing to the otherwise quiet room.
Now the smart home comes to the rescue:
It detects that whenever someone is entering the room and staying for longer, or powering up the TV or listening to music. Also it will log that regularly when these things happen also the aquarium air and maybe lights are turned off. Moreso they are turned back on again when the person leaves.
These correlations are what the smart house is using to identify groups of switches, events and actions that are somehow tied together. It’ll prepare a report and will recommend actions which at the push of a button can become a routine task always being executed when certain characteristics are lining up.
And since the smart house is a machine, it can look for correlations in a lot more dimensions a human could: Date, Time, Location, Duration, Sensor and Actor values (power up TV, Temperature in room < 22, Calendar = November, Windows closed => turn on the heating).
Did you notice that most calendars and timers are missing an important feature. Some information that I personally find most interesting to have readily available.
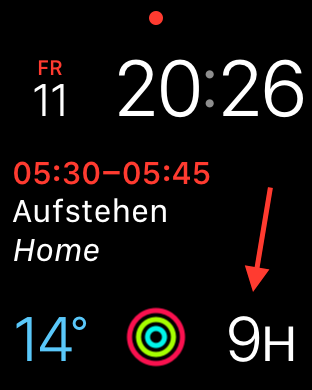
It’s the information about how much time is left until the next appointment is coming up. Even smartwatches, which should should be jack-of-all-trades in regards of time and schedule, do not display the “time until the next event”.
Now I came across this shortcoming when I started to look for this information. No digital assistant can tell me right away how much time until a certain event is left.
But the connected house also is based upon open technologies, so one can add these kind of features easily ourselves. My major use cases for this are (a) focussed work, plan quick work-out breaks and of course making sure there’s enough time left to actually get enough sleep.
As you can see in the picture attached my watch will always show me the hours (or minutes) left until the next event. I use separate calendars for separate displays – so there’s actually one for when I plan to get up and do work-outs.
Having the hours left until something is supposed to happen at a glance – and of course being able to verbally ask through chat or voice in any room of the house how long until the next appointment gives peace of mind :-).
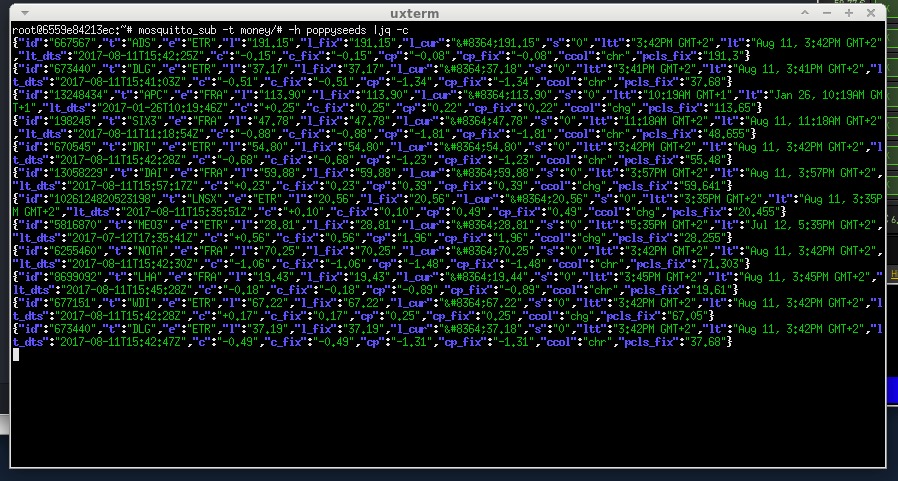
The Internet of Things might as well become your Internet of Money. Some feel the future to be with blockchain related things like BitCoin or Ethereum and they might be right. So long there’s also this huge field of personal finances that impacts our lives allday everyday.
And if you get to think about it money has a lot of touch points throughout all situations of our lifes and so it also impacts the smart home.
Lots of sources of information can be accessed today and can help to stay on top of the things going on as well as make concious decisions and plans for the future. To a large extend the information is even available in realtime.
– cost tracking and reporting
– alerting and goal setting
– consumption and resource management
– like fuel oil (get alerted on price changes, …)
– stock monitoring alerting
– and more advanced even automated trading
– bank account monitoring, in- and outbound transactions
– expectations and planning
– budgetting
After all this is about getting away from lock-in applications and freeing your personal financial data and have a all-over dashboard of transactions, plans and status.
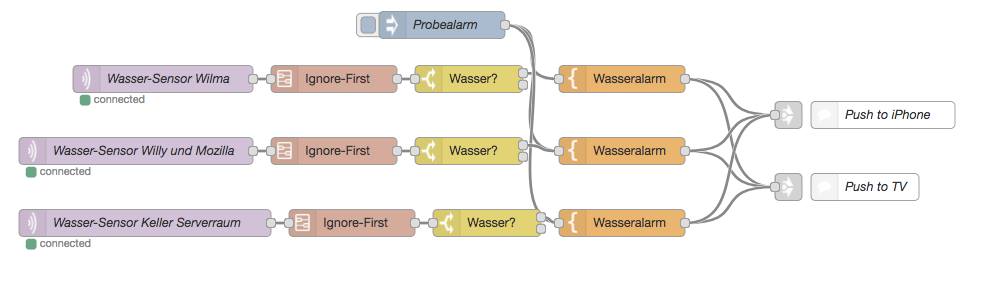
Water! Fire! Whenever one of those are released uncontrolled inside the house it might mean danger to life and health.
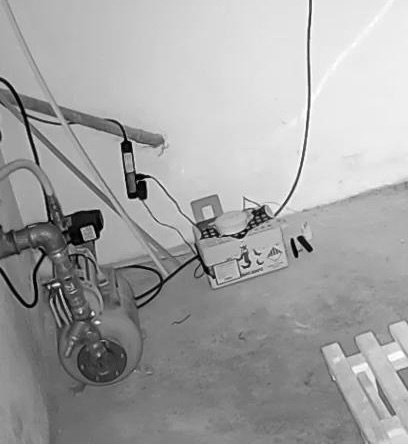
Having a couple of fish and turtle tanks spread out in the house and in addition a server rack in the basement it’s important to know when there’s a leak of water at moments notice.
As the server-room also is housing some water pumps for a well you got all sorts of dangers mixed in one location: Water and Fire hazard.
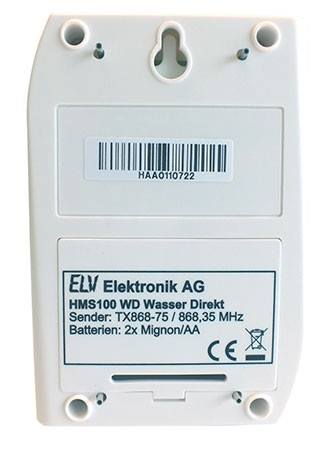
To detect water leaks all tanks and the pumps for the well are equipped with water sensors which send out an alerting signal as soon as water is detected. This signal is picked up and pushed to MQTT topics and from there centrally consumed and reacted upon.
Of course the server rack is above the water level so at least there is time to send out alerts while even power is out for the rest of the house (all necessary network and uplink equipment on it’s own batteries).
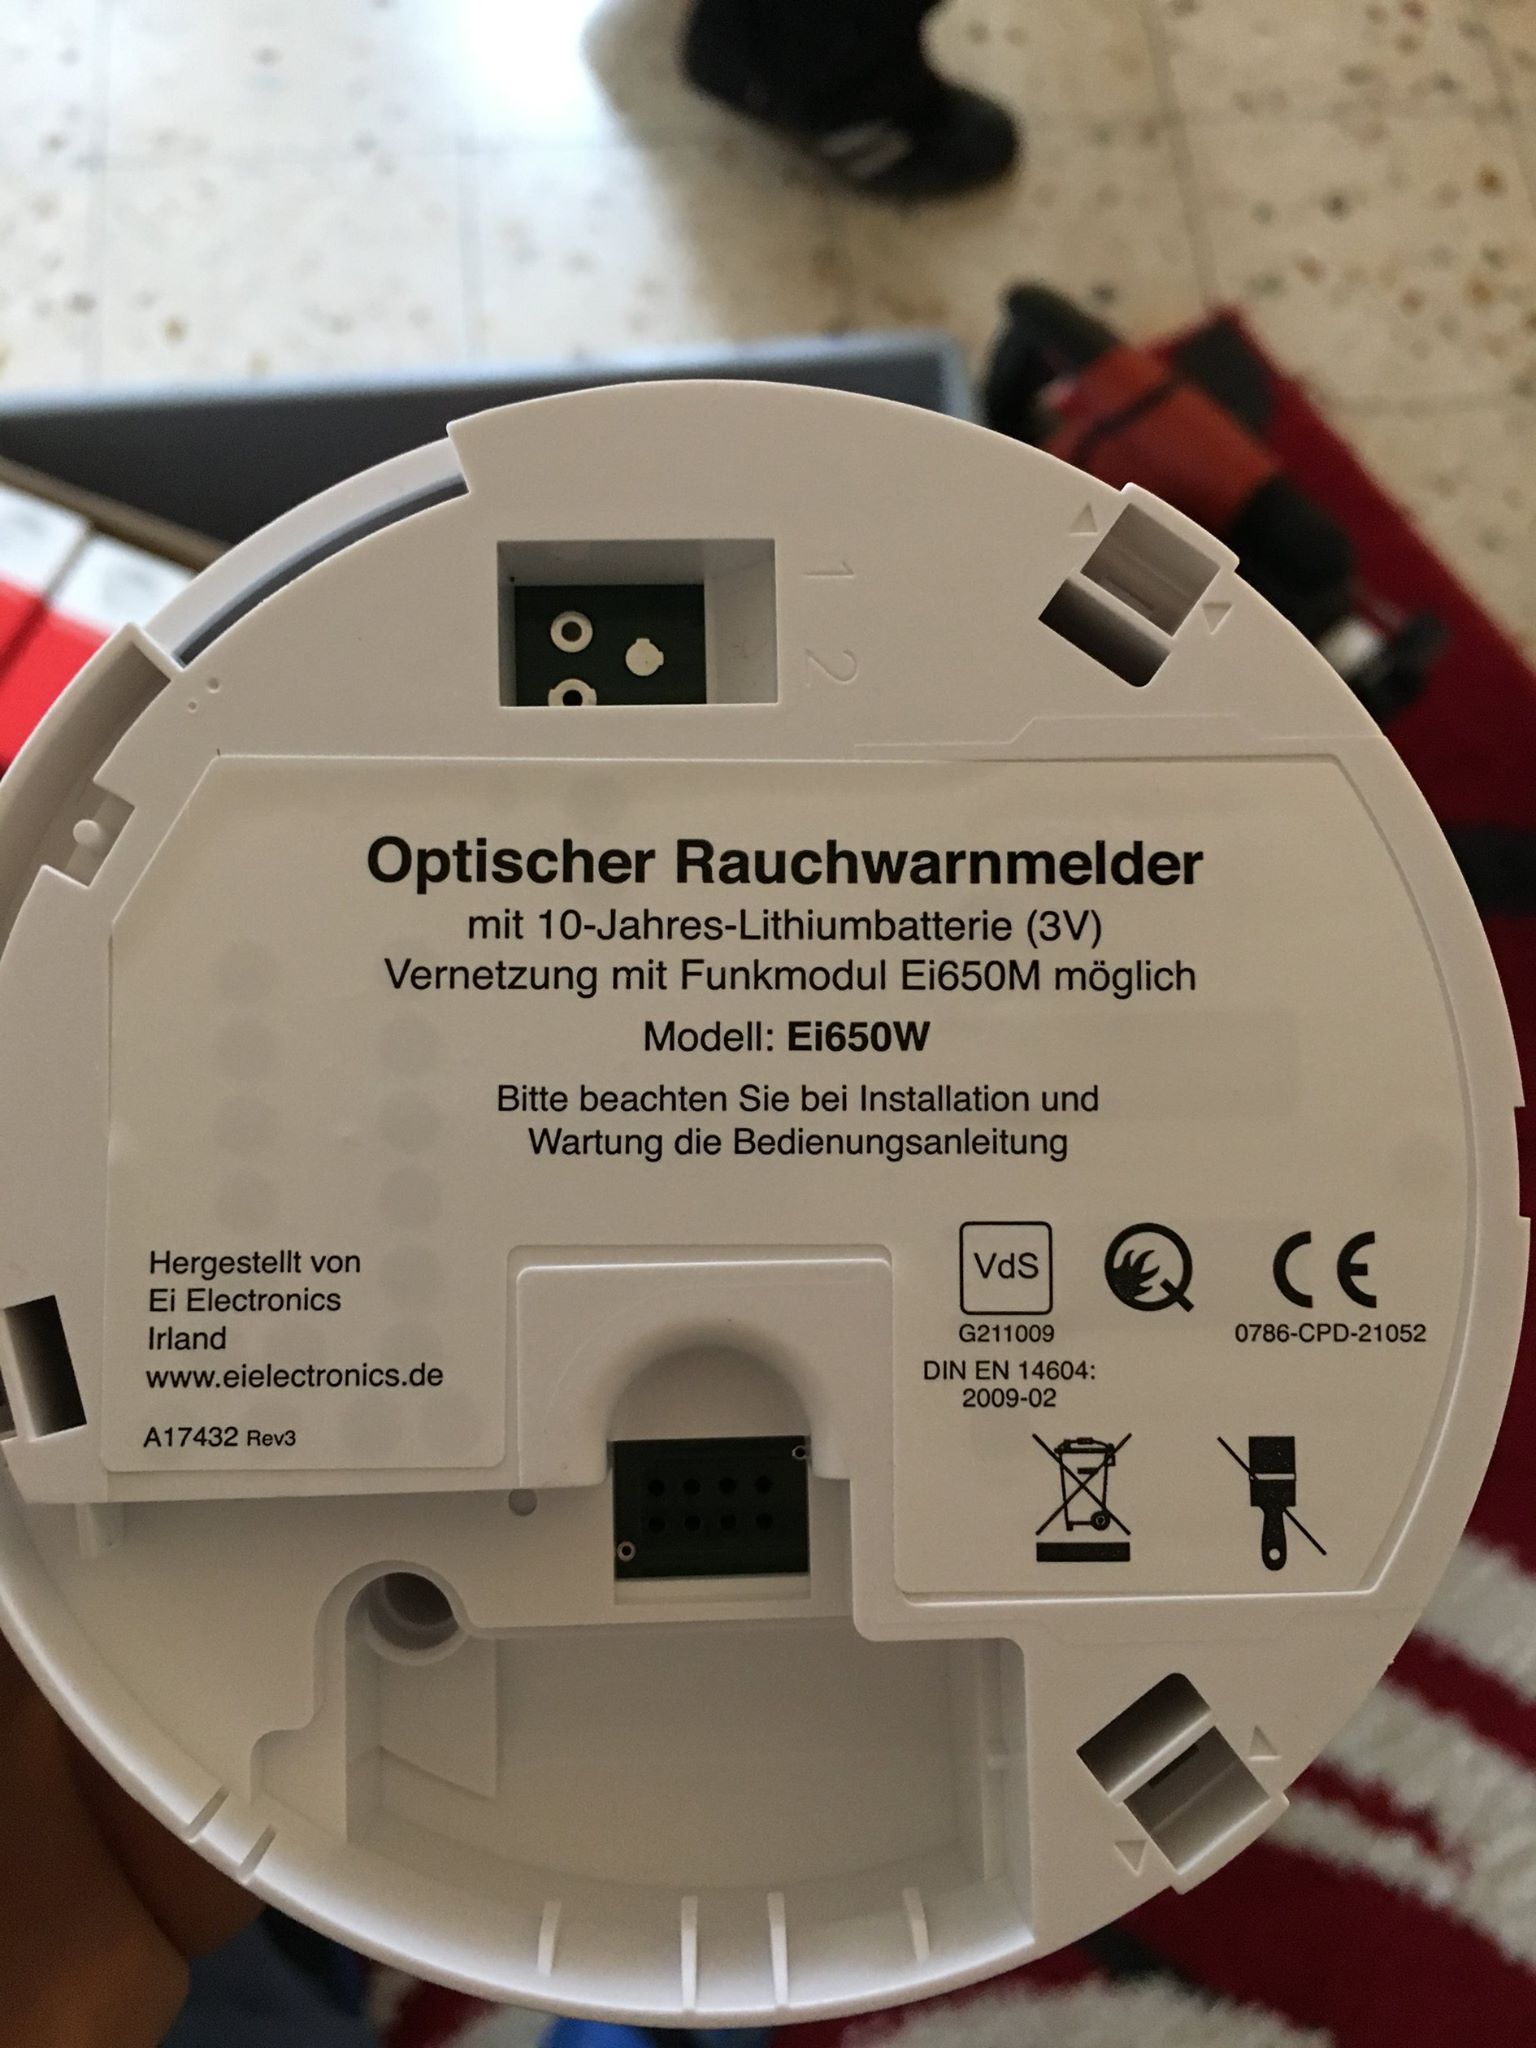
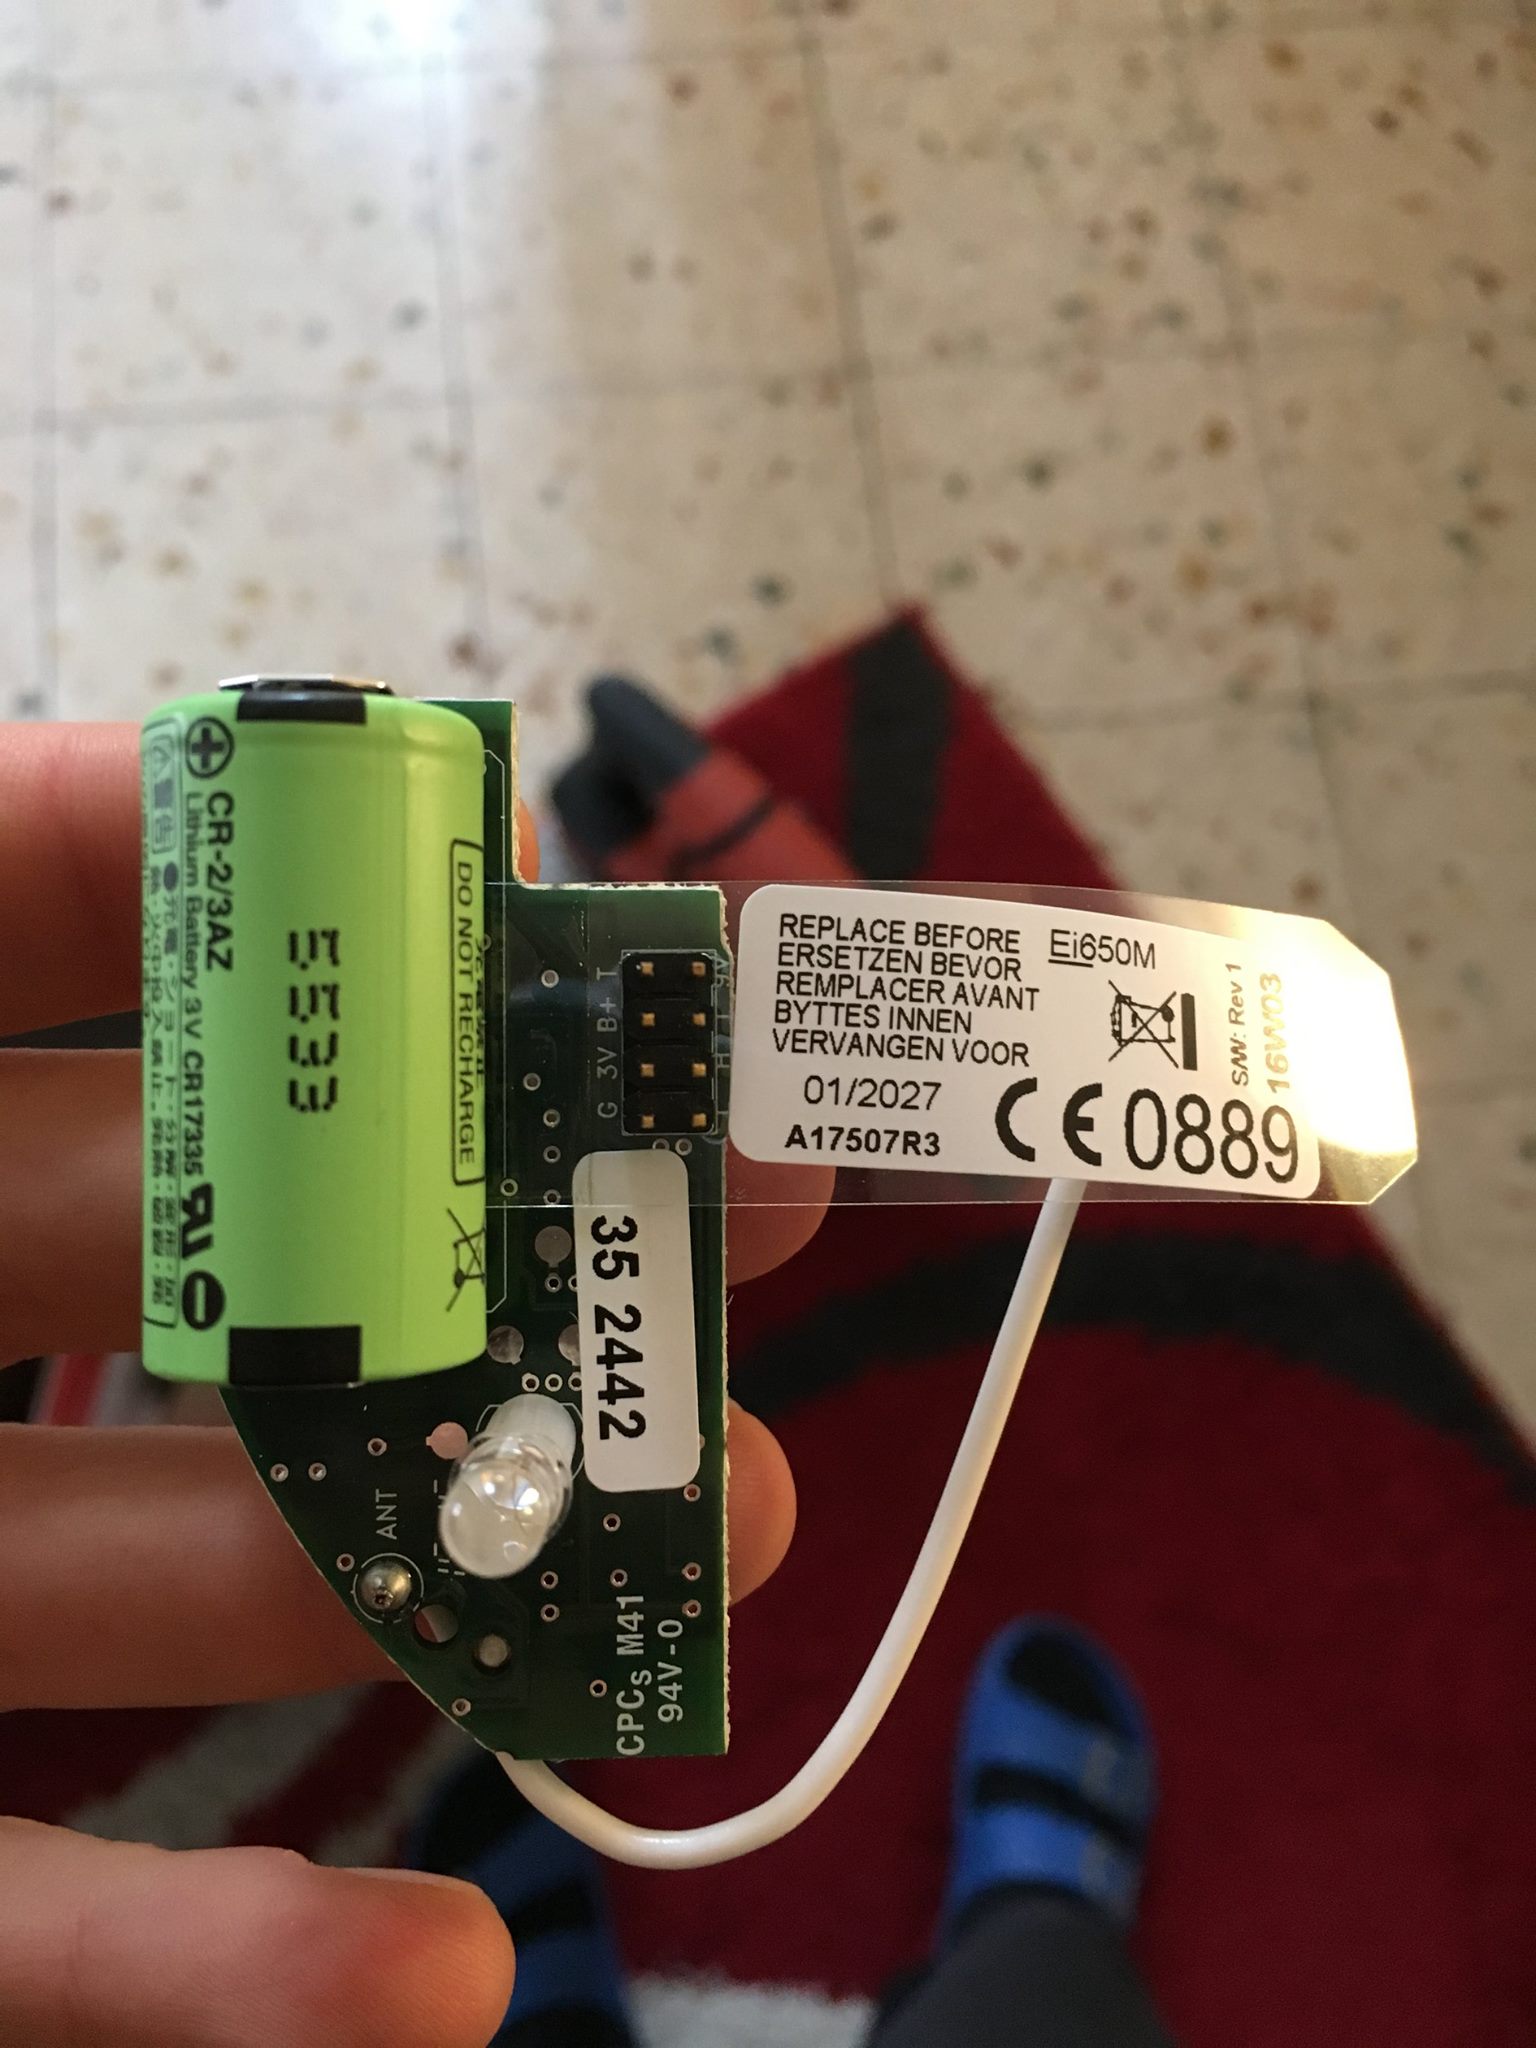
For alerting when there is smoke or a fire, the same logic applies. But for this some loud-as-hell smoke detectors are used. The smoke detectors interconnect with each other and make up a mesh for alerting. If one goes off. All go off. One of them I’ve connected to it’s very own ESP8266 which sends a detected signal to another MQTT topic effectively alerting for the event of a fire.
In one of the pictures you can see what happened when the basement water detector did detect water while the pump was replaced.
A lot of things in a household have weight, and knowing it’s weight might be crucial to health and safety.
Some of those weight applications might tie into this:
– your own body weight over a longer timespan
– the weight of your pets, weighed automatically (like on a kitty litter box)
– the weight of food and ingredients for recipes as well as their caloric and nutrition values
– keeping track of fill-levels on the base of weights
All those things are easily done with connected devices measuring weights. Like the kitty-litter box at our house weighing our cat every time. Or the connected kitchen-scale sending it’s gram measurements into an internal MQTT topic which is then displayed and added more smarts through an App on the kitchen-ipad consuming that MQTT messages as well as allowing recipe-weigh-in functions.
It’s not only surveillance but pro-active use. There are beekeepers who monitor the weight of their bee hives to see what’s what. You can monitor all sorts of things in the garden to get more information about it’s wellbeing (any plants, really).
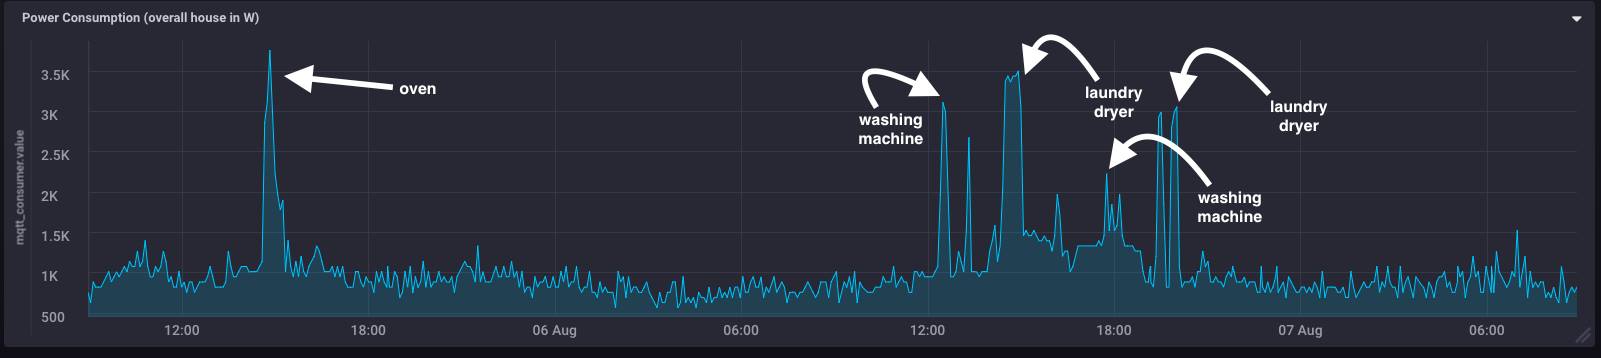
Weekend is laundry time! The smart house knows and sends out notifications when the washing machine or the laundry dryer are done with their job and can be cleared.
Of course this can all be extended with more sensory data, like power consumption measurements at the actual sockets to filter out specific devices much more accurate. But for simple notification-alerting it’s apparently sufficient to monitor just at the houses central power distribution rack.
On the sides this kind of monitoring and pattern-matching is also useful to identify devices going bad. Think of monitoring the power consumption of a fridge. When it’s compressor goes bad it’s going to consume an increasing amount of power over time. You would figure out the malfunction before it happens.
Same for all sorts of pumps (water, oil, aquarium,…).
All this monitoring and pattern matching the smart house does so it’s inhabitants don’t have to.
We love music. We love it playing loud across the house. And when we did that in the past we missed some things happening around.
Like that delivery guy ringing the front doorbell and us missing an important delivery.
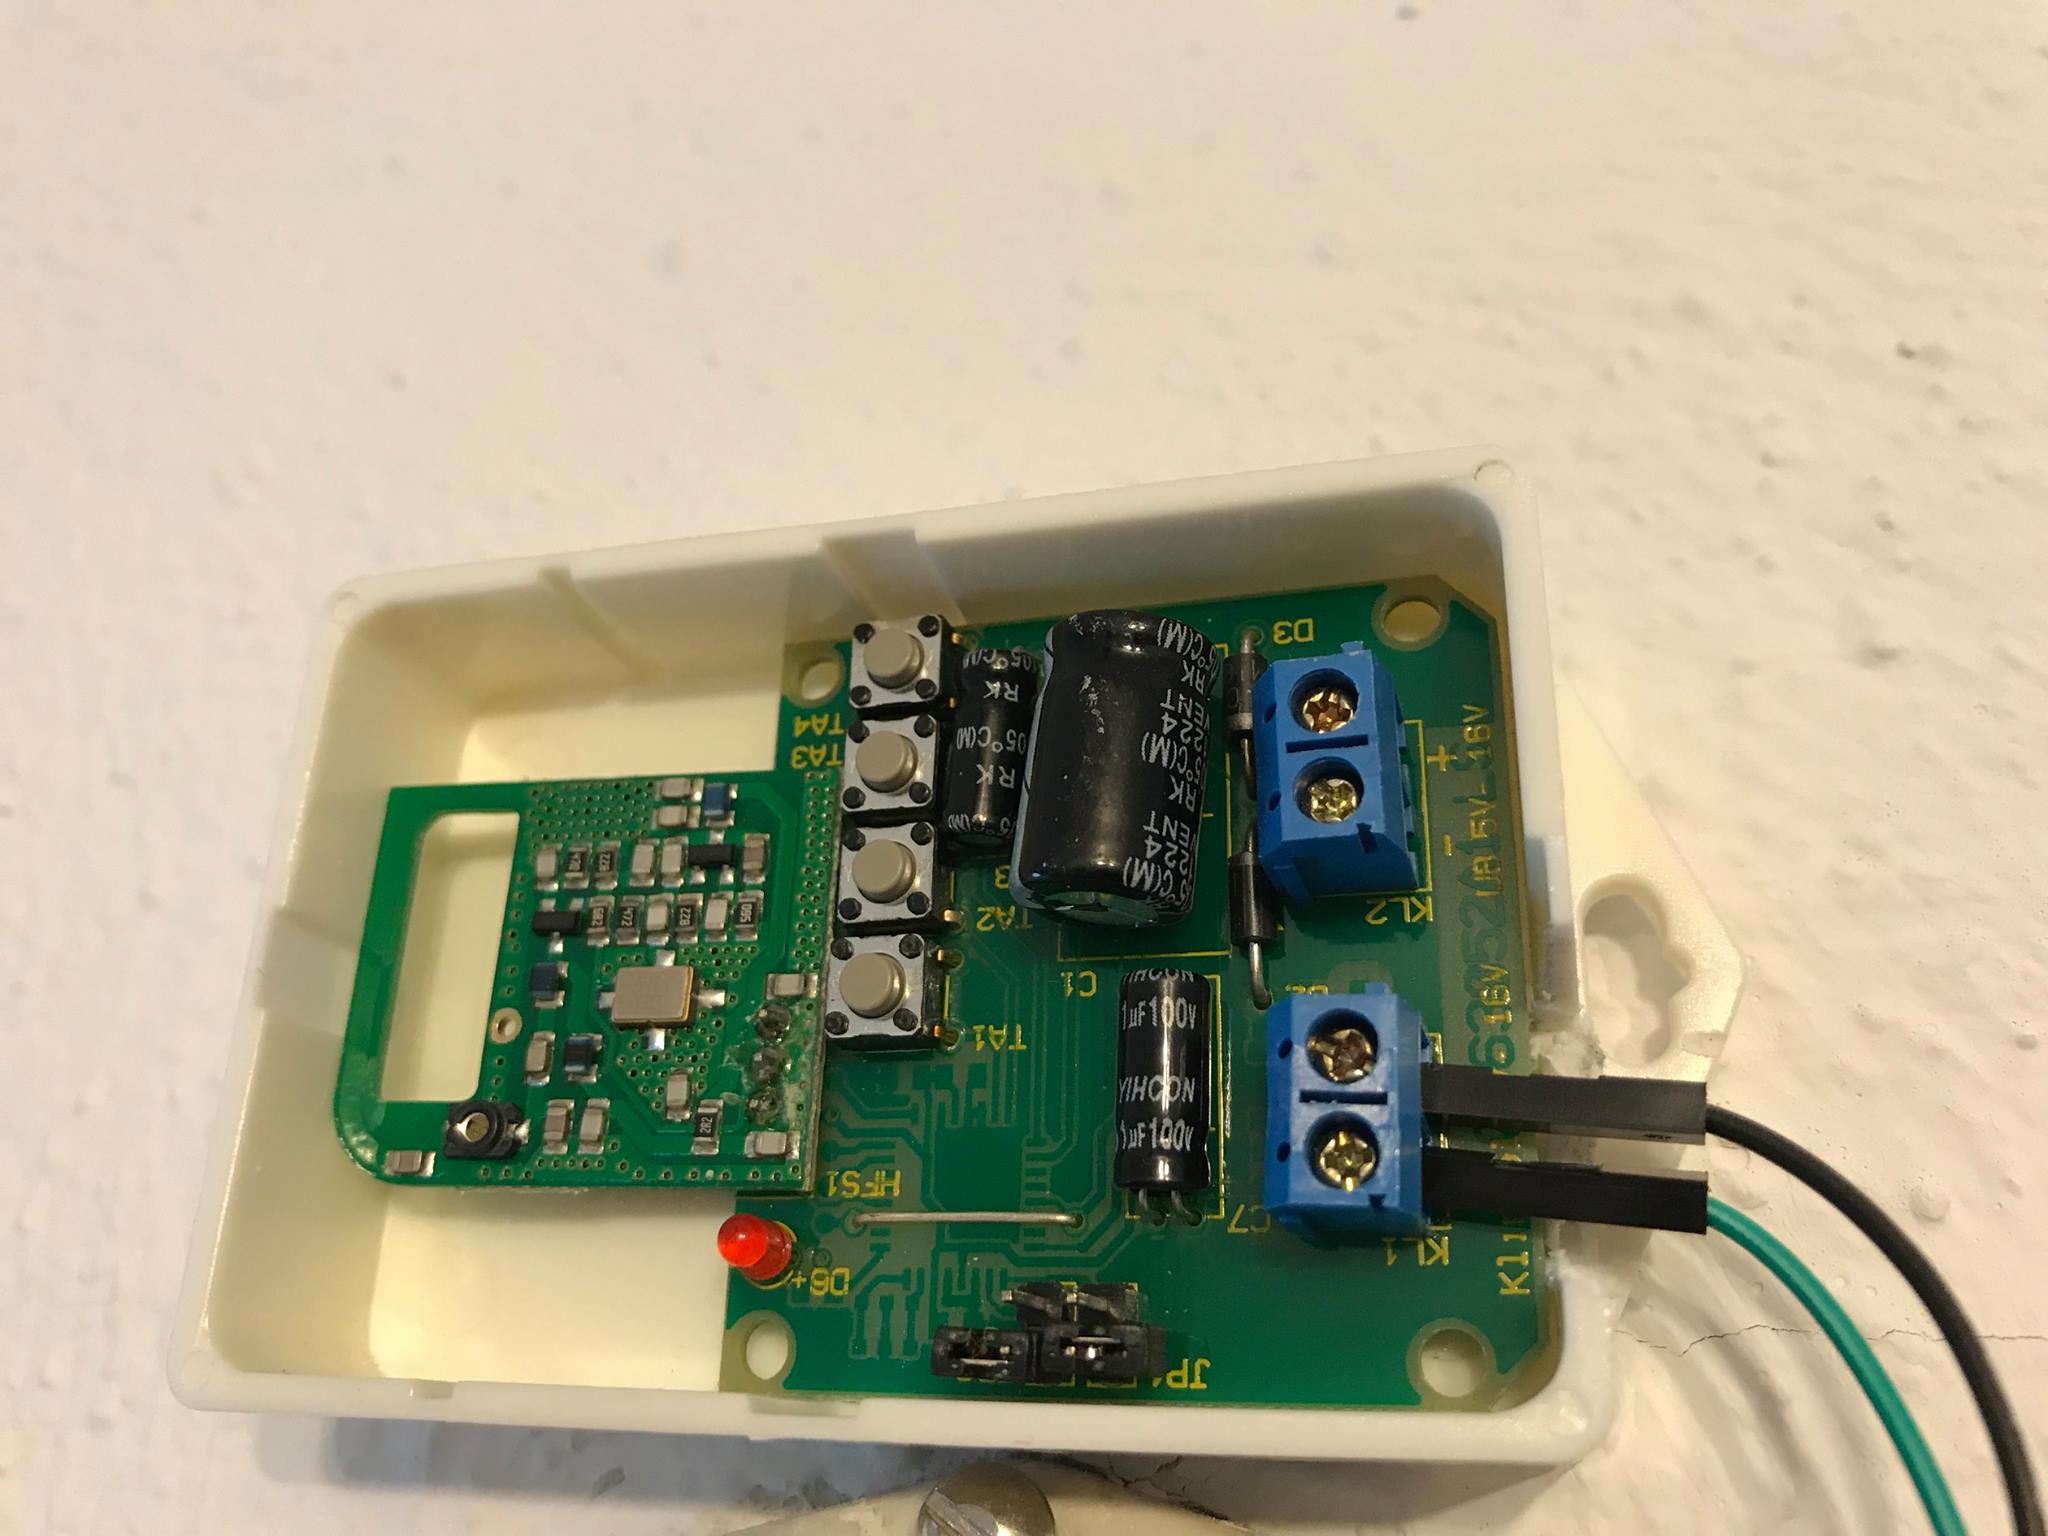
This happened a lot. UNTIL we retrofitted a little PCB to our doorbell circuit to make the house aware of ringing doorbells.
Now everytime the doorbell rings a couple of things can take place.
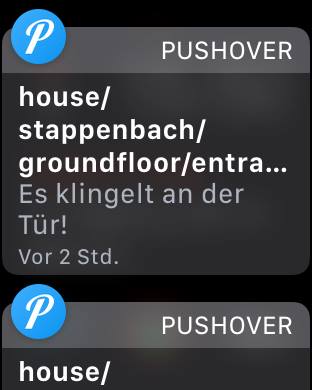
– push notifications to all devices, screens, watches – that wakes you up even while doing workouts
– pause all audio and video playback in the house
– take a camera shot of who is in front of the door pushing the doorbell
And: It’s easy to wire up things whatever those may be in the future.
So how do you manage all these sensors and switches, and lights, and displays and speakers…
One way has proven to be very useful and that is by using a standard calendar.
Yes, the one you got right on your smartphone or desktop.
A calendar is a simple manifestation of events in time and thus it can be used to either protocol or schedule events.
So the smart house uses calendars to:
schedule on/off times for switches, alarms, whatever can be switched
notes down locations and can react upon locations on schedule or when members of the household arrive/leave those locations based on calendar events
reminds members in the house on upcoming events
protocols media playback (what song,…) for later search
lets members of the house set events through different means like voice, smartphone, …
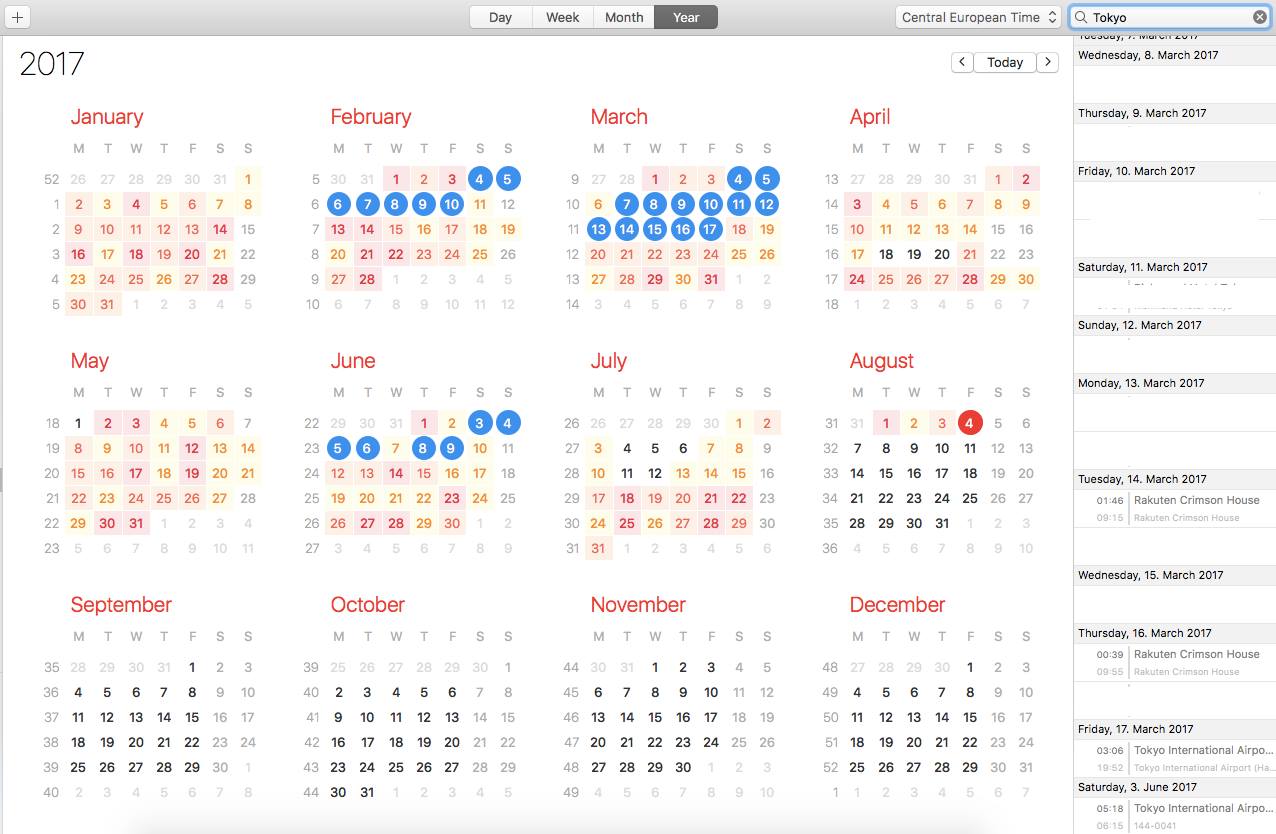
So what am I using this calendar(s) for? Simple. It’s there to track travelling since I know when I was where by simply searching the calendar (screenshot). It’s easy to make out patterns and times of things happening since a calendar/timeline view feels natural. Setting on/off times and such is just a bliss if you can make it from your phone in an actual calendar rather than a tedious additional app or interface.
And of course: the house can only be smart about things when it has a way to gather and access that data. Reacting to it’s inhabitants upcoming and previous events adds several levels of smartness.
We all know it: After a long day of work you chilled out on your bean bag and fell asleep early. You gotta get up and into your bed upstairs. So usually light goes on, you go upstairs, into bed. And there you have it: You’re not sleepy anymore.
Partially this is caused by the light you turned on. If that light is bright enough and has the right color it will wake you up no matter what.
To fight this companies like Apple introduced things like “NightShift” into iPhones, iPads and Macs.
“Night Shift uses your computer’s clock and geolocation to determine when it’s sunset in your location. It then automatically shifts the colors in your display to the warmer end of the spectrum.”
Simple, eh?. Now why does your house not do that to prevent you being ripped out of sleepy state while tiptoeing upstairs?
Right! This is where the smart house will be smart.
Nowadays we’ve got all those funky LED bulbs that can be dimmed and even their colours set. Why none of those market offerings come with that simple feature is beyond me:
After sunset, when turned on, default dim to something warmer and not so bright in general.
I did implement and it’s called appropriately the “U-Boot light”. Whenever we roam around the upper floor at night time, the light that follows our steps (it’s smart enough to do that) will not go full-blast but light up dim with redish color to prevent wake-up-calls.
The smart part being that it will take into account:
– movement in the house
– sunset and dawn depending on the current geographic location of the house (more on that later, no it does not fly! (yet))
– it’ll turn on and off the light according to the path you’re walking using the various sensors around anyways