Some might know AmbiLight – a great invention by Philips that projects colored light around a TV screen based upon the contents shown. It’s a great addition to a TV but naturally only available with Philips TV sets.
Not anymore. There are several open-source projects that allow you to build your very own AmbiLight clone. I’ve built one using a 50-LEDs WS2801 stripe, a 5V/10A power supply, a RaspberryPi, and the BobLight integration in RaspBMC (this is a nice XBMC distribution for the Pi).
“Boblight is a collection of tools for driving lights connected to an external controller.
Its main purpose is to create light effects from an external input, such as a video stream (desktop capture, video player, tv card), an audio stream (jack, alsa), or user input (lirc, http). Boblight uses a client/server model, where clients are responsible for translating an external input to light data, and boblightd is responsible for translating the light data into commands for external light controllers.”
The hardware to start with looks like this:
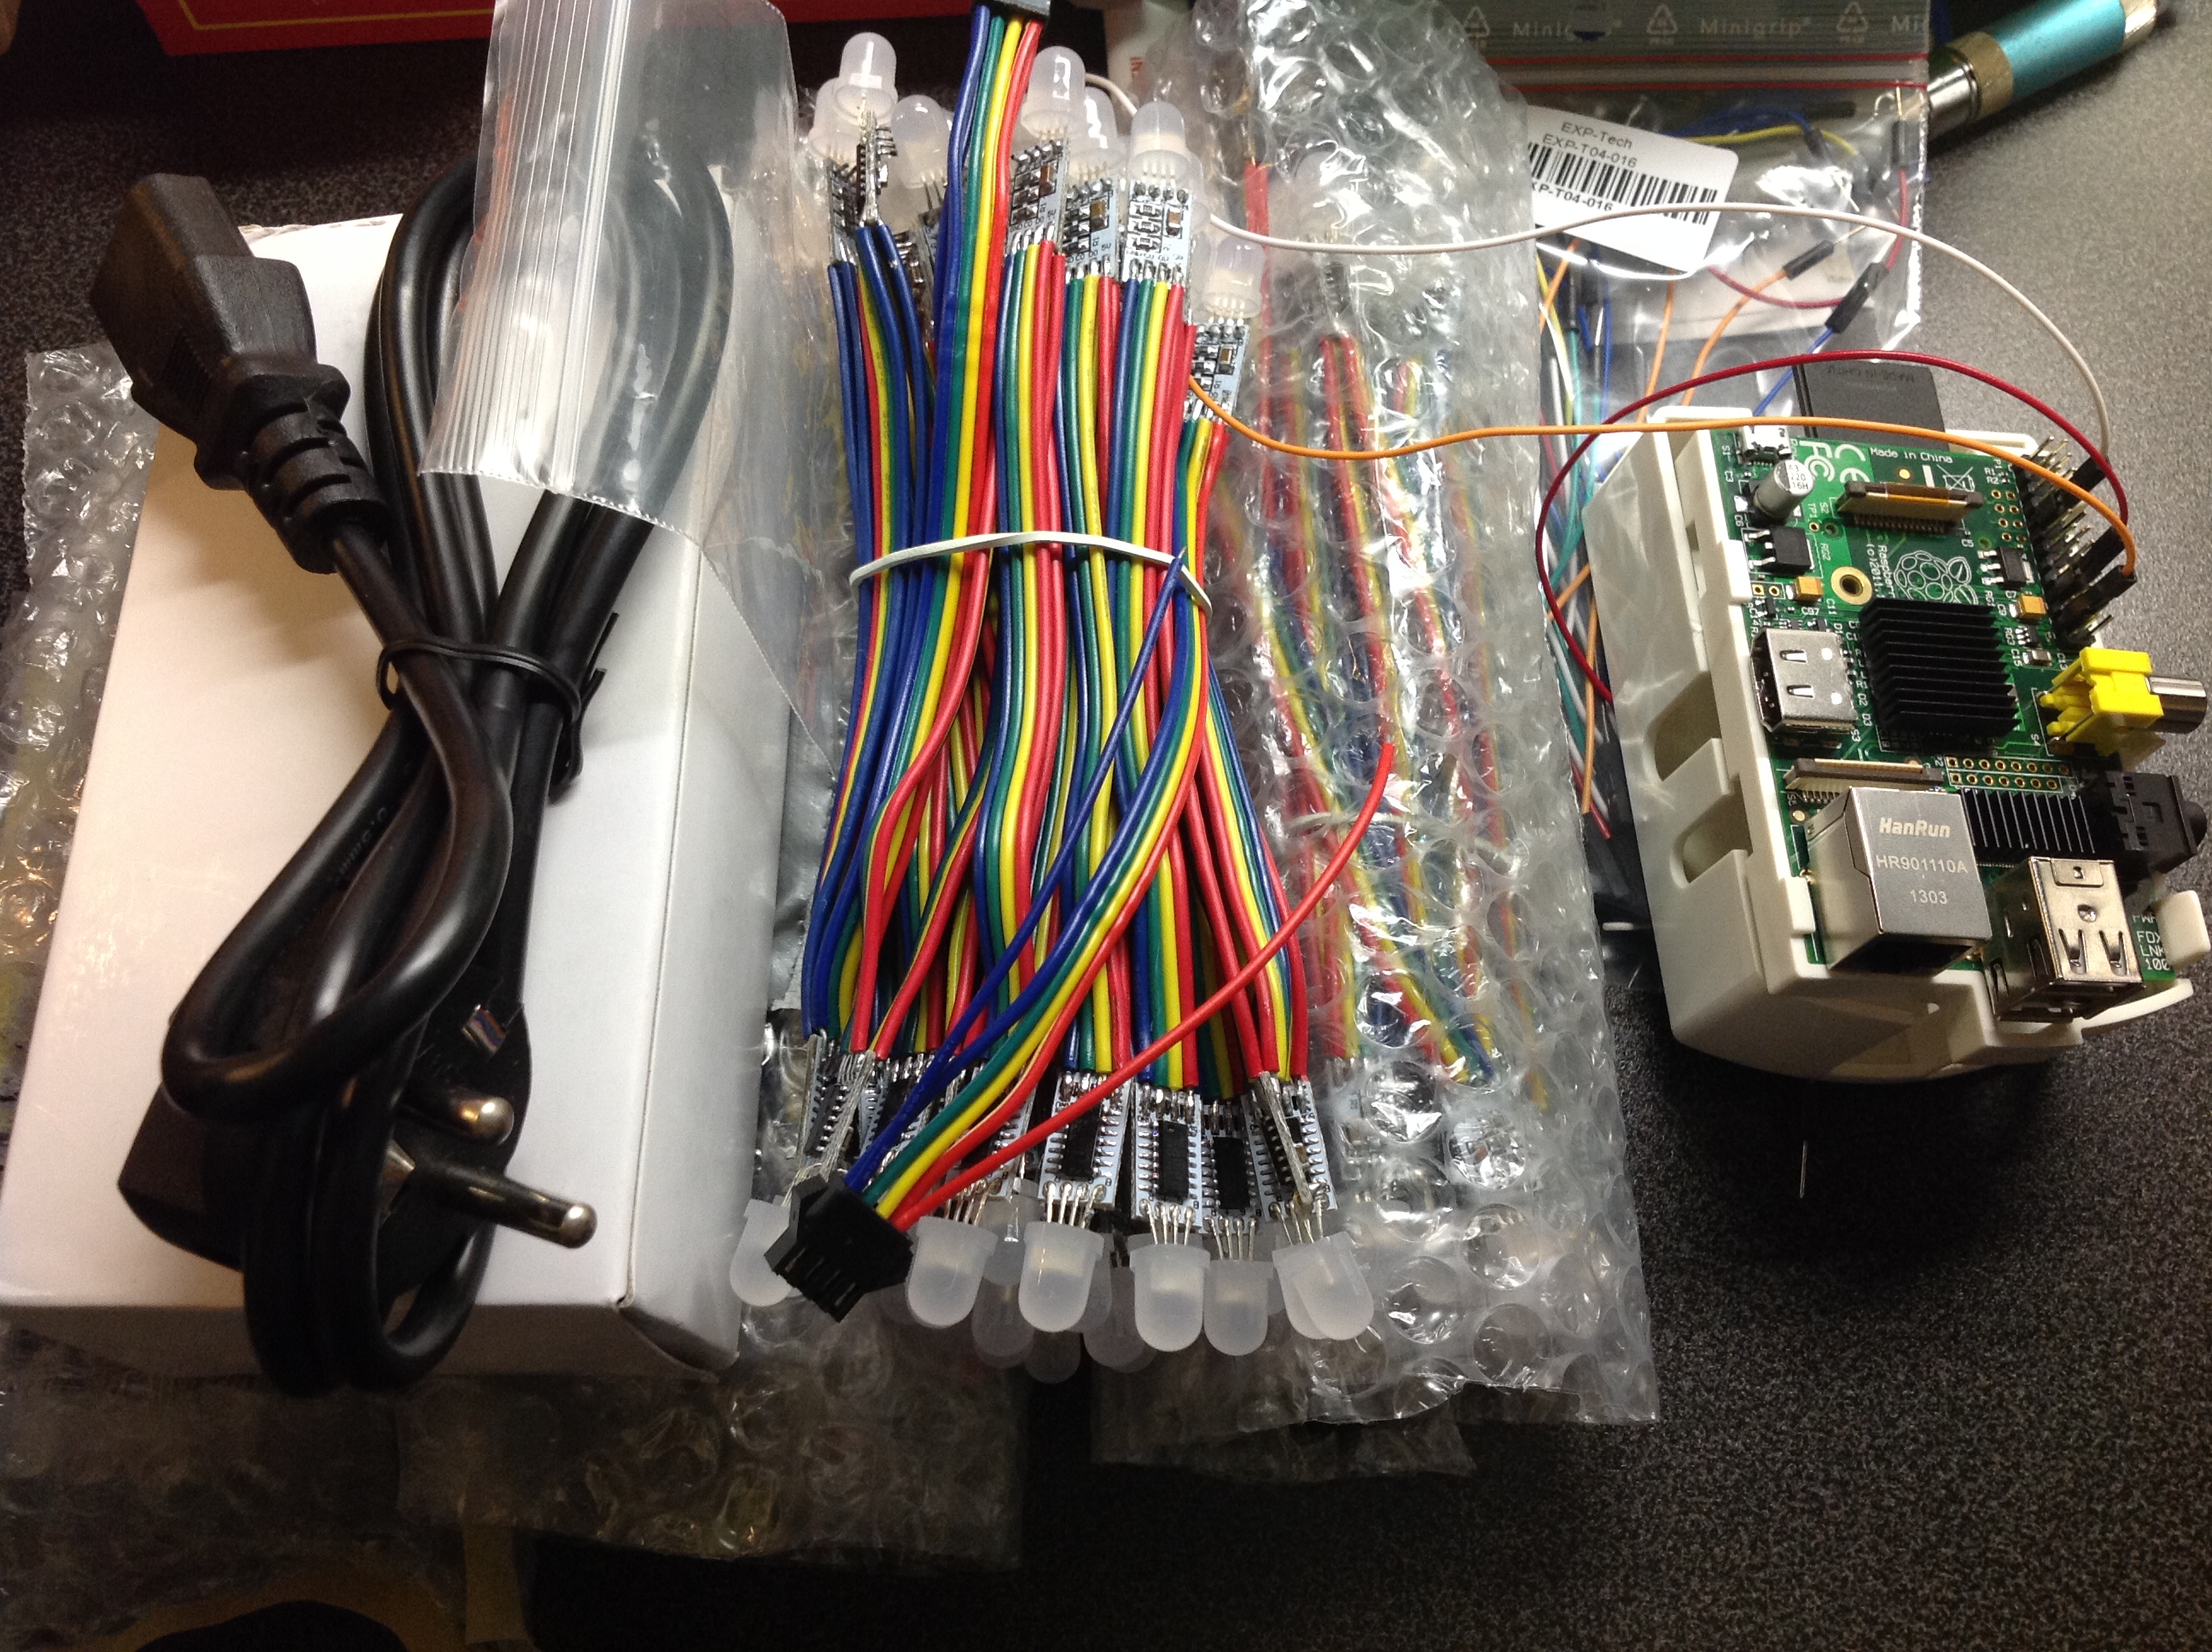
I’ve fitted some heat-sinks to the Pi since the additional load of controlling 50 LEDs will add a little bit of additional CPU usage which is desperately needed when playing Full HD High-Bitrate content.
The puzzle pieces need to be put together as described by the very good AdaFruit diagram:
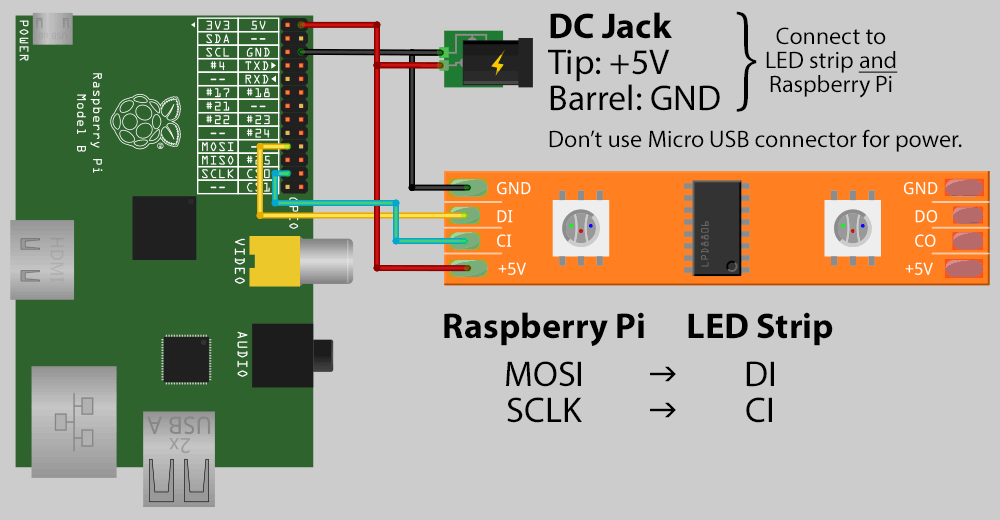 As you can see the Pi is powered directly through the GPIO pins. You’re not going to use the MicroUSB or the USB ports to power the Pi. It’s important that you keep the cables between the Pi and the LEDs as short as possible. When I added longer / unshielded cables everything went flickering. You do not want that – so short cables it is :-)
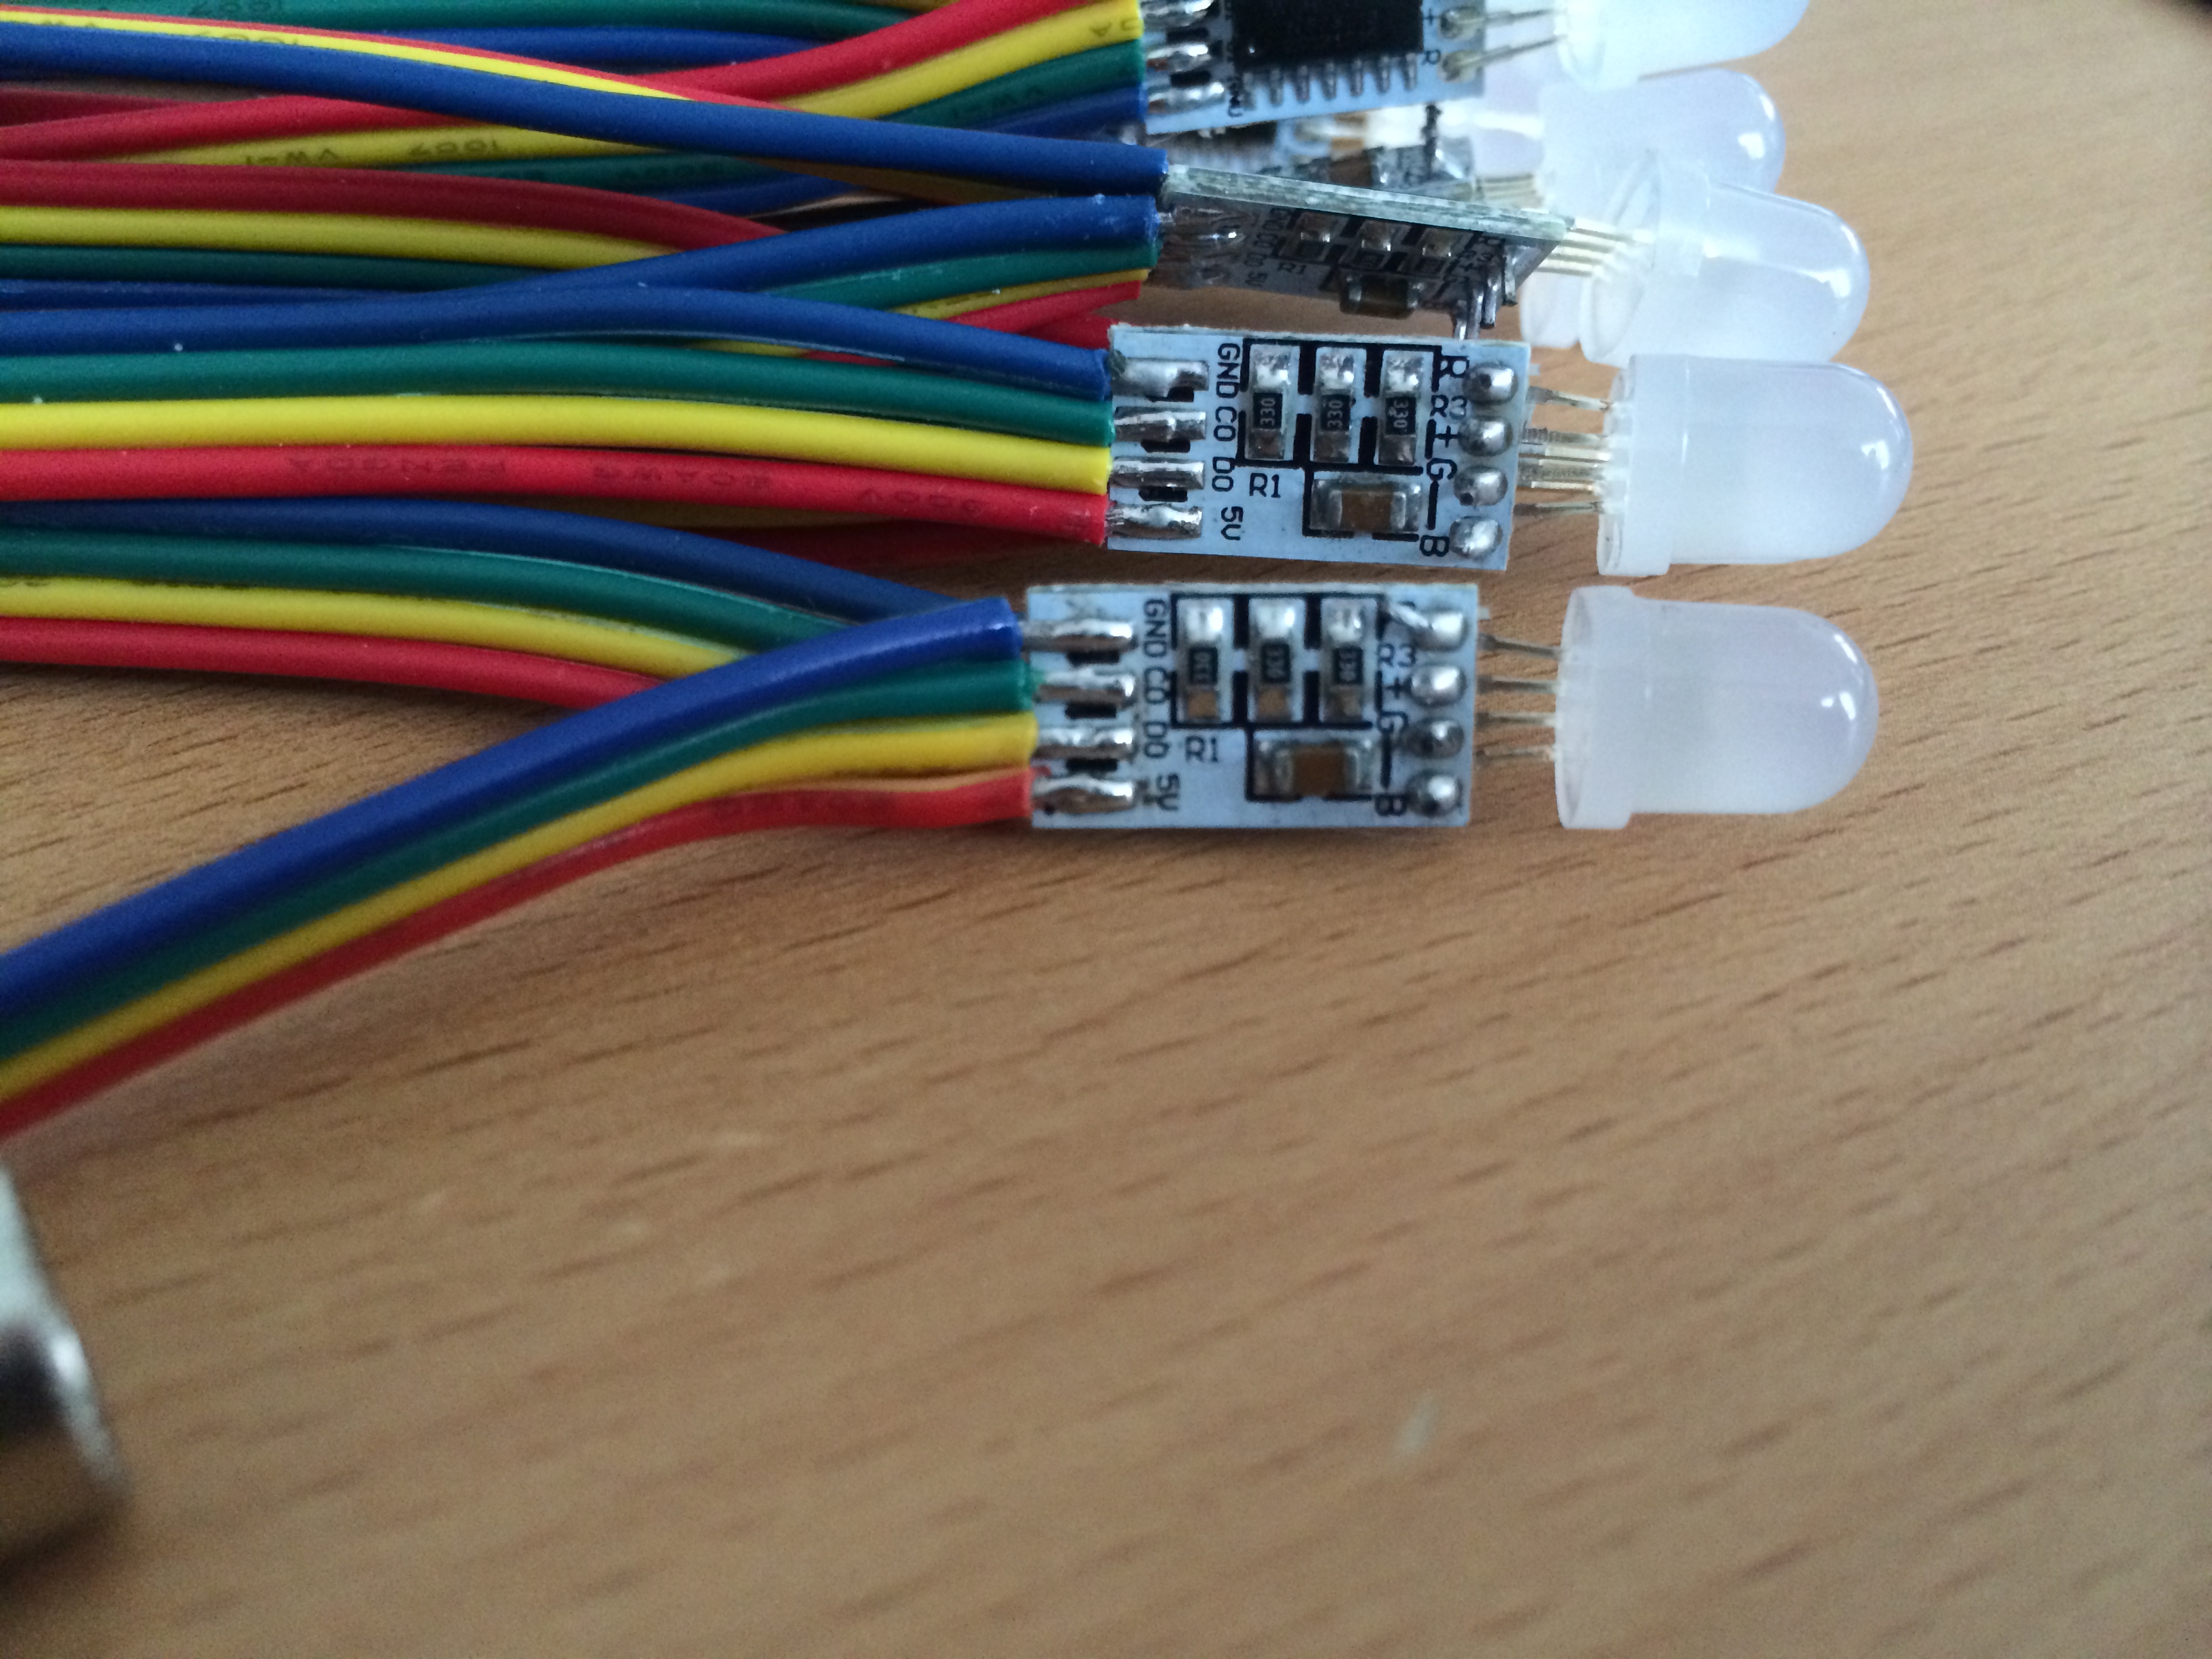
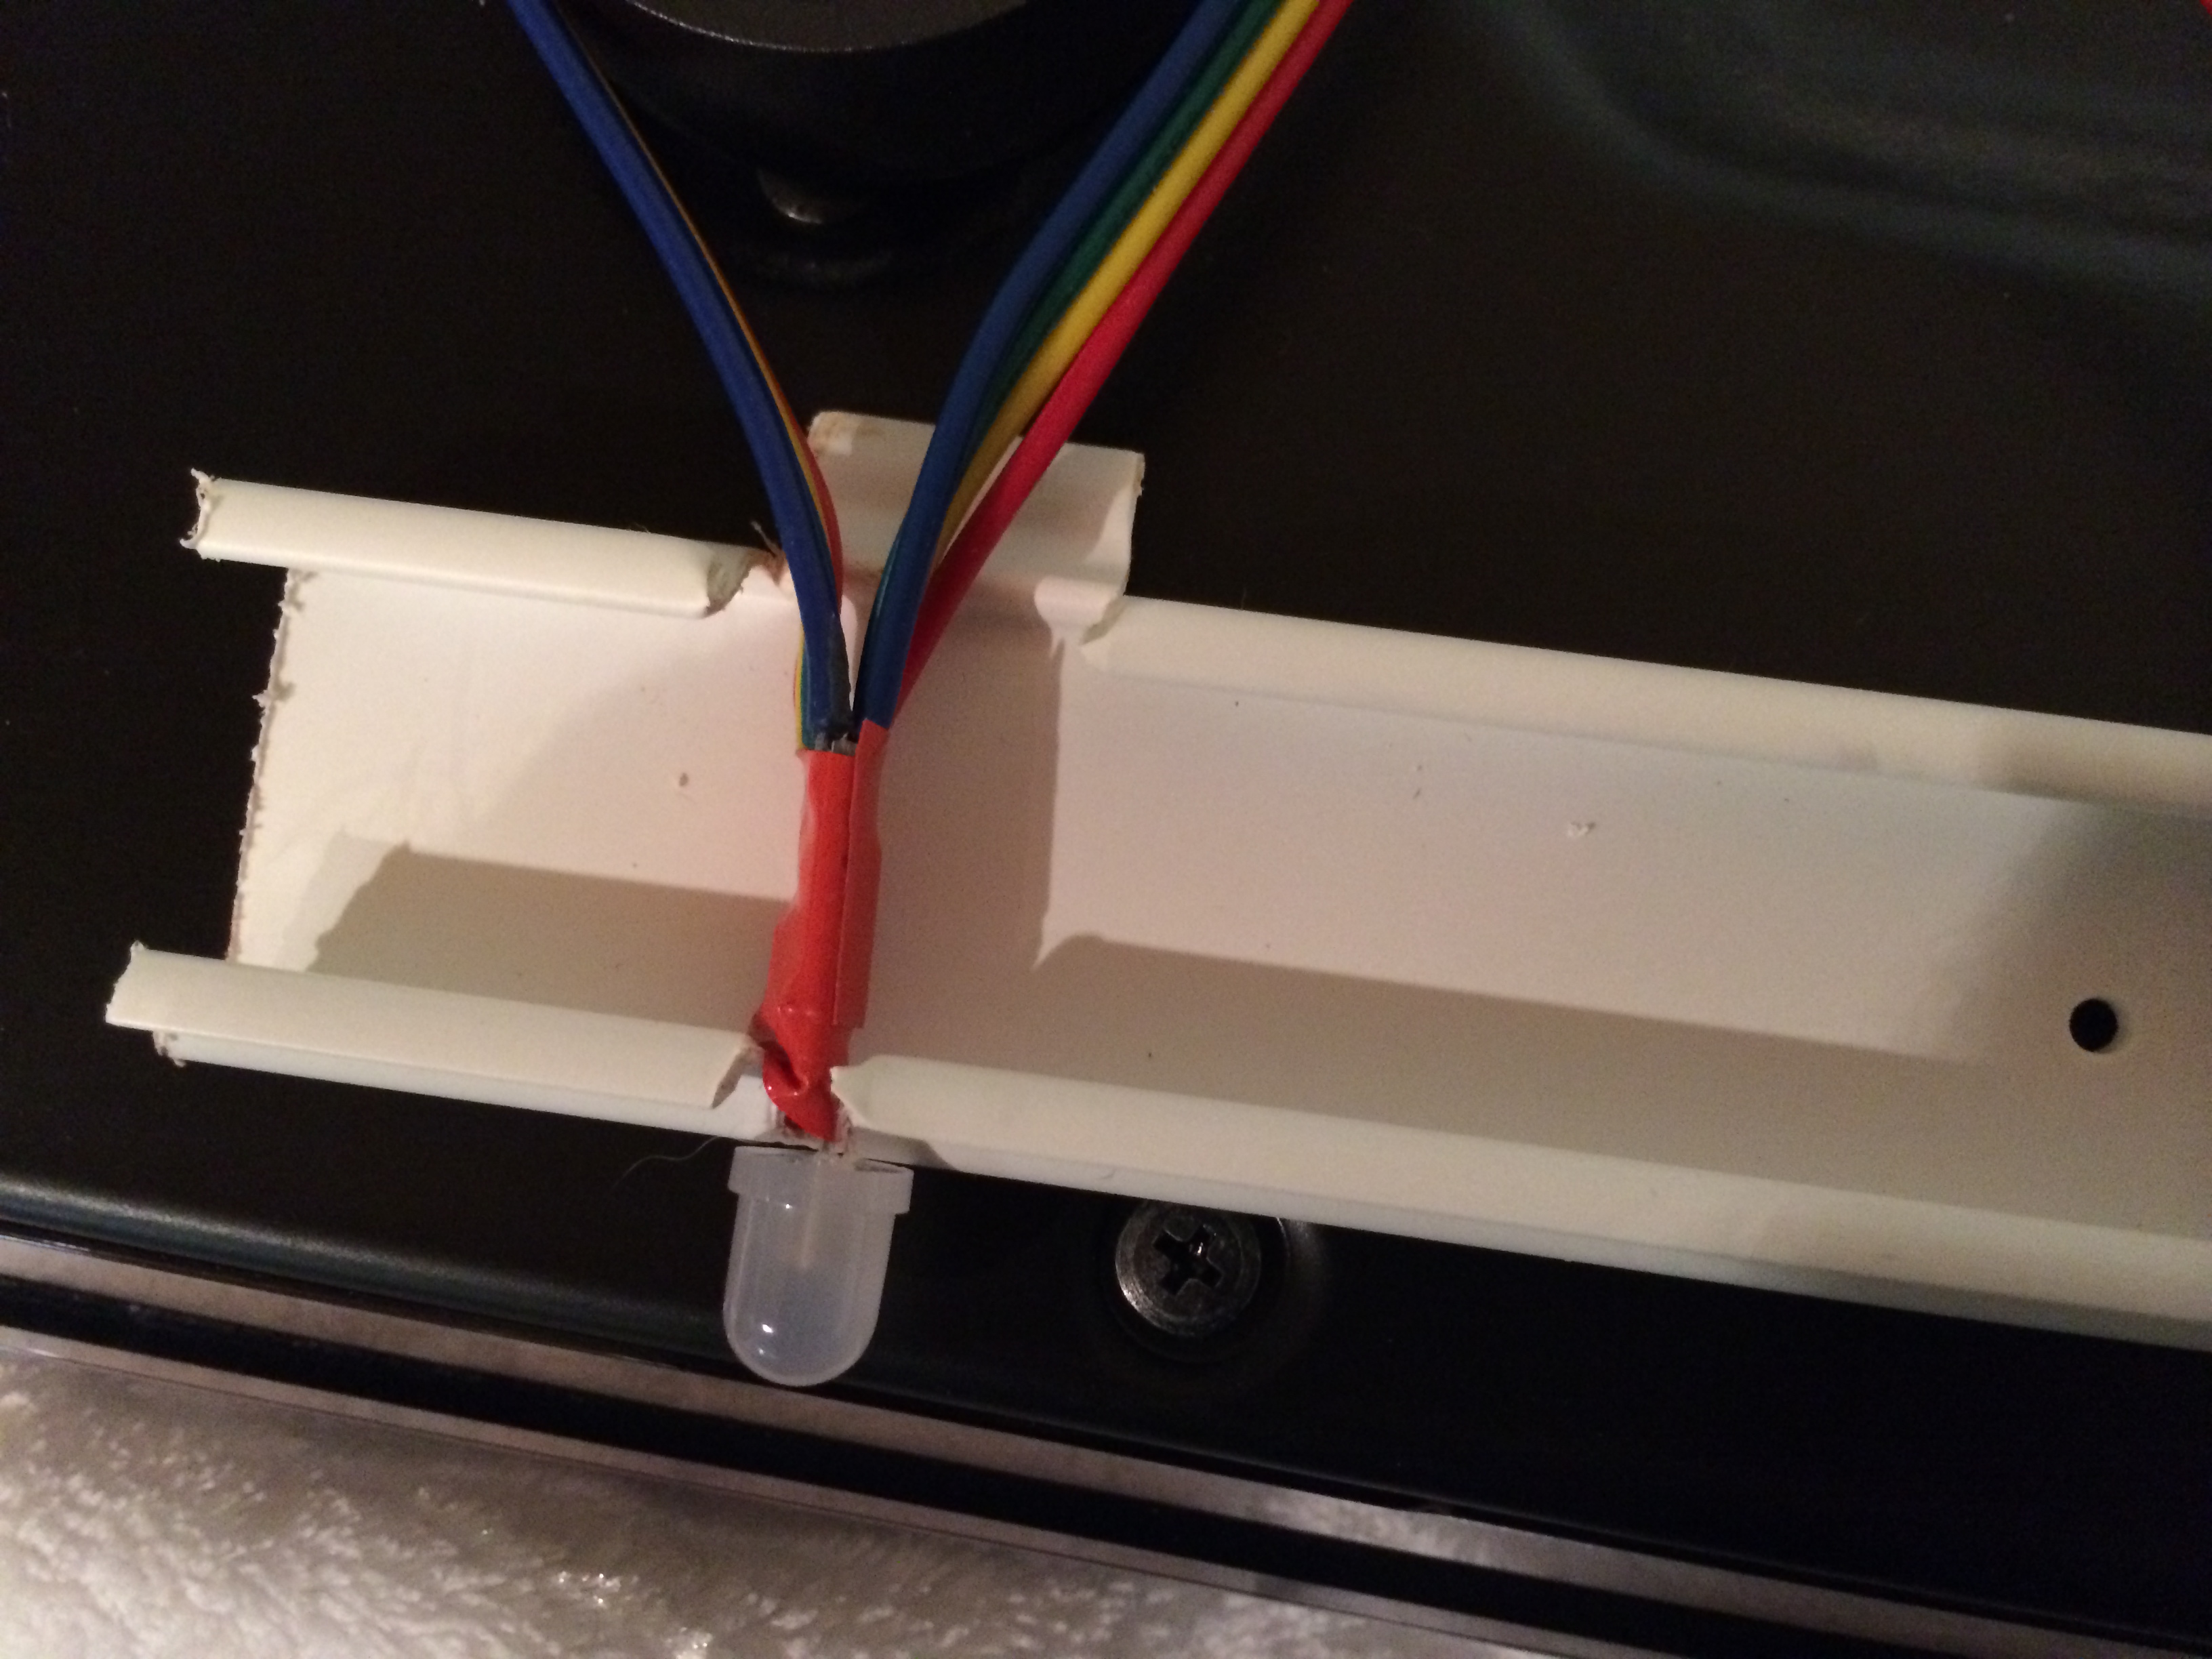
When you look at aboves picture closely you will find a CO and DO on the PCB of the LED. on the other side of the PCB there’s a CI and DI. Guess what: That means Clock IN and Clock OUT and Data IN and Data OUT. Don’t be mistaken by the adapter cables the LED stripes comes with. My Output socket looked damn close to something I thought was an Input socket. If nothing seems to work on the first trials – you’re holding it wrong! Don’t let the adapters fitted by the manufacturer mislead you.
Depending on the manufacturer of your particular LED stripe there are layouts different from the above image possible. Since RaspBMC is bundled with Boblight already you want to use something that is compatible with Boblight. Something that allows Boblight to control each LED in color and brightness separately.
I opted for WS2801 equipped LEDs. This pretty much means that each LED sits on it’s own WS2801 chip and that chip takes commands for color and brightness. There are other options as well – I hear that LDP8806 chips also work with Boblight.
My power supply got a little big to beefy – 10 Amps is plenty. I originally planned to have 100 LEDs on that single TV. Each LED at full white brightness would consume 60mA – which brings us to 6Amps for a 100 – add to that the 2 Amps for the PI and you’re at 8A. So 10A was the choice.
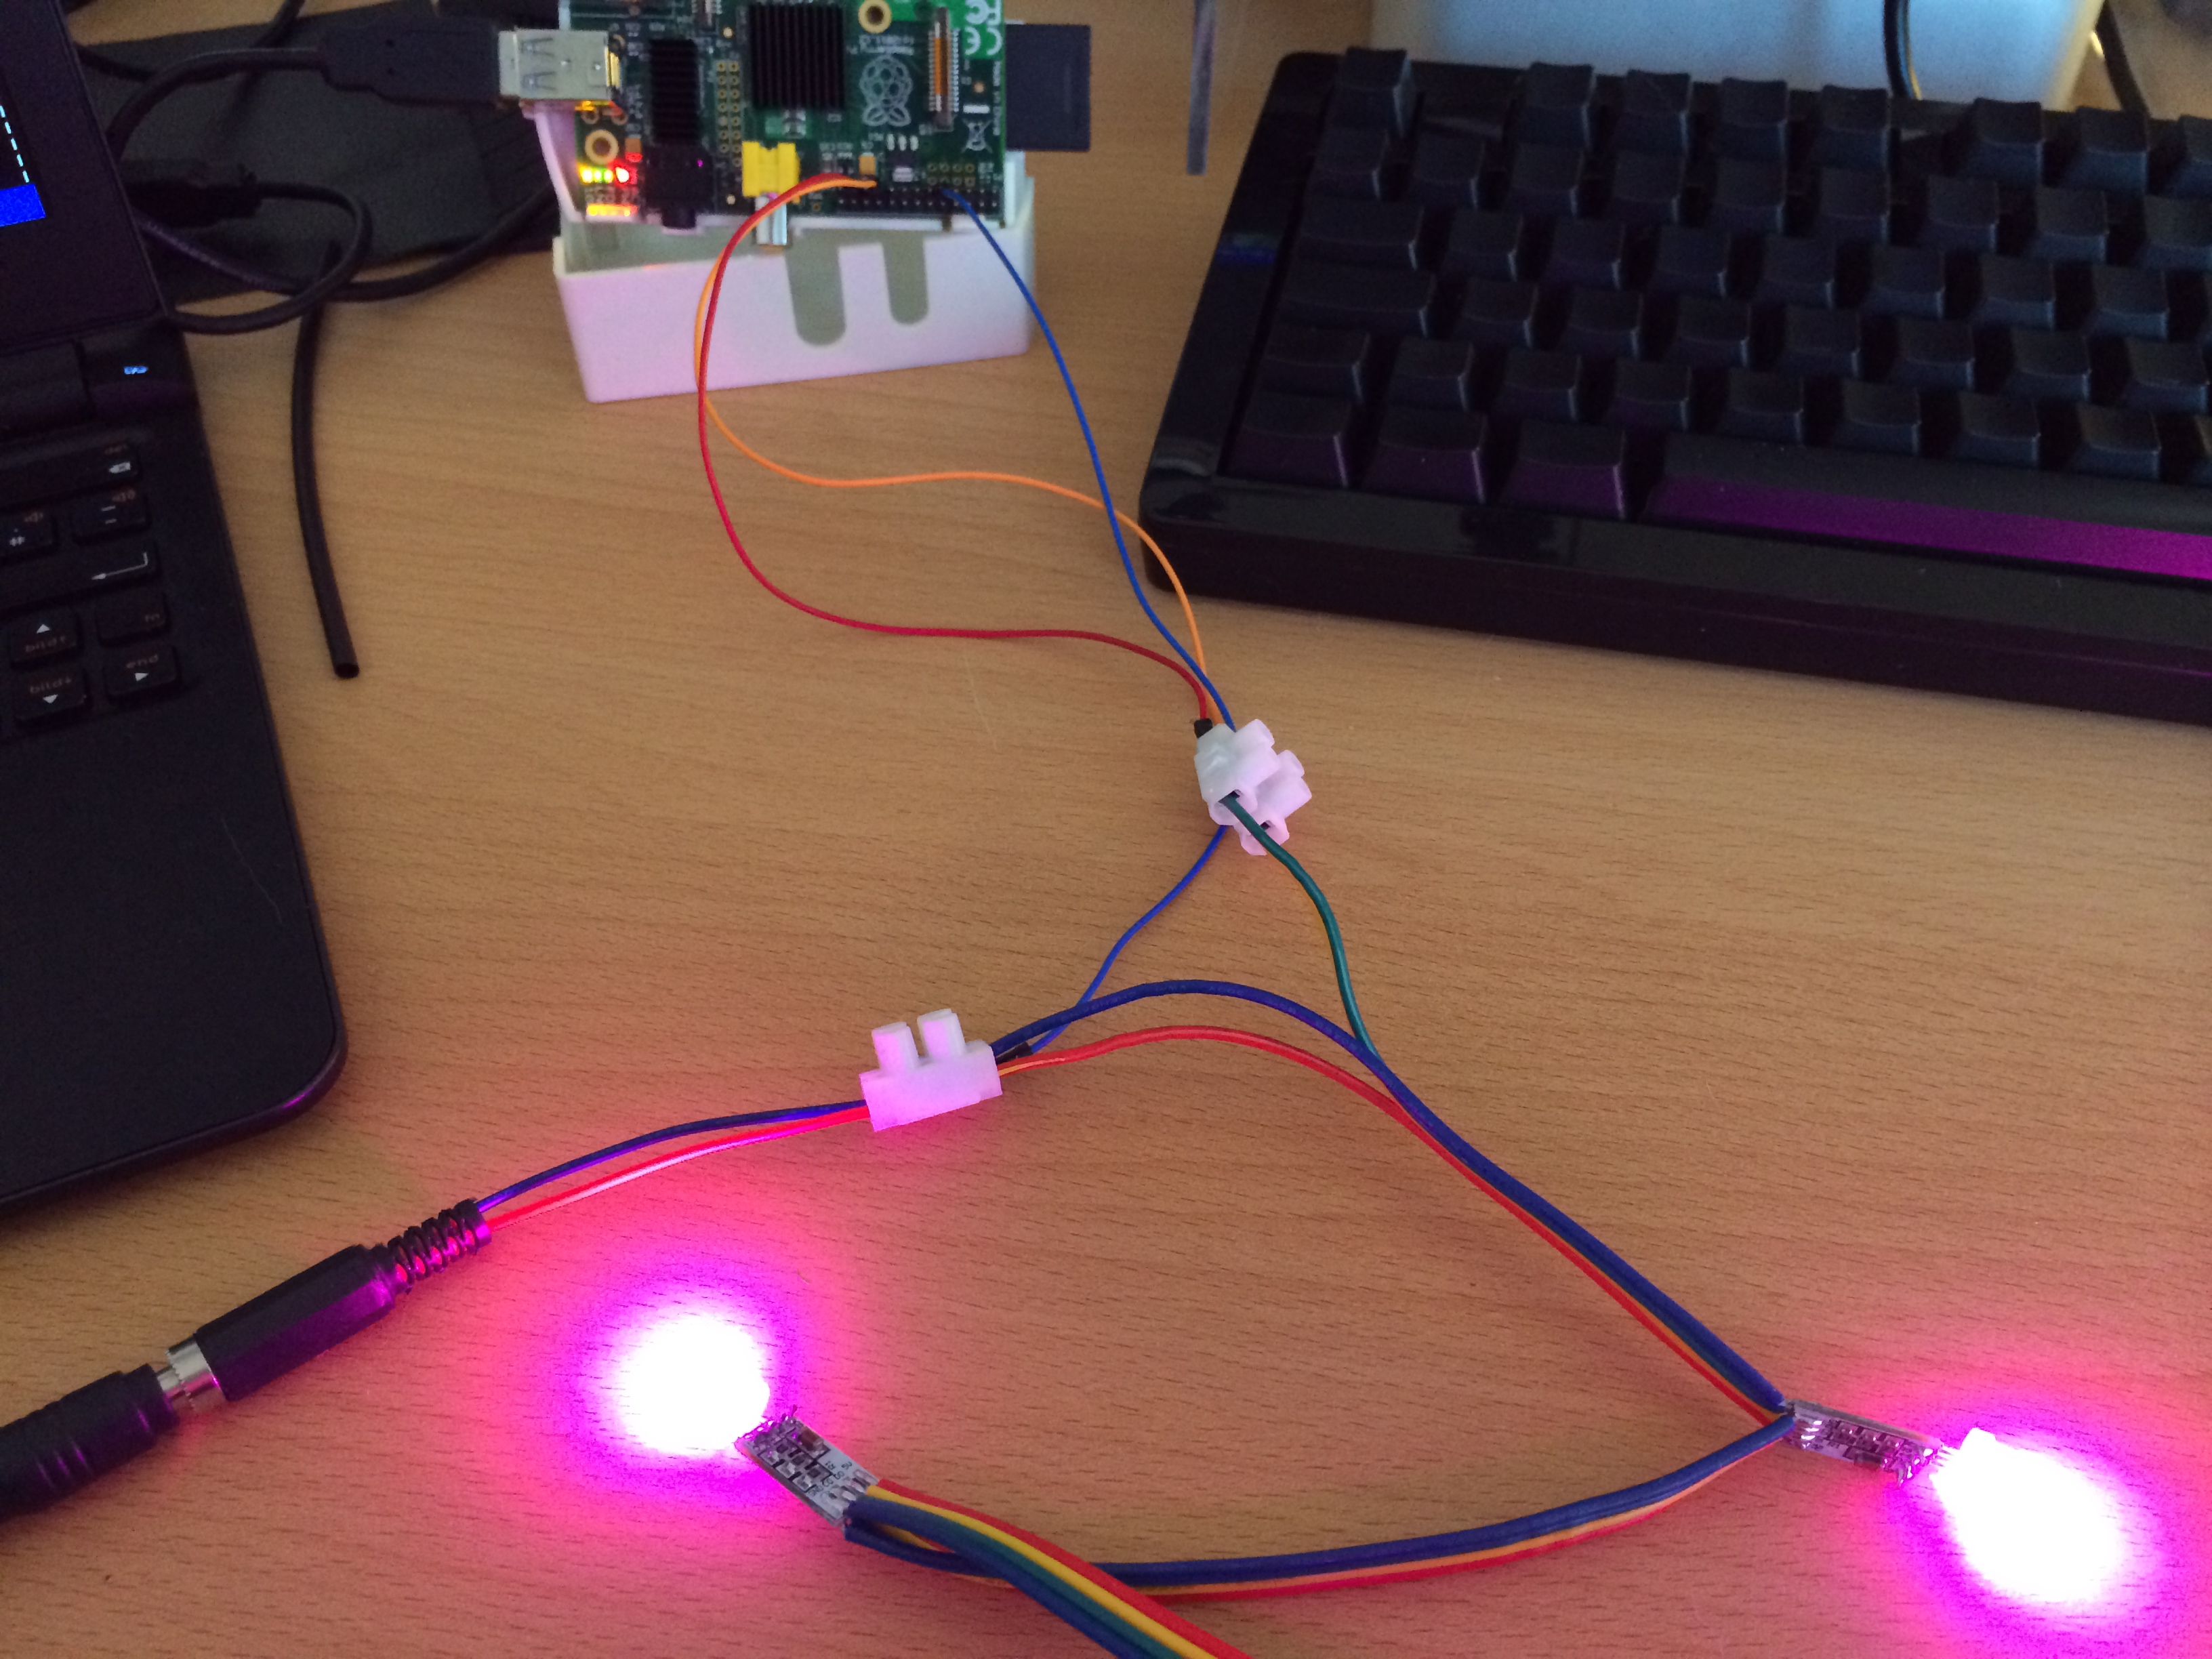
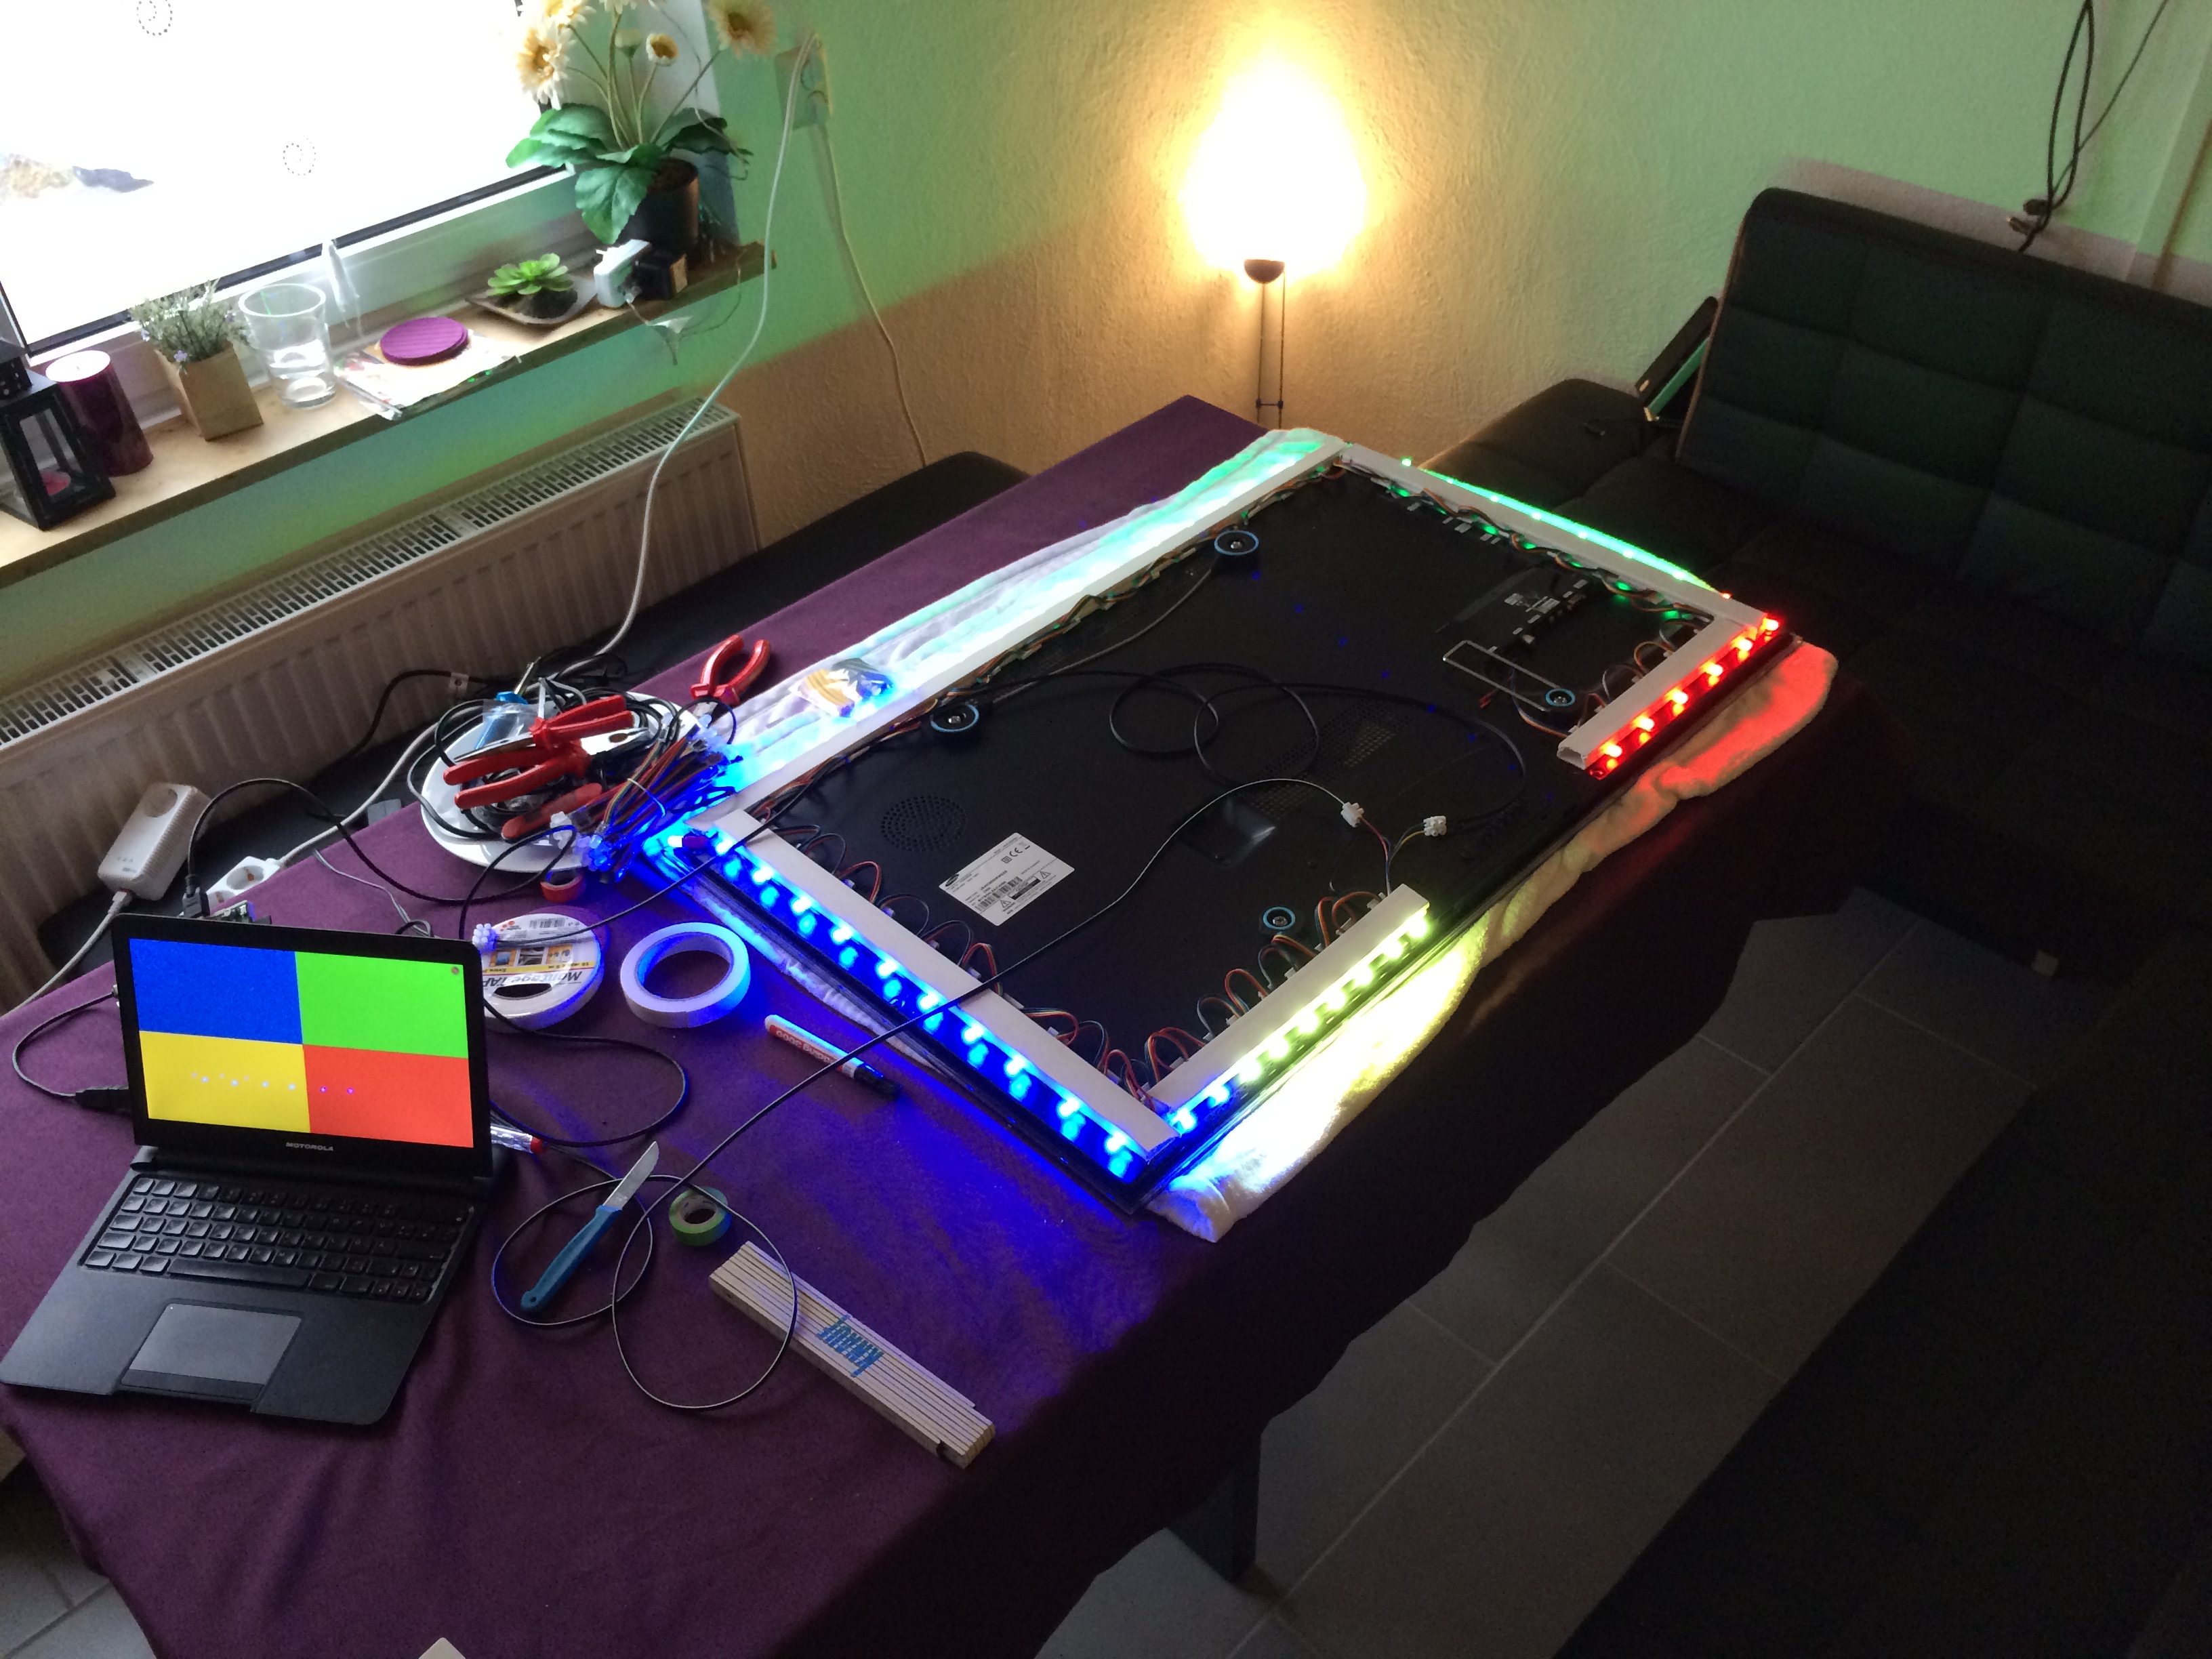
To connect to the Pi GPIO Pins I used simple jumper wires. After a little bit of boblightd compilation on a vanilla Raspbian SD card (how-to here). Please note that with current RaspBMC versions you do not need to compile Boblight yourself – I’ve just taken for debugging purposes as clean Raspbian Image and compiled it myself to do some boblight-constant tests. Boblight-constant is a tool that comes with Boblight which allows you to set all LEDs to one color.
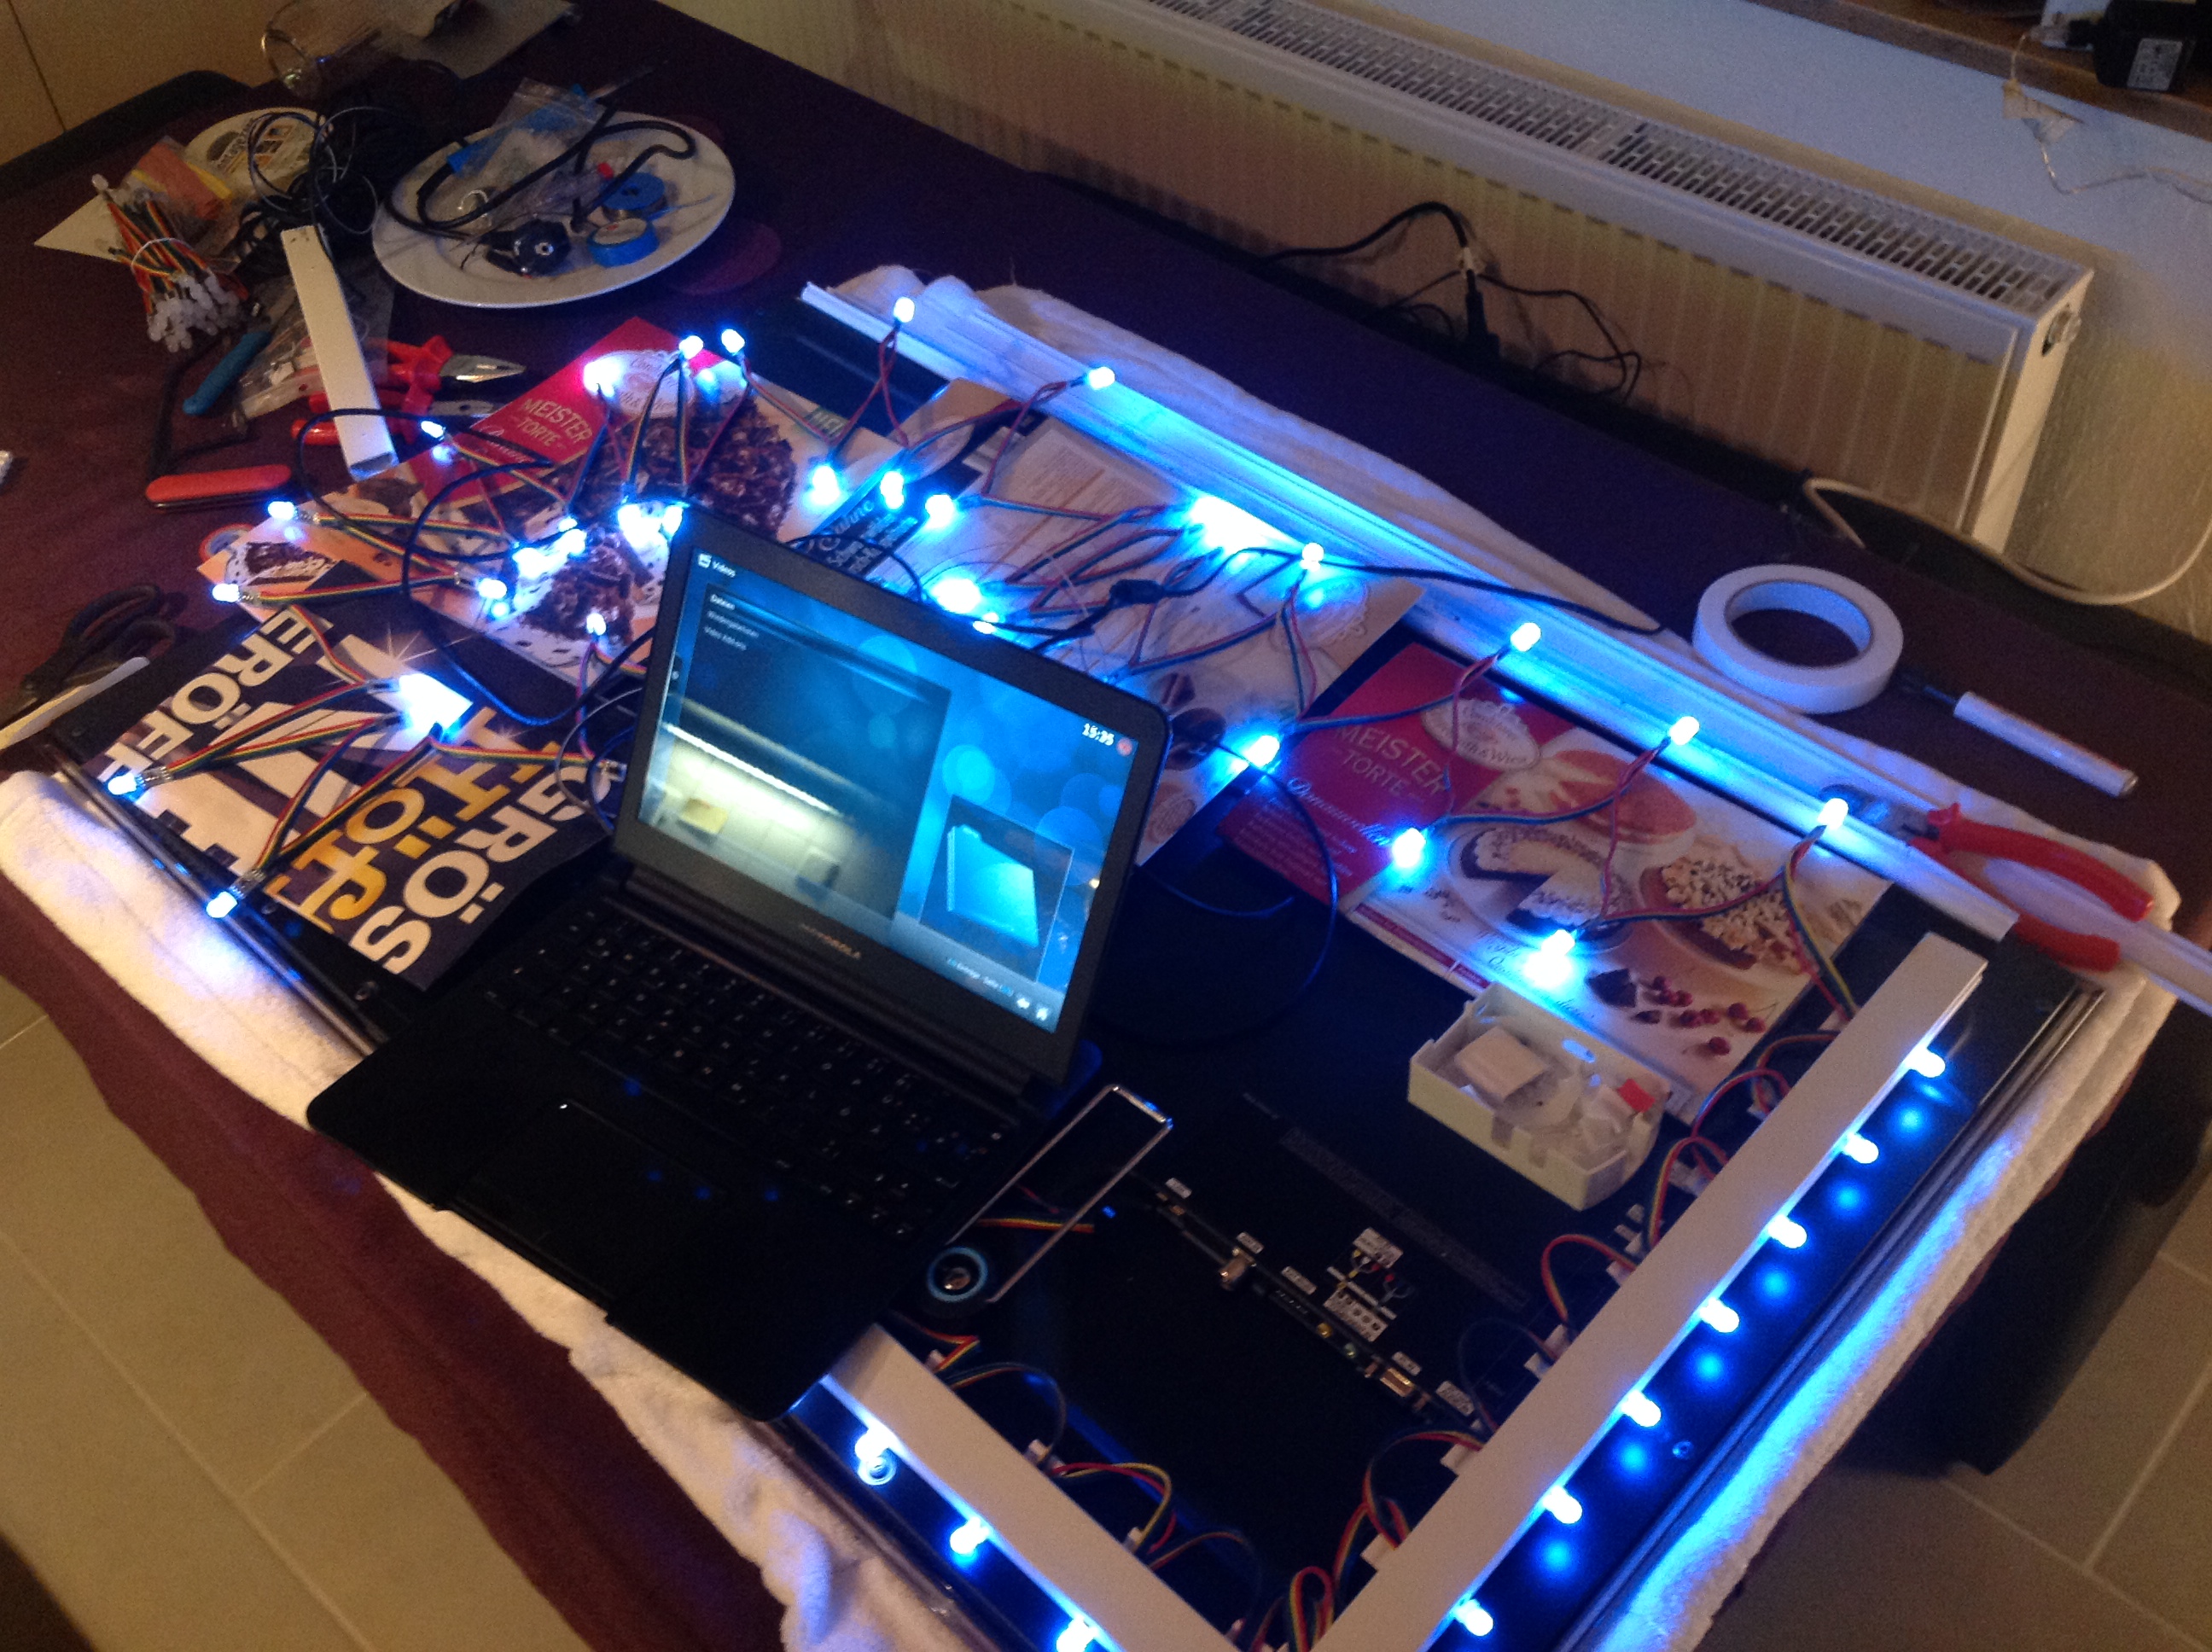
If everything is right, it should look like this:
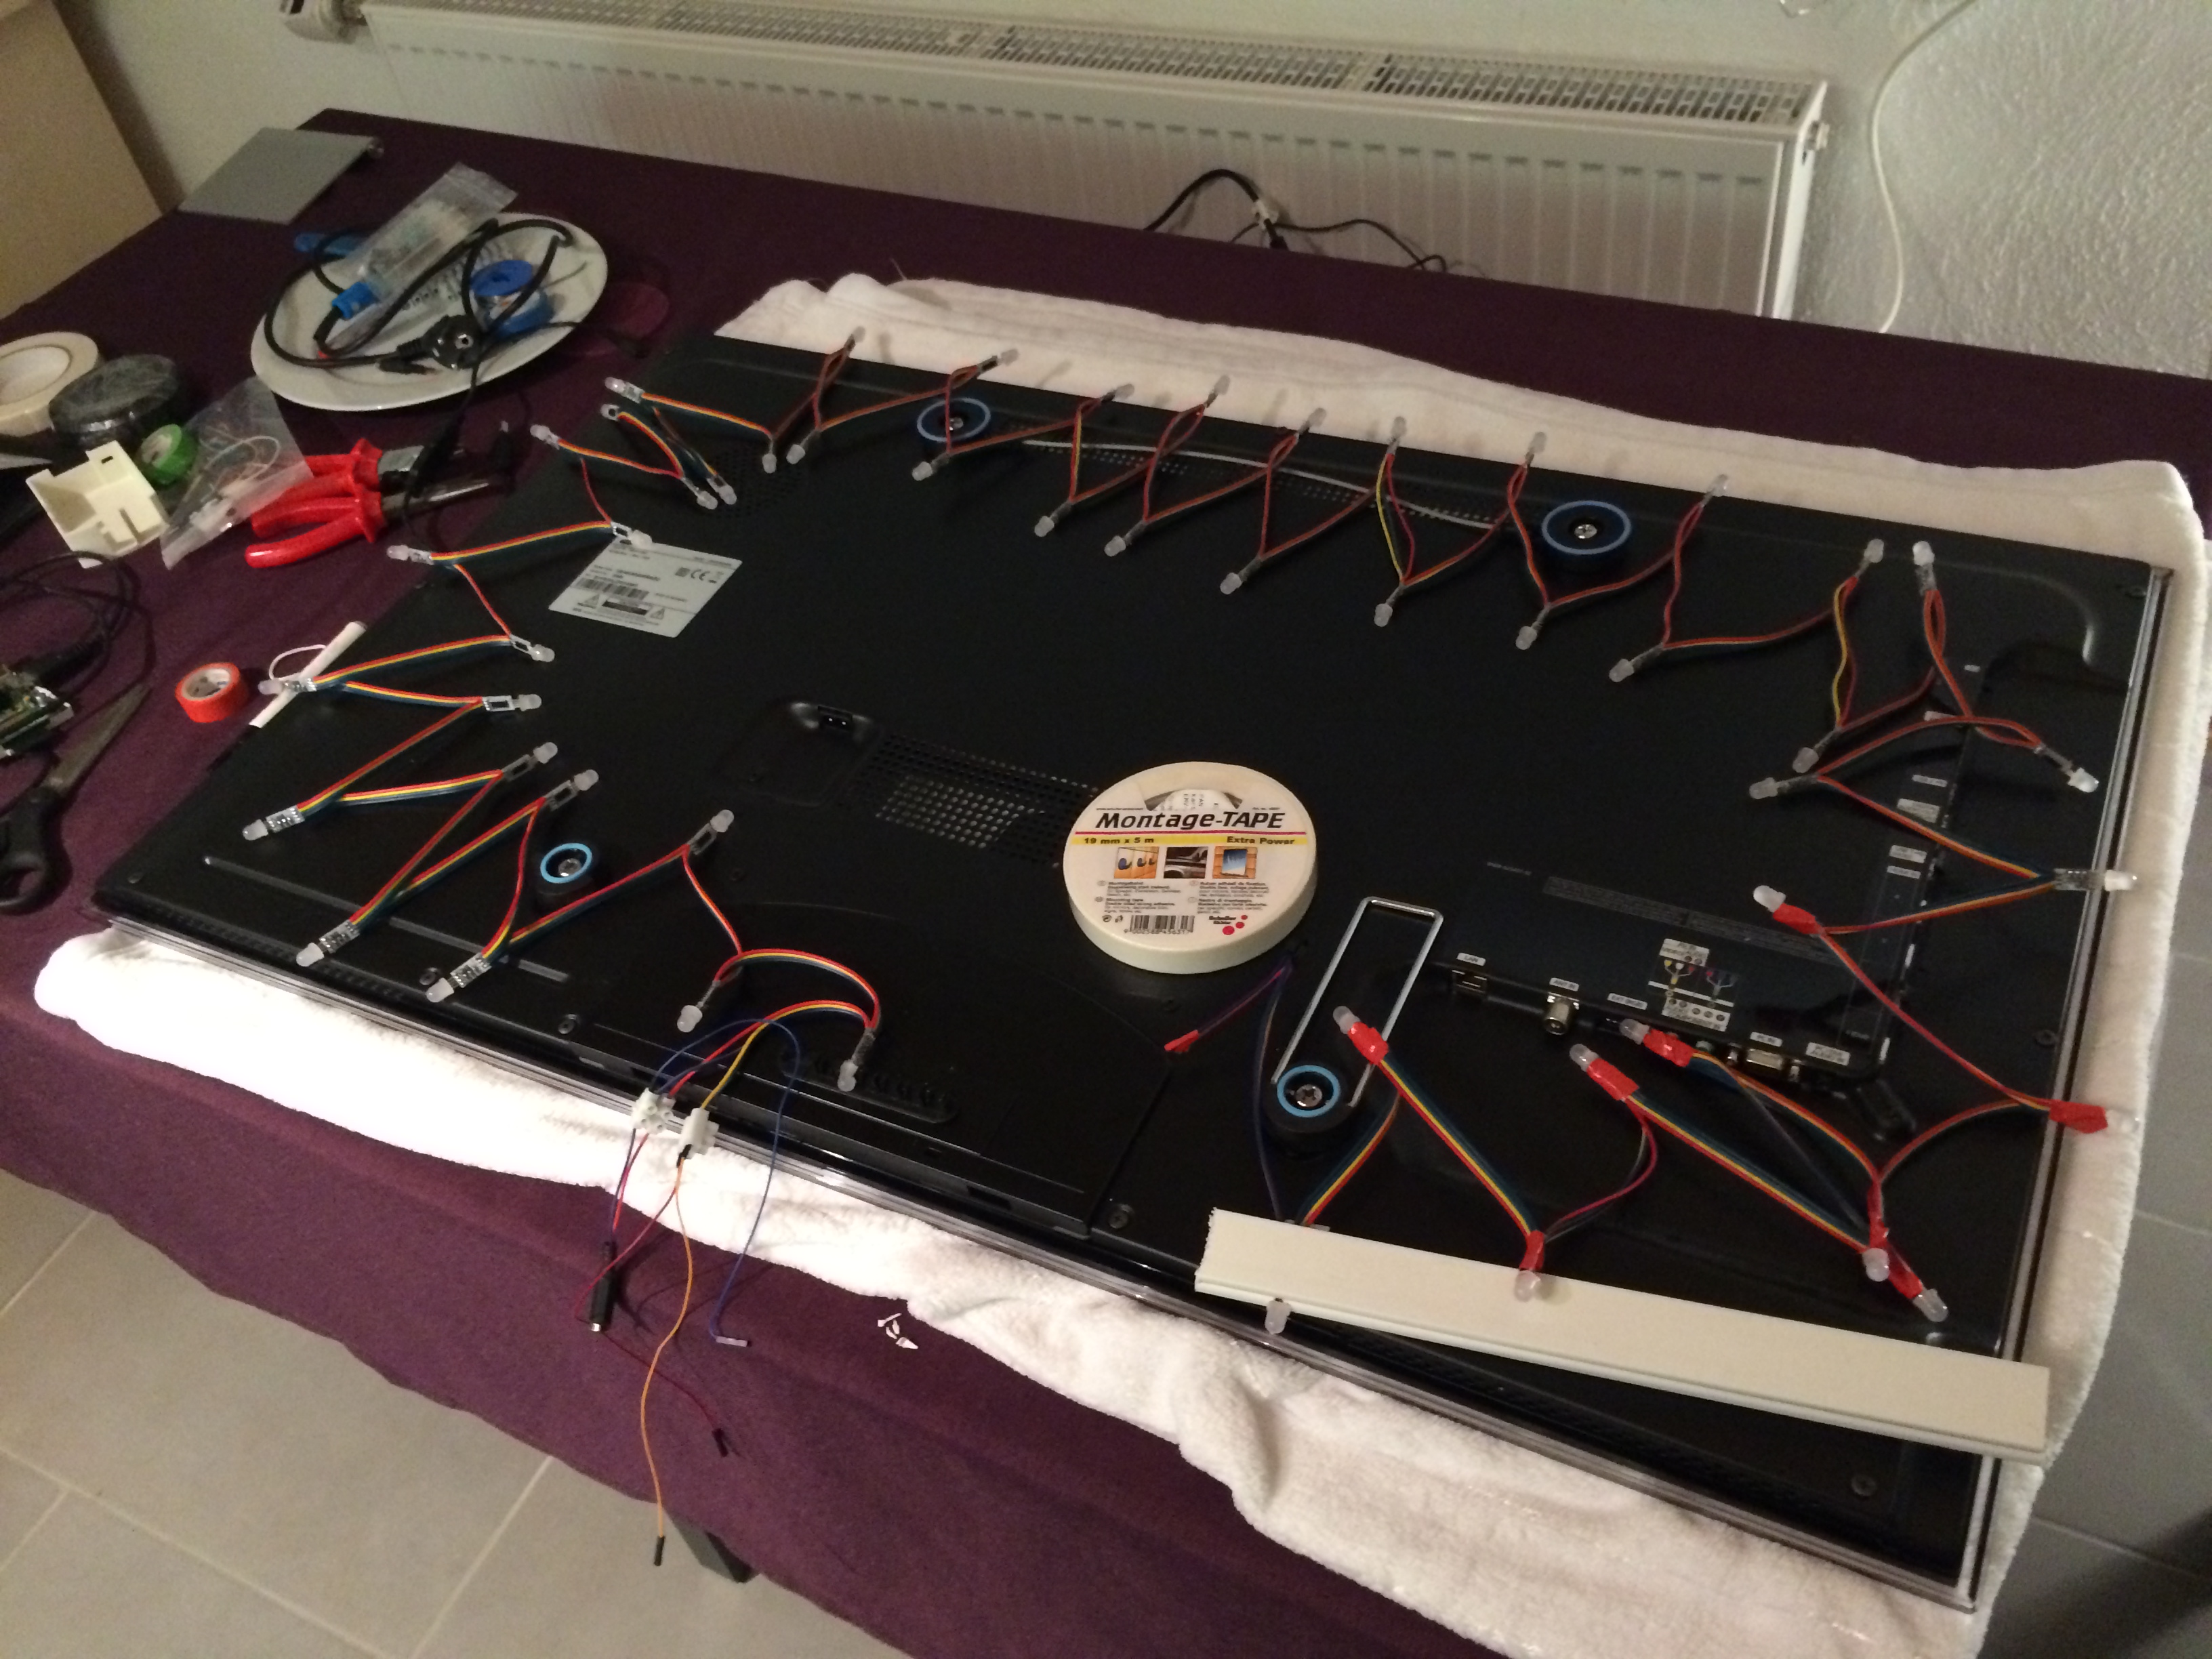
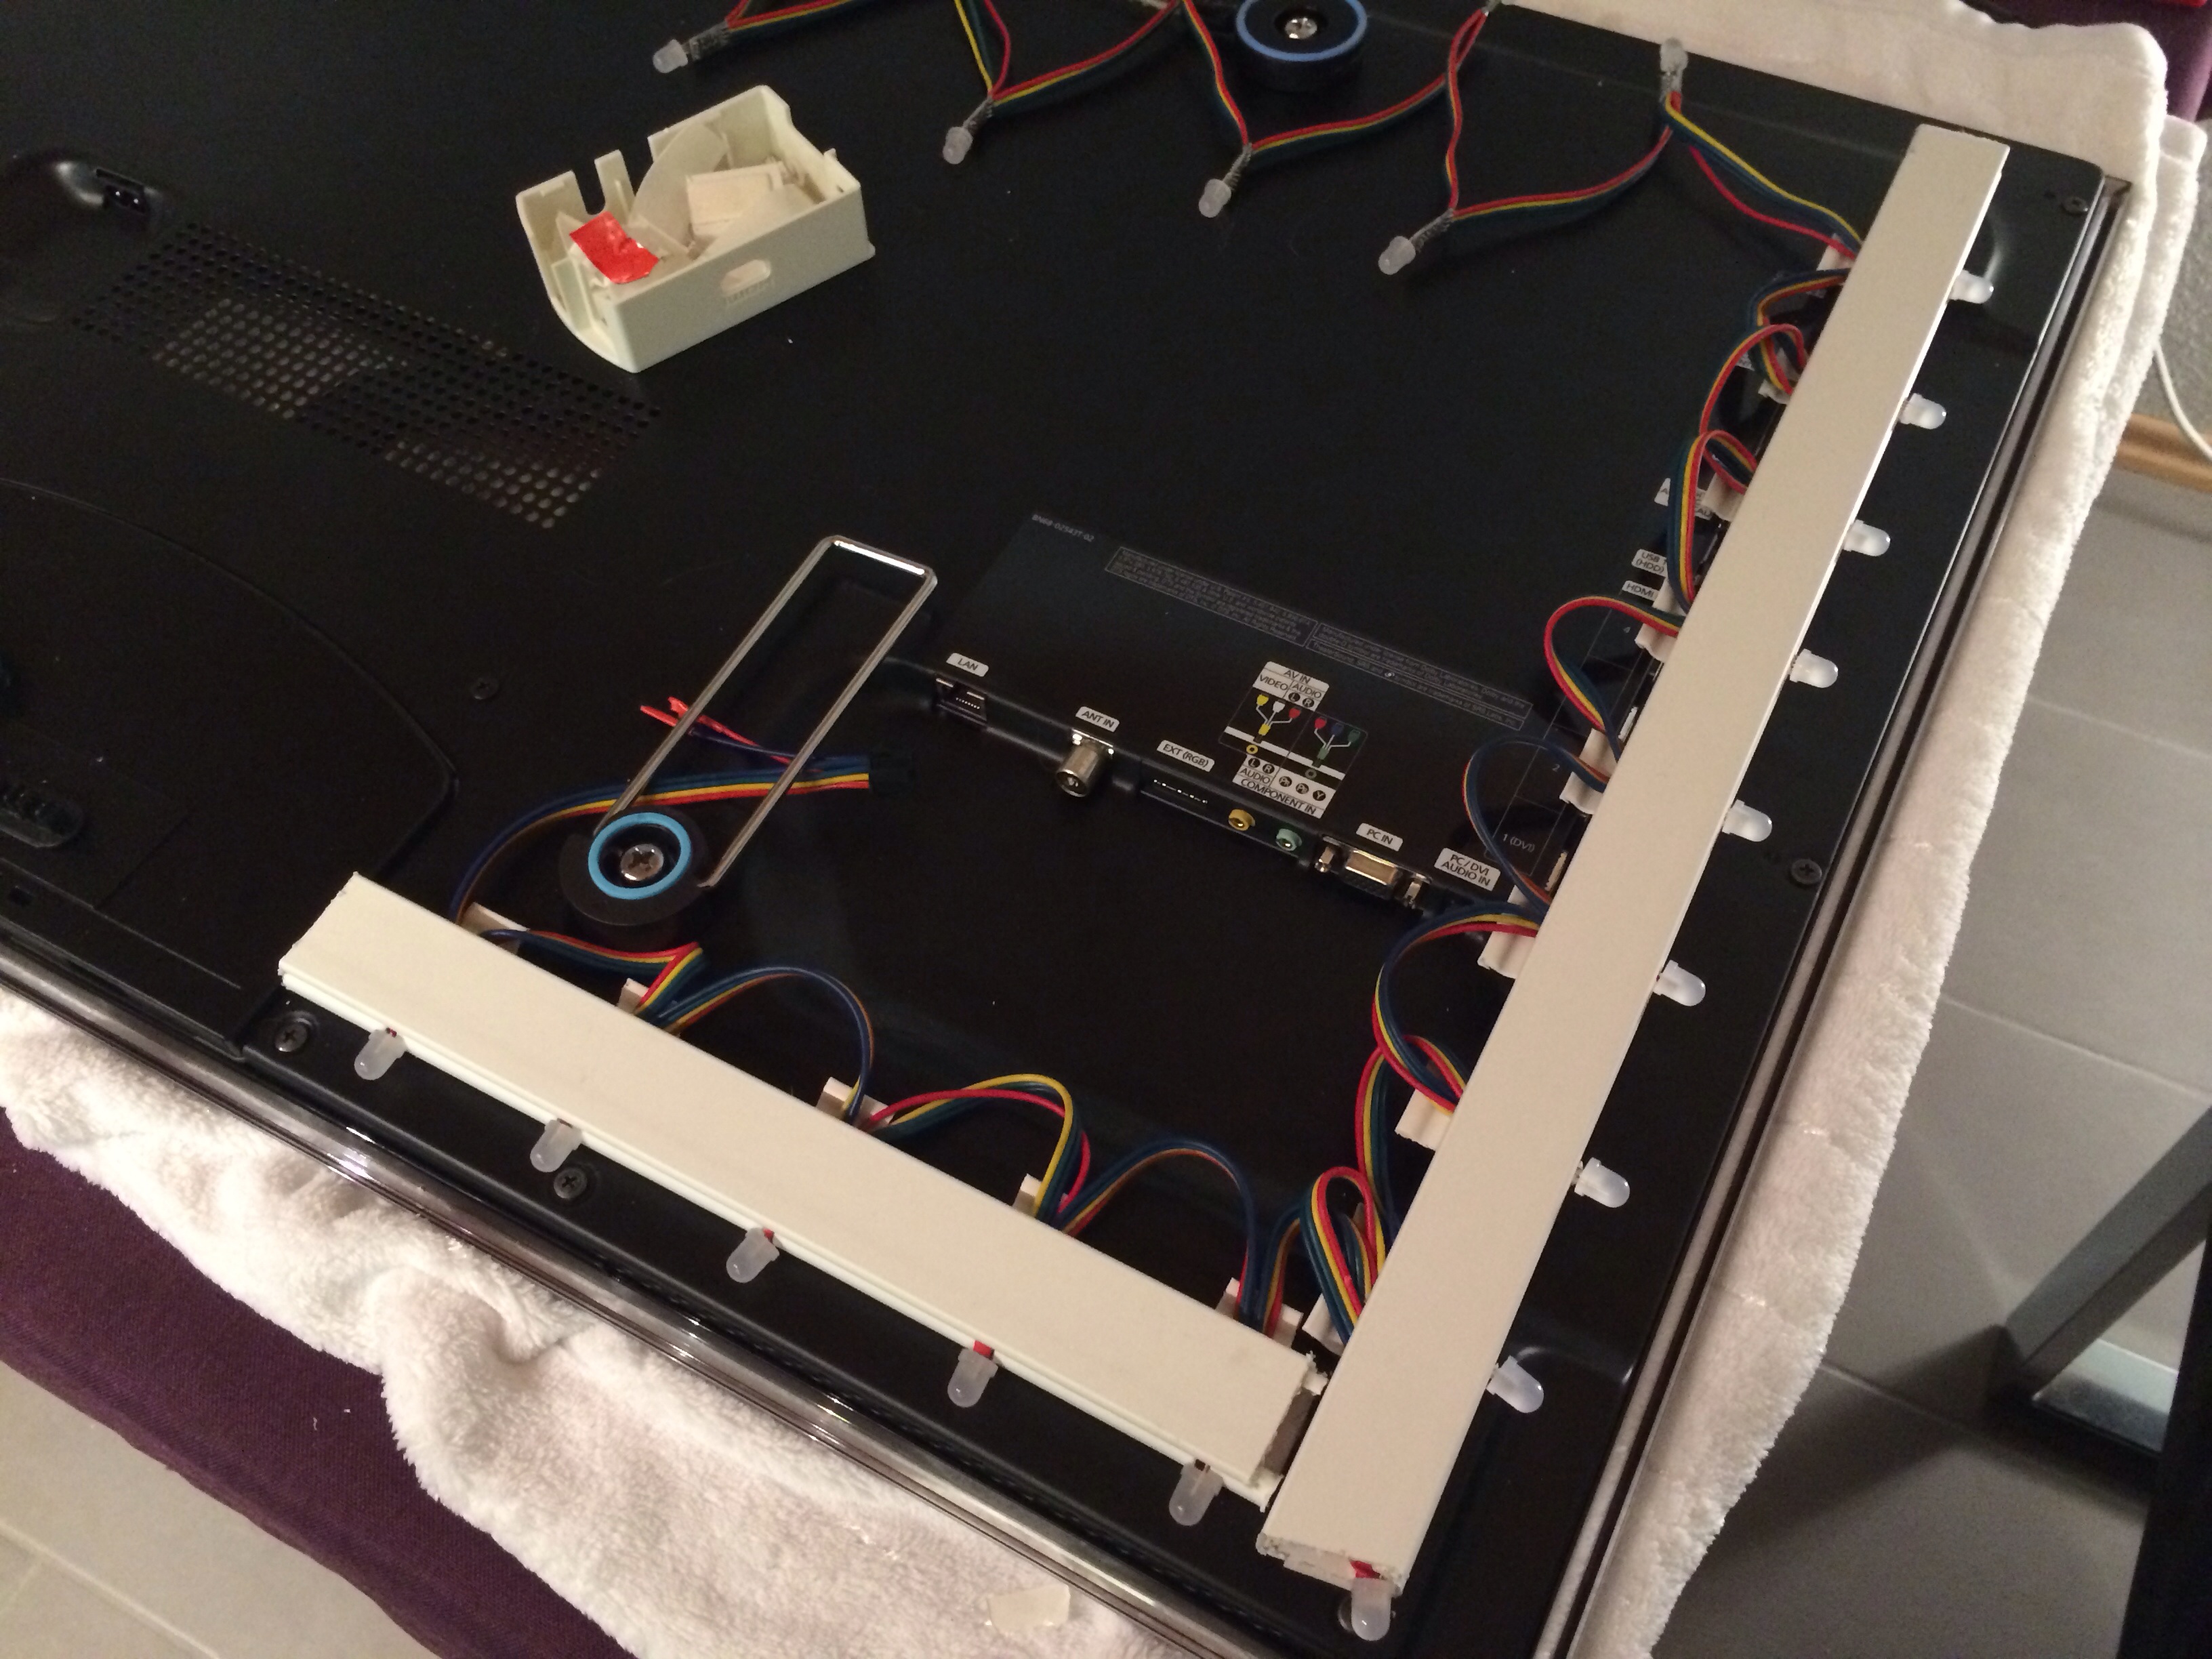
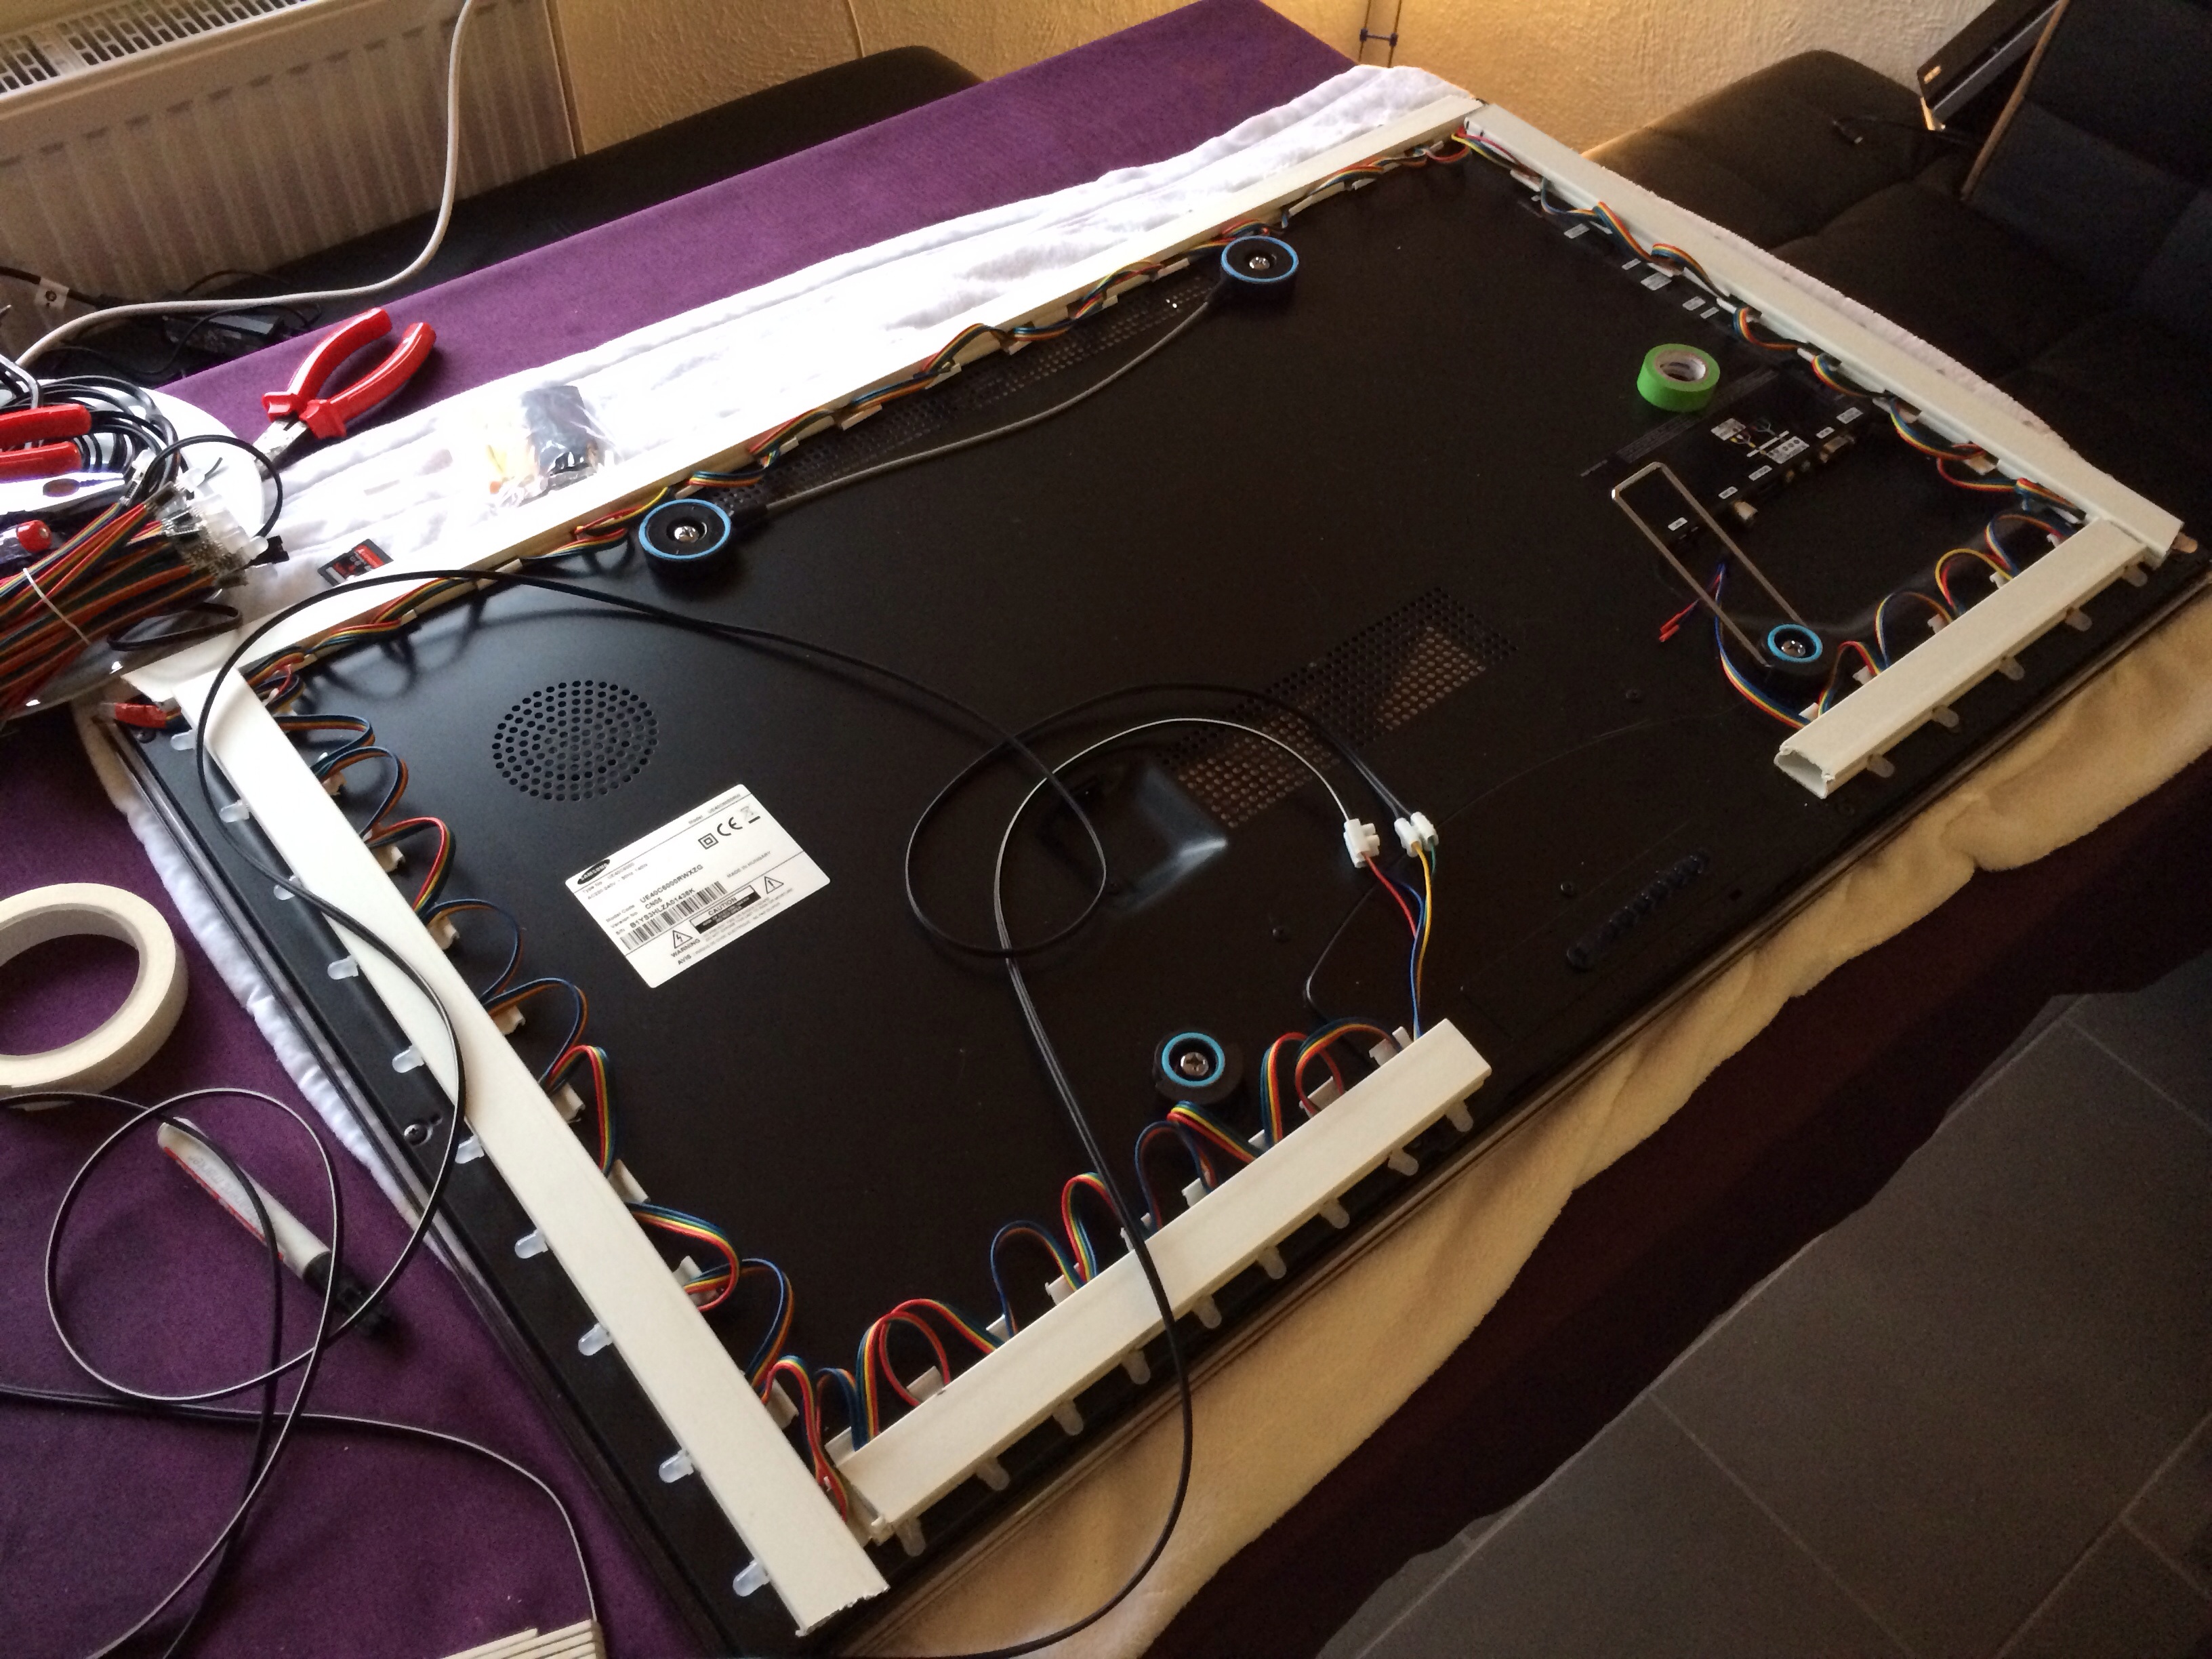
 Now everything depends on how your LED stripes look like and how your TVs backside looks like. I wanted to fit my setup to a 42″ Samsung TV. This one already is fitted with a Ultra-Slim Wall mount which makes it pretty much sitting flat on the wall like a picture. I wanted the LEDs to sit right on the TVs back and I figured that cable channels when cut would do the job pretty nicely.
To get RaspBMC working with your setup the only things you need to do are:
- Enable Boblight support in the Applications / RaspBMC tool
- Login to your RaspBMC Pi through SSH with the user pi password raspberry and copy your boblight.conf file to /etc/boblight.conf.
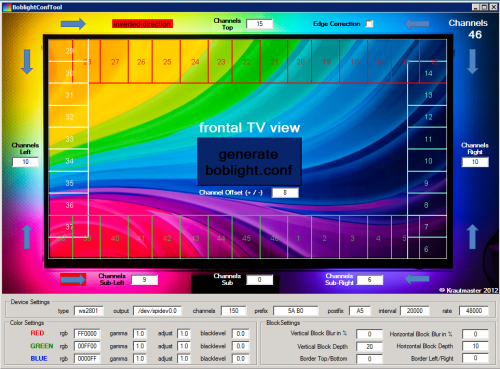
The configuration file can be obtained from the various tutorials that deal with the boblight configuration. You can choose the hard way to create a configuration or a rather easy one by using the boblight configuration tool.
I’ve used the tool :-)
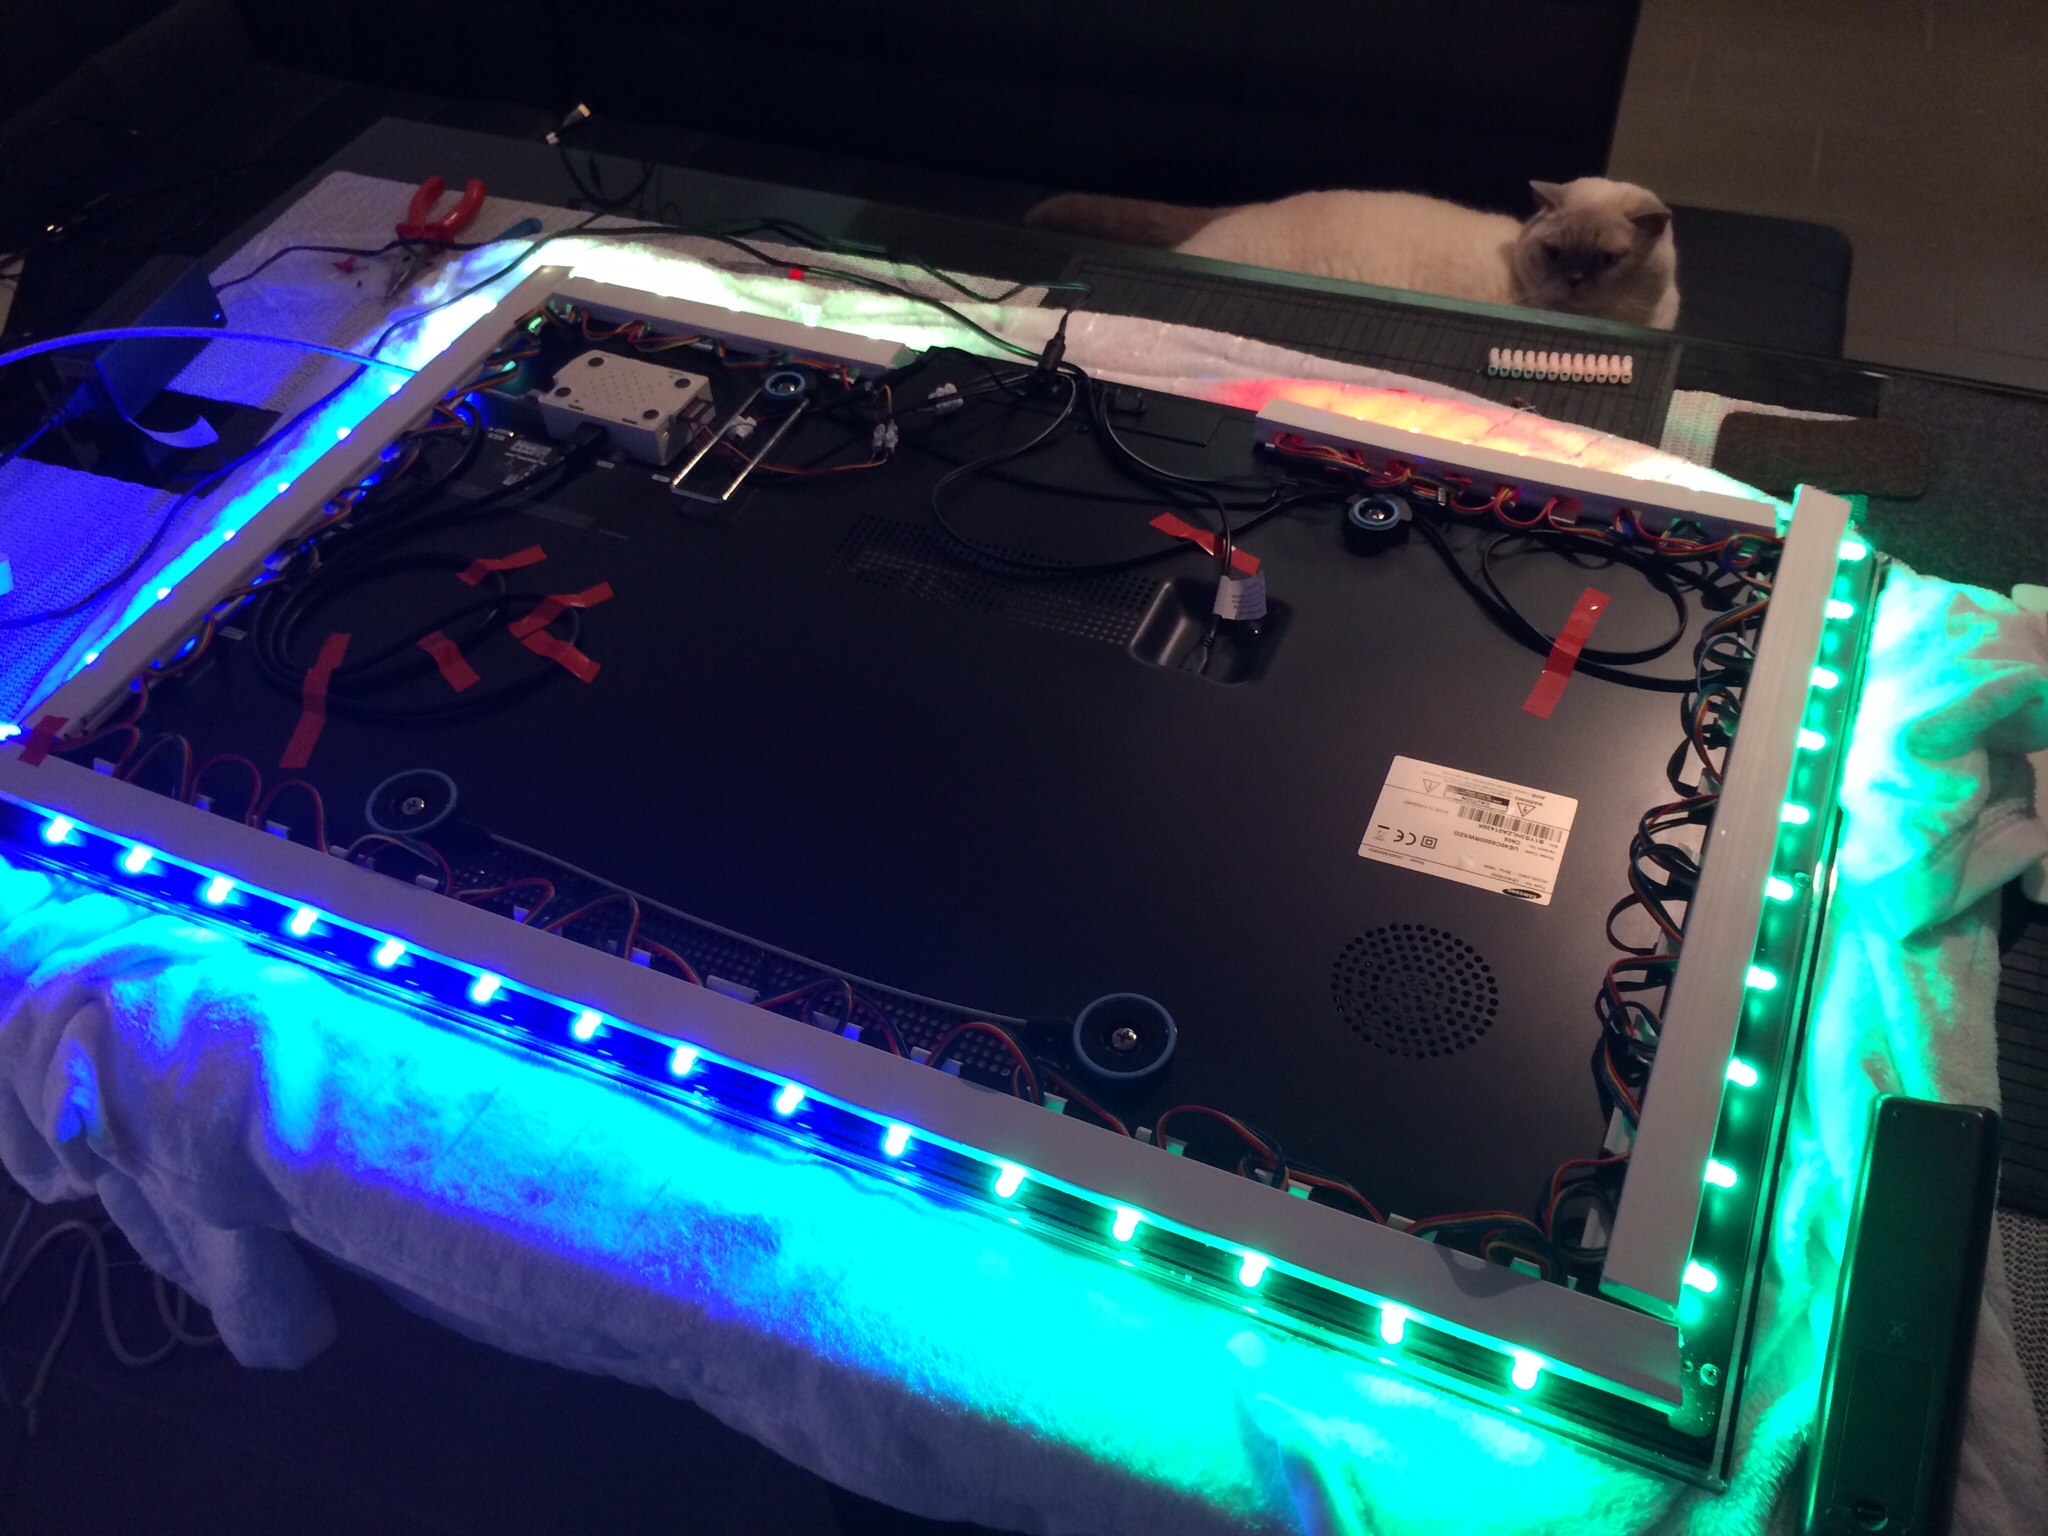
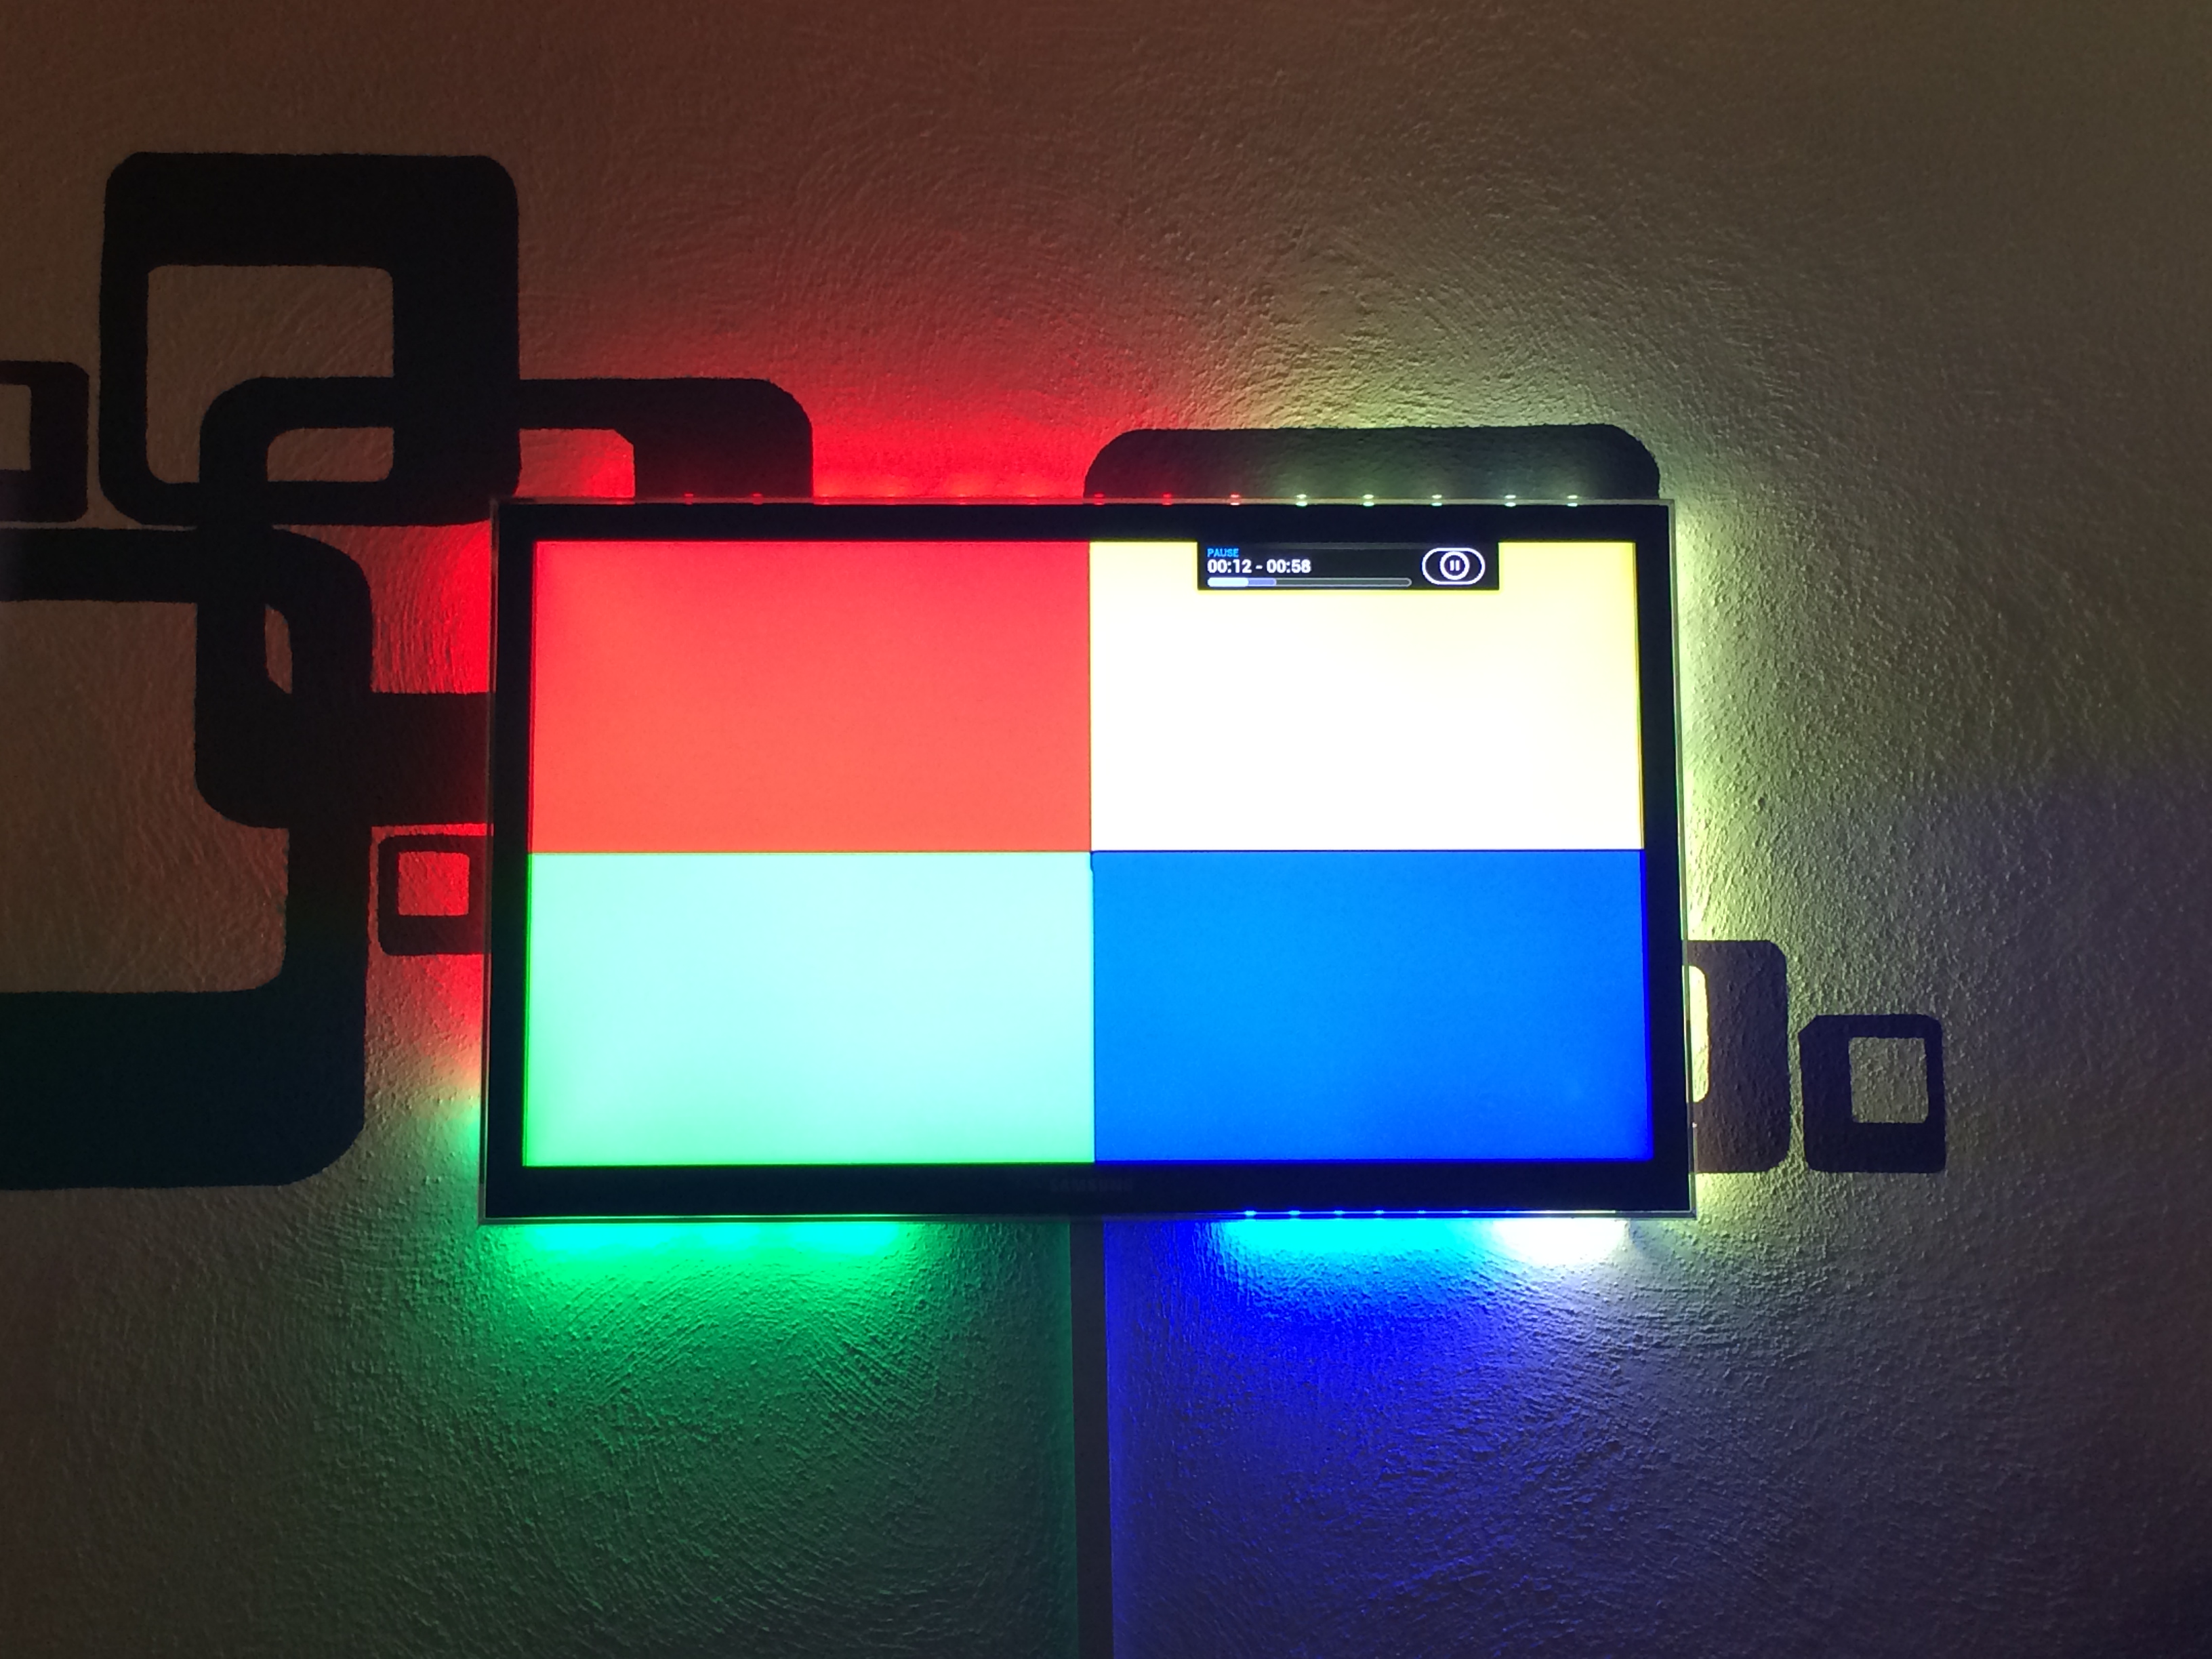
 Now if everything went right you don’t have flickering, the TV is on the wall and you can watch movies and what-not with beautiful light effects around your TV screen. If you need to test your set-up to tweak it a bit more, go with this or this.
Source 1: http://en.wikipedia.org/wiki/Ambilight
Source 2: http://www.raspberrypi.org/
Source 3: https://code.google.com/p/boblight/
Source 4: http://www.raspbmc.com/
Source 5: http://learn.adafruit.com/light-painting-with-raspberry-pi/hardware
Source 6: How-To-Compile-Boblight
Source 7: Boblight Config Generator
Source 8: Boblight Windows Config Creation Tool
Source 9: Test-Video 1
Source 10: Test-Video 2