LuckyV Spielerzahl für Streamer

Ich hatte ja schon darüber geschrieben dass ich beim Projekt “LuckyV” mitprogrammiere. Im Zuge dieser Programmierarbeit habe ich auch selbst begonnen GTA RP zu spielen und zu streamen.

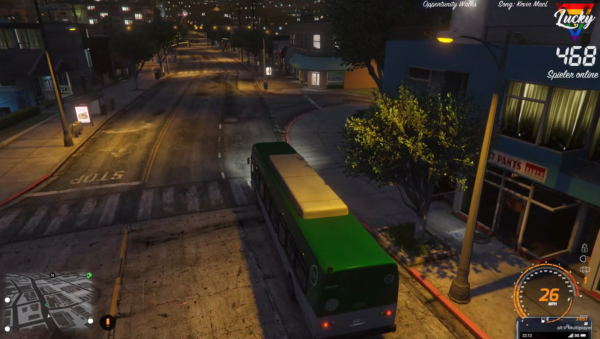
Gleich zu Anfang habe ich mir meinen Stream so eingerichtet dass jeweils der aktuelle Spieler-Counter immer im Bild zu sehen war. Ich finde das einfach eine ganze witzige Information vor allem für LuckyV-Interessierte.

rechts oben – die aktuelle Zahl der gleichzeitigen Spieler auf LuckyV

Meine ursprüngliche Implementierung war etwas kompliziert – zu kompliziert um sie einfach mit anderen zu teilen.

Daher habe ich mich entschlossen den Zähler in eine eigene Windows Applikation zu verpacken die von Streamern einfach verwendet und in OBS eingebunden werden kann.

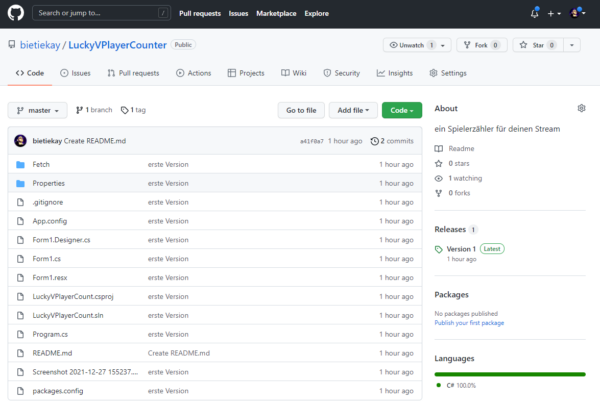
Daher gibt es ab sofort frei verfügbar ein Github Repository mit dem Quelltext und der fertig verpackten Applikation.

Das dann in seinen Stream einzubinden ist denkbar einfach:

  • Herunterladen – von hier zum Beispiel
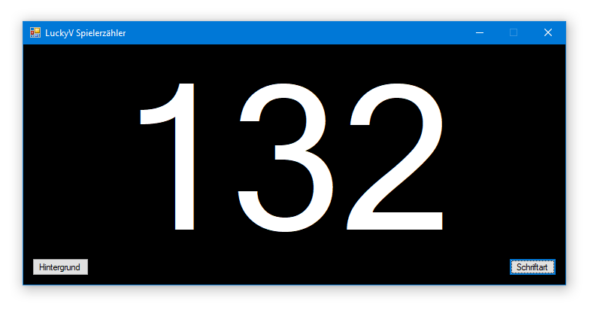
  • Starten und prüfen ob die Zahl auch angezeigt wird – es sollte ungefähr so aussehen:

Man kann das nun auf zwei Wegen einbinden.

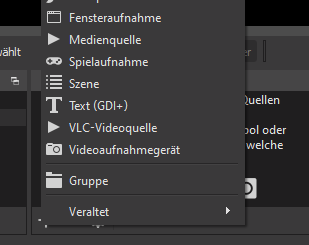
Weg 1: Fensteraufnahme

In der Applikation kann man Hintergrundfarben sowie Schriftart und Farbe konfigurieren. Wenn man das erledigt hat wie man es haben will wählt man im Quellenmenü “Fensteraufnahme” und dann das Applikationsfenster.

Fensteraufnahme

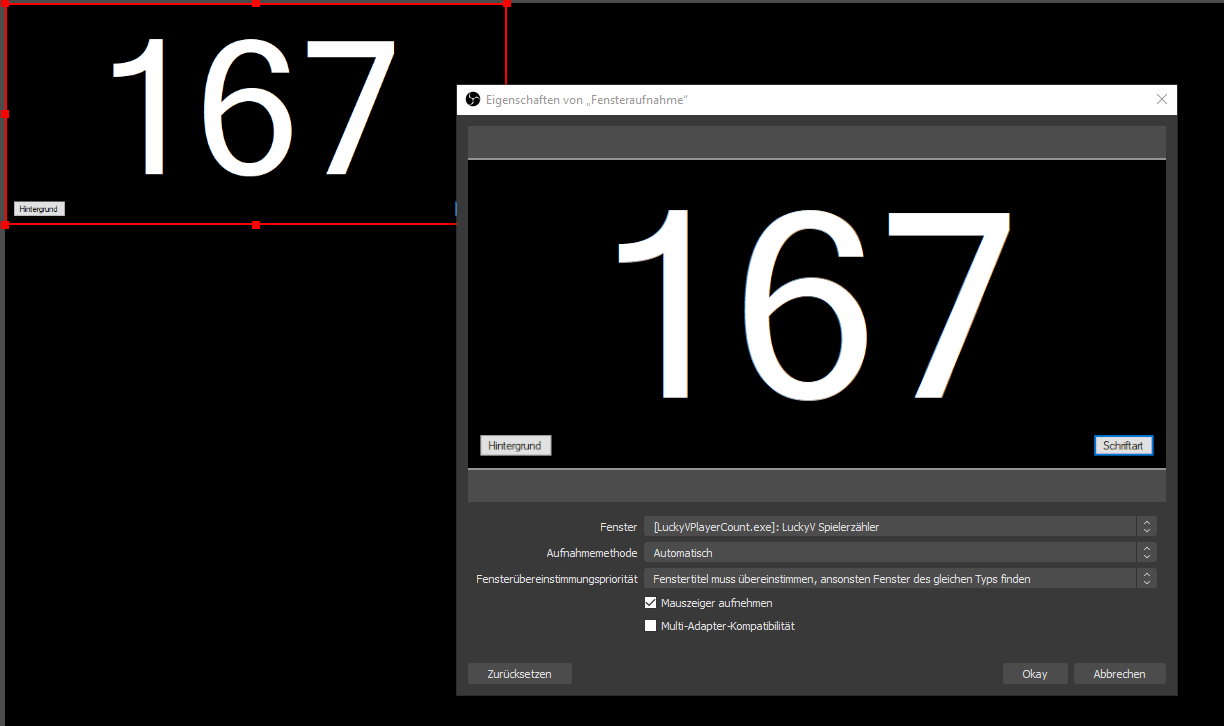
Diese Quelle kann man dann wie man möchte konfigurieren. z.B. mit Filtern um bis auf die Schrift alles transparent zu gestalten oder oder oder…

Weg 2: playercount.txt

Wenn die Applikation läuft aktualisiert sie ständig eine Datei “playercount.txt” im gleichen Ordner. Man kann nun OBS so konfigurieren dass diese Datei regelmässig ausgelesen und angezeigt wird.

Dazu fügt man ein “Text (GDI+)” im Quellenmenü hinzu und konfiguriert diese Quelle so dass der Text aus einer Datei gelesen wird:

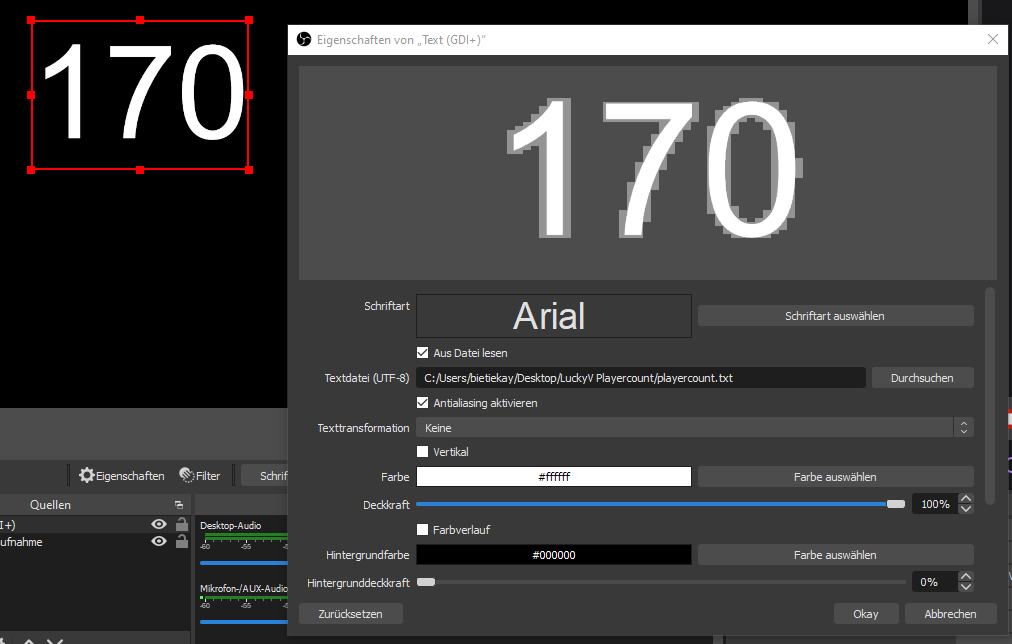
Hier kann man dann auch beliebig Schriftart, Größe und Farbe konfigurieren.

DOS64

So this is interesting: Normally a Windows program (executable) if you try to run it anywhere else will show a message “cannot be run here” and terminates.

Printing this message is actually done by a little program whos task is to only print out this very message. So it can be overwritten.

Michael Strehovský did exactly this, very impressively. He documented what he did to get the game “snake”, written in C#, running on DOS instead of the “does not run here” stub. In an executable file that would run both, on standard 90s MS-DOS as well as on Windows with the .NET Framework installed.

He used a quite elaborate toolchain – namely DOS64-stub.

You can read all of this in the full thread. I recommend a deeper dive, as it’s a great start to better understand the inner workings of your computer…

batch convert HEIF/HEIC pictures

When you own a recent iOS device (iOS 11 and up) you’ve got the choice between “High Efficiency” or “Most Compatible” as the format all pictures are being stored by the camera app.

Most Compatible being the JPEG format that is widely used around the internet and other cameras out there and the “High Efficiency” coming from the introduction of a new file format and compression/reduction algorithms.

A pointer to more information about the format:

High Efficiency Image File Format (HEIF), also known as High Efficiency Image Coding (HEIC), is a file format for individual images and image sequences. It was developed by the Moving Picture Experts Group (MPEG) and is defined by MPEG-H Part 12 (ISO/IEC 23008-12). The MPEG group claims that twice as much information can be stored in a HEIF image as in a JPEG image of the same size, resulting in a better quality image. HEIF also supports animation, and is capable of storing more information than an animated GIF at a small fraction of the size.

Wikipedia: HEIF

As Apple is aware this new format is not compatible with any existing tool chain to work with pictures from cameras. So you would either need new, upgraded tools (the Apple-way) or you would need to convert your images to the “older” – not-so-efficient JPEG format.

To my surprise it’s not trivial to find a conversion tool. For Linux I’ve already wrote about such a tool here.

For macOS and Windows, look no further. Waltr2 is an app catering your conversion needs with a drag-and-drop interface.

It’s advertised as being free and offline. And it works a treat for me.

the big list of RTL-SDR supported software

RTL-SDR is a very cheap ~$25 USB dongle that can be used as a computer based radio scanner for receiving live radio signals in your area (no internet required). Depending on the particular model it could receive frequencies from 500 kHz up to 1.75 GHz. Most software for the RTL-SDR is also community developed, and provided free of charge.

The origins of RTL-SDR stem from mass produced DVB-T TV tuner dongles that were based on the RTL2832U chipset. With the combined efforts of Antti Palosaari, Eric Fry and Osmocom (in particular Steve Markgraf) it was found that the raw I/Q data on the RTL2832U chipset could be accessed directly, which allowed the DVB-T TV tuner to be converted into a wideband software defined radio via a custom software driver developed by Steve Markgraf. If you’ve ever enjoyed the RTL-SDR project please consider donating to Osmocom via Open Collective as they are the ones who developed the drivers and brought RTL-SDR to life.

https://www.rtl-sdr.com/about-rtl-sdr/

And since the hardware is so affordable there’s lots of software and therefore things that can be done with it.

Simple Windows Text Expander

If you, like me, once every while need to type the same again and again it might also get tired for you as it got for me.

A specific example: I very frequently need to have the current date available to be entered.

May it be because I need to name a file correctly, prepending it with the current date, or because I need it to refer to a specific date in a text I am currently typing.

The common scheme for dates I am using is YYYY-MM-DD. The 24th of September 2019 becomes 2019-09-24.

click to download

For when I am on Windows I am using a small utility called “TyperTask” to have a system wide shortcut available to me that will enter the current date with the press of a button.

As you can see in the screenshot above. By simply adding / editing the TXT file you will be able to specify new shortcuts. In the above case ALT+D or STRG+SHIFT+D will generated my desired date text pattern.

It’s freeware. It’s from a company that ceased to exist. It’s 60kbyte. Download while supply lasts.

cross-platform NES emulator written in C#

XamariNES is a cross-platform Nintendo Emulator using .Net Standard written in C#. This project started initially as a nighits/weekend project of mine to better understand the MOS 6502 processor in the original Nintendo Entertainment System. The CPU itself didn’t take long working on it a couple hours here and there. I decided once the CPU was completed, how hard could it be just to take it to next step and do the PPU? Here we are a year later and I finally think I have the PPU in a semi-working state.

XamaiNES

If you ever wanted to start looking at and understand emulation this might be a starting point for you. With the high-level C# being used to describe and implement actual existing hardware – like the NES CPU:

Implementation of the Logical Shift Right opcode of the MOS6502 cpu

The author does the full circle and everything you’d expect from a simple working emulator is there:

housekeeping with NodeJS

When you are using or developing NodeJS applications and the Node Package manager (npm) over time a lot of old crusty libraries will accrue.

A lot means, a lot:

To have a chance to get on top of things and save space, try this:

npm i -g npkill 

By then using npkill you will get an overview (after a looong scan) of how much disk space there is to be saved.

Great tip!

Password Managers…

I am using 1Password for years now. It’s a great tool. So far.

As I am using it locally synced across my own infrastructure I feel like I am getting slowly but surely pushed out of their target-customer group. What does that mean?

The current pricing scheme, if you buy new, for 1Password looks like this:

So it’s always going to be a subscription if you want to start with it and if you want it in a straight line.

It used to be a one-time purchase per platform and you could set-up syncing across other cloud services as you saw fit. If you really start from scratch the 1Password apps still give you the option to create and sync locally but the direction is set and clear: they want you to sign up to a subscription.

I am not going to purchase a subscription. With some searching I found a software which is extremely similar to 1Password and fully featured. And is available as 1-time purchase per platform for all platforms I am using.

Also. This one is the first that could import my 1Password export files straight away without any issues. Even One-Time-Passwords (OTP) worked immediately.

The name is Enpass and it’s available for Mac, Windows, Linux, iOS, Android and basically acts as a step in replacement for 1Password. It directly imports what 1Password is exporting. And its pricing is:

much more reasonable and without subscriptions.

Subscriptions for services as this are a no-go for me. It’s a commodity service which I am willing to pay for trailing updates and maintenance every year or so in a major update.

I am not willing to pay a substantial amount of money per user per month to just keep having access to my Passwords. And having them synced onto some companies infrastructure does not make this deal sweeter.

Enpass on the other hand comes with peace-of-mind that no data leaves your infrastructure and that you can get the data in and out any time.

It can import from these:

As mentioned I’ve migrated from 1Password in the mere of minutes and was able to plug-in-replace it immediately.

Tool: Partition Recovery and Undelete – Testdisk

Mass storage hardware breaks all the time. Sometimes it’s hardware that breaks, but sometimes it’s the software that breaks. If it’s the software (or own talent) that made the data go boom, TestDisk is a tool you should know about.

DISCLAIMER: If the data you are trying so recover is actually worth anything you might want to reserve to a professional data recovery service rather than trying to train-on-the-job.

Apart from the availability of pre-compiled packages for most operating systems you can also grab a bootable LiveCD when everything seems gone and lost.

The process itself is rather exciting (if you want the data back) and may require a fresh pair of pants upfront, throughout and after.

Thankfully there’s a great wiki and documentation of how to go about the business of data recovery.

TestDisk is powerful free data recovery software! It was primarily designed to help recover lost partitions and/or make non-booting disks bootable again when these symptoms are caused by faulty software: certain types of viruses or human error (such as accidentally deleting a Partition Table). Partition table recovery using TestDisk is really easy.

  • TestDisk can
    • Fix partition table, recover deleted partition
    • Recover FAT32 boot sector from its backup
    • Rebuild FAT12/FAT16/FAT32 boot sector
    • Fix FAT tables
    • Rebuild NTFS boot sector
    • Recover NTFS boot sector from its backup
    • Fix MFT using MFT mirror
    • Locate ext2/ext3/ext4 Backup SuperBlock
    • Undelete files from FAT, exFAT, NTFS and ext2 filesystem
    • Copy files from deleted FAT, exFAT, NTFS and ext2/ext3/ext4 partitions.

TestDisk has features for both novices and experts. For those who know little or nothing about data recovery techniques, TestDisk can be used to collect detailed information about a non-booting drive which can then be sent to a tech for further analysis. Those more familiar with such procedures should find TestDisk a handy tool in performing onsite recovery.

And if you give up, think about writing an article of you actually digging deeper:

electronic firecracker: Chuwi Hi10 AIR Tablet

The Android tablets I am using for my kitchen scale display and for myfitnesspal data-entry are aging quite bad and apart from the near-display death of one of the tablets both are not supported and updated anymore.

Using them therefore poses an increasing risk. After one of them almost died on me I was determined to replace them both. Looking at alternatives at the lowest possible price quickly showed that I am not going to get another Android tablet.

Instead I was ready to give a chinese company a chance:

I ordered it on 24th of June and it was delivered today. All in all I’ve paid 136 Euro for the tablet and 45 Euro for the keyboard attachement.

Despite the ridiculously low price this thing is quite impressive. It’s sporting a fast-enough Intel Atom processor with 1.4 ghz and 4 Gbyte of RAM. The 64 Gb of solid-state storage where quickly upgraded by an additional 400 Gb MicroSD card for local data storage.

As of writing this it’s still installing and updating the Windows 10 to 1903 but so far I am beyond impressed.

I’ll write more about the device when I’ve had more time to use it. One word for the keyboard attachement: the keyboard is good-enough. Not great but better than for example that on the Pinebook. The touchpad is very small but works – the thing has a Touchscreen anyway.

I don’t like the long-tail Windows 10 default cursor

The first device in my household recently has updated itself to the newest Windows 10 1903 build.

On the very first moment of the login screen appearing and logging in I could tell that I hate one specific change that has made it into this latest update.

And it’s the default mouse cursor.

Back in the Pre-Windows Vista days, when I used to work for Microsoft, I was using the latest internal build of Windows and just around the first RTM (release-to-manufacture) build they touched up on the final designs.

I remember vividly when the mouse cursor had changed from the one we new and used since Windows 3 to a shorter tailed more “high-def” looking one.

Since then there were a couple of changes on the cursor but the general design was kept.

Now apparently with the latest Windows 10 update from 1803 to 1903 I got a new – old default mouse cursor.

left: like!
right: booh!

By reflex I changed it back to the one I love and stored safely in a backup. I cannot stand the long tail and the weird pixel-ness of the cursor. It just looks kinda weird to my eyes.

the “new” cursor in 1903
the beloved cursor.

Which one do you like better?

IP-over-DNS

Picture yourself in this situation. You connect to a network and nothing works. Except for this:

It is quite common to have DNS working in networks while everything else is not. Sometimes the network requires a log-in to give you access to a small portion of the internet.

Now, with the help of a tool called iodine, you can get access to the full internet with only DNS working in your current network:

iodine lets you tunnel IPv4 data through a DNS server. This can be usable in different situations where internet access is firewalled, but DNS queries are allowed. 

It runs on Linux, Mac OS X, FreeBSD, NetBSD, OpenBSD and Windows and needs a TUN/TAP device. The bandwidth is asymmetrical with limited upstream and up to 1 Mbit/s downstream. 

iodine

Setting it up is a bit of work but given that you are anyway having access to a well connected server on the free portion of the internet it can be easily done.

Of course the source is on github.

technical visualization tools

There’s so much happening in this field as visualizations become more powerful and easier to create.

WaveDrom

WaveDrom draws your Timing Diagram or Waveform from simple textual description. It comes with description language, rendering engine and the editor.

WaveDrom editor works in the browser or can be installed on your system. Rendering engine can be embeded into any webpage.

https://wavedrom.com/

MermaidJS

Generation of diagrams and flowcharts from text in a similar manner as markdown.

Ever wanted to simplify documentation and avoid heavy tools like Visio when explaining your code?

This is why mermaid was born, a simple markdown-like script language for generating charts from text via javascript. Try it using our editor.