Funny how the house reacts to our presence…
Funny how the house reacts to our presence…
I am back again and developing some smaller APIs for my own use.
As I am learning a new programming language and framework (SwiftUI) and for my little learning project I need to also implement a server backend. Implementing a RESTful service is quite straight-forward but for testing and UI prototyping I actually want to do some testing before really setting up the server side.
To easily test RESTful calls without actually implementing anything I found that Reqres is a quite useful tool to have in the toolbelt:
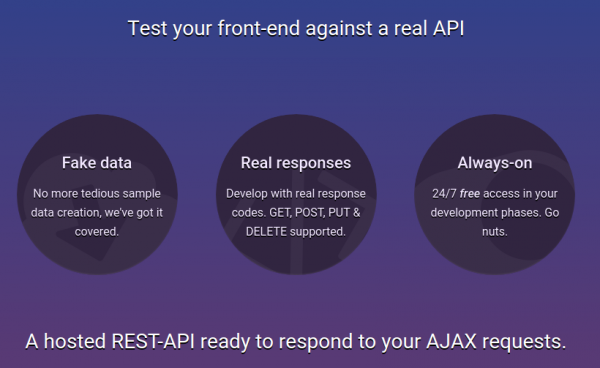
Apart from some pre-set-up API endpoints with dummy data (like users, …) it also features a request mirror service.
With that you can simply throw a JSON document into the general direction of Reqres and it will put a timestamp on it and return it right away.
Like so:

For big parts of my VPN needs I use OpenVPN. Especially on iOS devices the deep integration just works. Even to a degree that you enable the VPN once and the device will transparently keep it up / reestablish connections when required.
OpenVPN protocol has emerged to establish itself as a de- facto standard in the open source networking space with over 50 million downloads. OpenVPN is entirely a community-supported OSS project which uses the GPL license.
VISIT THE OPENVPN COMMUNITY
I am using the dockerized version of OpenVPN. From there I’ve got several ways to get telemetry data (like connections, traffic, …) out of it. One way is the management interface provided by OpenVPN. Another way is by using the default openvpn-status.log file.
Since the easiest way out-of-the-box was to use the logfile I sat down and wrote a little 2mqtt bridge for the contents of the logfile.
It’s also dockerized so you can easily set it up by pointing the openvpn-status.log to the right volume/mount-point.
When done it’ll produce MQTT messages like this:
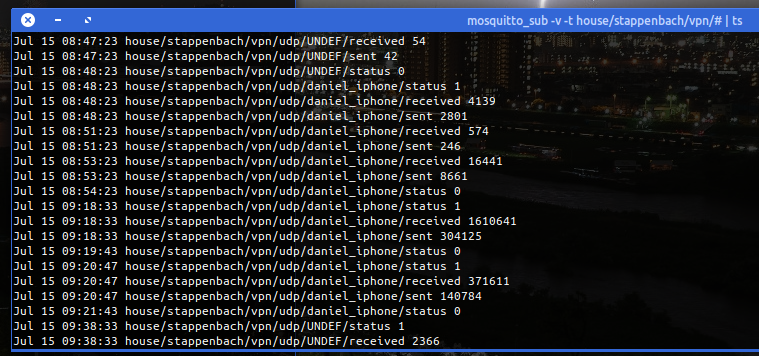
The set-up and start-up is rather simple:
docker run -d --restart=always --volume /openvpnstatus2mqttconfiglocation/:/configuration --volume /openvpnstatusloglocation/:/openvpn openvpn-status2mqttMQTT Broker, Topic-Prefix and so on are configured with the .json configuration file found along the project.
Of course everything I wrote is available on GitHub as open-source.
The immediate outcome of this is that with the always-on VPN I am now getting statistics about, for example, the data consumption of my iPhone.
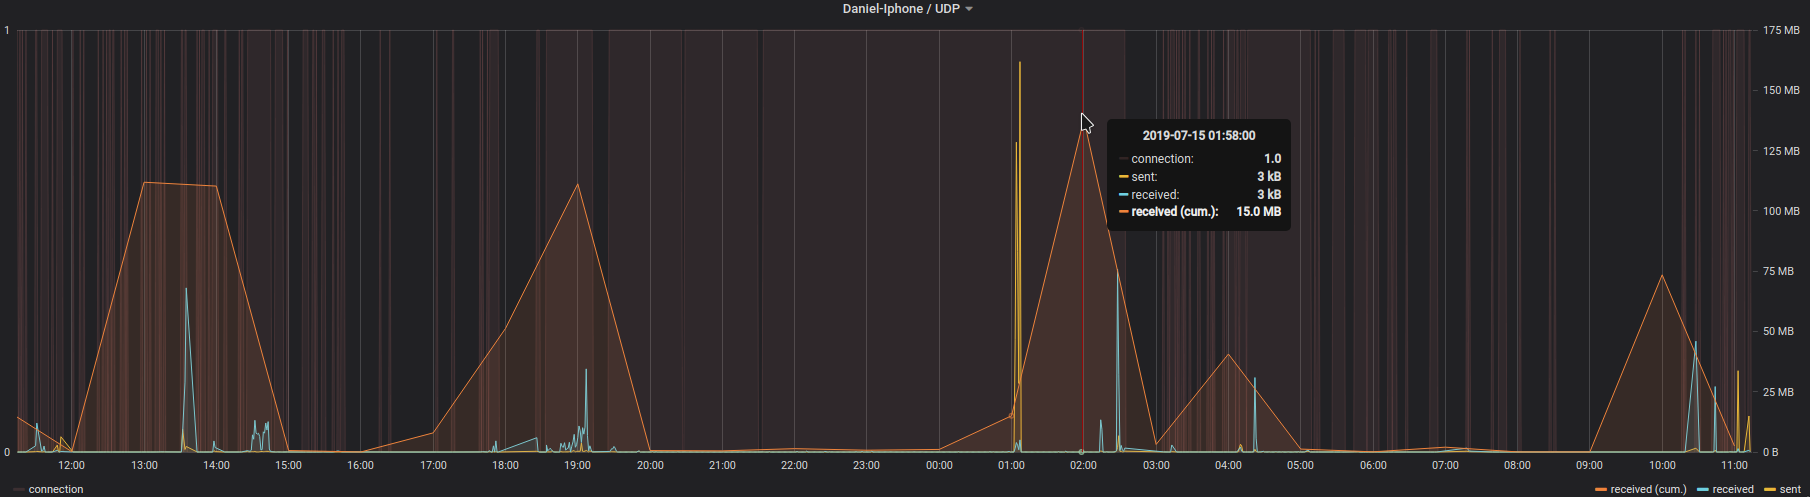
The big traffic spike at 1 AM is the backup that my iPhone does every night. Very interesting also how often the connection is closed and opened again even without me using the phone…
Picture yourself in this situation. You connect to a network and nothing works. Except for this:
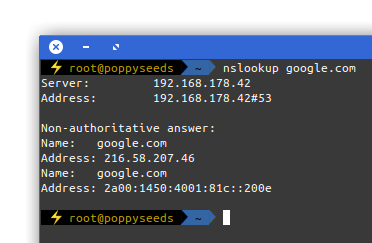
It is quite common to have DNS working in networks while everything else is not. Sometimes the network requires a log-in to give you access to a small portion of the internet.
Now, with the help of a tool called iodine, you can get access to the full internet with only DNS working in your current network:
iodine lets you tunnel IPv4 data through a DNS server. This can be usable in different situations where internet access is firewalled, but DNS queries are allowed.
It runs on Linux, Mac OS X, FreeBSD, NetBSD, OpenBSD and Windows and needs a TUN/TAP device. The bandwidth is asymmetrical with limited upstream and up to 1 Mbit/s downstream.
iodine
Setting it up is a bit of work but given that you are anyway having access to a well connected server on the free portion of the internet it can be easily done.
Of course the source is on github.
Rclone is a command line program to sync files and directories to and from:
Alibaba Cloud (Aliyun) Object Storage System (OSS), Amazon Drive, Amazon S3, Backblaze B2, Box, Ceph, DigitalOcean Spaces, Dreamhost, Dropbox, FTP, Google Cloud Storage, Google Drive, HTTP, Hubic, Jottacloud, IBM COS S3, Koofr, Memset Memstore, Mega, Microsoft Azure Blob Storage, Microsoft OneDrive, Minio, Nextcloud, OVH, OpenDrive, Openstack Swift, Oracle Cloud Storage, ownCloud, pCloud, put.io, QingStor, Rackspace Cloud Files, Scaleway, SFTP, Wasabi, WebDAV, Yandex Disk, The local filesystem
rclone.org
Whenever you would need to move large and/or many files between cloud storages you should give rClone a try.
And to spice things up a bit more:

By many known as “High Availability” this elusive thing as a lot of different perspectives to consider…
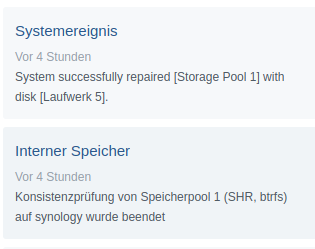
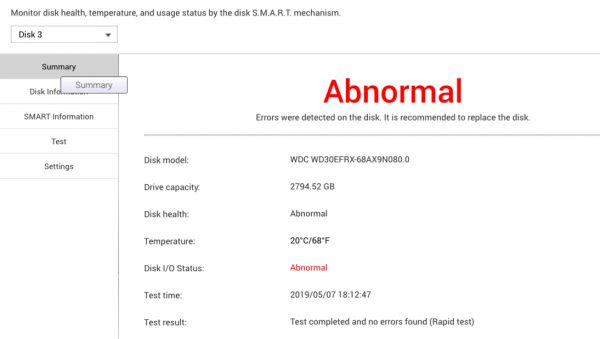
All is good. No data has been harmed in the process. Now drive #8 needs to be replaced.
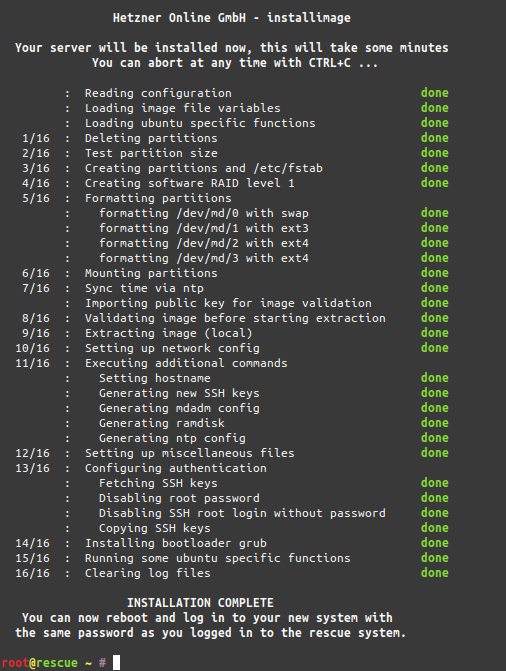
Server move has been finished!
If you can read this article you are already getting this website served from the new machine and your DNS got the memo to update.
This website is delivered to you by a single dedicated server in a datacenter in Germany. This server is old.
11:13:58 up 1320 days, 25 min, 2 users, load average: 1.87, 1.43, 1.25
uptime
And I am replacing it. While doing so I am going to take some shortcuts to lower the effort I have to put in for the move.
It will save me 2 days of work. It will mean for you: there might be some interruptions of the services provided by this website (there are more than this page…).
We know that using swap space instead of RAM (memory) can severely slow down the performance of Linux. So then, one might ask, since I have more than enough memory available, wouldn’t it better to remove swap space completely? The short answer is, No. There are performance benefits when swap is enabled, even when you have more than enough ram.
Why you should almost always add swap space
vfs_cache_pressure – Controls the tendency of the kernel to reclaim the memory which is used for caching of directory and inode objects. (default = 100, recommend value 50 to 200)
swappiness – This control is used to define how aggressive the kernel will swap memory pages. Higher values will increase aggressiveness, lower values decrease the amount of swap. (default = 60, recommended values between 1 and 60) Remove your swap for 0 value, but usually not recommended in most cases.
https://access.redhat.com/solutions/103833
As I’ve now brought up the topic, go ahead and read the complete story at the source.
I ran a VVV job to catalog a storage array I have. To my surprise at least one file had a very very strange timestamp:
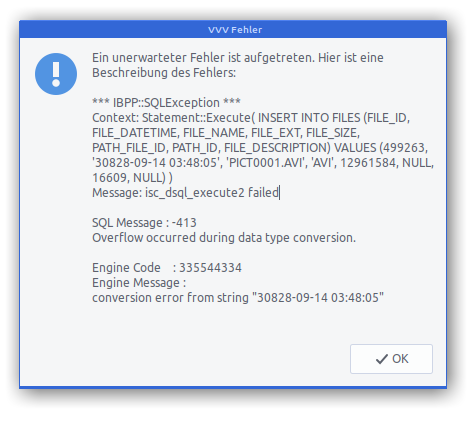
Apparently the file in question was generated on an action cam which had lost its correct date and time setting at the time of recording…
The tool I am using to catalogue the storages is also worth a mention:
VVV is an application that catalogs the content of removable volumes like CD and DVD disks for off-line searching. Folders and files can also be arranged in a single, virtual file system. Each folder of this virtual file system can contain files from many disks so you can arrange your data in a simple and logical way.
about VVV
VVV also stores metadata information from audio files: author, title, album and so on. Most audio formats are supported.
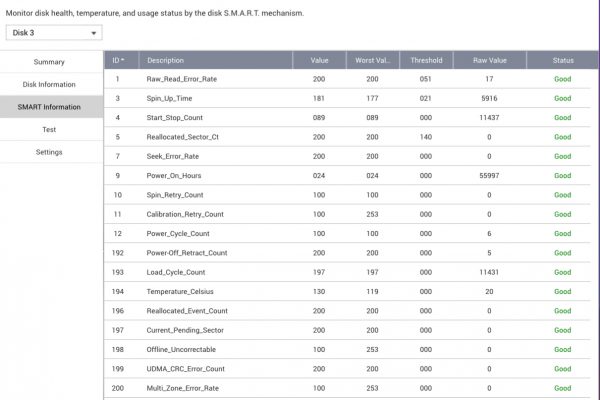
Every once in a while a hard drive fails in our house. Since all is setup to tolerate one or more failed drives no data was lost with this incident.
This drive especially gives reason to look back as it is more old with more than 6 years of continuously being powered up.
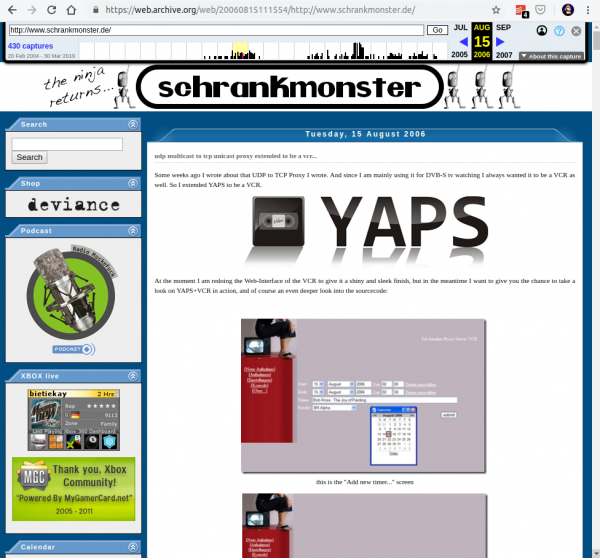
Many use and love archive.org. A service that roams the public internet and archives whatever it finds. It even creates timelines of websites so you can dive right into history.
Have a piece of history right here:
You can have something similar hosted in your own environment. There are numerous open source projects dedicated to this archival purpose. One of them is ArchiveBox.
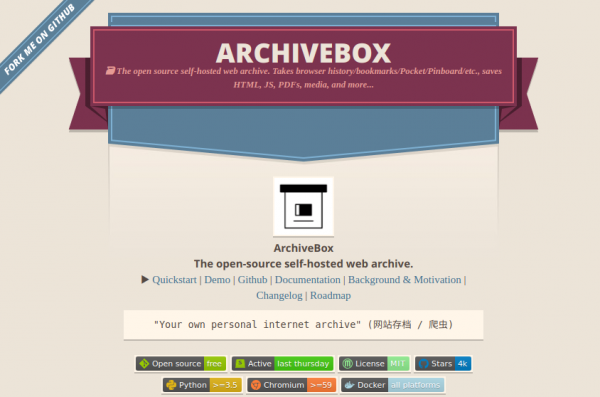
ArchiveBox takes a list of website URLs you want to archive, and creates a local, static, browsable HTML clone of the content from those websites (it saves HTML, JS, media files, PDFs, images and more).
I’ve done my set-up of ArchiveBox with the provided Dockerfile. Every once in a while it will start the docker container and check my Pocket feed for any new bookmarks. If found it will then archive those bookmarks.
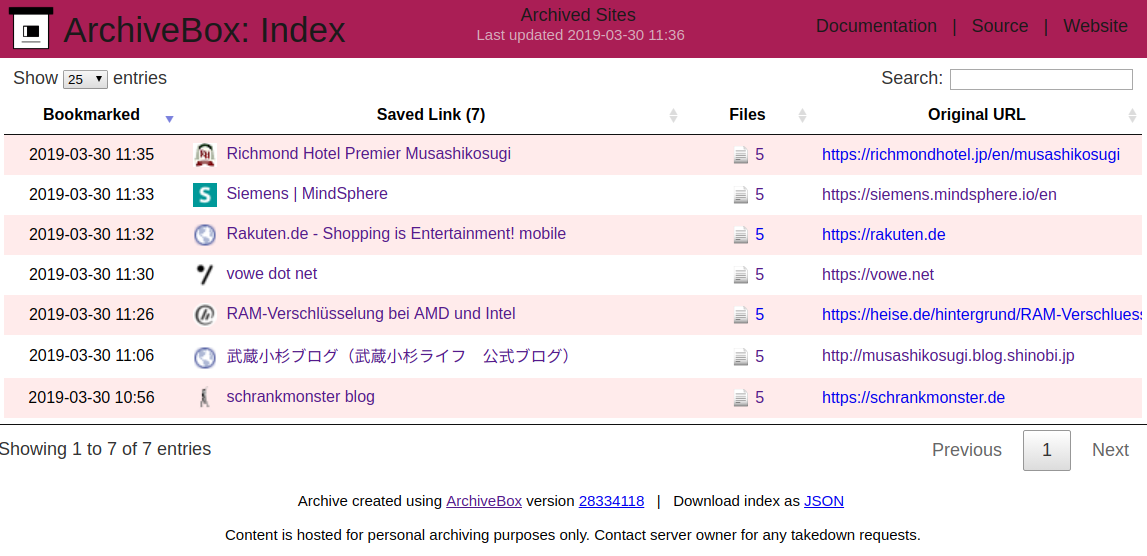
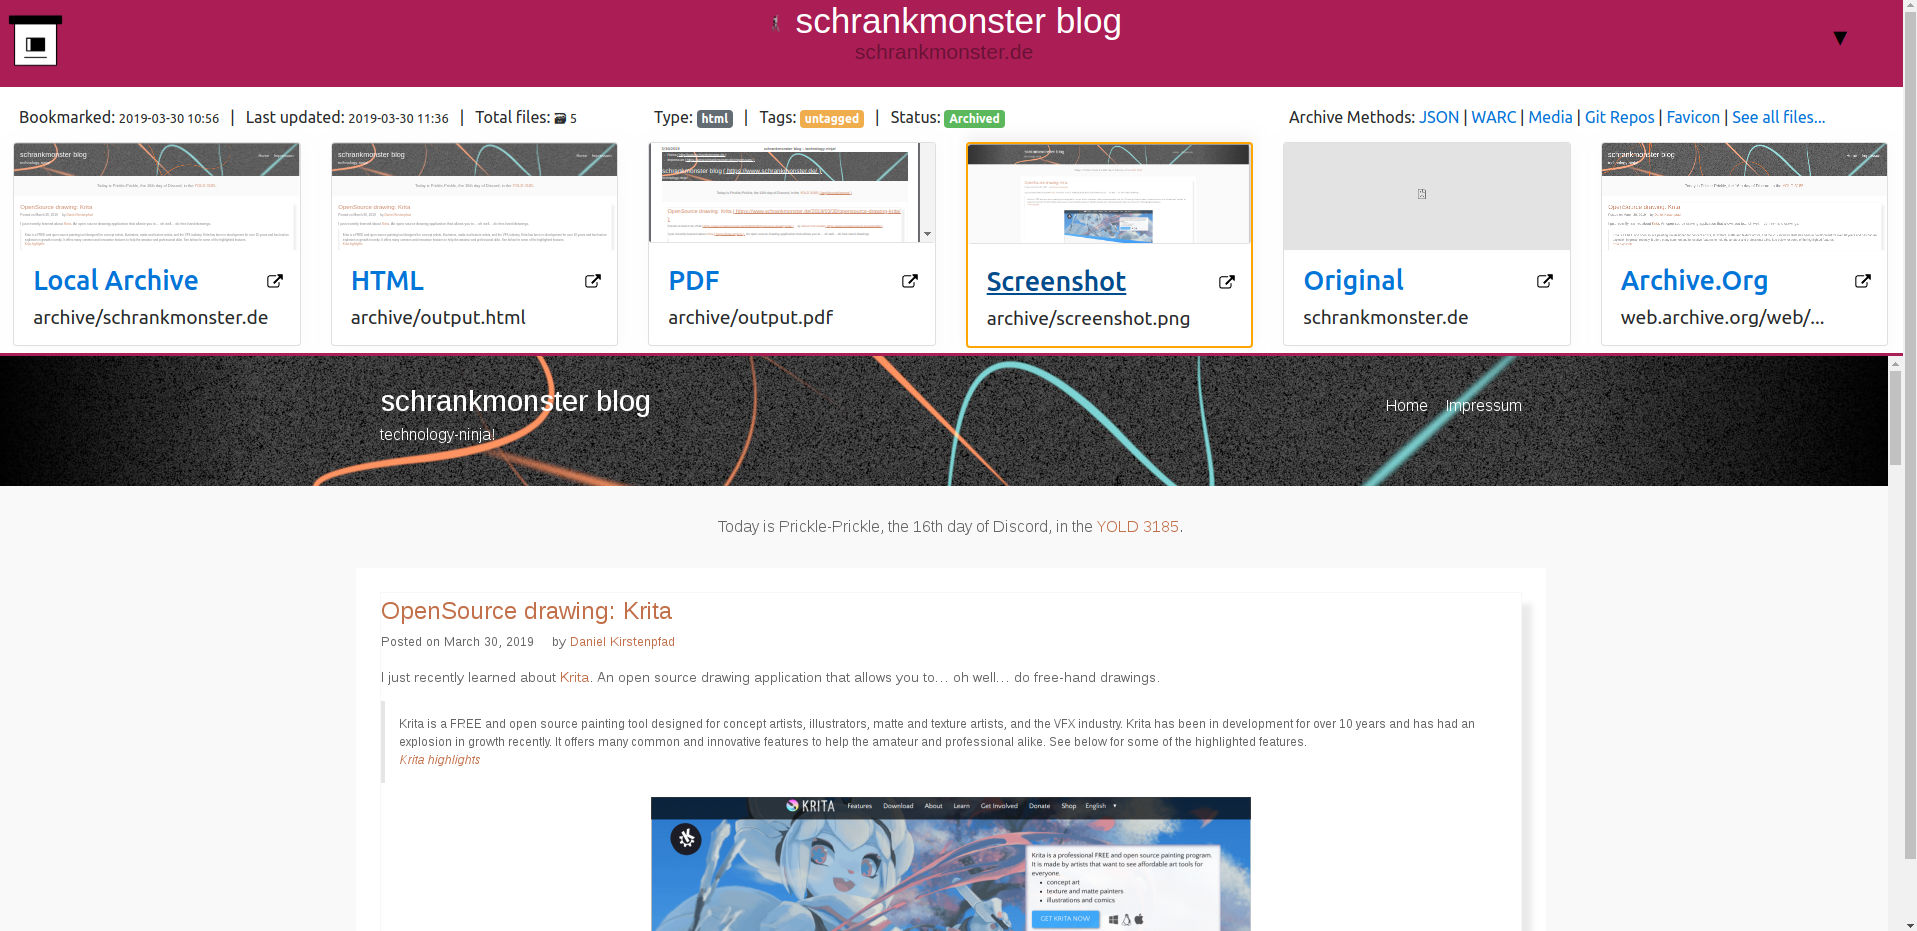
As the HTML as well as PDF and Screenshot is saved this is extremely useful for later look-ups and even full-text search indexing.
I had to solve a problem. The problem was that I did not wanted to have the exact same session and screen shared across different work places/locations simultaneously. From looking at the same screen from a different floor to have the option to just walk over to the lab-desk solder some circuits together and have the very same documents opened already and set on the screens over there.
One option was to use a tablet or notebook and carry it around. But this would not solve the need to have the screen content displayed on several screens simultaneously.
Also I did not want to rely on the computing power of a notebook / tablet alone. Of course those would get more powerful over time. But each step would mean I would have to purchase a new one.
Then in a move of desperation I remembered the “old days” when ThinClients used to be the new-kid in town. And then I tried something:
I just recently had moved all house server infrastructure over to Linux and Docker. So what would keep me from utilizing the computing power of that one beefy server in the basement to host all of my desktop needs?
It turns out: Nothing really. Docker is well prepared to host desktop environments. With a bit of tweaking and TigerVNC Xvnc I was able to pre-configure the most current Ubuntu to start my preferred Mate desktop environment in a container and expose it through VNC.
If you wanted to replicate this I would recommend this repository as a starting point.
Even better I found that the RaspberryPi single board computers come with a free pre-licensed and accelerated version of RealVNC.
So I took one of those RaspberryPis, booted up the Raspbian Desktop lite and connected to the dockers VNC port. It all worked just like that.
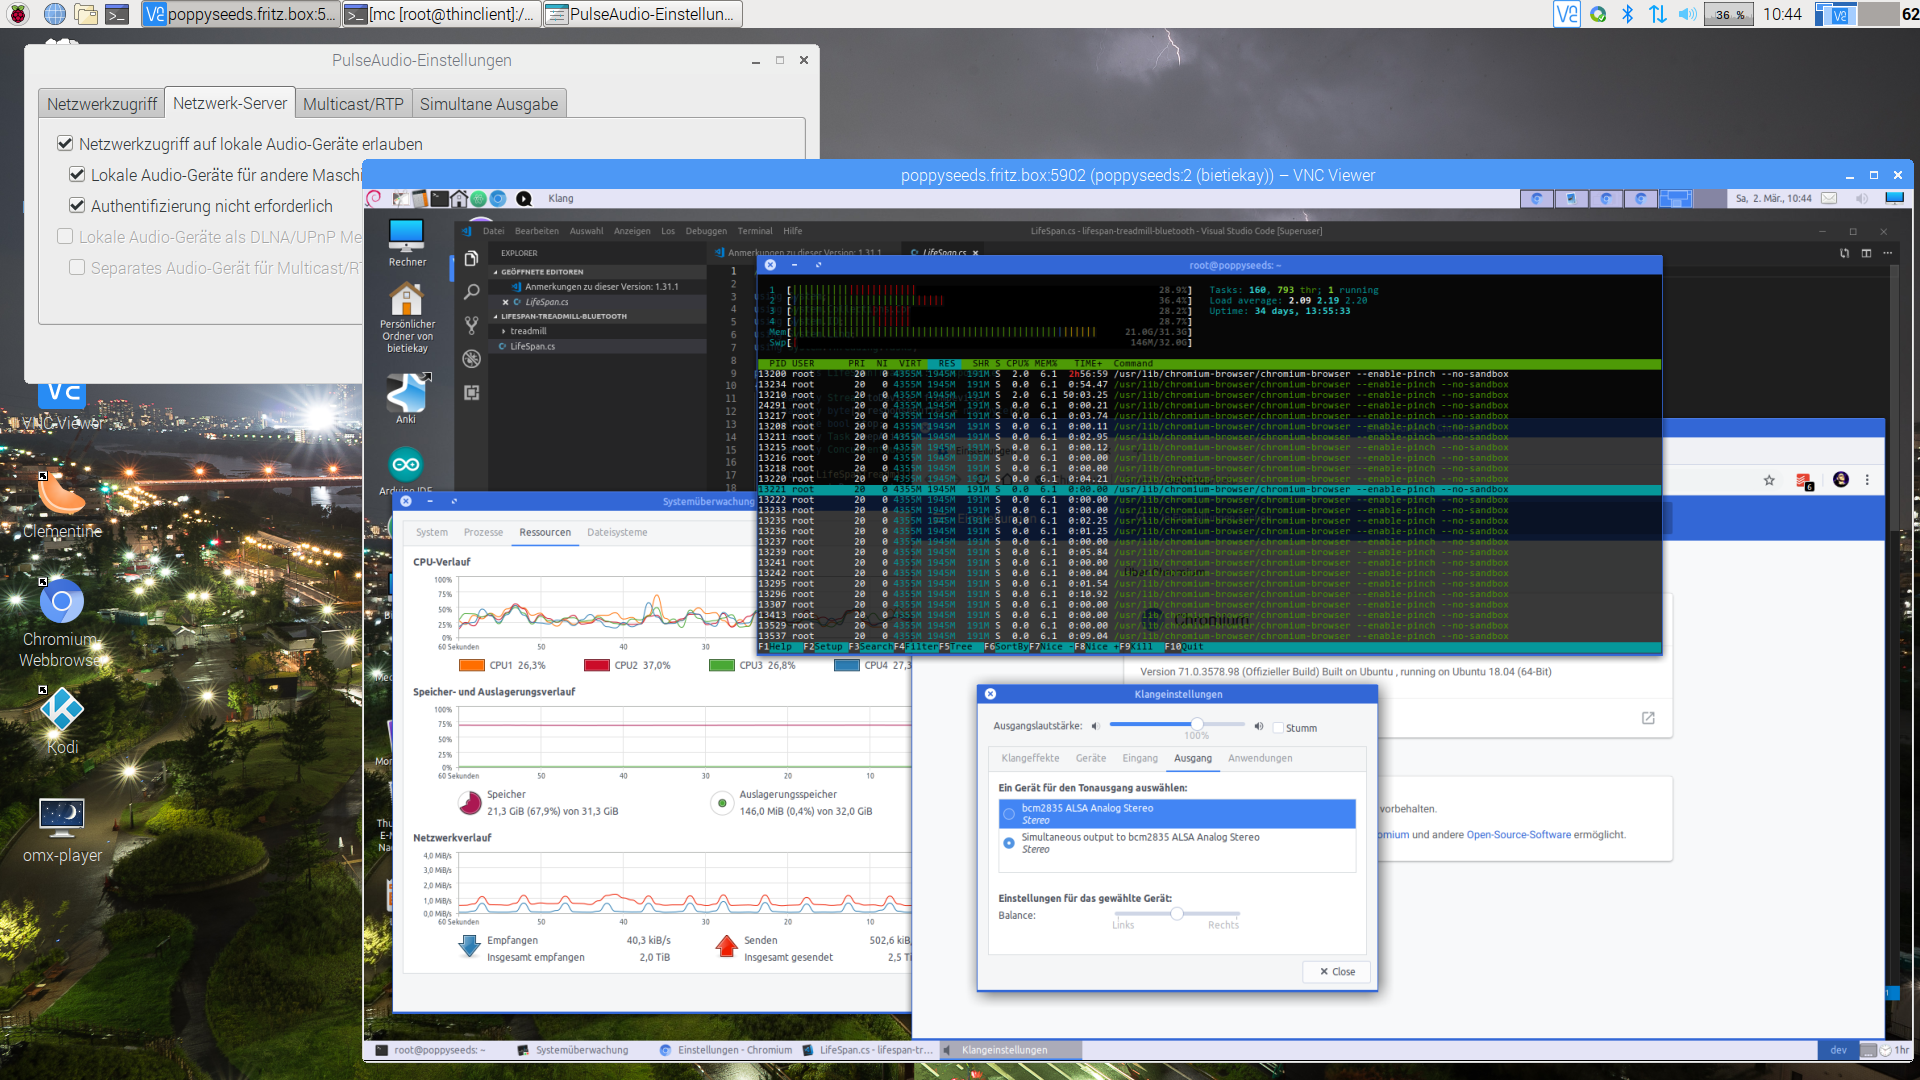
The screenshot above holds an additional information for you. I wanted sound! Video works smooth up to a certain size of the moving video – after all those RaspberryPis only come with sub Gbit/s wired networking. But to get sound working I had to add some additional steps.
First on the RaspberryPI that you want to output the sound to the speakers you need to install and set-up pulseaudio + paprefs. When you configure it to accept audio over the network you can then configure the client to do so.
In the docker container a simple command would then redirect all audio to the network:
pax11publish -e -S thinclient
Just replace “thinclient” with the ip or hostname of your RaspberryPI. After a restart Chrome started to play audio across the network through the speakers of the ThinClient.
Now all my screens got those RaspberryPIs attached to them and with Docker I can even run as many desktop environments in parallel as I wish. And because VNC does not care about how many connections there are made to one session it means that I can have all workplaces across the house connected to the same screen seeing the same content at the same time.
And yes: The UI and overall feel is silky smooth. And since VNC adapts to some extend to the available bandwidth by changing the quality of the image even across the internet the VNC sessions are very much useable. Given that there’s only 1 port for video and 1 port for audio it’s even possible to tunnel those sessions across to anywhere you might need them.
We use the term “smart home” lightly these days. It has become a term of marketing and phantastic stories.
Considering how readily available lots of different sensors, actors and personal-assistants are these days one would think that most people would start to expect more from the marketing “smart-home”.
I believe that the smart is to be found in the small and simple. There are a lot of small things that actually make something feel smart without it actually being smart about anything.
Being smart is something not achieved yet – not even by a far stretch of the sense of the word. So let’s put that to the sides of the discussion for now and move a simple thing in the middle of this article.
Have you ever had an argument about who should or should have cleared out the dishwasher after it’s finished?
We had.
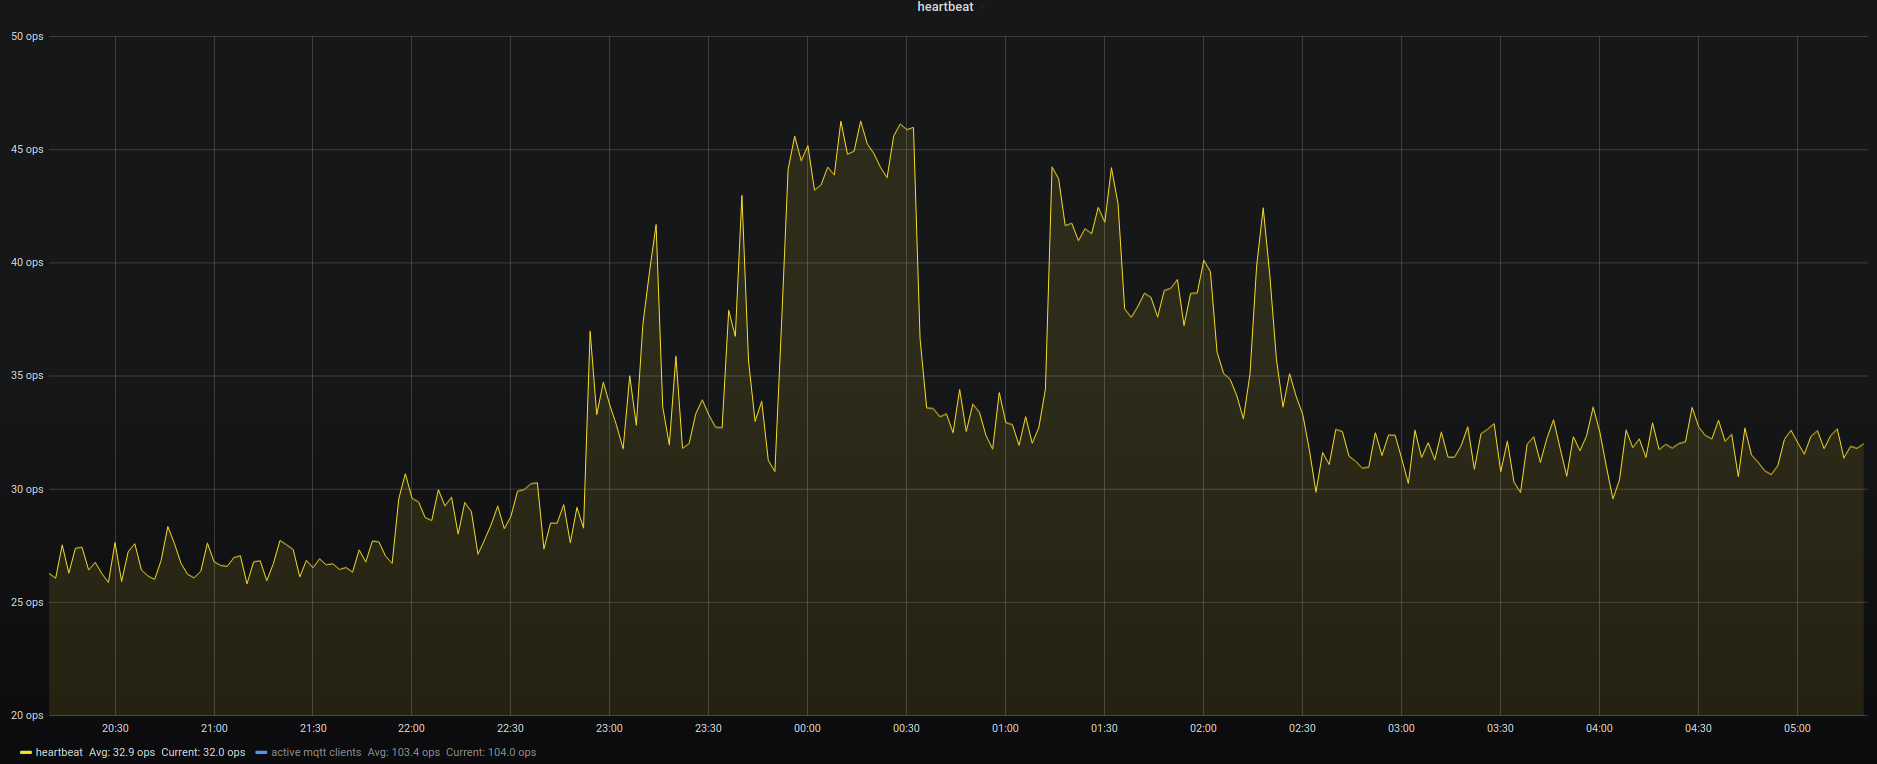
So we outsourced the discussion and decision to a 3rd party. We made our house understand when the dishwasher starts and ends it’s task. And made it flip a coin.
There was already a power consumption monitoring in place for the dishwasher. Adding a hysteresis over that monitoring would yield a simple “starts running” / “stops running” state of the dishwasher.
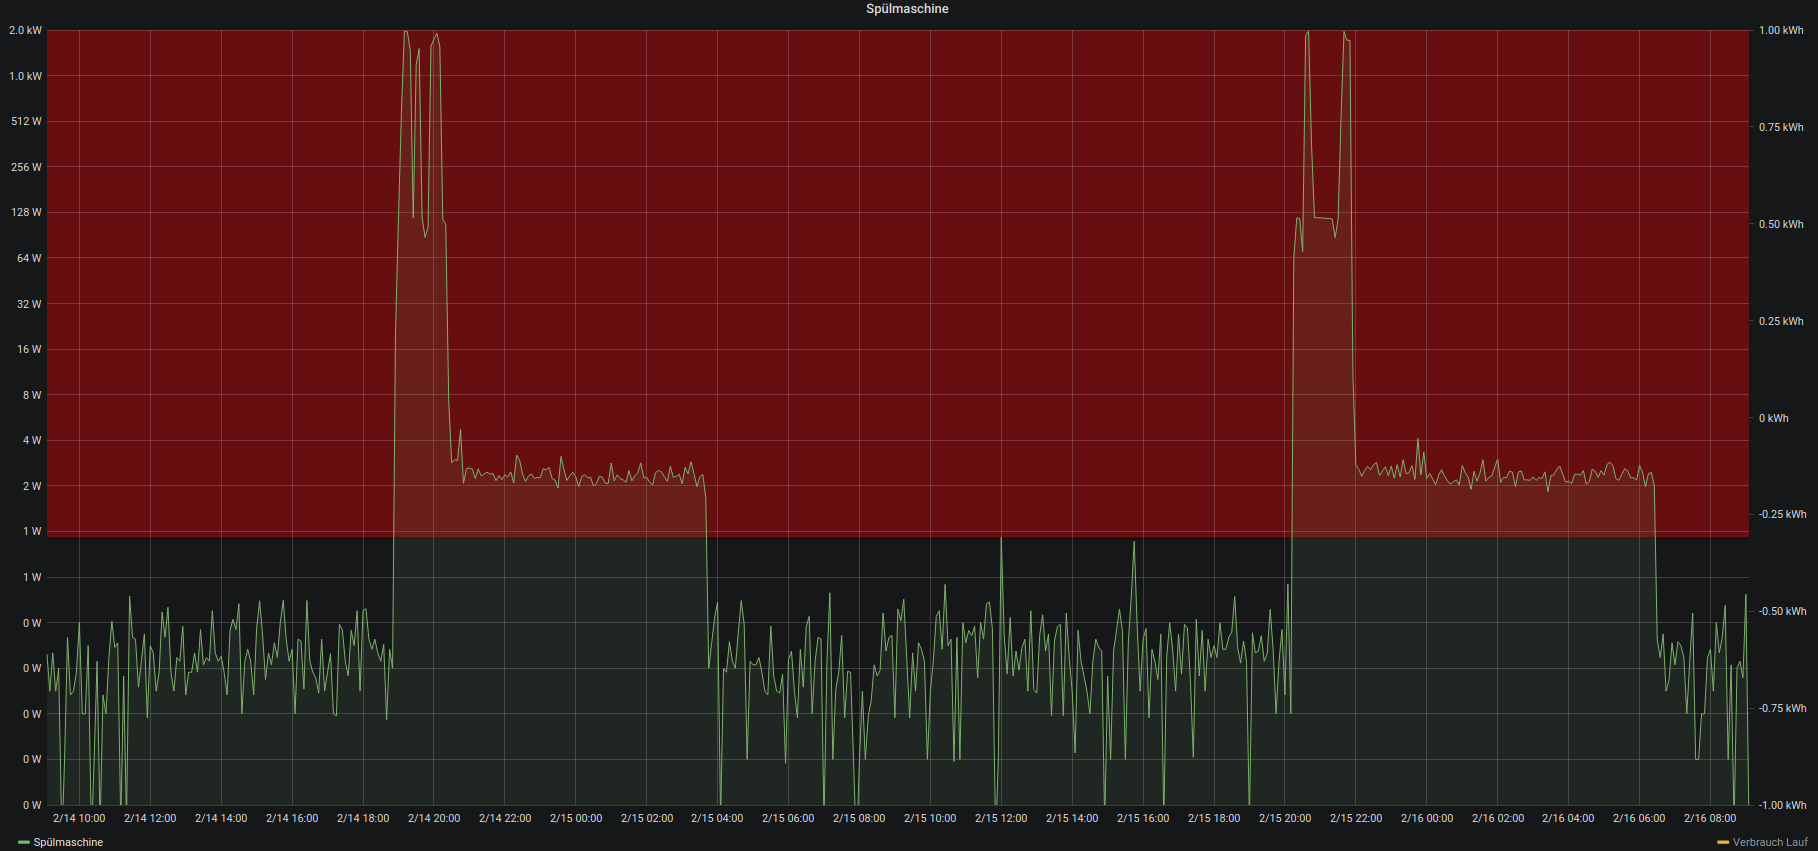
Pictured above is said power consumption.
Now adding a bit of random coin-tossing by the computer and each time when the dishwasher is detected to have started work a message is sent out depending on the result of the coin-toss.
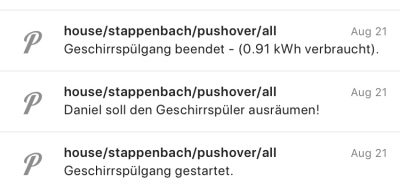
That message is published and automatically displayed on all active displays in the house (TVs/…) and sent as push notifications to all members that need to be informed of this conclusive and important decision.
In short:
Everyone gets a push notification who is going to clear out the dishwasher based upon a coin-toss by a computer every time the dishwasher starts.
The base of all of this is a Node-RED flow that that uses the power consumption MQTT messages as an input and outputs back to MQTT as well as pushes out the push notifications to phones, screens and watches.
Additionally it creates a calendar entry with the start-finish time of the dishwasher run as well as the total energy consumption for this run.
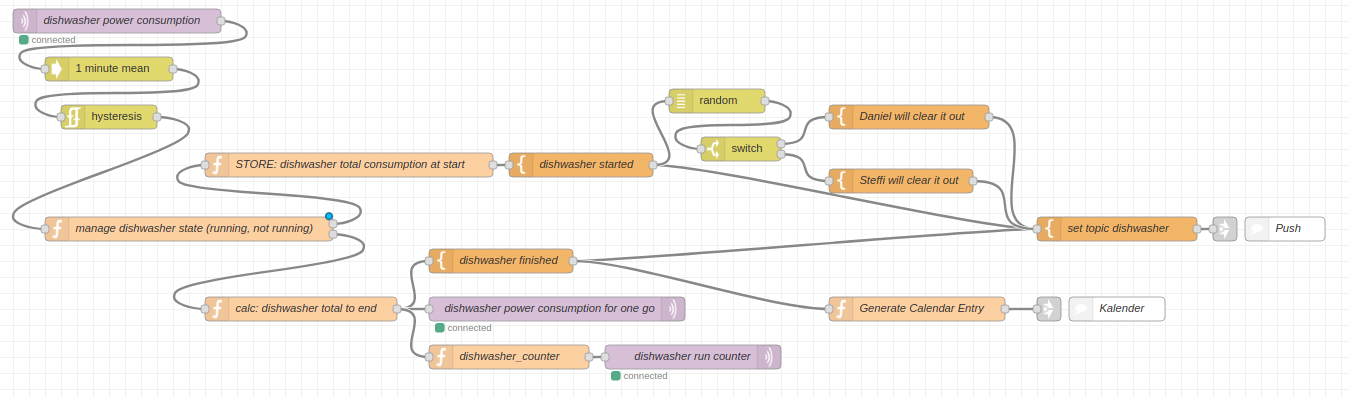
The flow works like this: on the right the message enters the flow from MQTT. The message itself contains just the value of the power consumed at this very moment. In this case consumed the dishwasher.
The power consumption is updated regularly, every couple of seconds this way. So every couple of seconds this flow runs and gets an updated value of
Next a hysteresis is applied. In simple terms this means: when the value goes above a certain threshold the dishwasher is considered to be running. When it goes below a certain threshold then it is considered finished.
When the dishwasher changed it’s state to “running” the flow will generate a random number between 0 and 1. This give a 50:50 chance for either Steffi or Daniel be the chosen one to clear out the dishwasher for this run. This message is sent out as push notification to all phones, watches and TVs.
When the dishwasher finishes it’s run the total energy consumption is taken and sent out as the “I am done message”. Also this information is added to the calendar. Voilá.
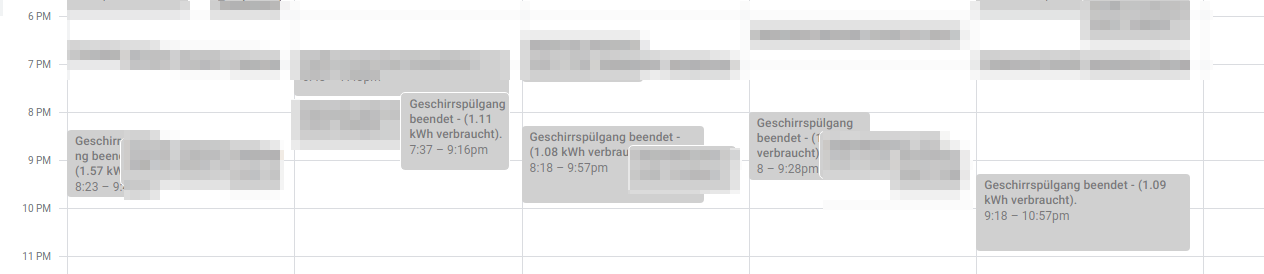
A calendar? Why a calendar you may ask. Oh well there are several reasons. Think of calendars as another way to interact with the house. All sorts of things happen on a timeline. A calendar is only a visual aid to interact with timelines.
May it be a home appliance running and motion being sensed for your home alarm system. All of that can be displayed in a calendar and thus automatically sync to all your devices capable to display this calendar.
And if you start adding entries to a calendar that the house uses to know what to do next… how about putting light on-off times into an actual calendar right on your phone instead of a complicated browser user interface like many of those marketing smart-homes want us to use?
Never confuse wisdom with luck.
44th Rule of Acquisition / Ferengi
As of early 2019 I’ve started to bring back my content output stream to this website/weblog.
So far I am feeling quite confident publishing content here and even with changing legislation I am doing my best to provide an as good as possible experience to each visitor.
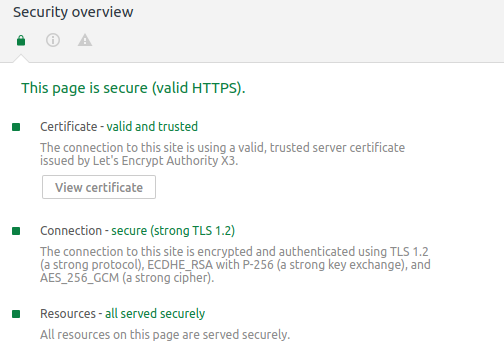
As of End-of-February 2018 this blog is being provided securly encrypted with SSL certificates from Let’s Encrypt.
So security is one thing. Data privacy and safety another.
Apart from the commenting and searching there’s no functionality provided to enter/store data.
When you enter a comment the assumption is that this is your call for consent. Your comment will be stored. With the information you’ve entered and can see on-screen as well as the IP address you’ve used. Akismet then is used to provide Anti-comment-SPAM functionality – so part of this data is transferred over to Akismet for processing. After moderation the comment is visible for everyone under the article you’ve created it.
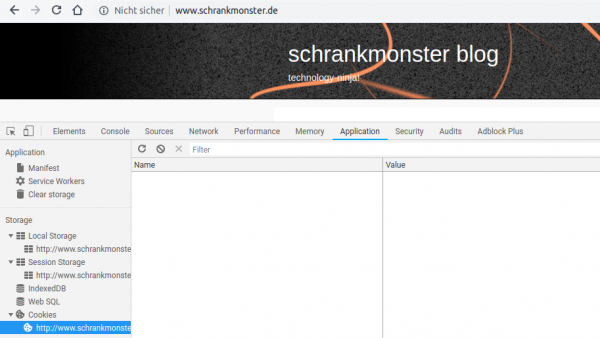
No cookies are used or required by the website.
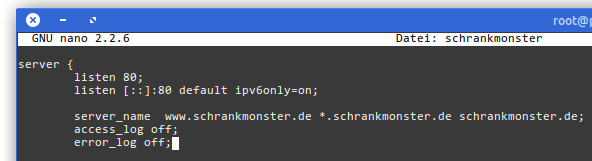
There are no logfiles. No access and no error logs. There is no tracking or analysis. There is no advertisting or monitoring. All I can see is an nginx and php process delivering websites. Your IP address is know to the server for as long as it takes to do his job of delivering the asset you asked for. Nothing gets stored on server side for your read requests.
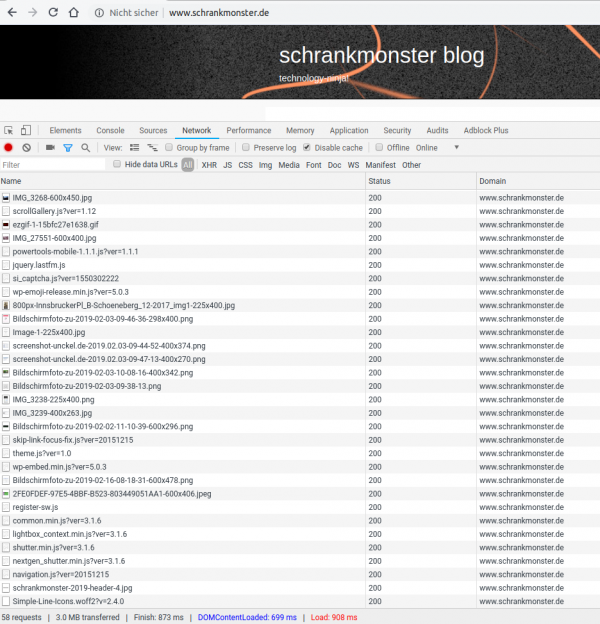
No content is loaded from other domains or websites. Everything is hosted on my server. No data is exchanged with externals to bring you this website.
A week after swapping out mechanical hard drives for SSDs it’s time to look at what it meant in the longer run for the power consumption of the server.
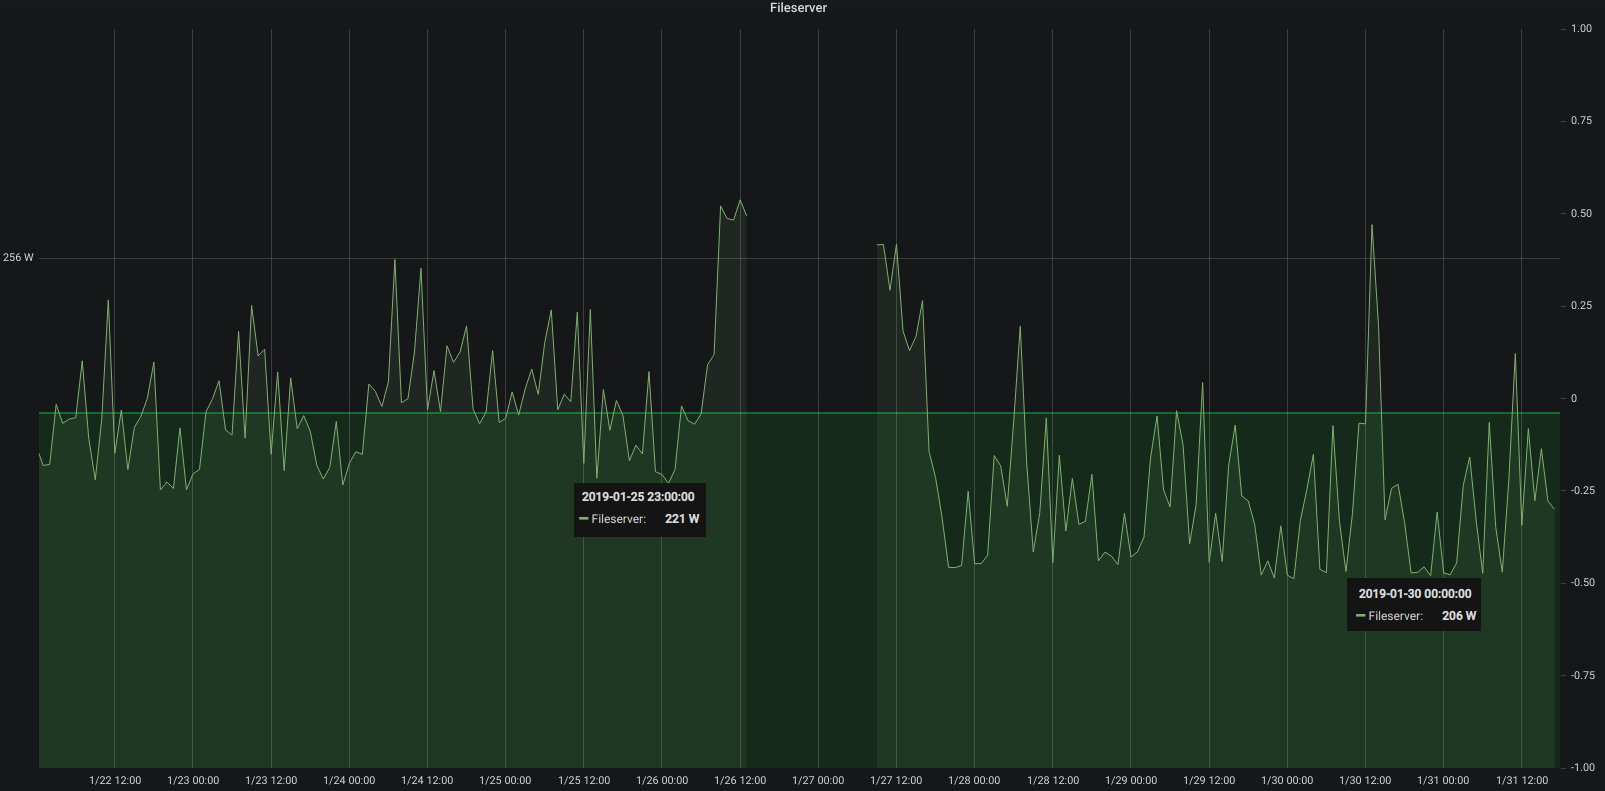
Depending on what the server is asked to do – high or low cpu load and so on – the power consumption fluctuates but it’s very visible that the averages are about 15 watt lower at all times. Great!
A week ago I had written about another mechanical hard drive that was about to bite the dust in our houses elaborate set-up.
Not having time for a full-day-of-focus I postponed the upgrade to this saturday. With the agreement of the family as they are suffering through the maintenance period as well.
The upgrade would need cautious preparation in order to be doable in one sitting. And this was also meant to be some sort of disaster-recovery-drill. I would restore the house central docker and service infrastructure from scratch along this.
And this would need to happen:
Apart from some hardware/bios related issues and the rather unexpected netplan introduction everything went fairly good. It just takes ages to see data copied.
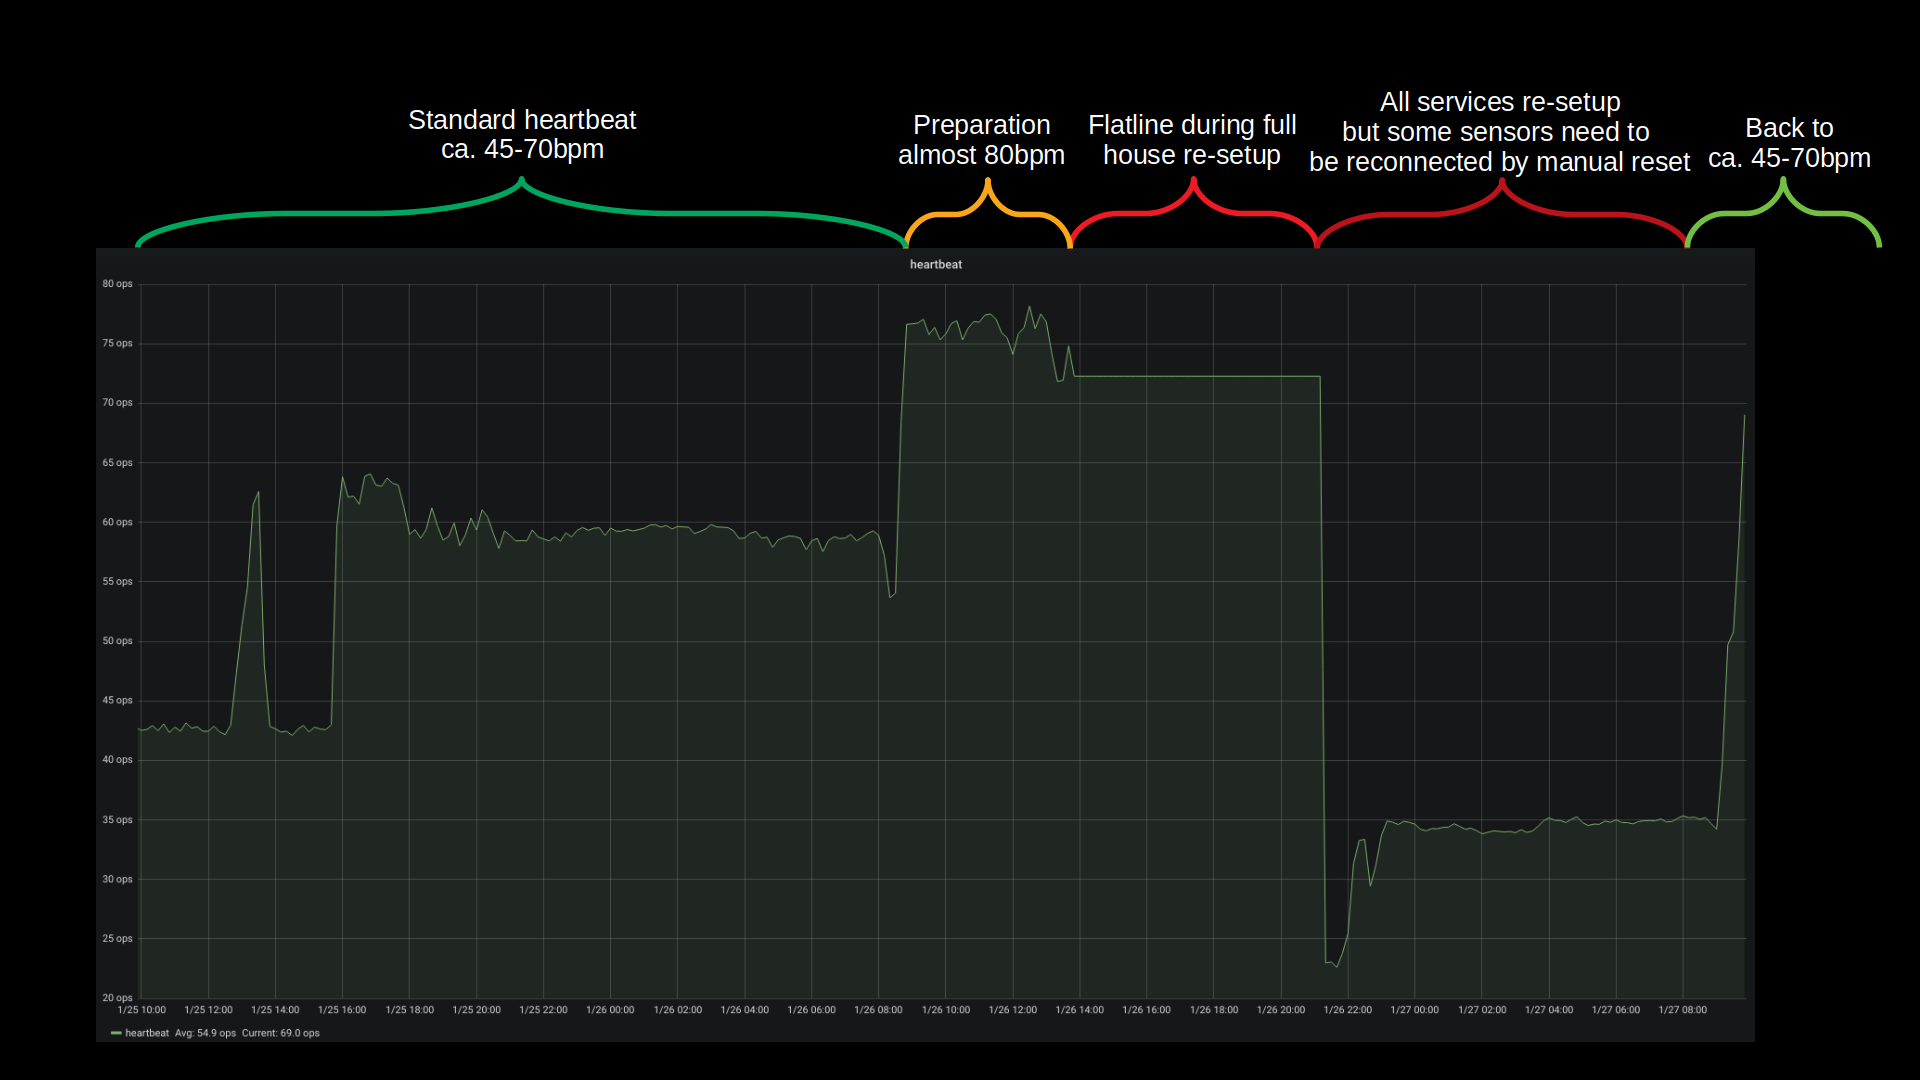
Bandwidth was the only real issue with this disaster recovery. All building blocks seemed to fall into place and no unplanned measure had to be taken. The house systems went partially down at around 12:30 and were back up 10 hours later 22:00. Of course non-automated things like internet kept working and all switches were only manual push-buttons. So everything could be done still but with a lot less convenience.
All in all there are more than 40 vital docker container based services that get started one after the other and interconnect to deliver a full house home automation. With the added SSD performance this whole ship is much much more responsive to activities. And hopefully less prone to mechanical defects.
Backup and Disaster-Preparations showed to be practical and working well. There was no beat missed (except sensor measure values during the 10 hours downtime) and no data lost.
What could be done better: It could be much more straight forward when there were less dependencies on external repositories / docker-hub. Almost all issues that came up with containers where from the fact that the maintainers had just a day before introduced something that kept them from spinning up naturally. Bad luck. But that can be helped! There’s now a multi-page disaster-recovery-procedure document that will be used and updated in the future.
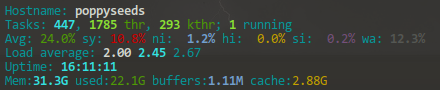
Oh and what speeds am I seeing? The promissed 3 Gbyte/s read and write speeds are real. It’s quite impressive to see 4-digit megabyte/s values in iotop frequently.
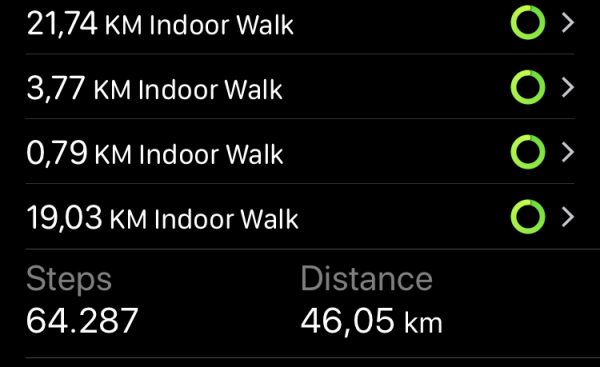
I almost forgot! During this exercise I had been in the server room less than 30 minutes. But I was on a warm and nice work-desk set-up I am using in the house as much as I can – and I will tell you about it in another article. But the major feature of this work-desk set-up is that it is (a) a standing desk and (b) has a treadmill under it. Yes. Treadmill.
You will get pictures of the set-up in that mentioned article, but since I had spent more than 10 hours walking on saturday doing the disaster recovery I want to give you a glimpse of what such a set-up means:
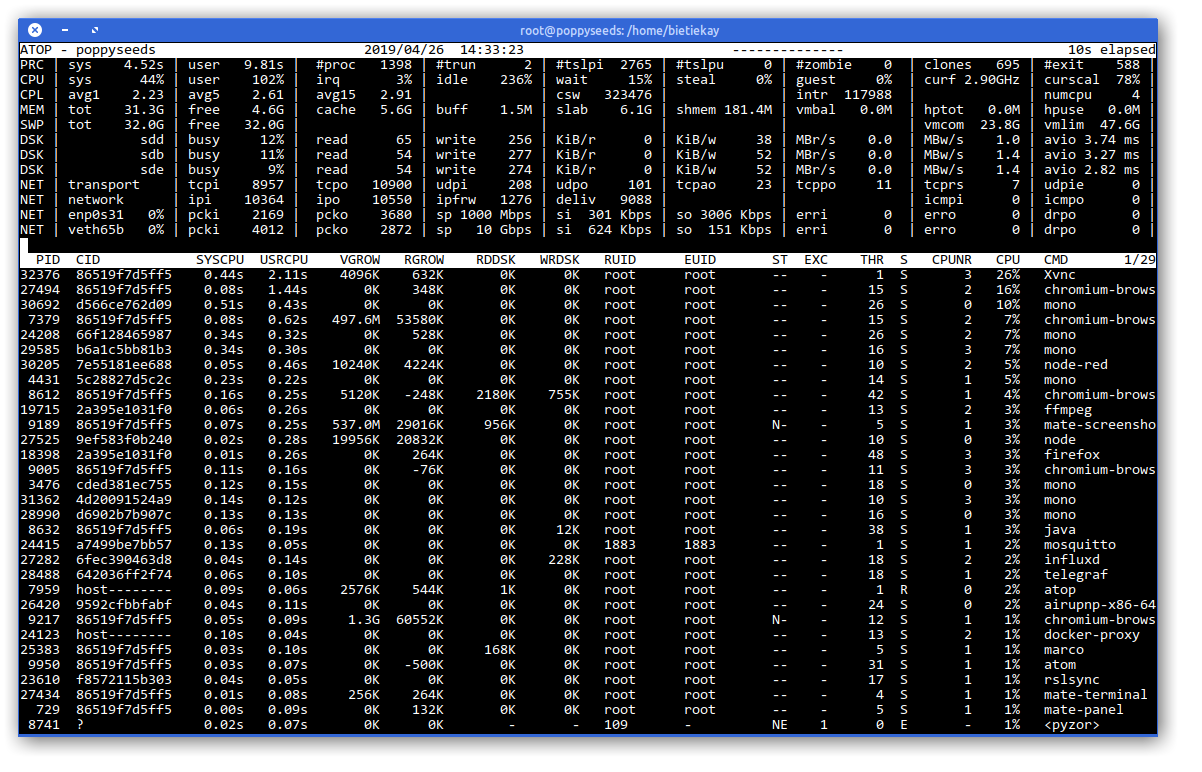
At our house I am running a medium-sized operation when it comes to all the storage and in-house / home-automation needs of the family.
This is done by utilizing several products from QNAP, Synology and a custom built server infrastructure that does most of the heavy-lifting using Docker.
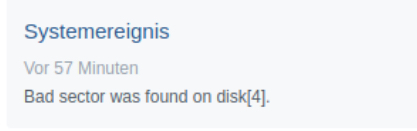
This morning I woke up to an eMail stating that one of the mirrored drives in the machine is reporting read-errors.
Since this drive is part of a larger array of spinning-rust style hard disks just replacing it would work but due to the life-time of those drives I am not particularly interested in more replacing in the very near future. So a more general approach seems right.
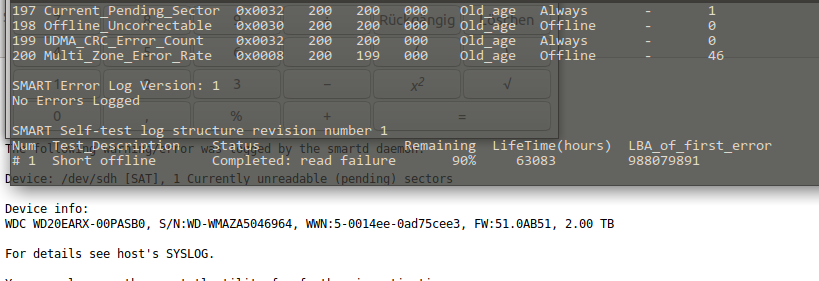
You can see what I mean. This drive is old. Very old. And so are its mates. Actually this is the newest drive of another 6 or so 1.5TB and 1TB drives in this array.
Since this redundant array in fact is still quite small and not fully used as most storage intensive non service-related disk space demands have moved to iSCSI and other means it’s not the case anymore that so many disks, so well redundant with so little disk space are needed anymore. Actual current space utilization seems about 20% of the available 2TB volume.
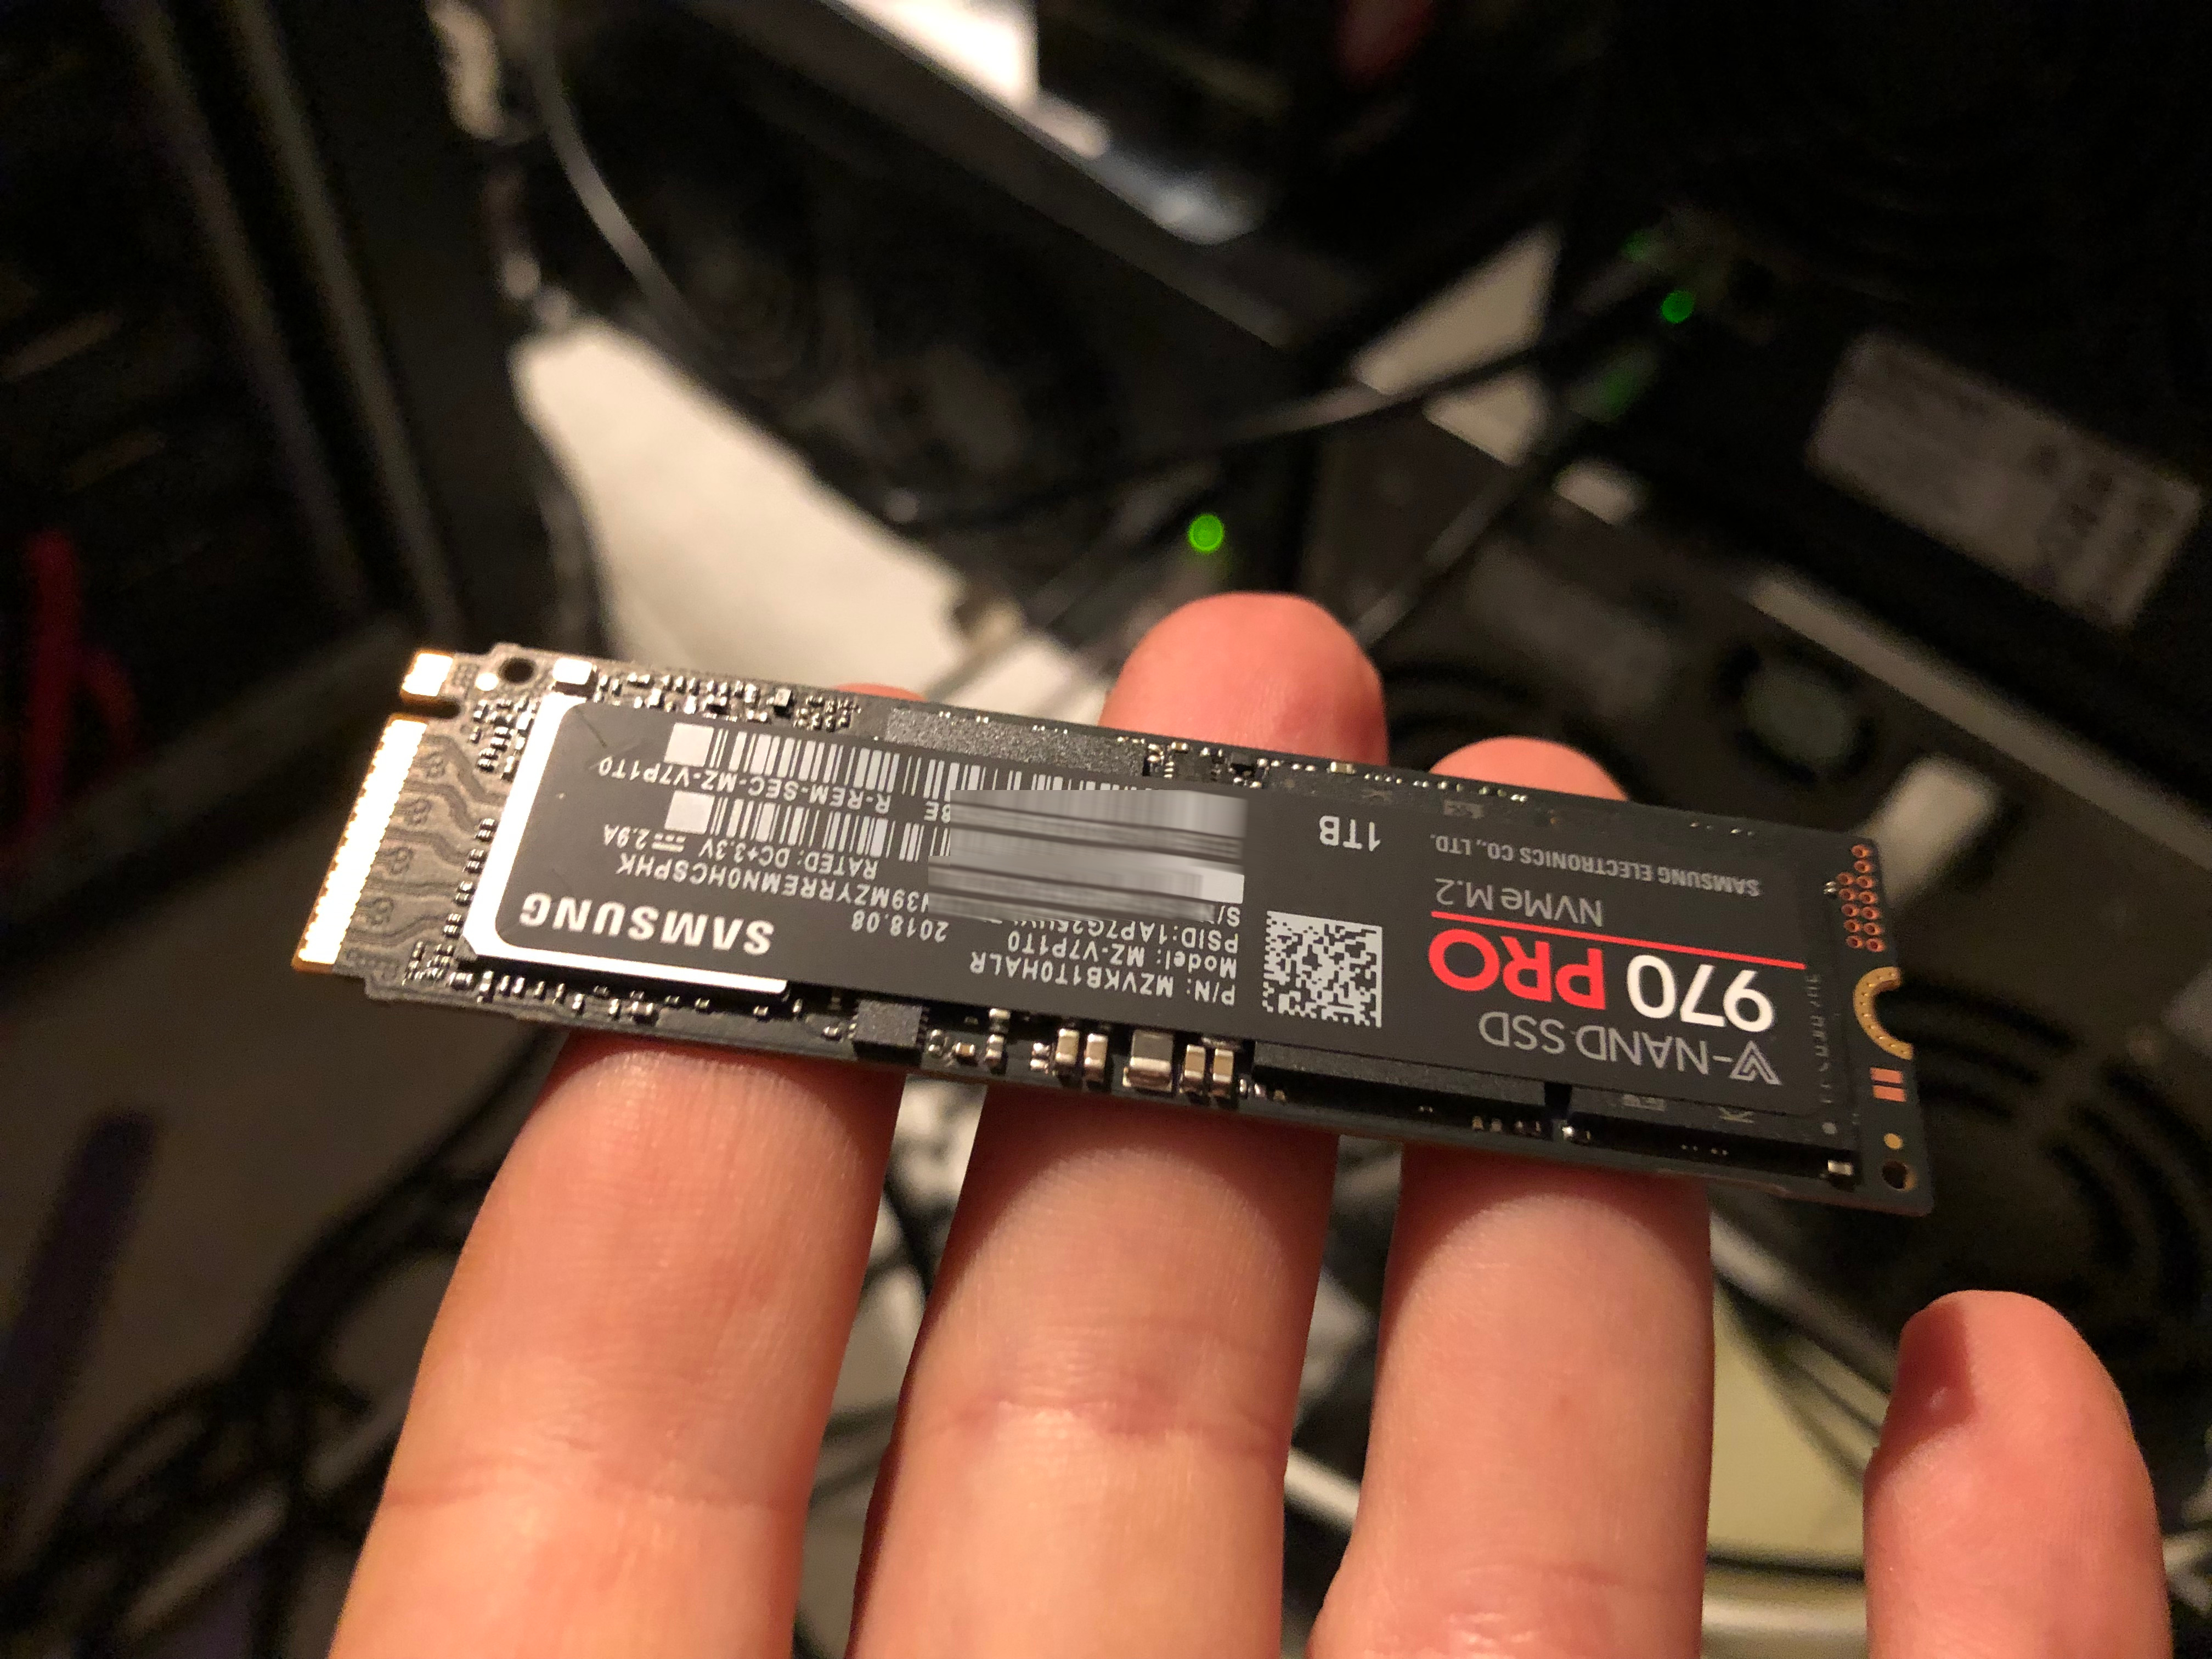
Time for an upgrade! Taking a look in the manual of the mainboard I had replaced 2 years ago I found that this mainboard does have dual NVMe m.2 ports. From which I can boot according to that same manual.
So I thought: Let’s start with replacing the boot drives and the /var/lib docker portions with something fast.
To my surprise Samsung is building 1 TB NVMe M.2 SSDs to a price I expected to be much higher.

Nice! So let me reeport back when this shipped and I can start the re-set-up of the operating system and docker environment. Which by all fairness should be straight forward. I will upgrade from Ubuntu 16.04 LTS to 18.04 LTS in the same step – and the only more complex things I expect to happen is the boot-from-ZFS(on Linux) and iSCSI set-up of the machine.
If you got any tips or best-practice, let me know.
I just have started the catch-up on what happpened in the last 2 years to ZFS on Linux. My initial decision to use Linux 2 years ago as the main driver OS and Ubuntu as the distribution was based upon the exepectation to not have this as my hobby in the next years. And that expectation was fulfilled by Ubuntu 16.04 LTS.