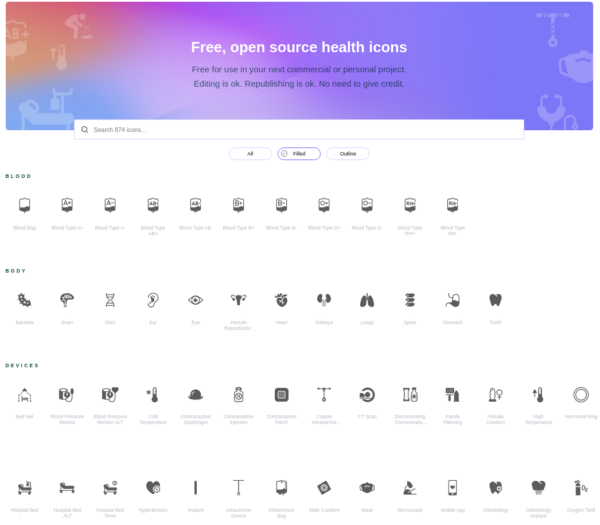
Found that nice heap of Icons that are free to use and high-quality:
Health Icons is a volunteer effort to create a ‘global good’ for health projects all over the world. These icons are available in the public domain for use in any type of project.
The project is hosted by the public health not-for-profit Resolve to Save Lives as an expression of our committment to offer the icons for free, forever.
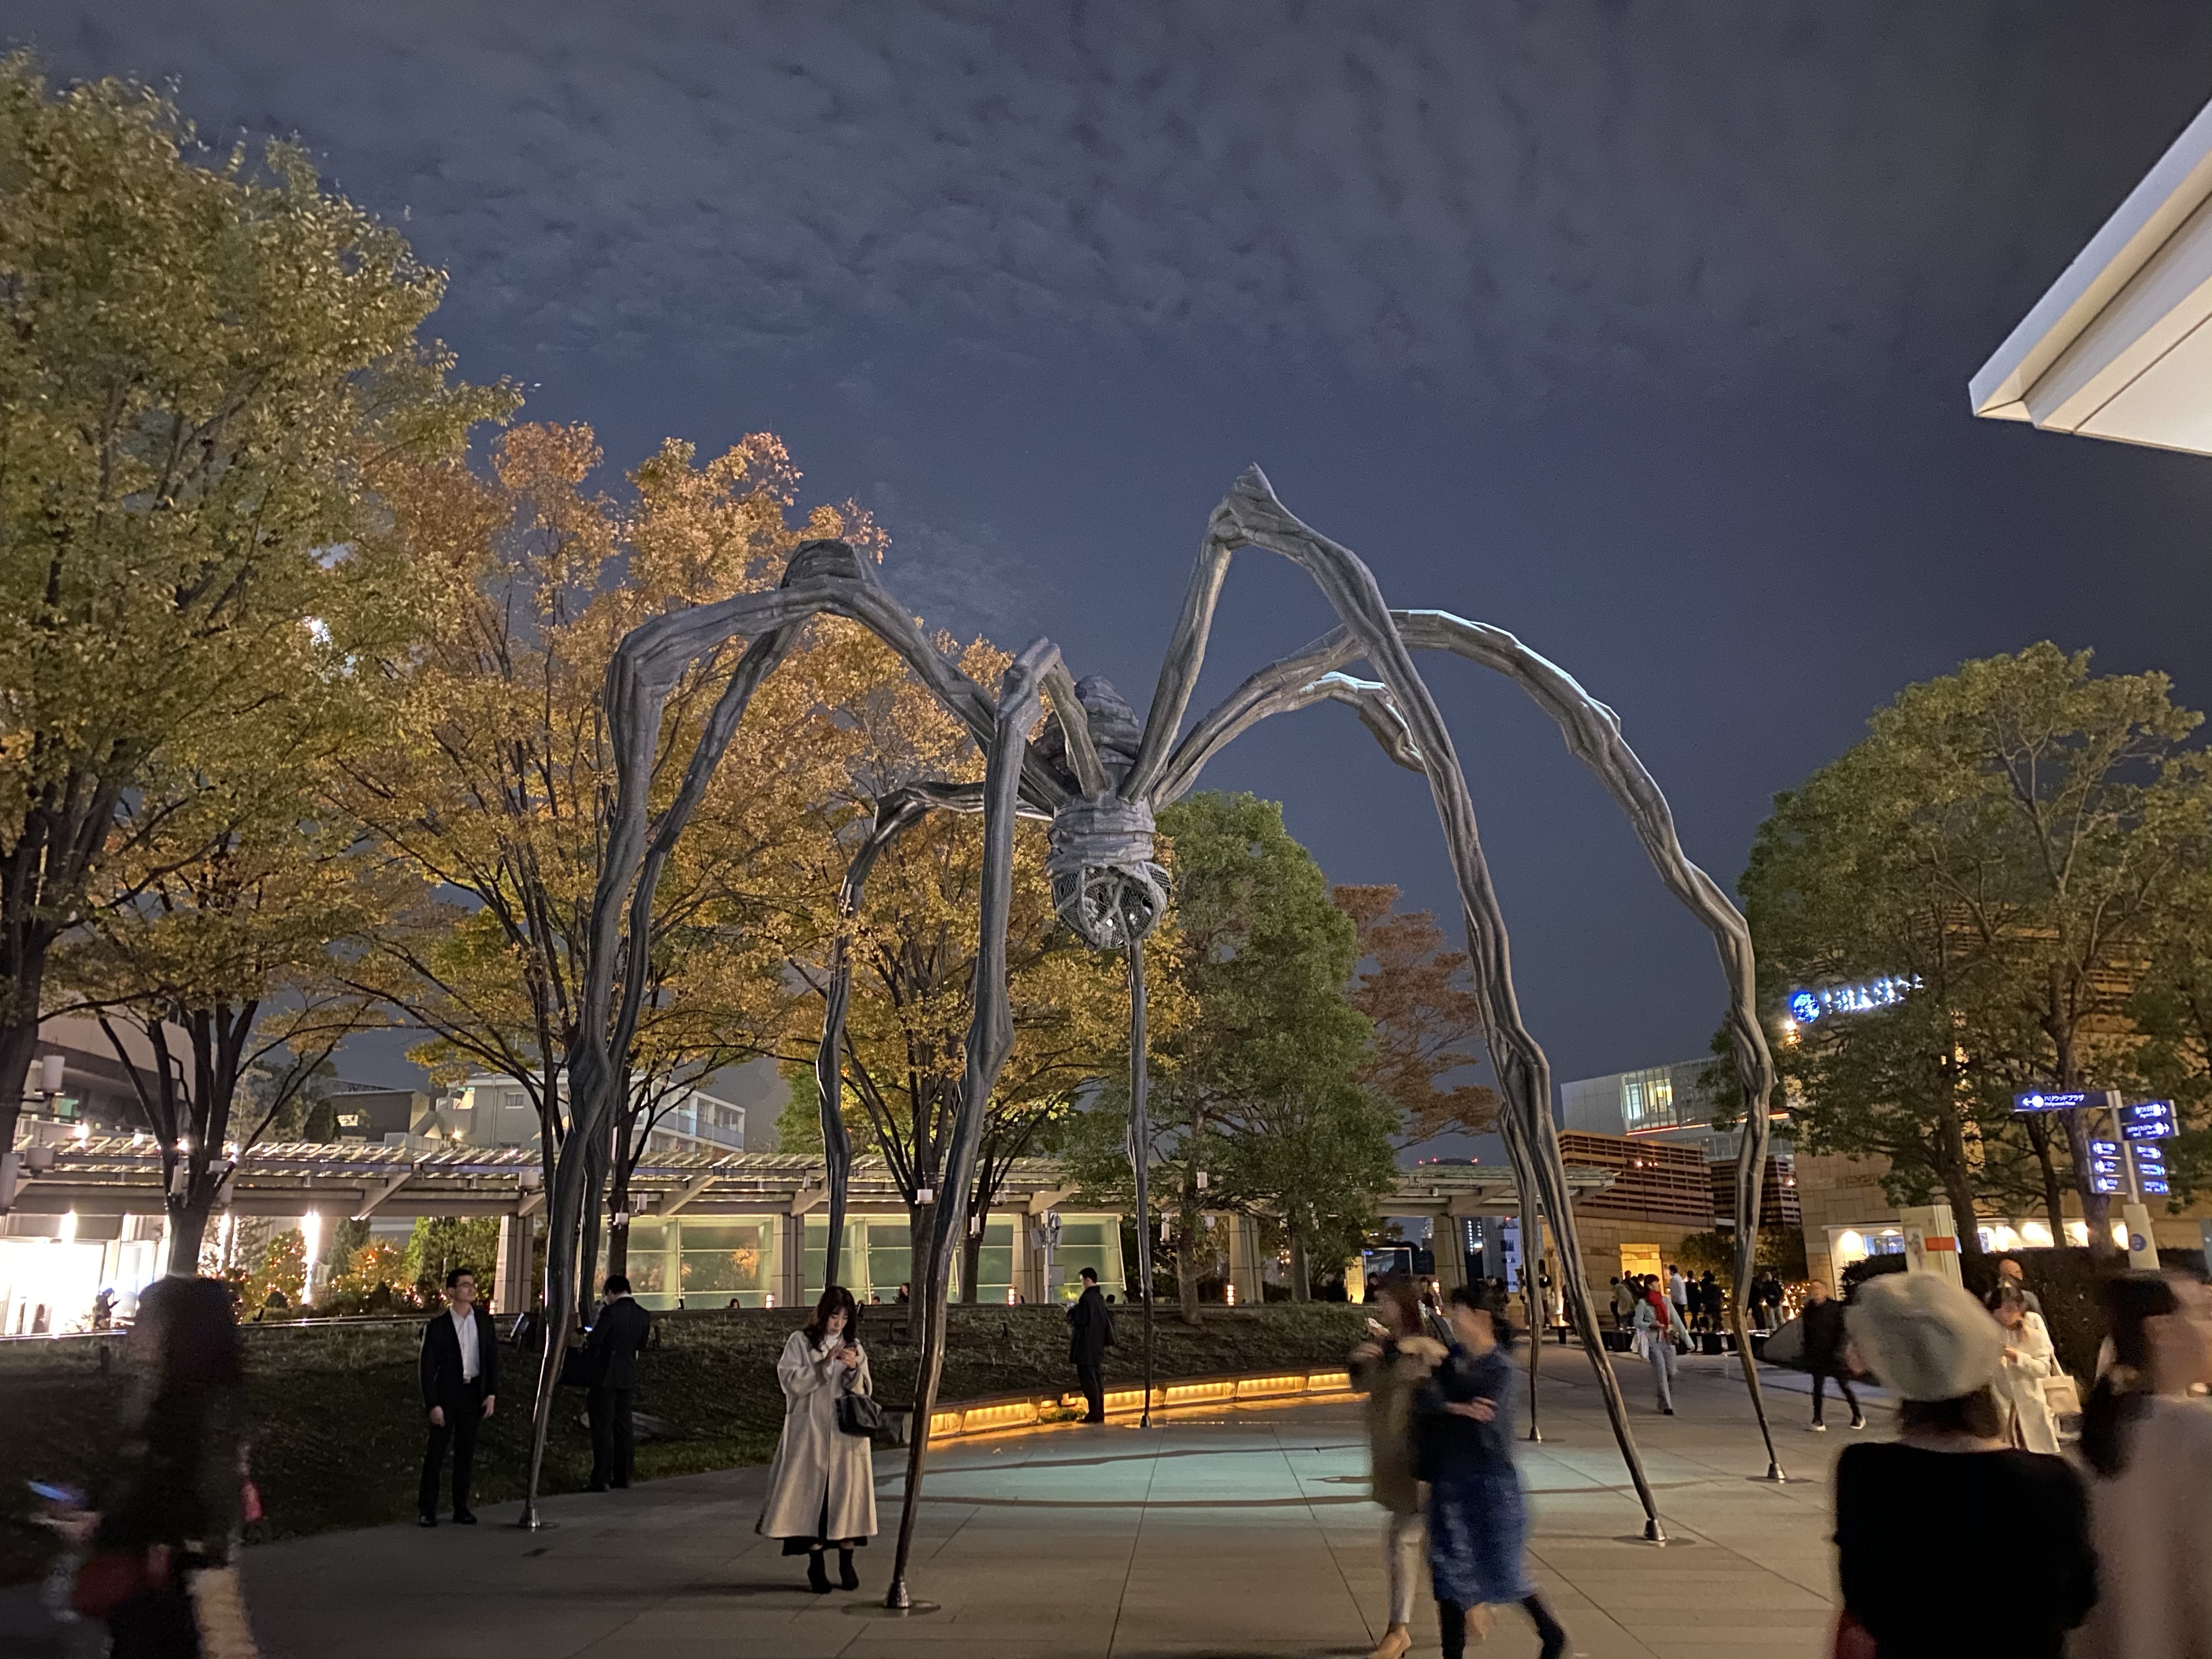
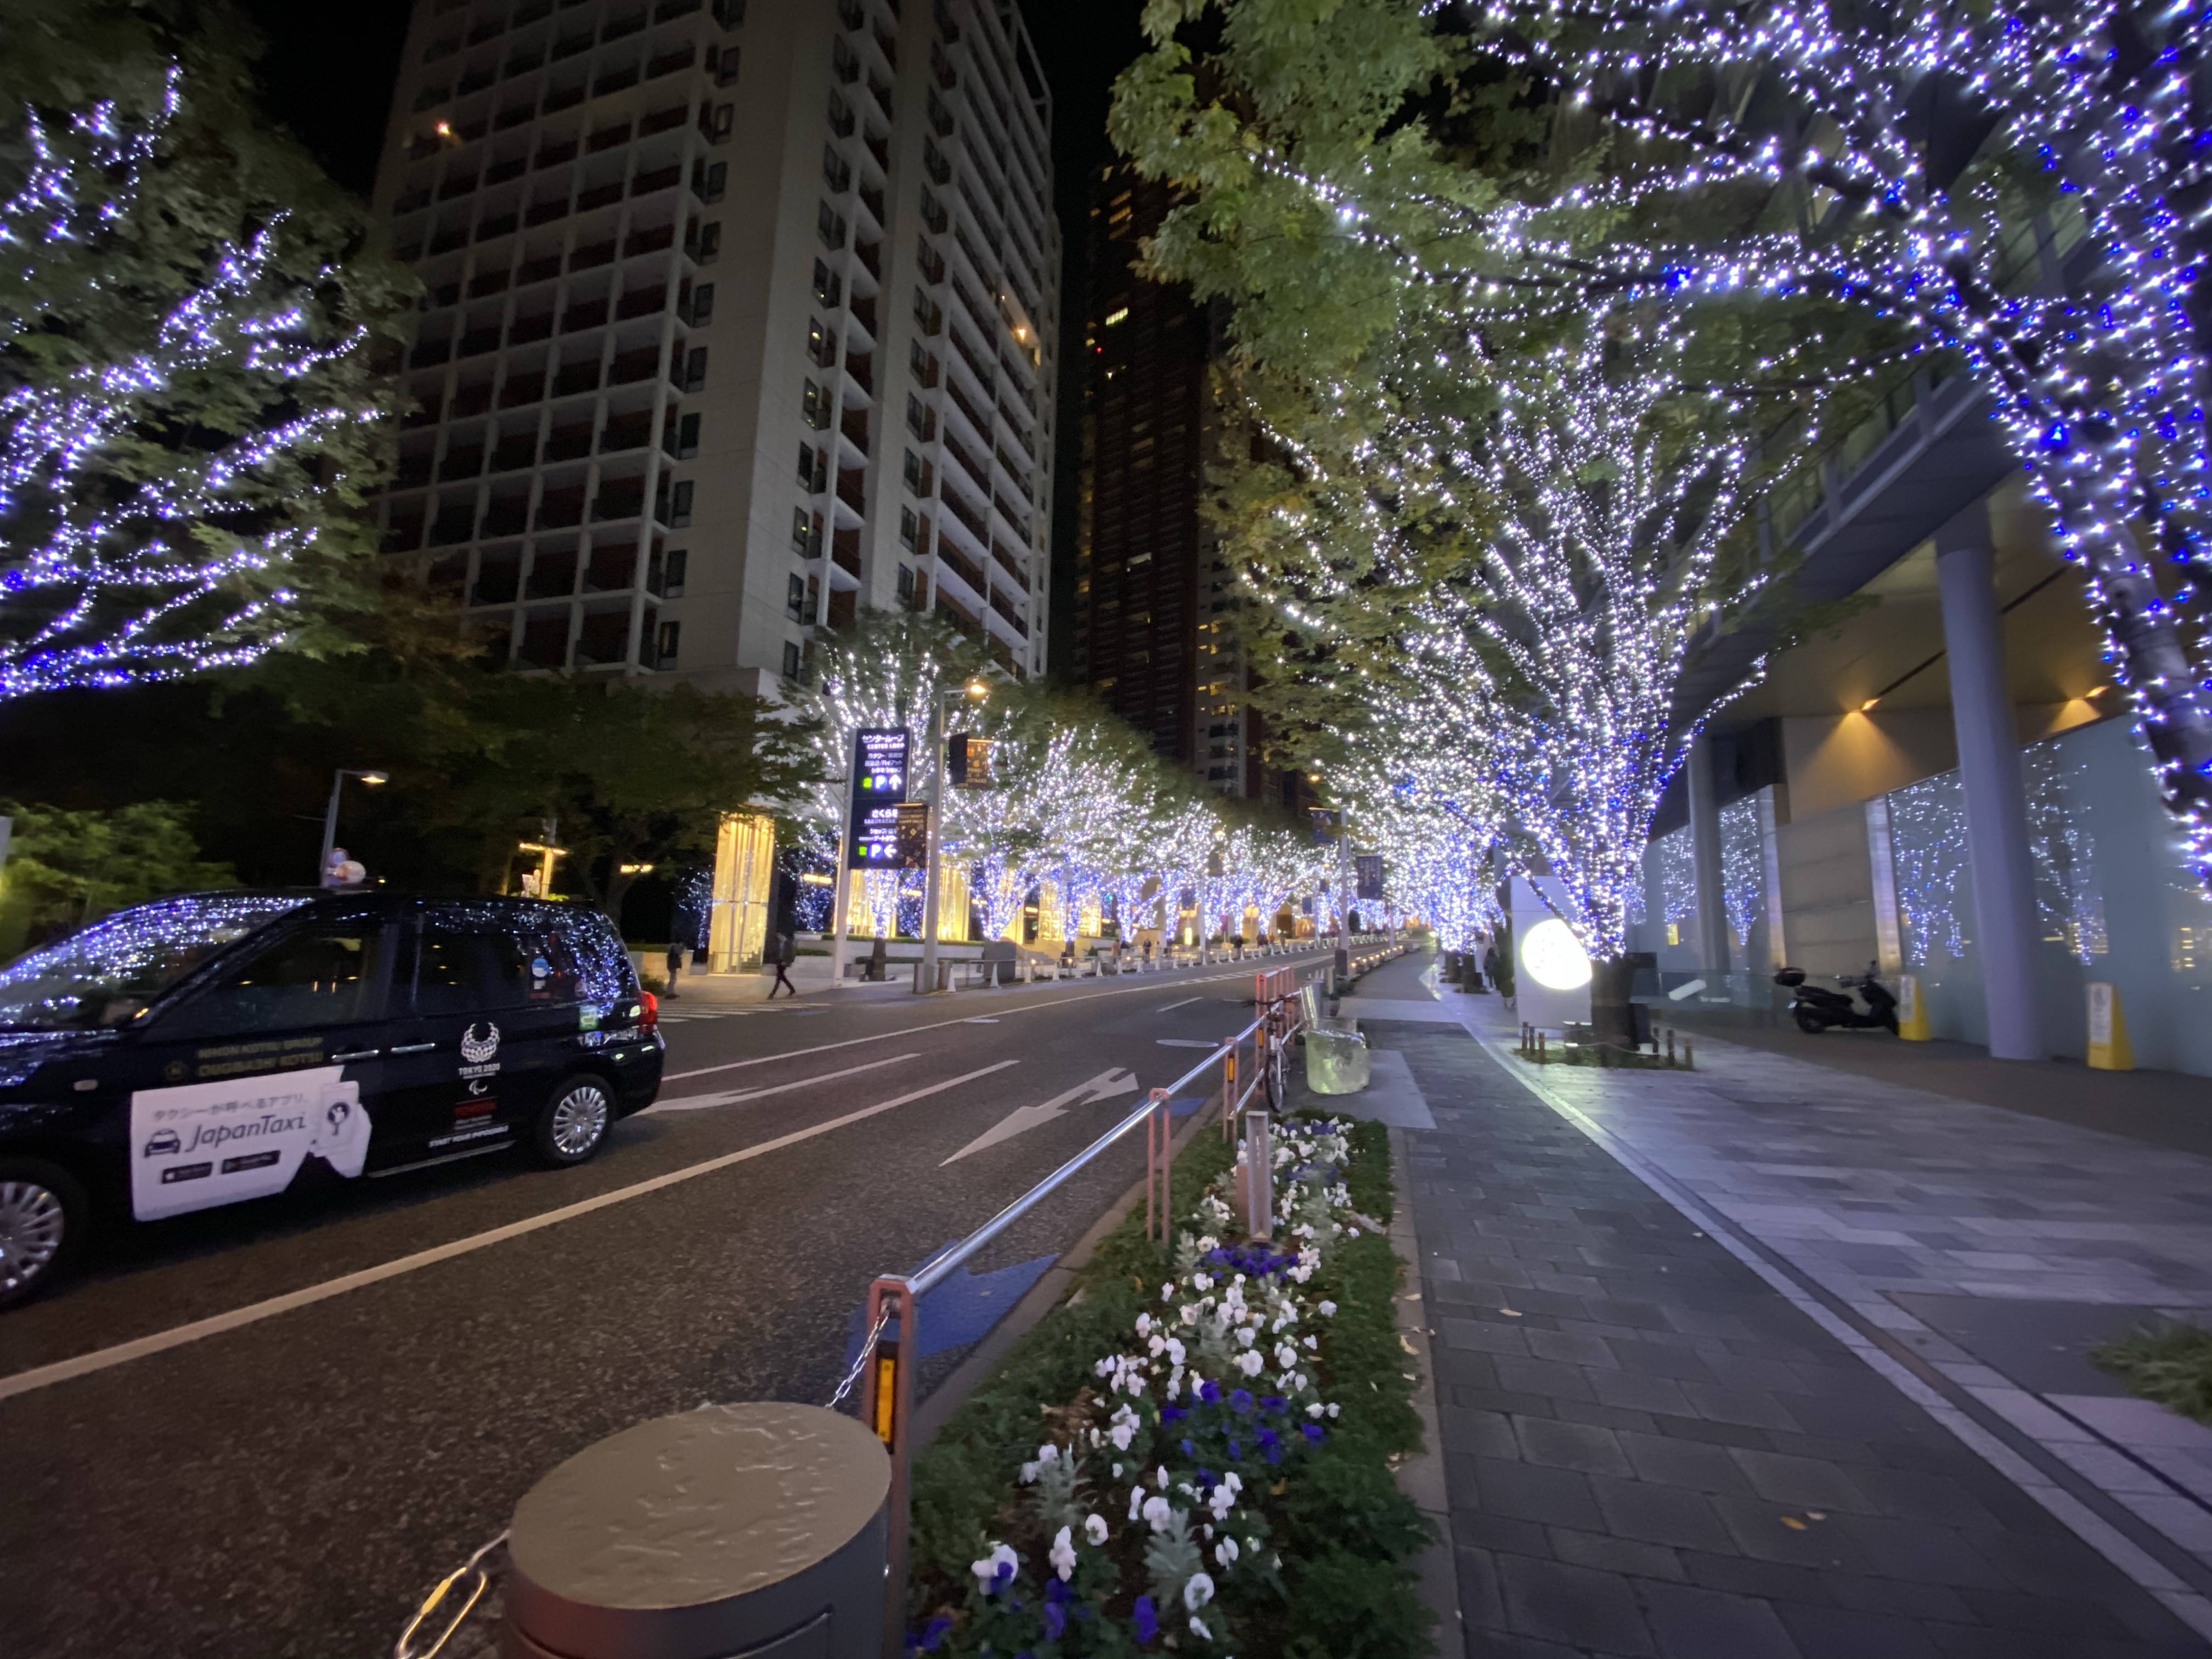
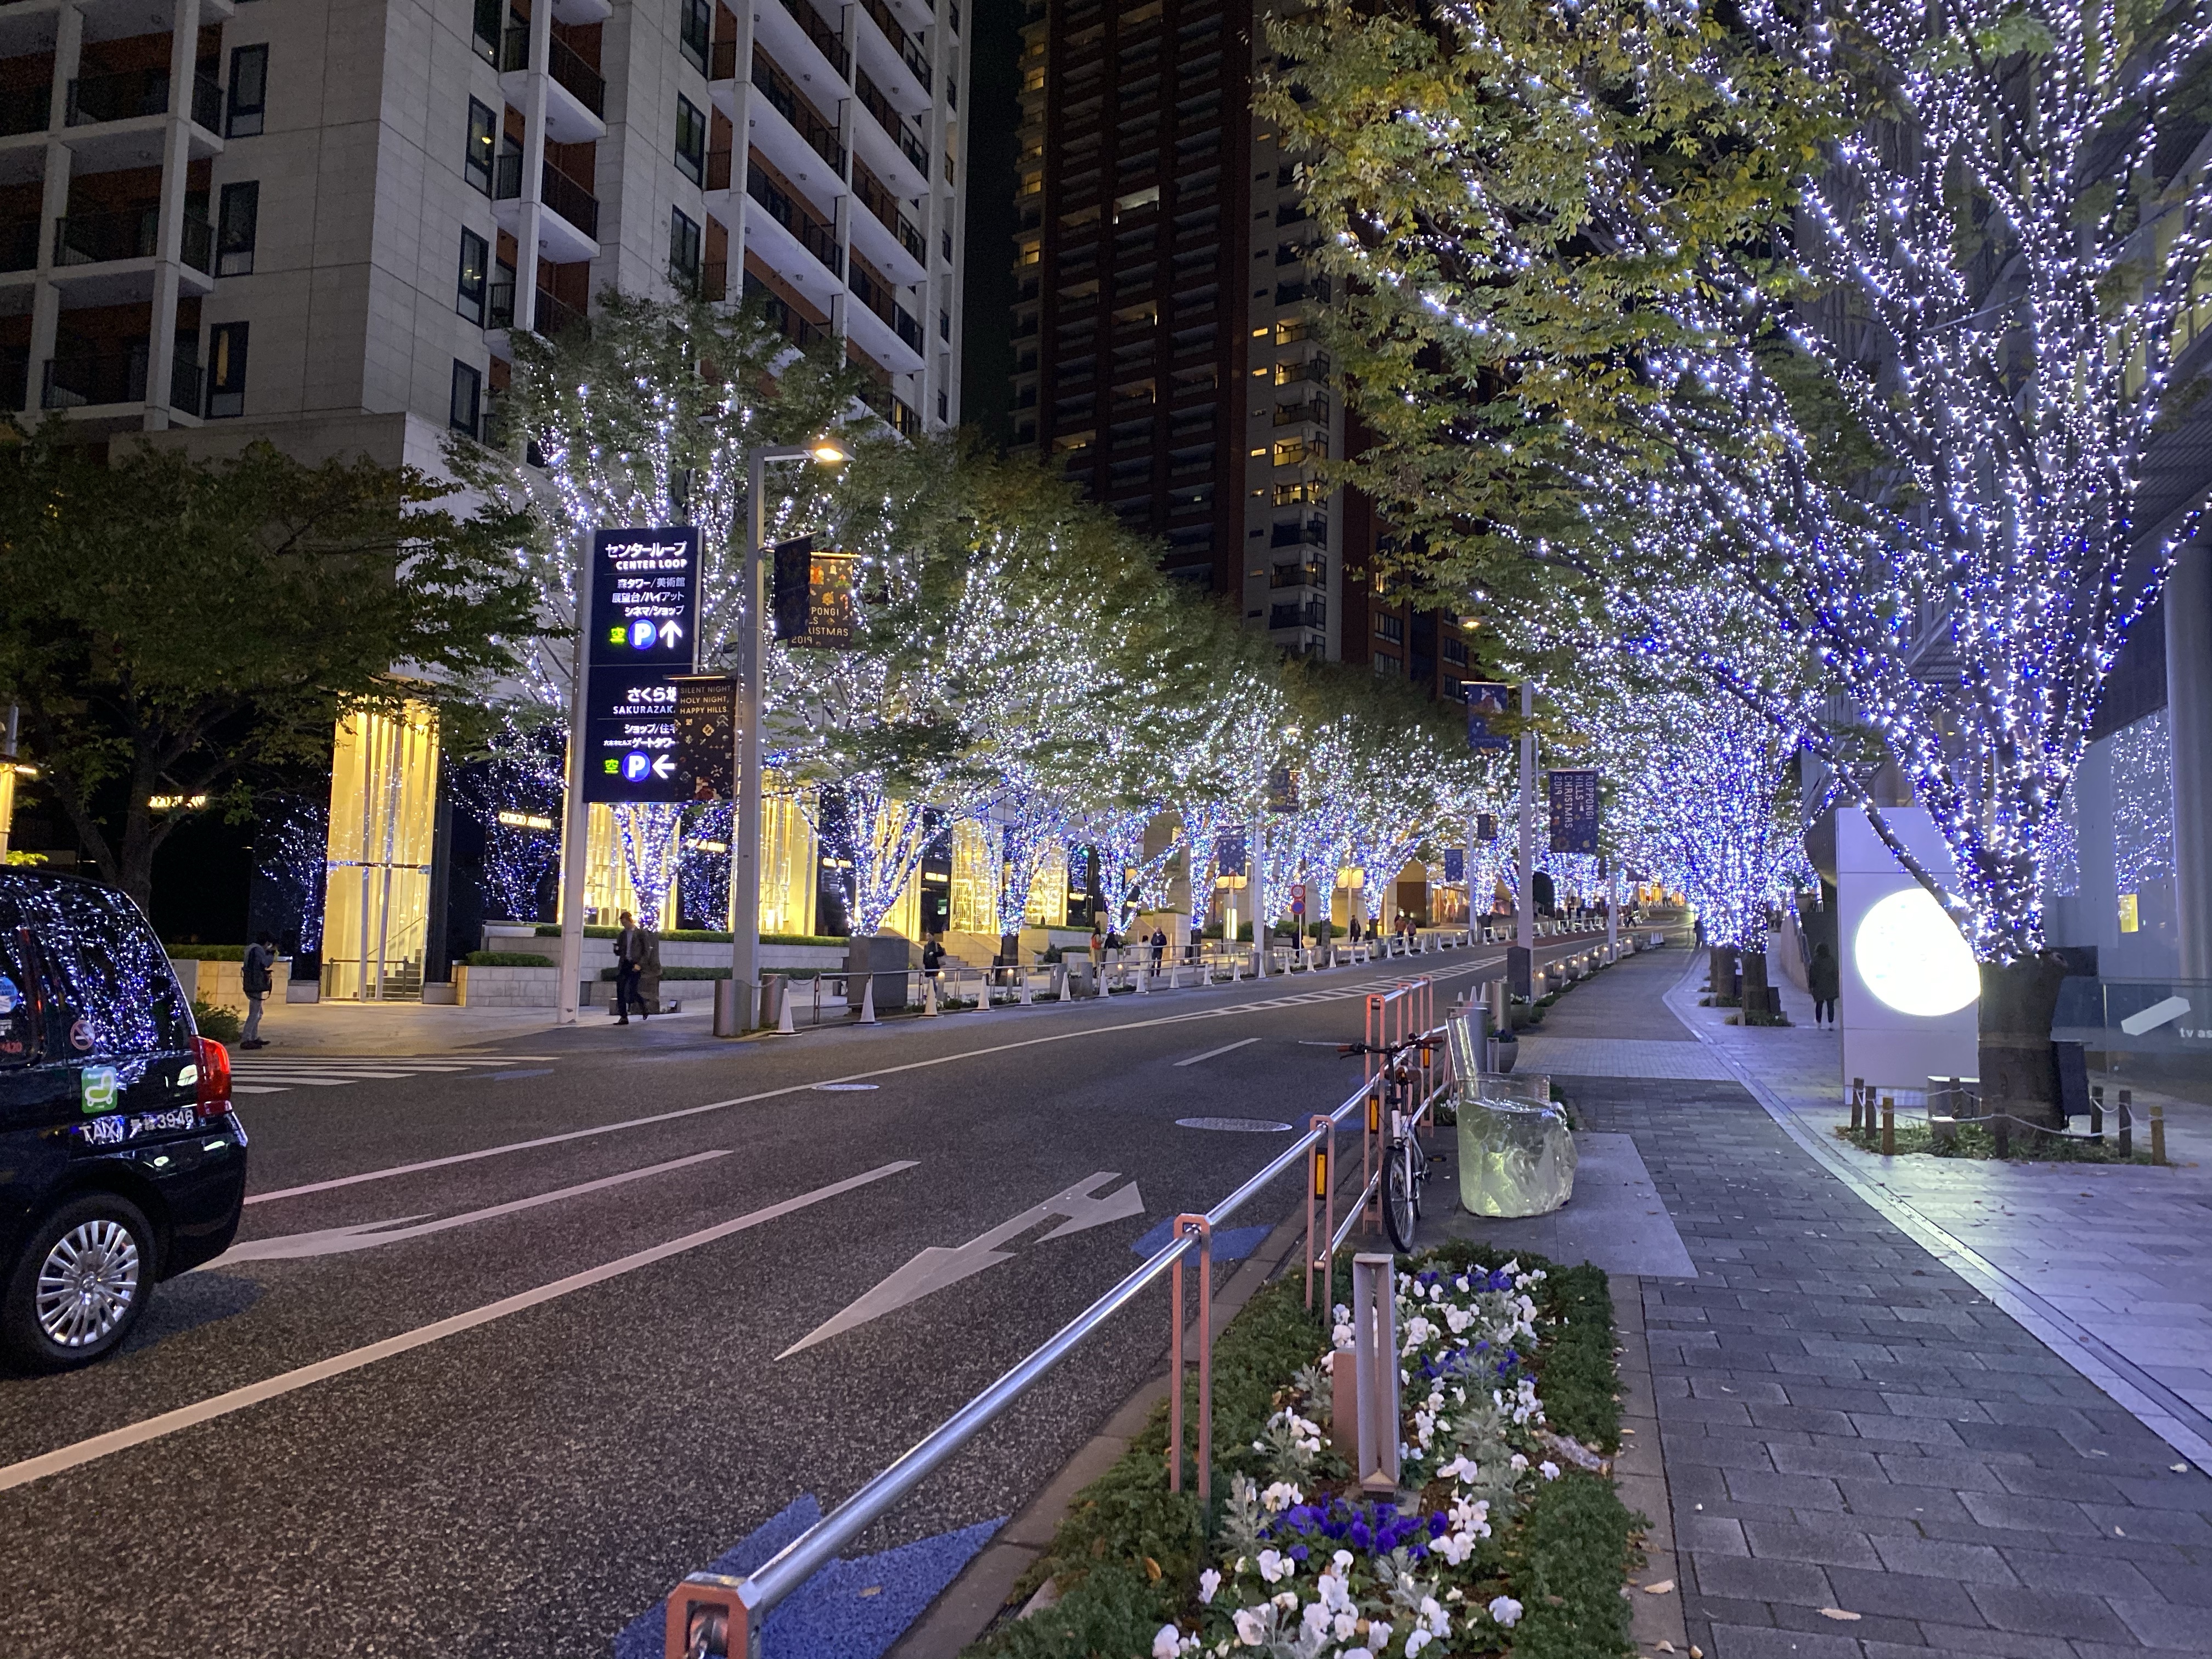
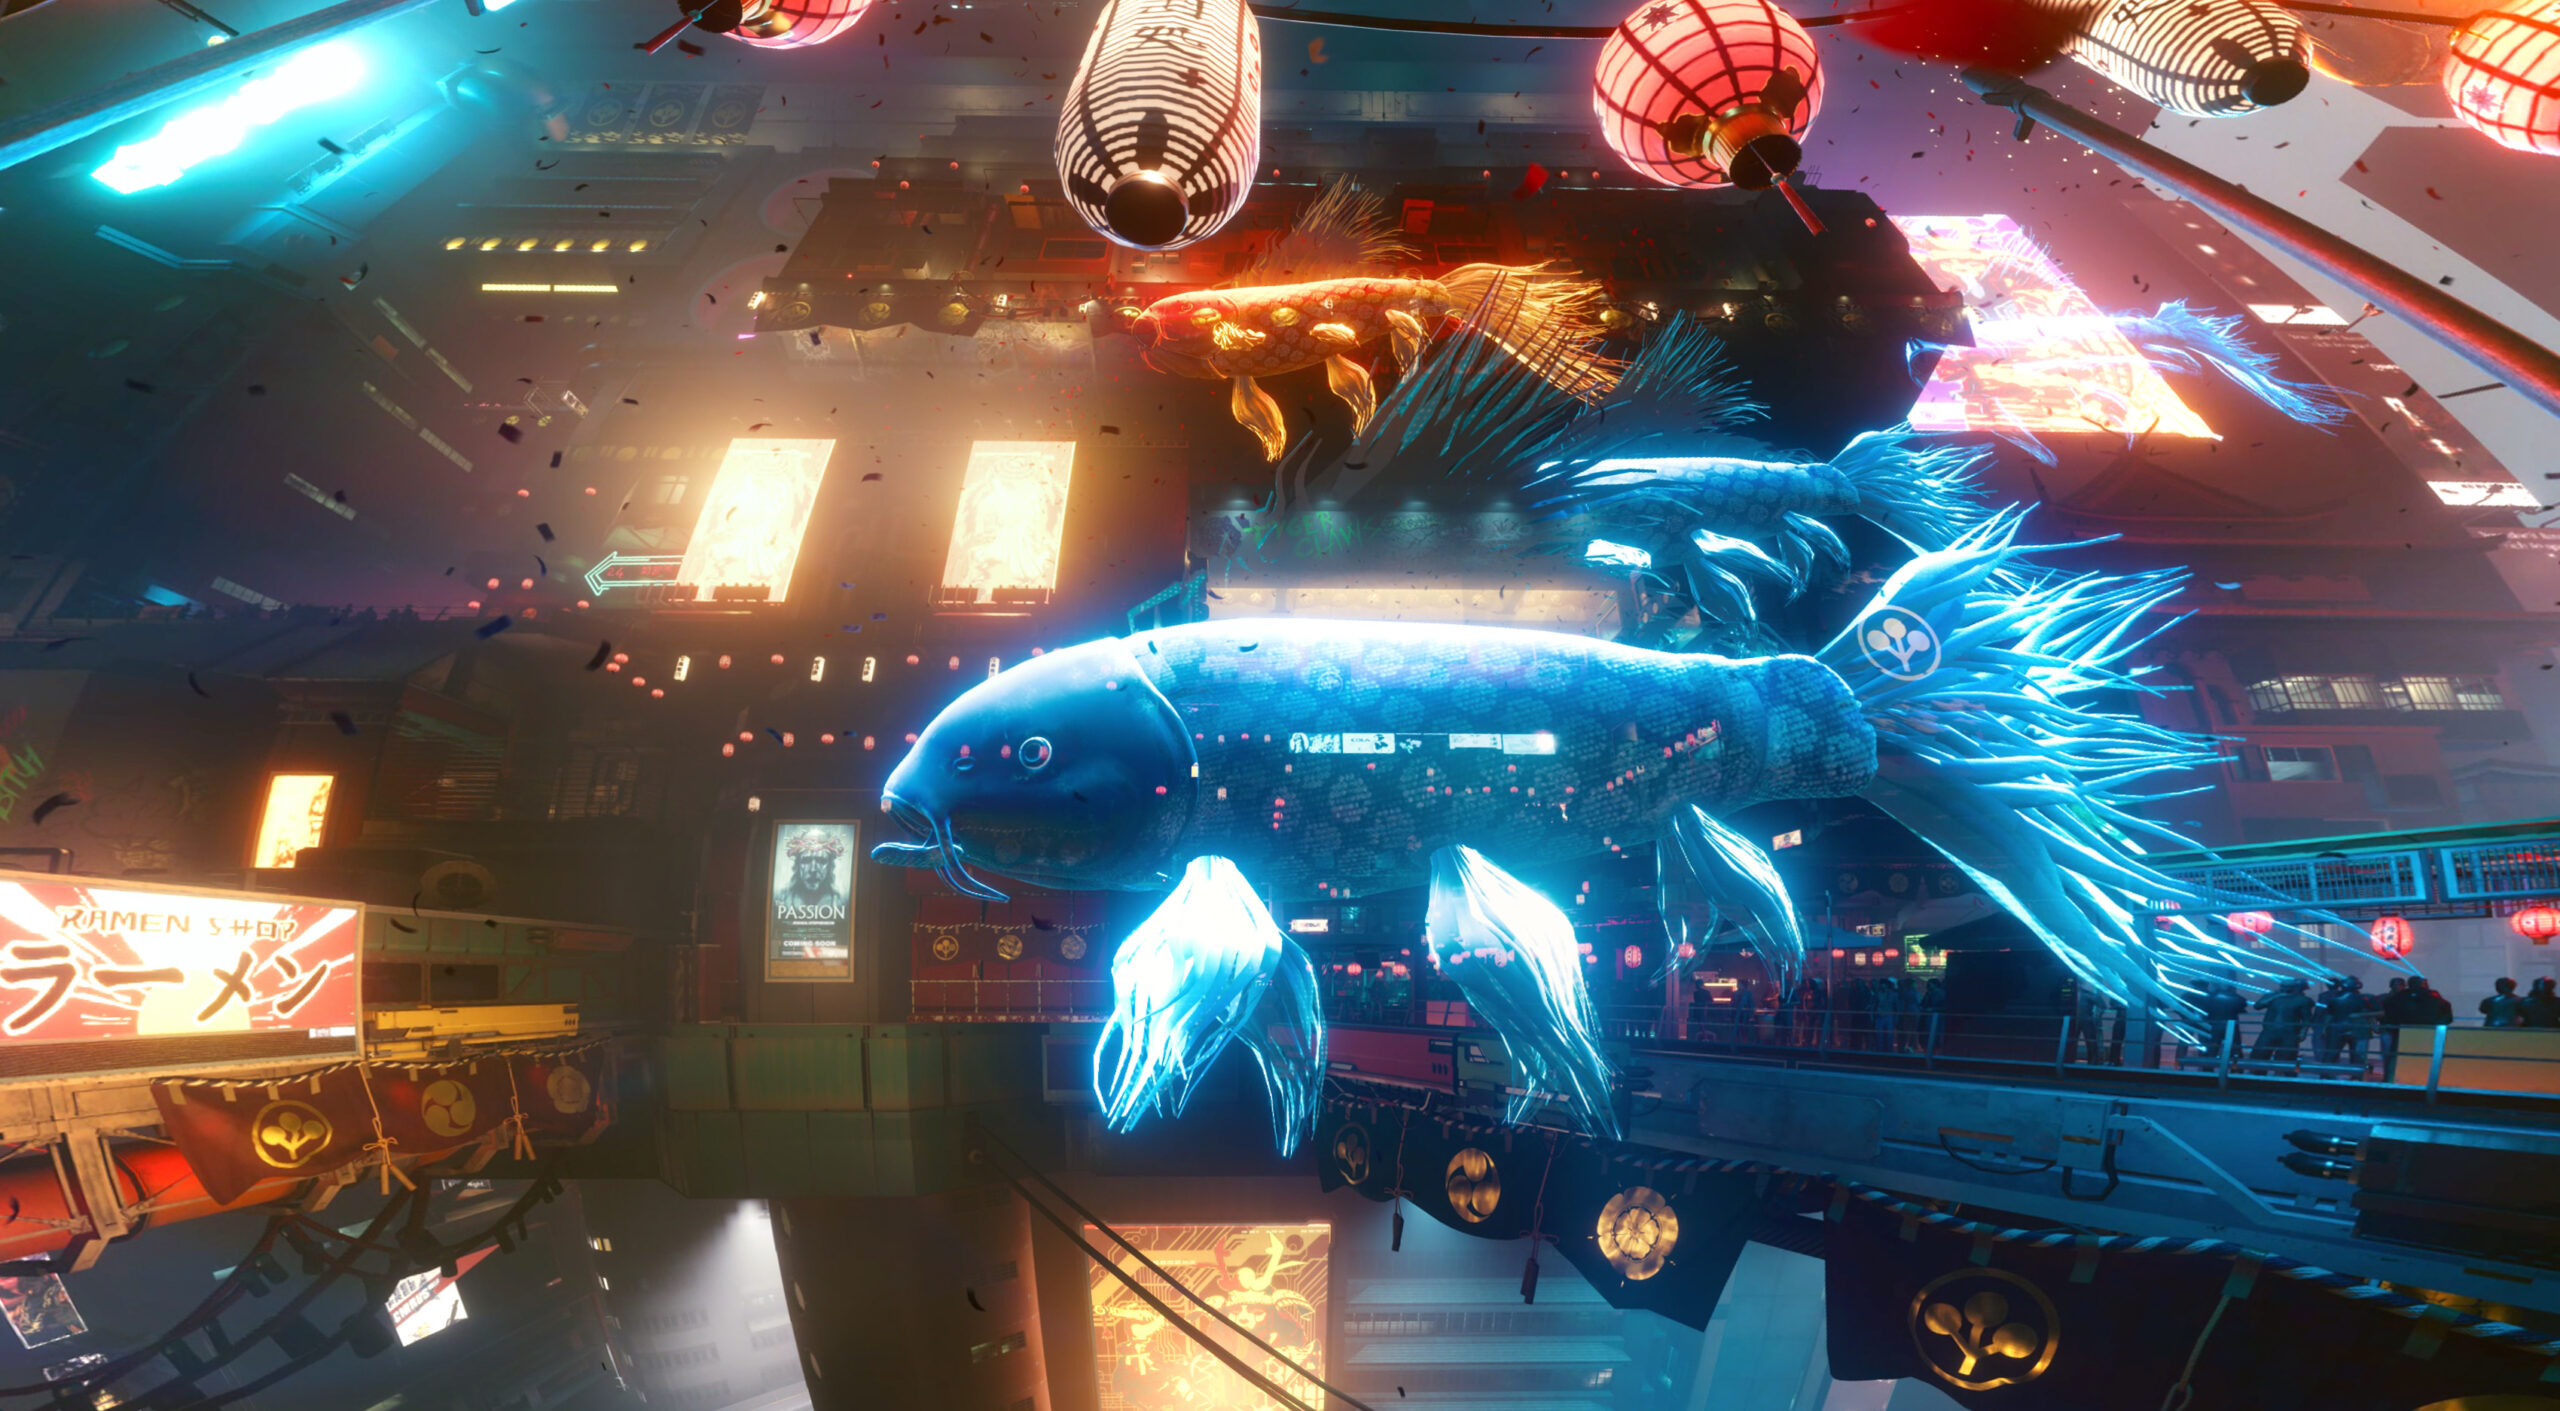
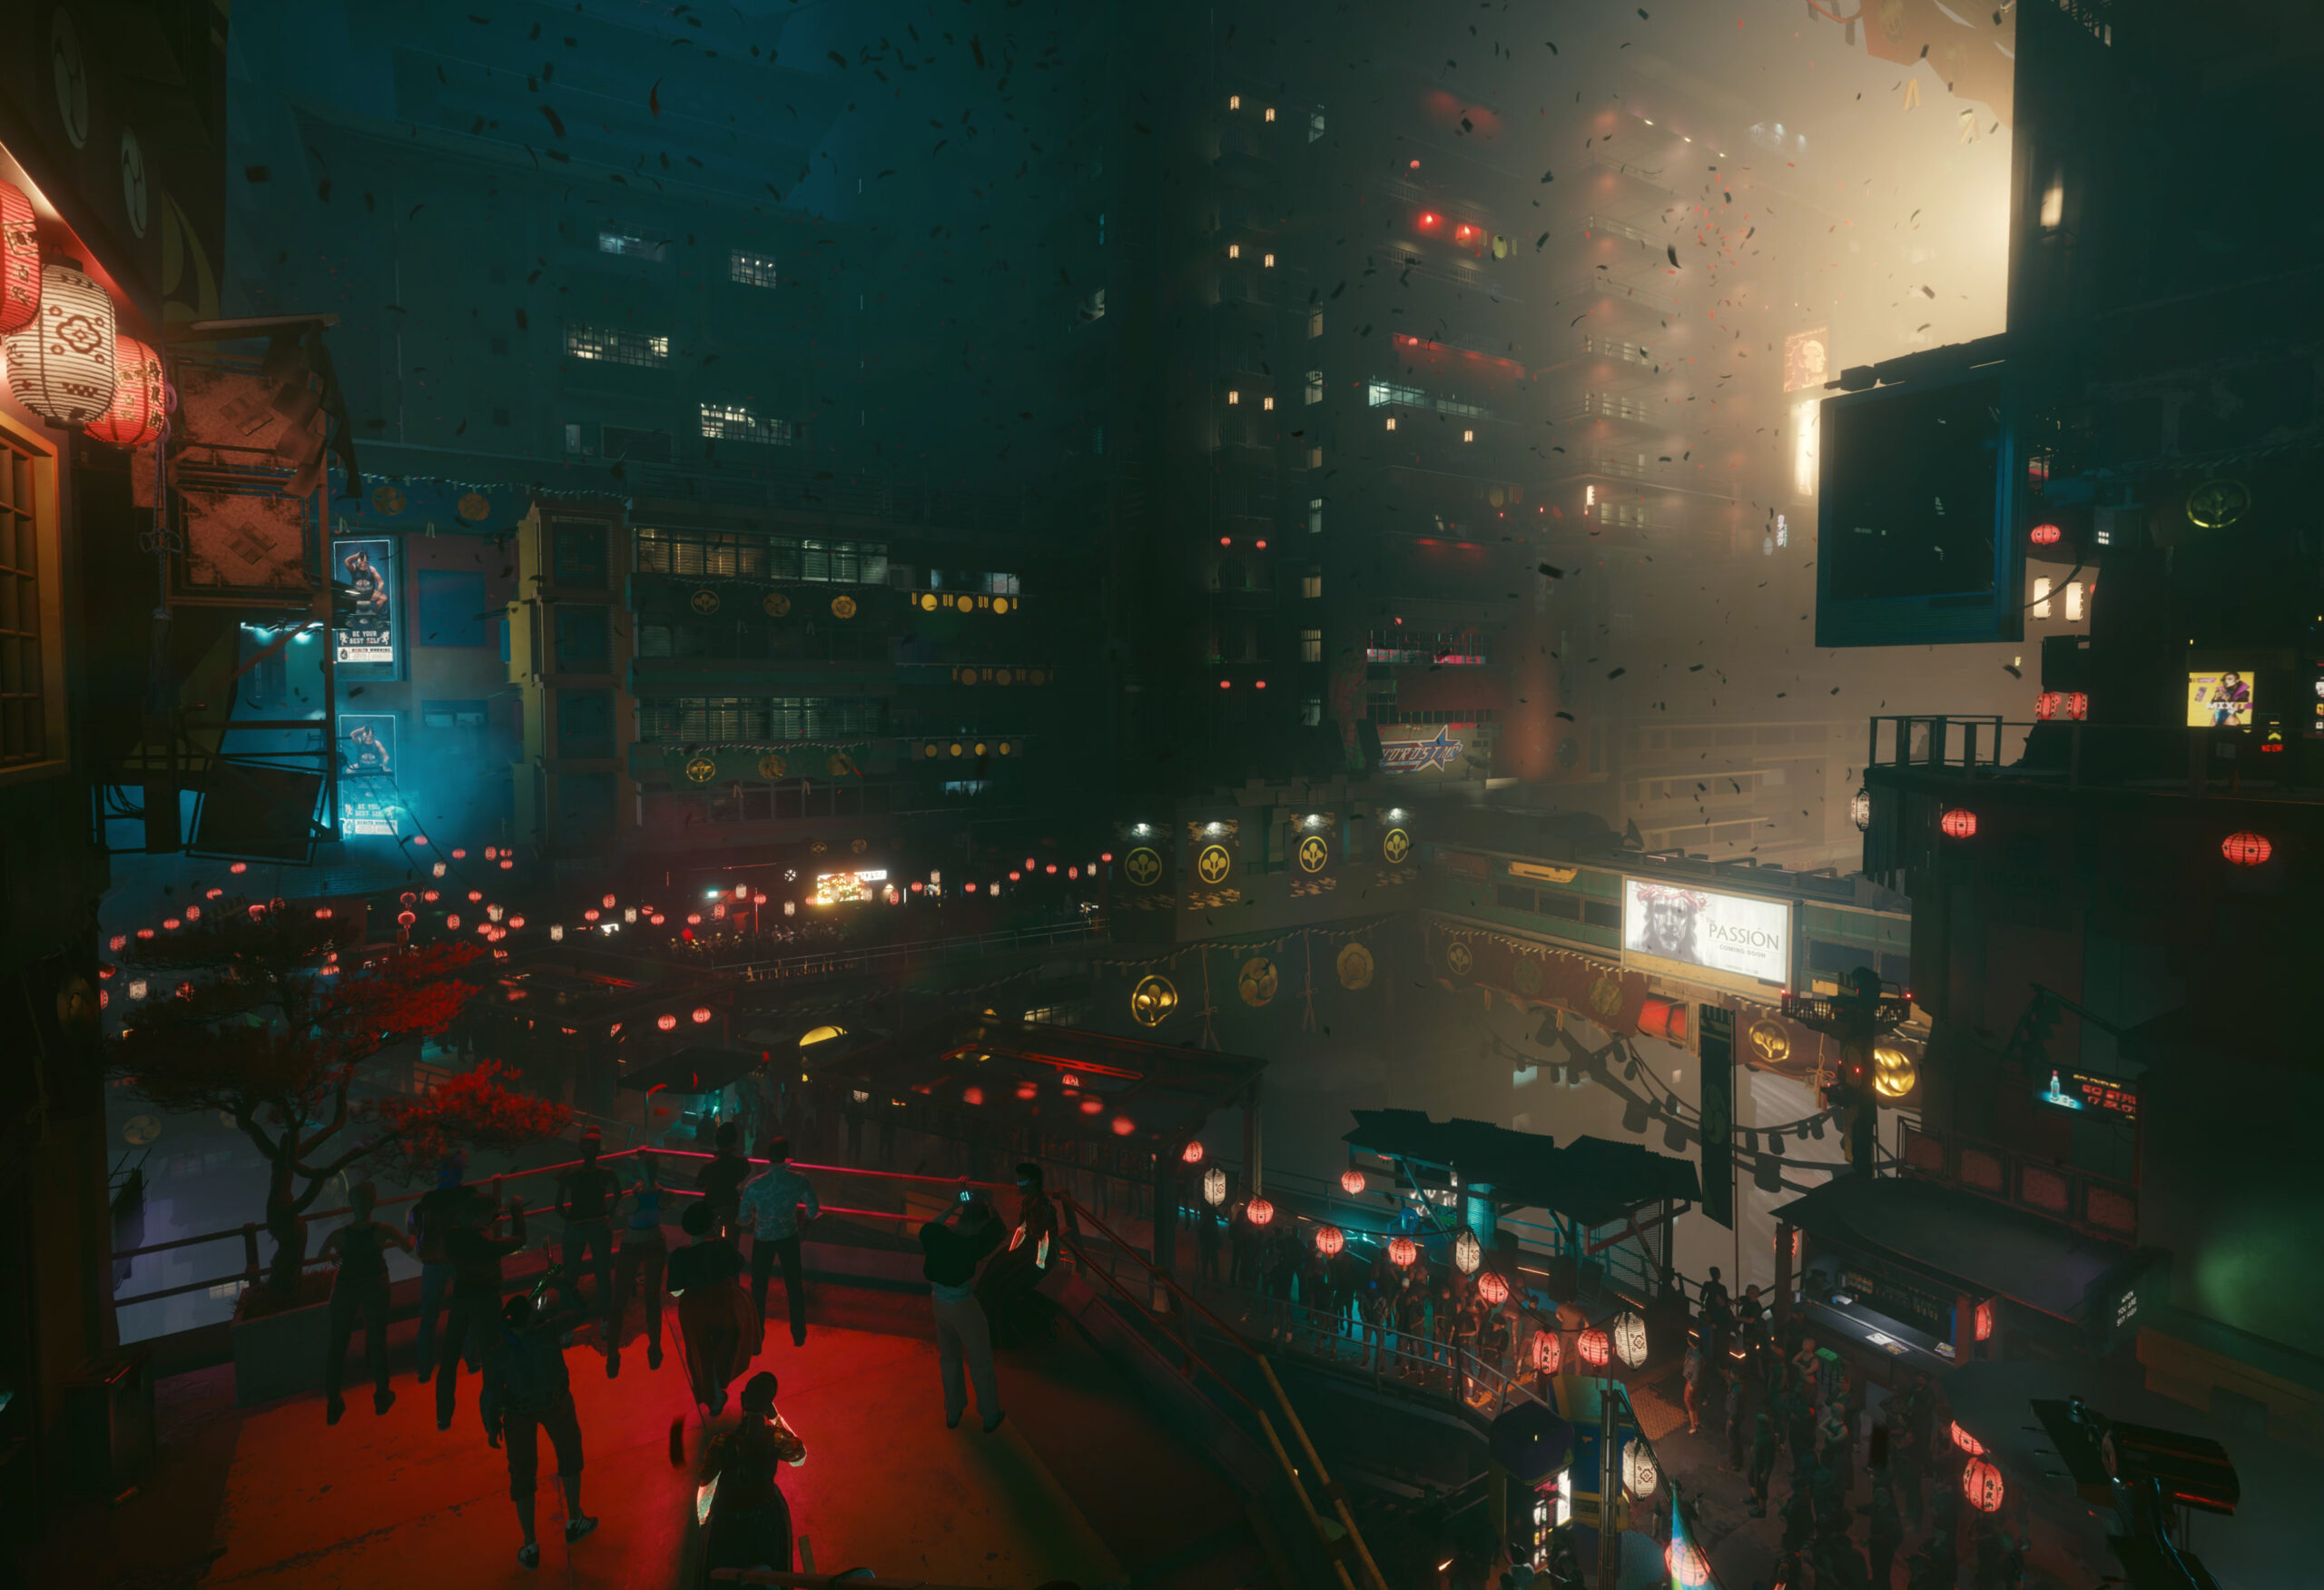
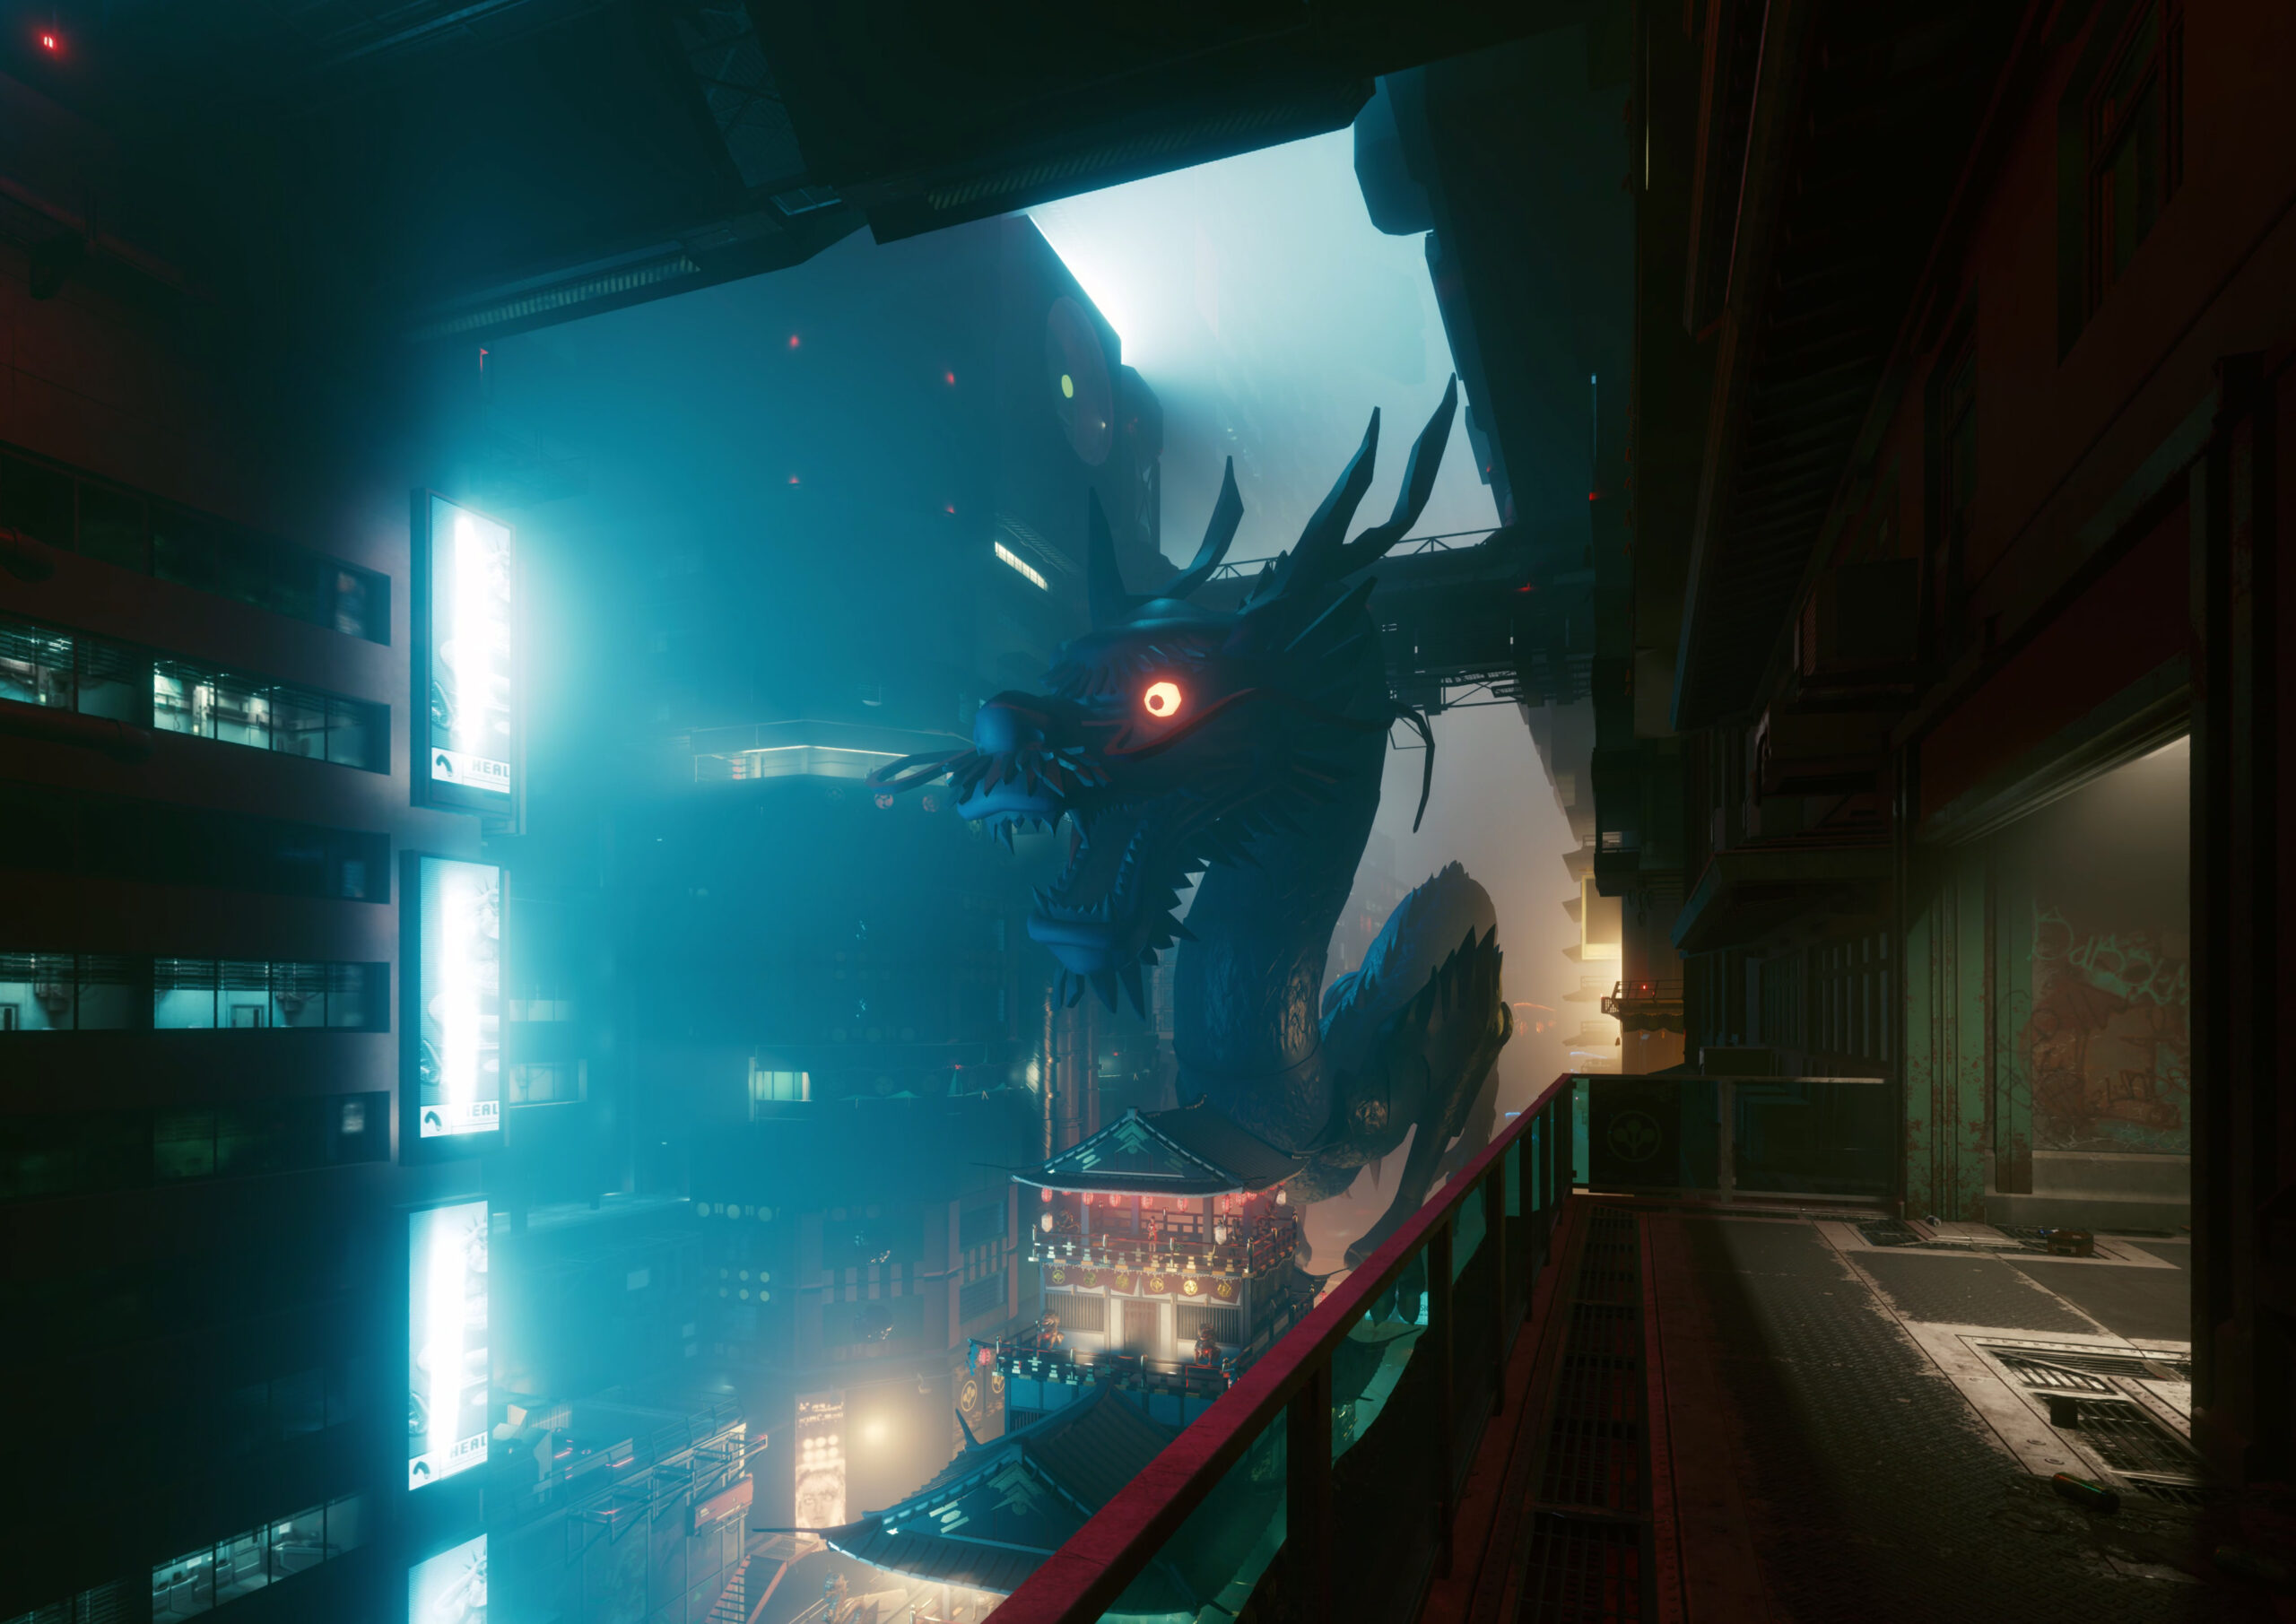
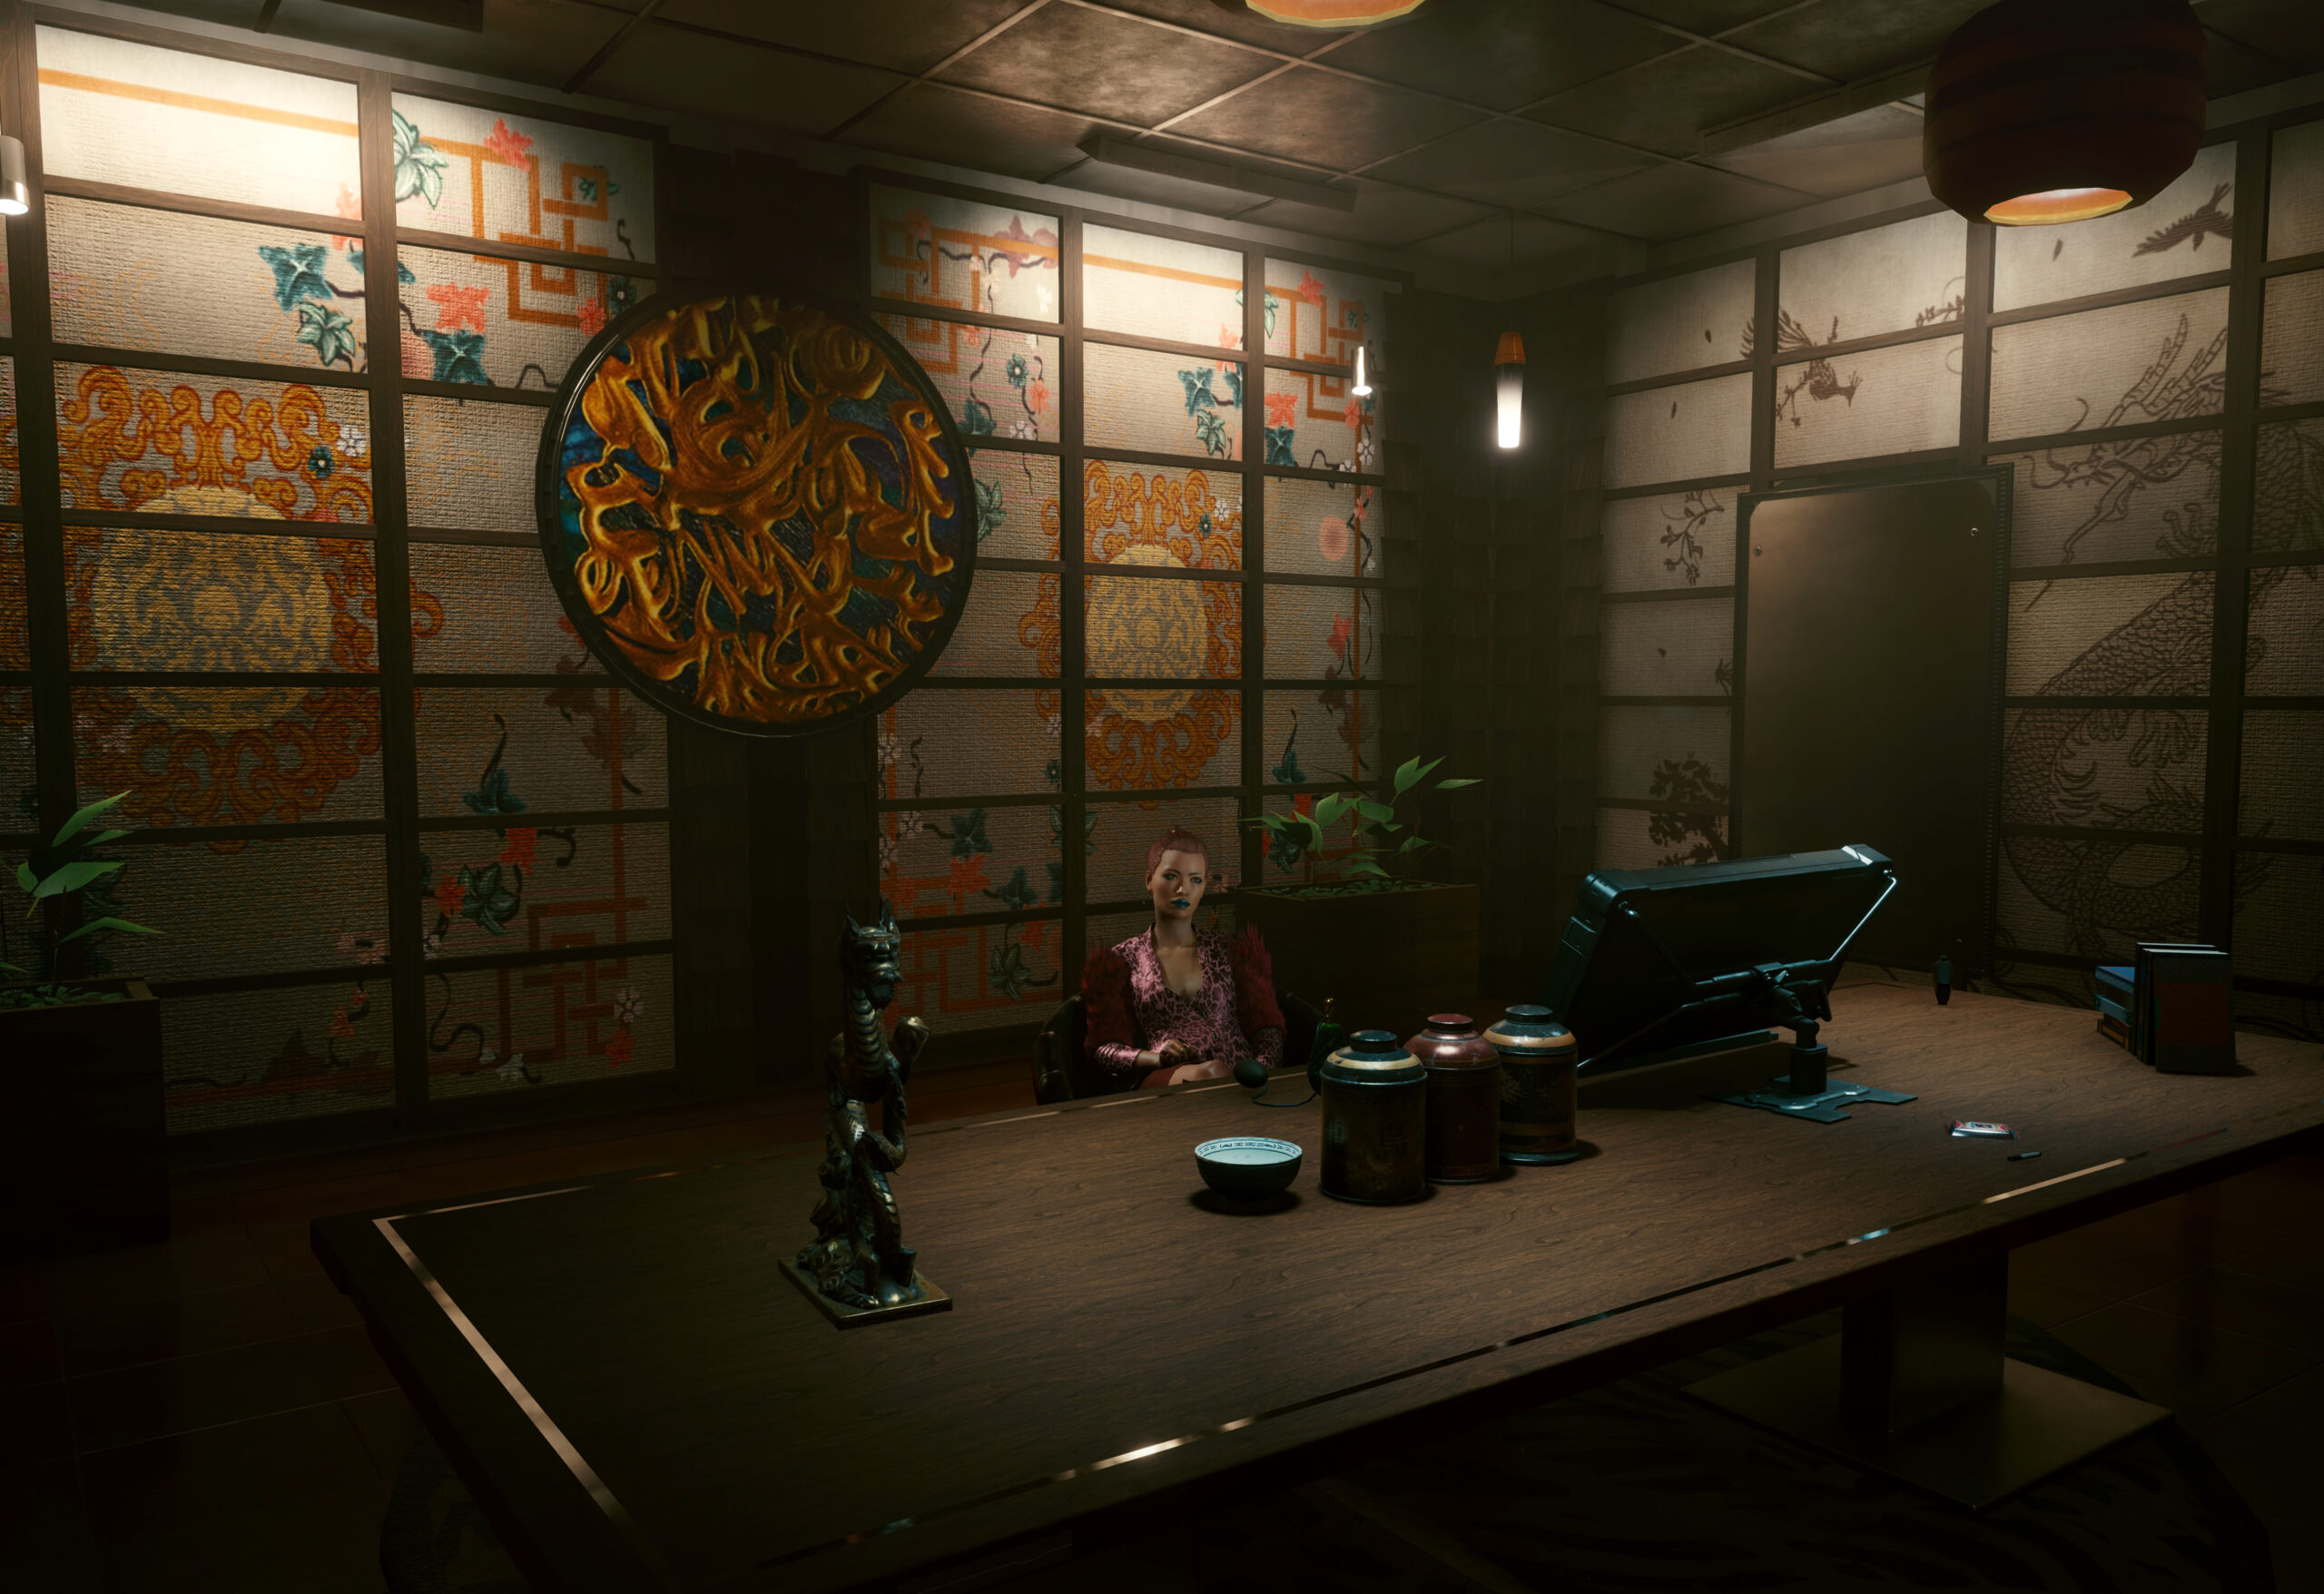
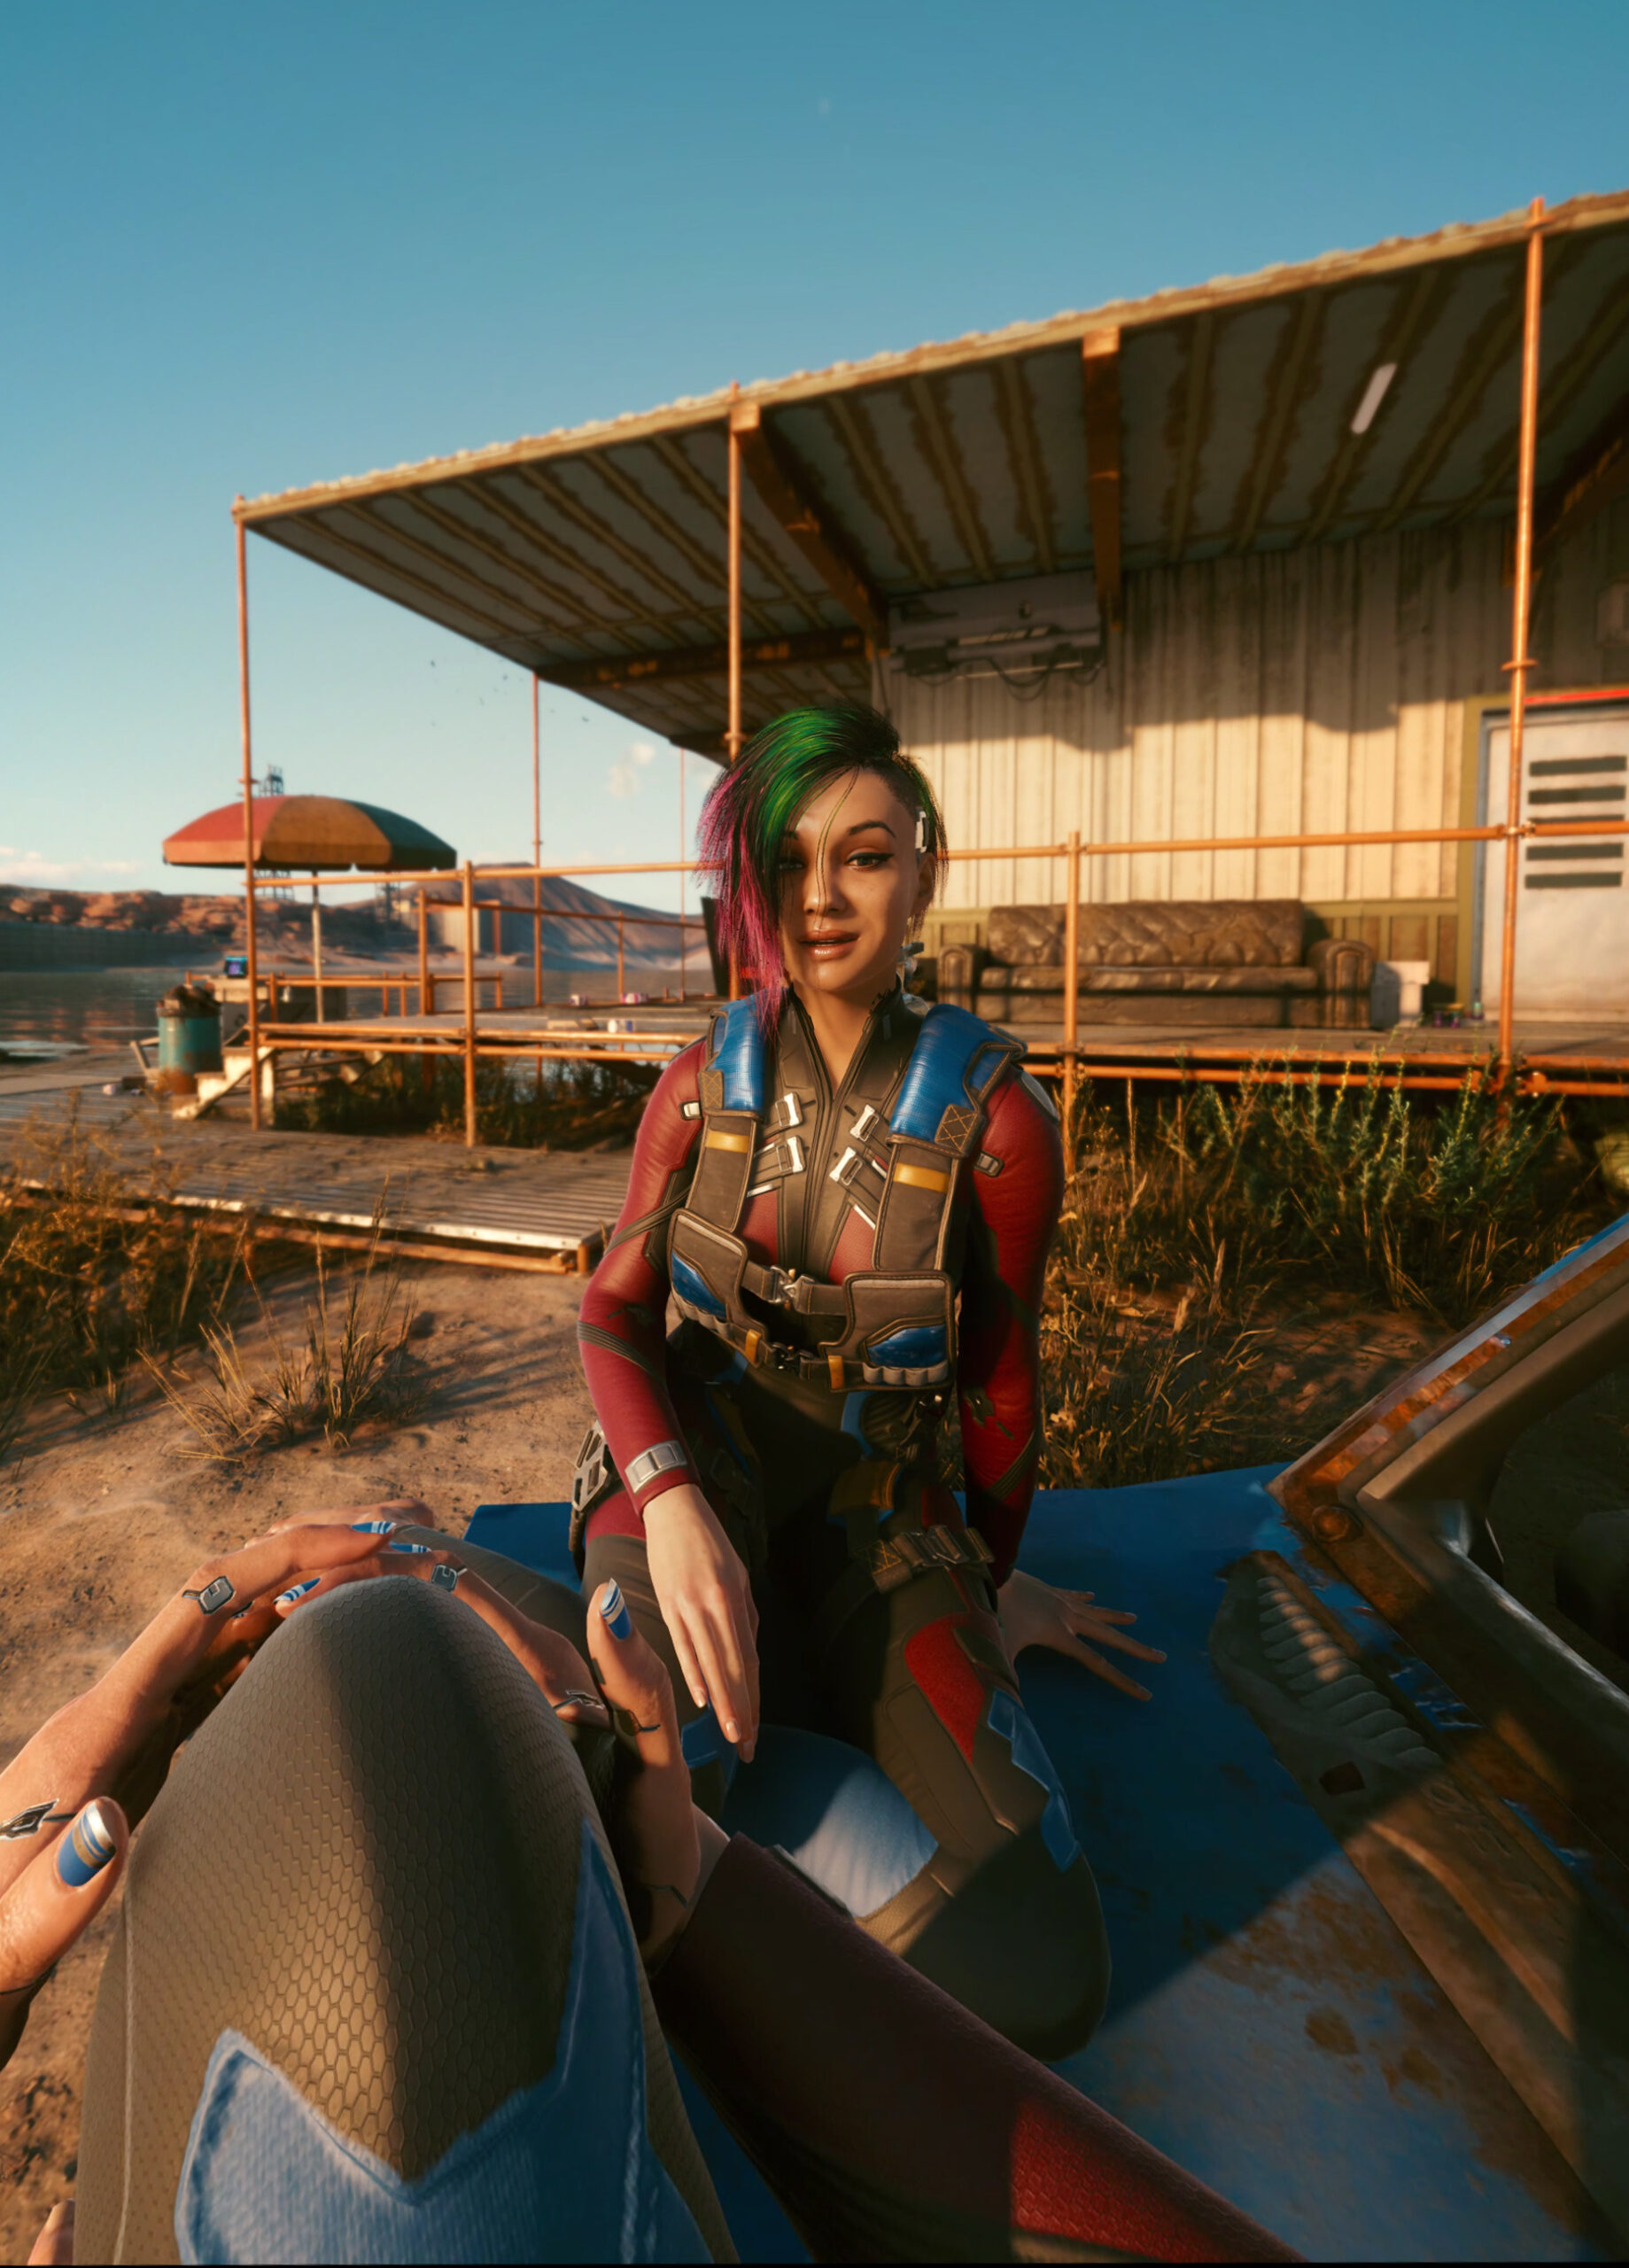
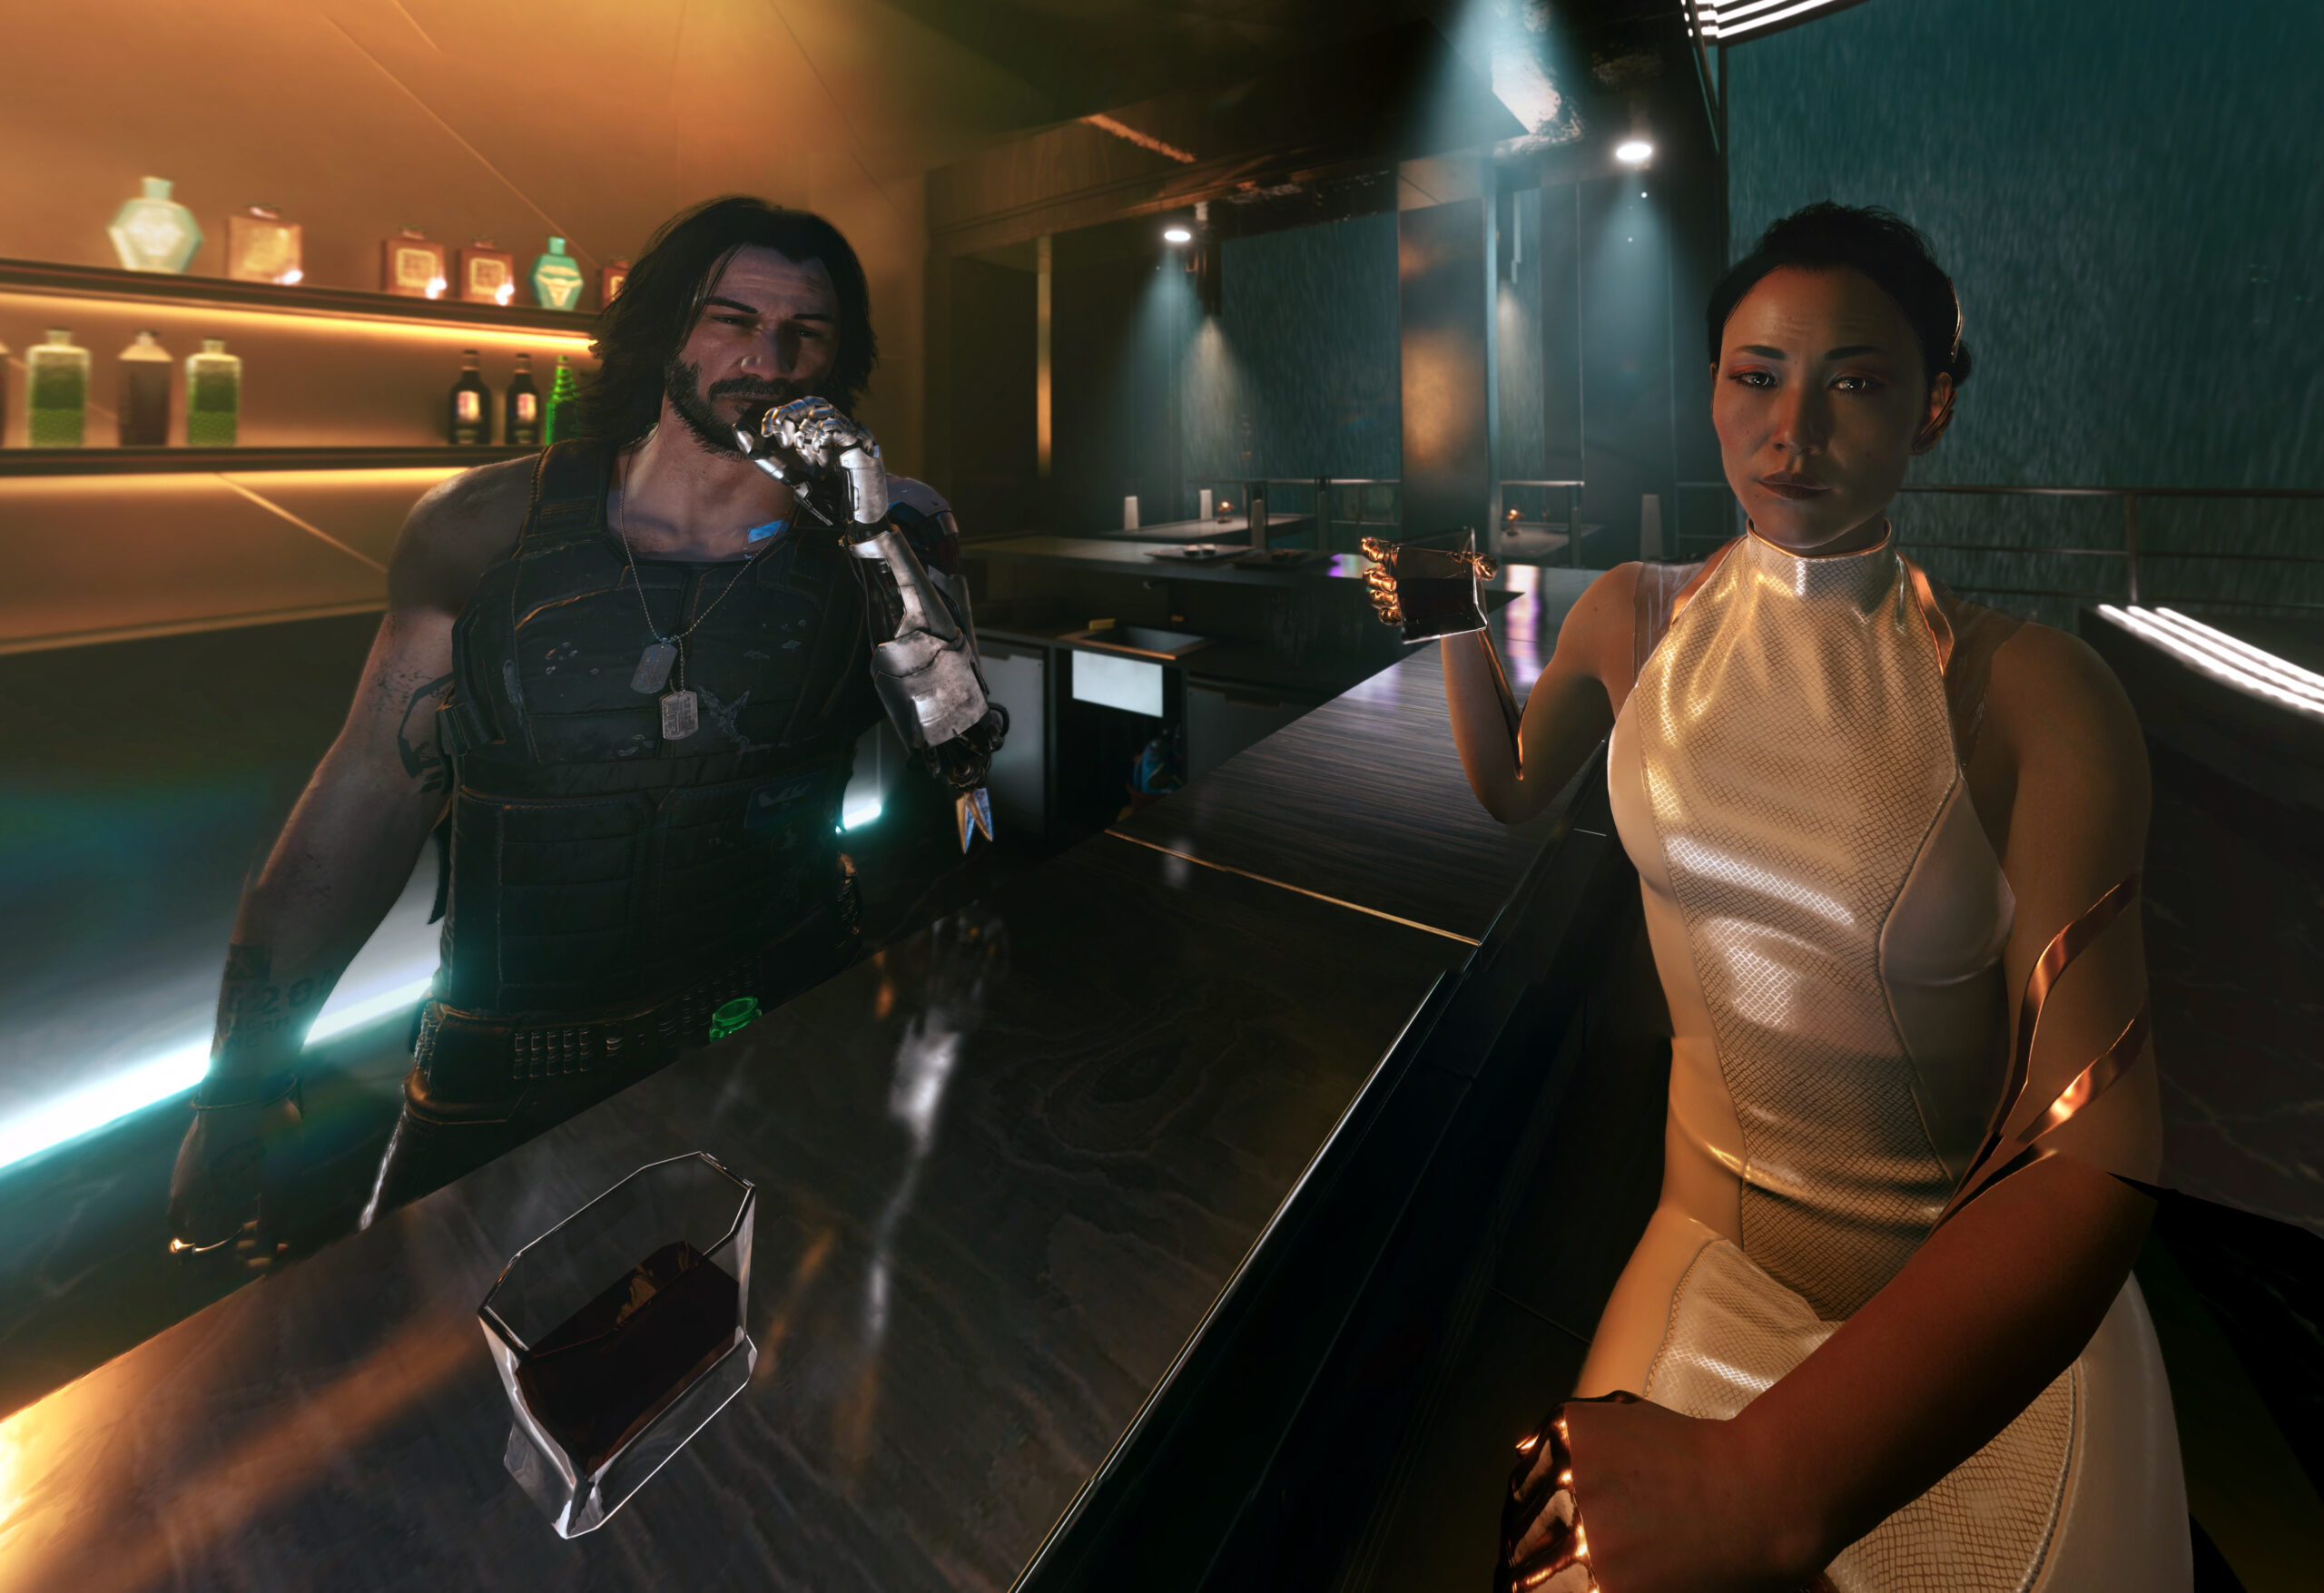
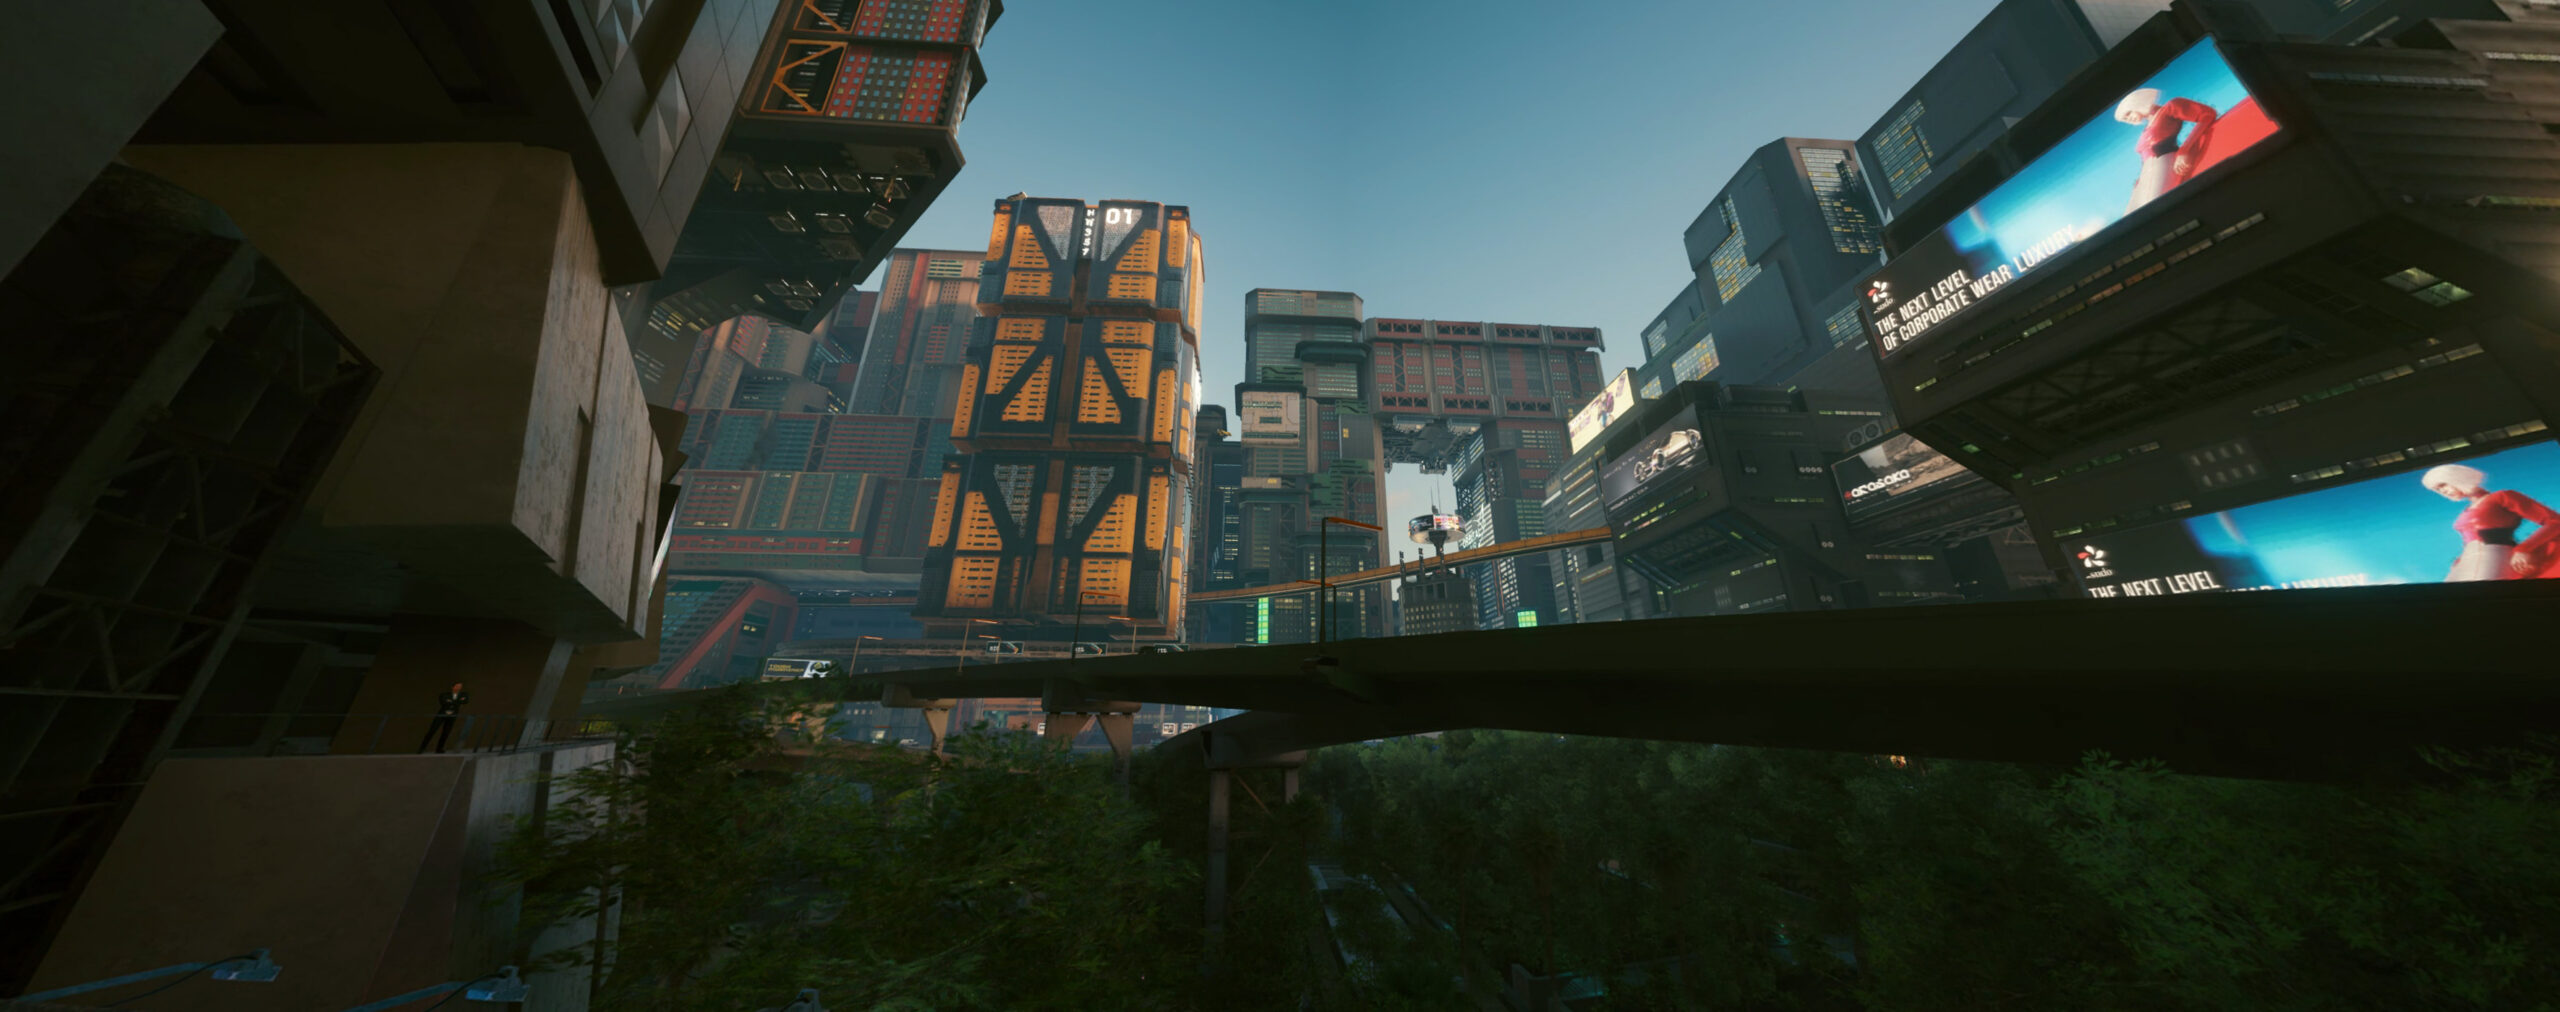
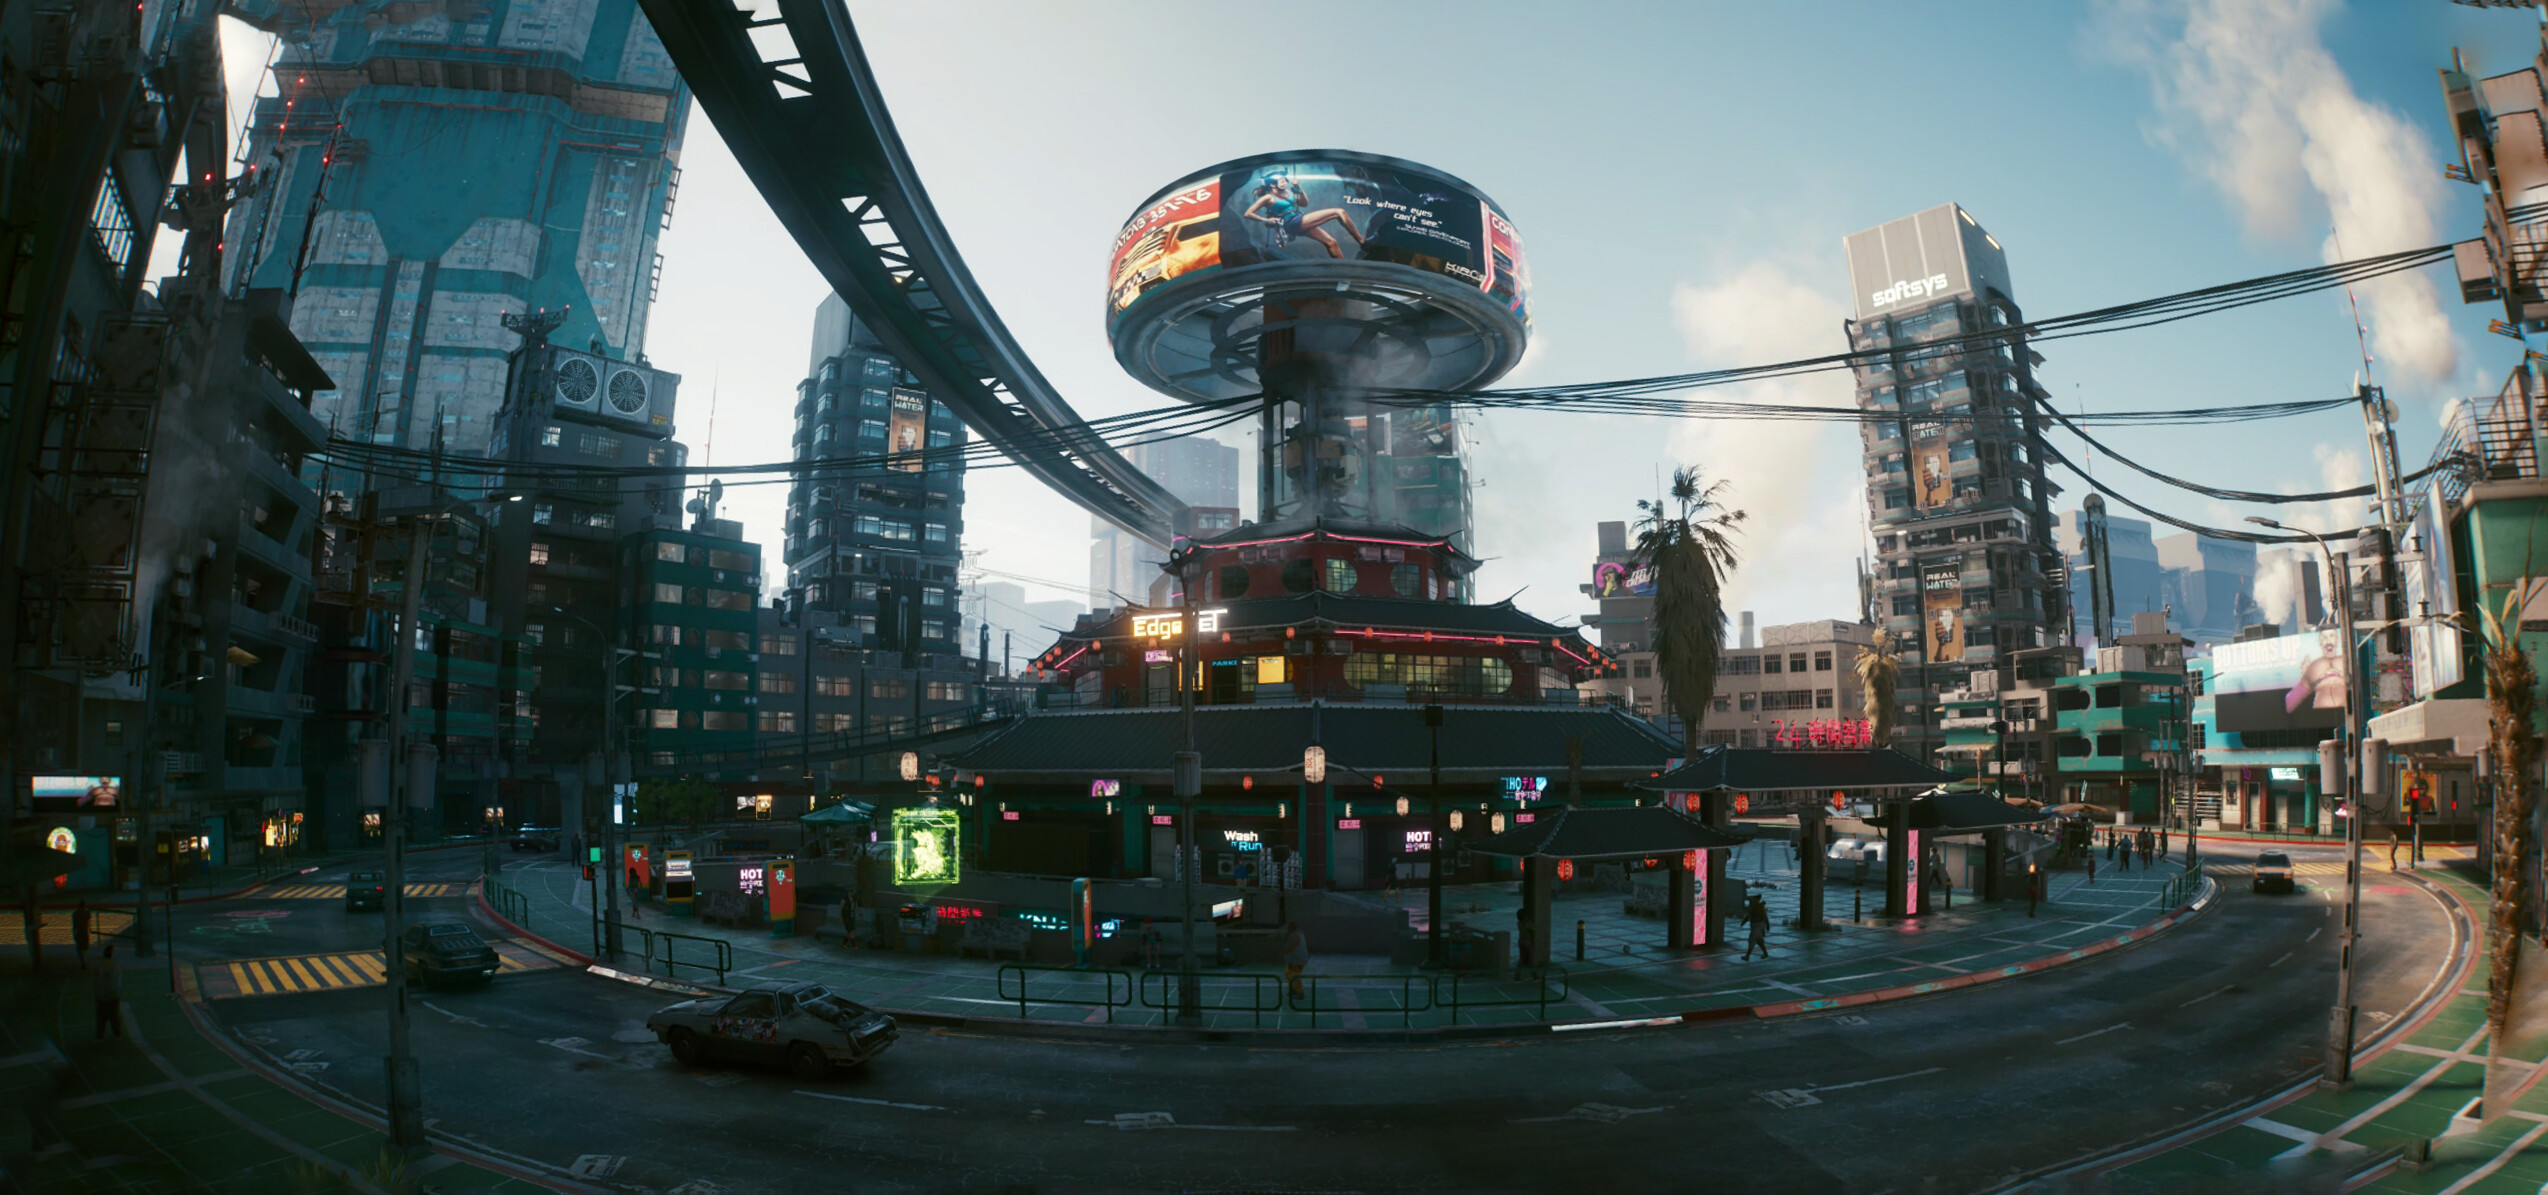
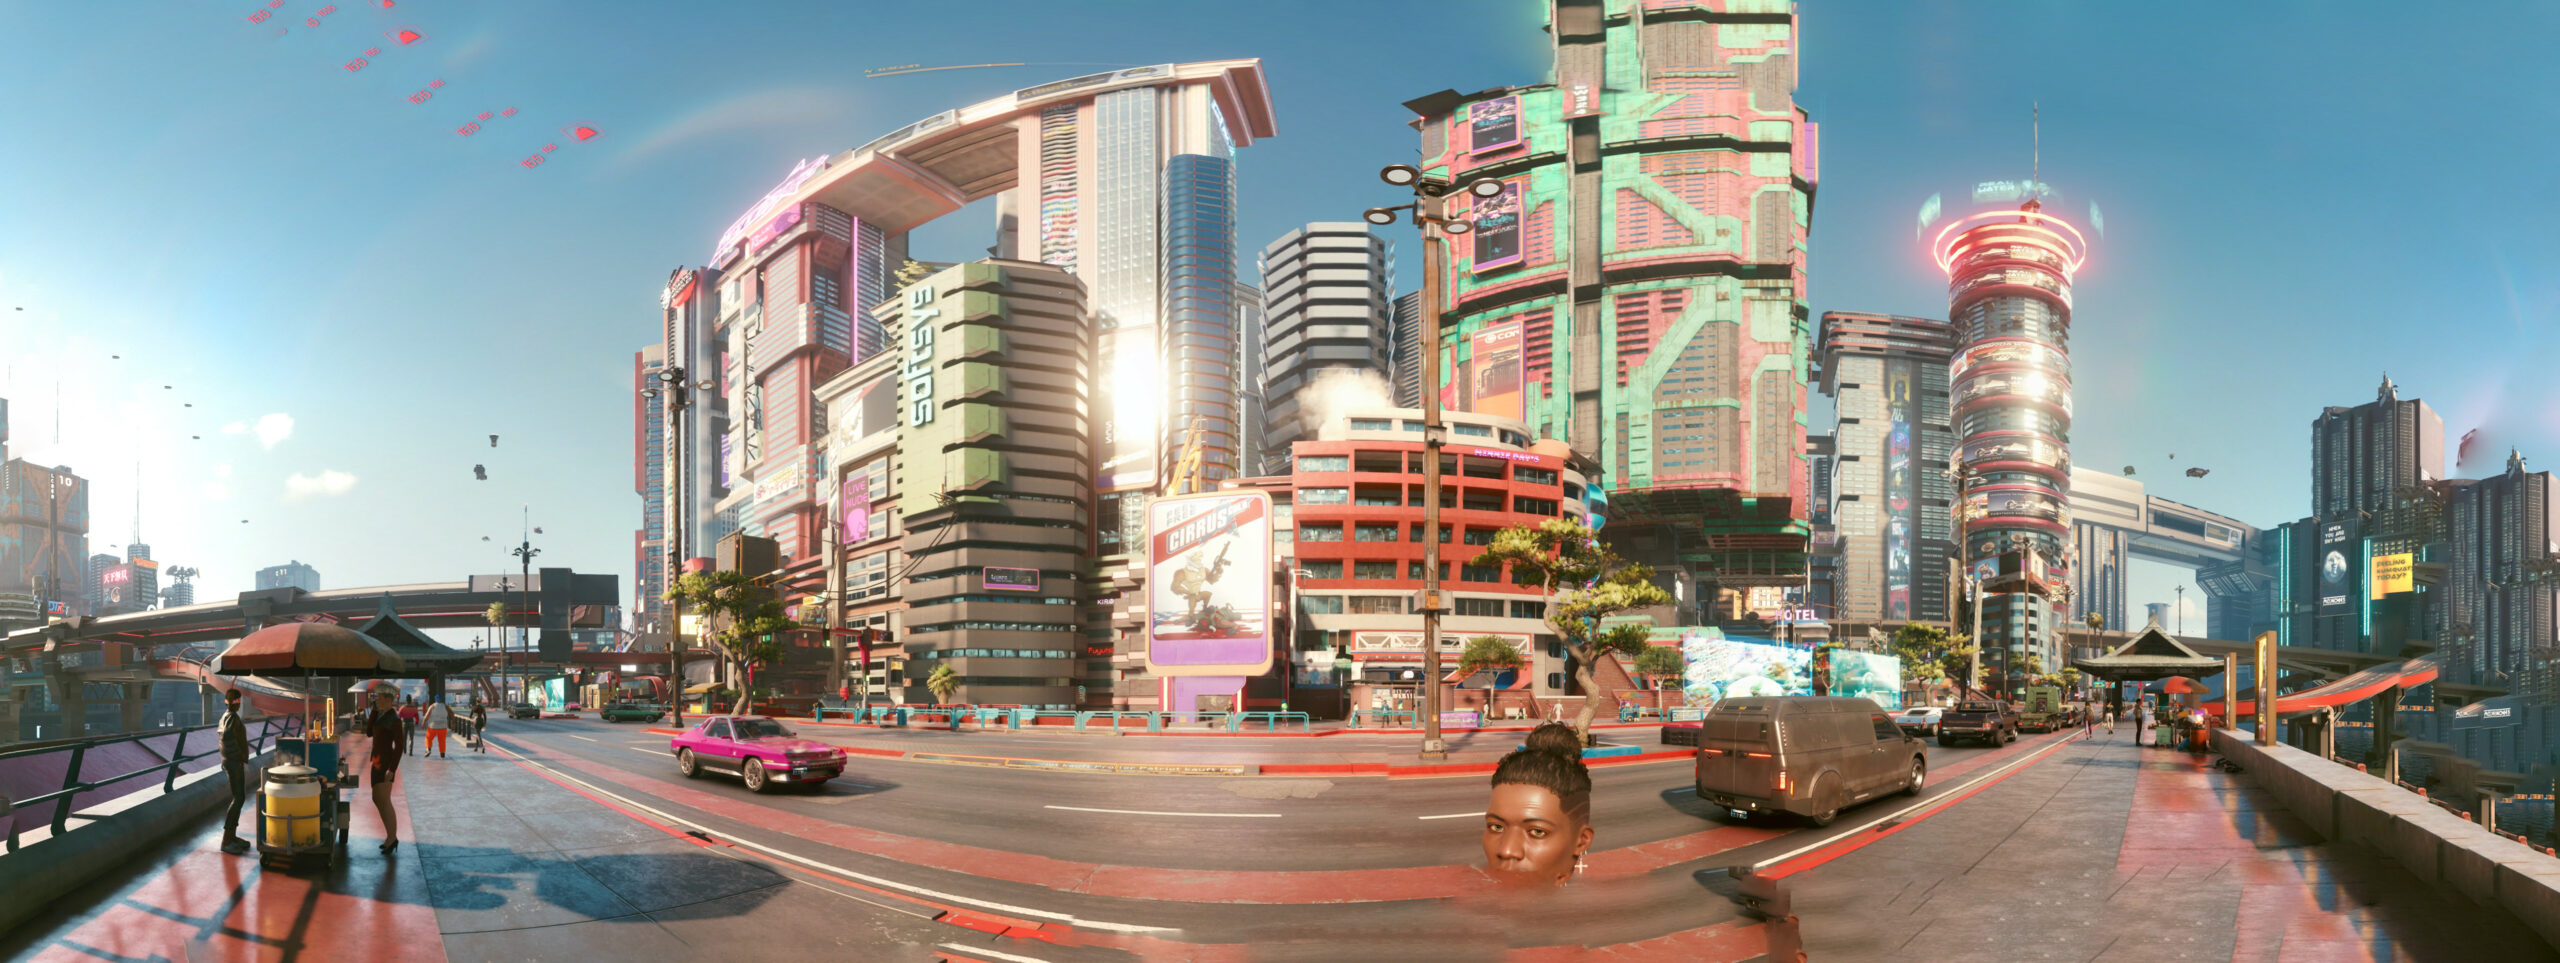
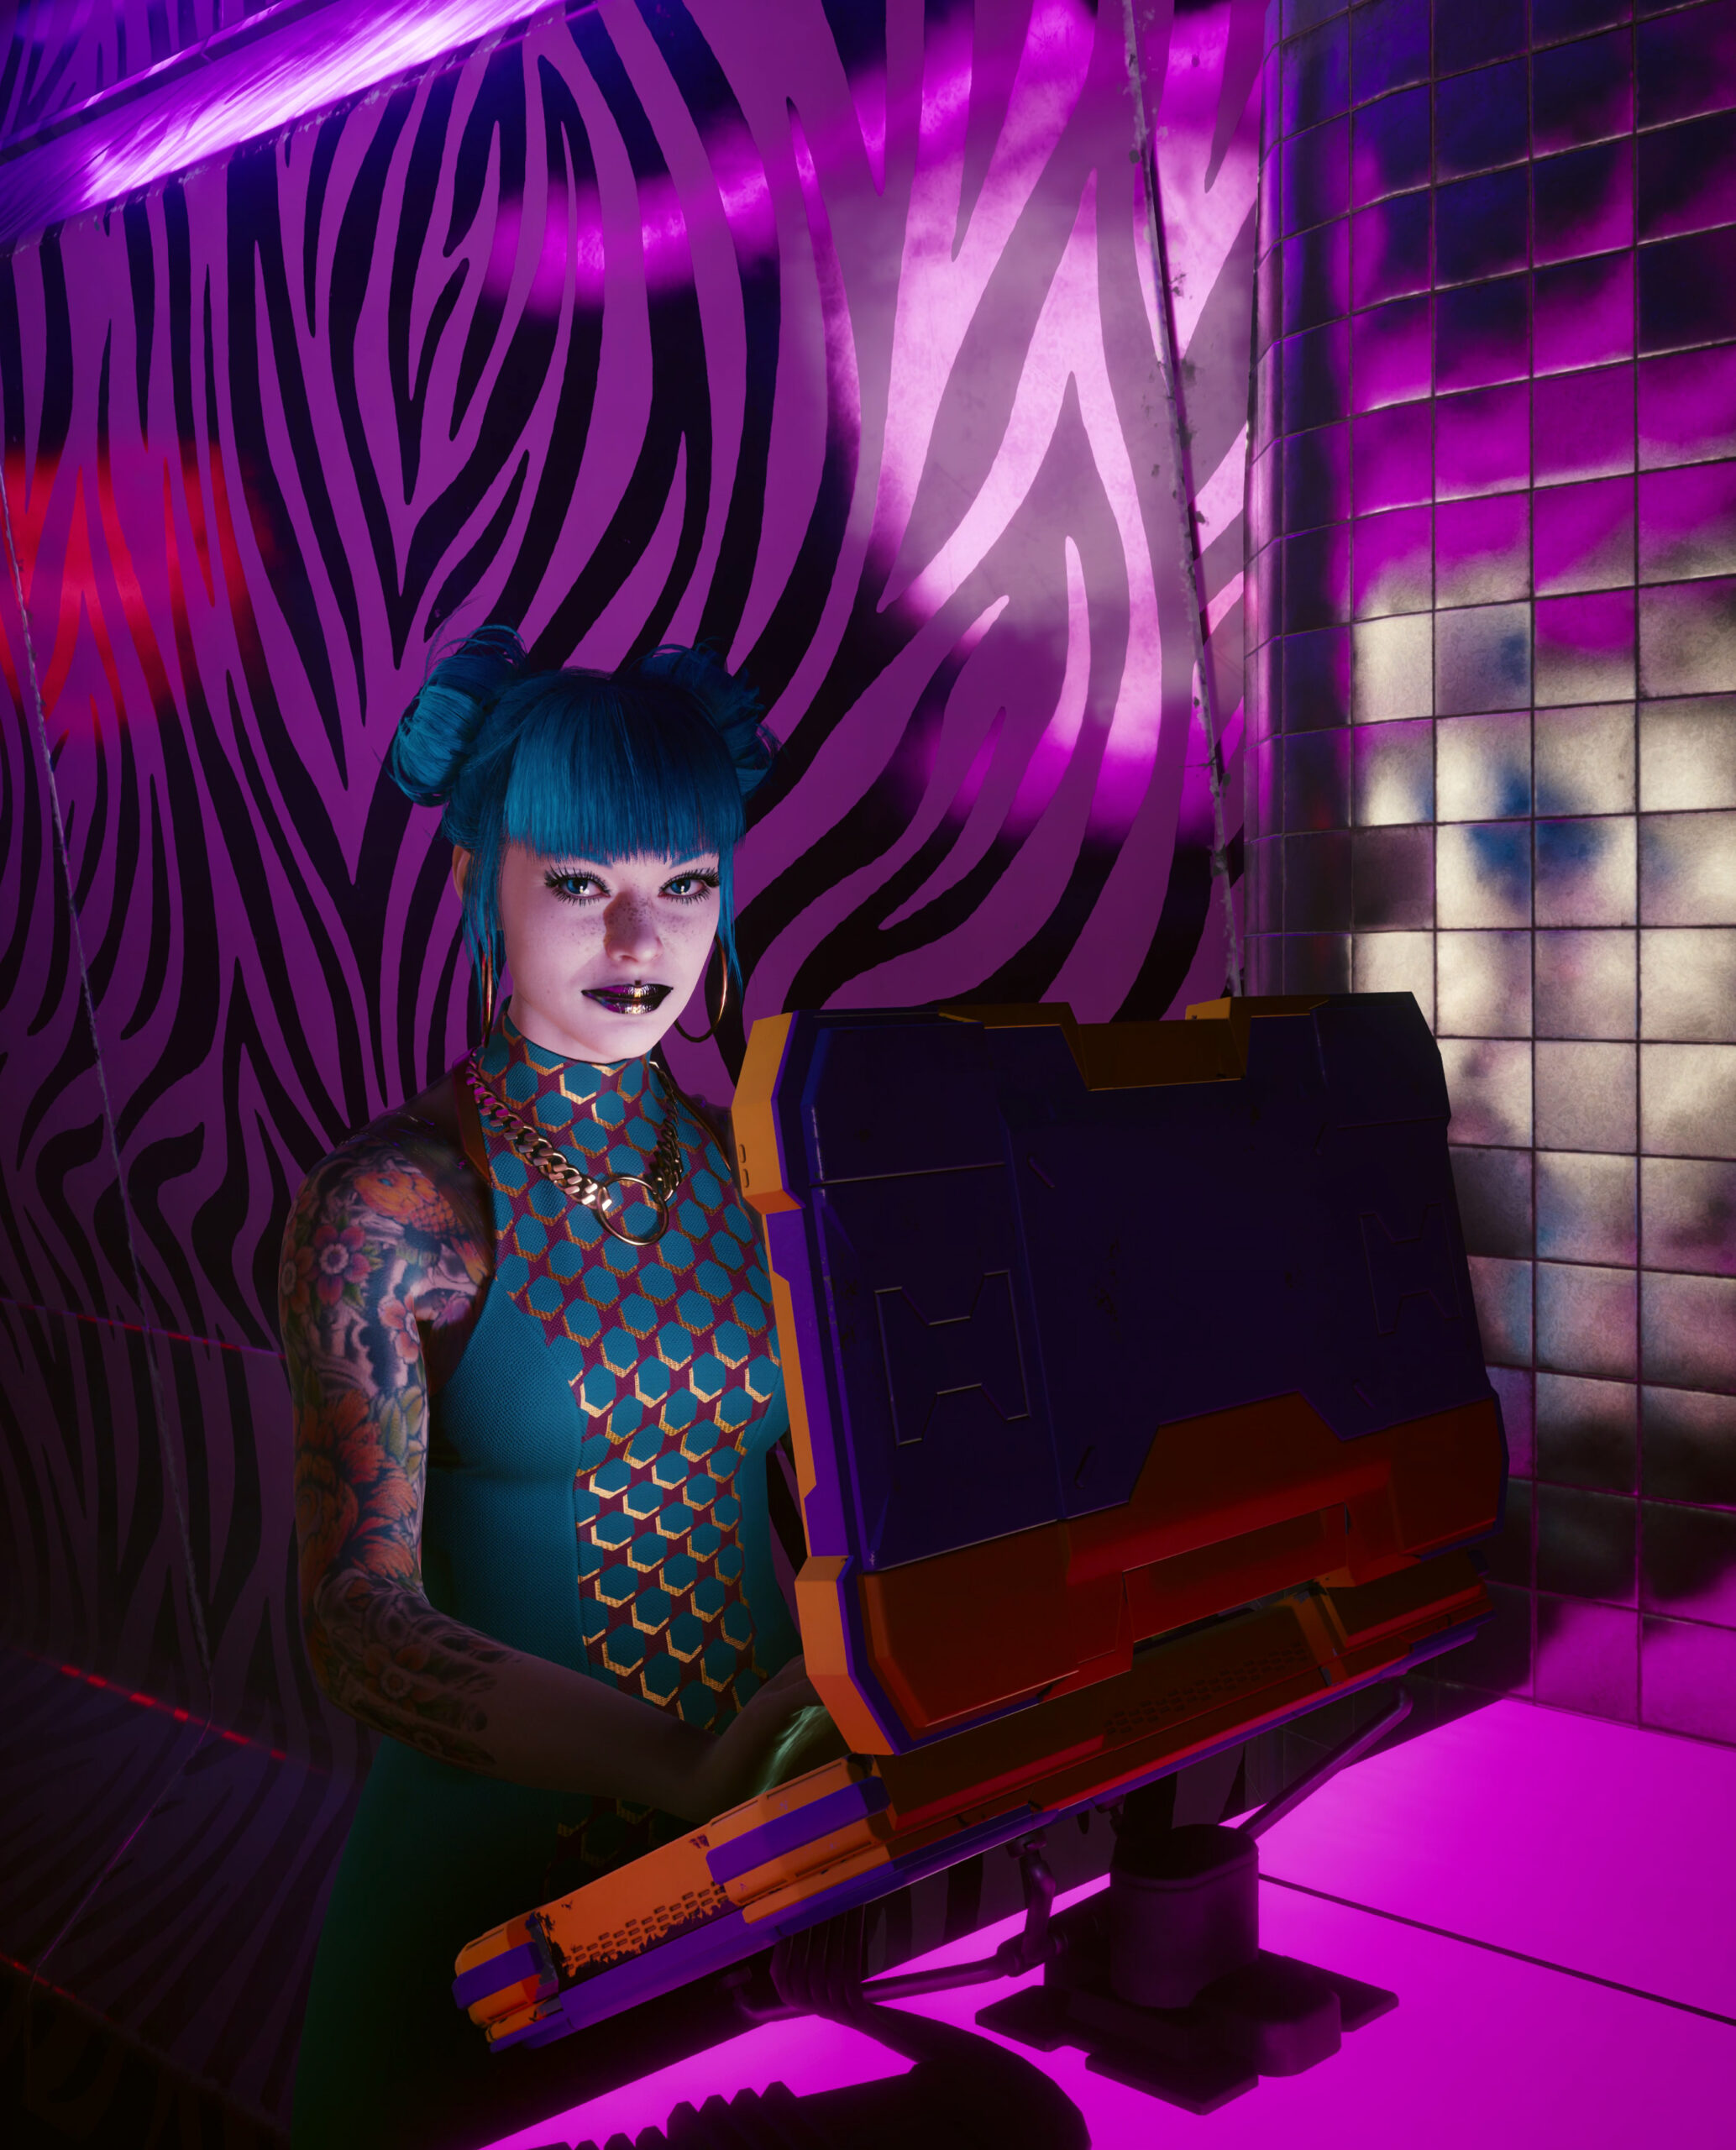
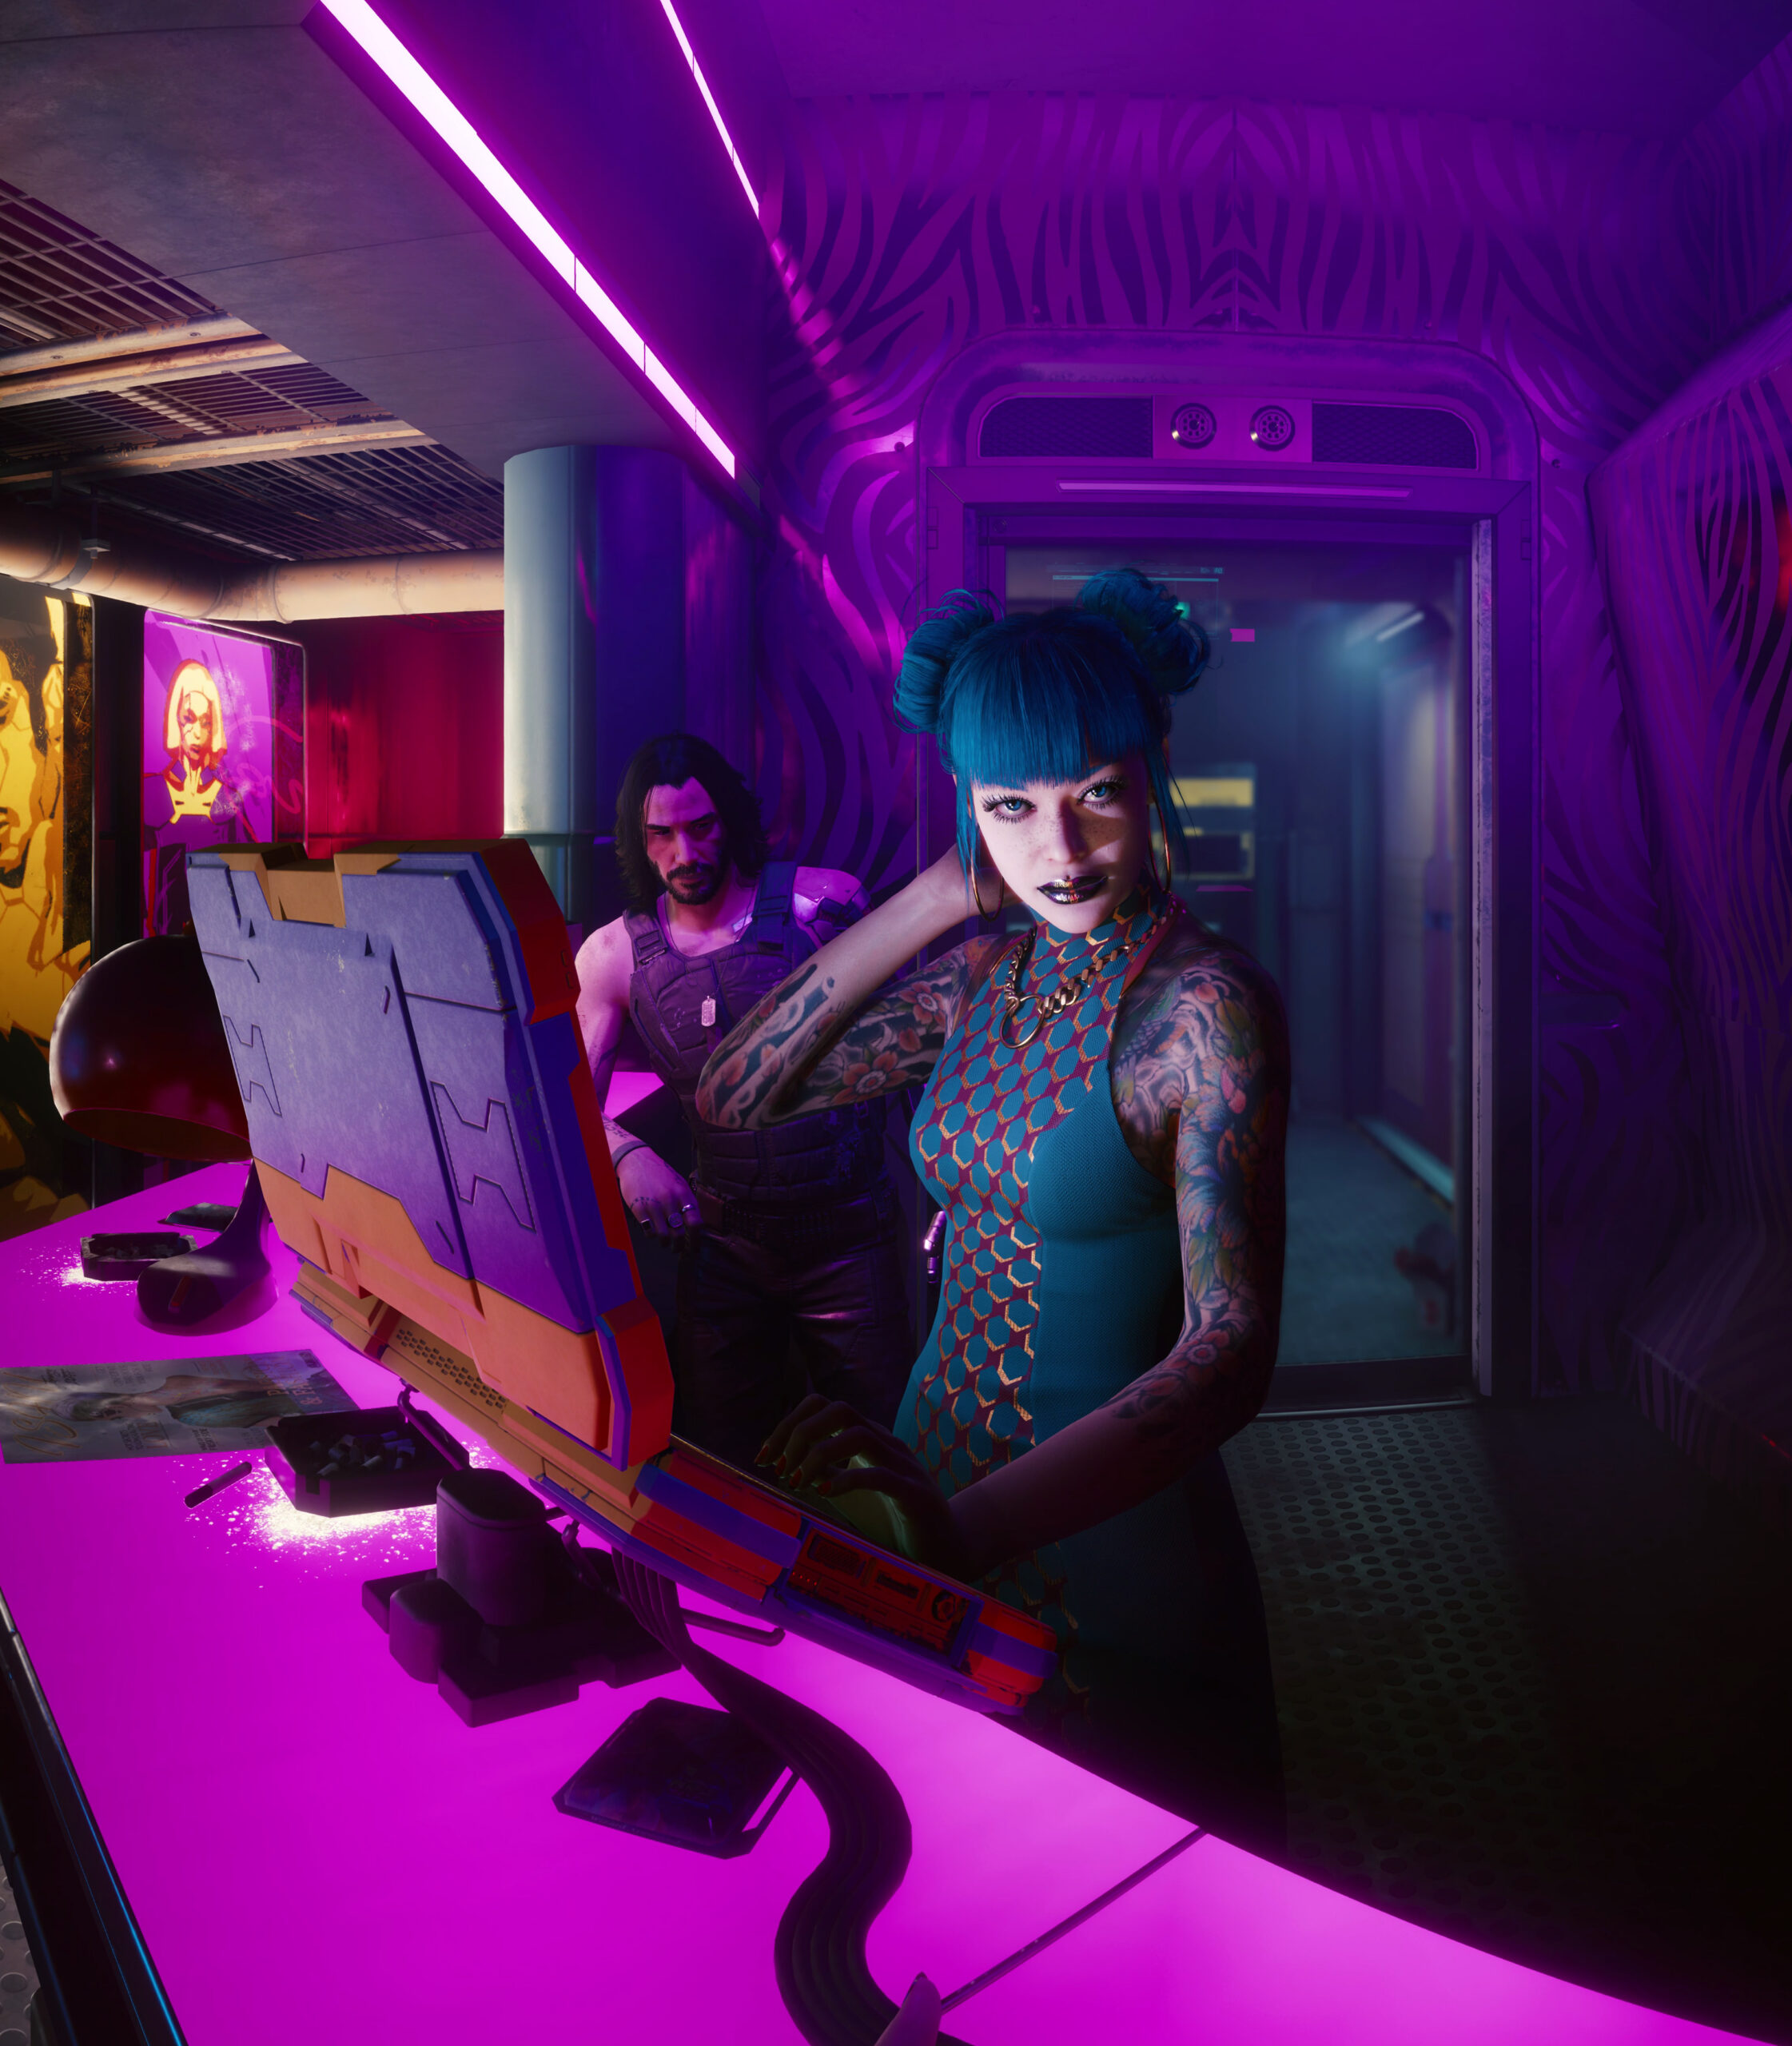
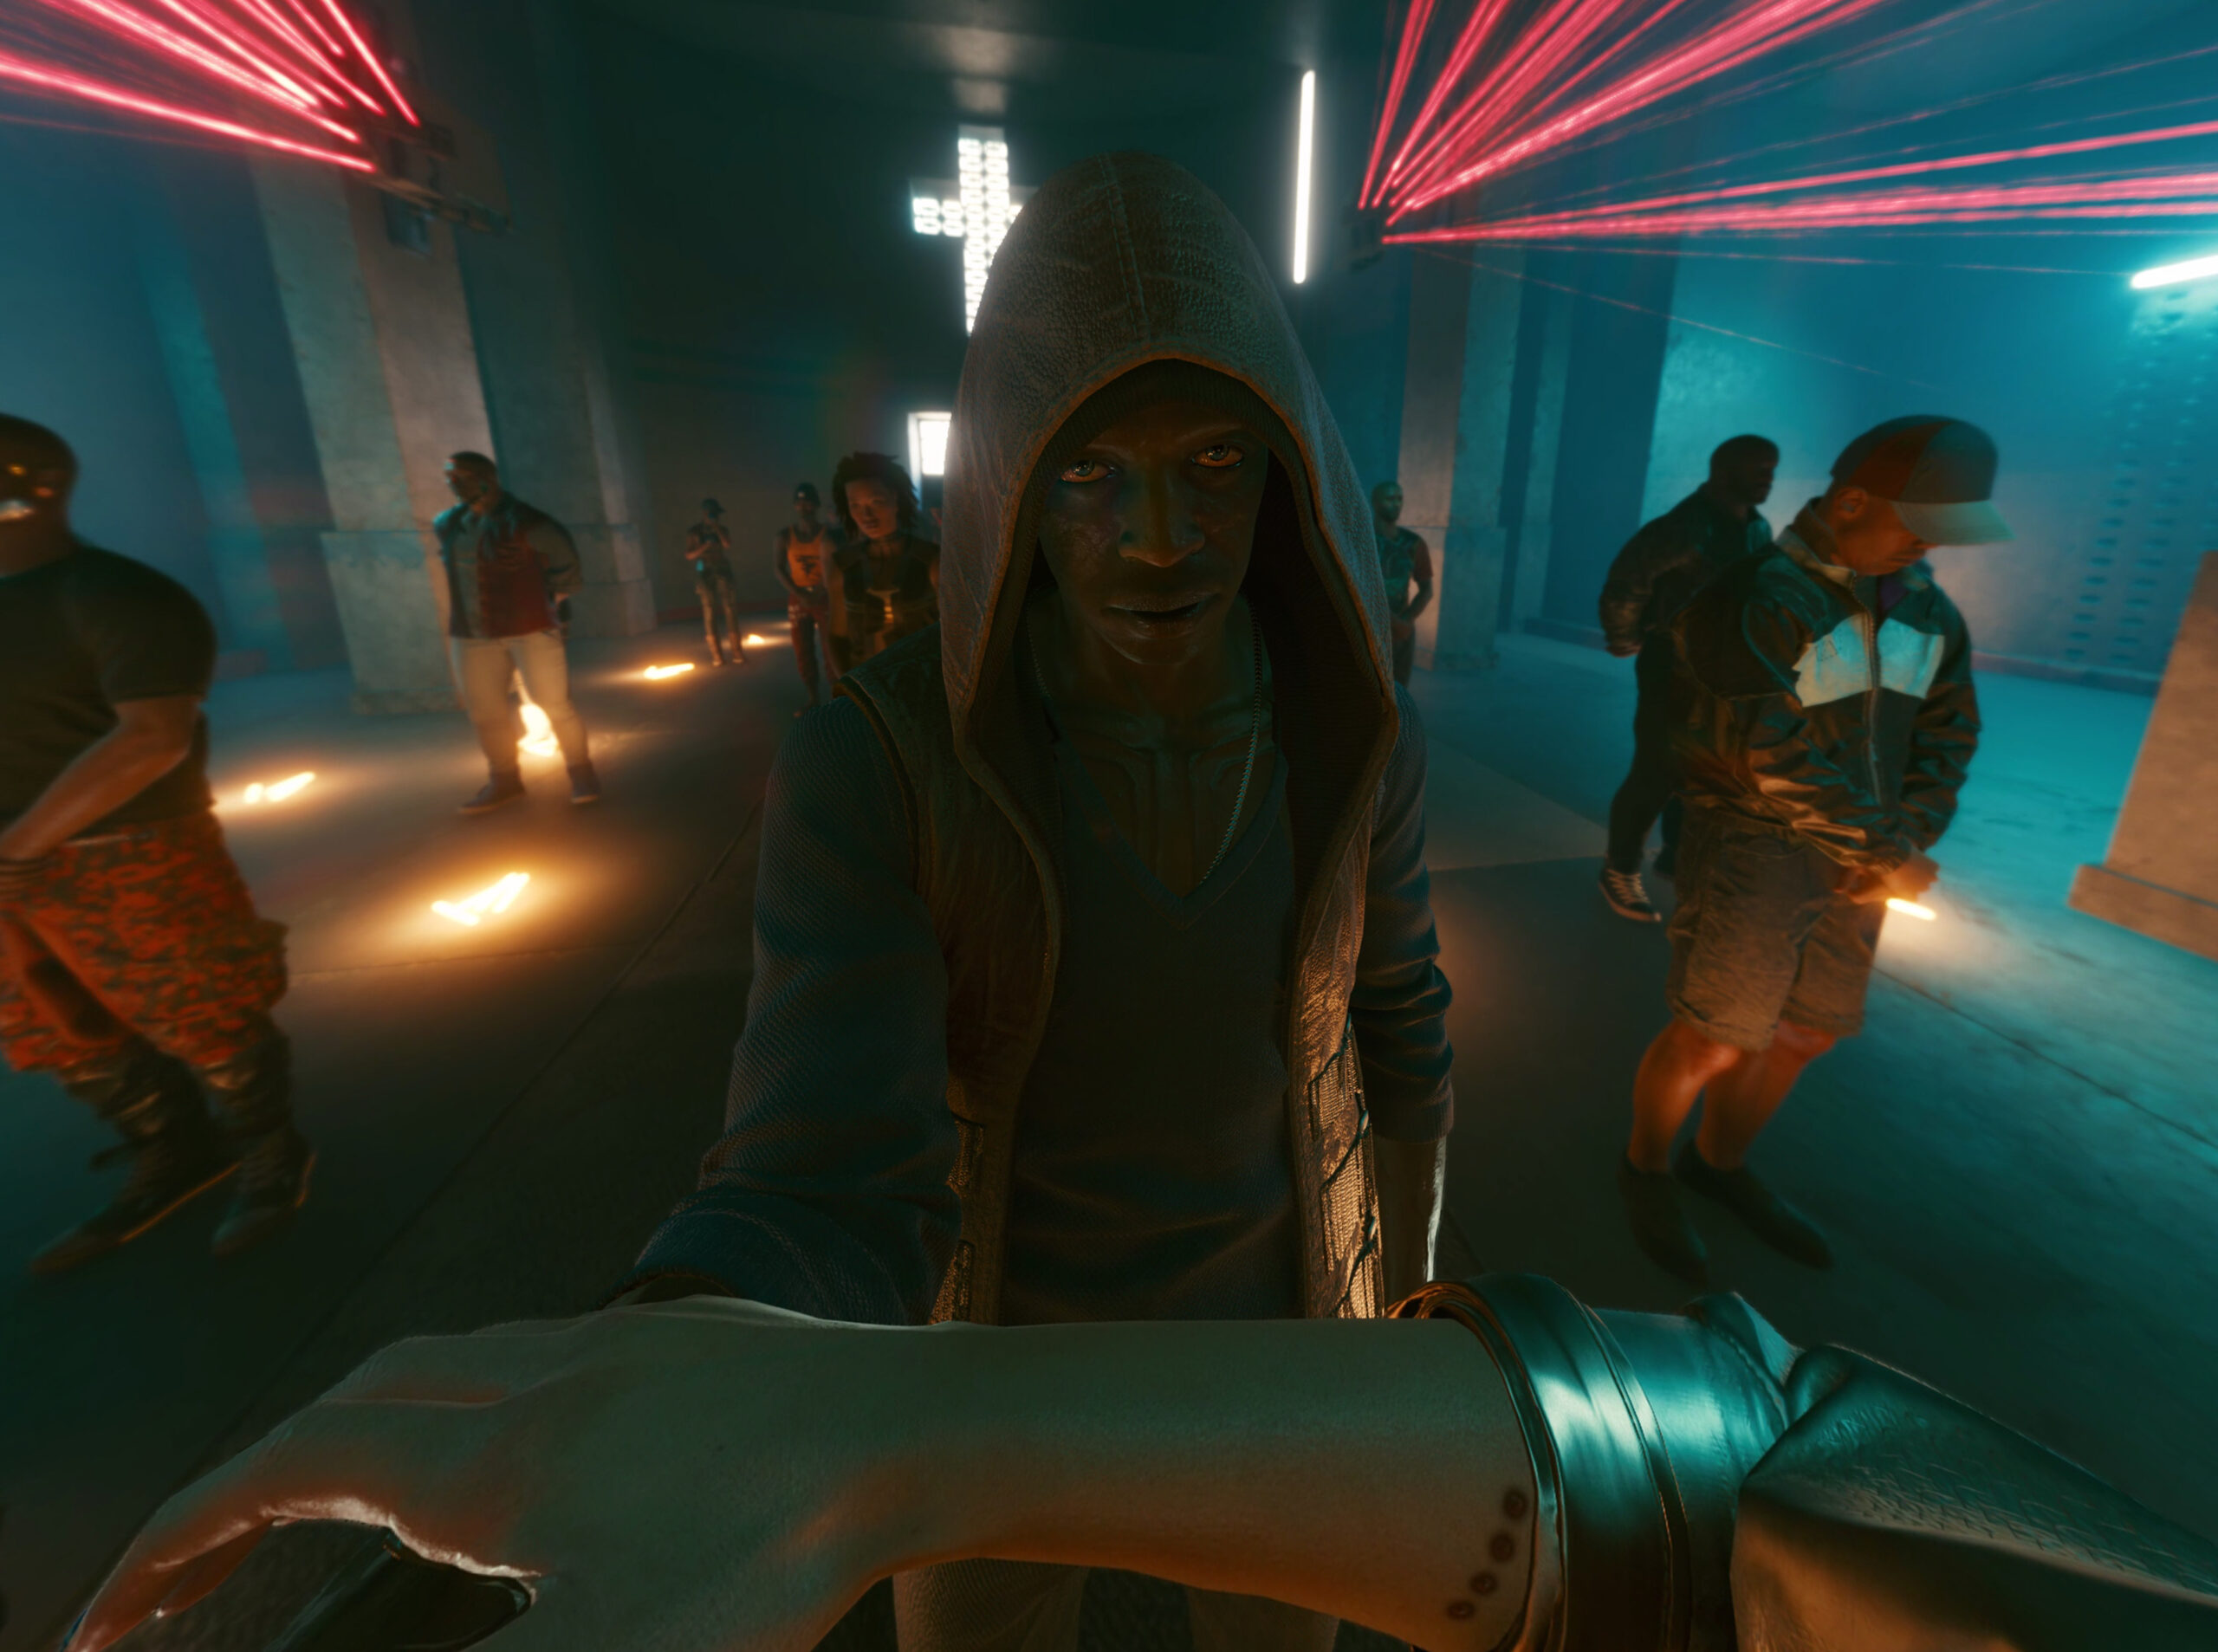
In part 1 I wrote a bit about this great game and shared some screenshots. By now I’ve finished the story and almost all side-quests and I still see it as the best game since years.
Anyway, here are more pictures taken in-game (sometimes stitched):
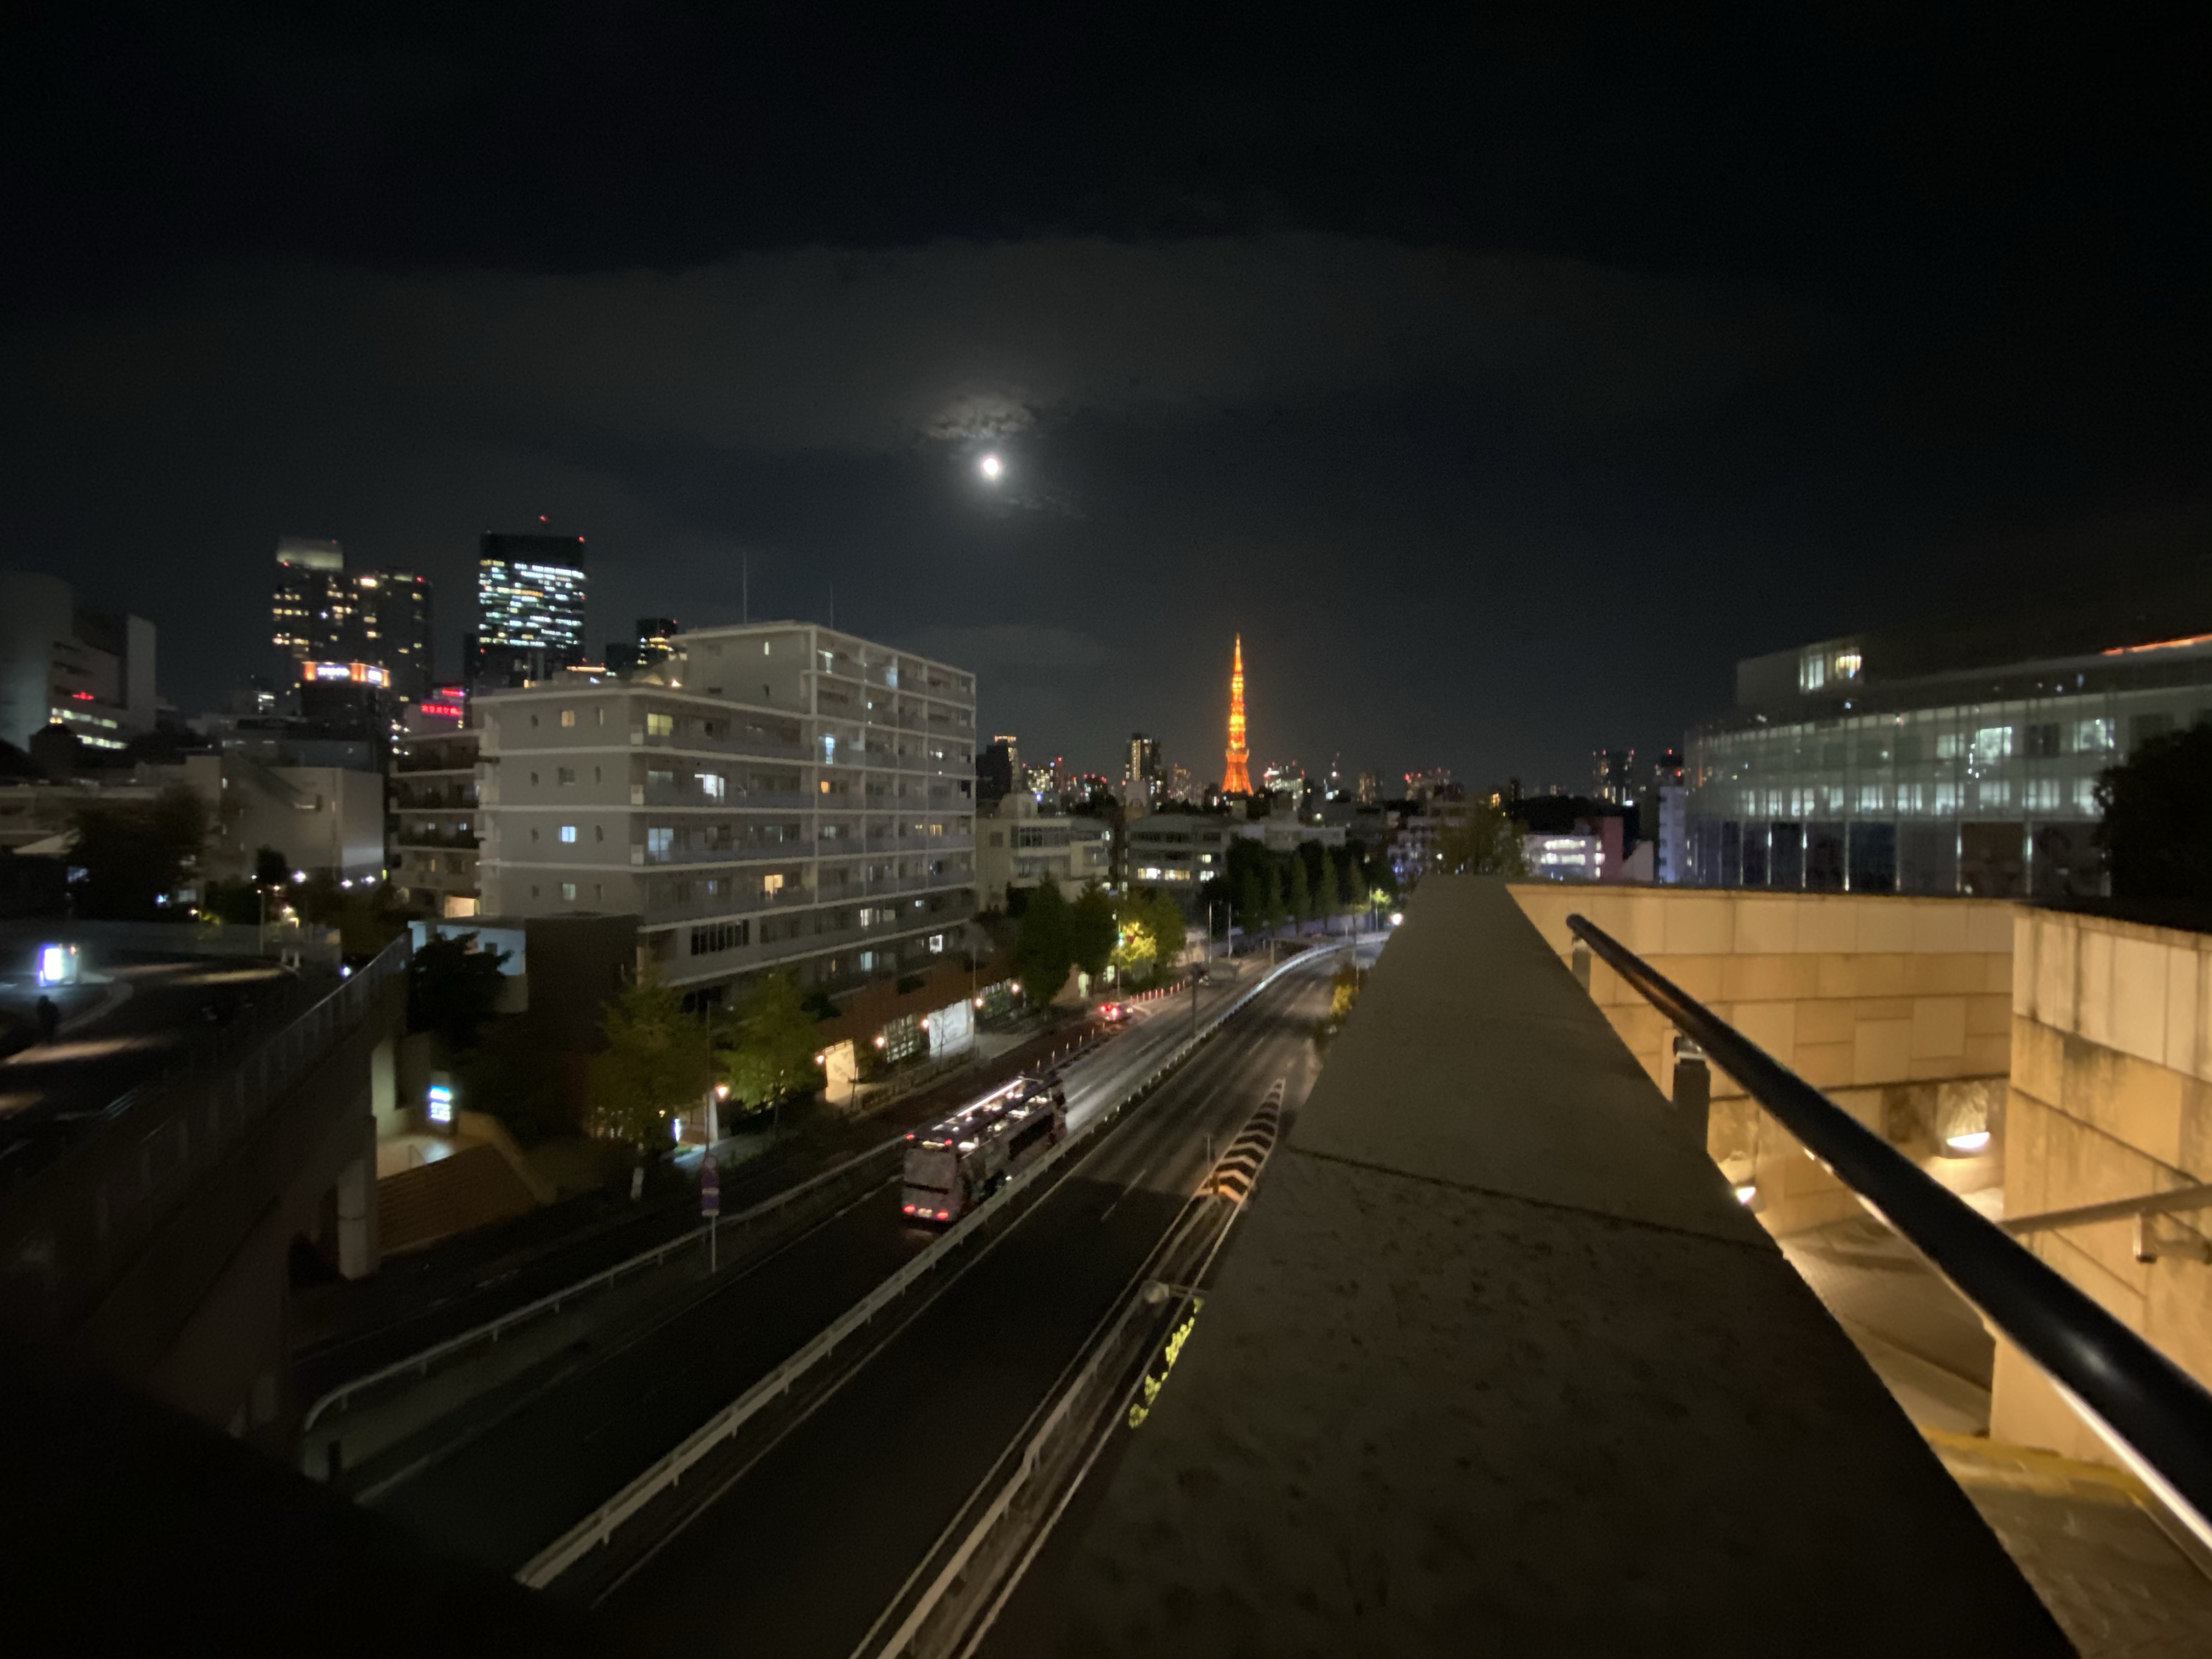
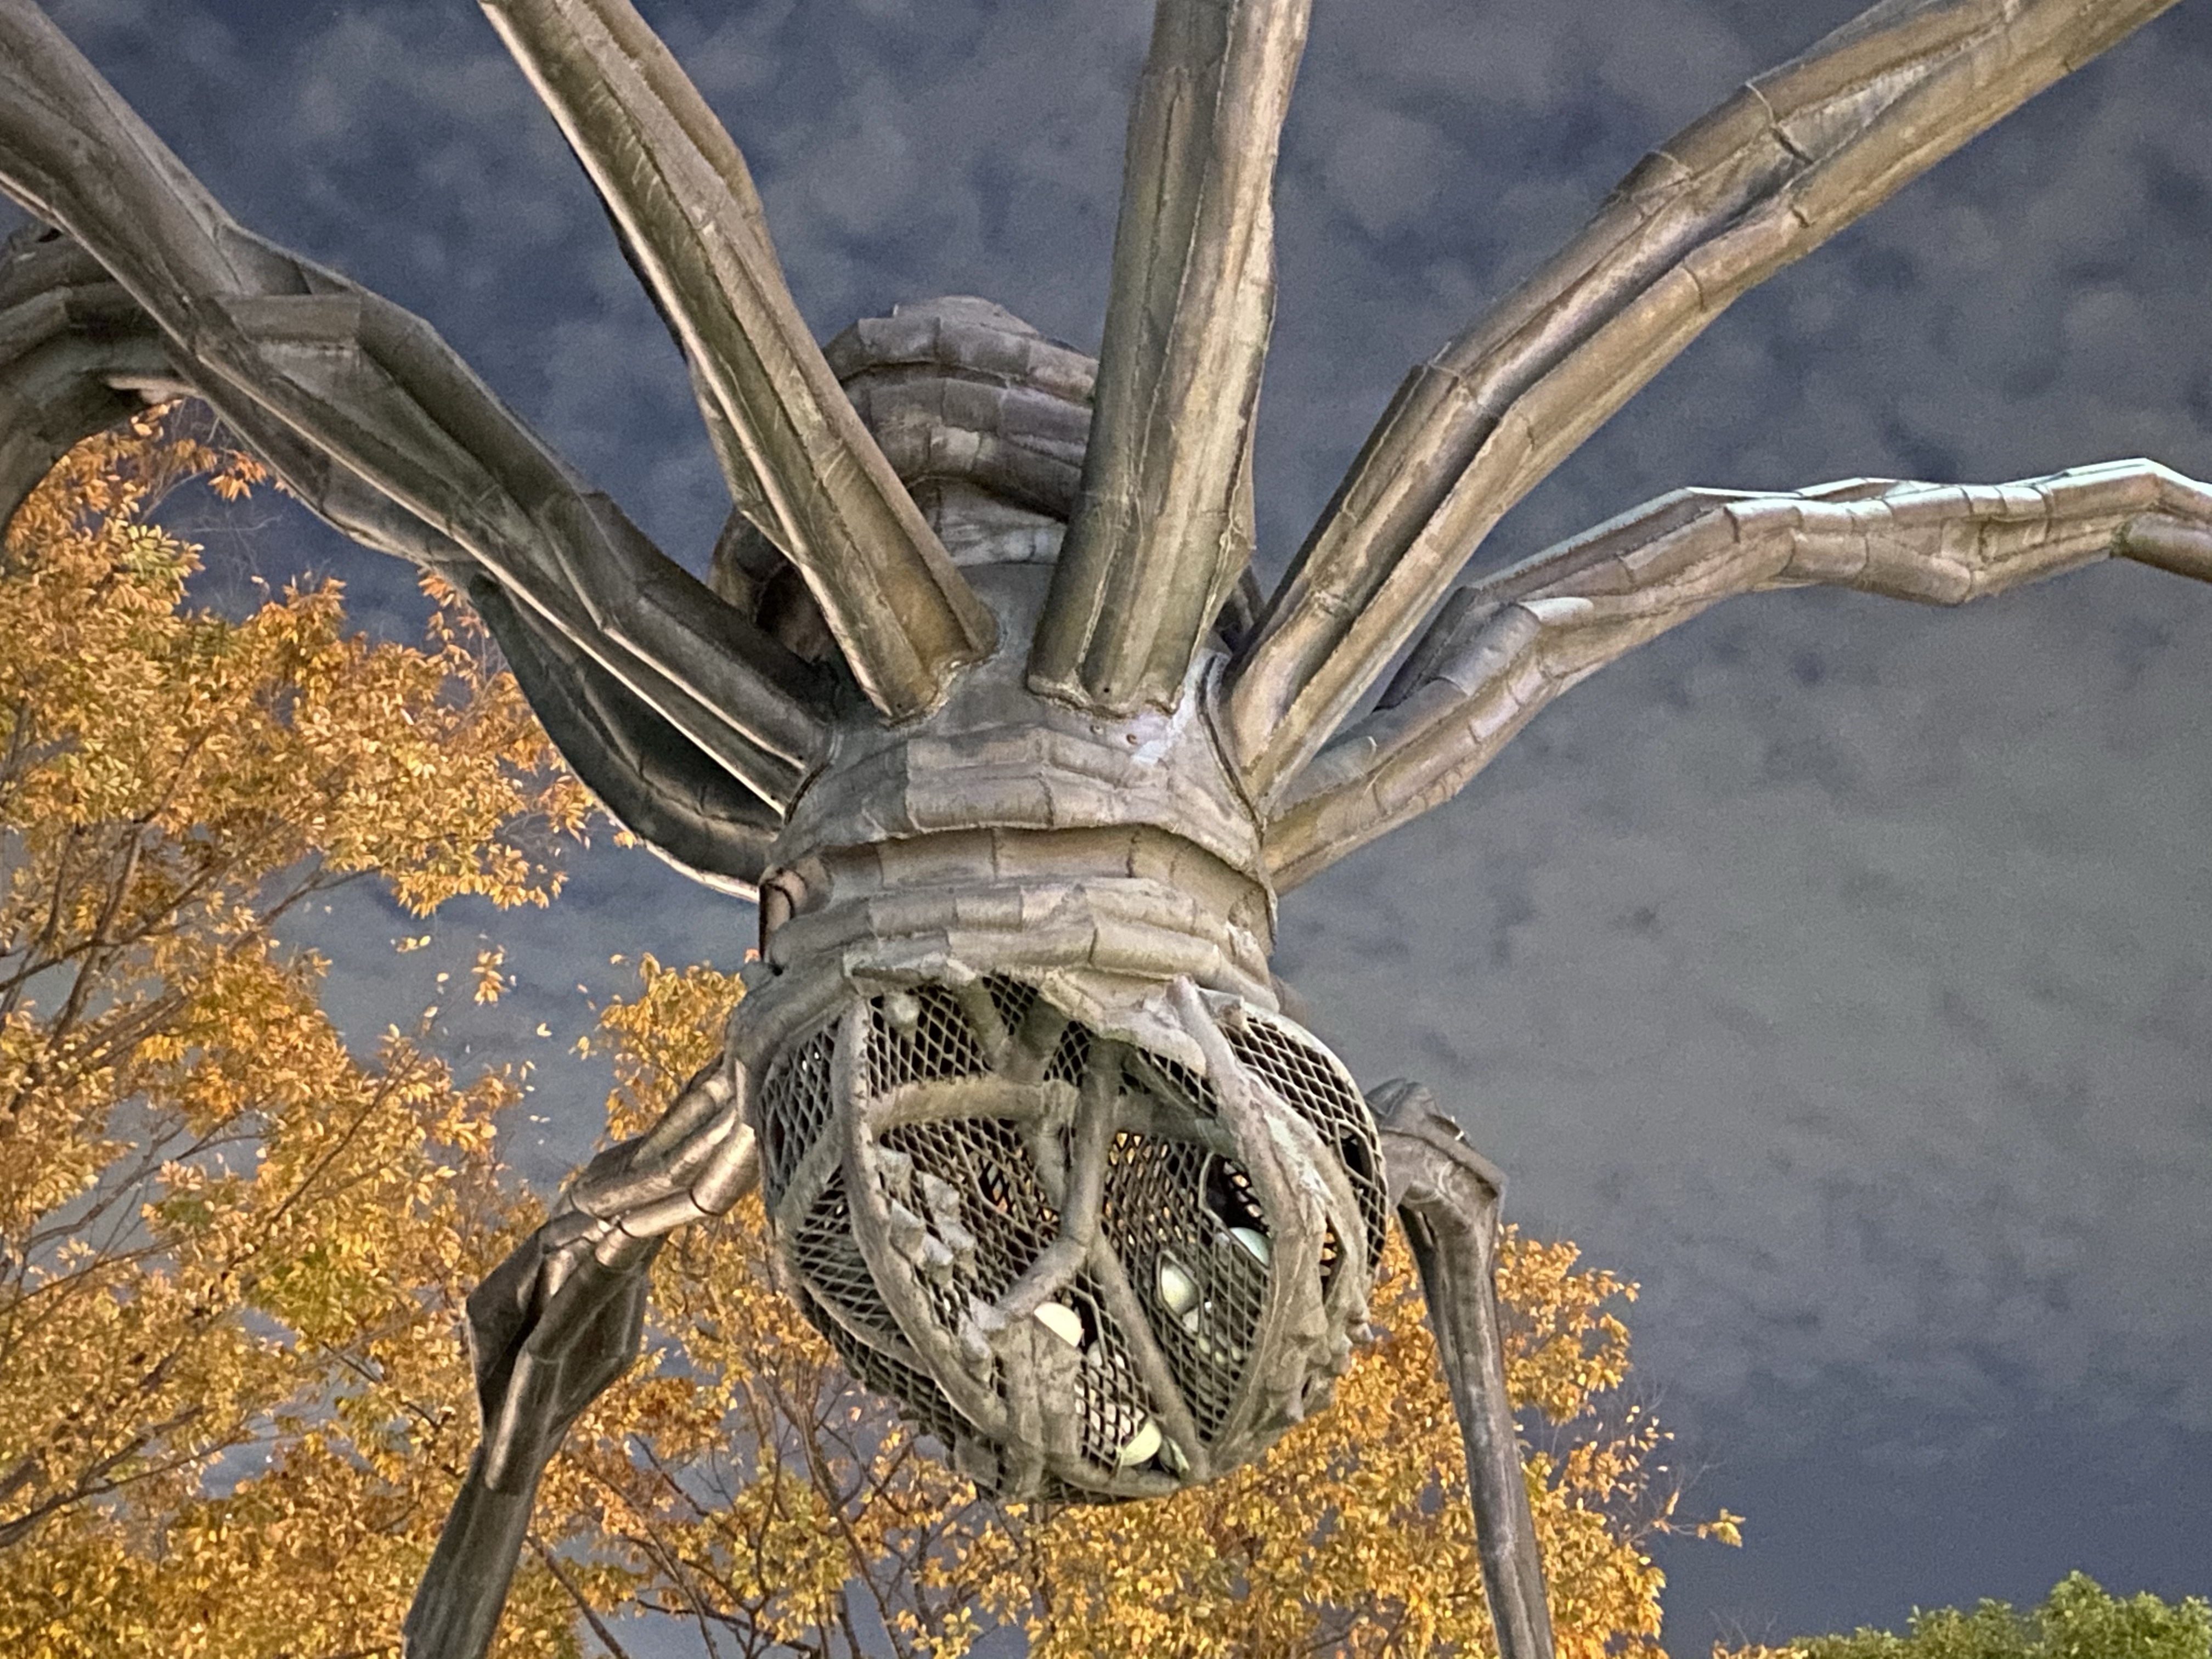
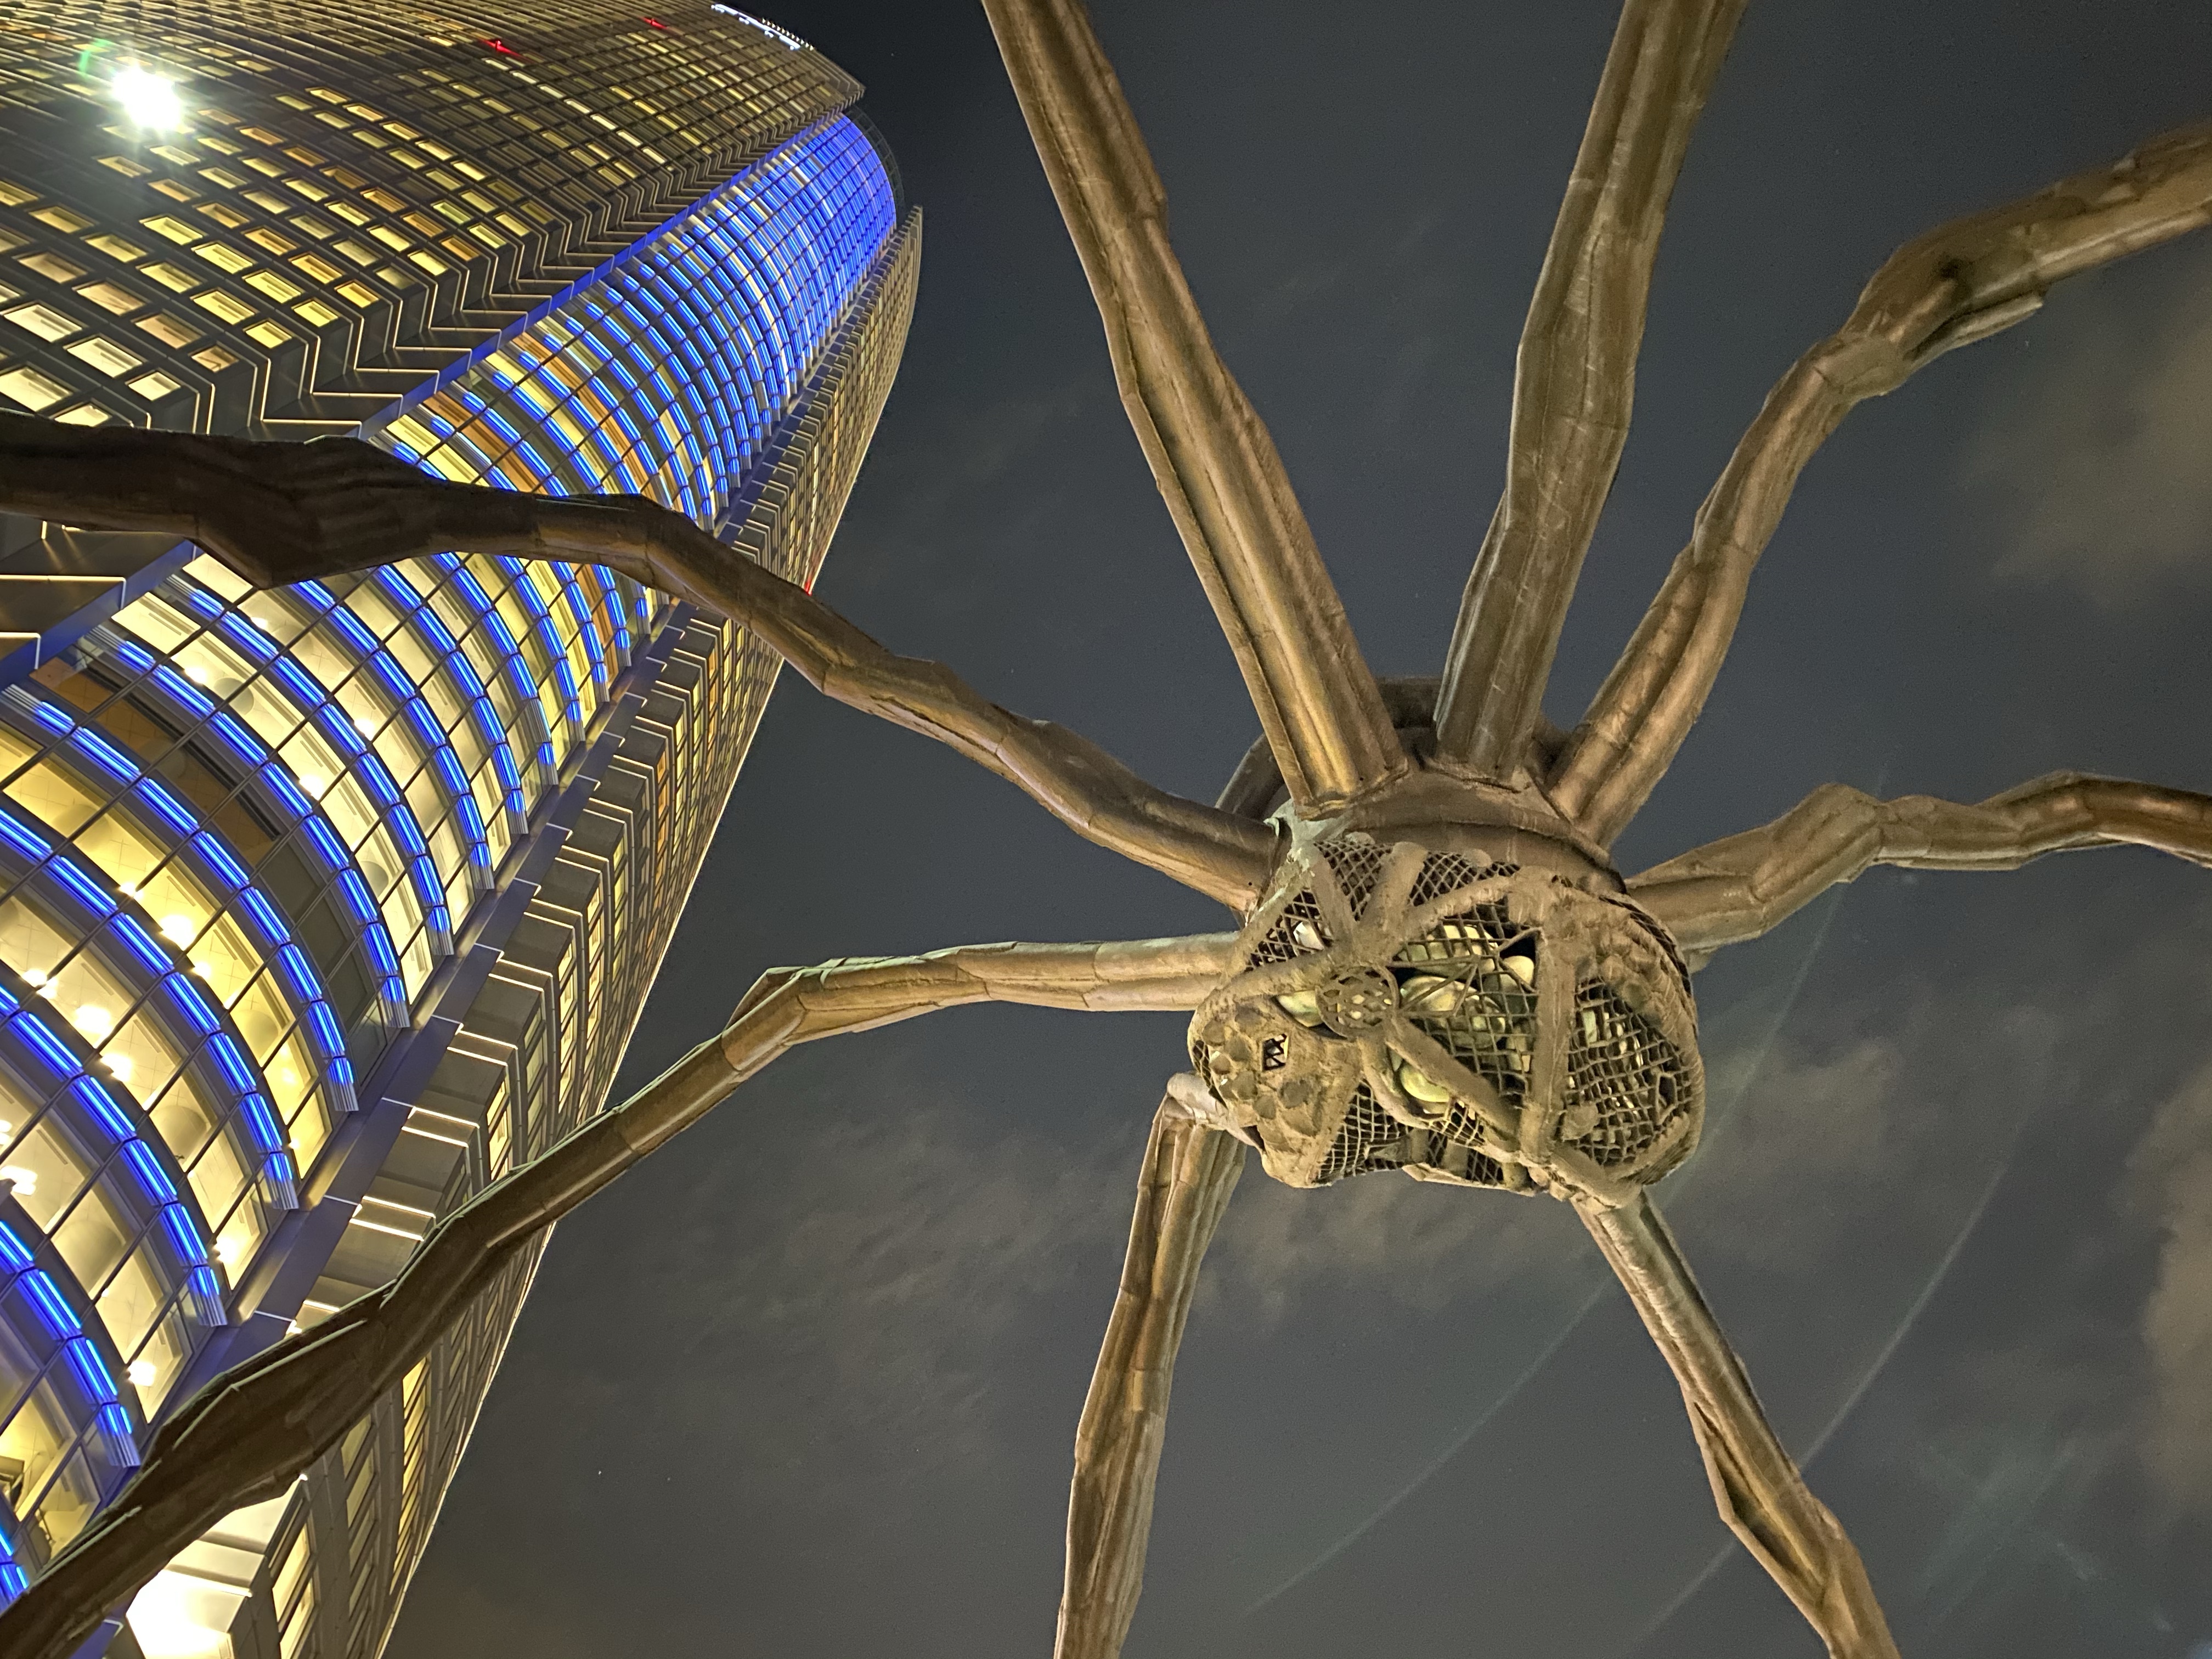
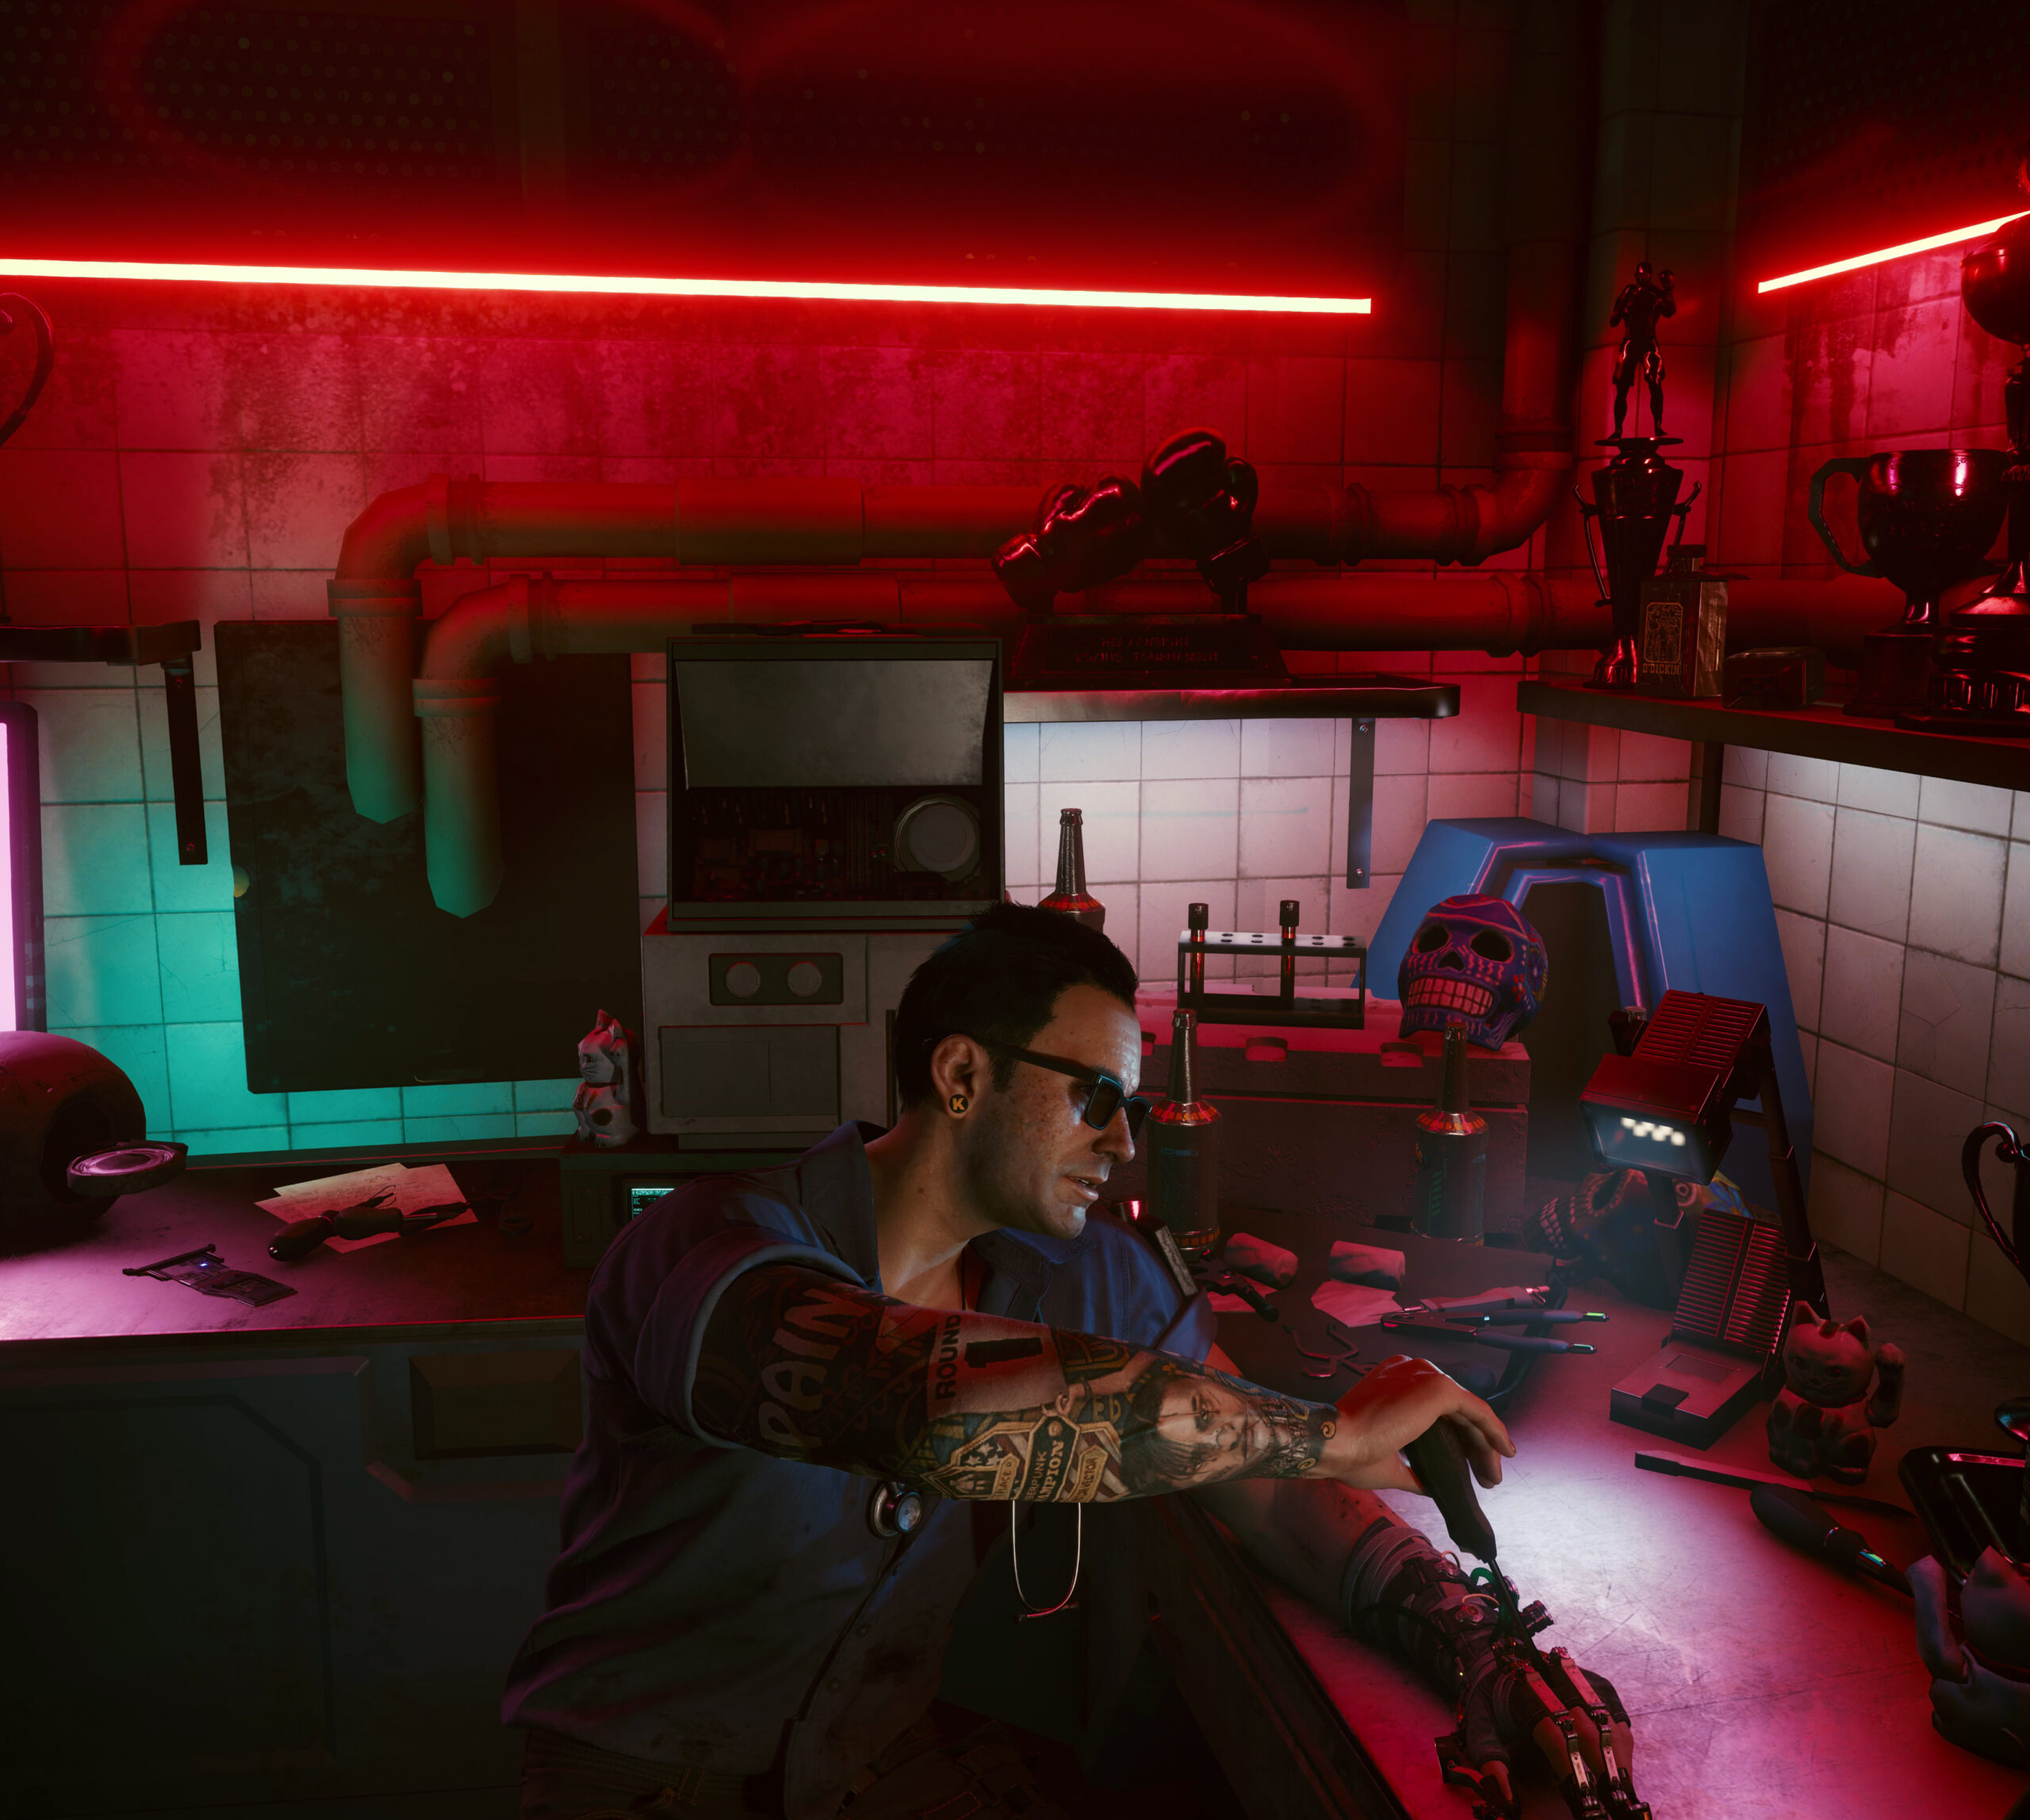
For the first time in the last 10ish years I am back playing a game that really impresses me. The story, the world and the technology of Cyberpunk 2077 really is a step forward.
It’s a first in many aspects for me. I do not own a PC capable enough of playing Cyberpunk 2077 at any quality level. Usually I am playing games on consoles like the Playstation. But for this one I have selected to play on the PC platform. But how?
I am using game streaming. The game is rendered in a datacenter on a PC and graphics card I am renting for the purpose of playing the game. And it simply works great!
So I am playing a next-generation open-world game with technical break-throughs like Raytracing used to produce really great graphics streamed over the internet to my big-screen TV and my keyboard+mouse forwarded to that datacenter without (for me) noticeable lag or quality issues.
The only downside I can see so far is that sooo many people like to play it this way that there are not enough machines (gaming-rigs) available to all the players that want – so there’s a queue in the evening.
But I am doing what I am always doing when I play games. I take screenshots. And if the graphics are great I am even trying to make panoramic views of the in-game graphics. Remember my GTA V and BioShock Infinite pictures?
So here is the first batch of pictures – some stitched together using 16 and more single screenshots. Look at the detail! Again – there are in-game screenshots. Click on them to make them bigger – and right-click open the source to really zoom into them.
I like playing arcade games. I’ve had an “arcade” in my home town and I used to go there after school quite frequently. It was a small place – maybe 5 machines and some pinball machines.
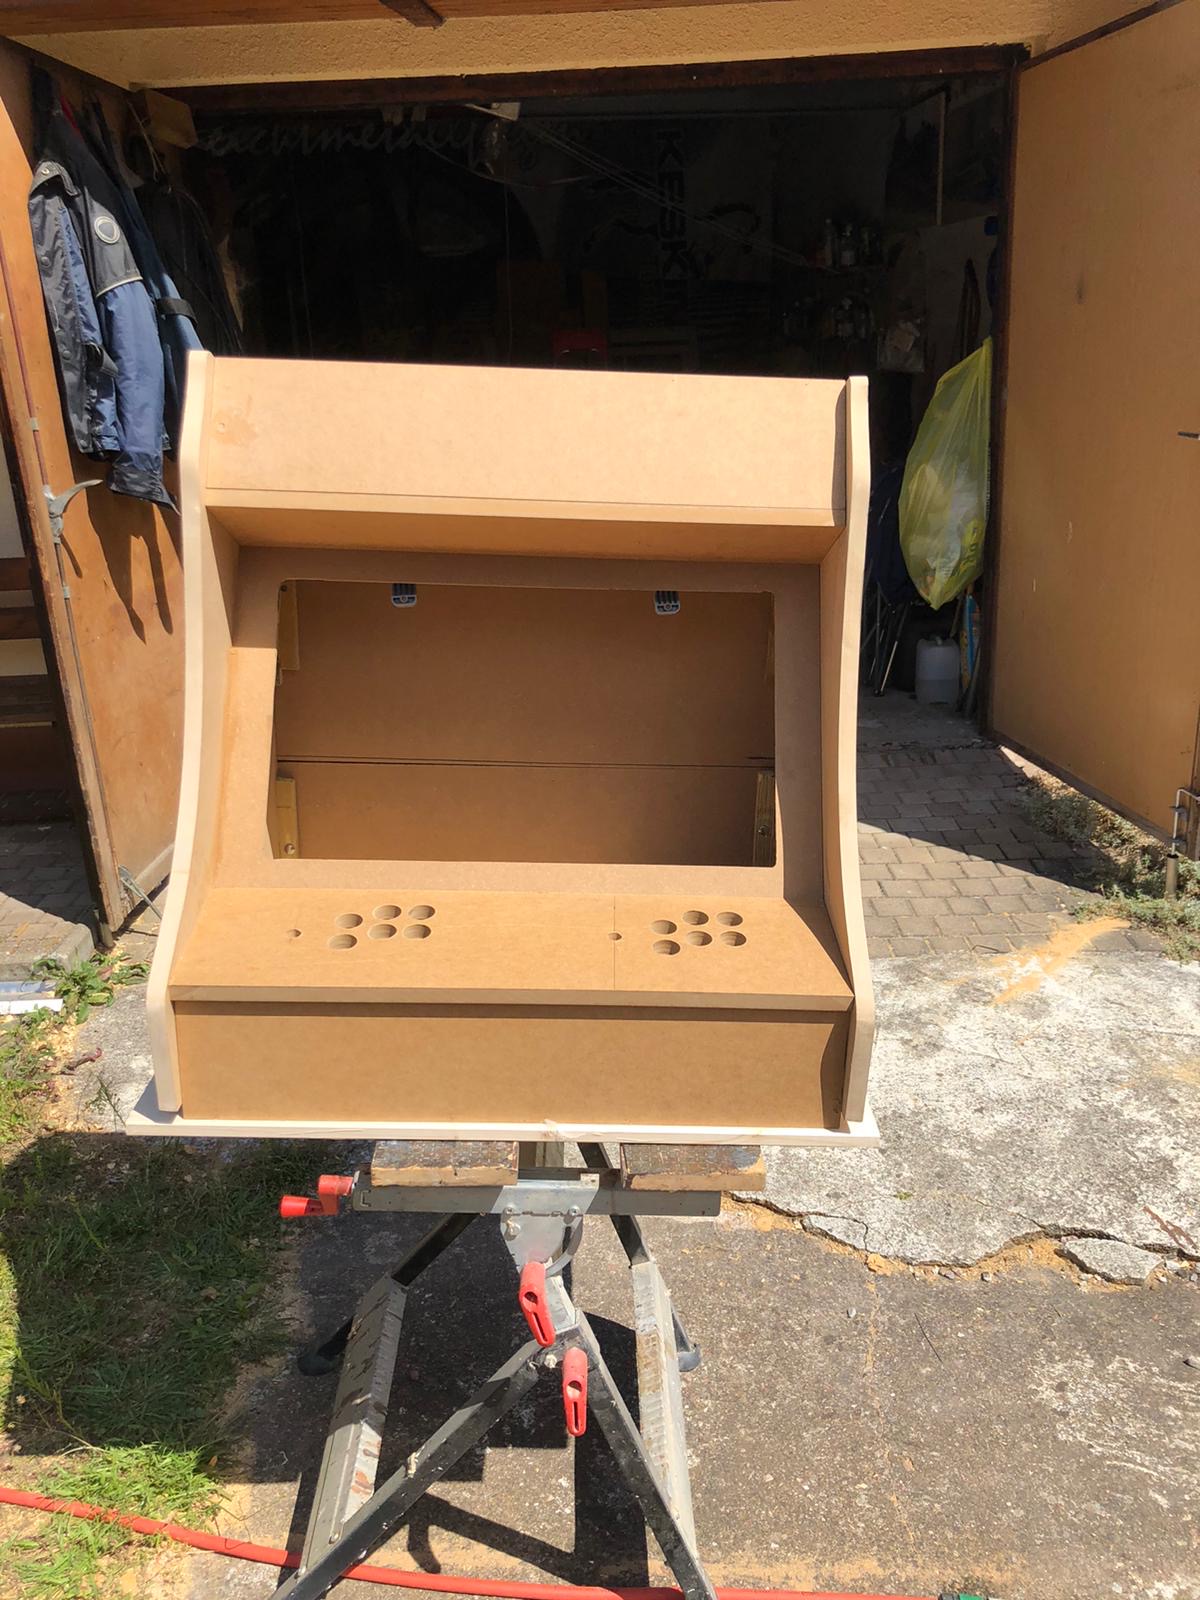
In february this year it occured to be that with the power of the Raspberry Pi and a distribution called RetroPie I could build something that would bring back the games and allow me to play/try those games I never could because my arcade was so small back in the days.
With their basic plans I started drawing in Inkscape and told my father about the plan. He was immediately in – as the plan now was to not build one but two bartop arcade machines. He would take the task of carrying out the wood works and I would do the rest – procurements, electronics, wiring, design and “painting”.
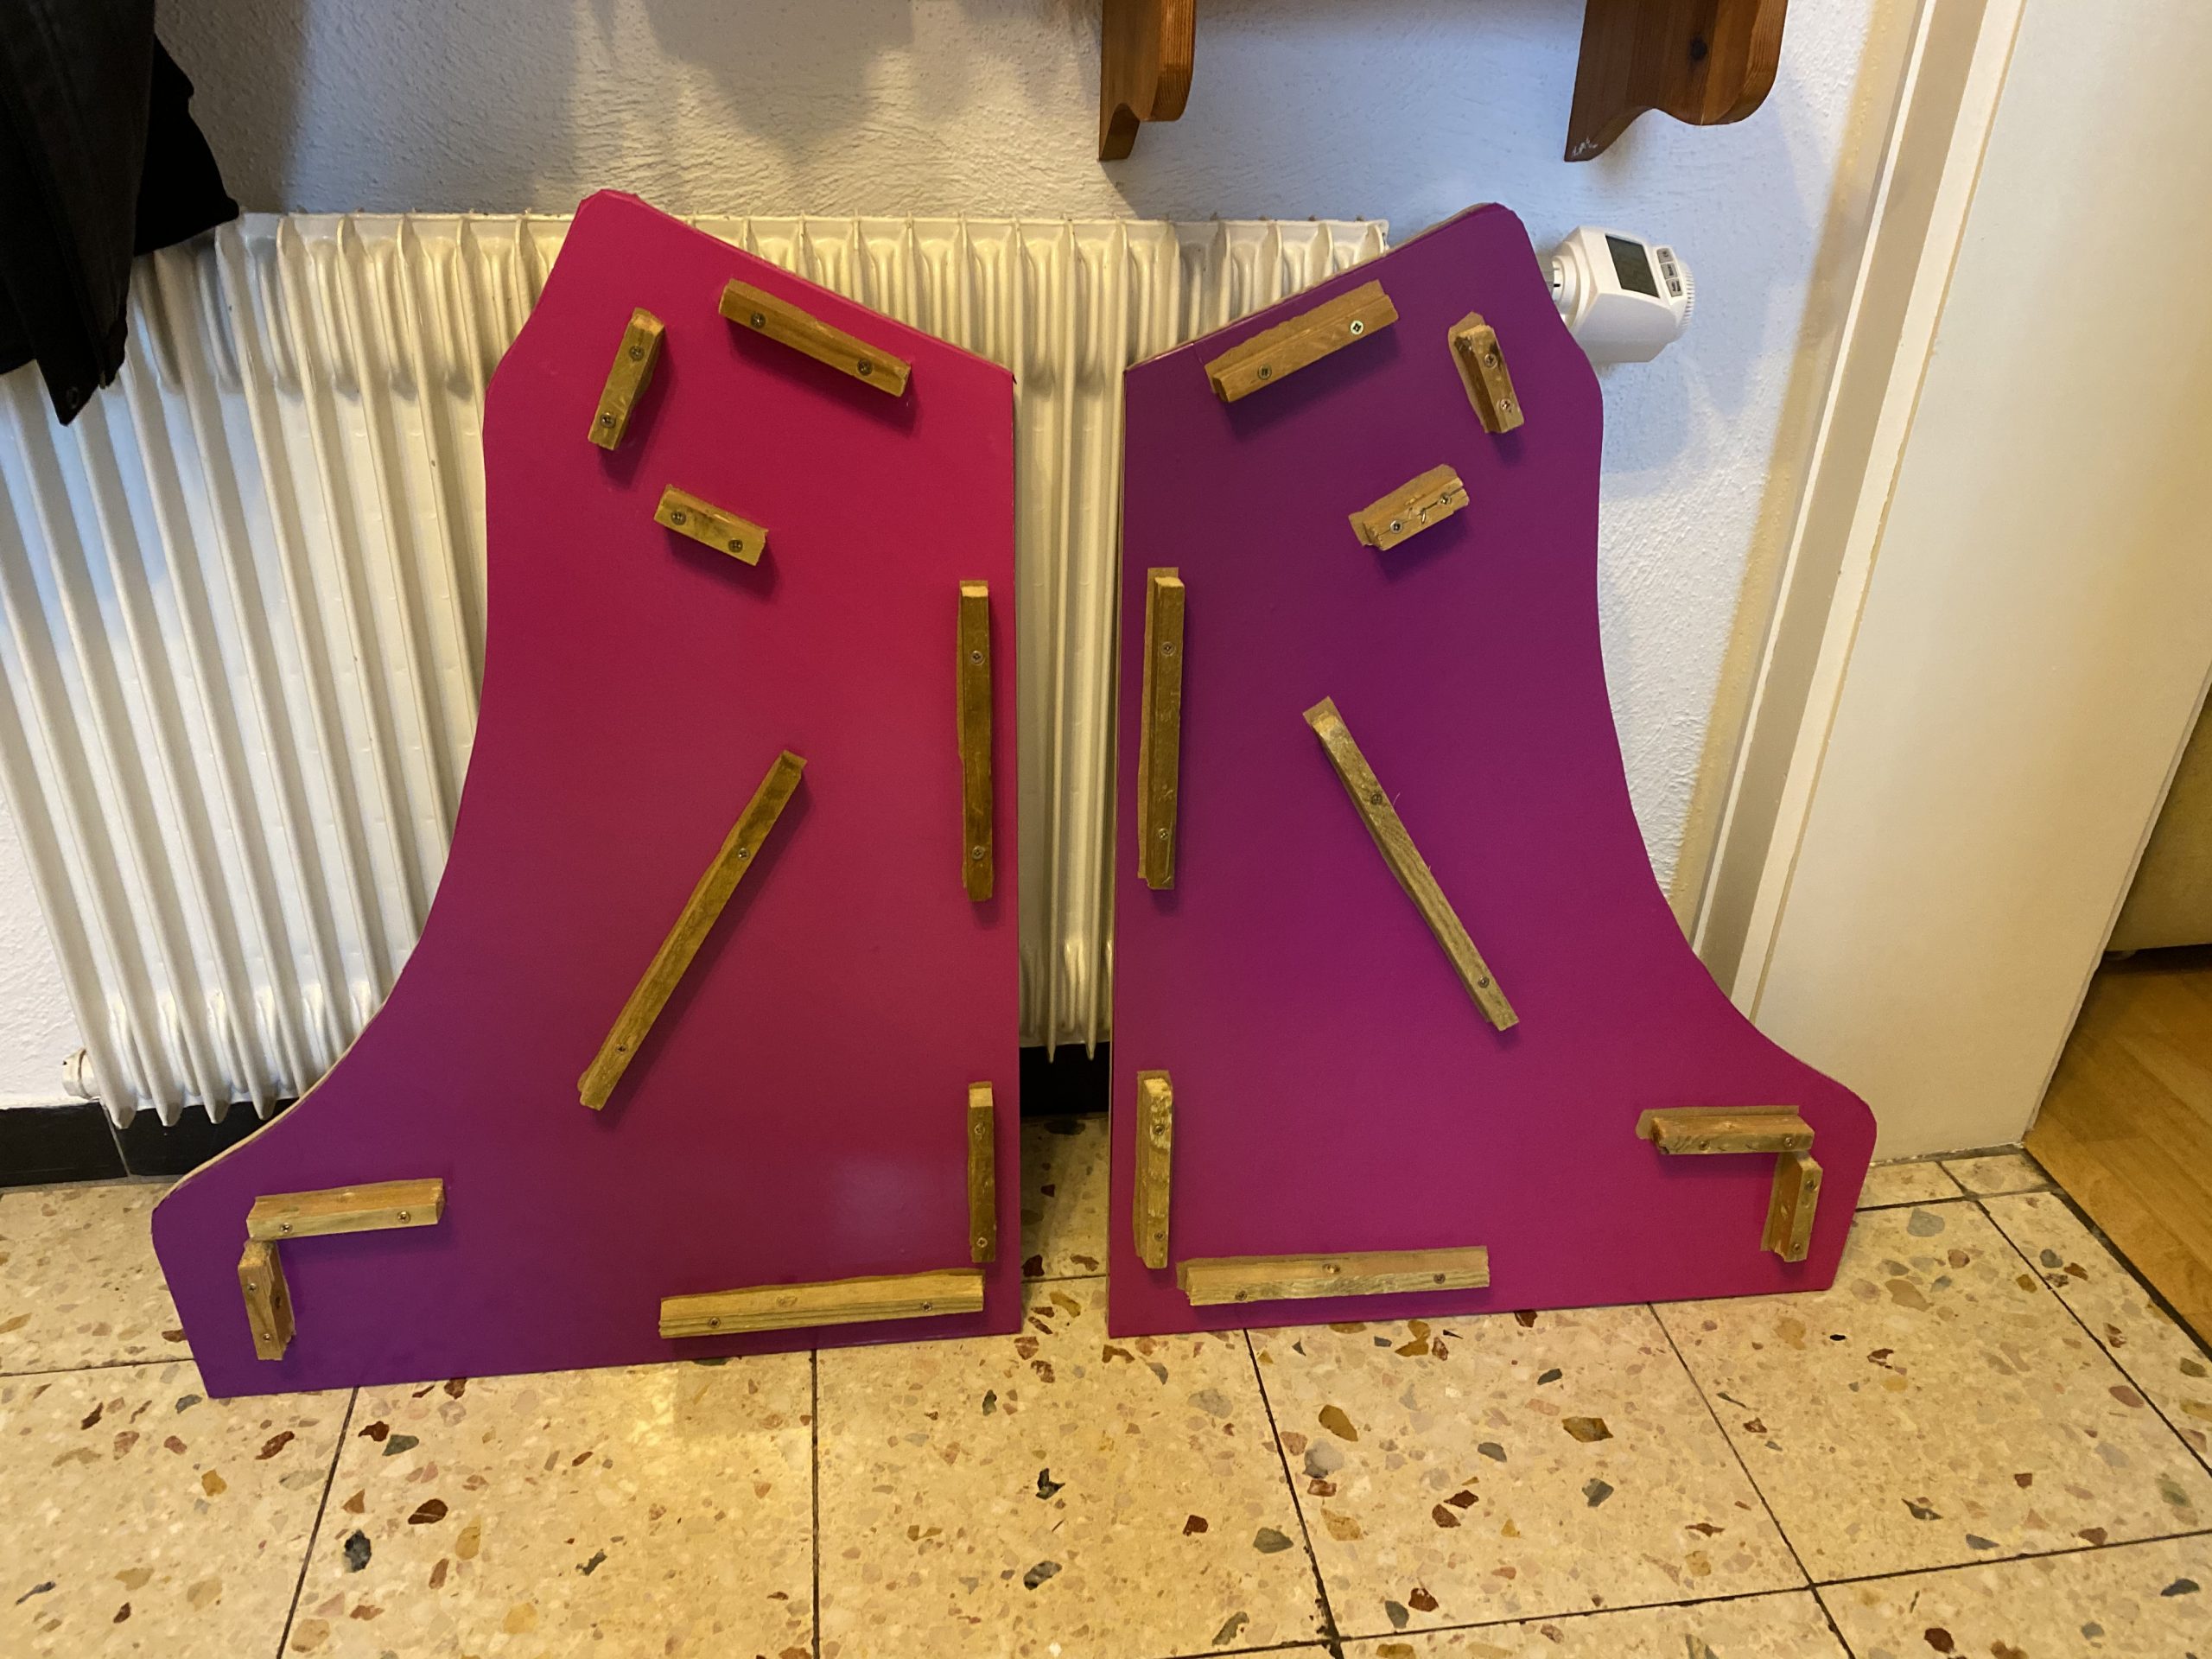
first drawings of the side panels
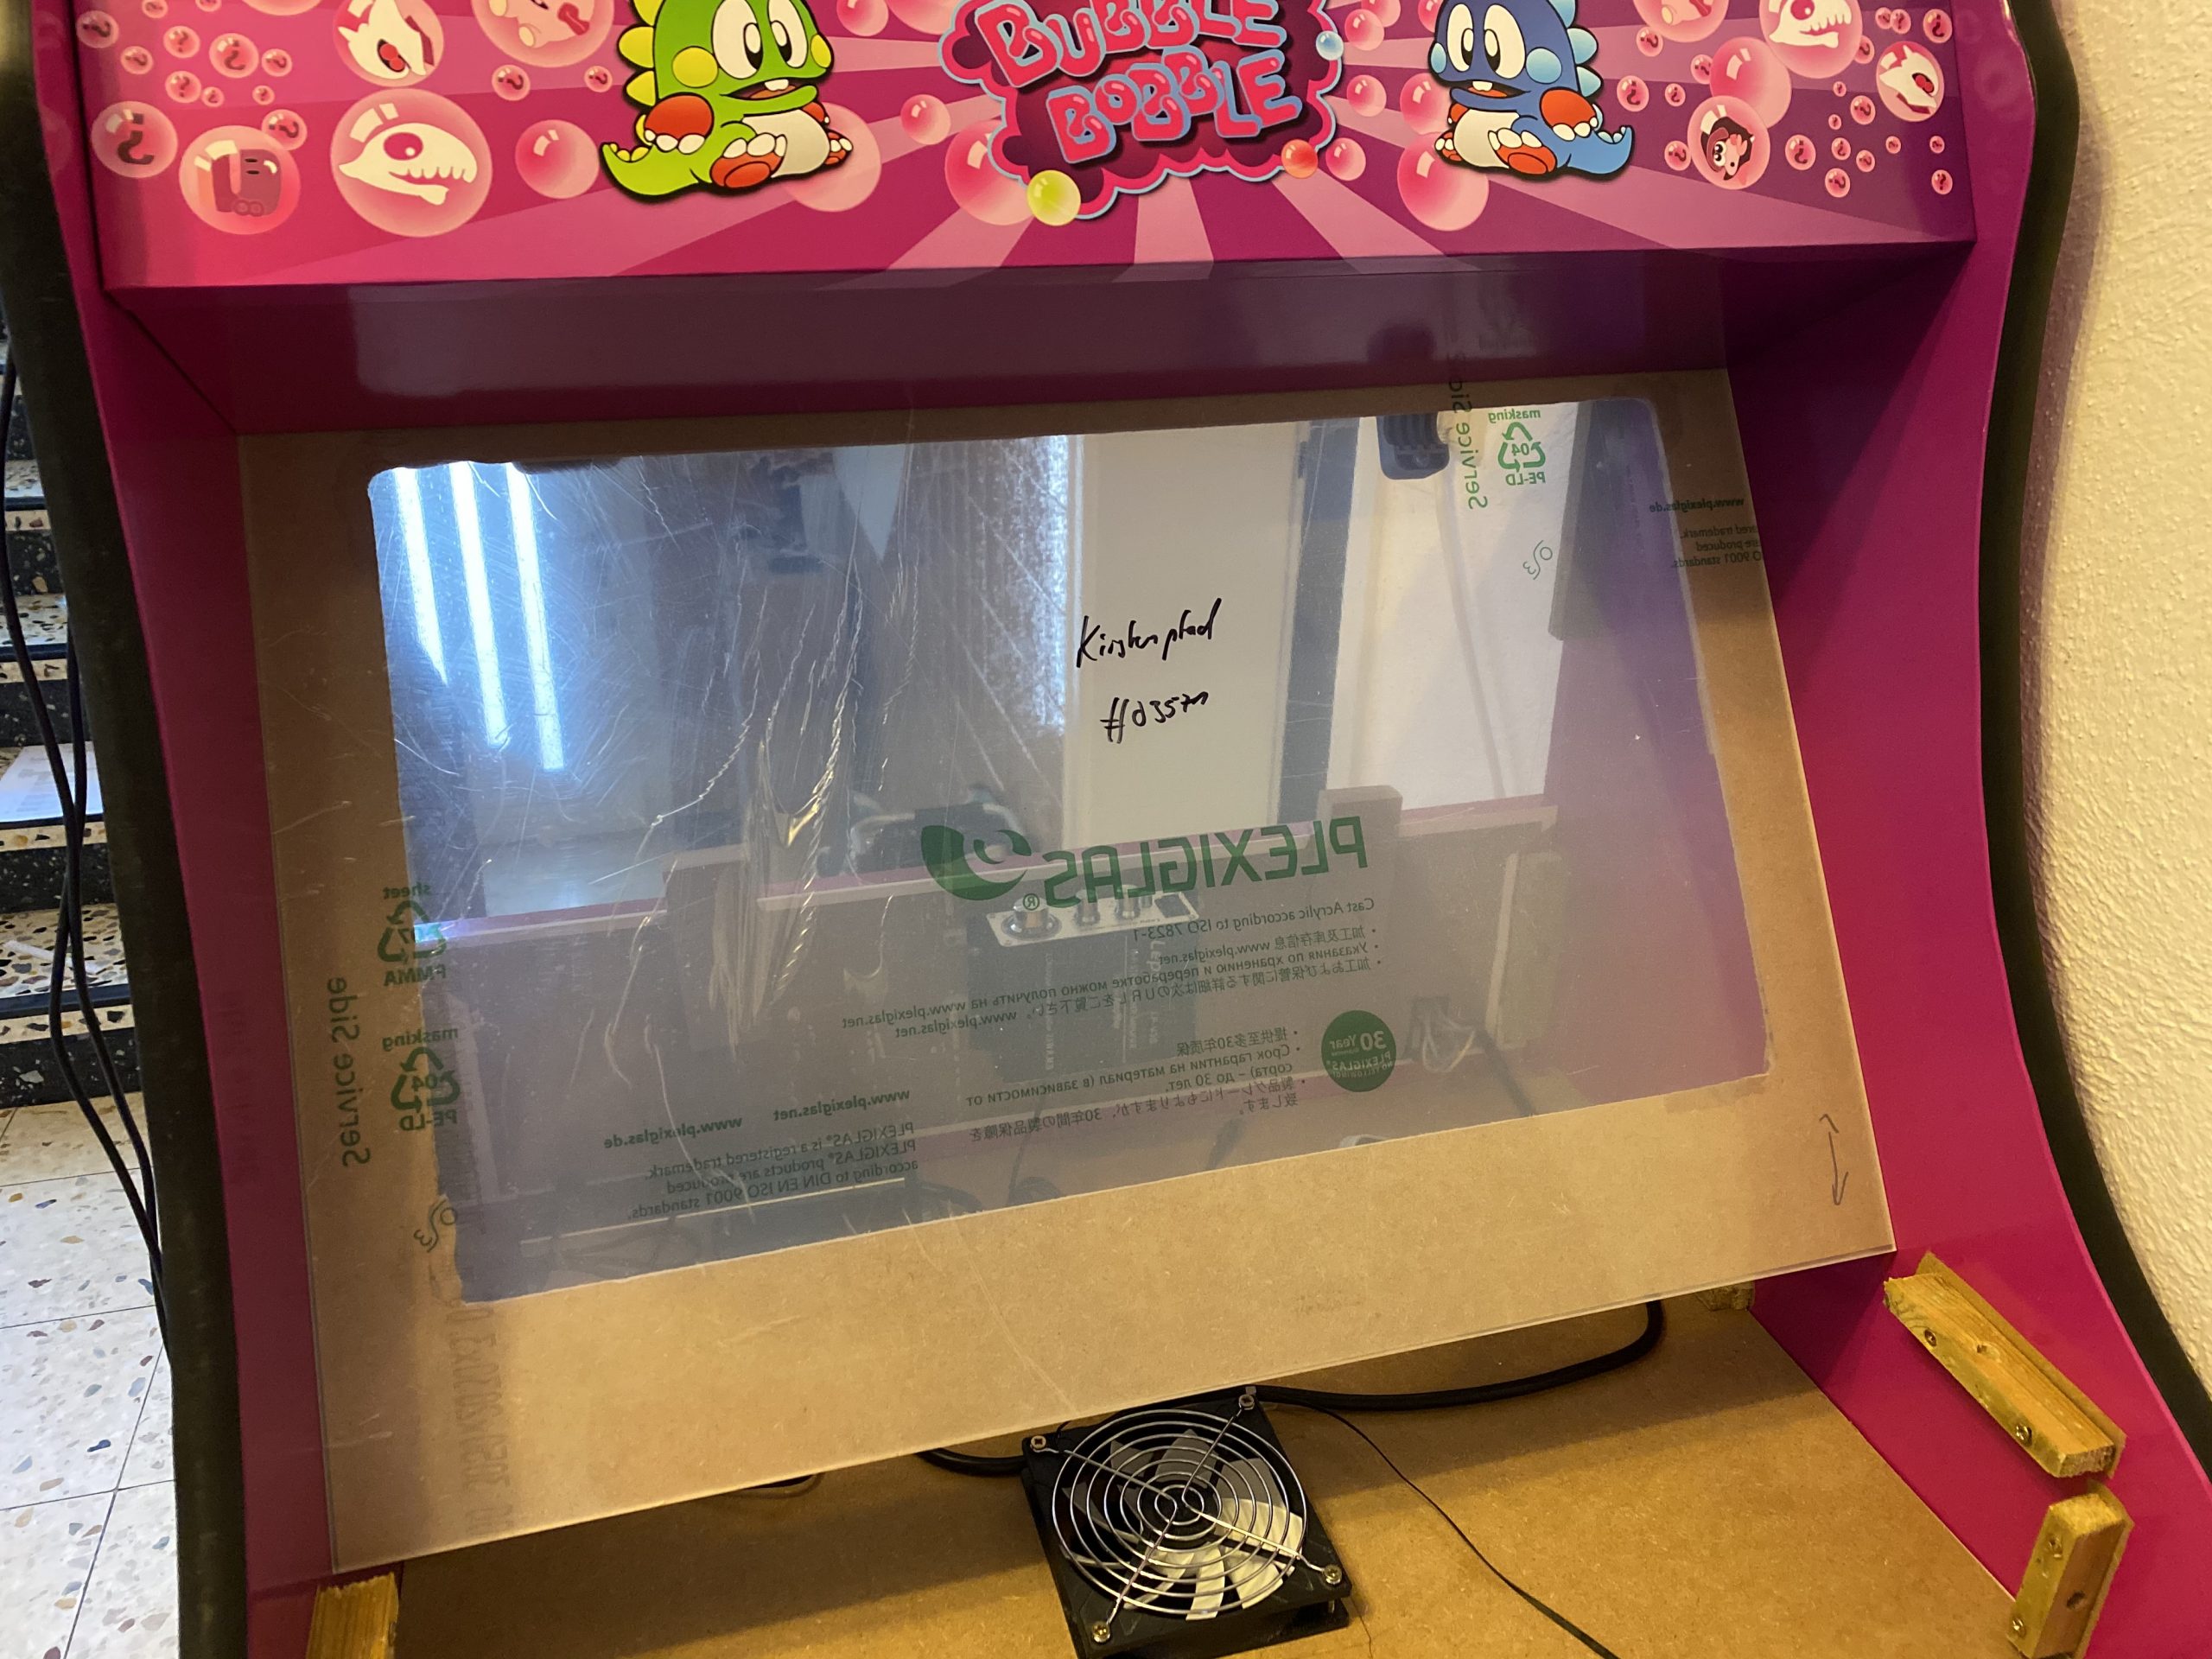
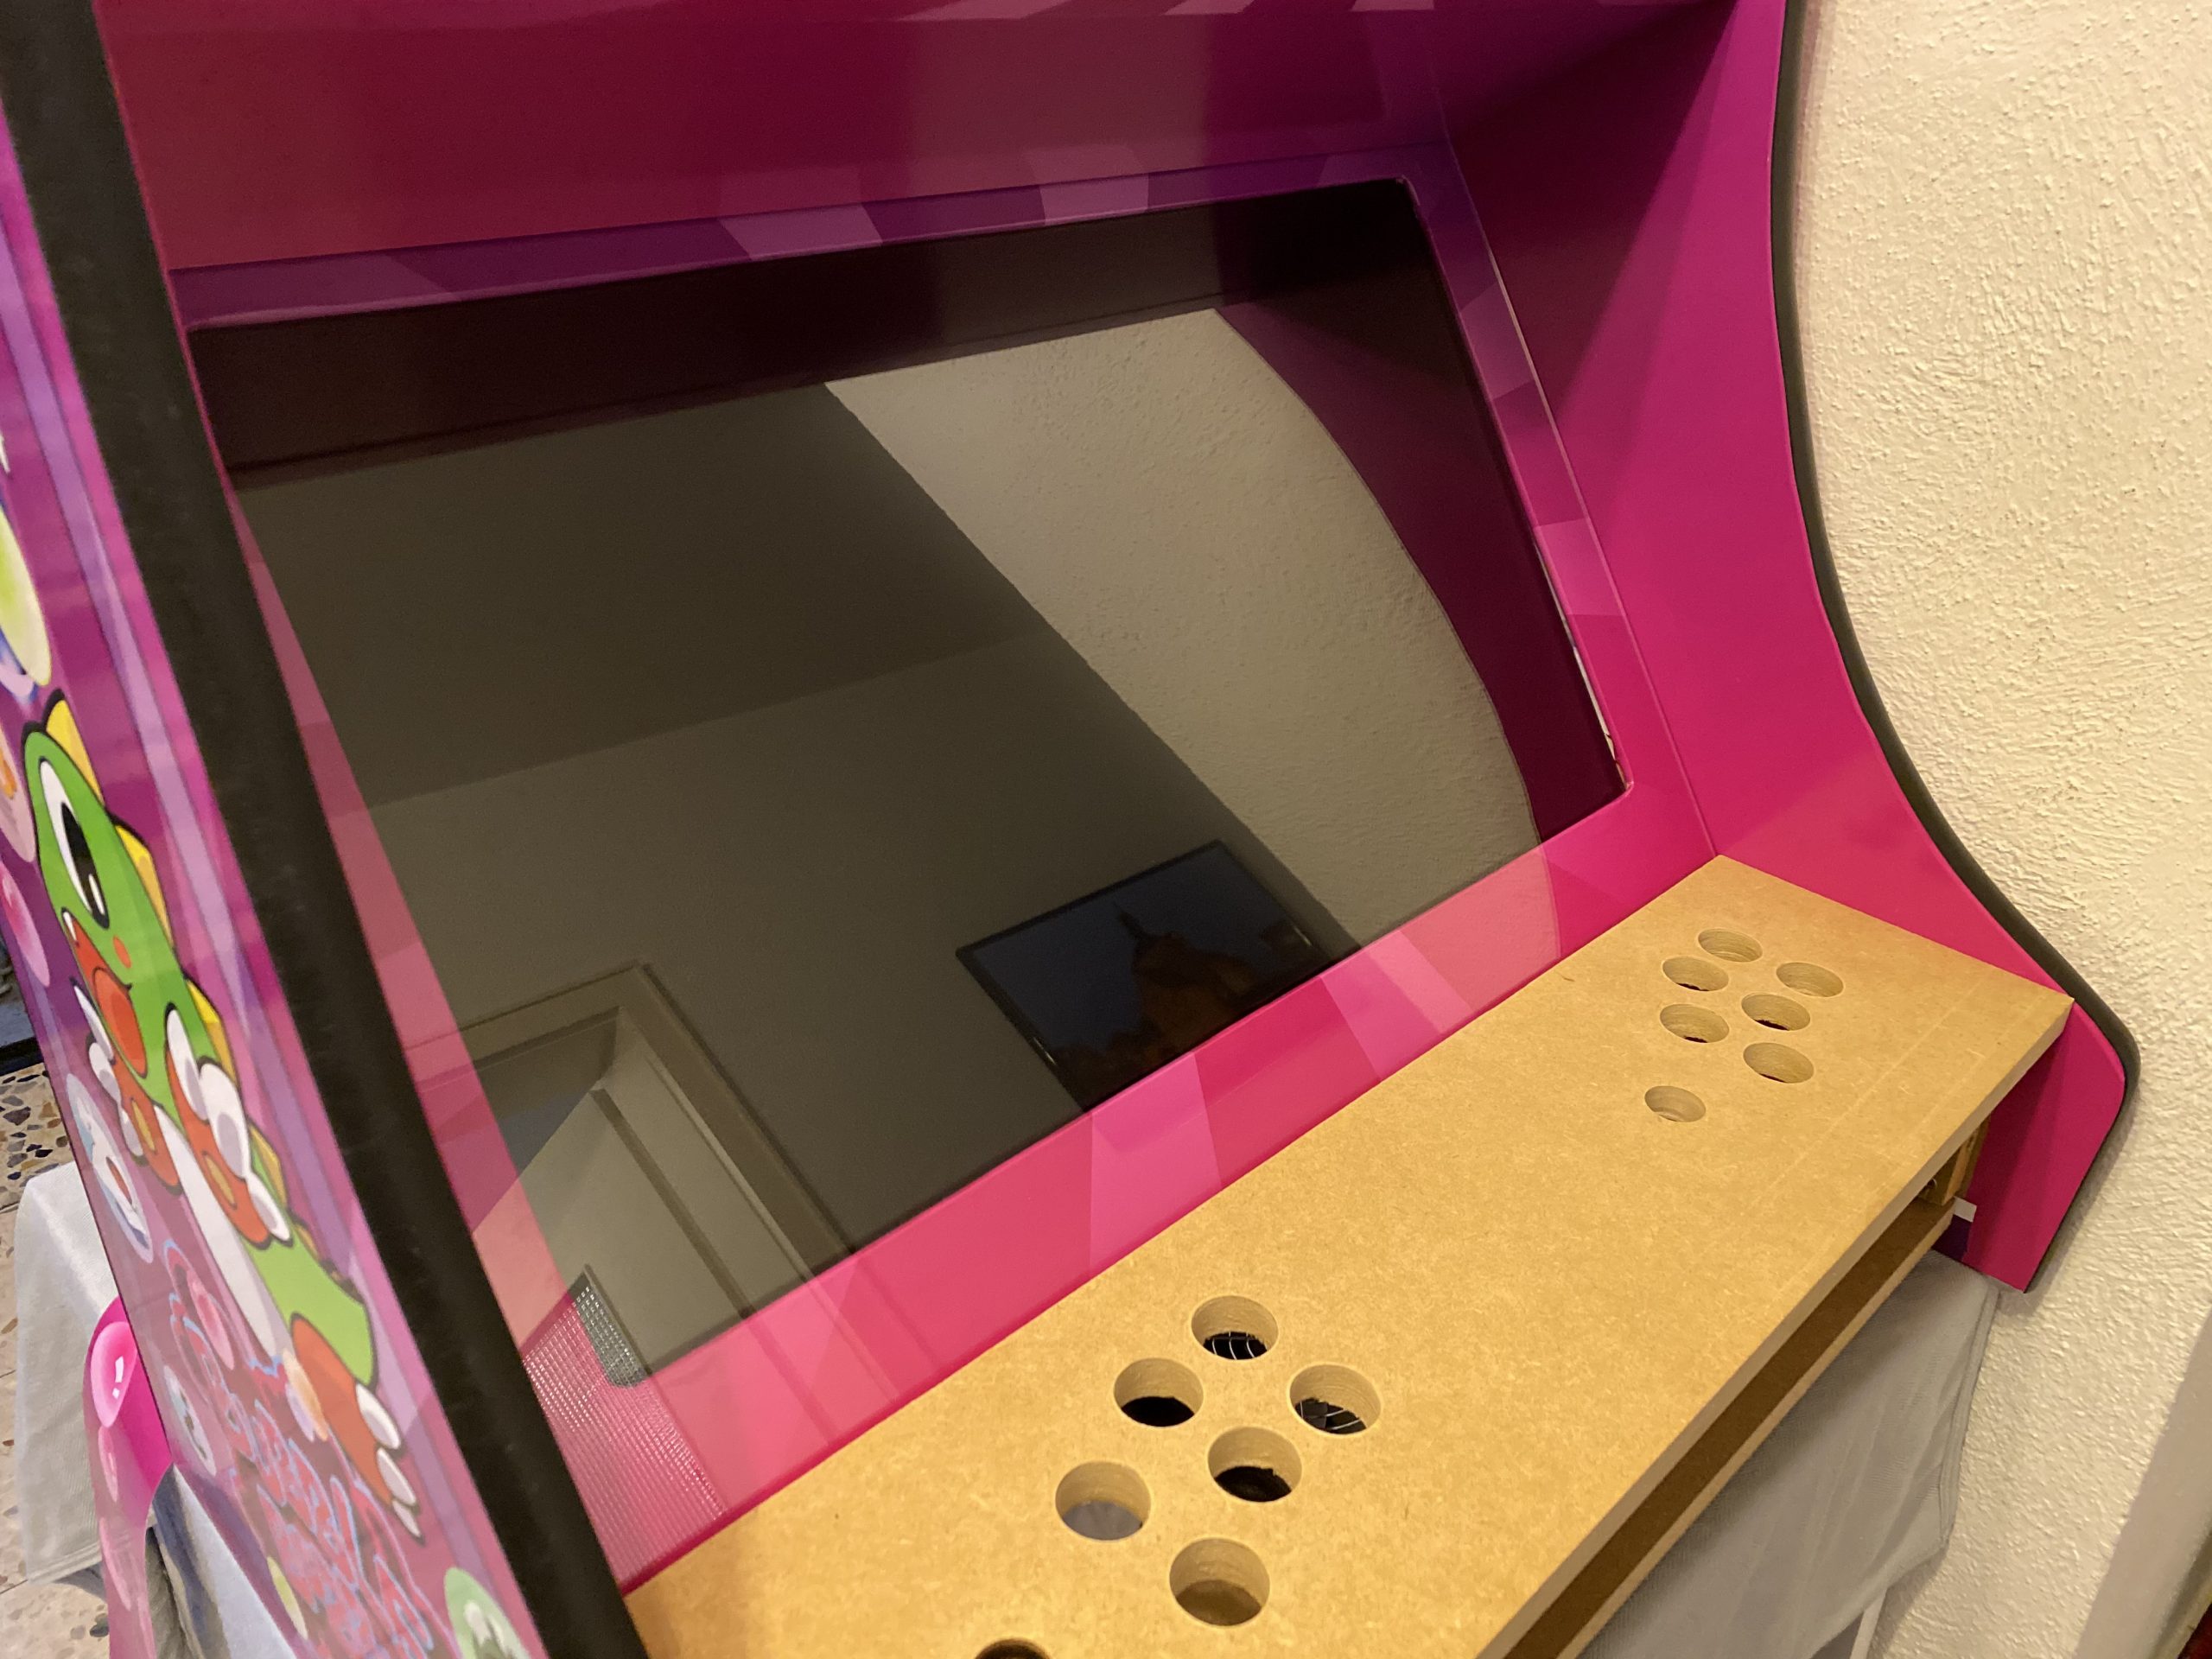
While I took the Holbrook Tech schematics as a base it quickly came apparent that I had to build/measure around the one fixed big thing in the middle: the screen.
screen
I wanted something decently sized that the RaspberryPi would be able to push out to and that would require no maintenance/further actions when installed.
To find something that fits I had my requirements fixed:
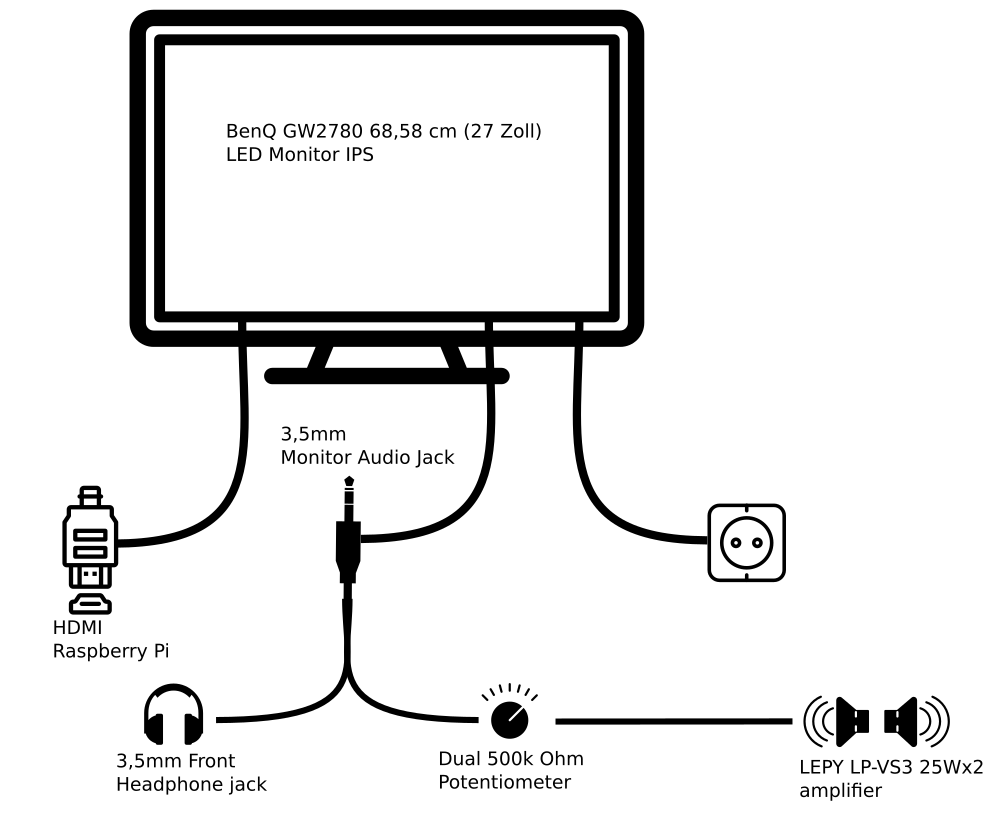
between 24″ – 32″
colour shift free wide viewing angle
1080p
takes audio over HDMI and is able to push it out through headphone jack
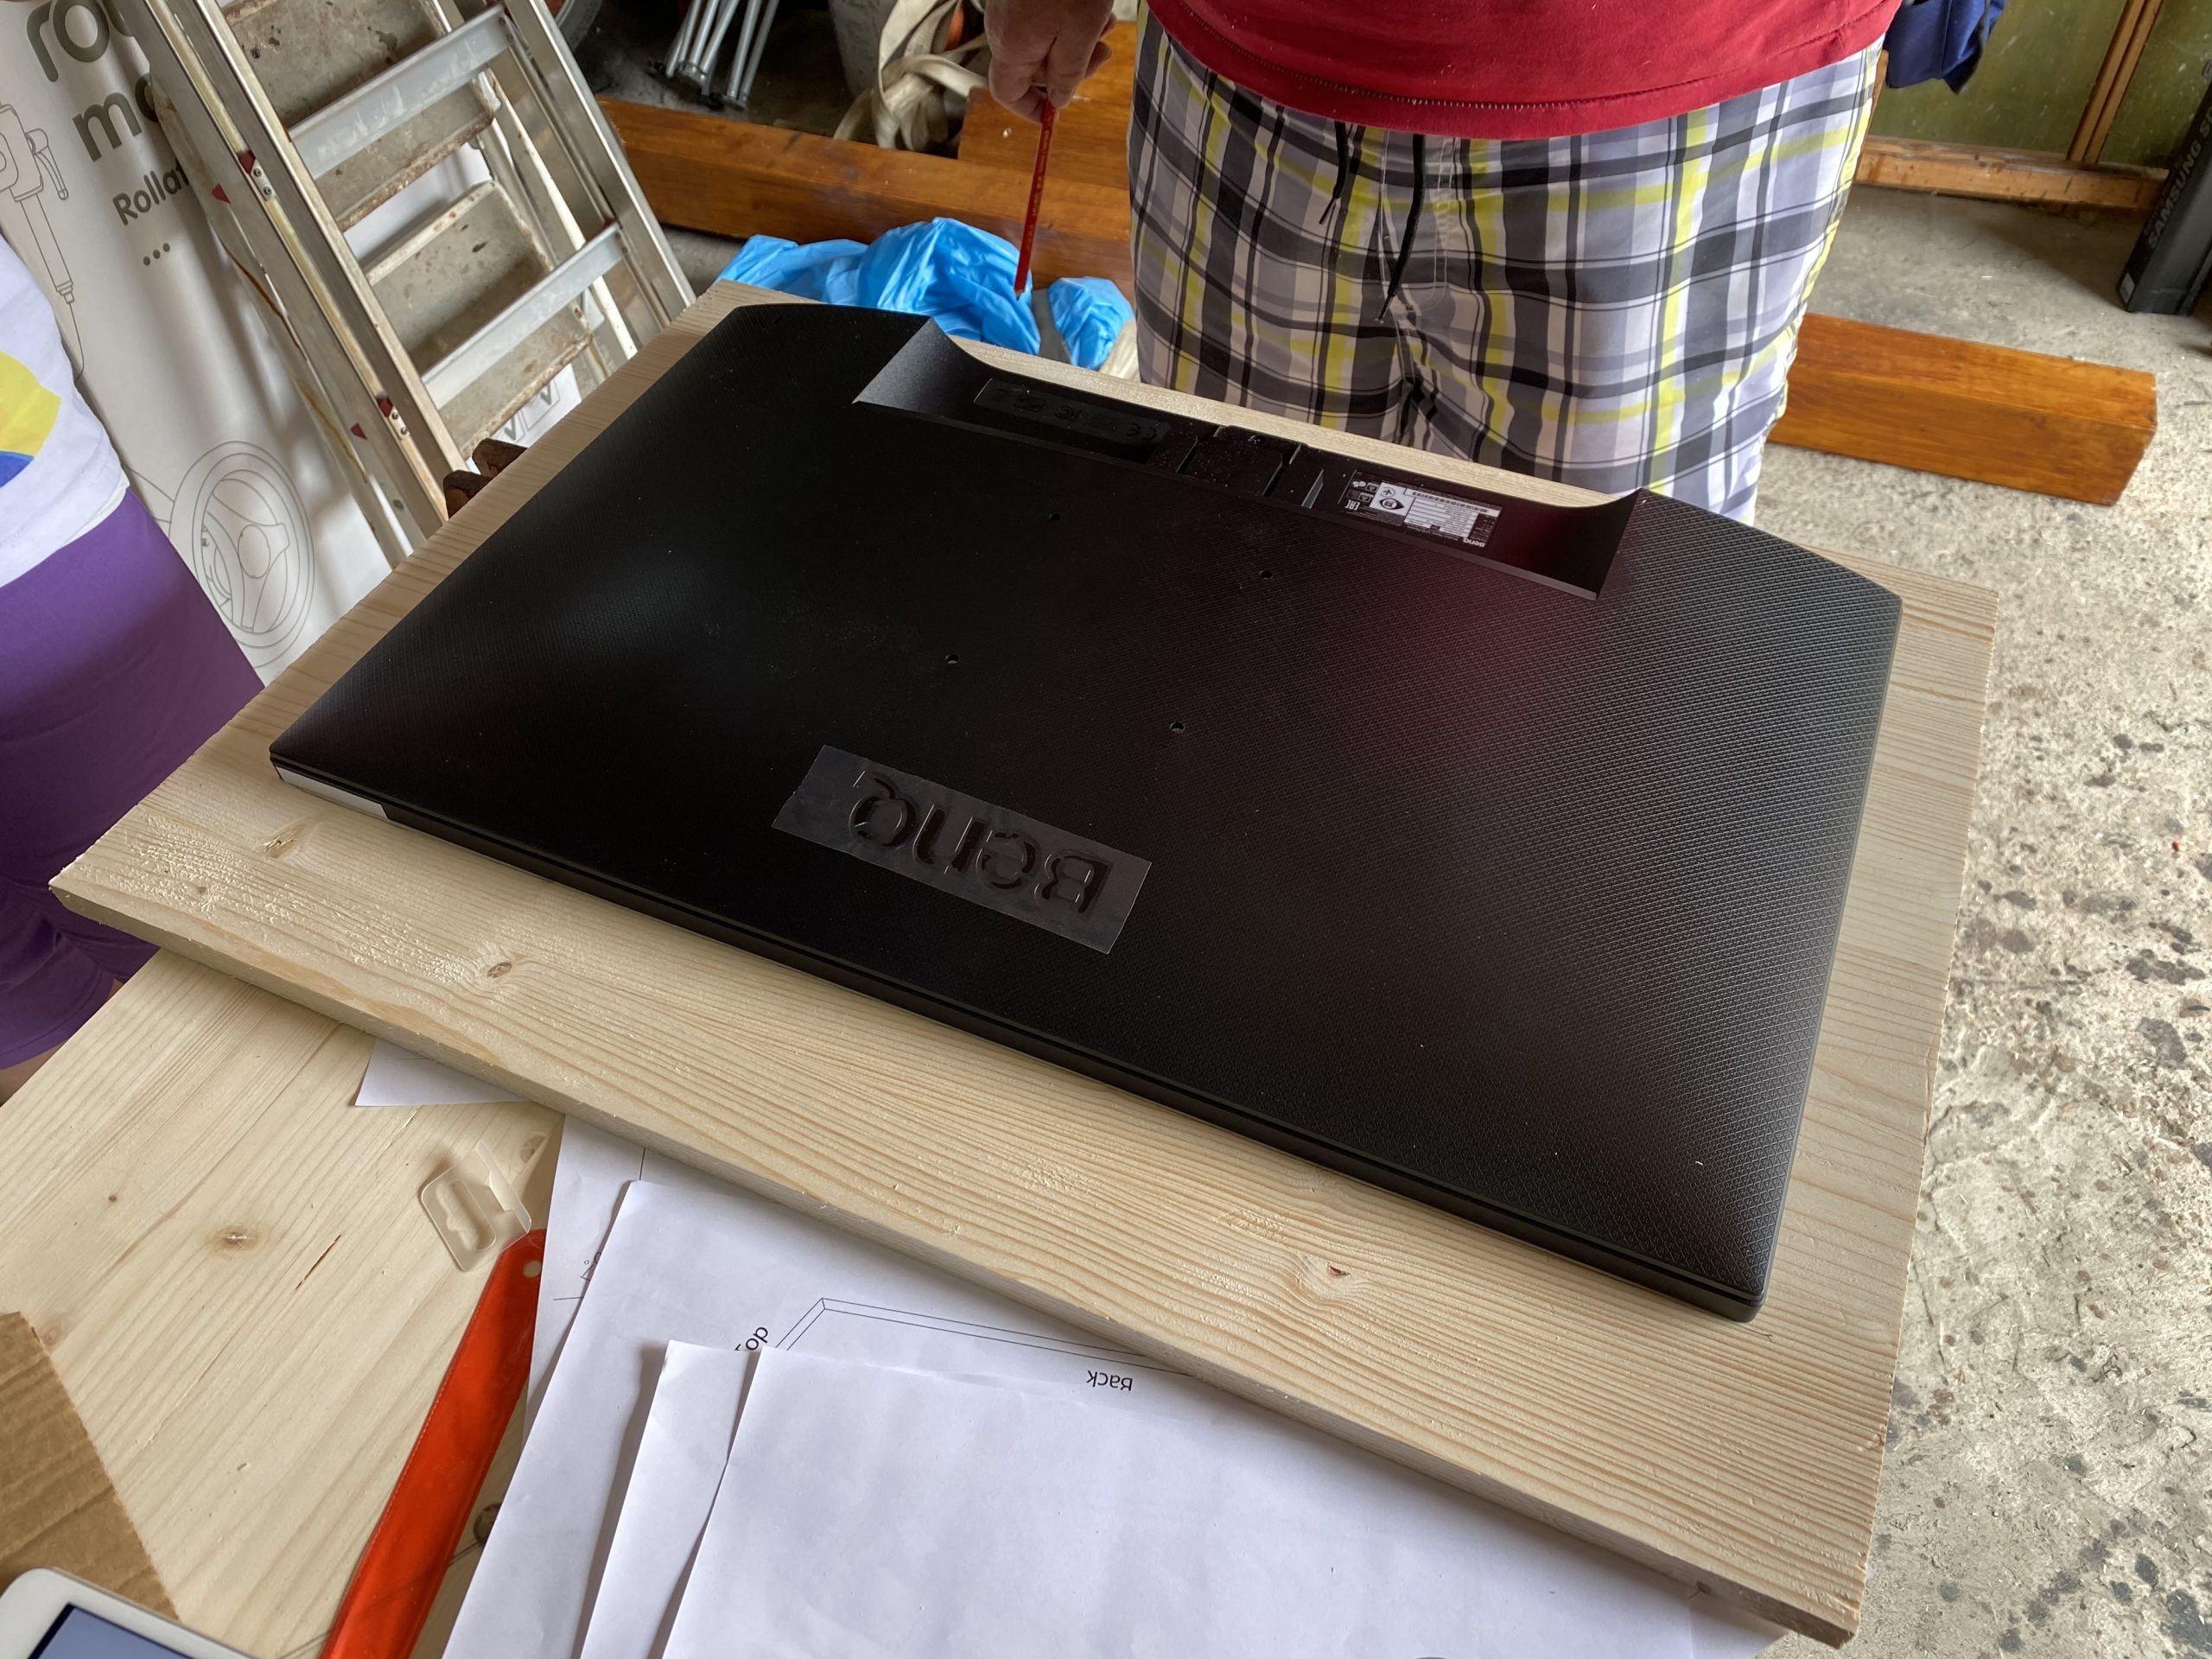
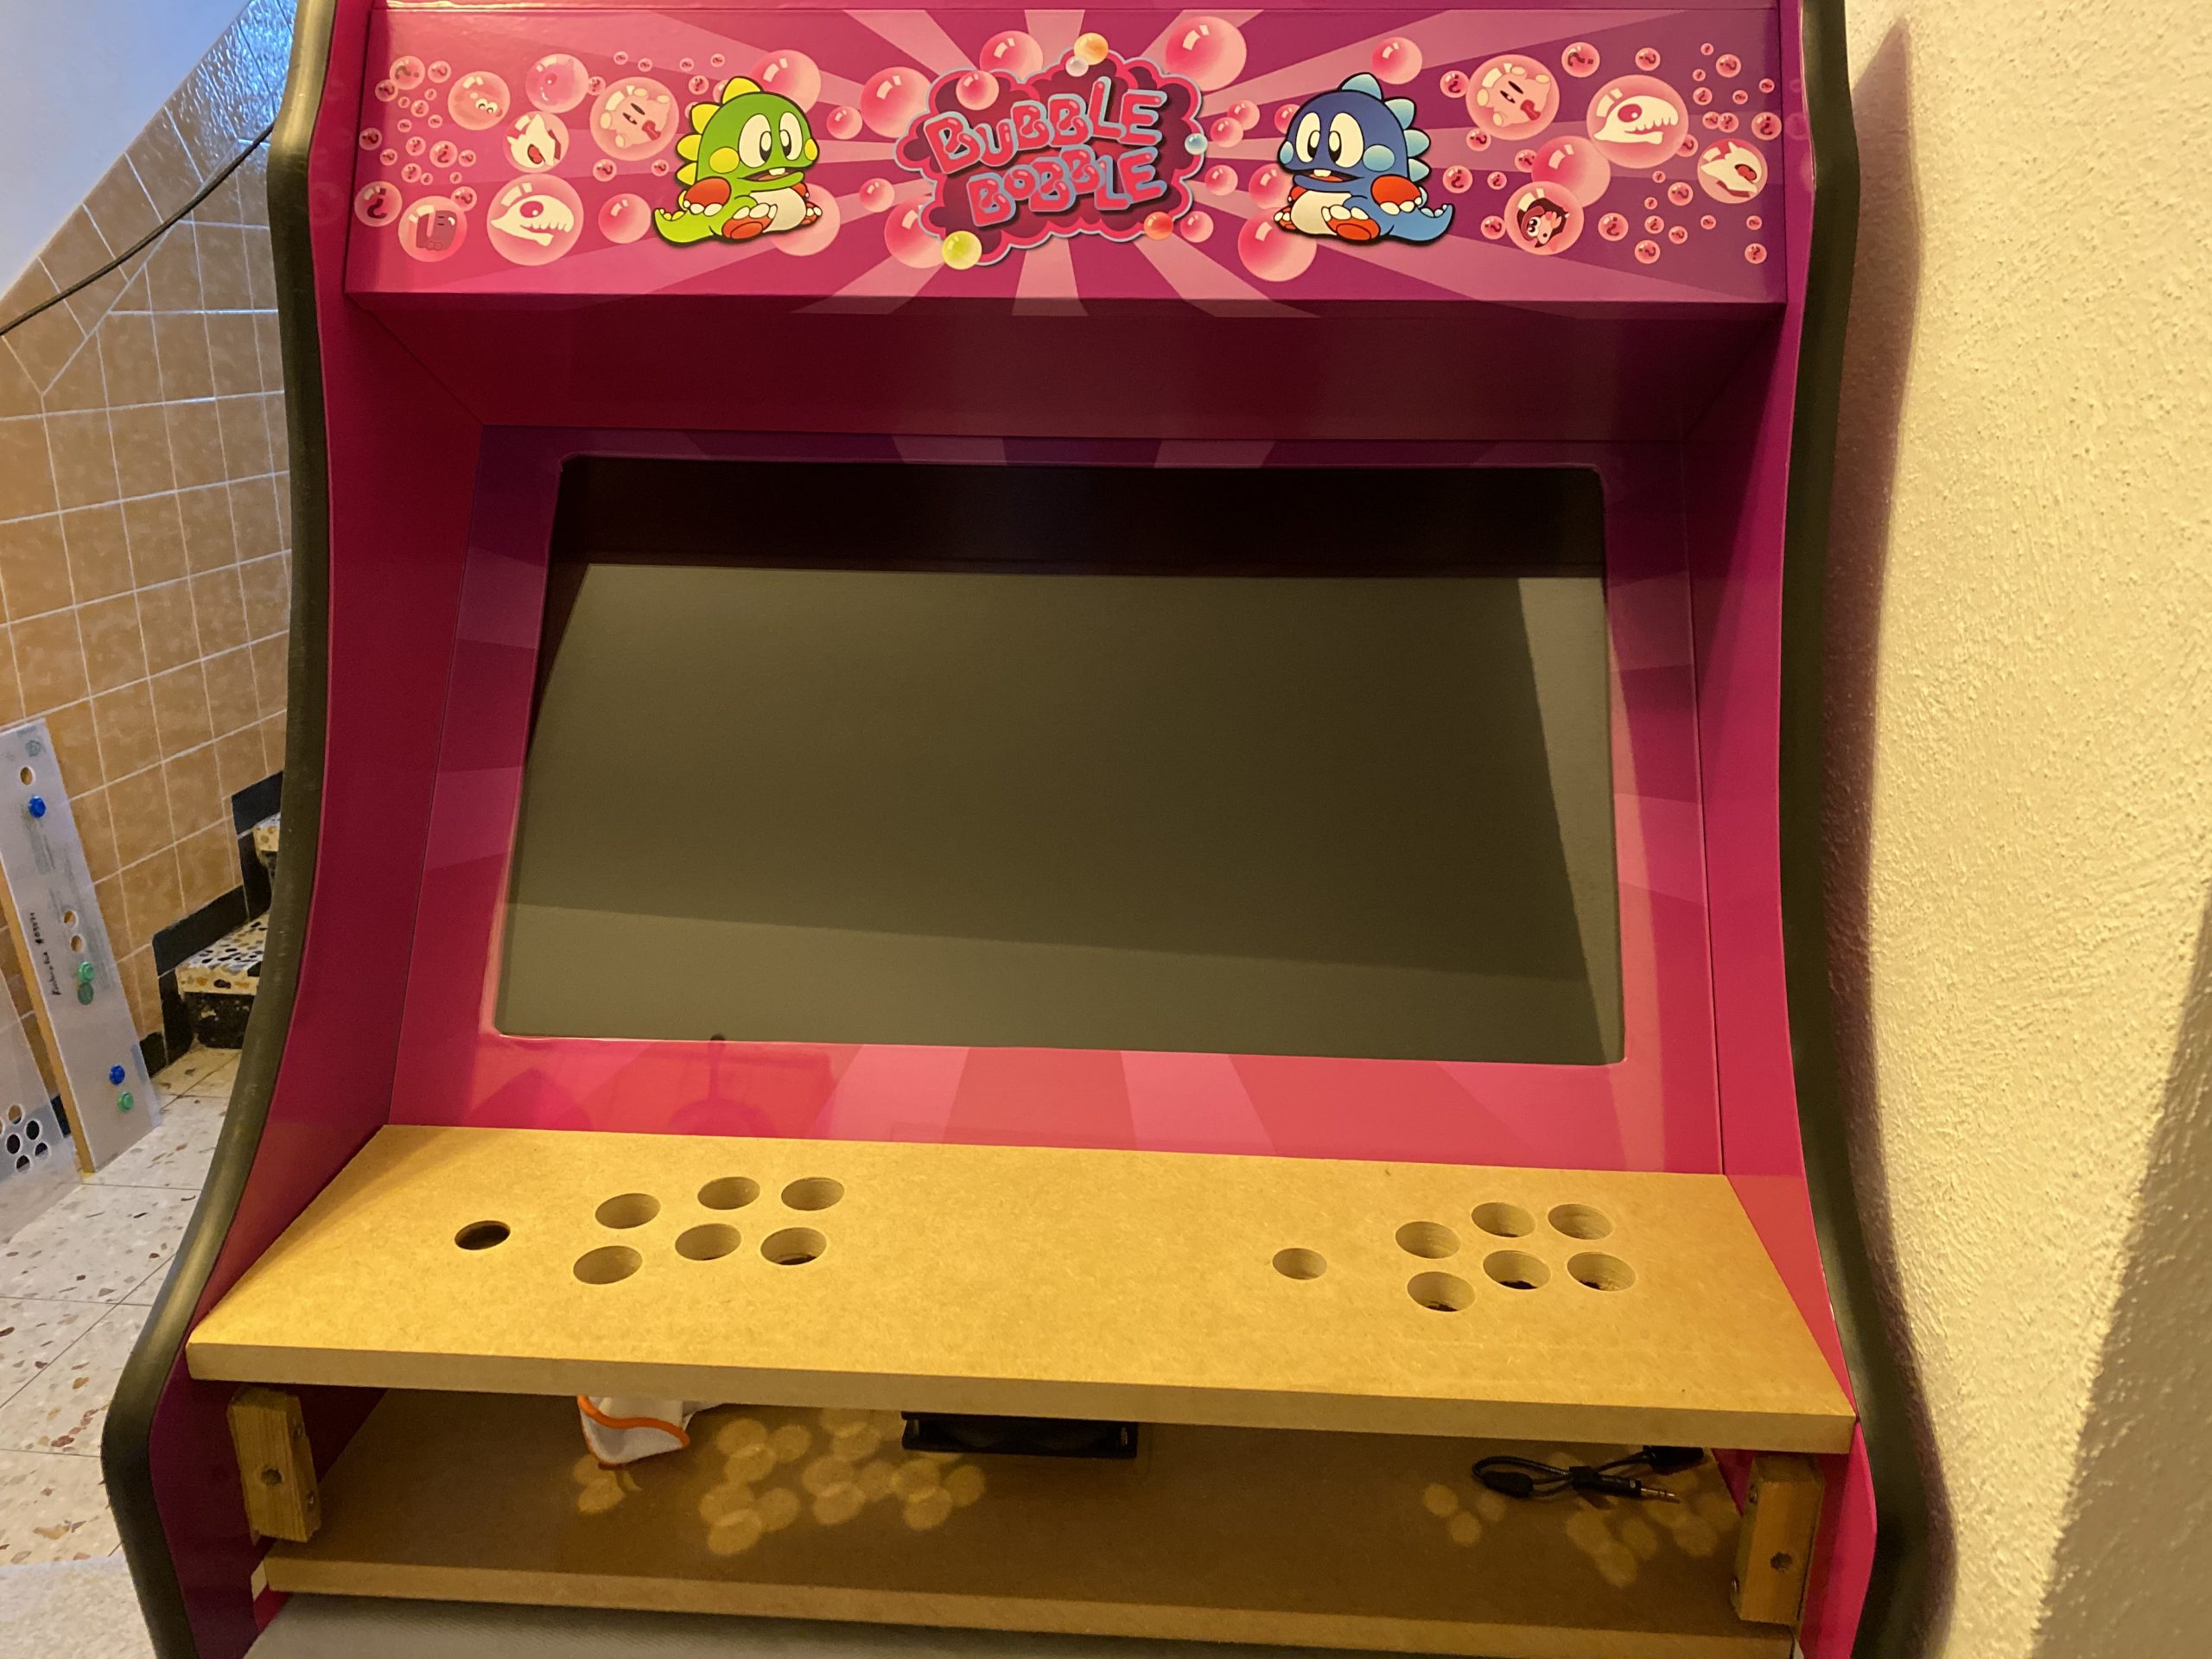
I eventually settled for a BenQ GW2780 27″ monitor with all boxes ticked for a reasonable price.
After the monitor arrived I carried it to my fathers house and we started to cut the bezel as a first try.
measuring the monitor in – on a piece of wood for testing.
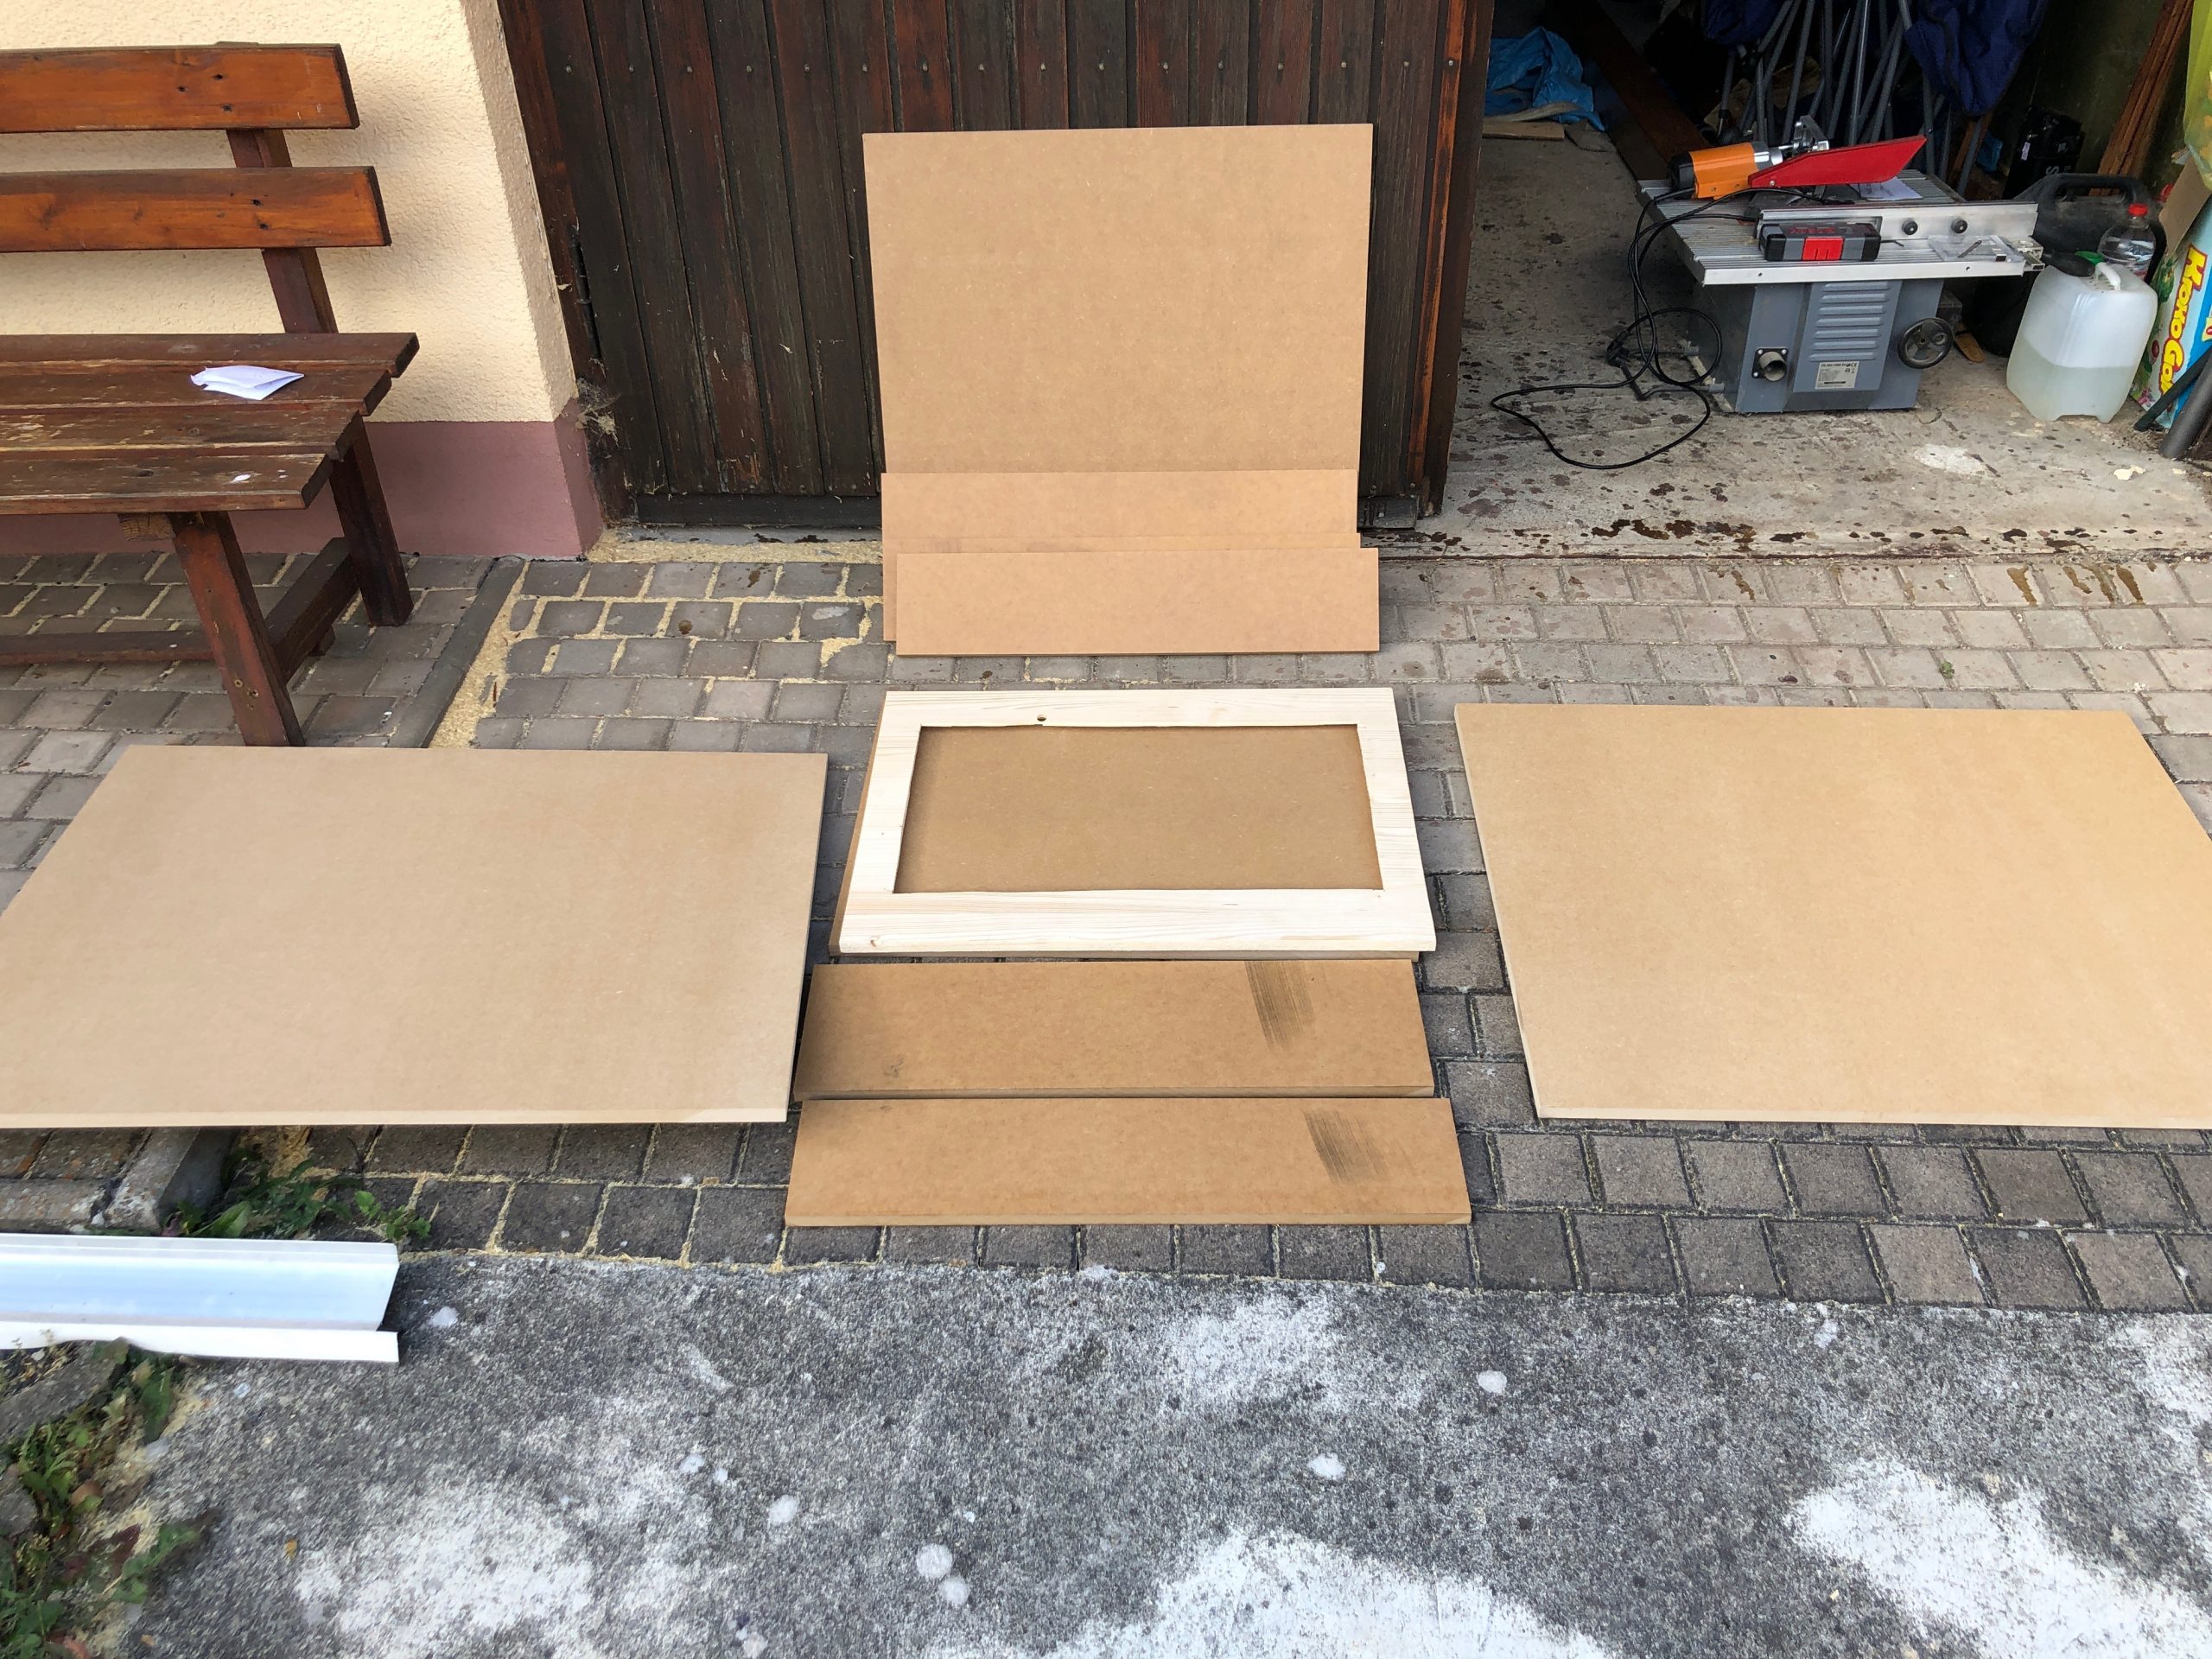
After some testing with plywood we went for MDF as it was proposed by others on the internet as well. This made the cutting so much easier.
woodwork
We went with standard 2cm MDF sheets and my father cut them to size with the measurements derived from the monitor bezel centerpiece.
Big thanks to my father for cutting so much wood so diligently! The next days he sent me pictures of what he’d made:
the plywood bezel was replaced with the MDF version
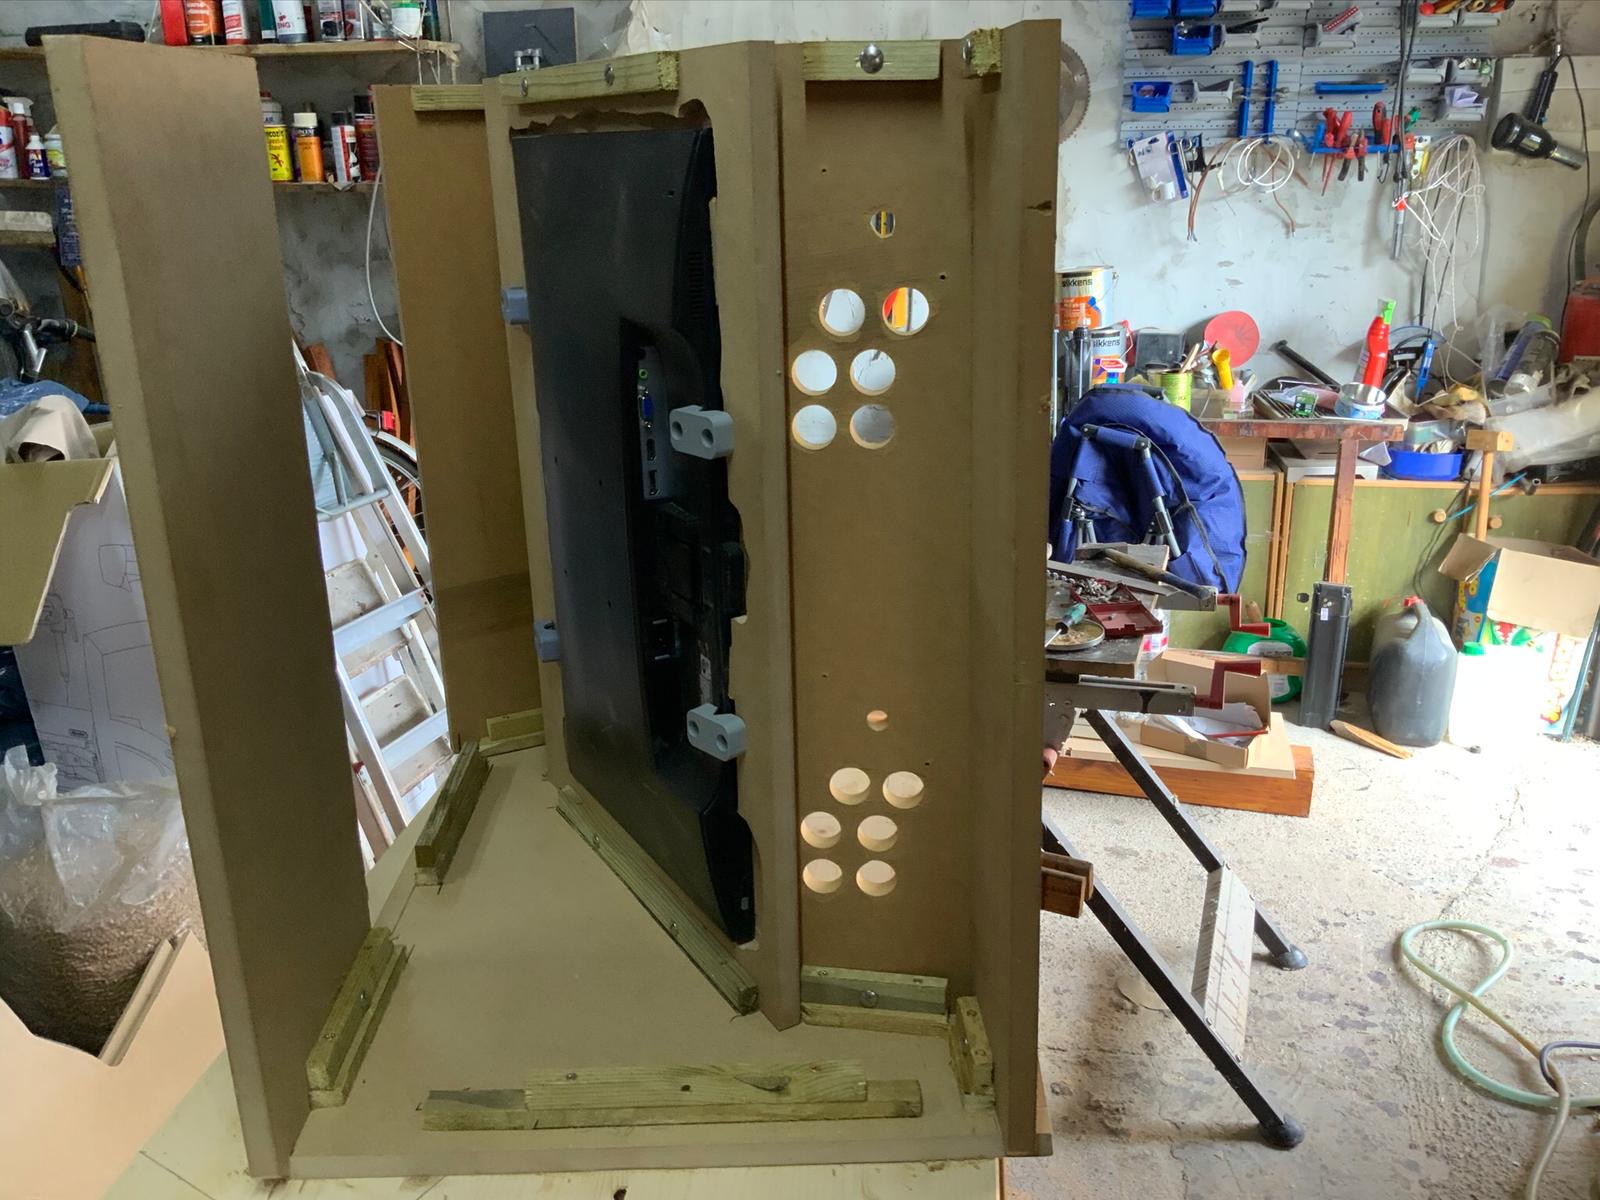
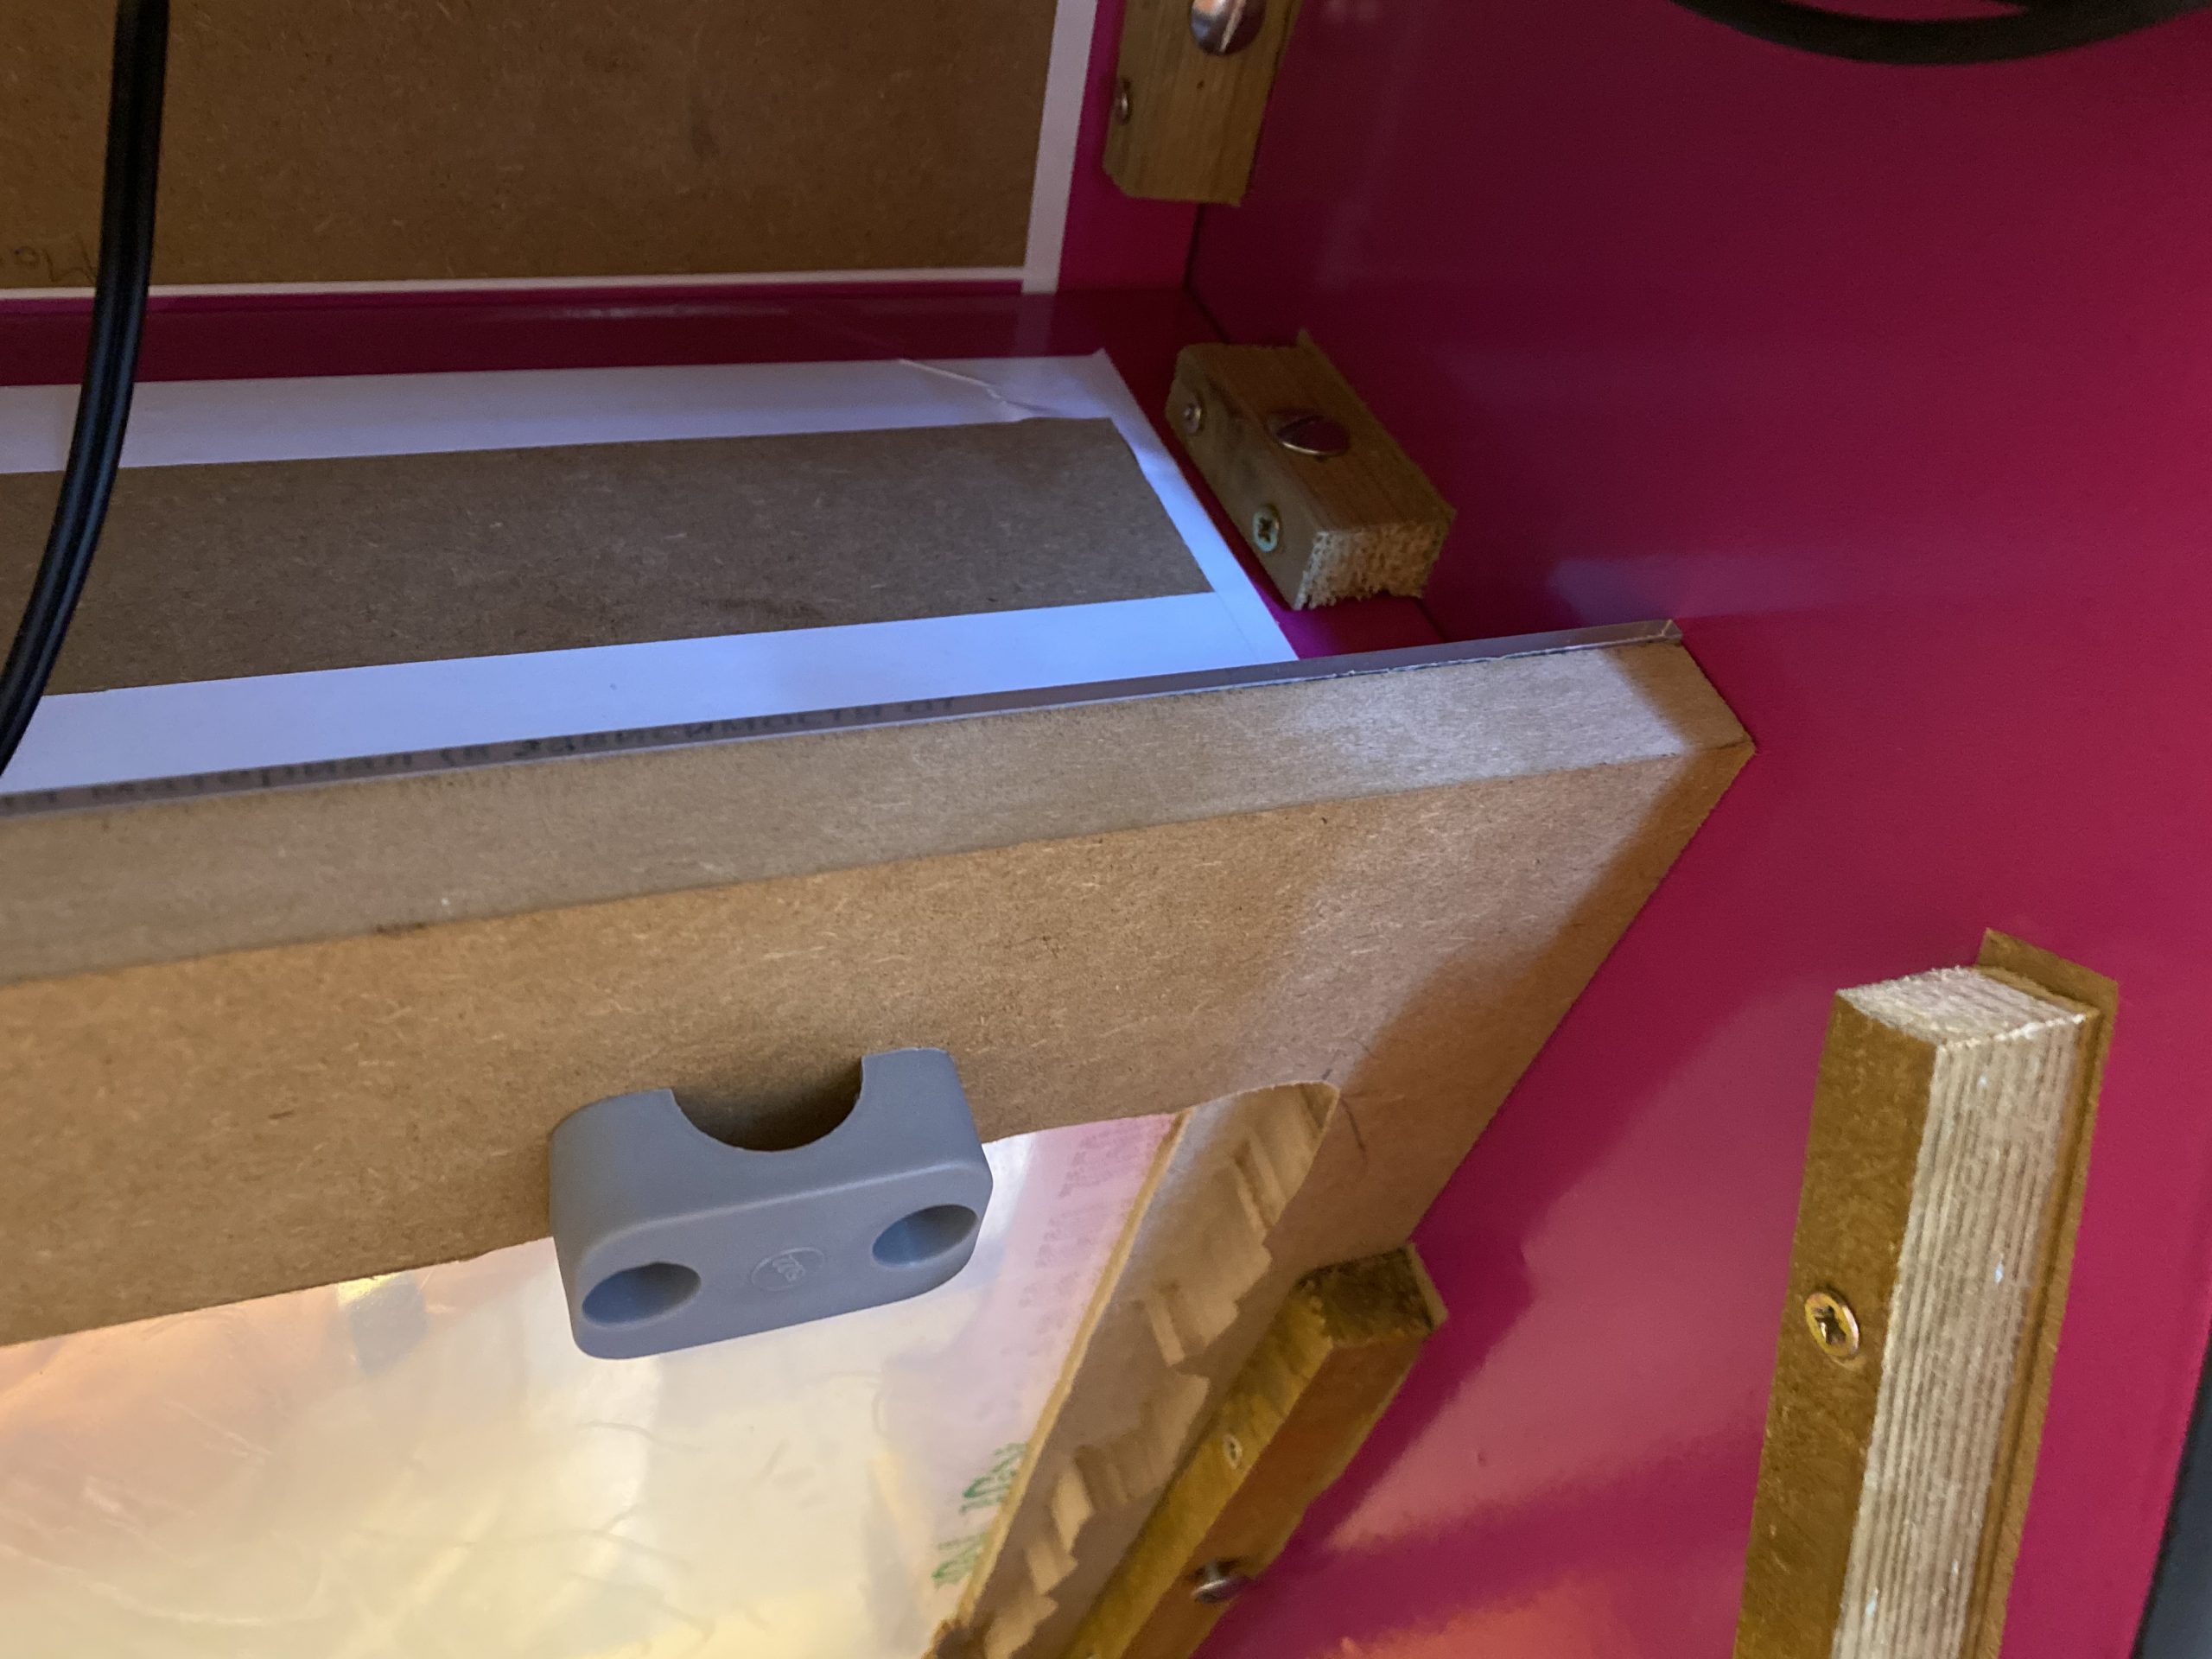
Each sheet of MDF wood got a steel screw thread insert. The screw is going on the inside through another peice of wood which is screwed and glued directly to the insides. This holds everything firm and is invisible from the outsides.
The only screws visible from the outside are holding the back panel on. Because you need to be able to remove the back panel they can be removed. Also the back panel is plit into two parts because that gave more structural strength and helps with the power input mounting later.
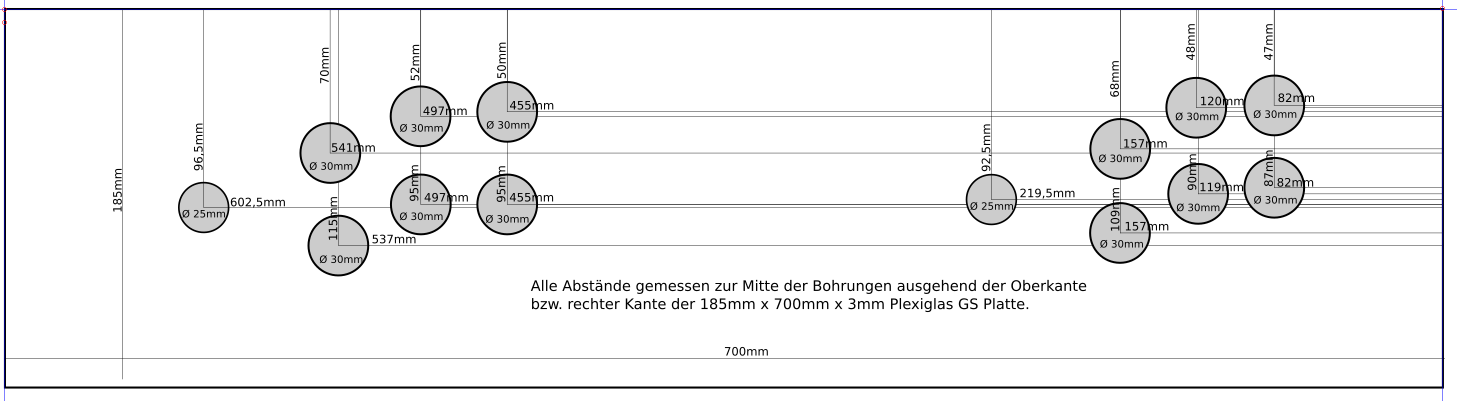
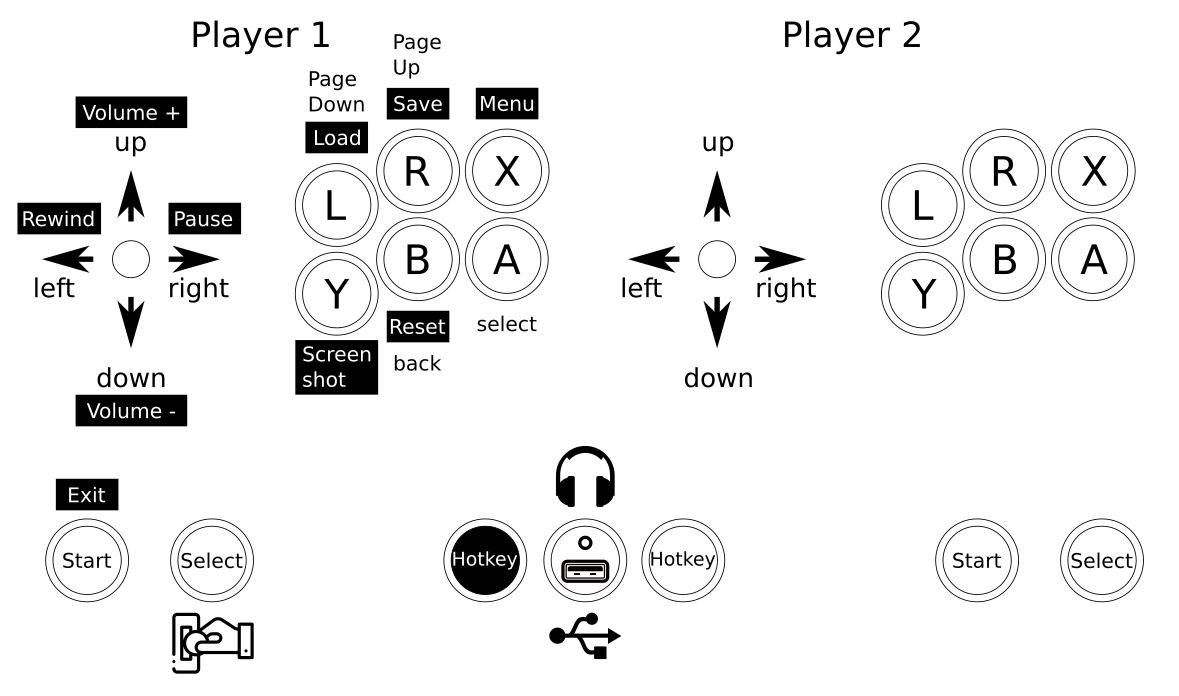
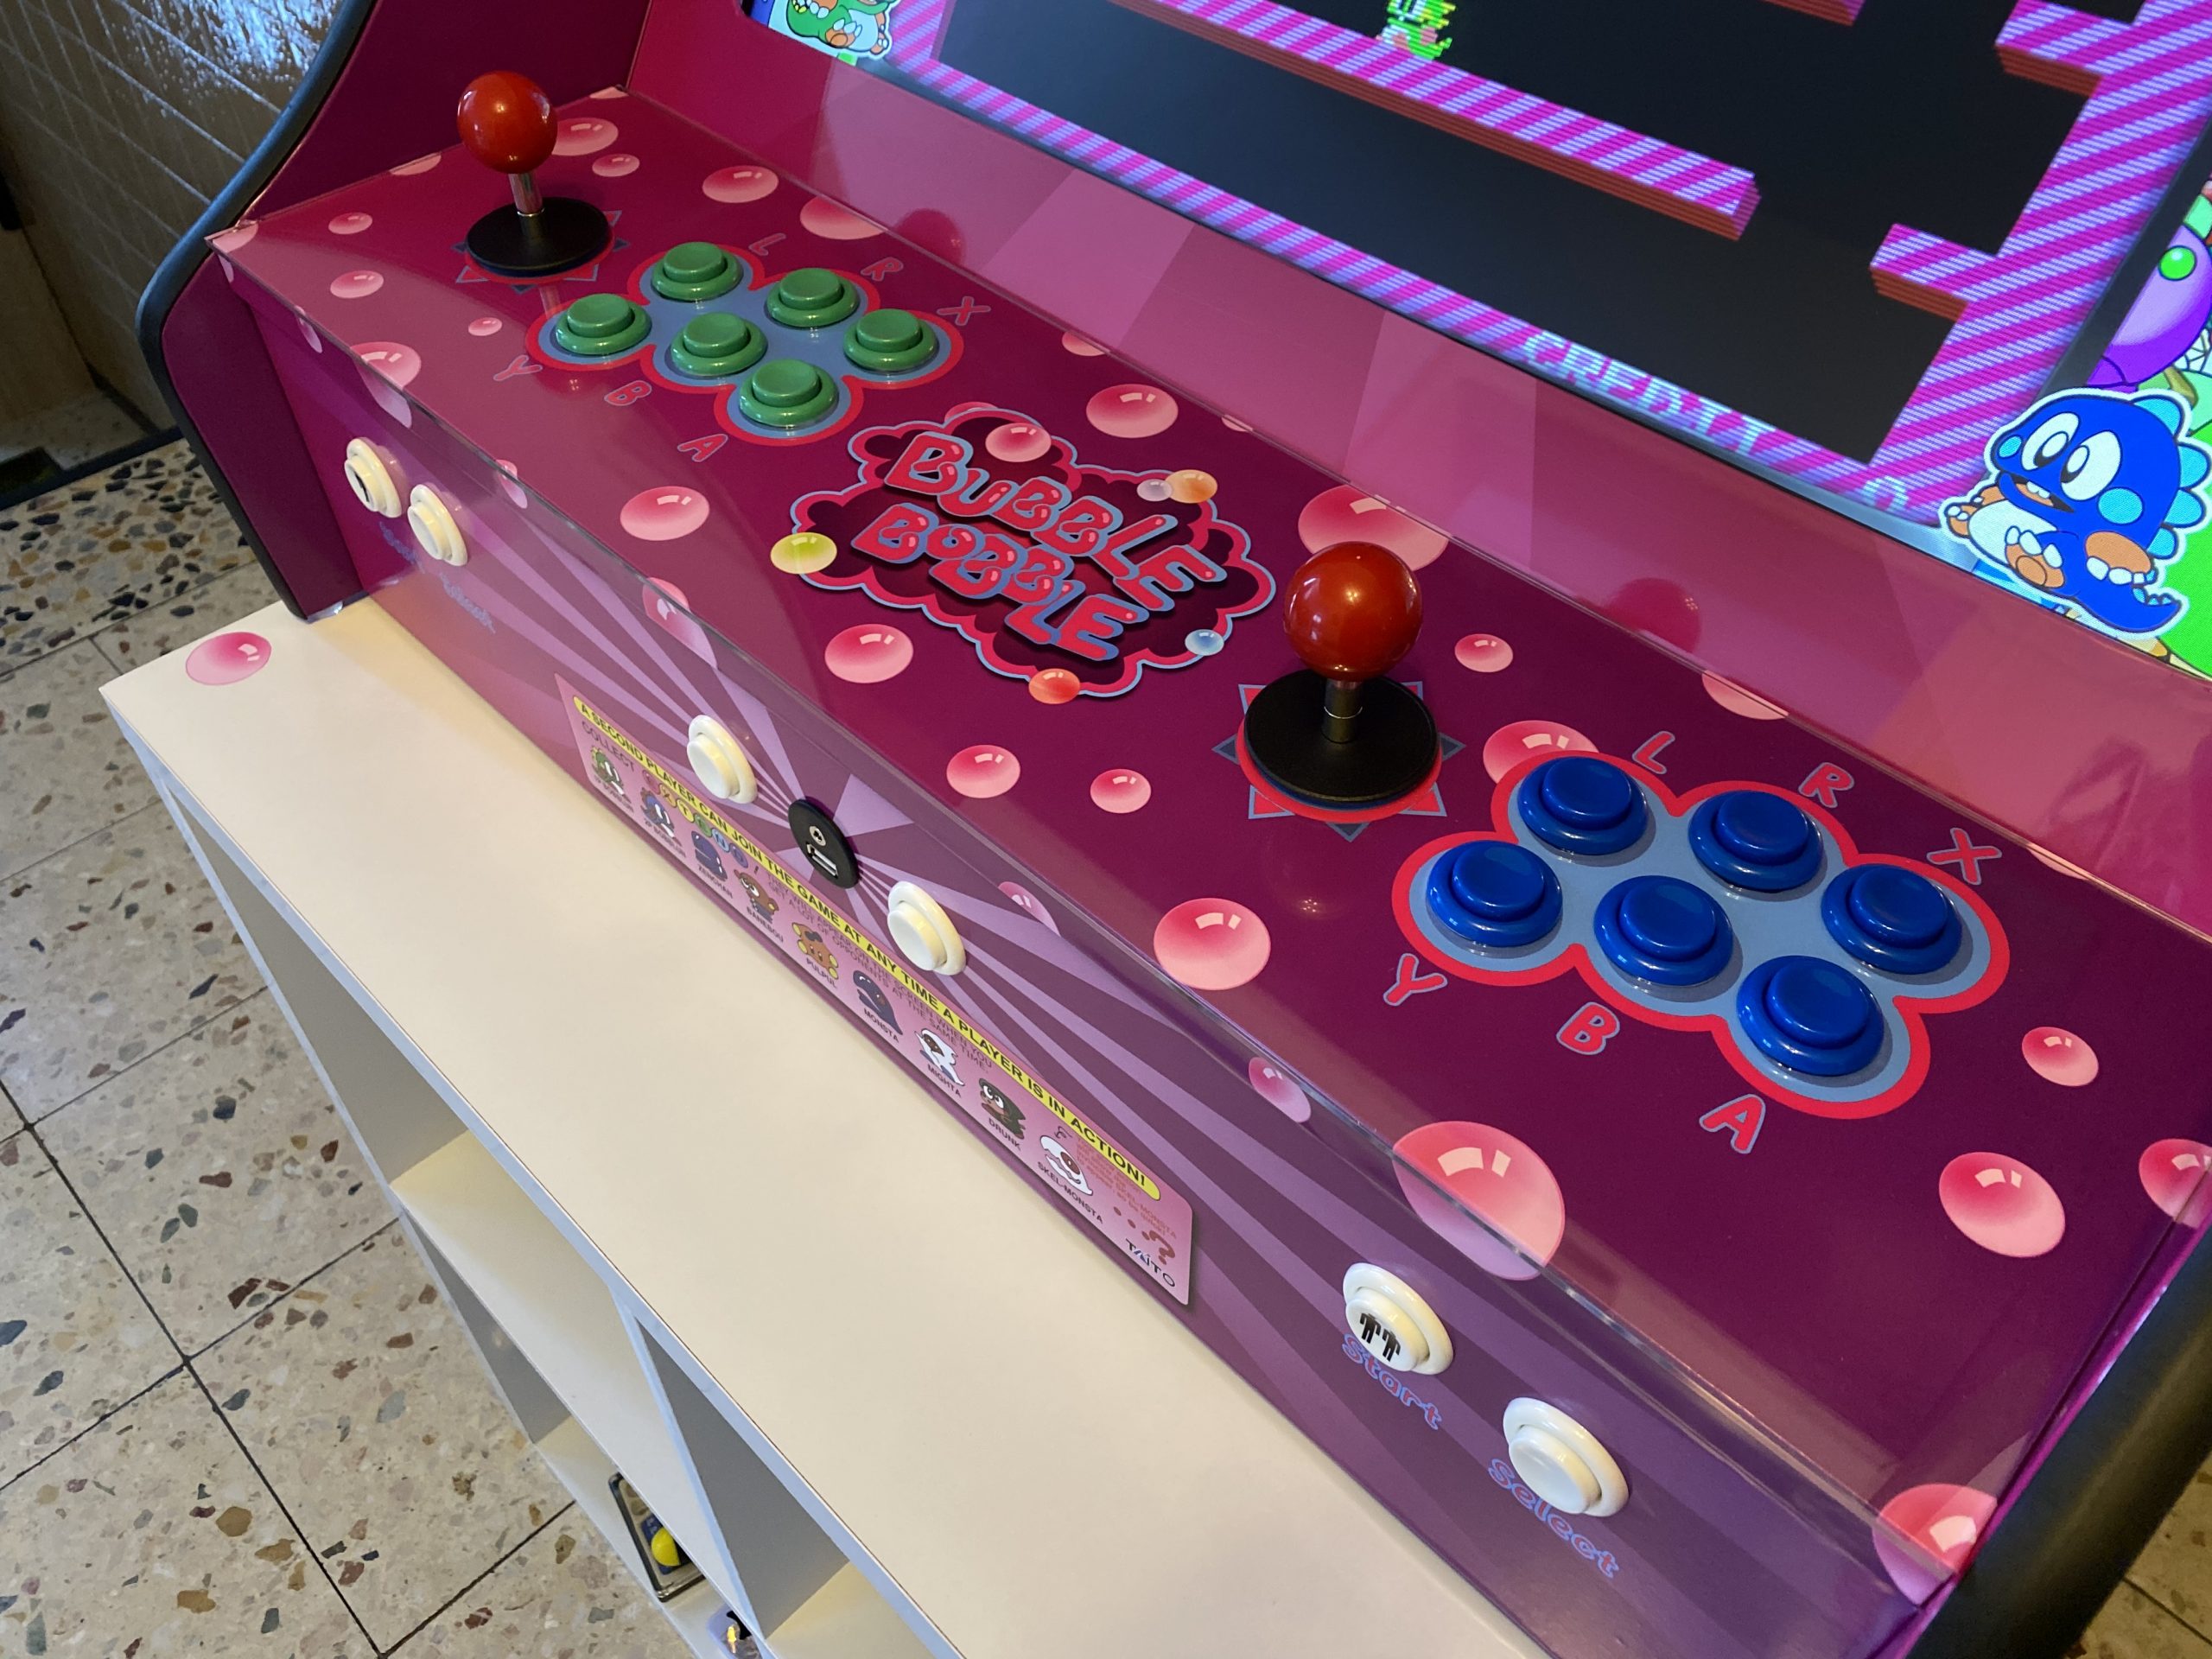
I went for Joystick + 6-Button layout for the control panel. I’ve changed the measurements a bit over the ones I’ve found on the internet to my taste.
The above schematics show the actual measured holes as they were drilled. As everything went more or less “free-hand” it’s quite astonishing to me how accurate it went. This measurement schematic was later used to laser cut the acrylic handrest.
The side panels got a cut around for the black T-Molding to be added later.
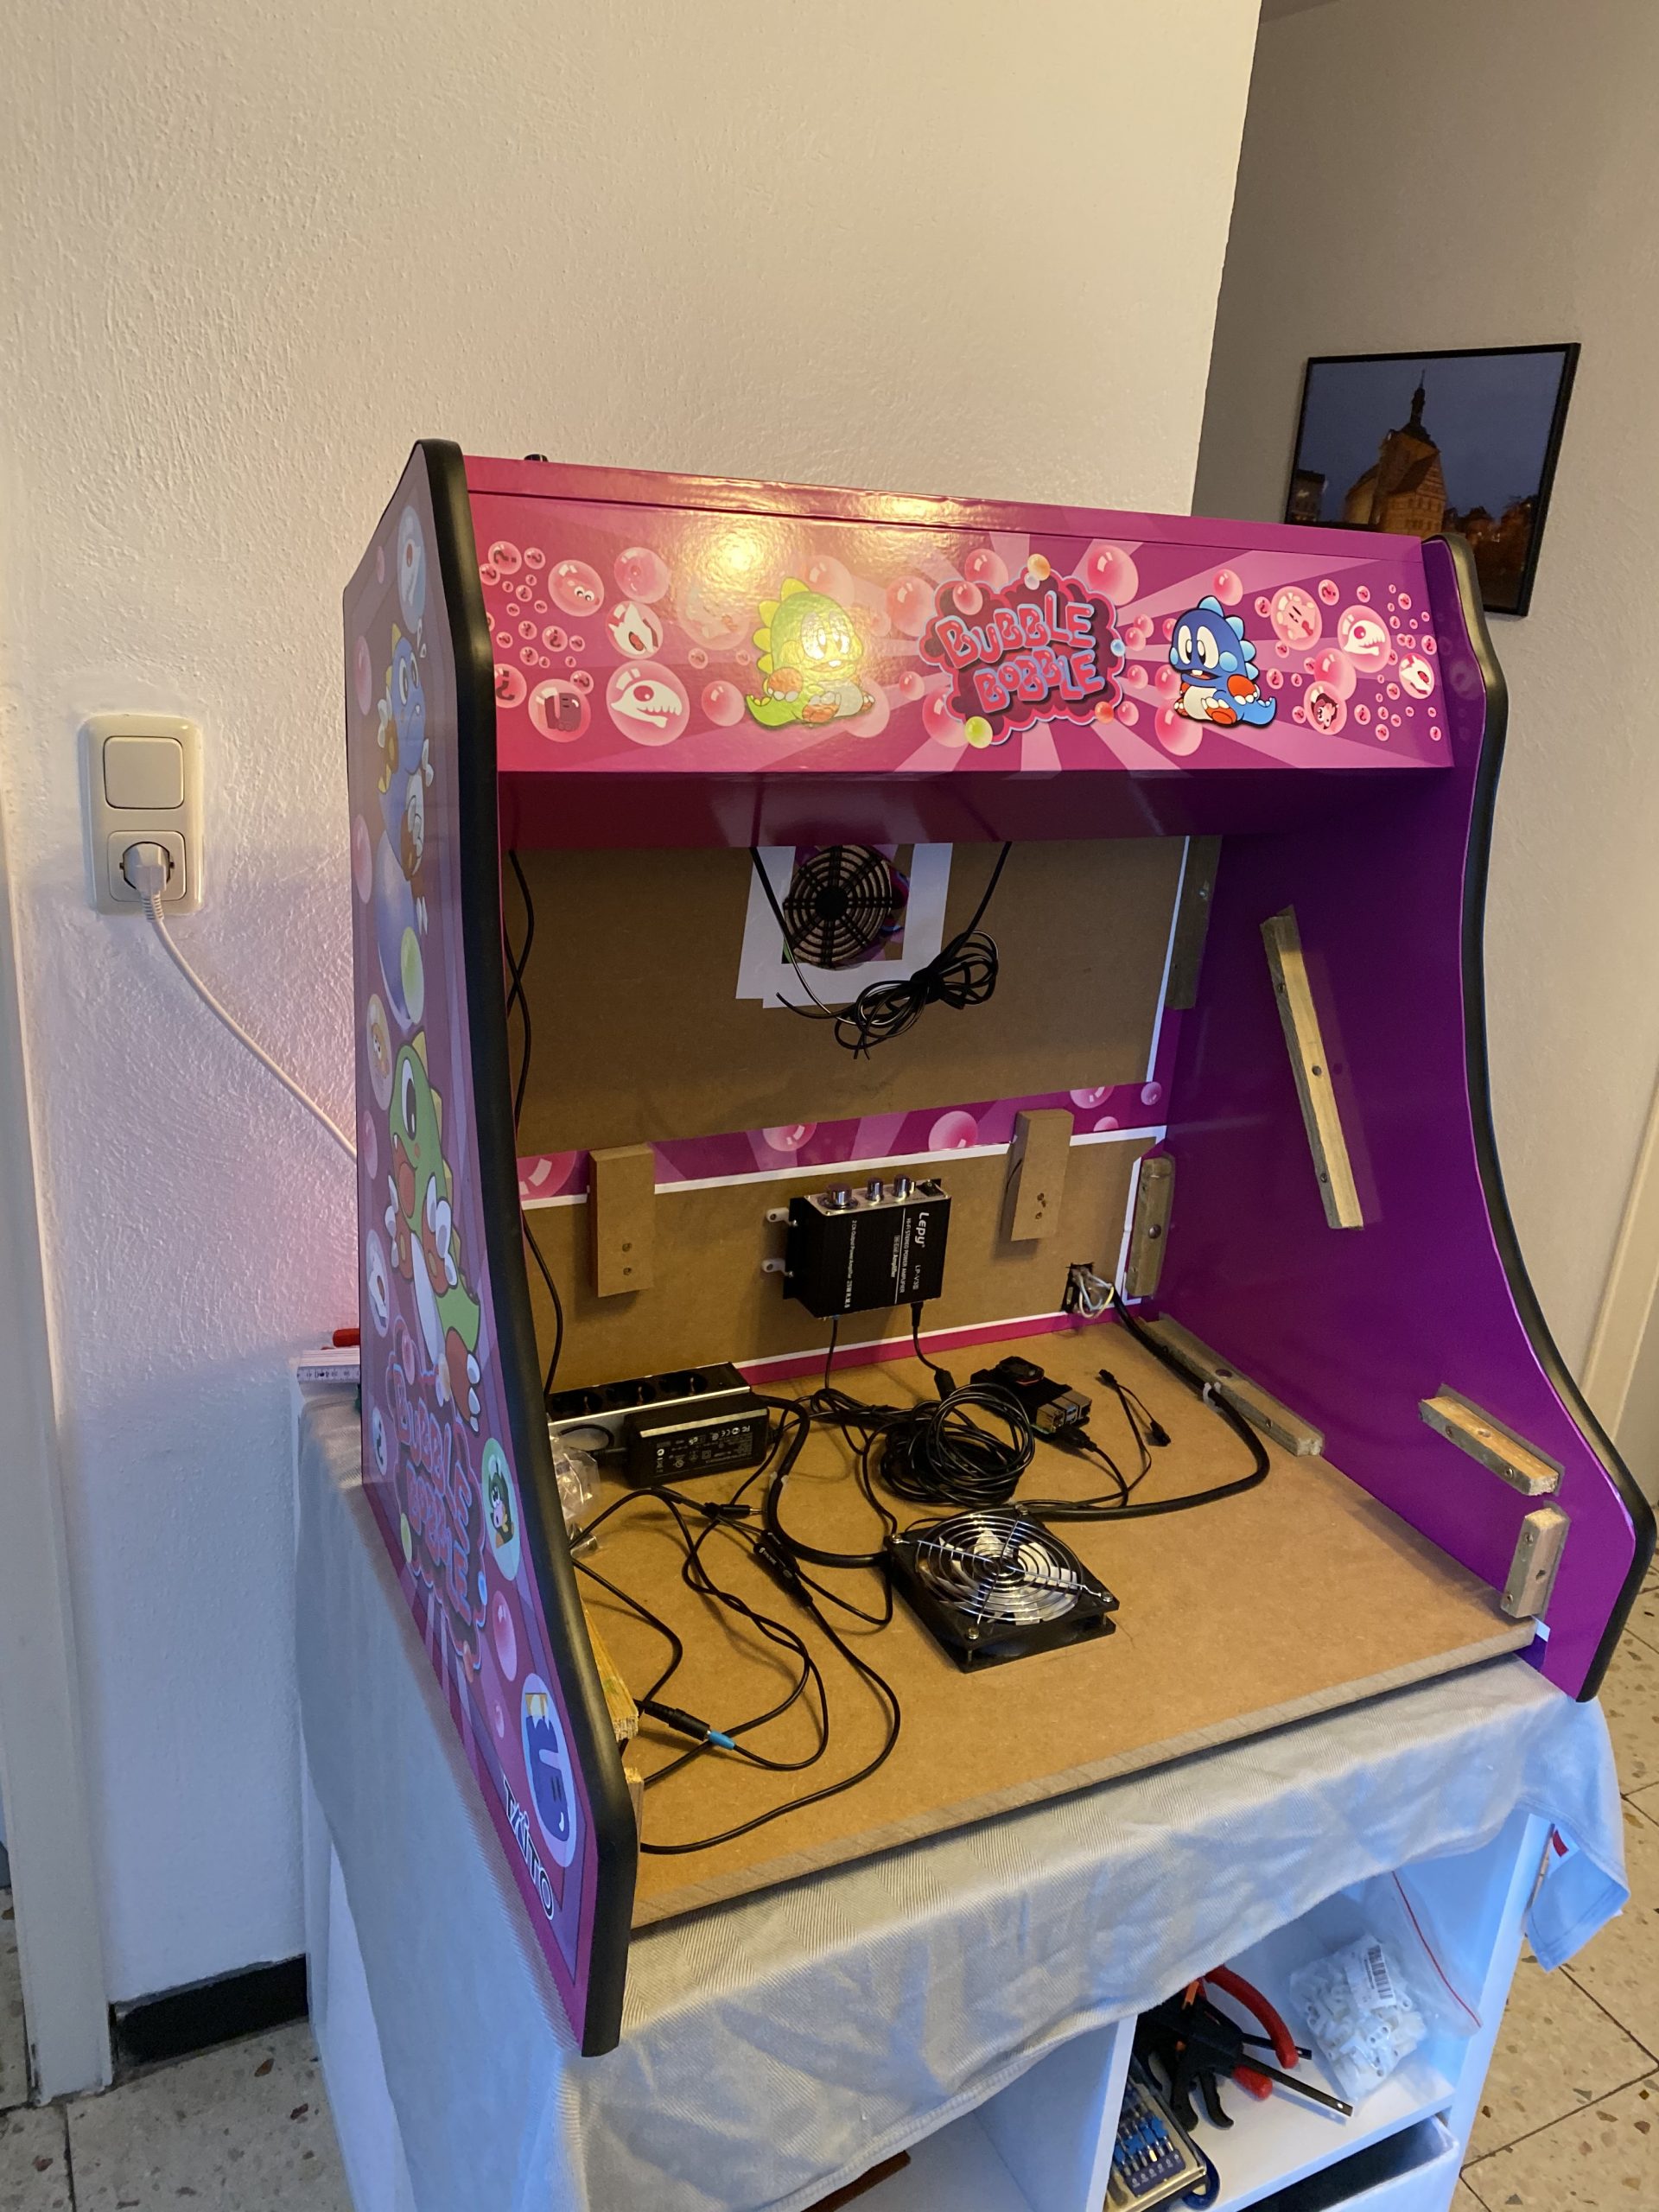
electronics and wiring
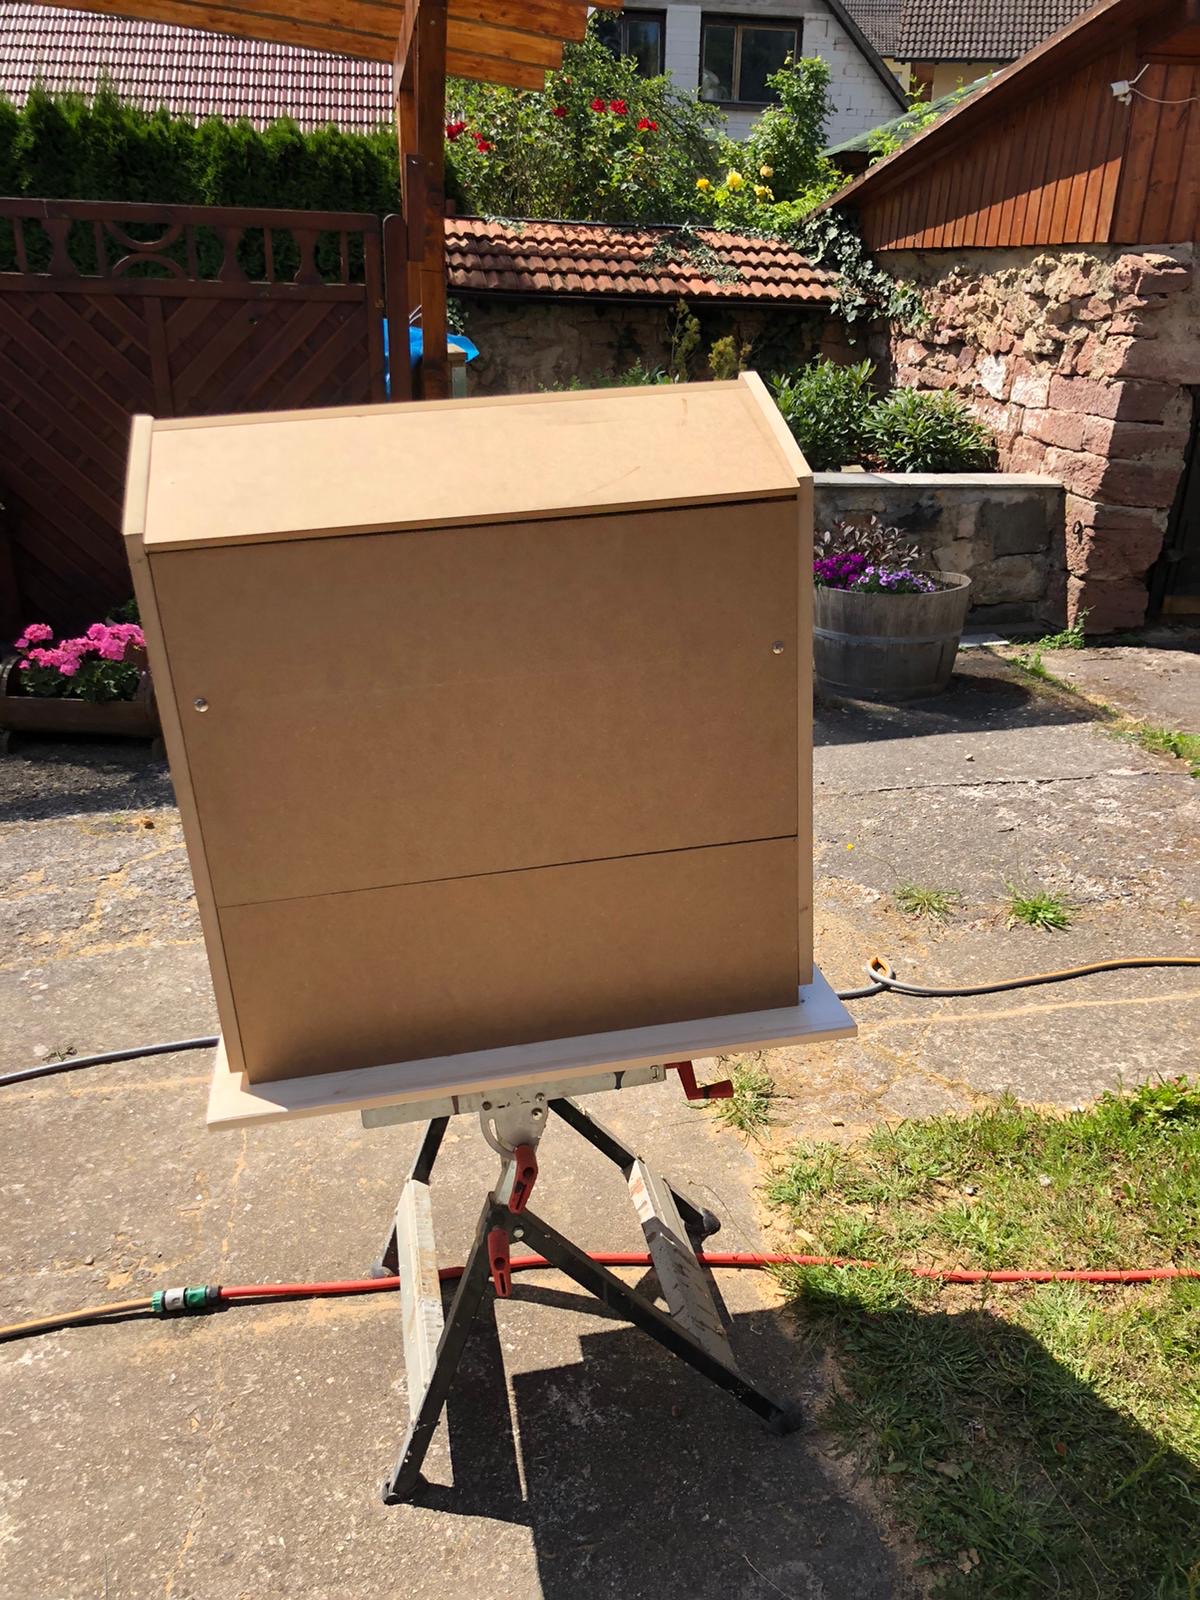
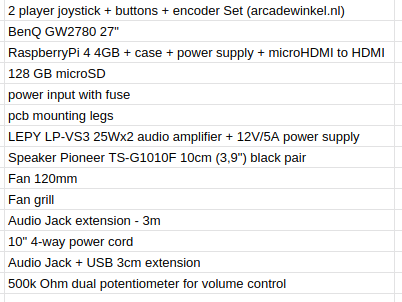
After about 2 weeks my father had built the first arcade out of sheets of MDF and I had taken delivery of the remaining pieces of hardware I had ordered after making a long list.
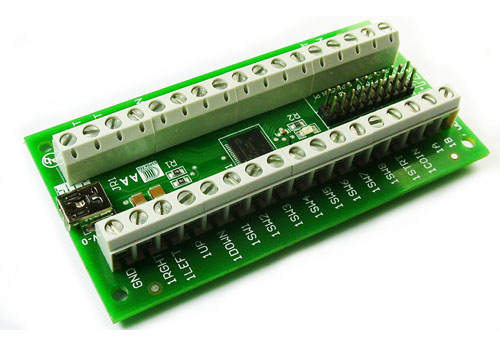
It contains 2 standard 4/8-way switchable arcade joysticks, 10 buttons, all microswitches required and the Ultimarc I-PAC-2 joystick encoder.
You connect every microswitch to this board and it will translate all button presses/joystick movements into keyboard or joystick movements. You connect it through USB to the RaspberryPi and it either shows up as 2 gamepads or one keyboard. Also a nice configuration app is available from the manufacturer.
So when I got the first arcade from my father I started to put in the electonics immediately.
The wiring to the I-PAC was straight forward. Worked at the first try.
The sound was a bit more complicated. I wanted a volume control knob on the outside but also did not want to disassemble any audio amplifier.
I went with the simplest solution: A 500k Ohm dual potentiometer soldered into the headphone extension cable going to the amplifier. The potentiometer then got put into a pot and a whole made it stick out so that a knob could be attached.
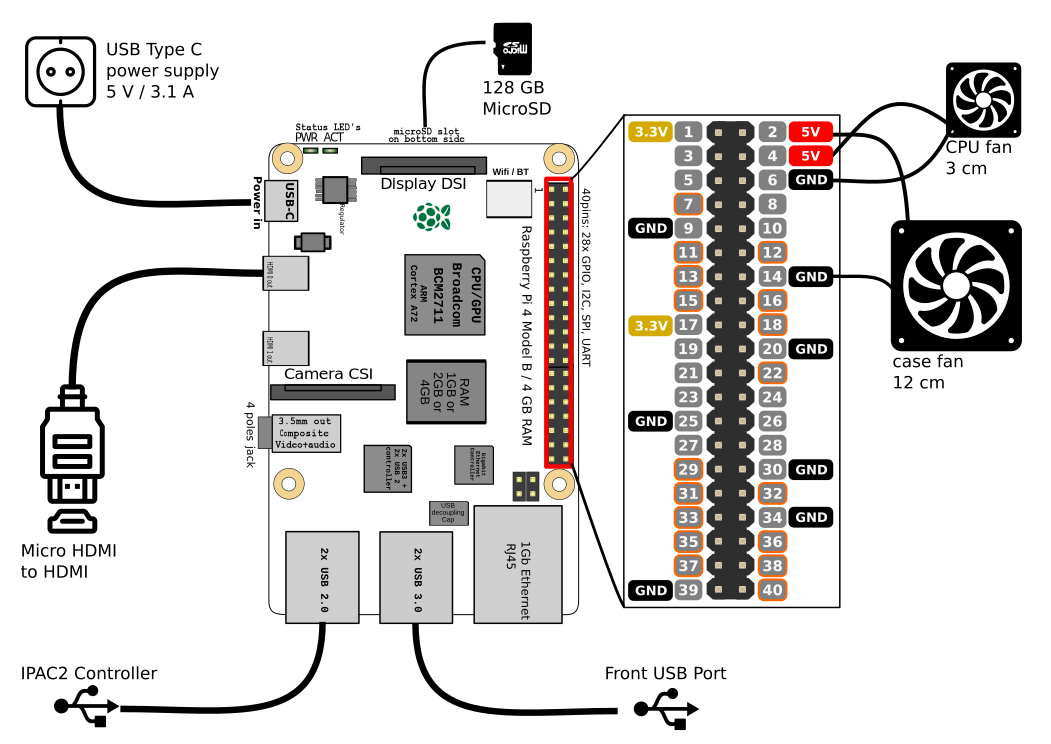
The RaspberryPi set-up then only lacked cooling. The plan was to put a 120mm case fan to pull in air from the bottom and went it out another 120mm case hole at the upper back. Additionally the RaspberryPi would get it’s own small 30mm fan on top of it’s heatsink case.
I attached both fans directly to the RaspberryPi – so I saved myself another power supply.
software
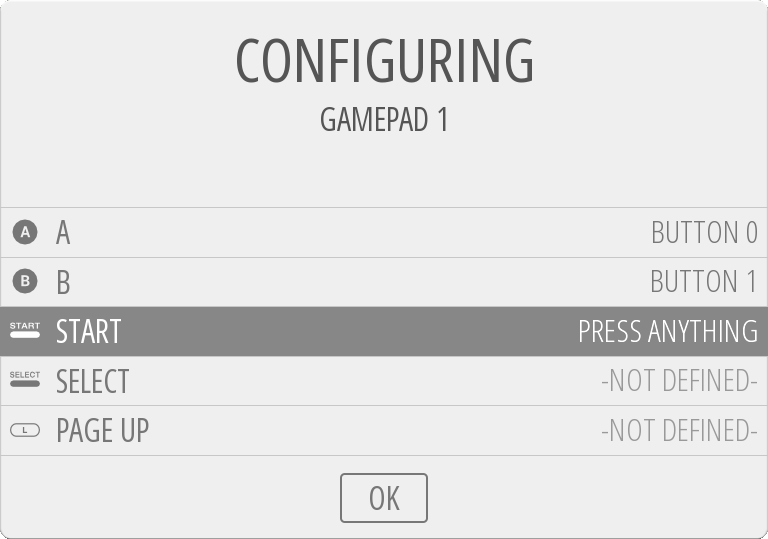
Now I had to make it all work together. As I wanted to use RetroPie in the newest 4.6 release I’ve set that up and hooked it all up.
On first start-up EmulationStation asked me to configure the inputs. It had detected 2 gamepads as I had put the IPAC-2 into gamepad mode before. You can do this with a simple mode-switch key-combination that you need to hold for 10 seconds to make it switch.
The configuration of the buttons of the two players went without any issue. First I had set-up the player 1 input. Then I re-ran the input configuration again for player 2 inputs.
The controls where straight forward. I wanted mainly 4-way games but with enough buttons to switch to some beat-em-ups at will.
So I configured a simple layout into Retroarch with some additional hotkeys added:
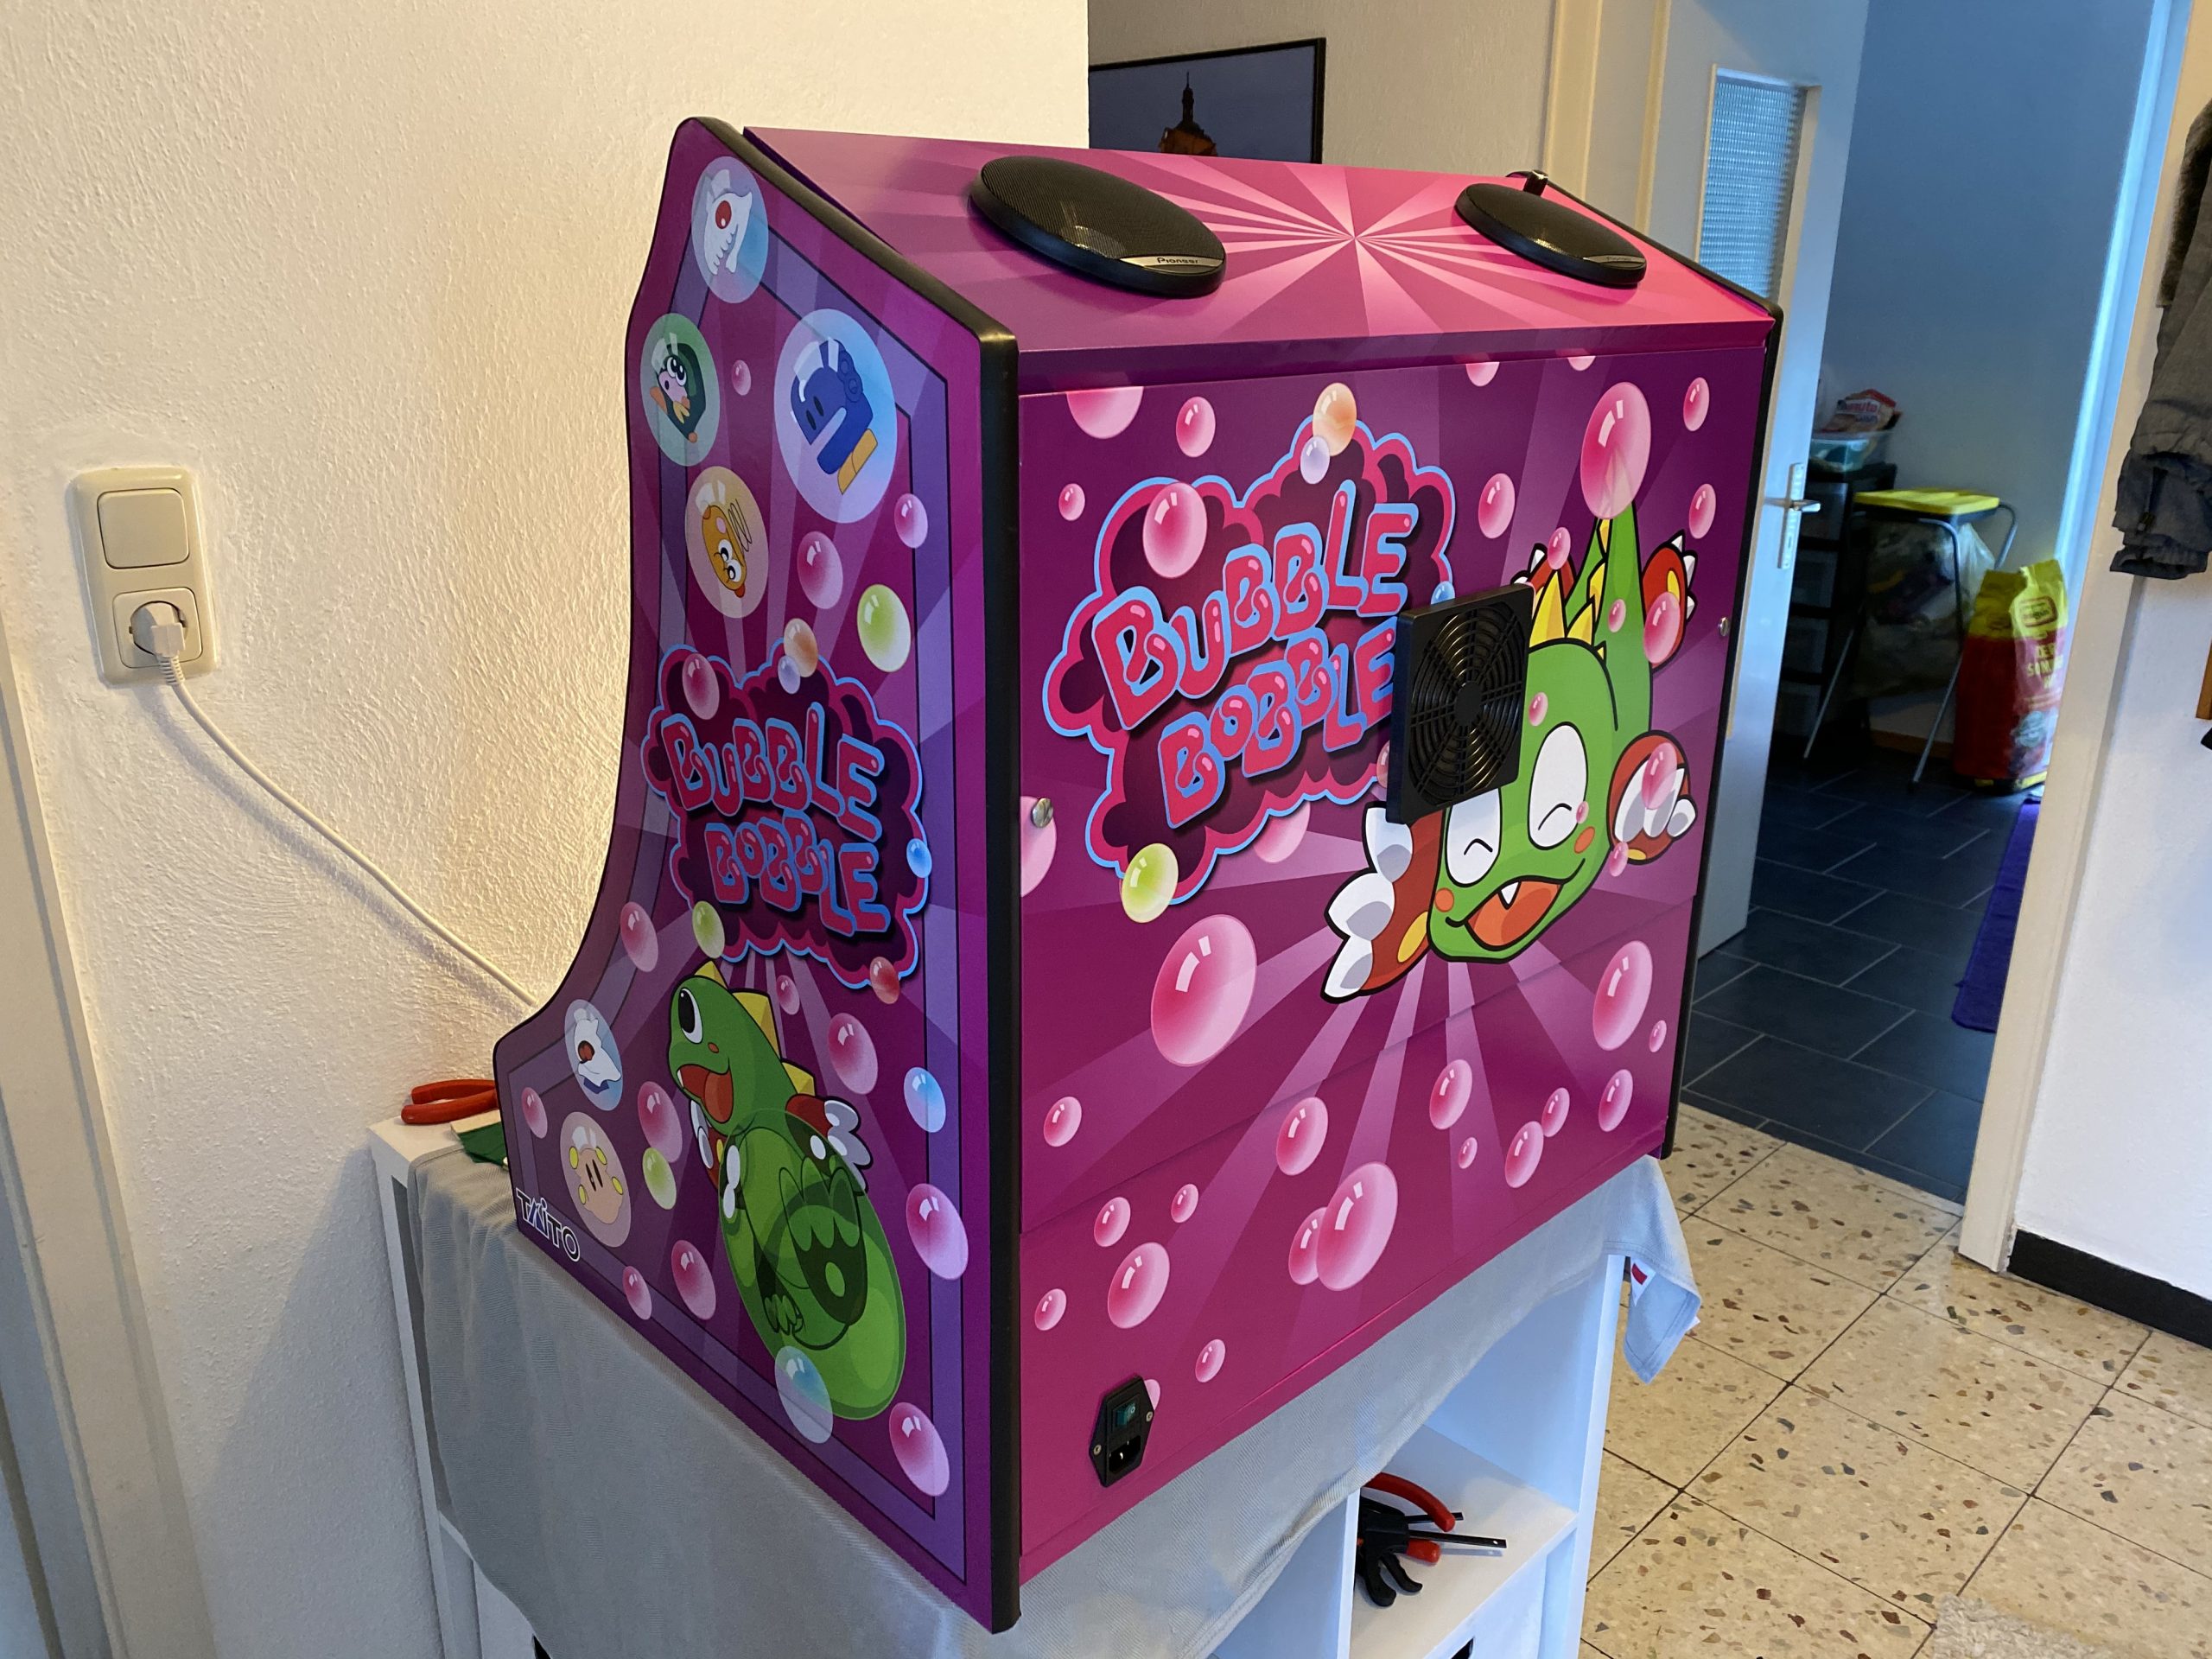
vinyl design
I tossed around several design ideas I had. Obviously derived from those games I wanted to play and looked forward to.
There was some Metal Slug or some Cave shooter related designs I thought of. But then my wife had the best ideas of them all: Bubble Bobble!
So I went and looked for inspiration on Bubble Bobble and found some but none that sticked.
There was one a good inspiration. And I went to design based upon this one – just with a more intense purple color scheme.
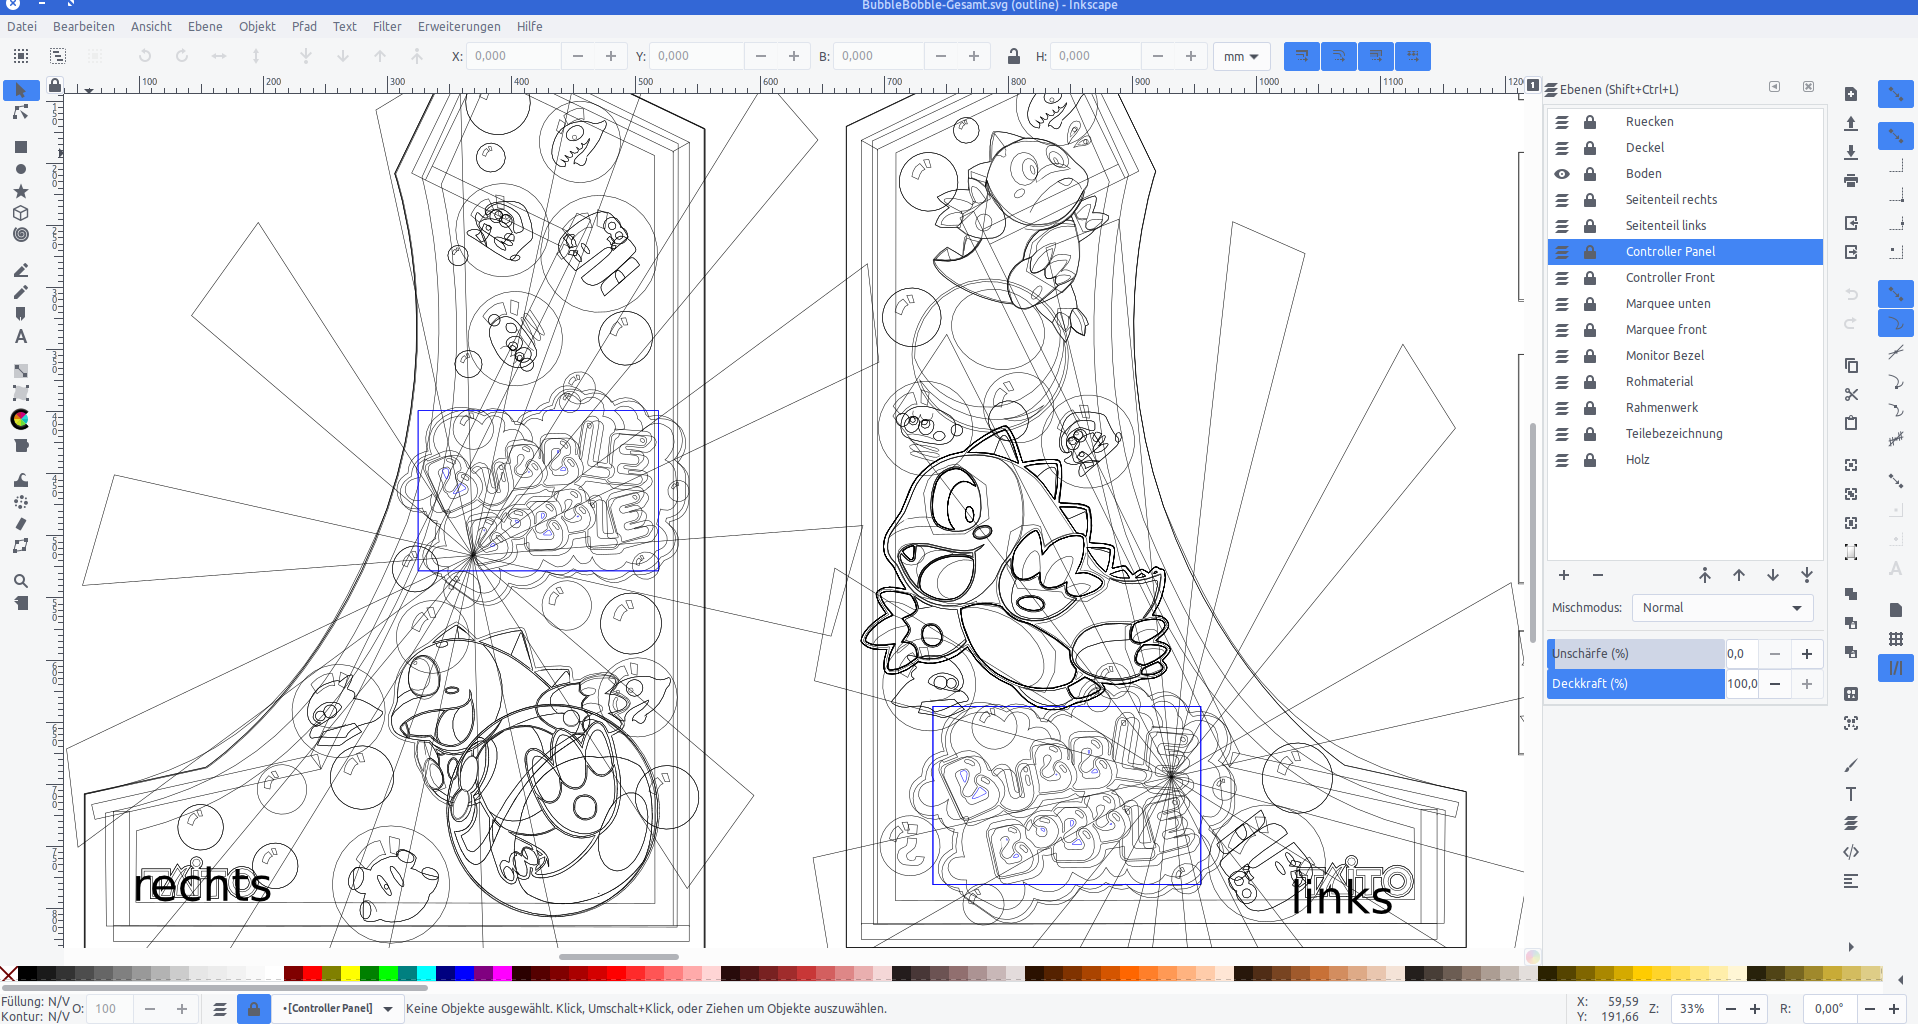
I used Inkscape to pull in bitmap graphics from Bubble Bobble and to vectorize them one by one, eventually ending up with a lot of layers of nice scalable vector graphics.
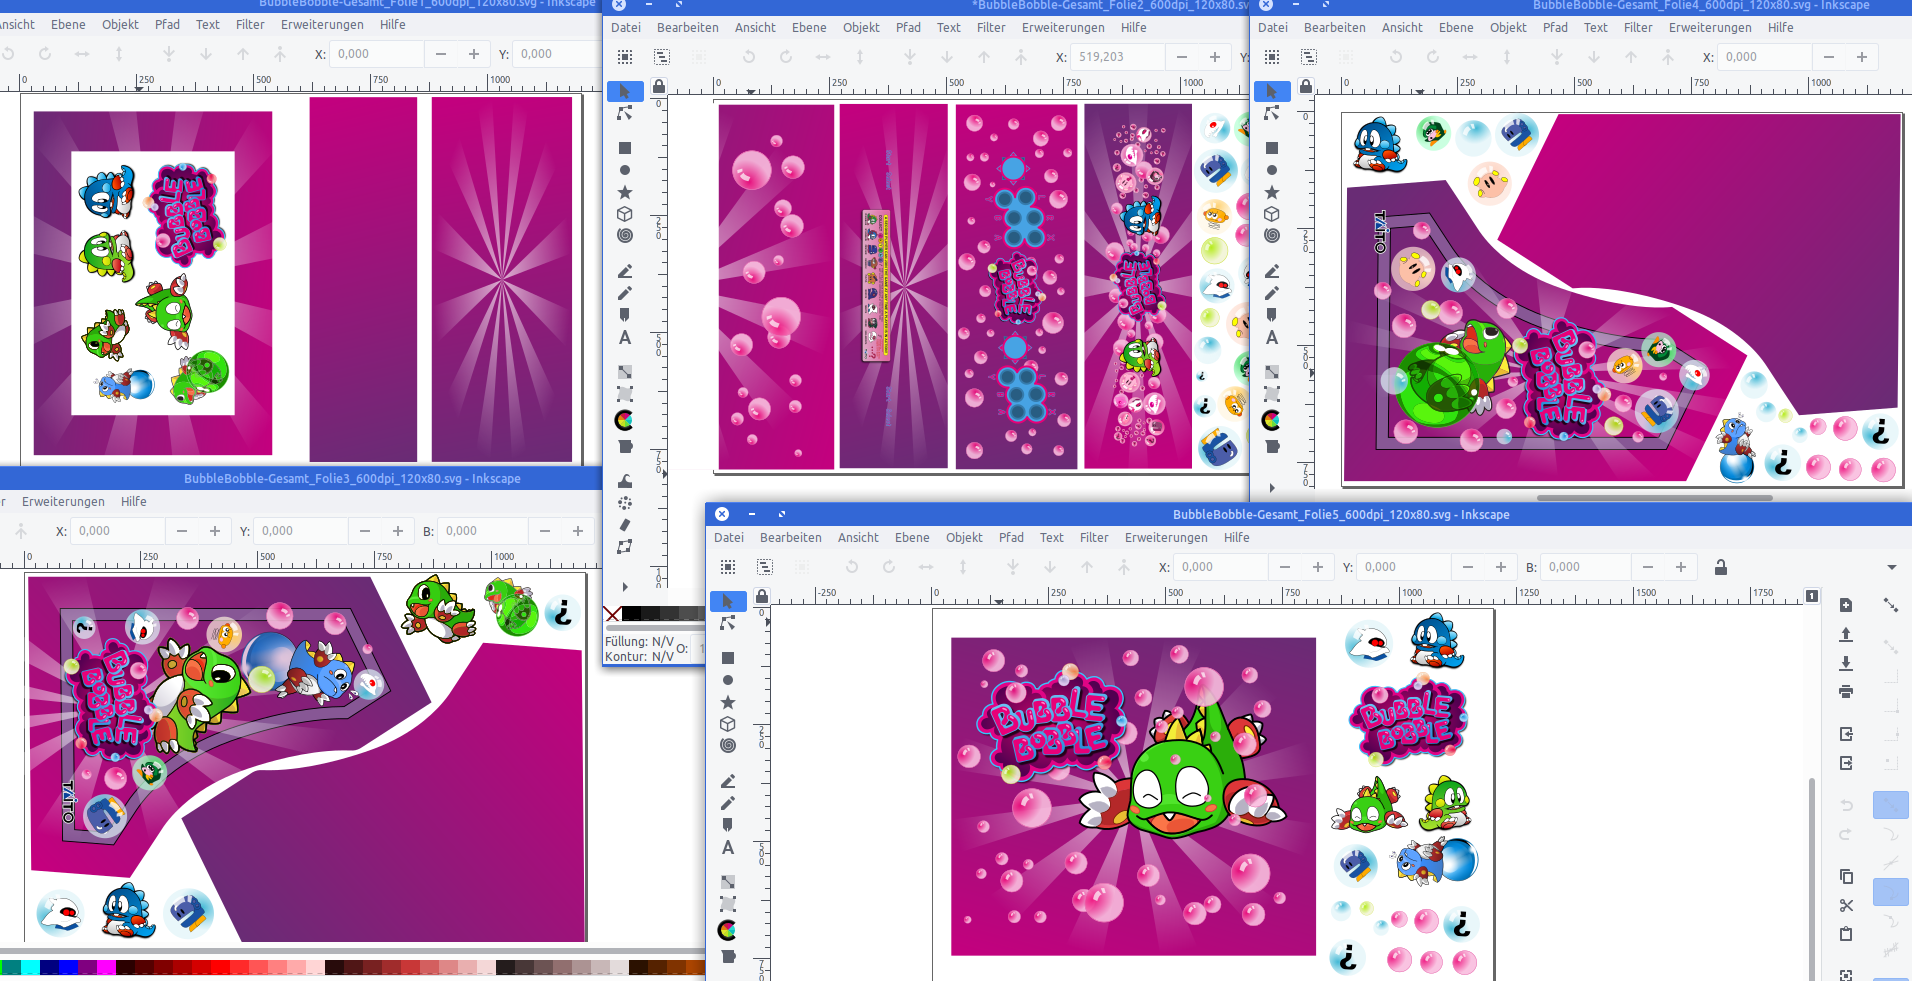
With all design set I went and sliced it up and found a company that would print my design on vinyl.
With the final arcade-wood accessible top me I could take actual measurements and add to each element 4cm of margin. This way putting it on would hopefully be easier (it was!).
Originally I wanted to have it printed on a 4m by 1,2m sheet of vinyl. It all would have fit there.
But I had to find out that Inkscape was not capable of exporting pixel data at this size and a pixel-density of 600dpi. It just was too large for it to output.
So I had to eventually cut all down into 5 pieces of 1,2m by 80cm each.
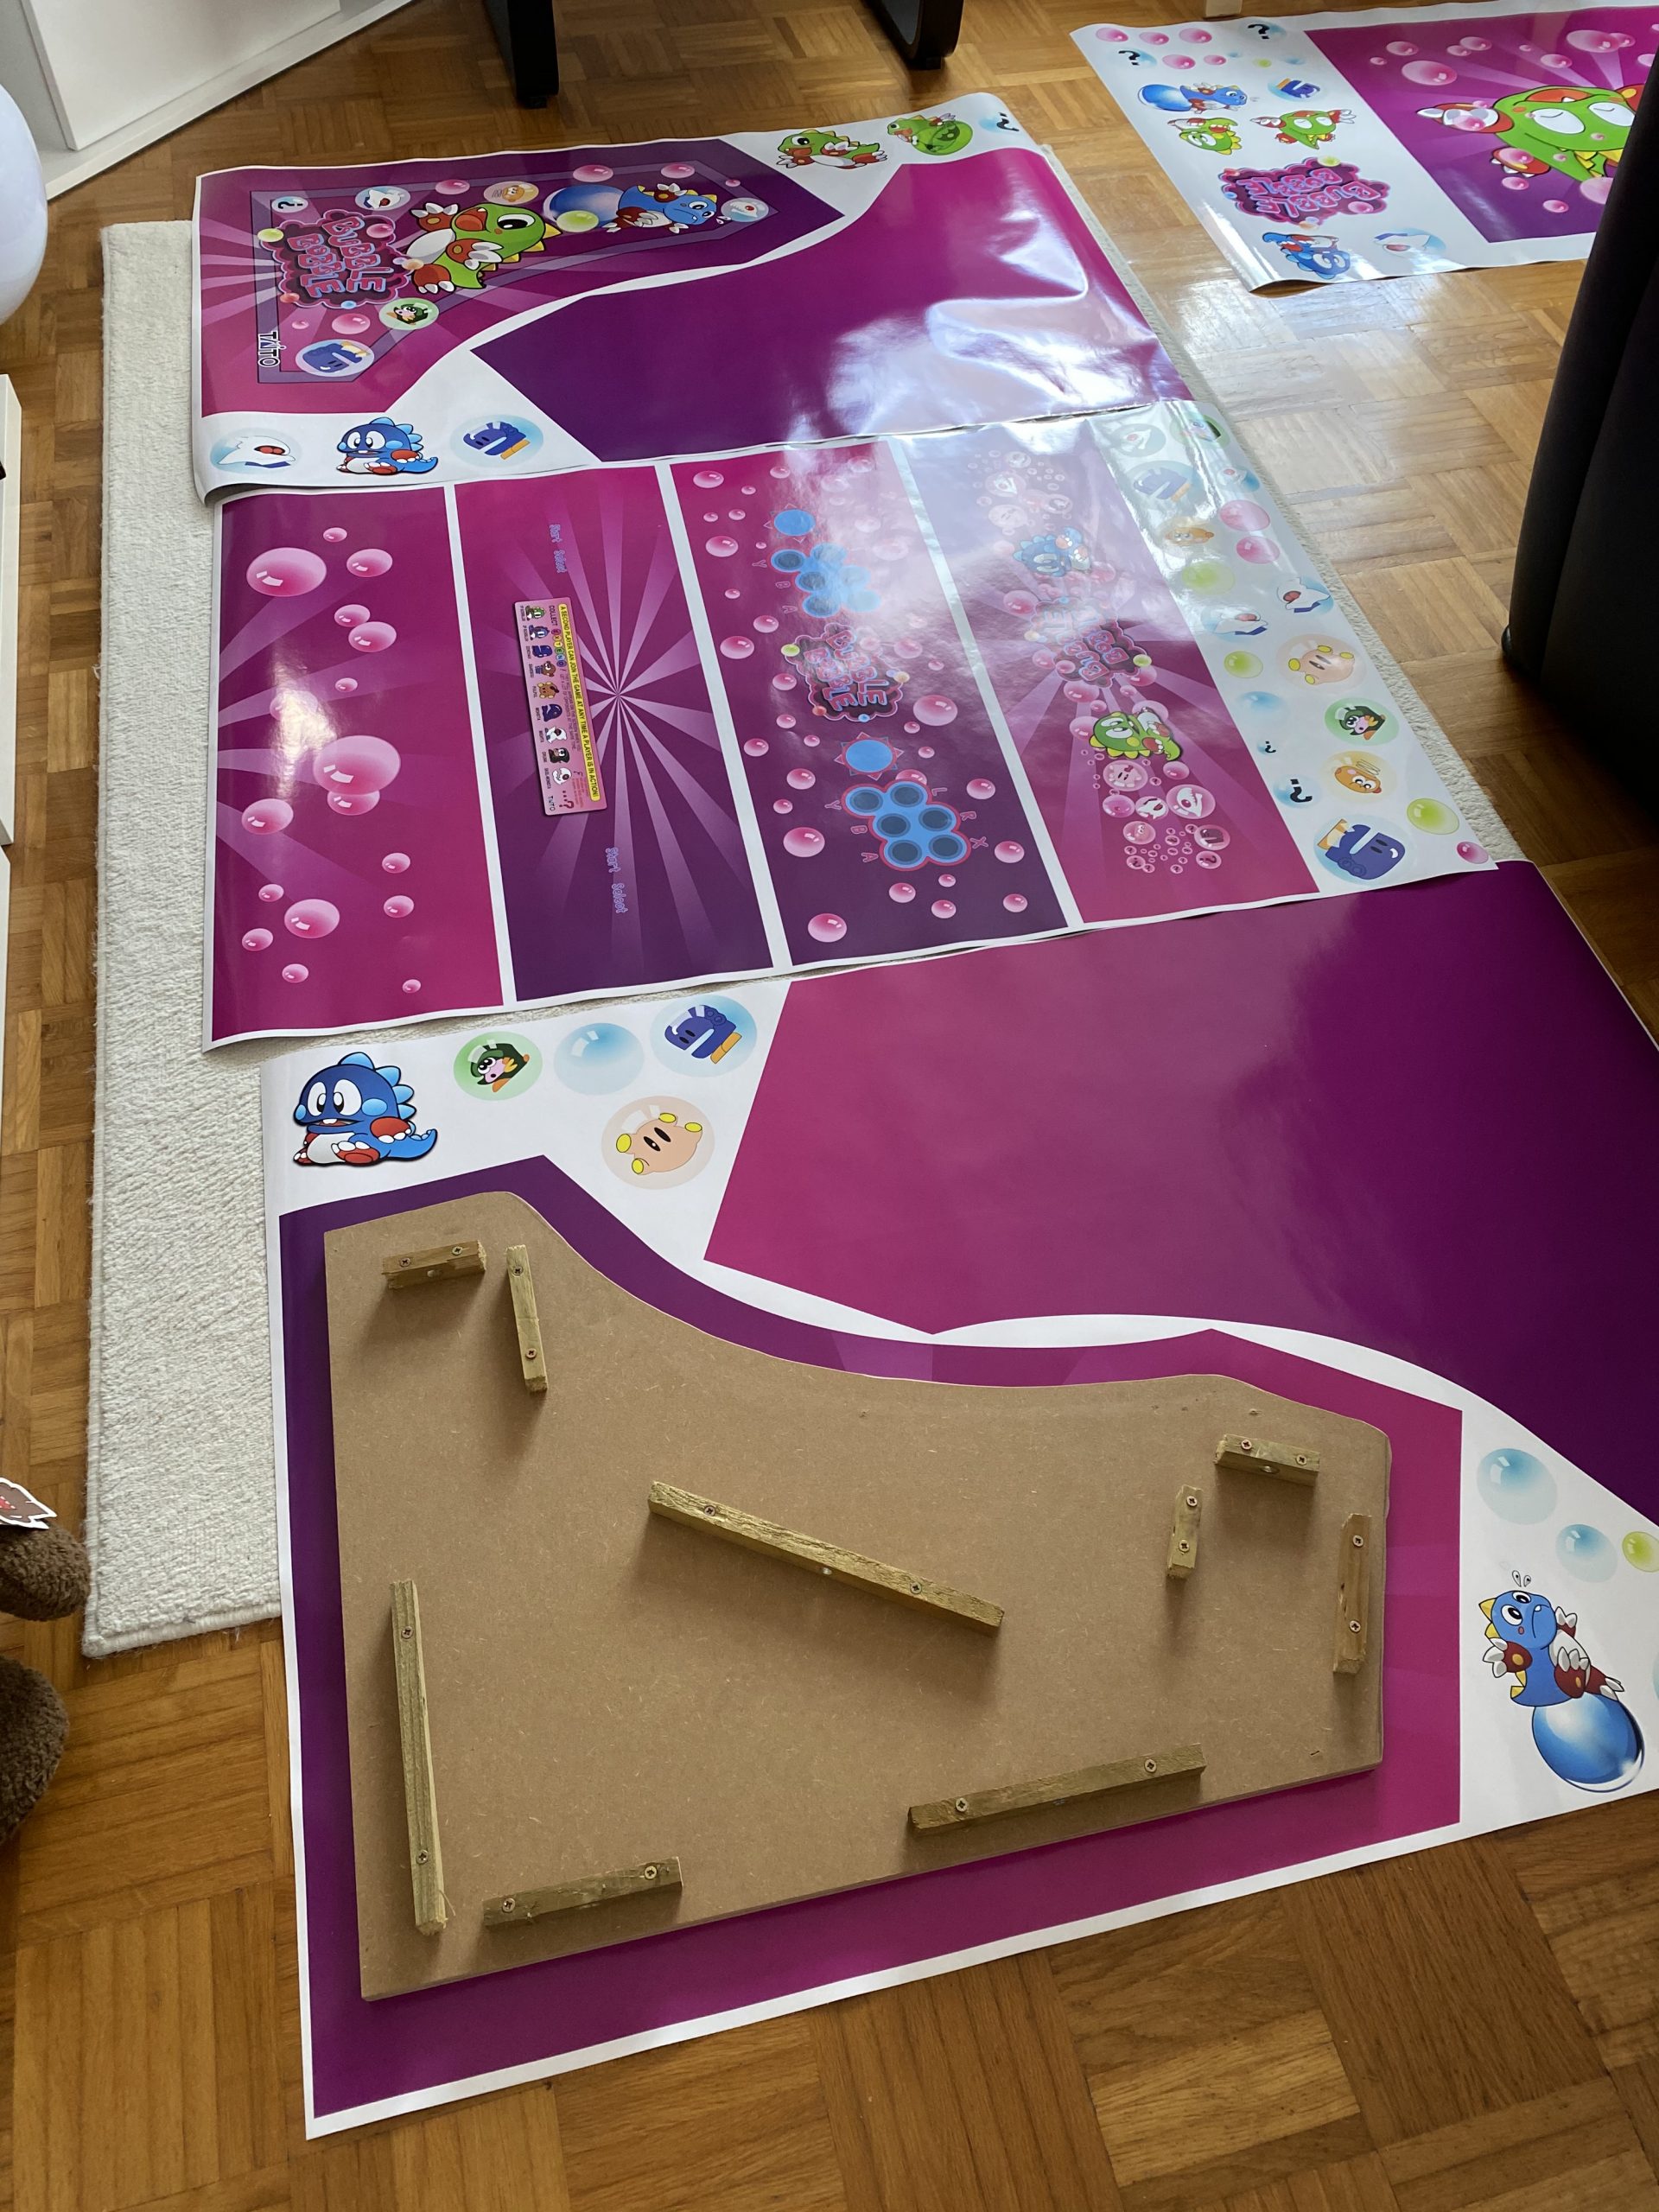
After about 7 days all arrived printed on vinyl at my house. I immediately laid everything out and tried if it would fit. It did!
Now everything had to go onto the wood. I did a test run before ordering to check if it would stick securely to the wood. It did stick very nicely. So putting it on was some intense fiddling but it eventually worked out really really great.
You can see the inside here and the structural struts where everything attaches to screwed in from the insides.
Now it was time for some acrylic. I wanted to get a good bezel and covering of the monitor as well as the handrest and the front buttons.
Cutting acrylic myself was out of questions – so I went with a local company that would laser-cut acrylic for me to my specification.
I’ve sent them the schematics and measurements and the panels for reference and 4 days later the acrylic arrived. We could then put the last bits together for completion!
Result
I am really happy how this turned out – especially since with everything that required actual work with hands I am a hopeless case. With this somehow everything worked out.
I still employ the idea of a vertical shoot-em-up centered version… but maybe some day.
Neumorphic card however pretends to extrude from the background. It’s a raised shape made from the exact same material as the background. When we look at it from the side we see that it doesn’t “float”.
This is so much nicer! Of course this has to be taken with the addition of: there are several “jokes” hidden in the names and lines. Don’t take this as an actual reference – rather go by the official ones.
Video incoorporating image processing via python and BigGAN adversarial artificial neural network to breed new images. There are papers about “high fidelity natural image synthesis”.
Anthony Baldino – Like Watching Ghosts from his recently released album Twelve Twenty Two
When you own a recent iOS device (iOS 11 and up) you’ve got the choice between “High Efficiency” or “Most Compatible” as the format all pictures are being stored by the camera app.
Most Compatible being the JPEG format that is widely used around the internet and other cameras out there and the “High Efficiency” coming from the introduction of a new file format and compression/reduction algorithms.
A pointer to more information about the format:
High Efficiency Image File Format (HEIF), also known as High Efficiency Image Coding (HEIC), is a file format for individual images and image sequences. It was developed by the Moving Picture Experts Group (MPEG) and is defined by MPEG-H Part 12 (ISO/IEC 23008-12). The MPEG group claims that twice as much information can be stored in a HEIF image as in a JPEG image of the same size, resulting in a better quality image. HEIF also supports animation, and is capable of storing more information than an animated GIF at a small fraction of the size.
As Apple is aware this new format is not compatible with any existing tool chain to work with pictures from cameras. So you would either need new, upgraded tools (the Apple-way) or you would need to convert your images to the “older” – not-so-efficient JPEG format.