I’ve built two corne keyboards by now and I am using them as daily-drivers. I won’t switch back to other keyboards if I have the choice.
Also I have settled on firmware features, keyboard layout and what I am using the OLEDs for:

I’ve built two corne keyboards by now and I am using them as daily-drivers. I won’t switch back to other keyboards if I have the choice.
Also I have settled on firmware features, keyboard layout and what I am using the OLEDs for:
Found that nice heap of Icons that are free to use and high-quality:
Health Icons is a volunteer effort to create a ‘global good’ for health projects all over the world. These icons are available in the public domain for use in any type of project.
The project is hosted by the public health not-for-profit Resolve to Save Lives as an expression of our committment to offer the icons for free, forever.
https://healthicons.org/about
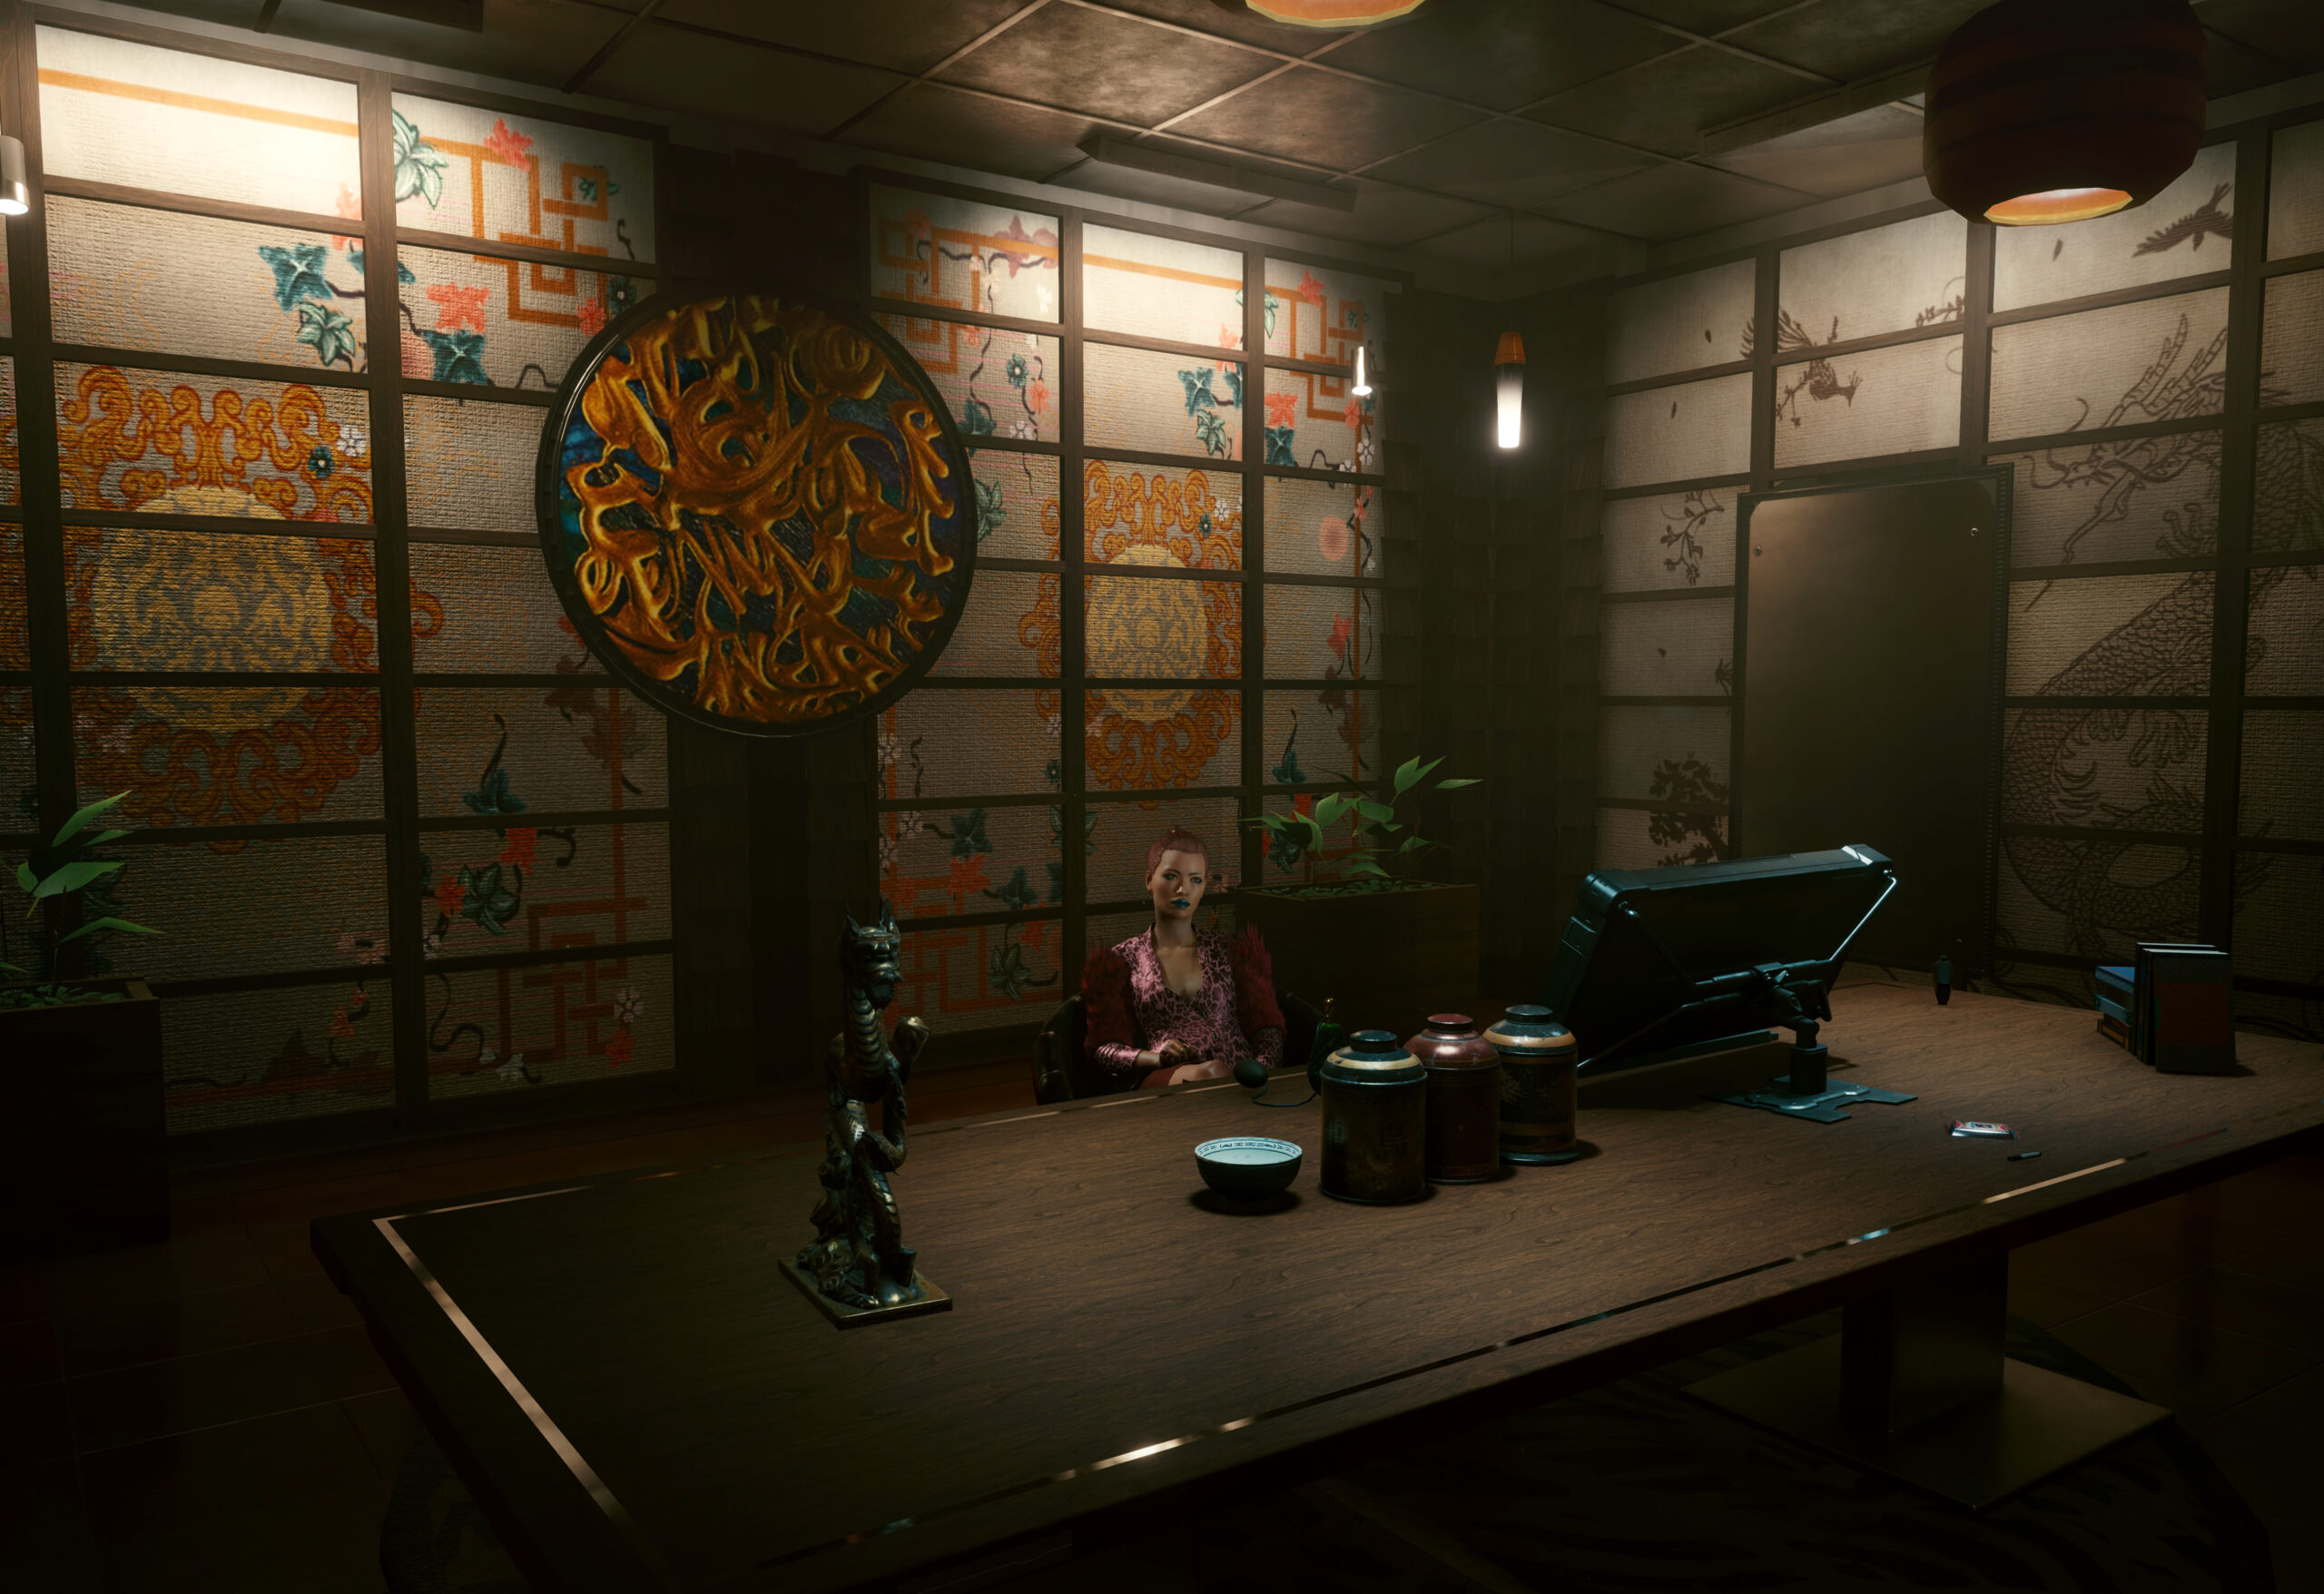
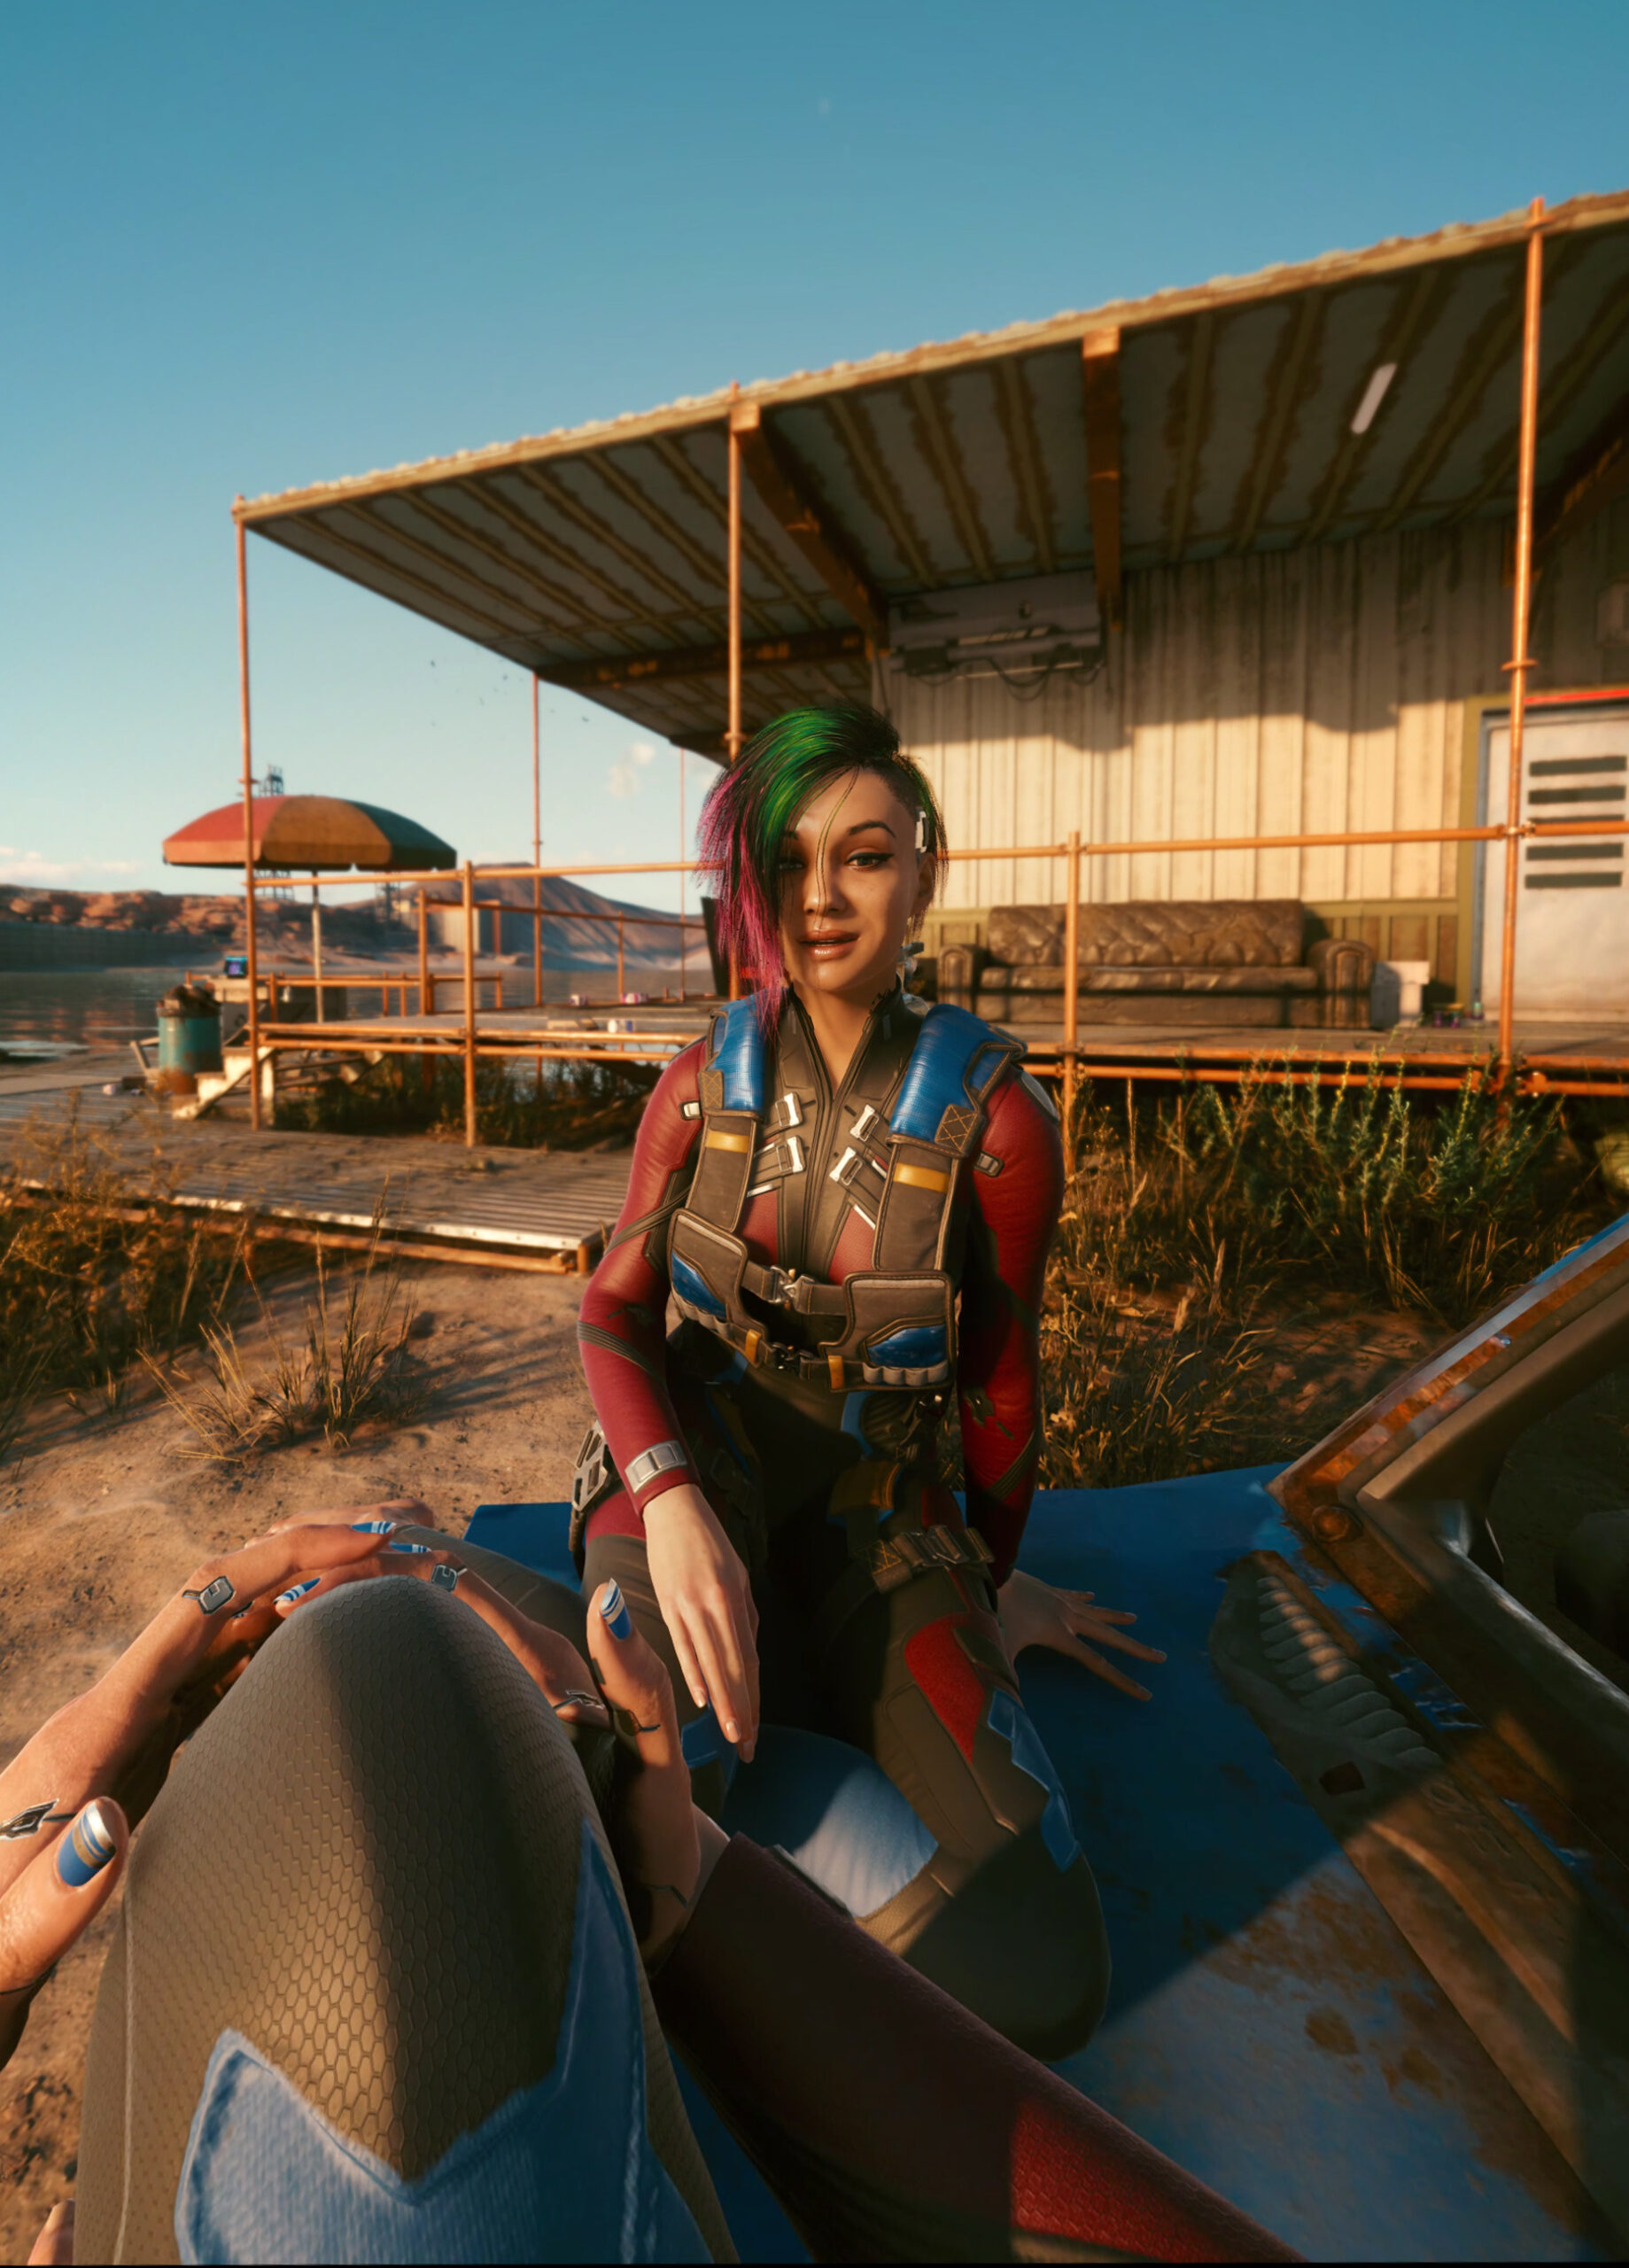
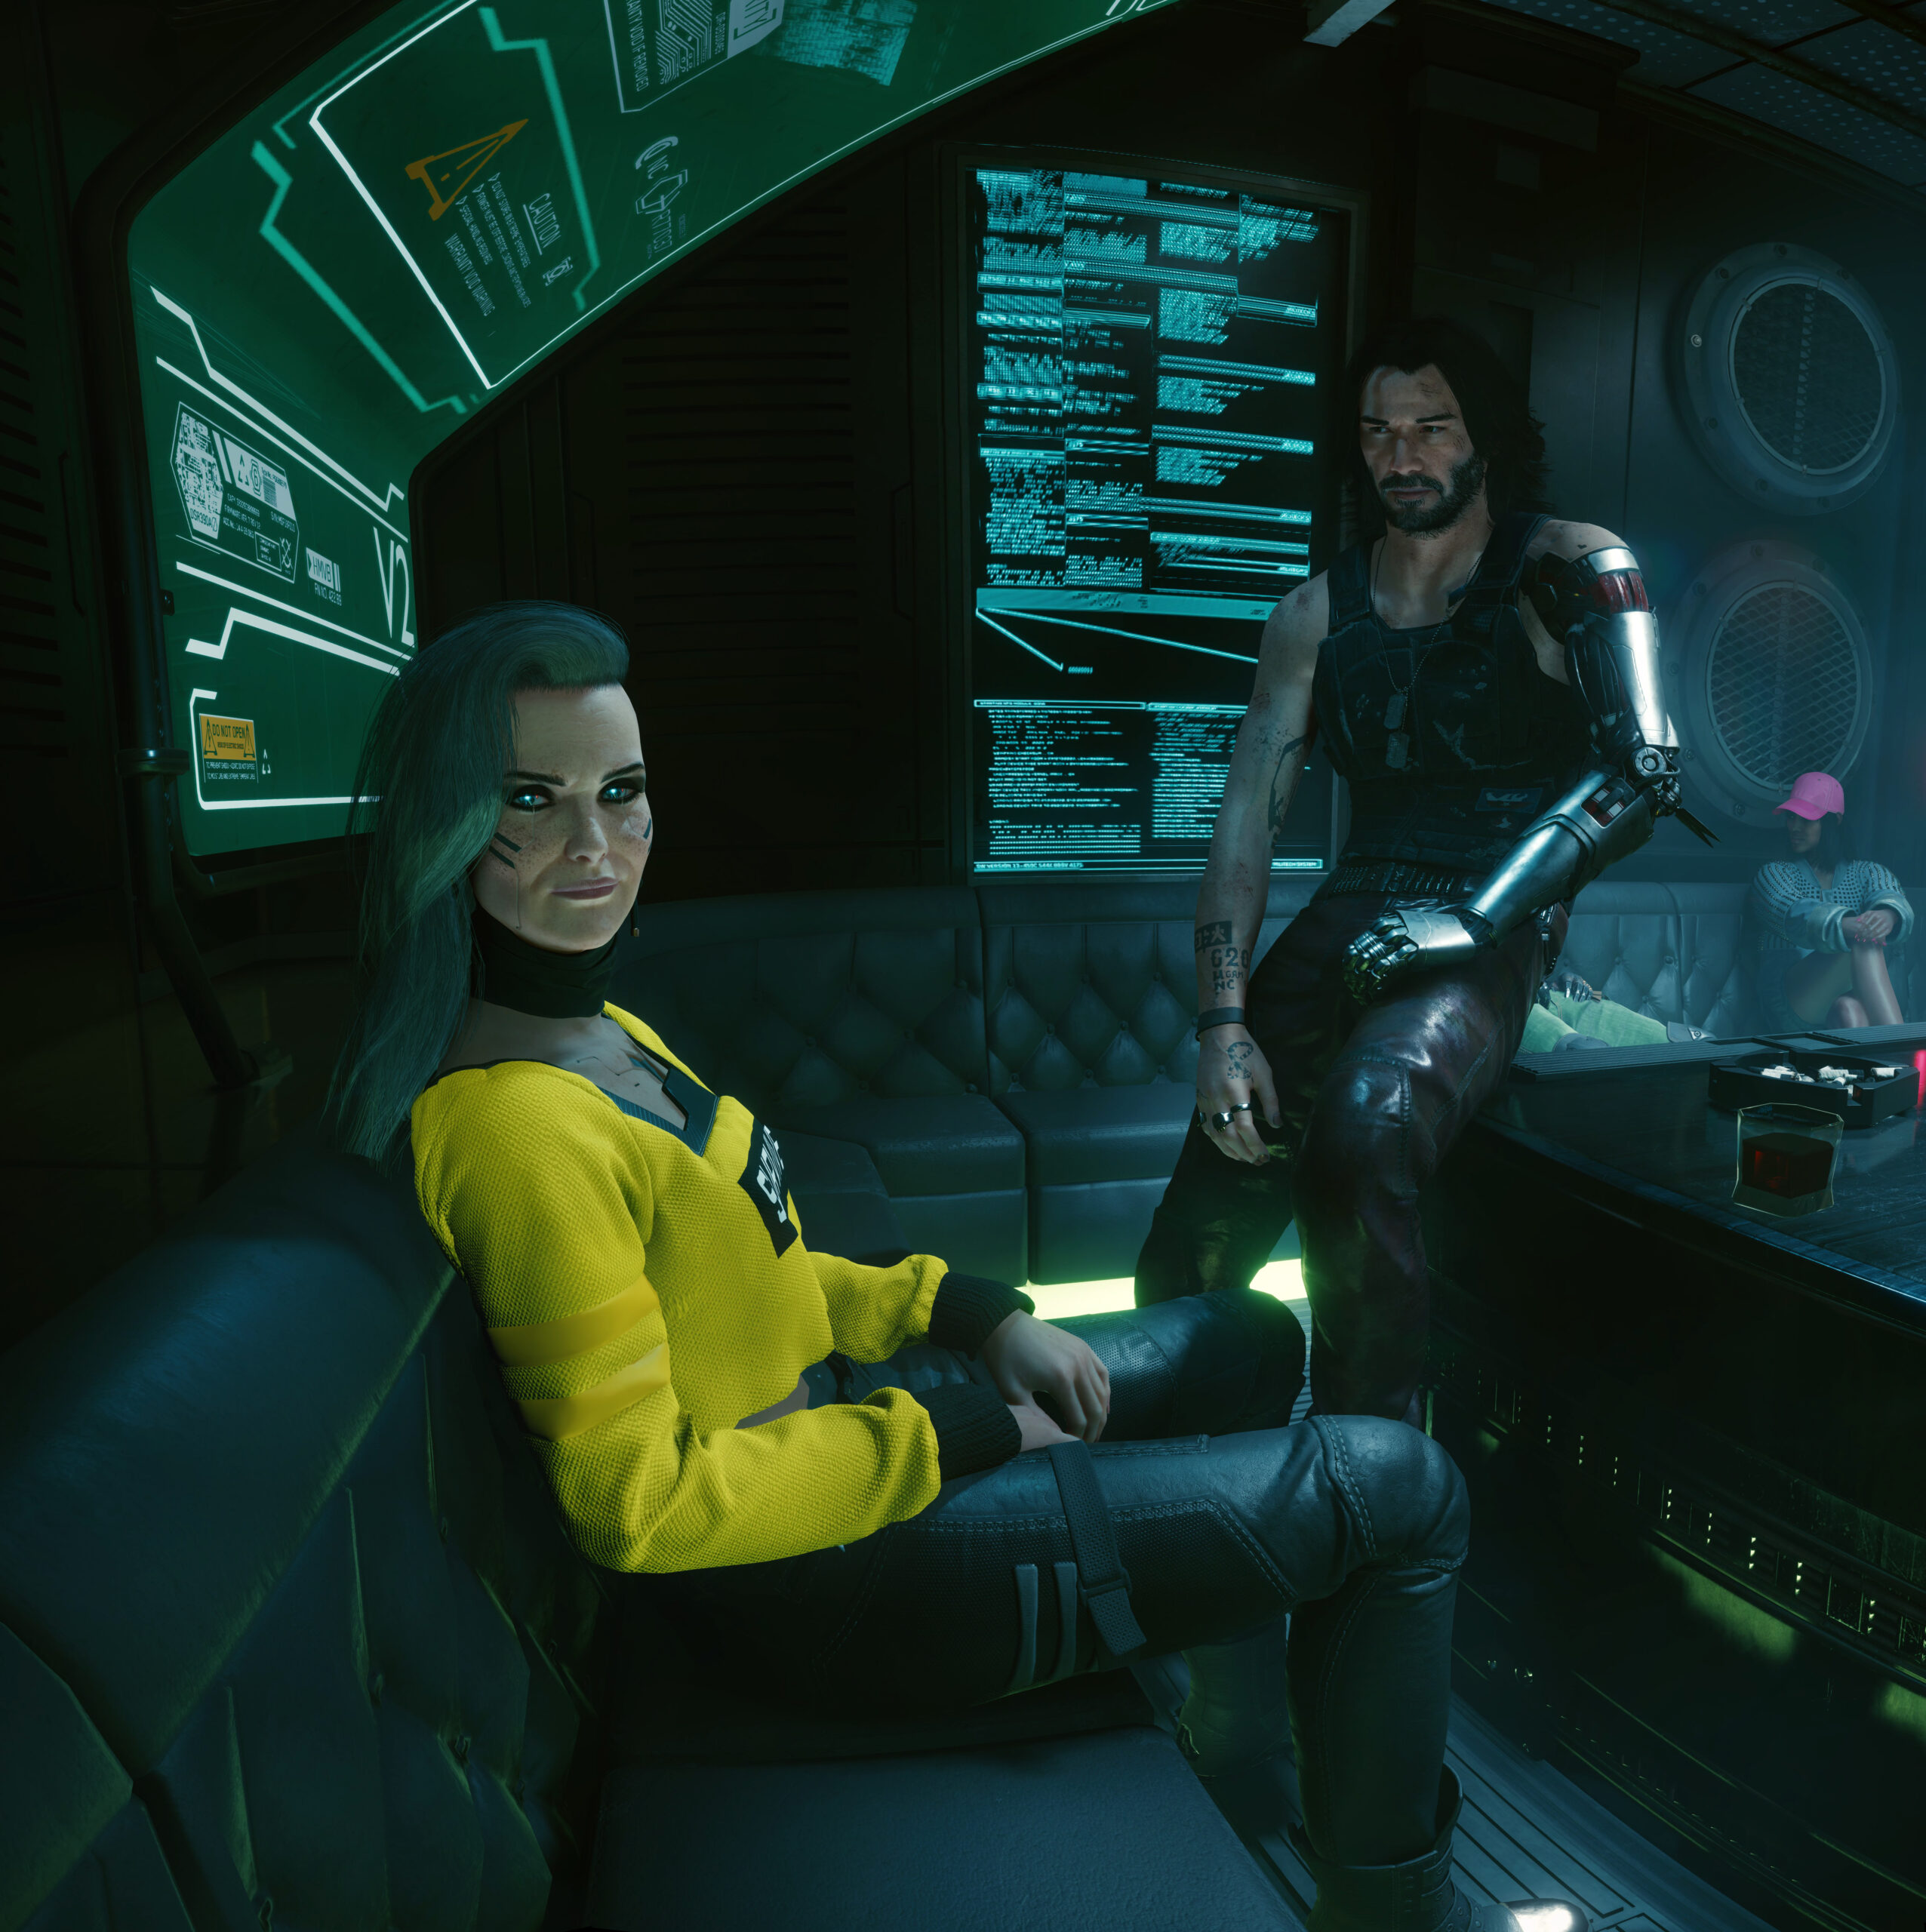
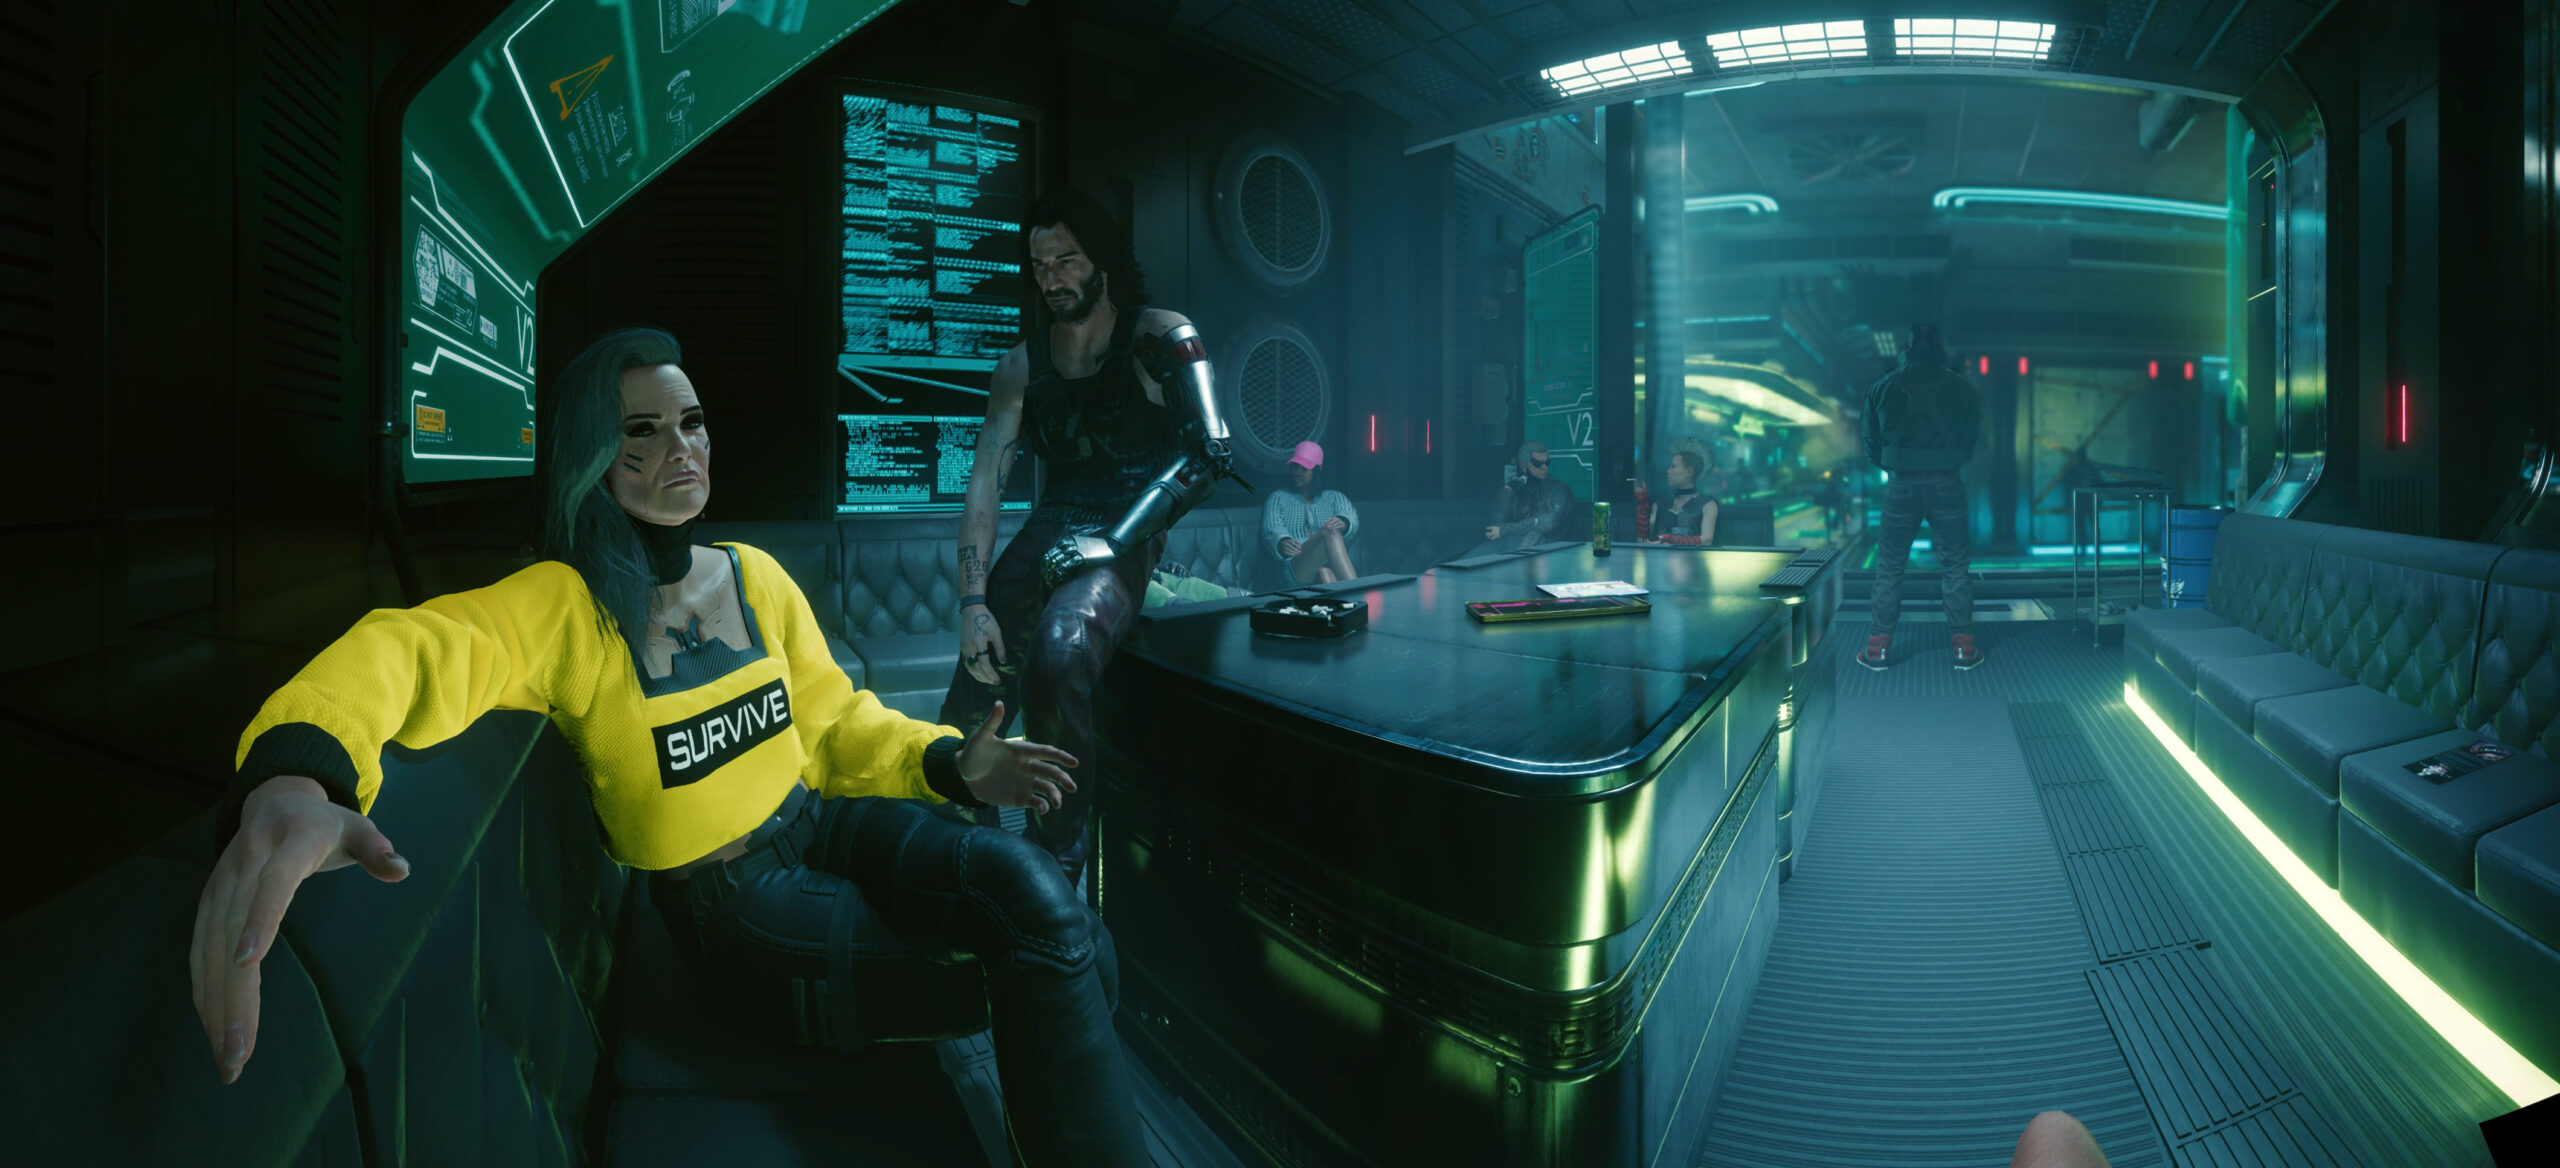
In part 1 I wrote a bit about this great game and shared some screenshots. By now I’ve finished the story and almost all side-quests and I still see it as the best game since years.
Anyway, here are more pictures taken in-game (sometimes stitched):
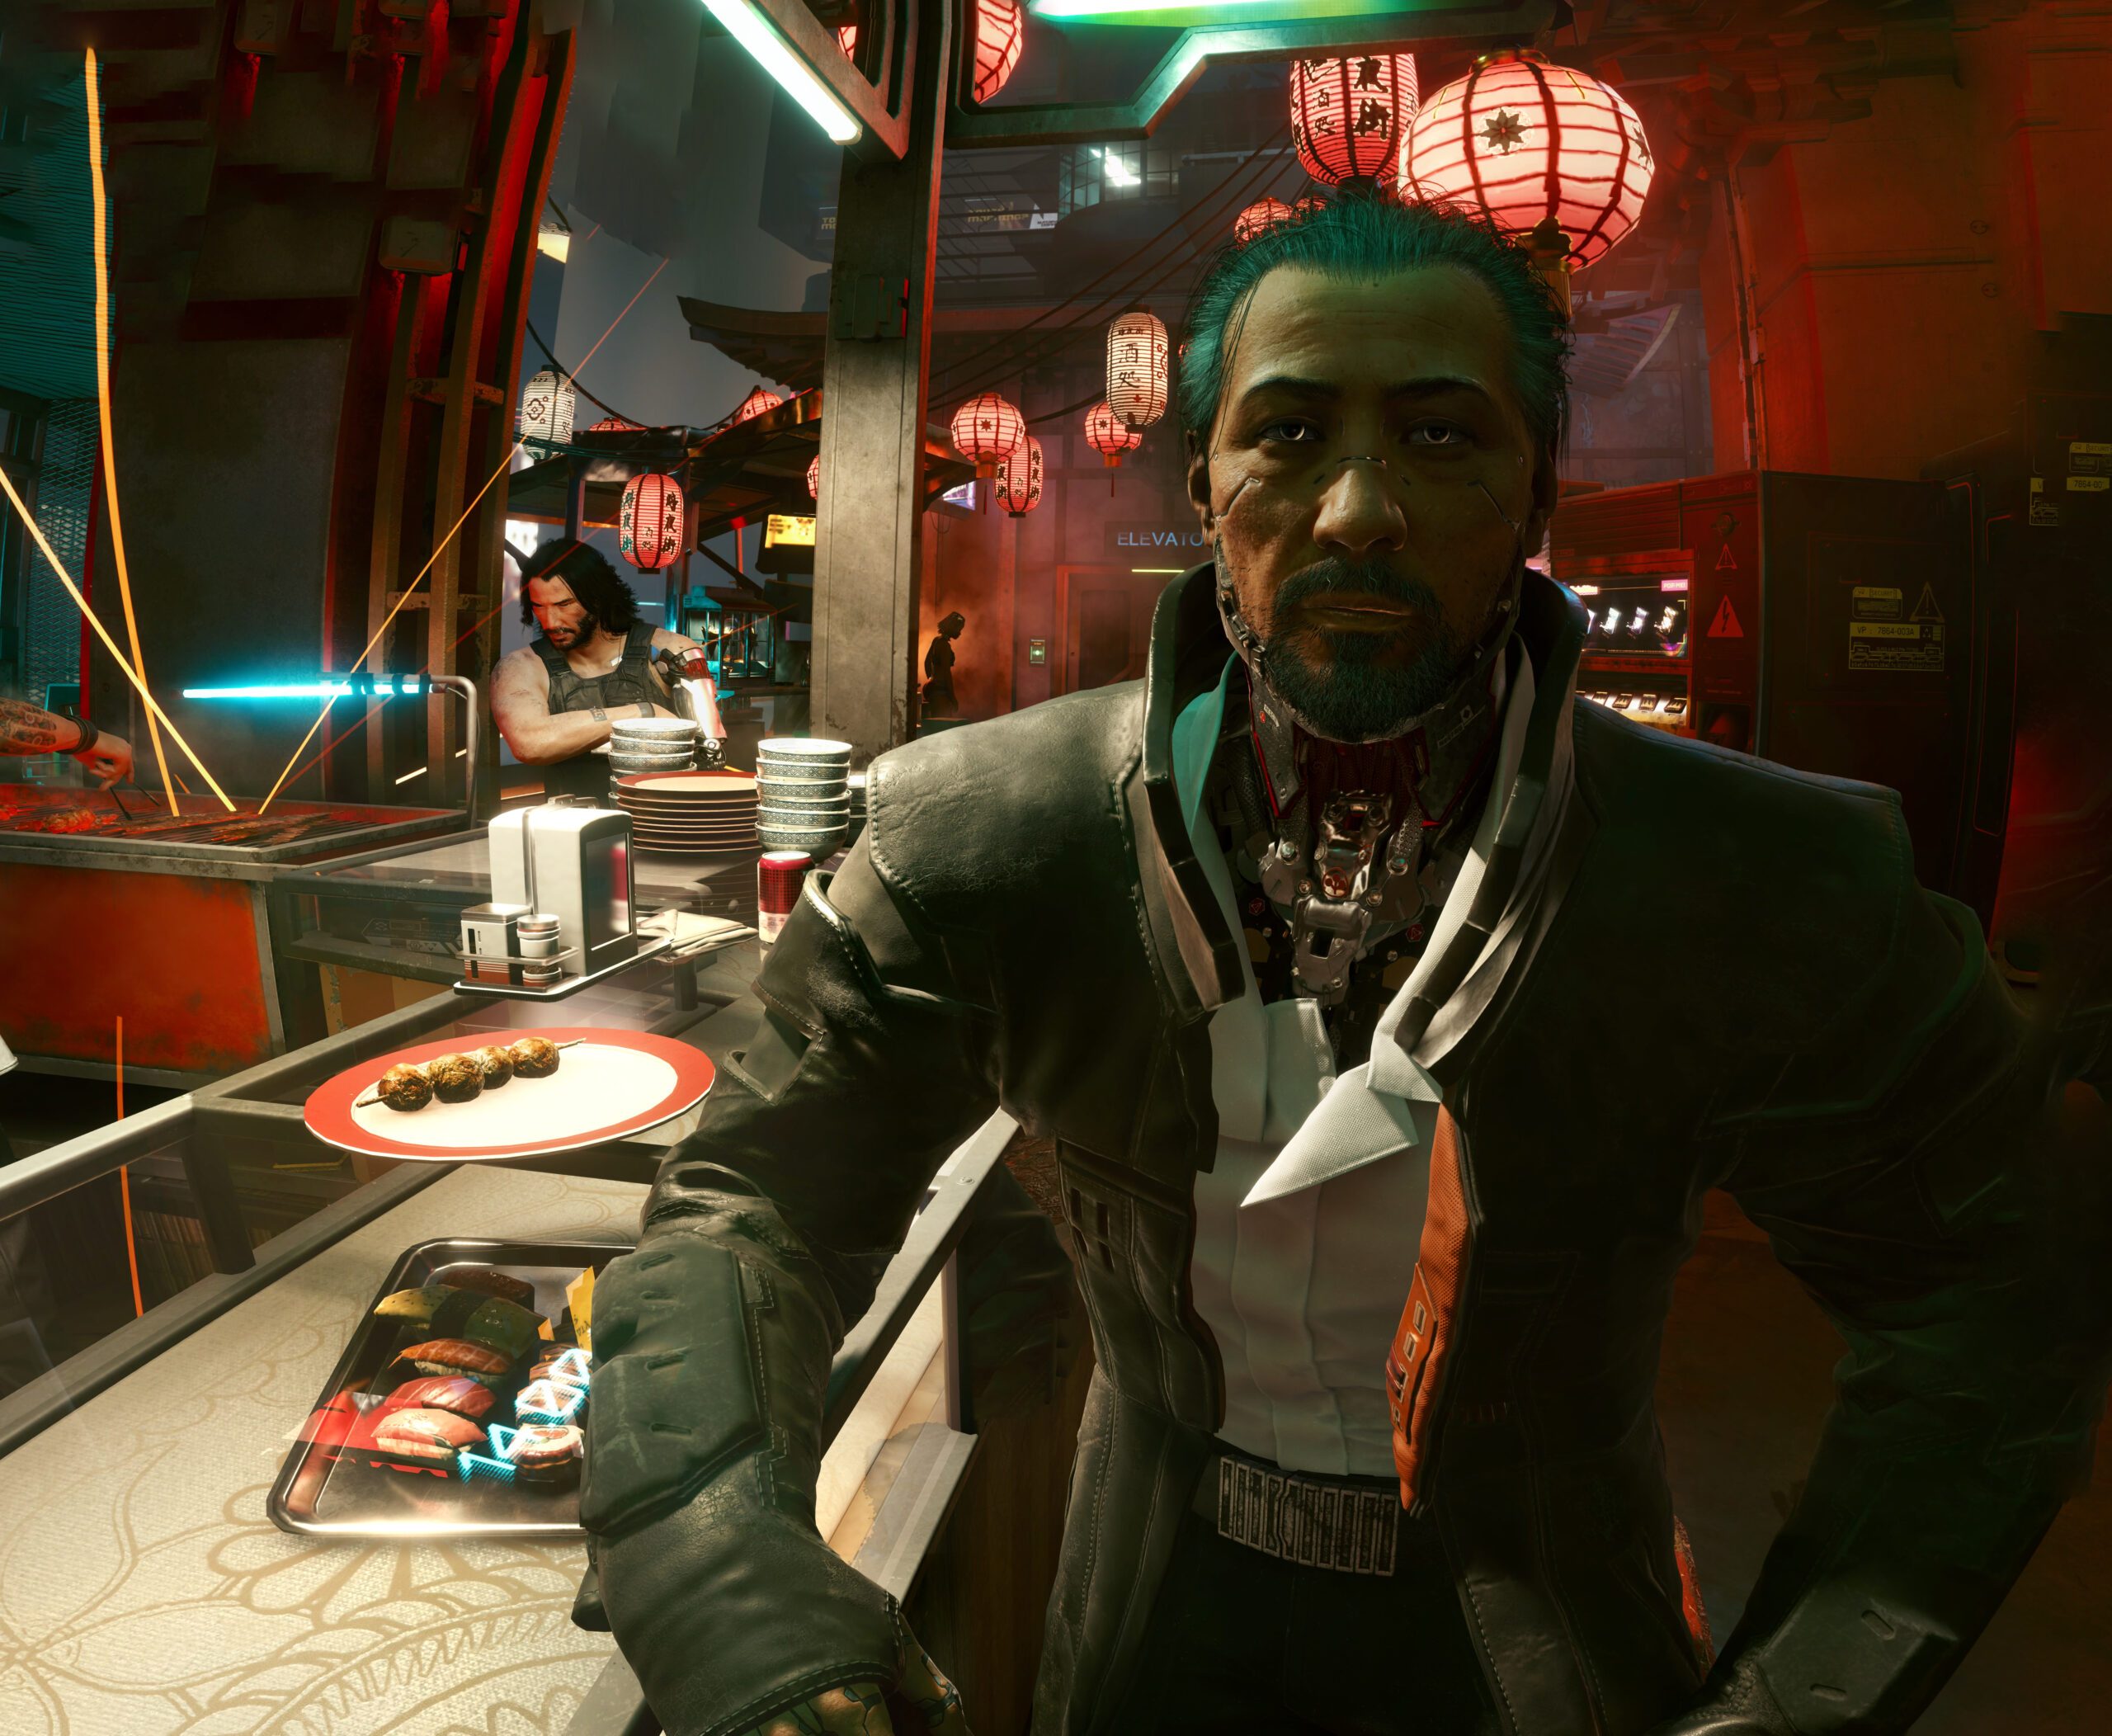
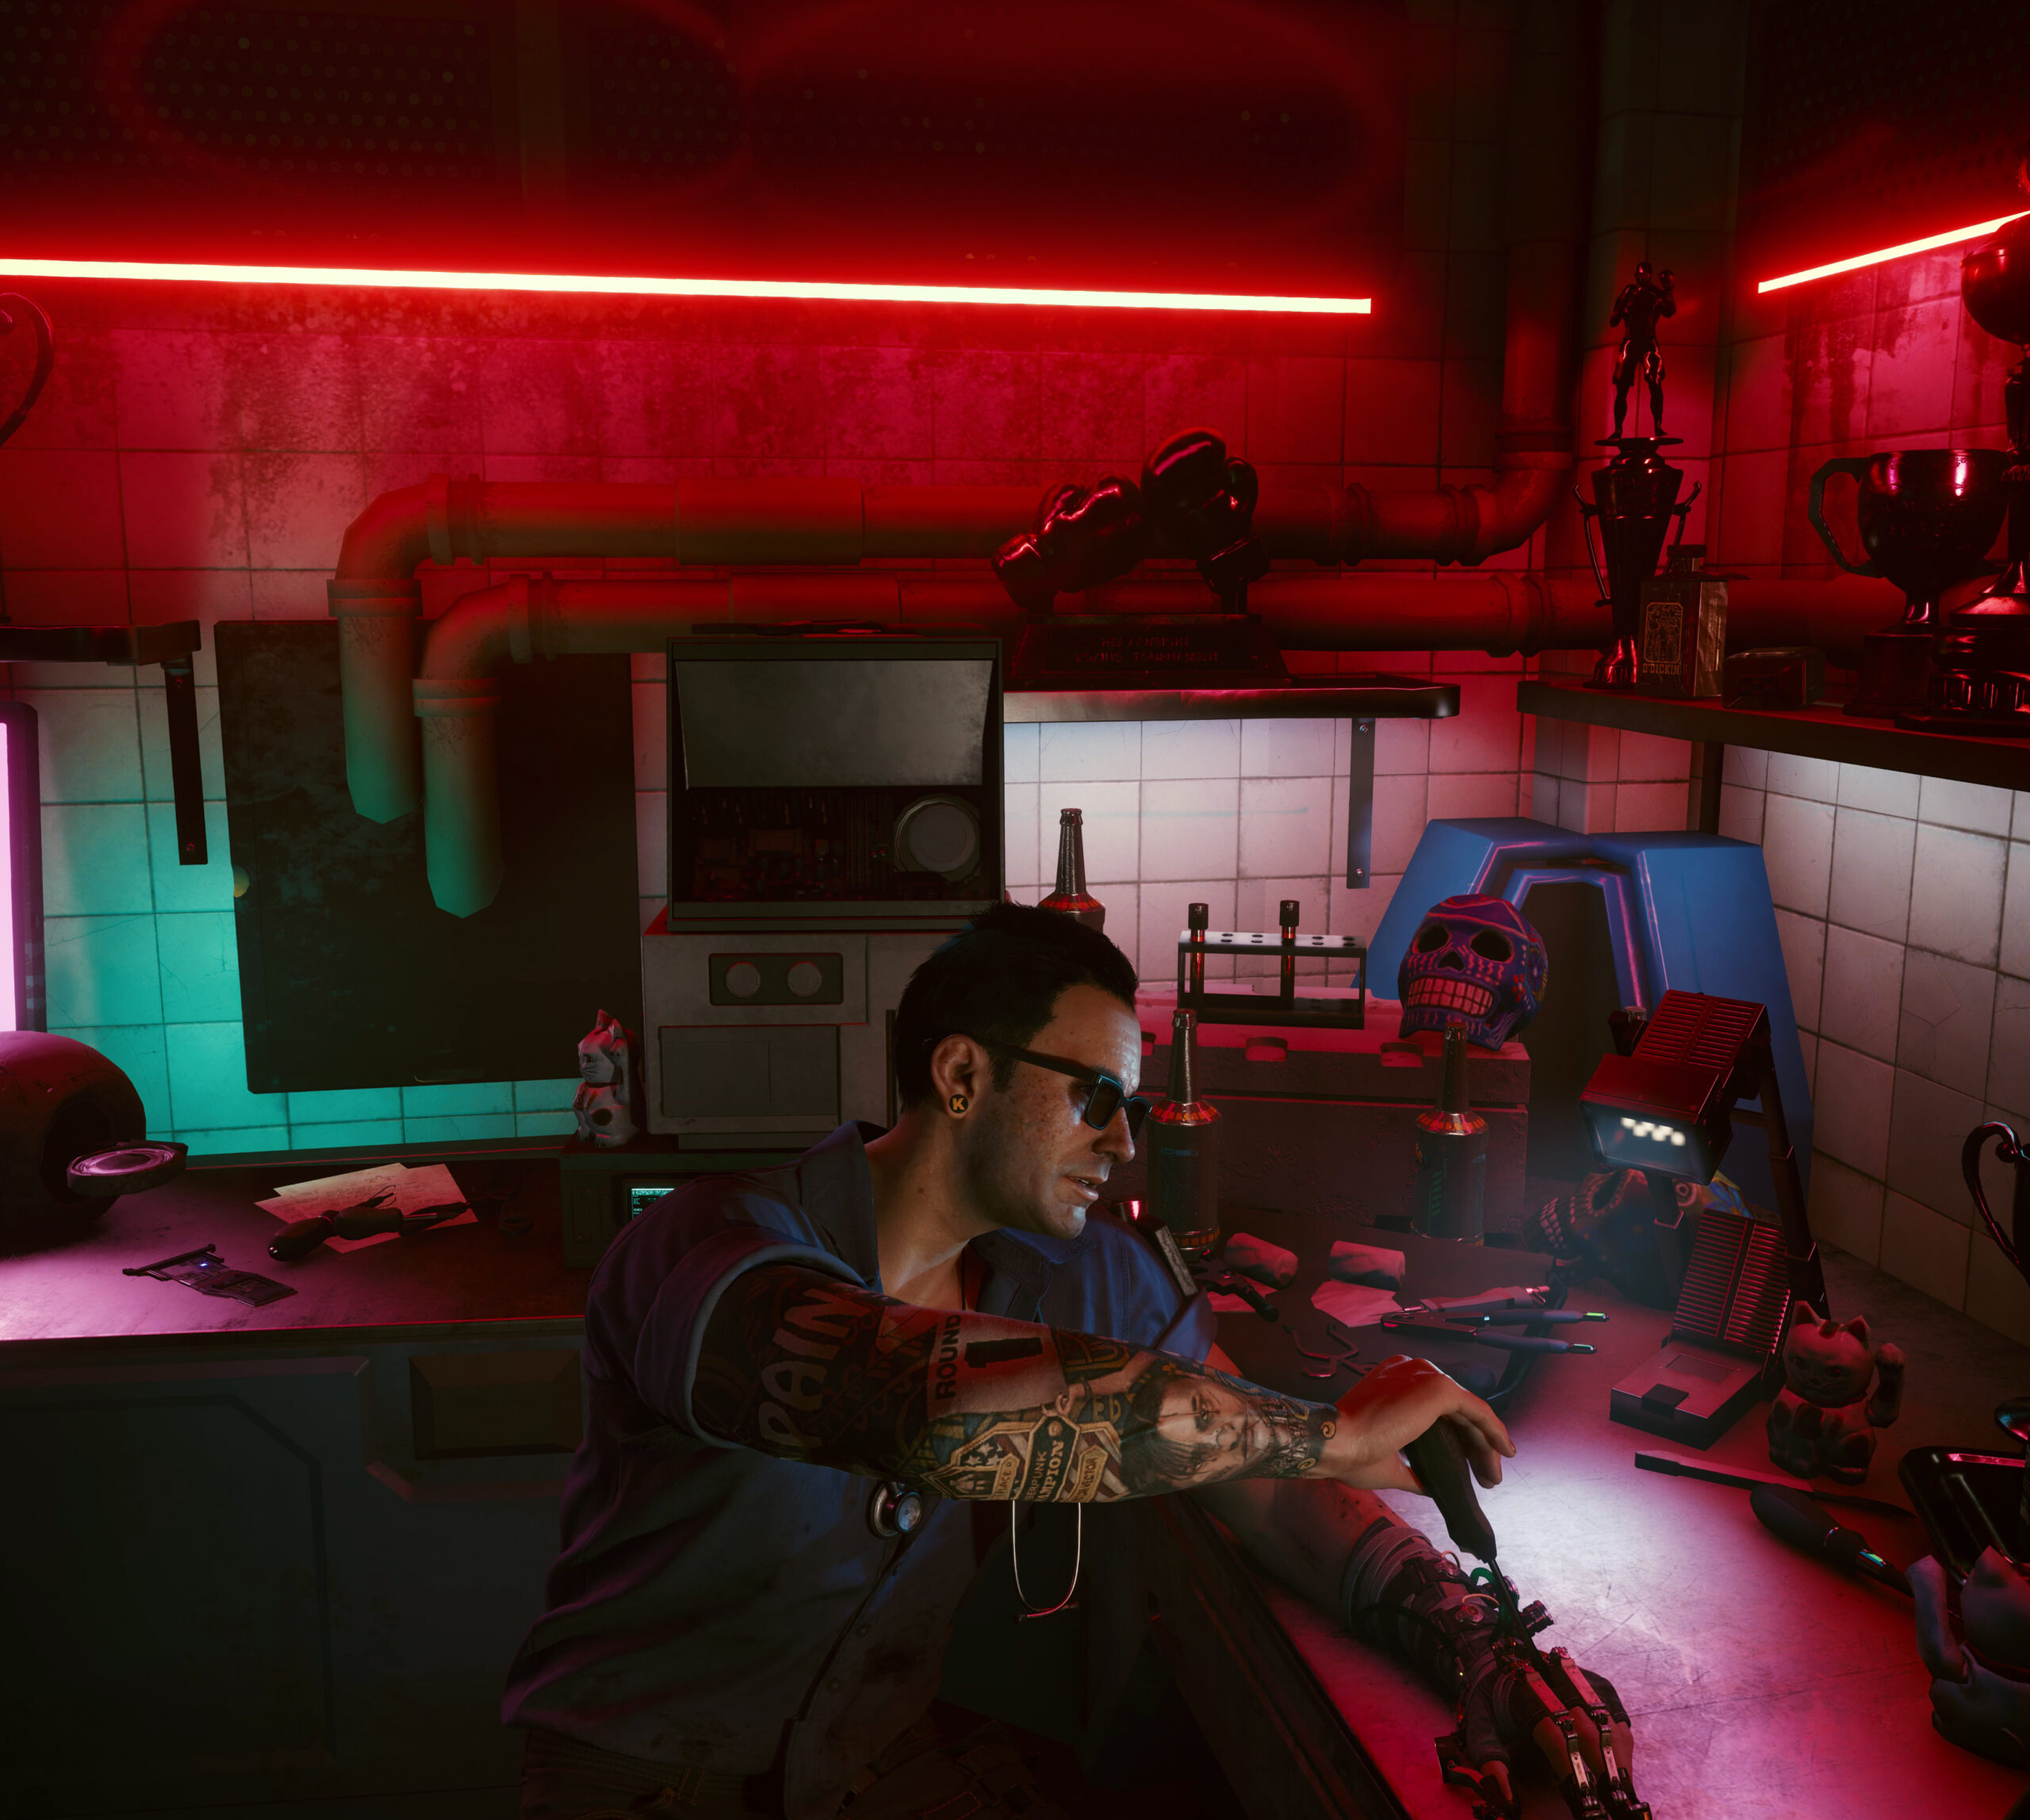
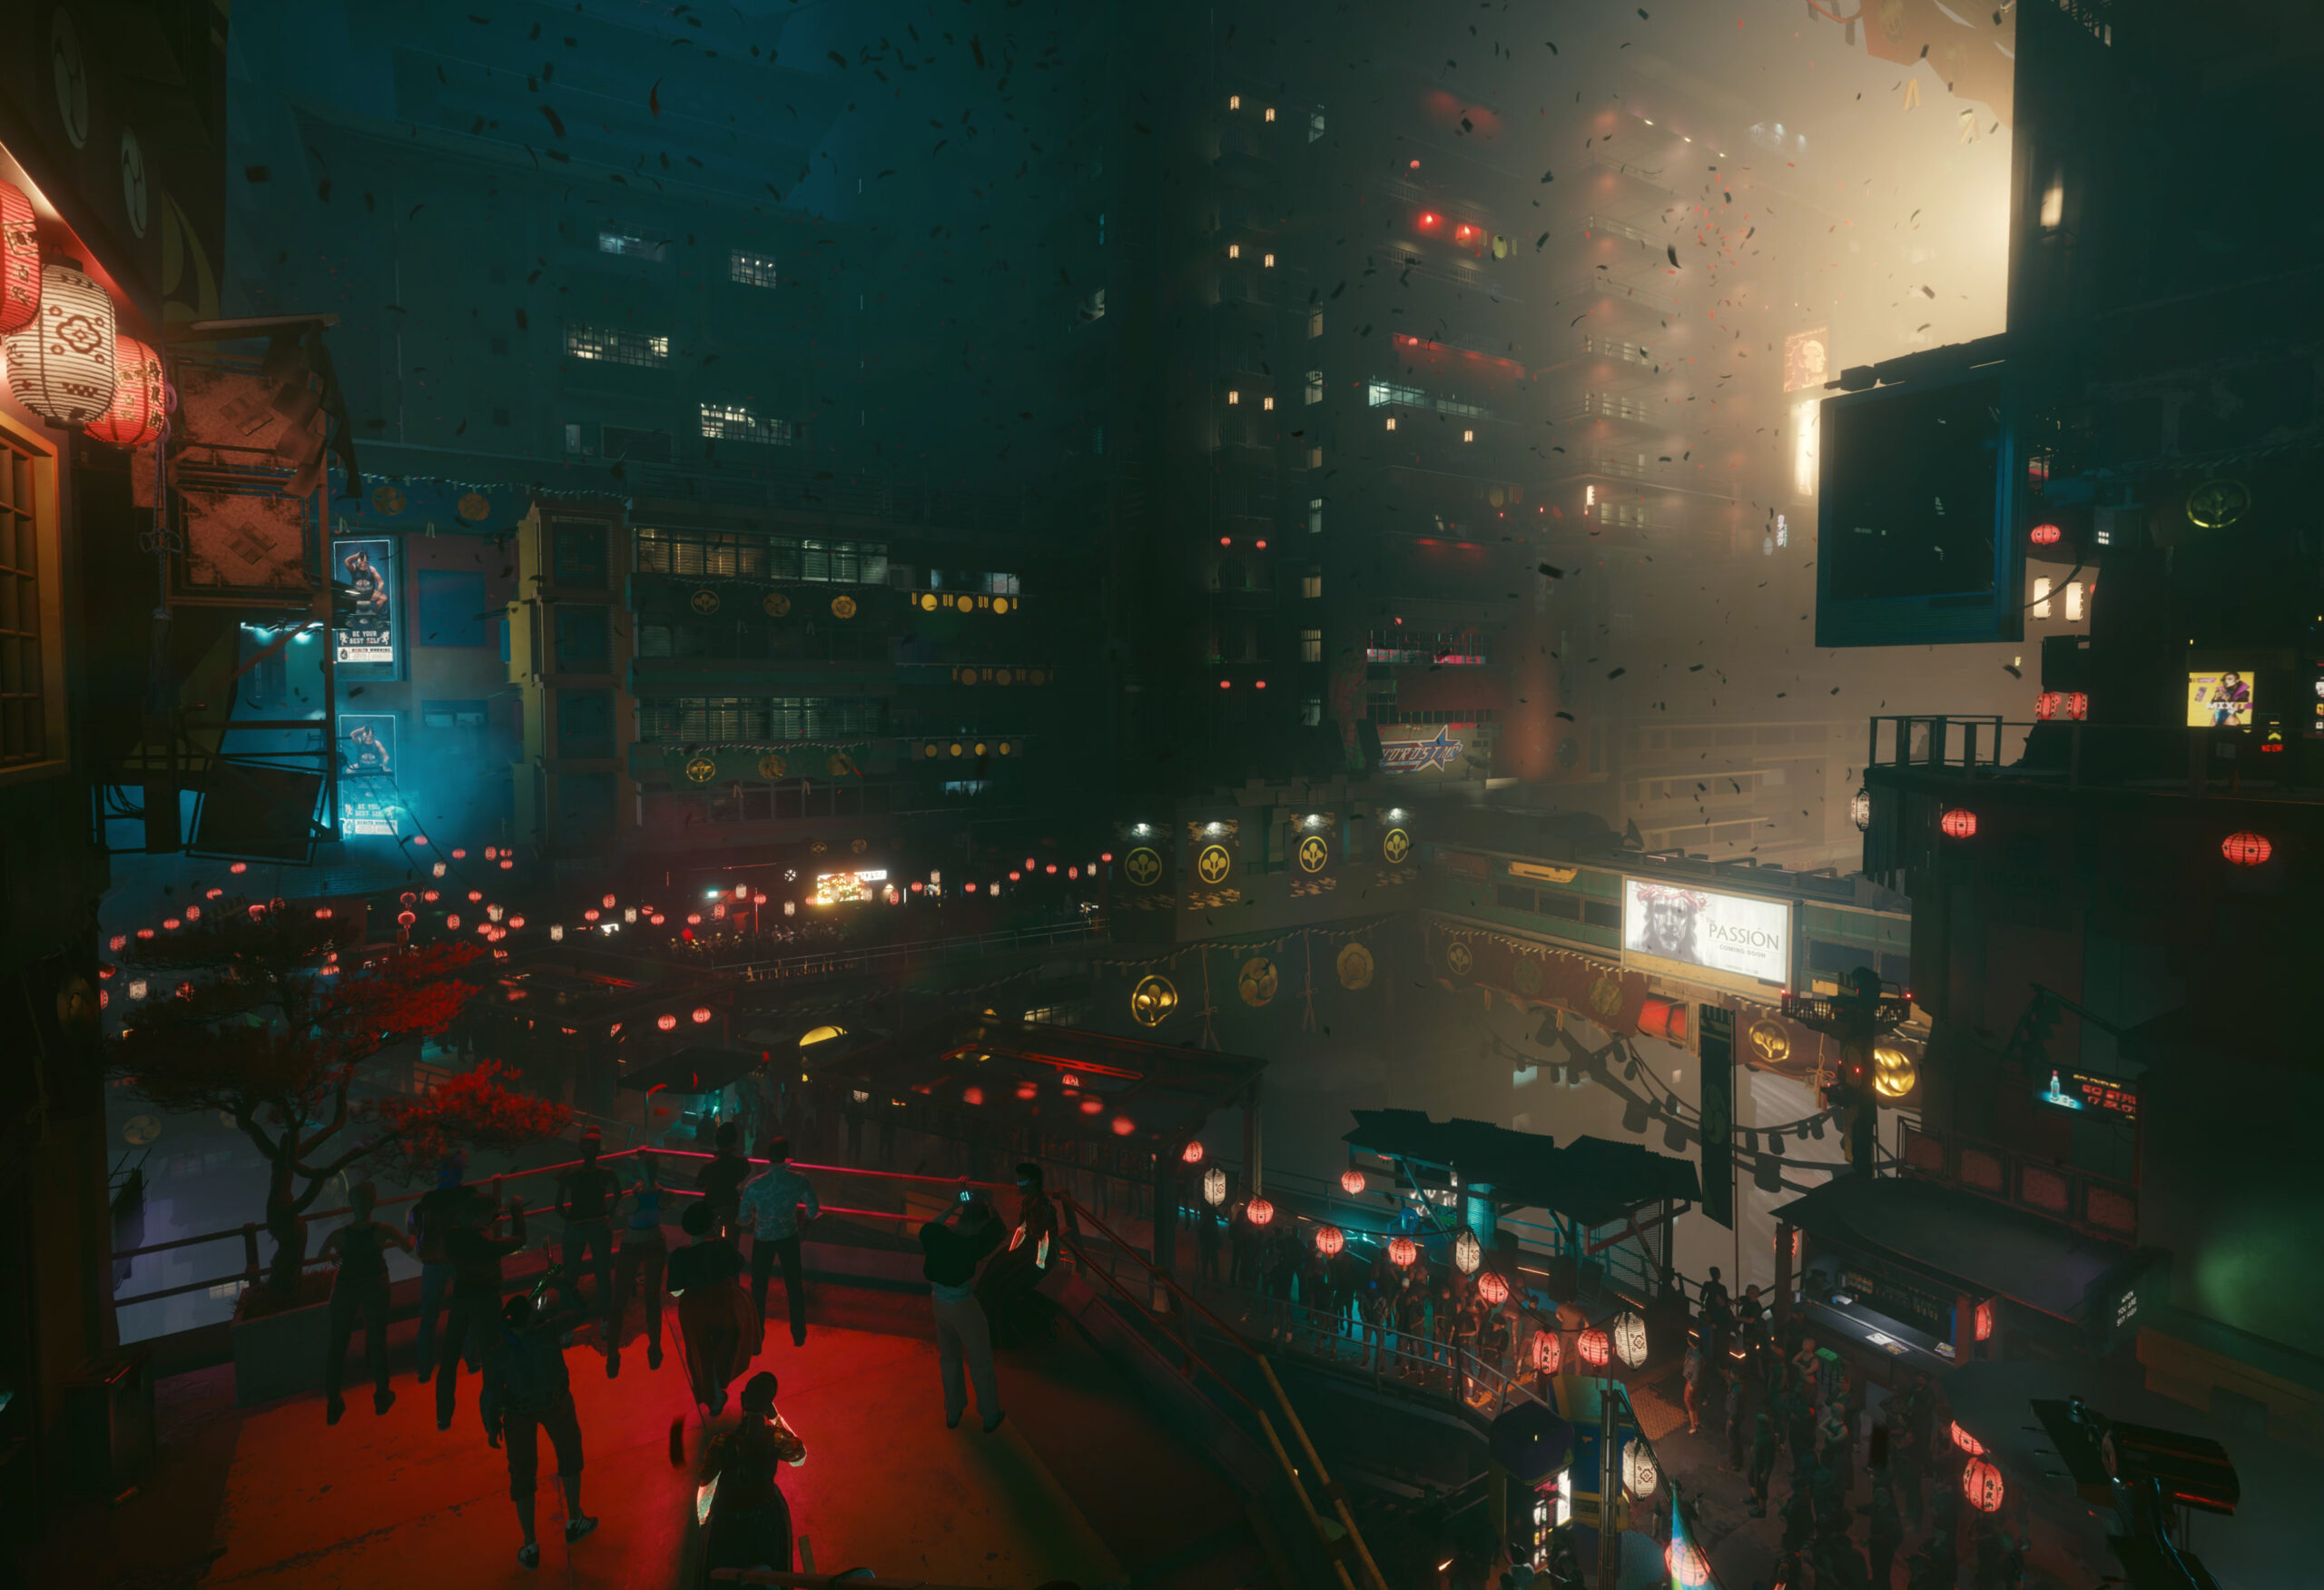
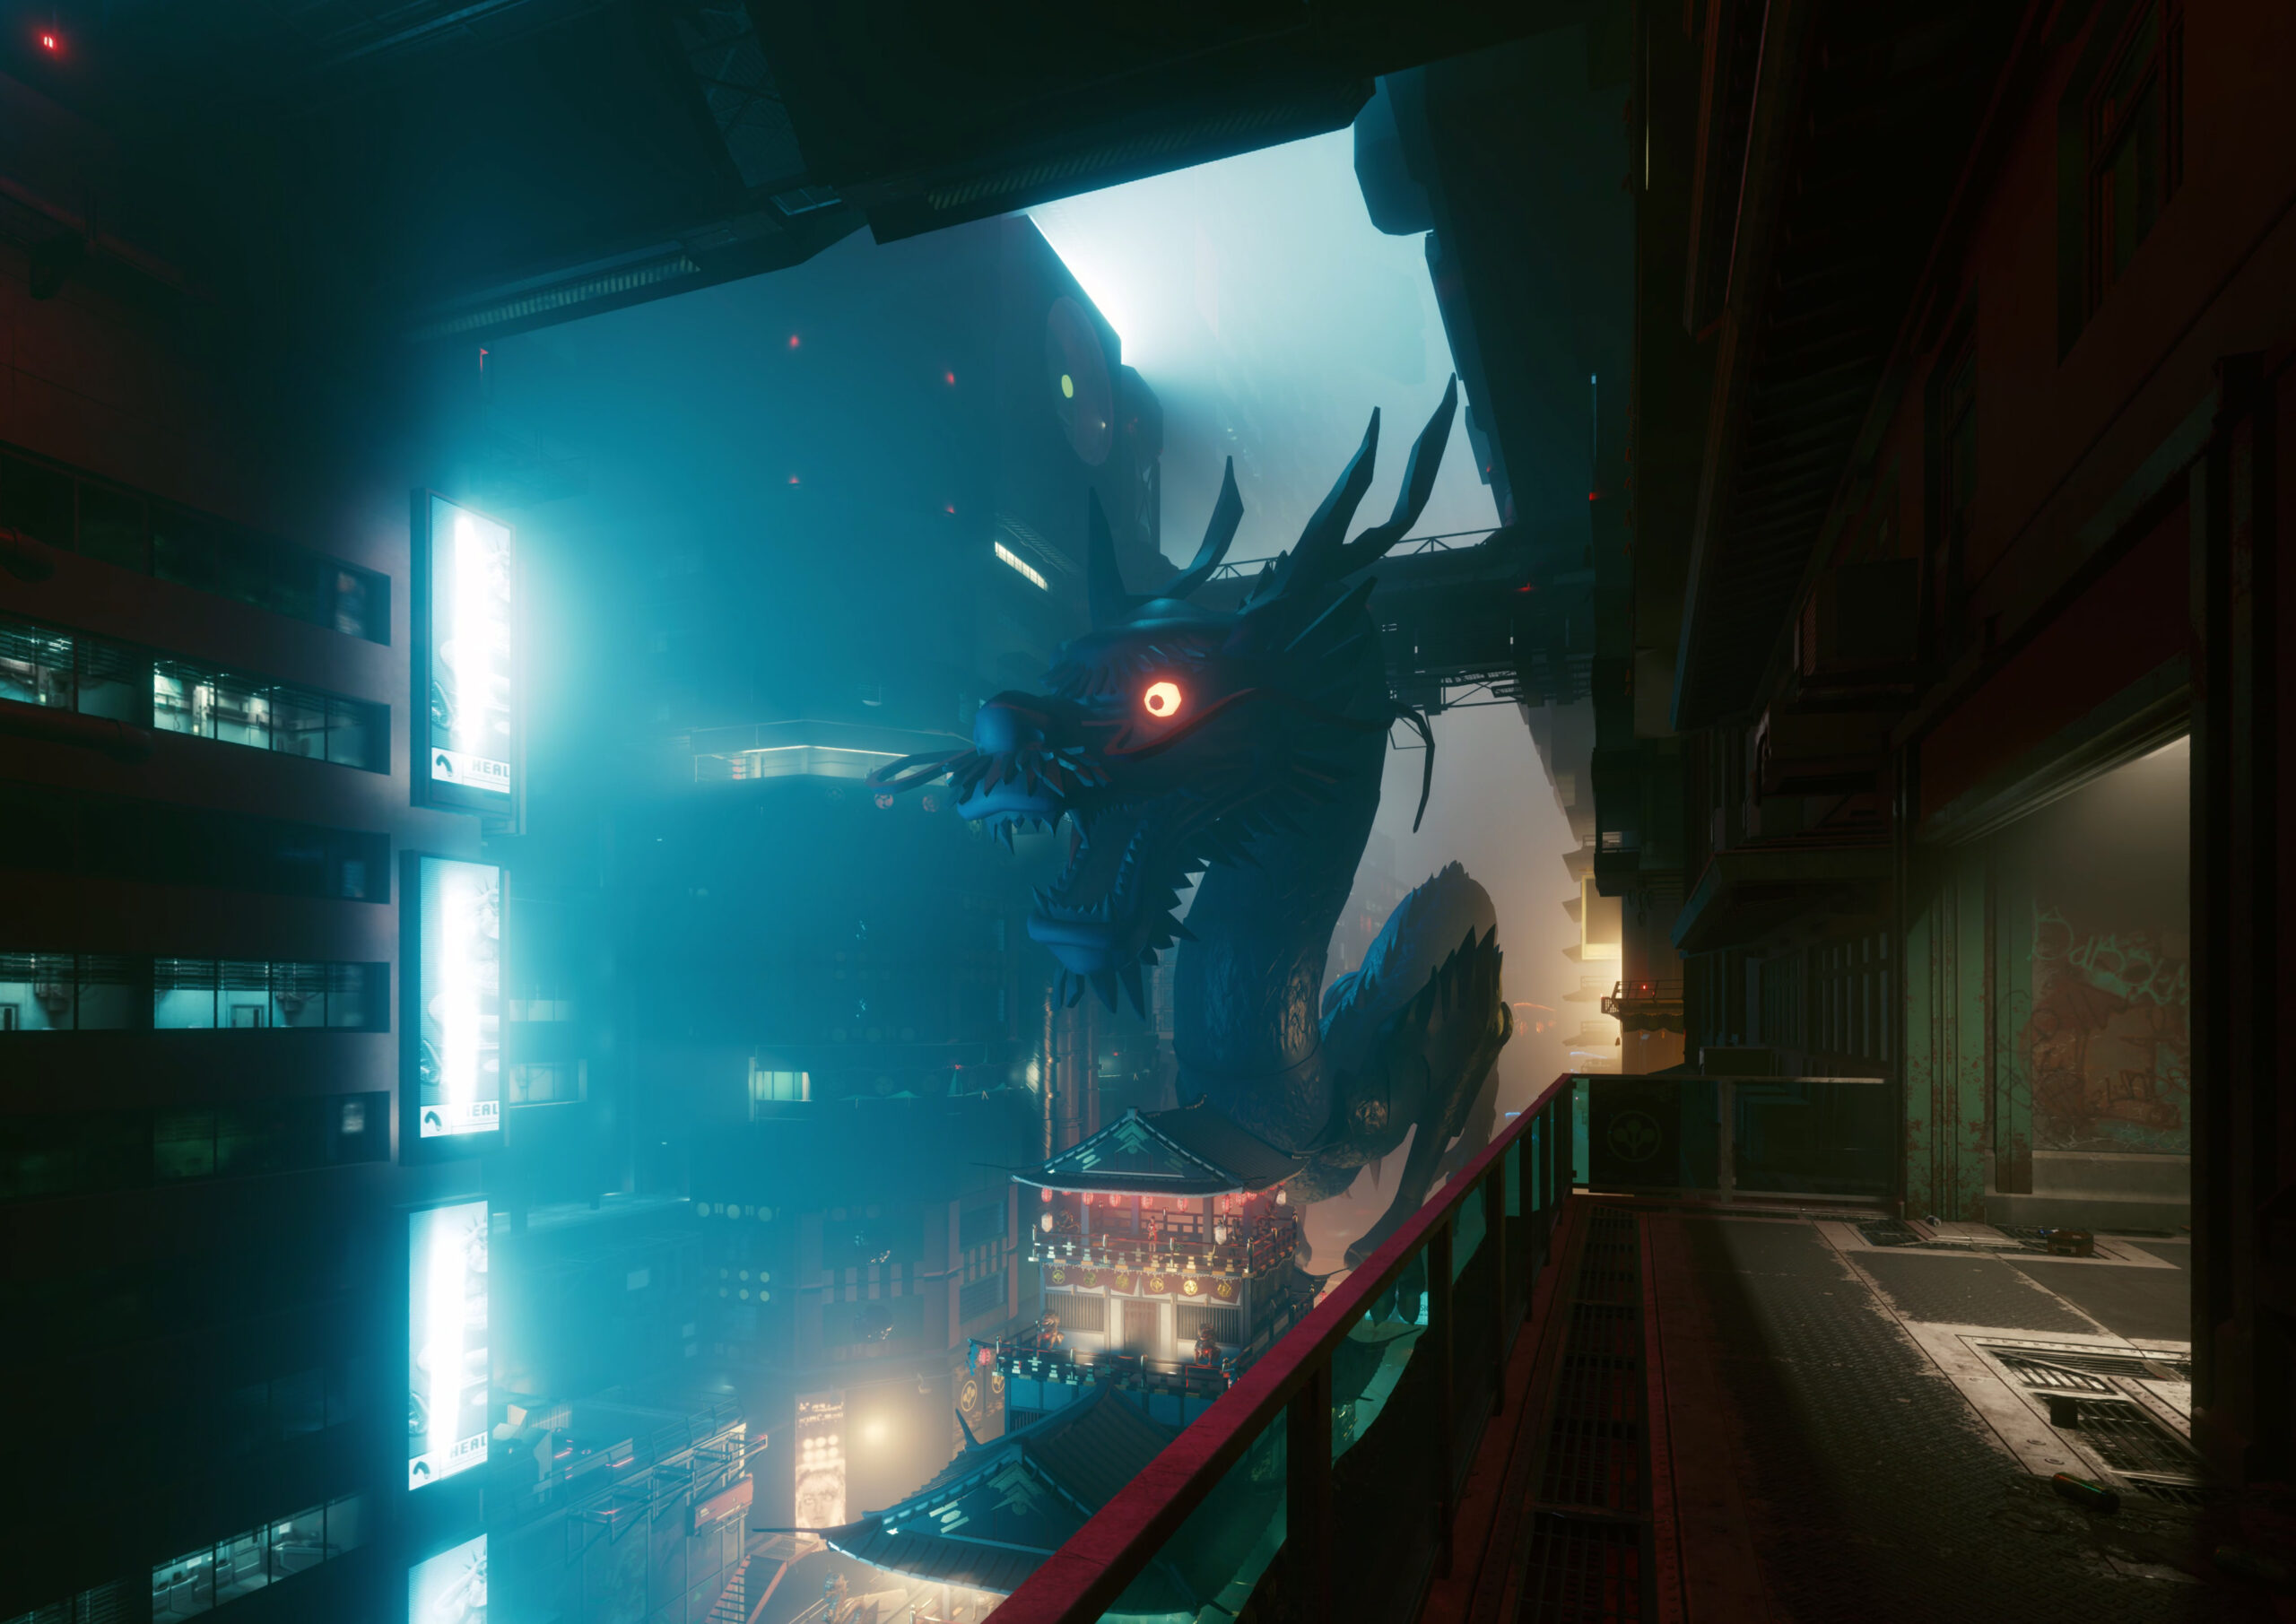
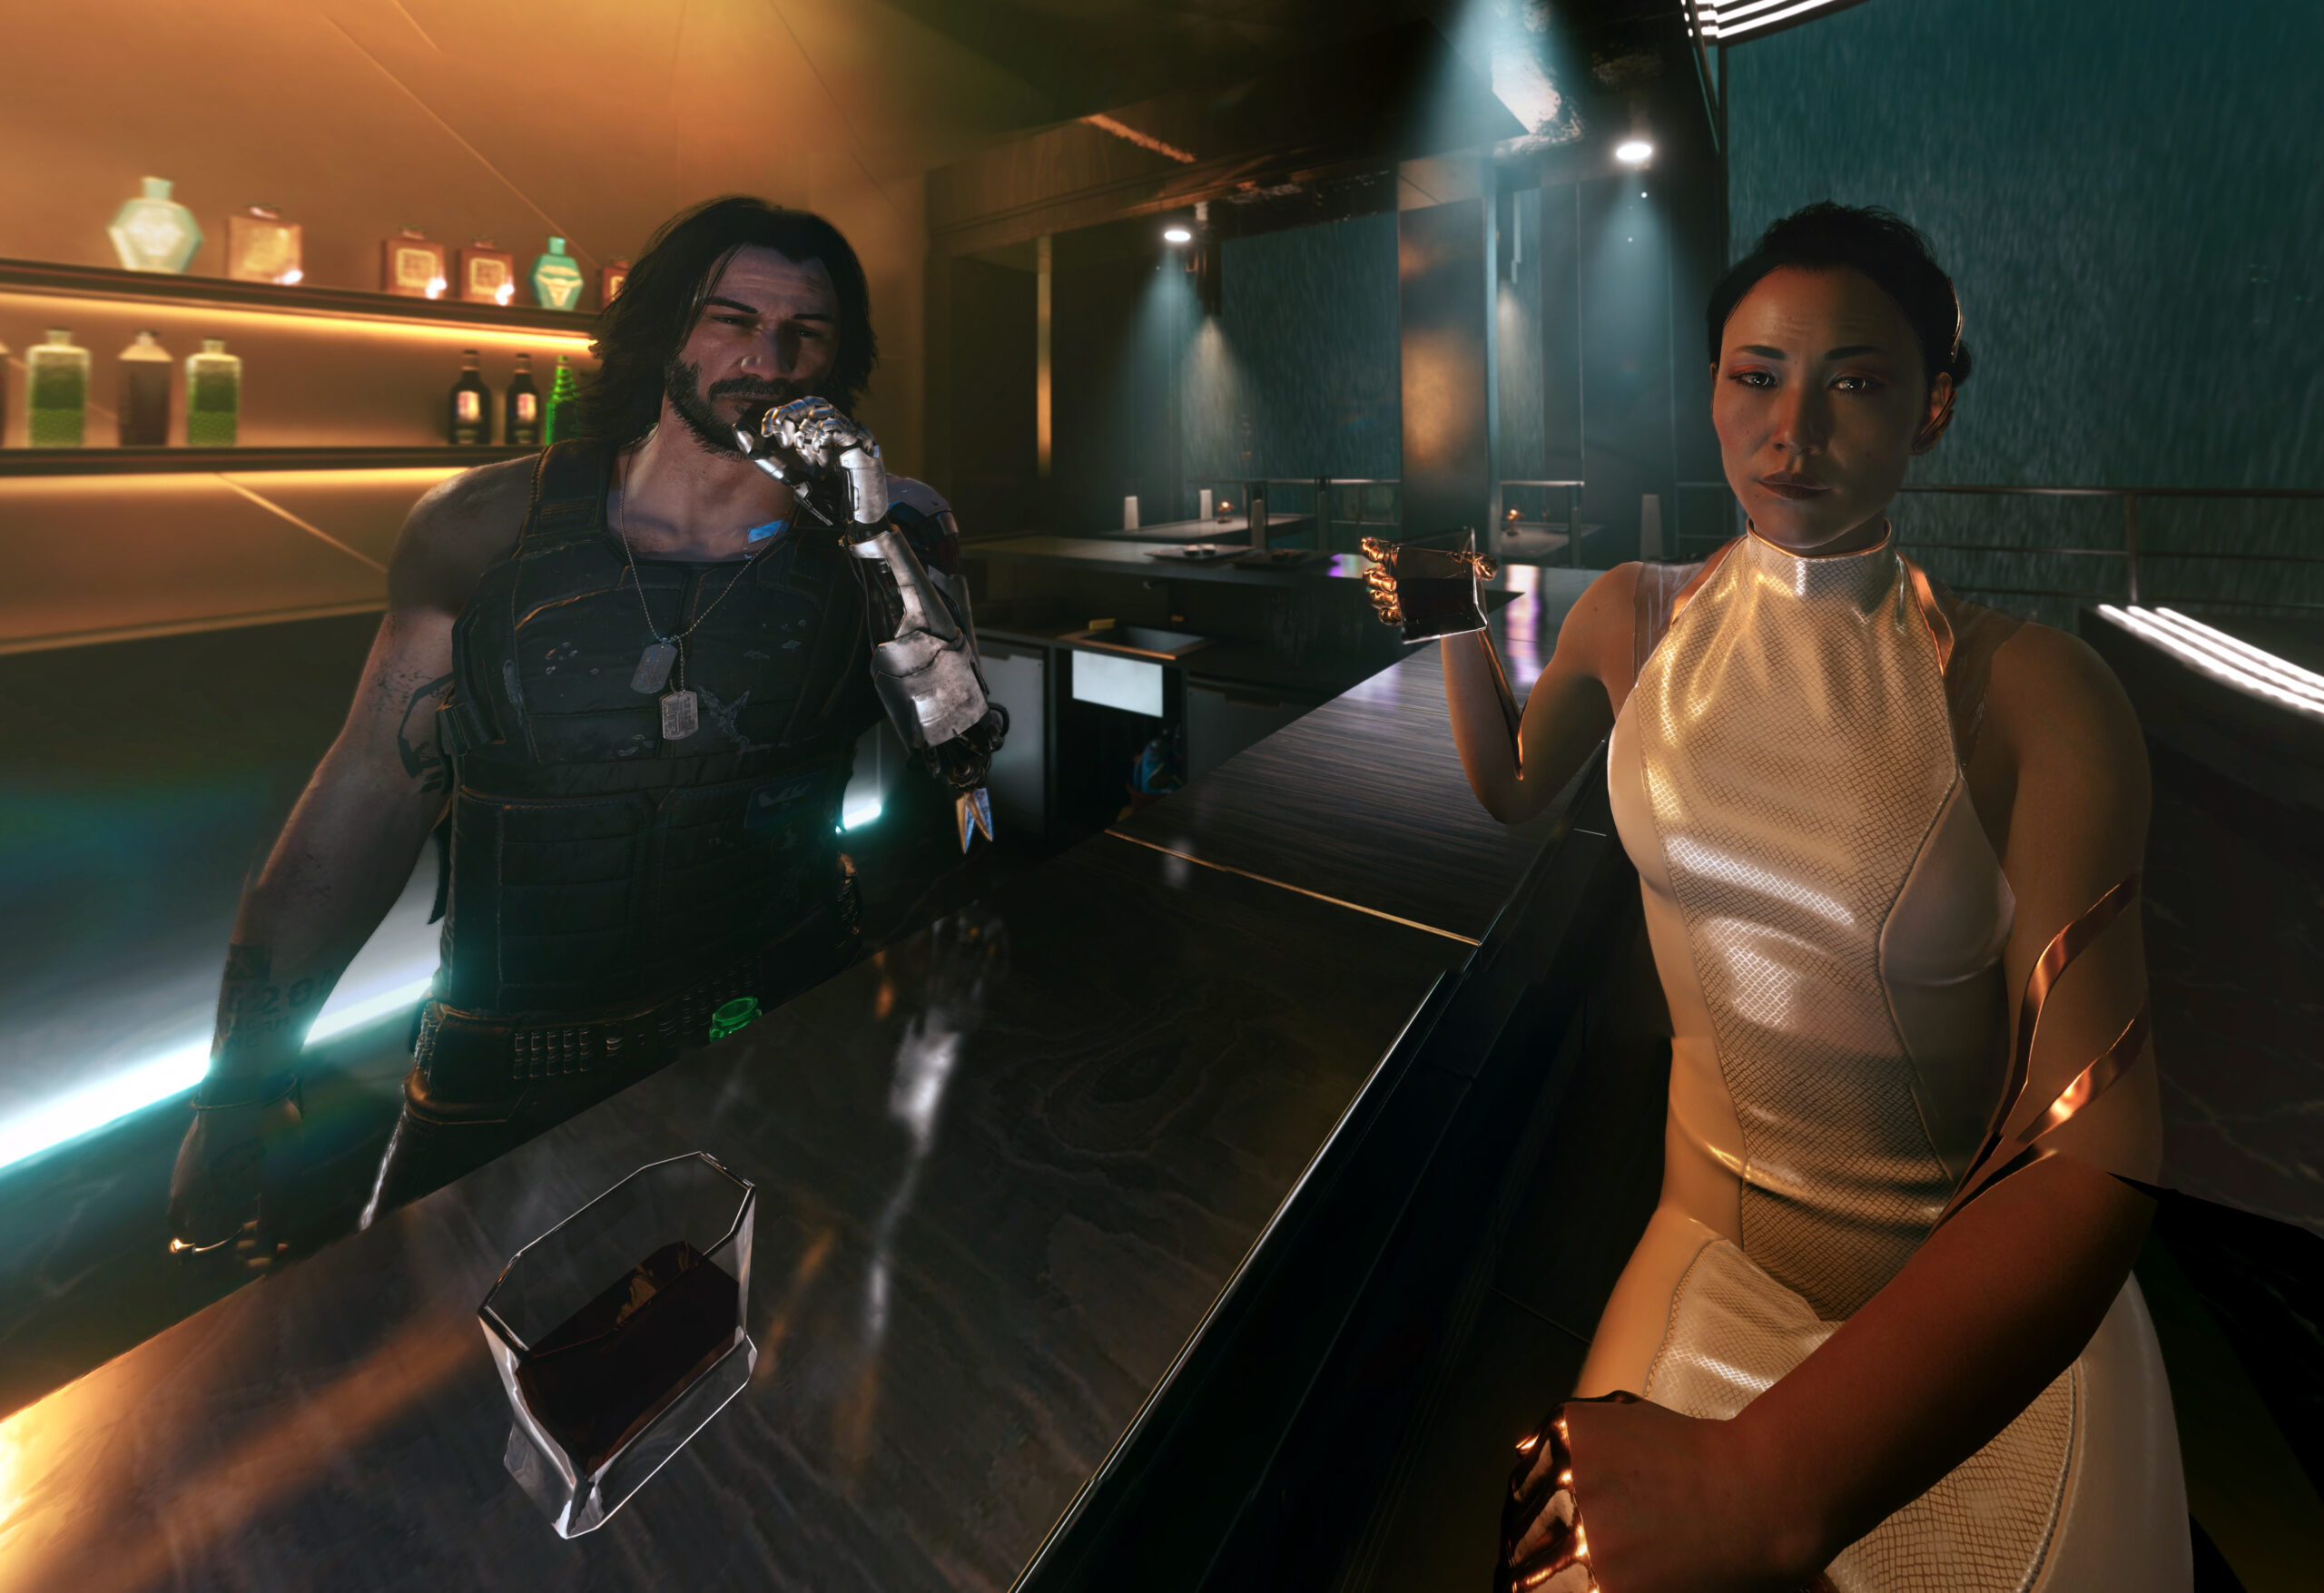
For the first time in the last 10ish years I am back playing a game that really impresses me. The story, the world and the technology of Cyberpunk 2077 really is a step forward.
It’s a first in many aspects for me. I do not own a PC capable enough of playing Cyberpunk 2077 at any quality level. Usually I am playing games on consoles like the Playstation. But for this one I have selected to play on the PC platform. But how?
I am using game streaming. The game is rendered in a datacenter on a PC and graphics card I am renting for the purpose of playing the game. And it simply works great!
So I am playing a next-generation open-world game with technical break-throughs like Raytracing used to produce really great graphics streamed over the internet to my big-screen TV and my keyboard+mouse forwarded to that datacenter without (for me) noticeable lag or quality issues.
The only downside I can see so far is that sooo many people like to play it this way that there are not enough machines (gaming-rigs) available to all the players that want – so there’s a queue in the evening.
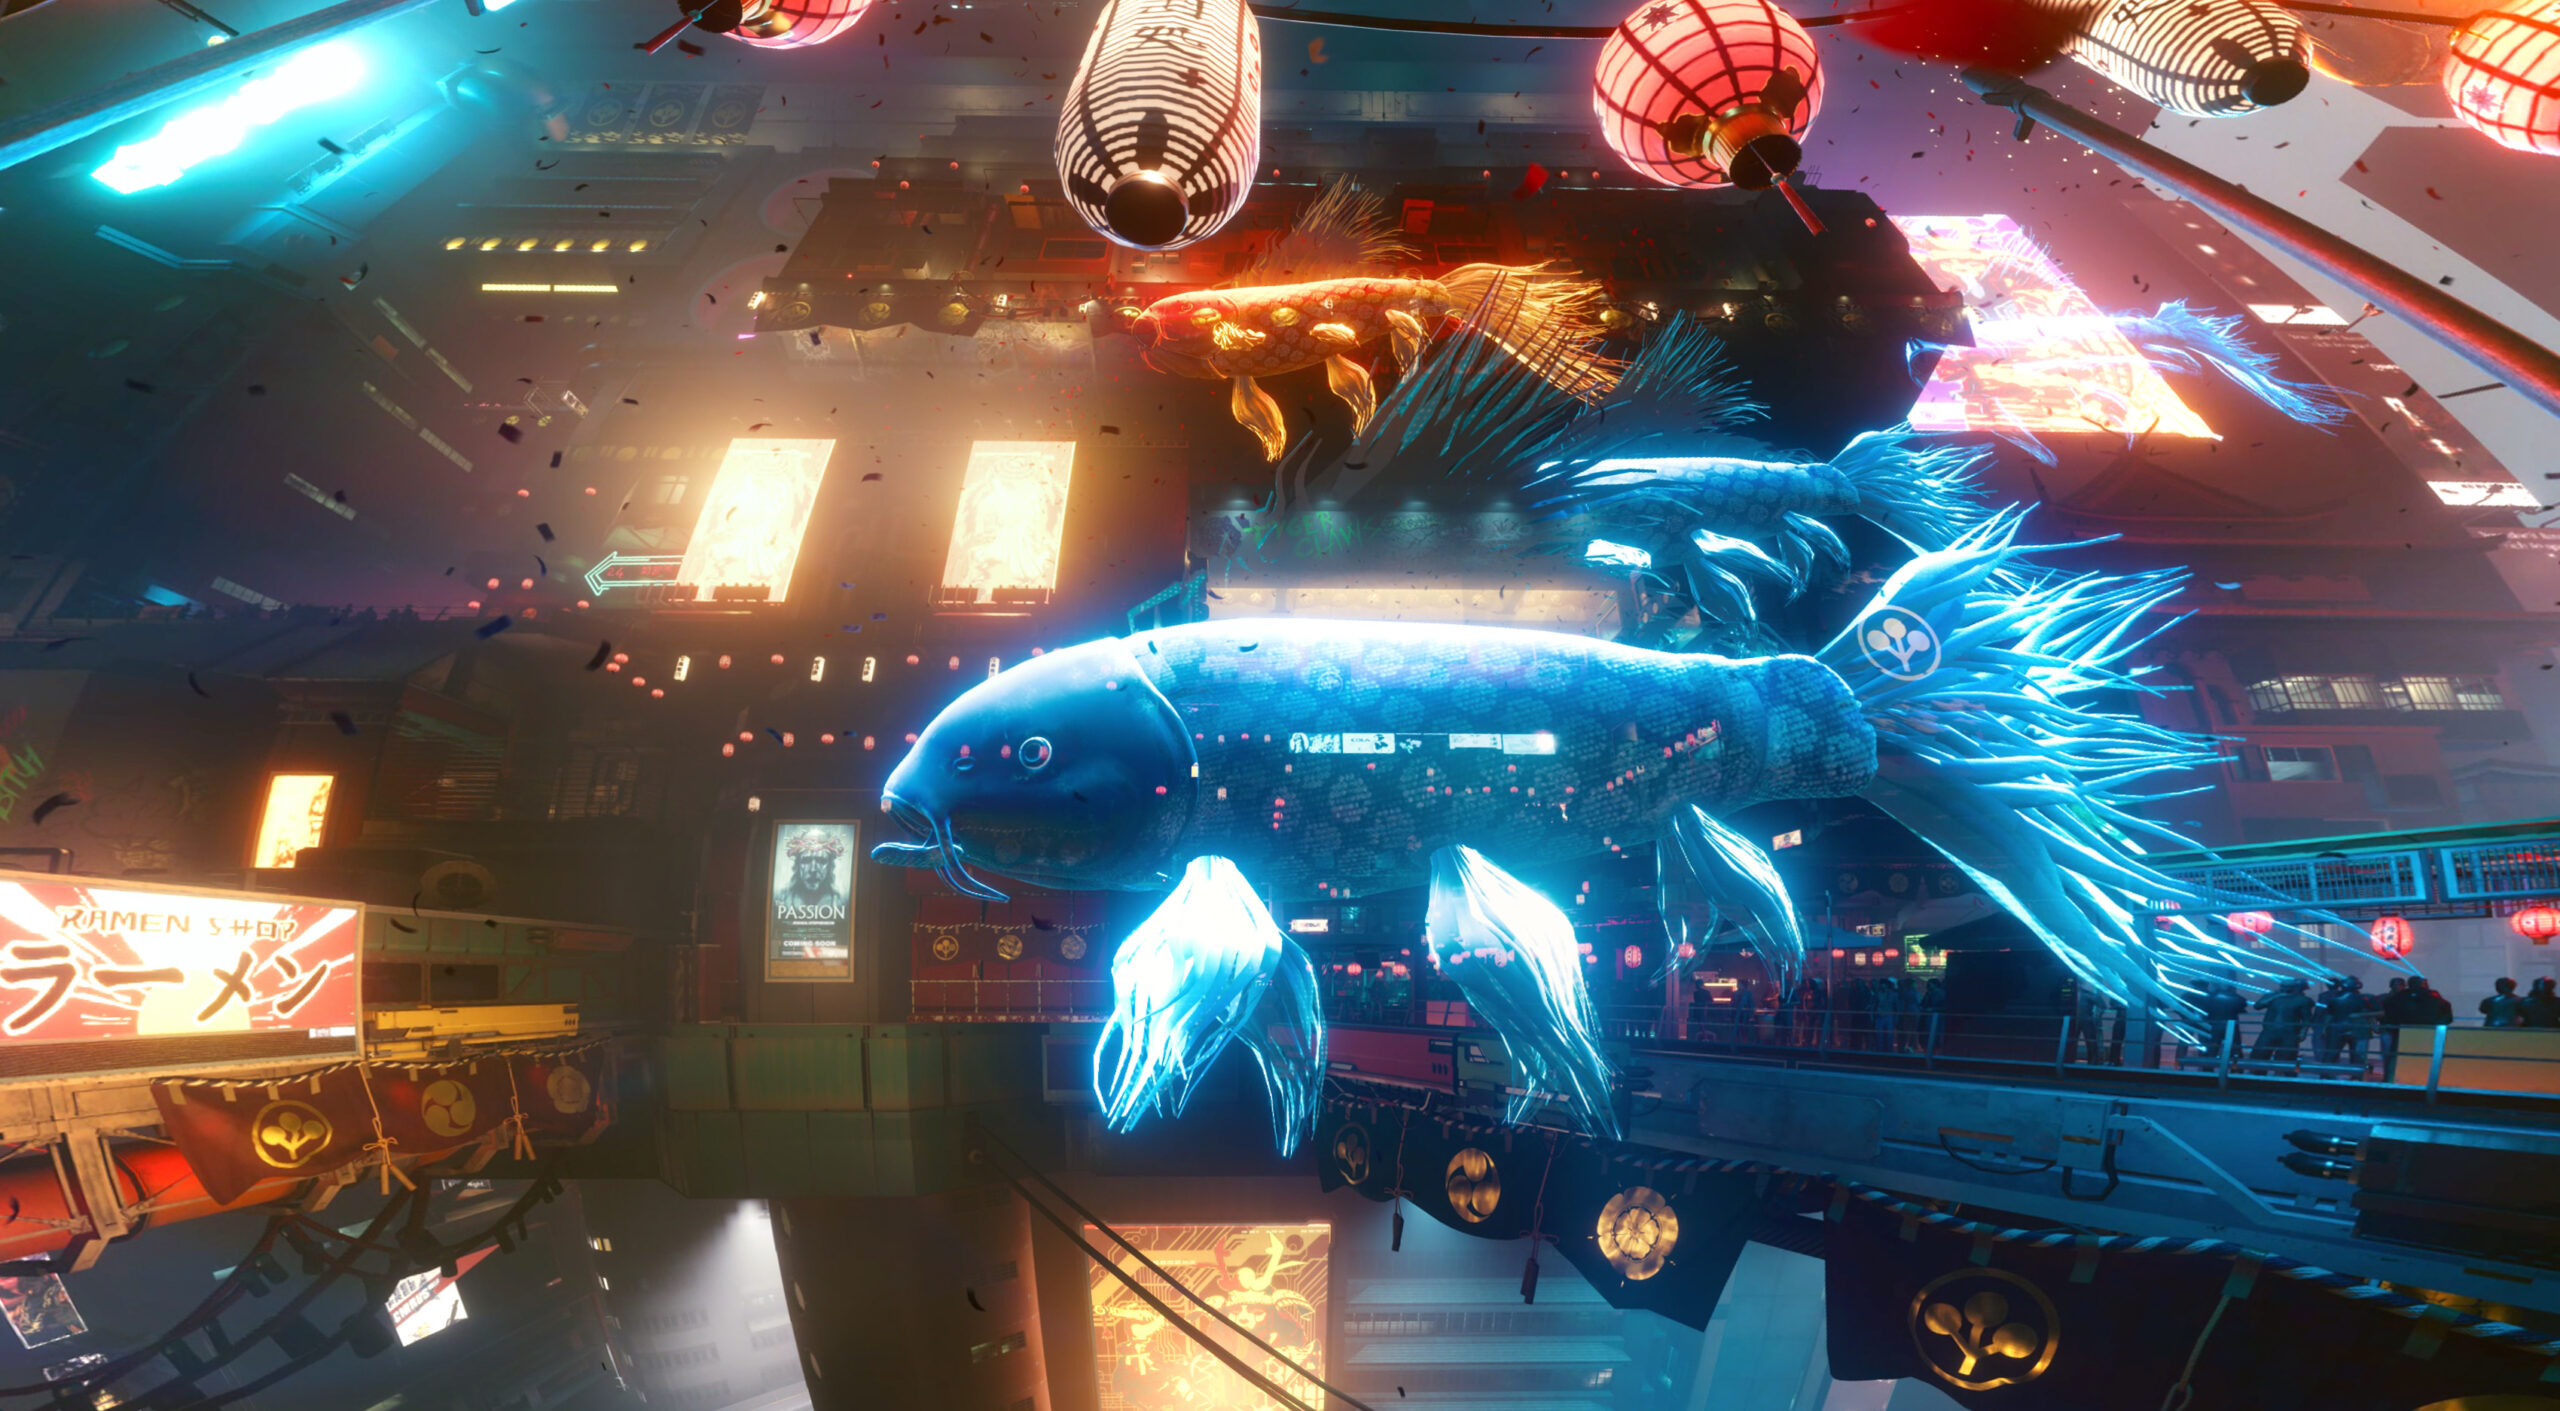
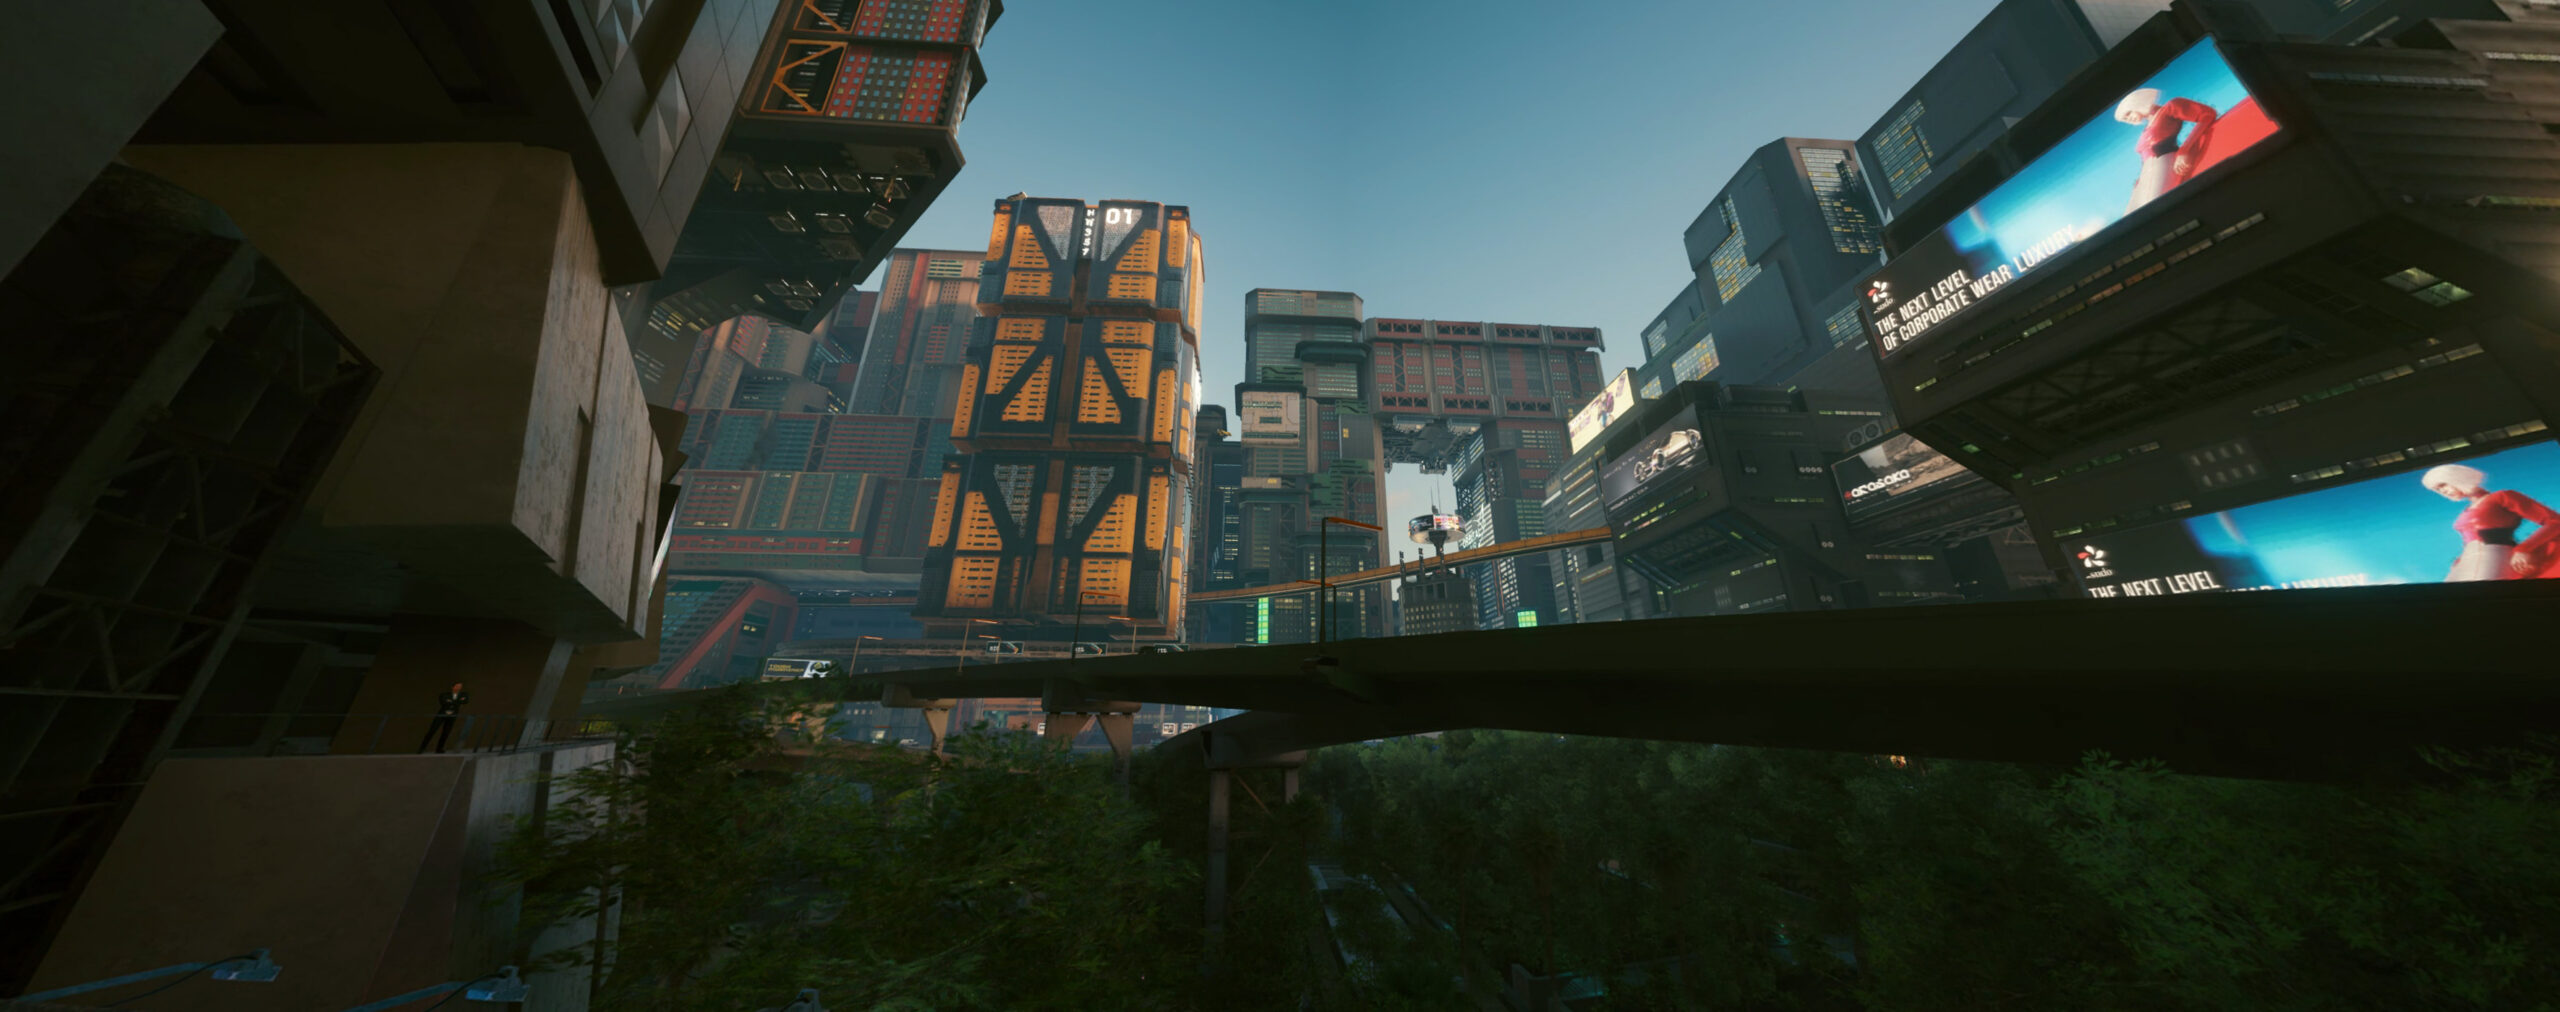
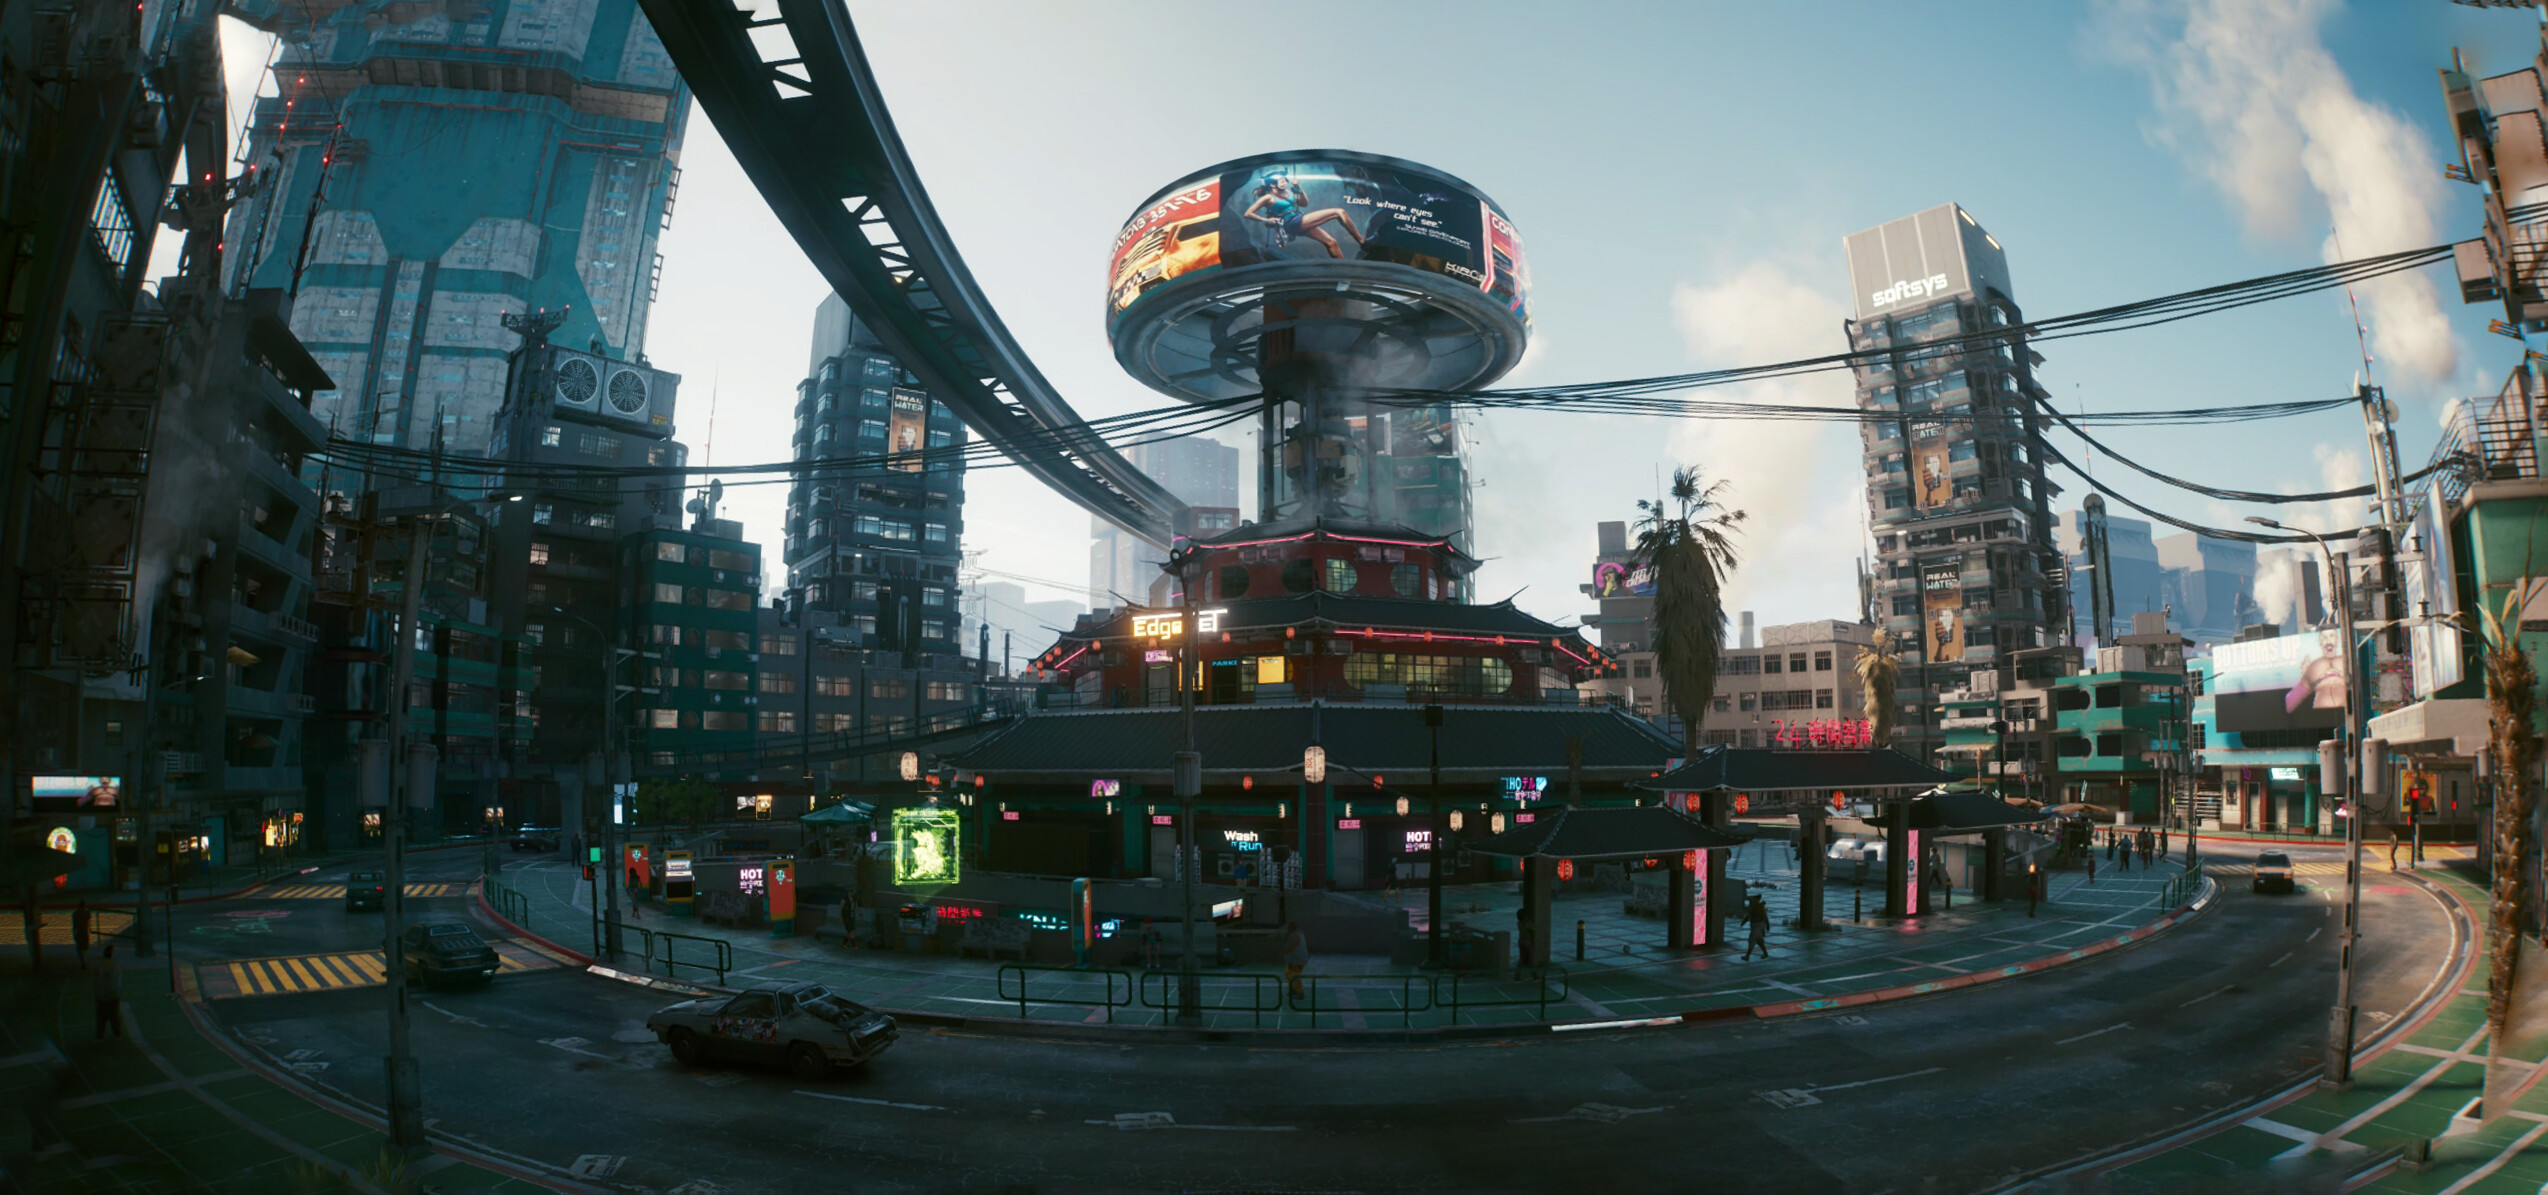
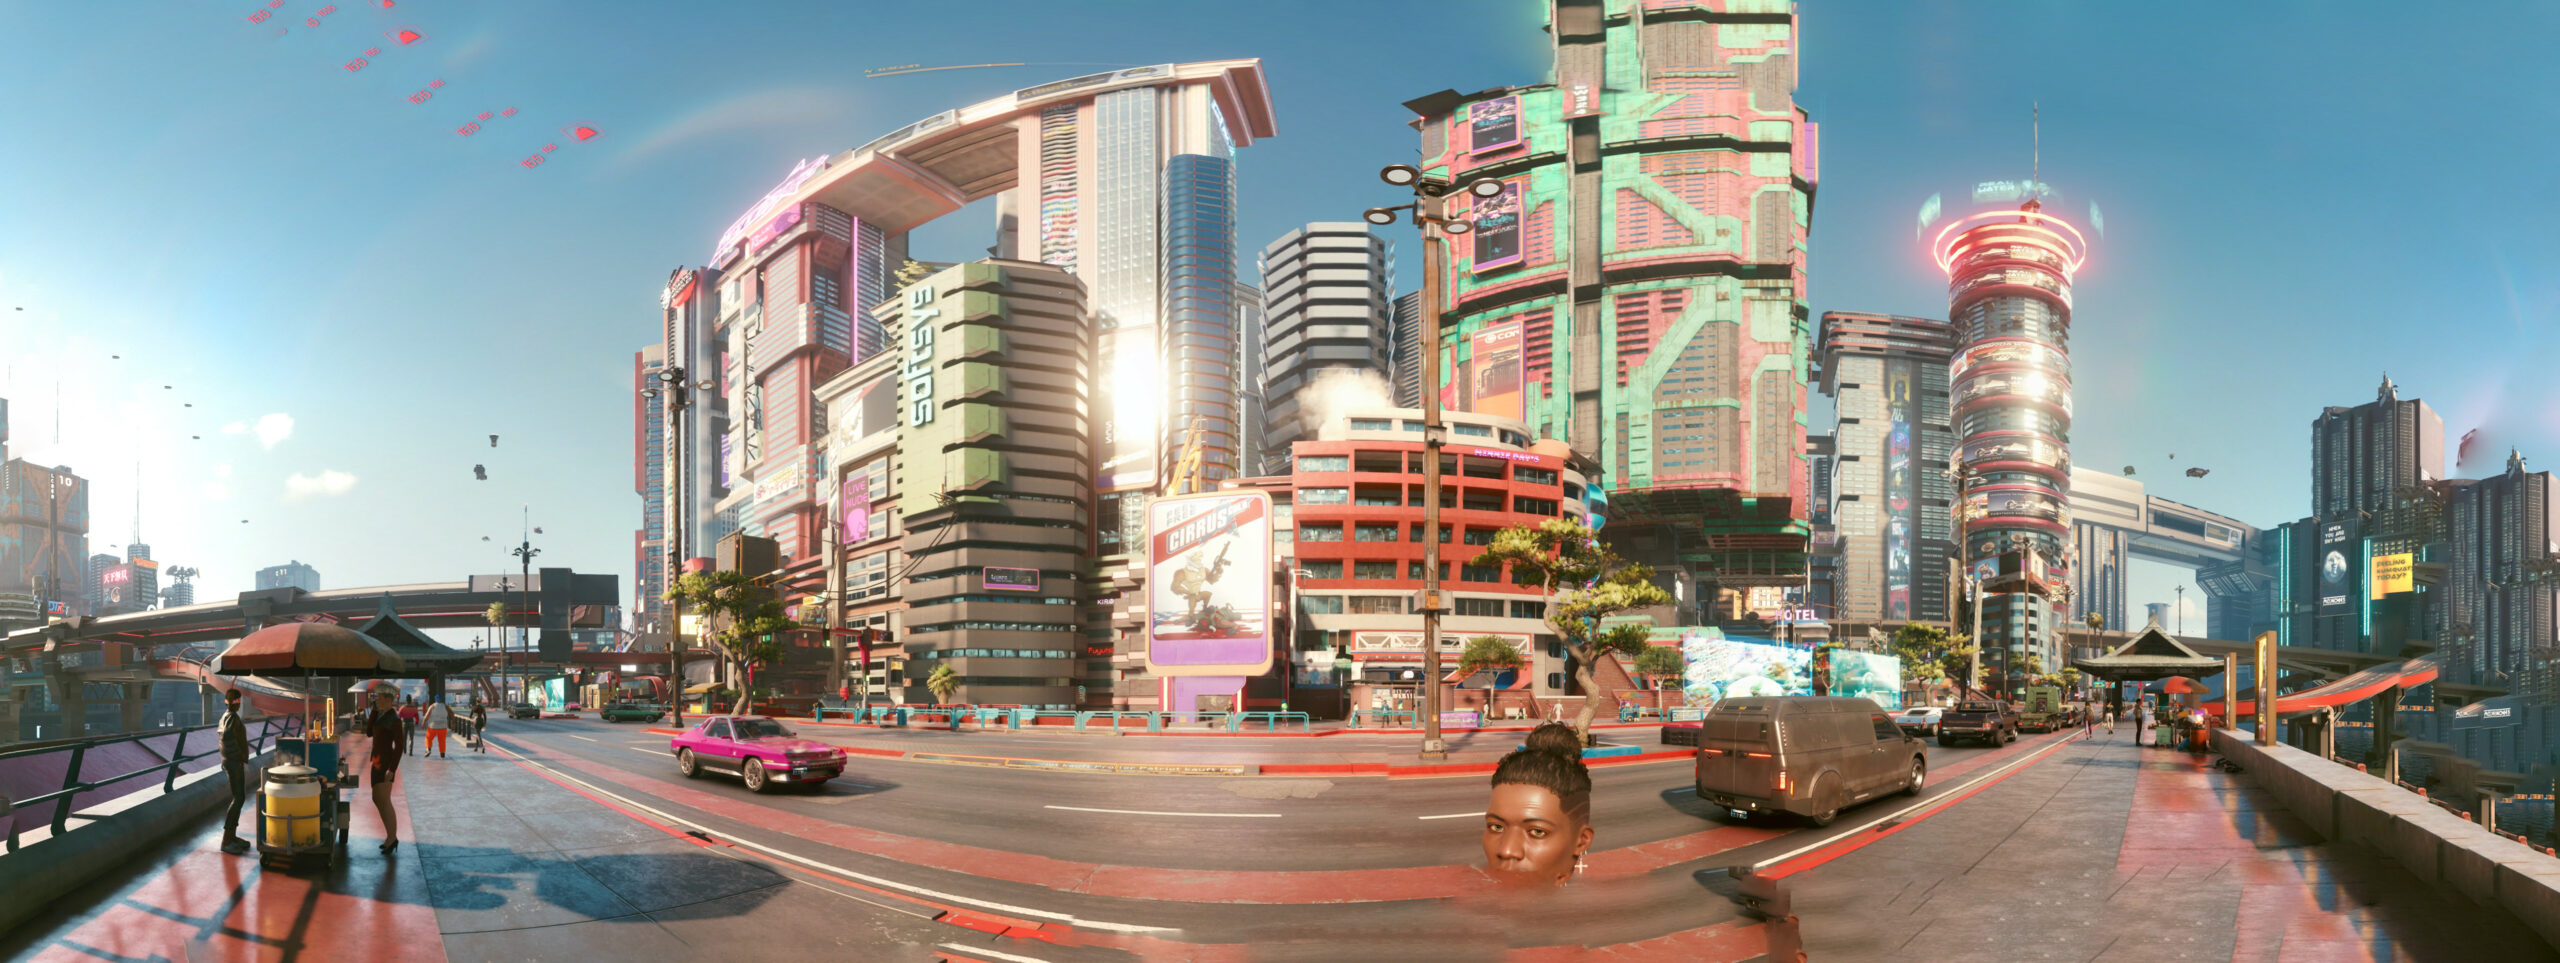
But I am doing what I am always doing when I play games. I take screenshots. And if the graphics are great I am even trying to make panoramic views of the in-game graphics. Remember my GTA V and BioShock Infinite pictures?
So here is the first batch of pictures – some stitched together using 16 and more single screenshots. Look at the detail! Again – there are in-game screenshots. Click on them to make them bigger – and right-click open the source to really zoom into them.
I like playing arcade games. I’ve had an “arcade” in my home town and I used to go there after school quite frequently. It was a small place – maybe 5 machines and some pinball machines.
In february this year it occured to be that with the power of the Raspberry Pi and a distribution called RetroPie I could build something that would bring back the games and allow me to play/try those games I never could because my arcade was so small back in the days.
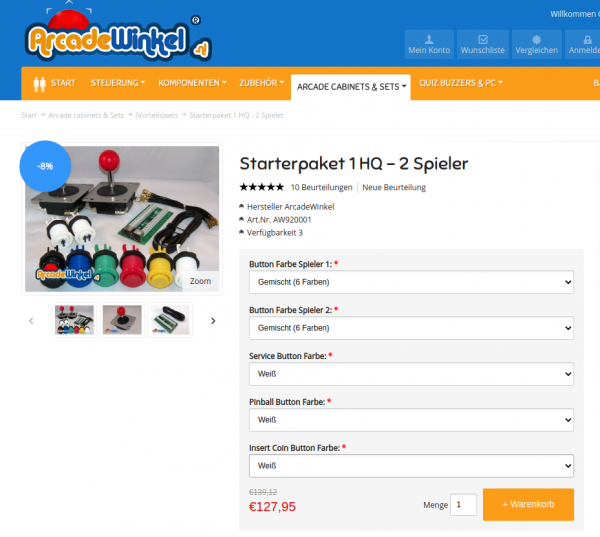
To get a better idea of how to approach this I started to search around and found the build-log of Holbrook Tech where they’ve built a “Bigger Bartop Arcade”.
With their basic plans I started drawing in Inkscape and told my father about the plan. He was immediately in – as the plan now was to not build one but two bartop arcade machines. He would take the task of carrying out the wood works and I would do the rest – procurements, electronics, wiring, design and “painting”.
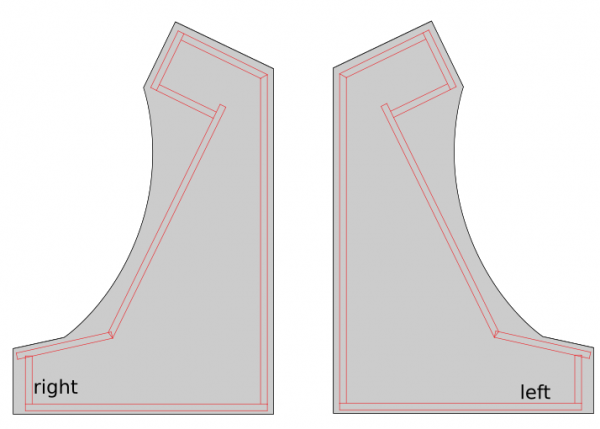
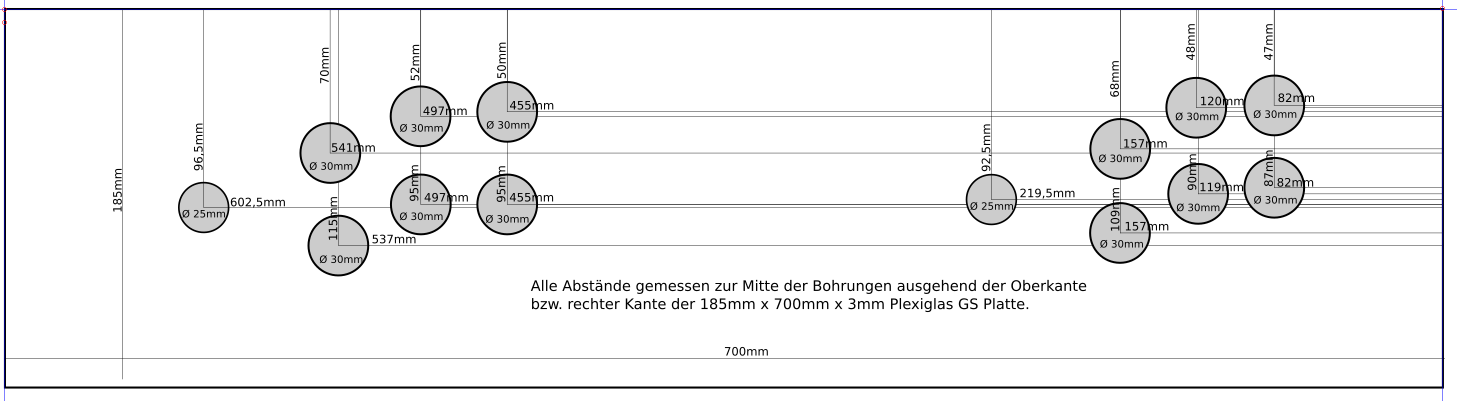
While I took the Holbrook Tech schematics as a base it quickly came apparent that I had to build/measure around the one fixed big thing in the middle: the screen.
I wanted something decently sized that the RaspberryPi would be able to push out to and that would require no maintenance/further actions when installed.
To find something that fits I had my requirements fixed:
I eventually settled for a BenQ GW2780 27″ monitor with all boxes ticked for a reasonable price.
After the monitor arrived I carried it to my fathers house and we started to cut the bezel as a first try.
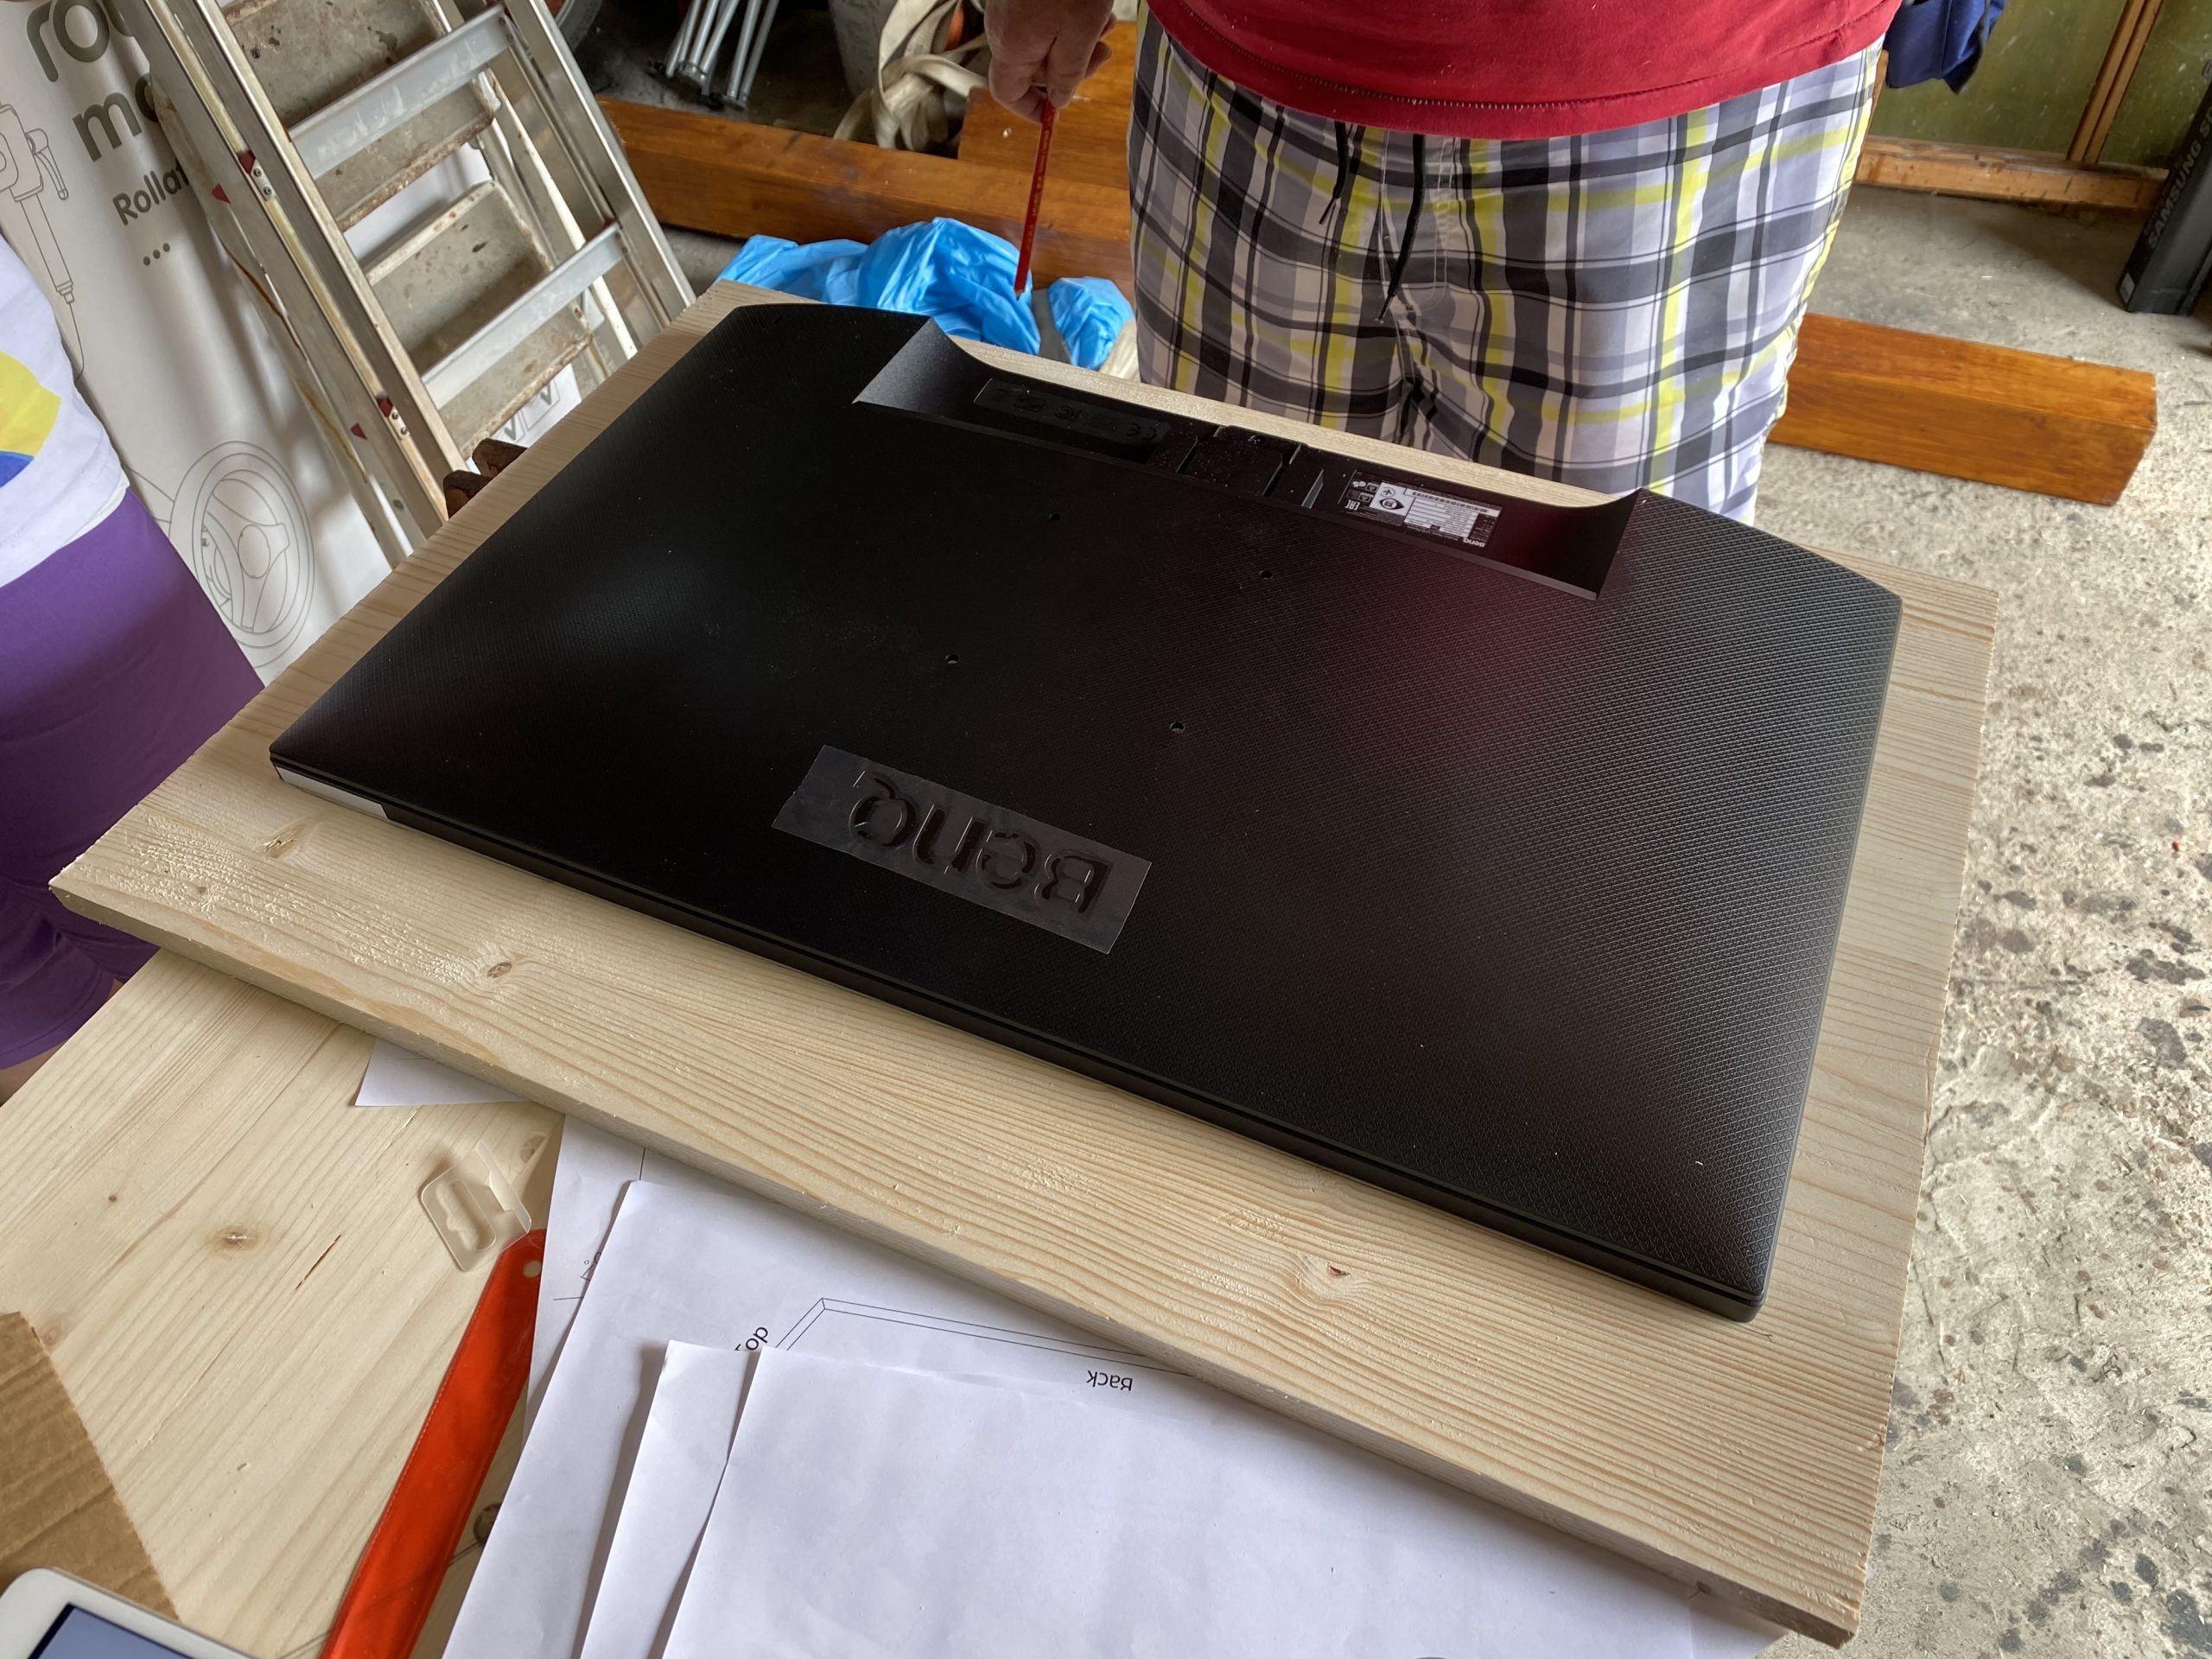
After some testing with plywood we went for MDF as it was proposed by others on the internet as well. This made the cutting so much easier.
We went with standard 2cm MDF sheets and my father cut them to size with the measurements derived from the monitor bezel centerpiece.
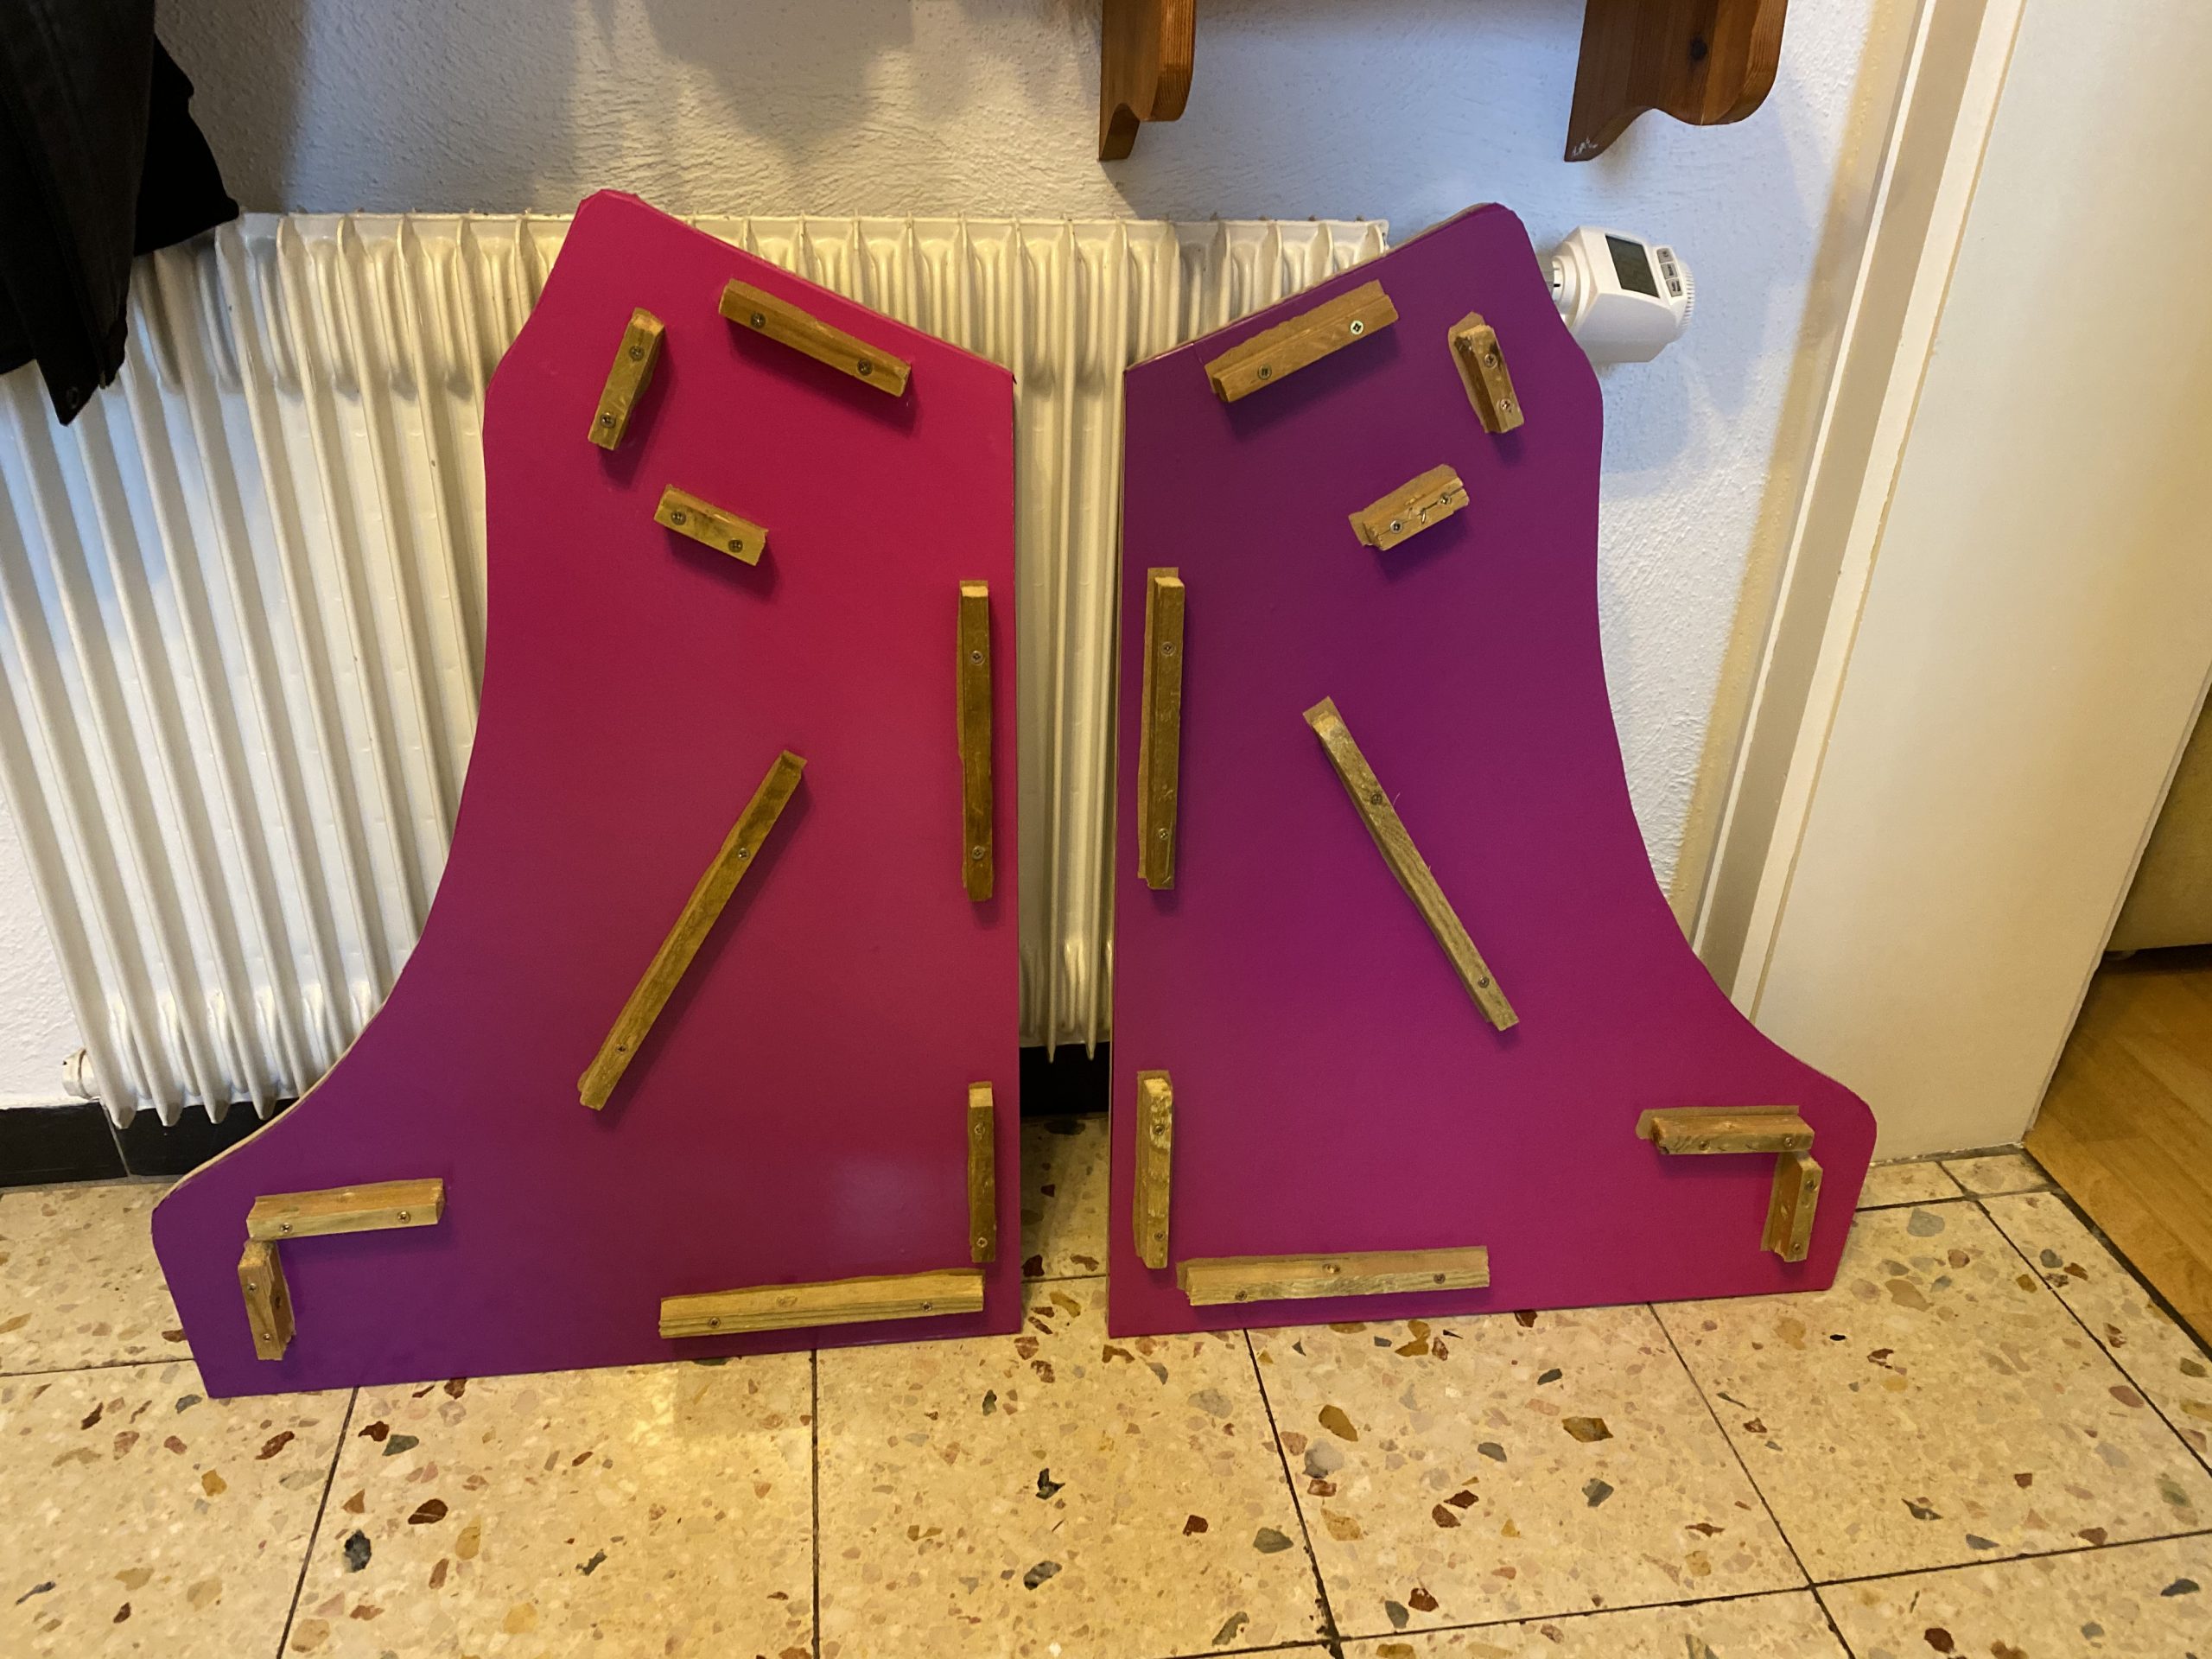
Big thanks to my father for cutting so much wood so diligently! The next days he sent me pictures of what he’d made:
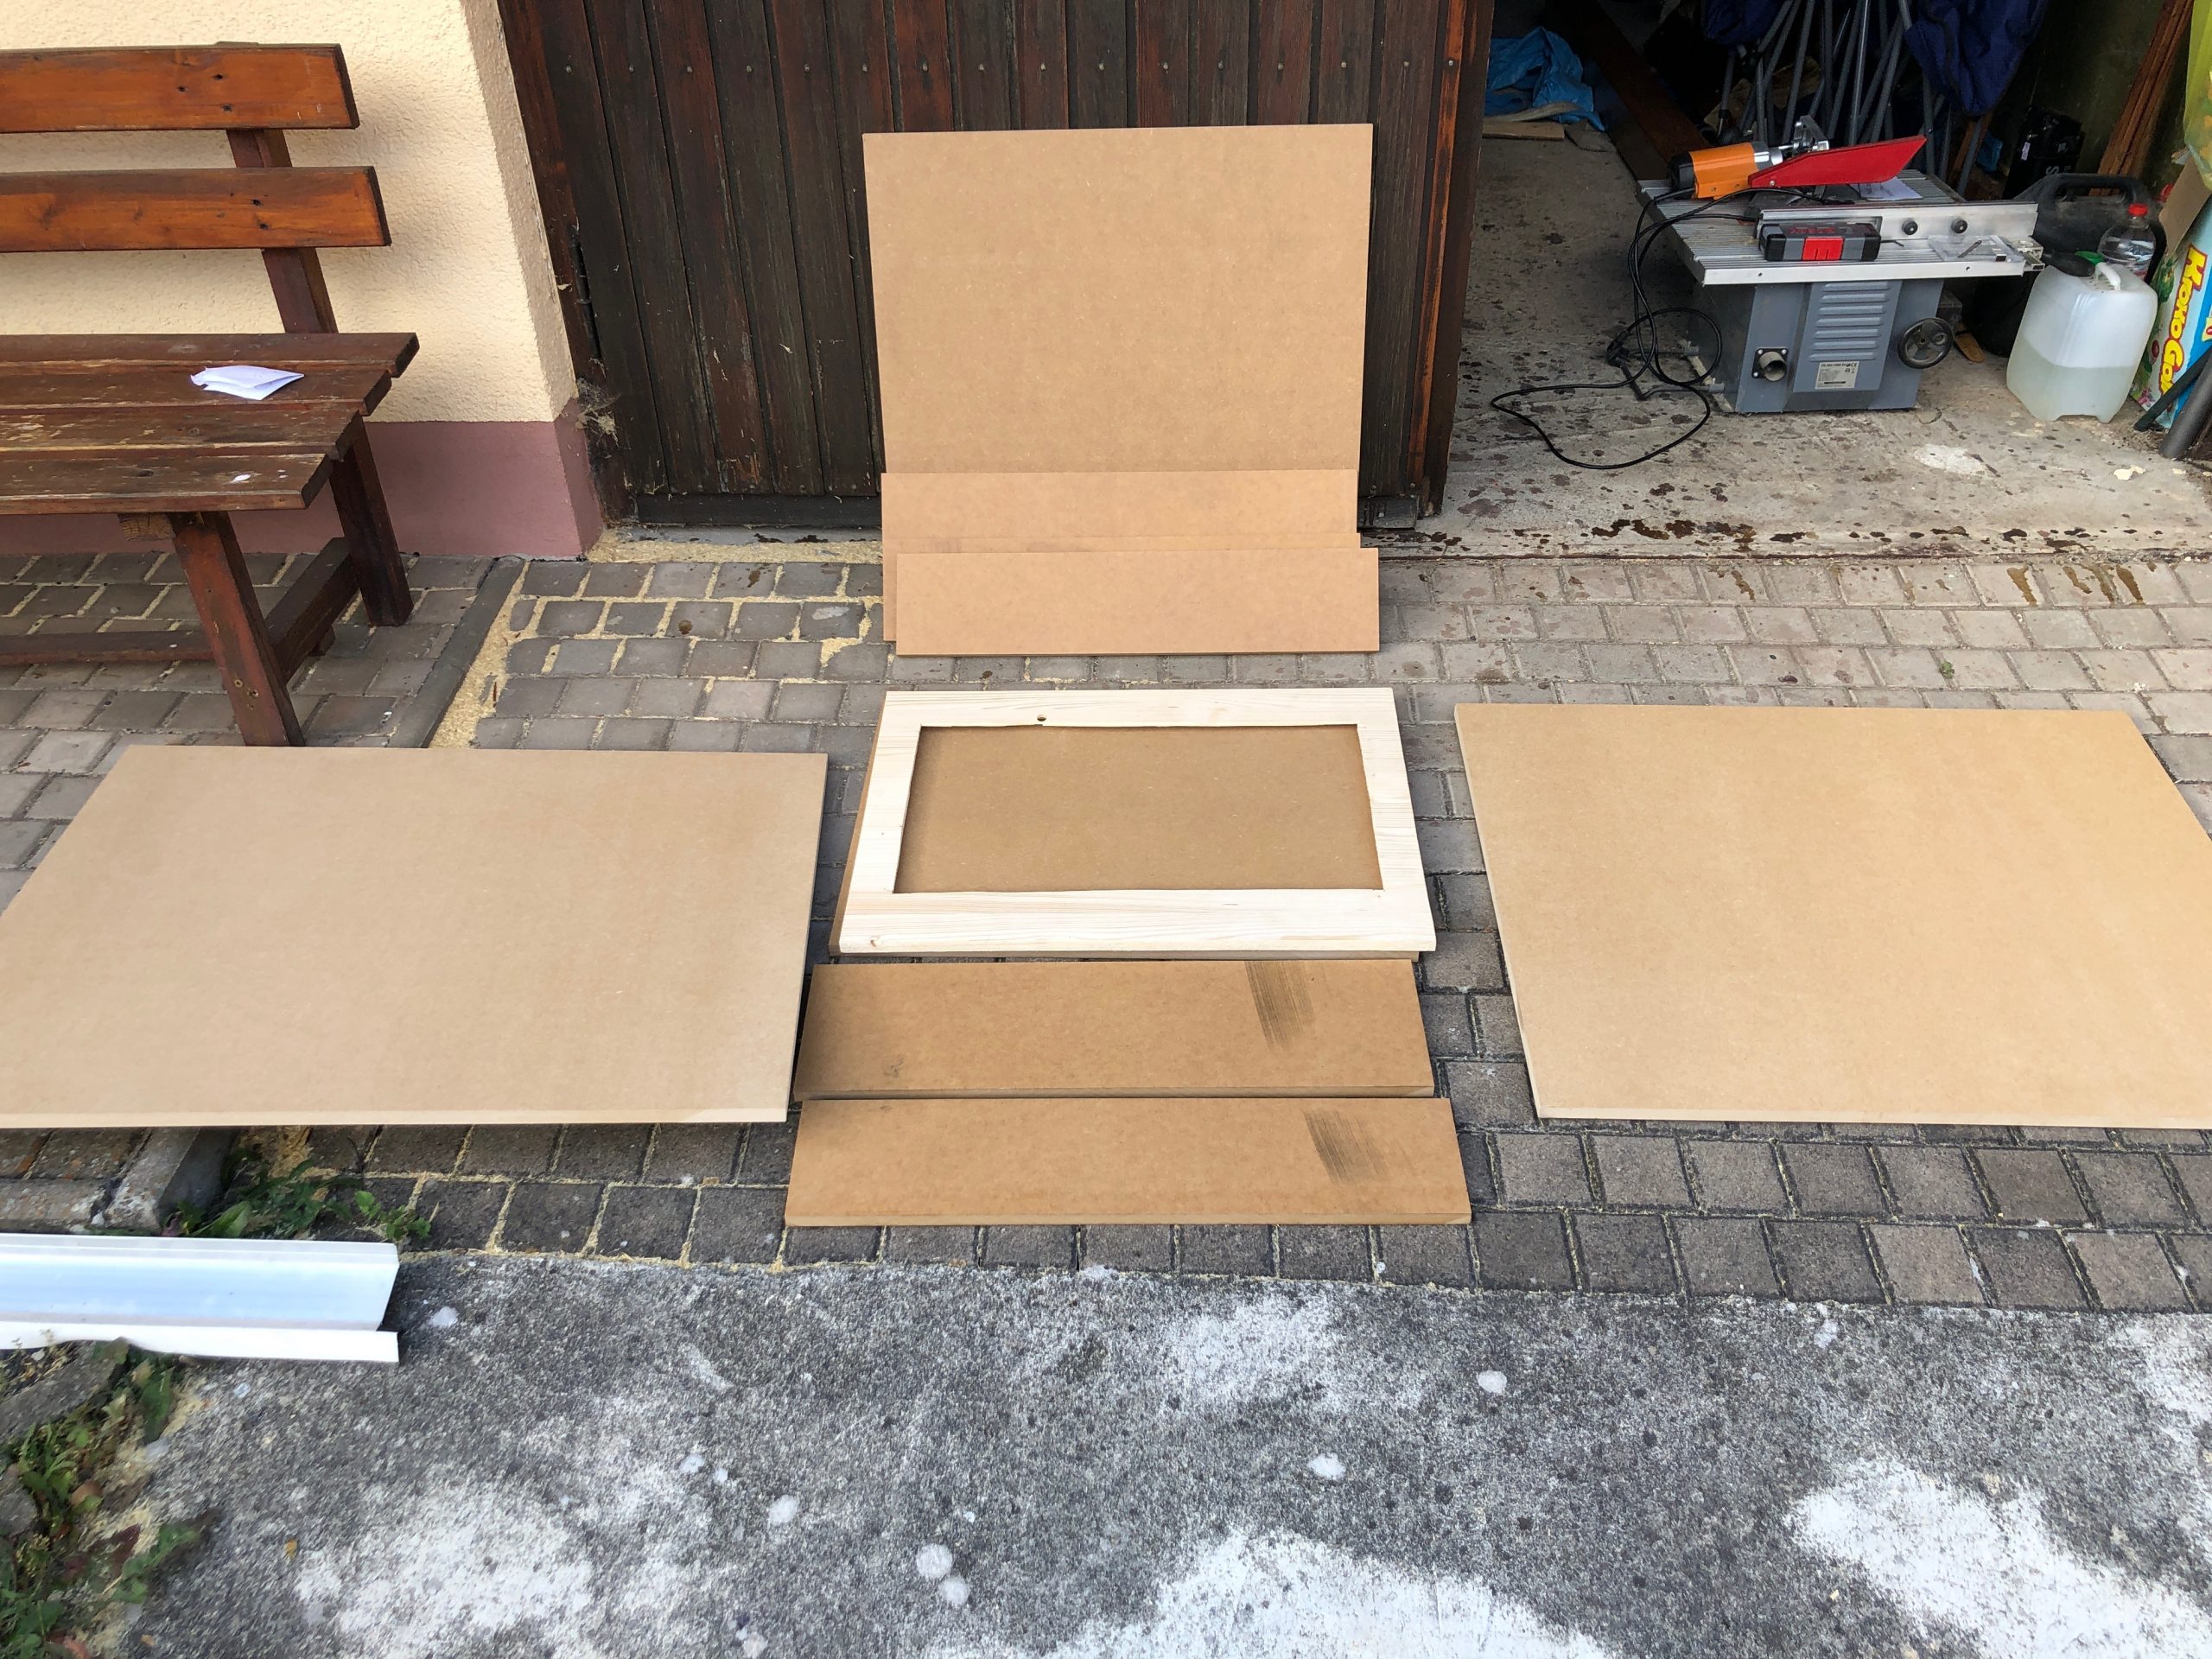
The side panels got a cut around for the black T-Molding to be added later.
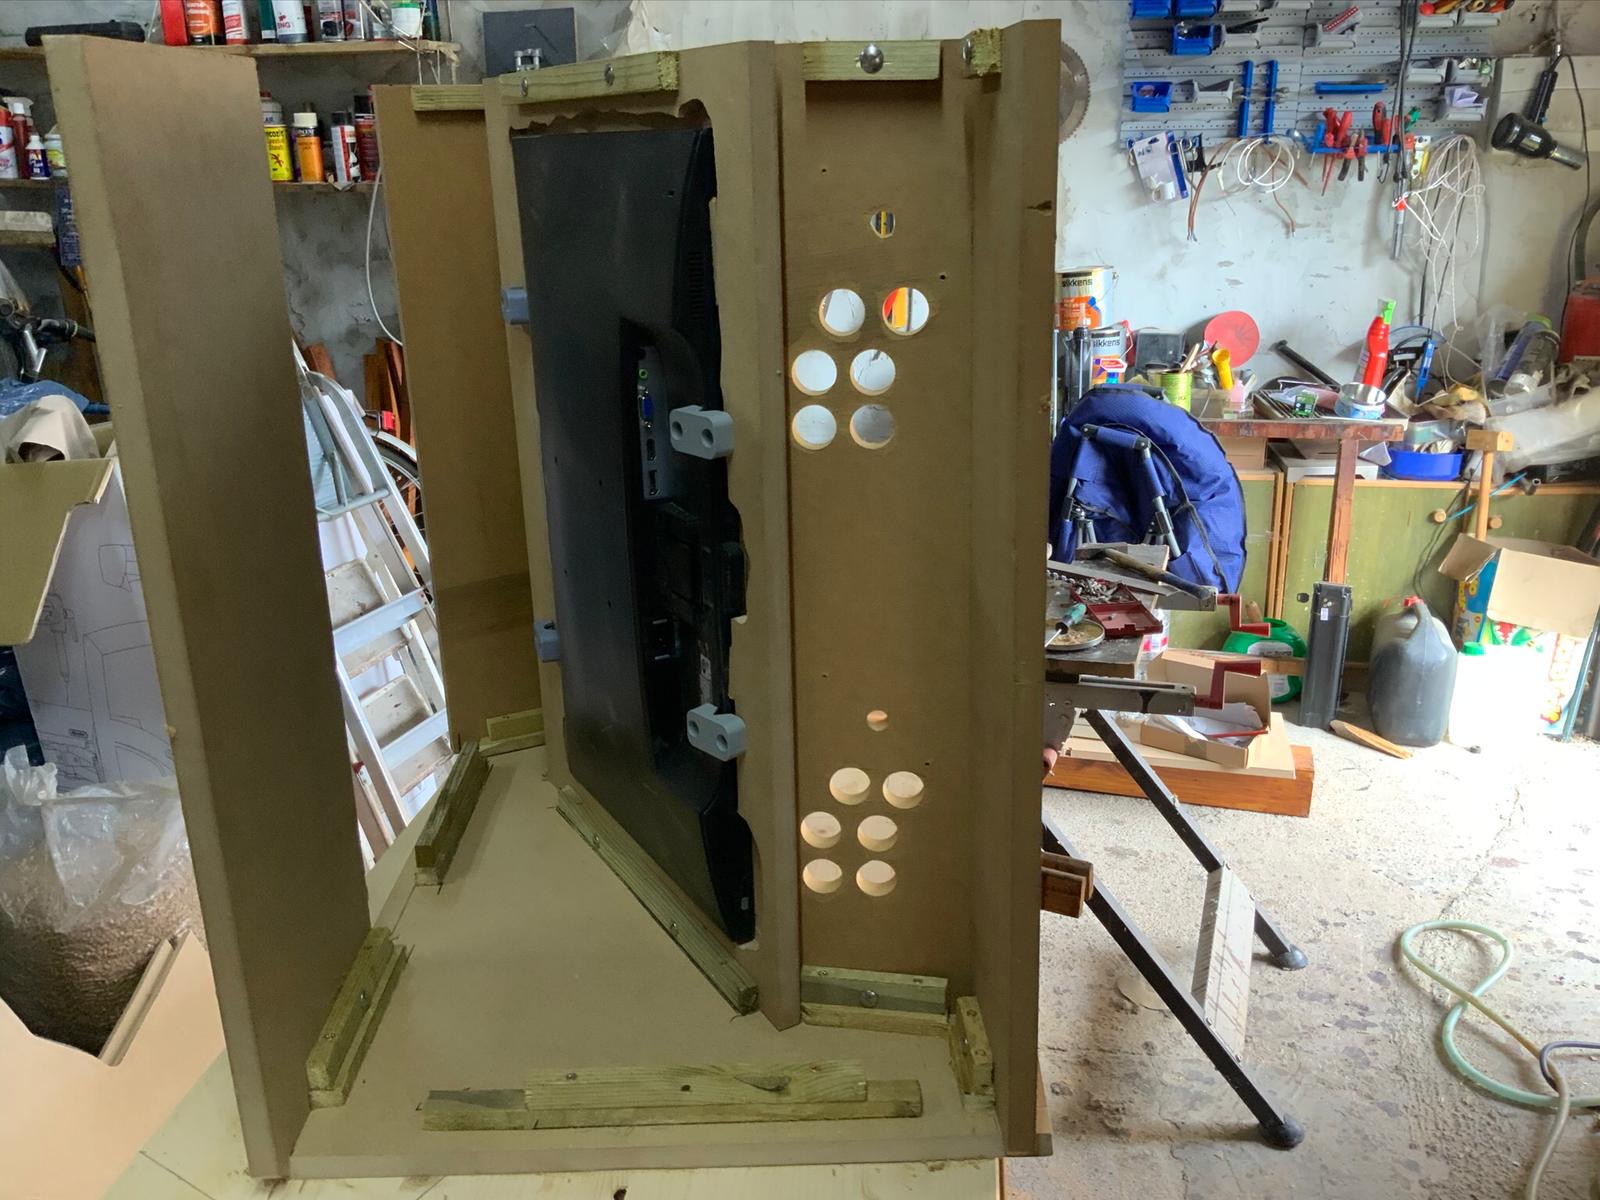
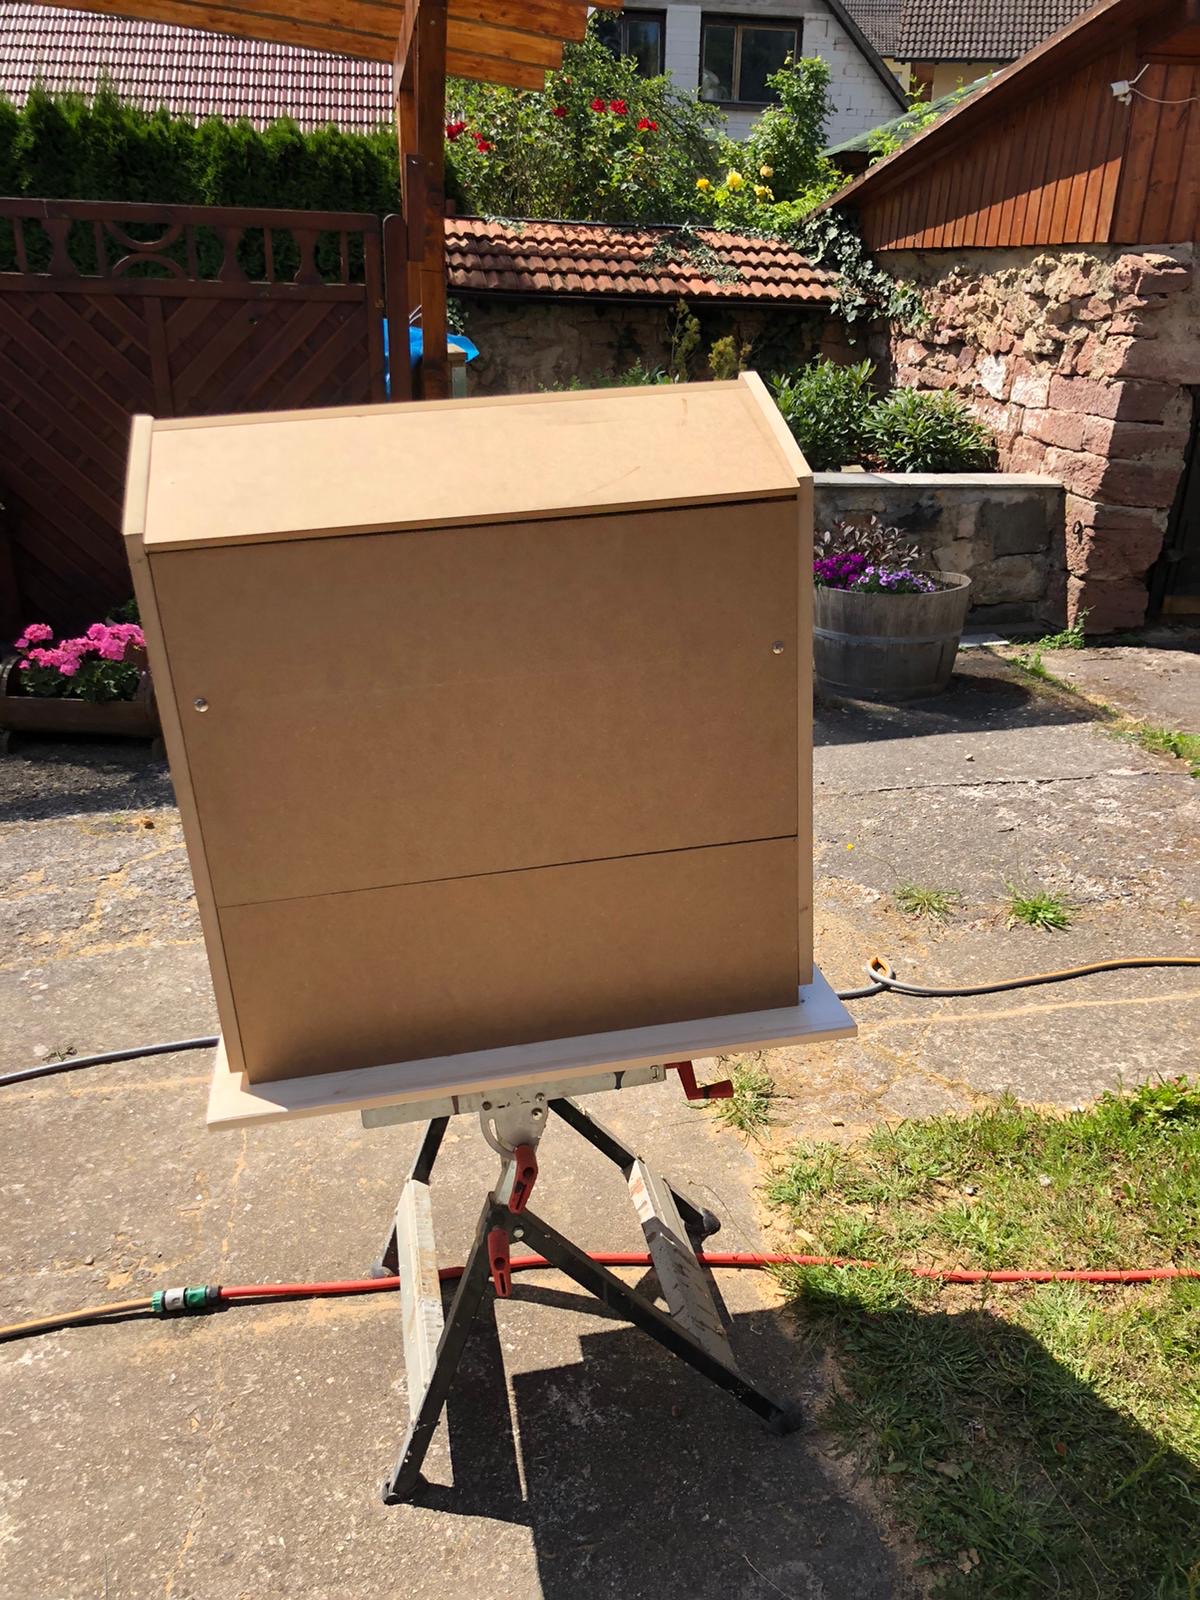
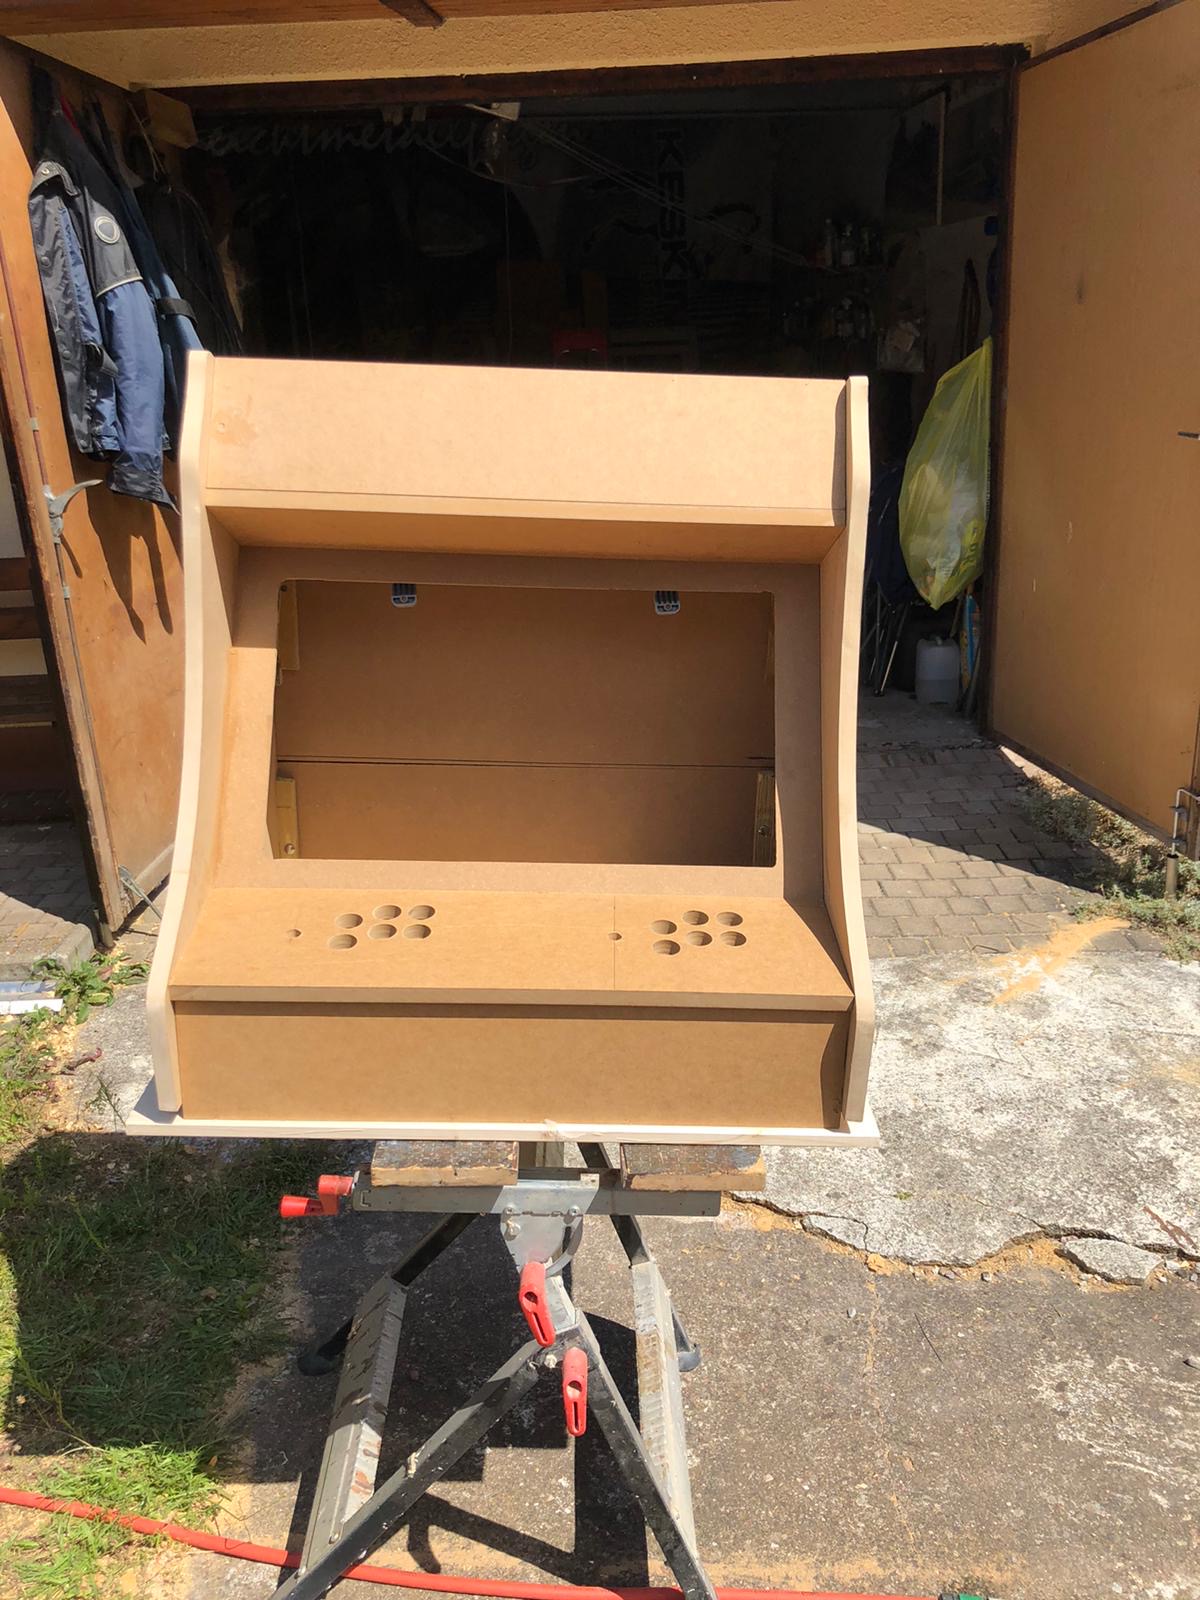
After about 2 weeks my father had built the first arcade out of sheets of MDF and I had taken delivery of the remaining pieces of hardware I had ordered after making a long list.
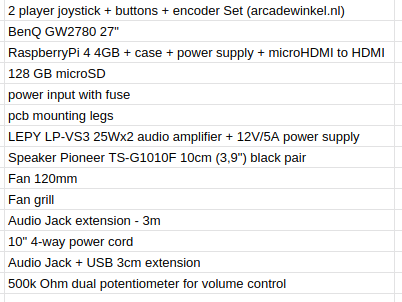
The most interesting parts of the above list might be the 2-player joystick + buttons + encoder set.
It contains 2 standard 4/8-way switchable arcade joysticks, 10 buttons, all microswitches required and the Ultimarc I-PAC-2 joystick encoder.
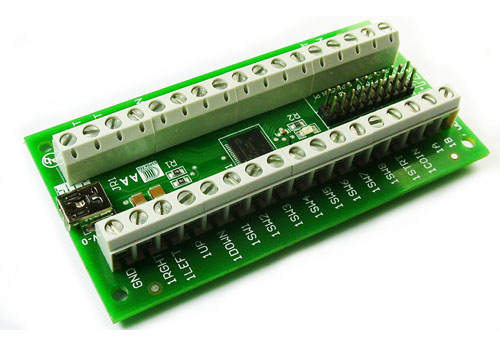
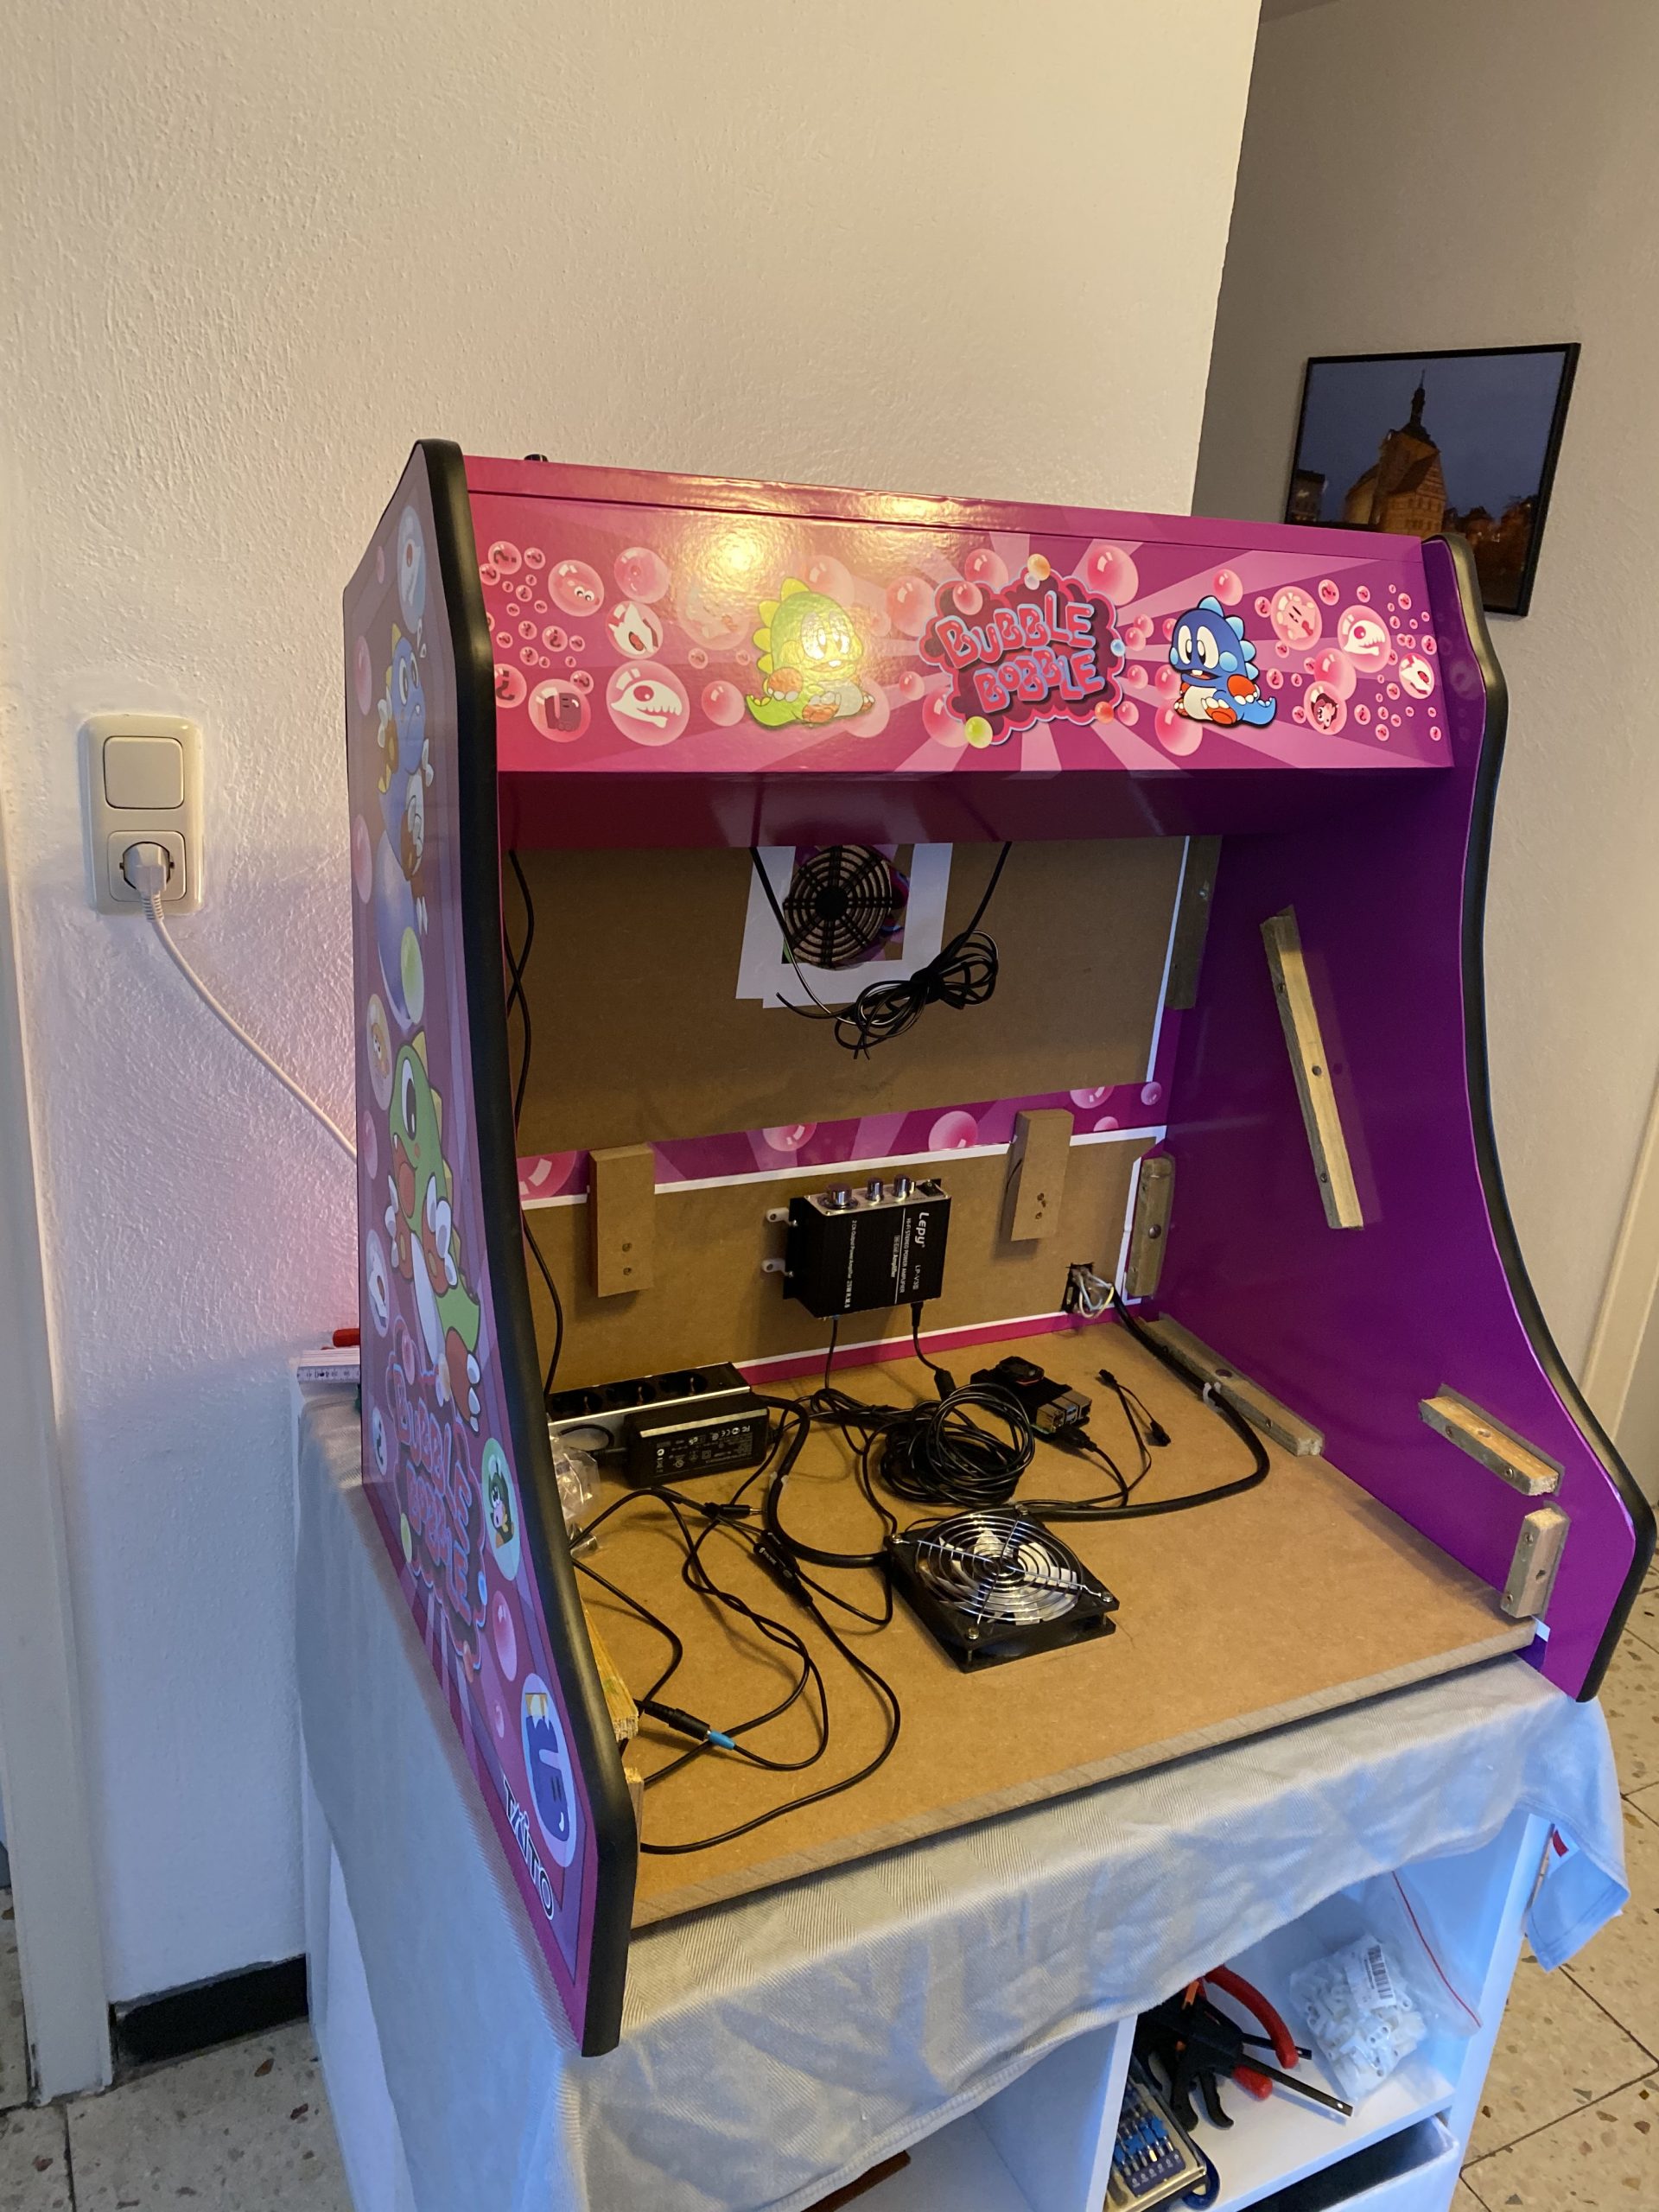
So when I got the first arcade from my father I started to put in the electonics immediately.

The sound was a bit more complicated. I wanted a volume control knob on the outside but also did not want to disassemble any audio amplifier.
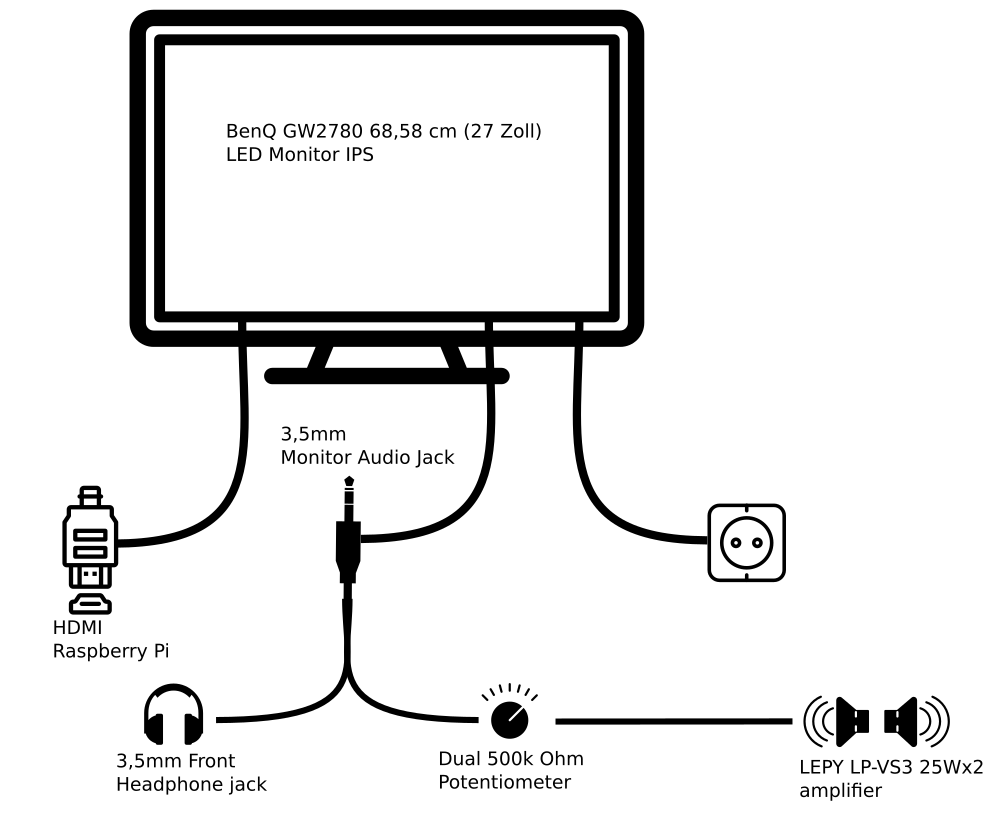
I went with the simplest solution: A 500k Ohm dual potentiometer soldered into the headphone extension cable going to the amplifier. The potentiometer then got put into a pot and a whole made it stick out so that a knob could be attached.
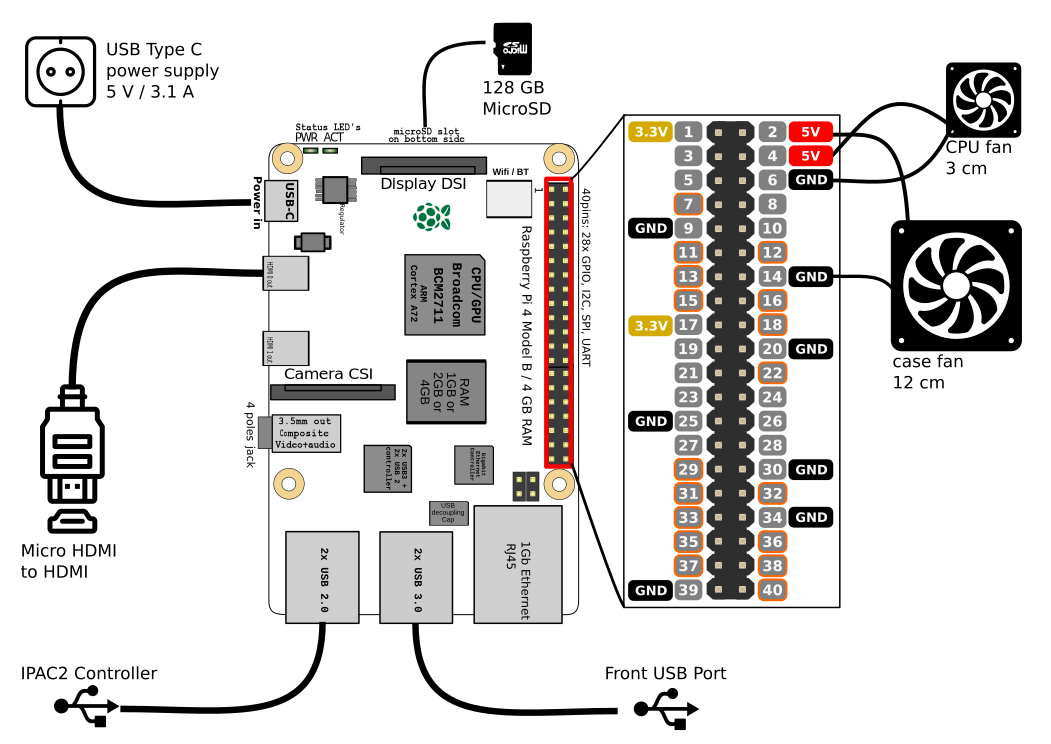
The RaspberryPi set-up then only lacked cooling. The plan was to put a 120mm case fan to pull in air from the bottom and went it out another 120mm case hole at the upper back. Additionally the RaspberryPi would get it’s own small 30mm fan on top of it’s heatsink case.
I attached both fans directly to the RaspberryPi – so I saved myself another power supply.
Now I had to make it all work together. As I wanted to use RetroPie in the newest 4.6 release I’ve set that up and hooked it all up.

On first start-up EmulationStation asked me to configure the inputs. It had detected 2 gamepads as I had put the IPAC-2 into gamepad mode before. You can do this with a simple mode-switch key-combination that you need to hold for 10 seconds to make it switch.
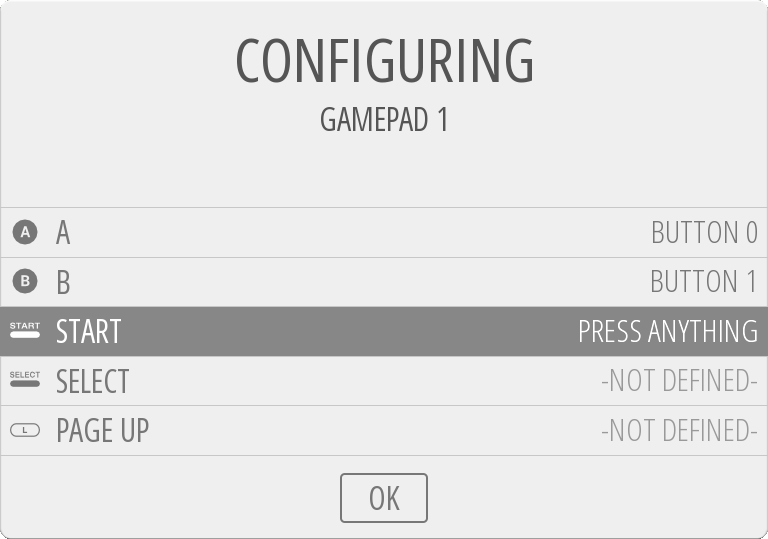
The configuration of the buttons of the two players went without any issue. First I had set-up the player 1 input. Then I re-ran the input configuration again for player 2 inputs.
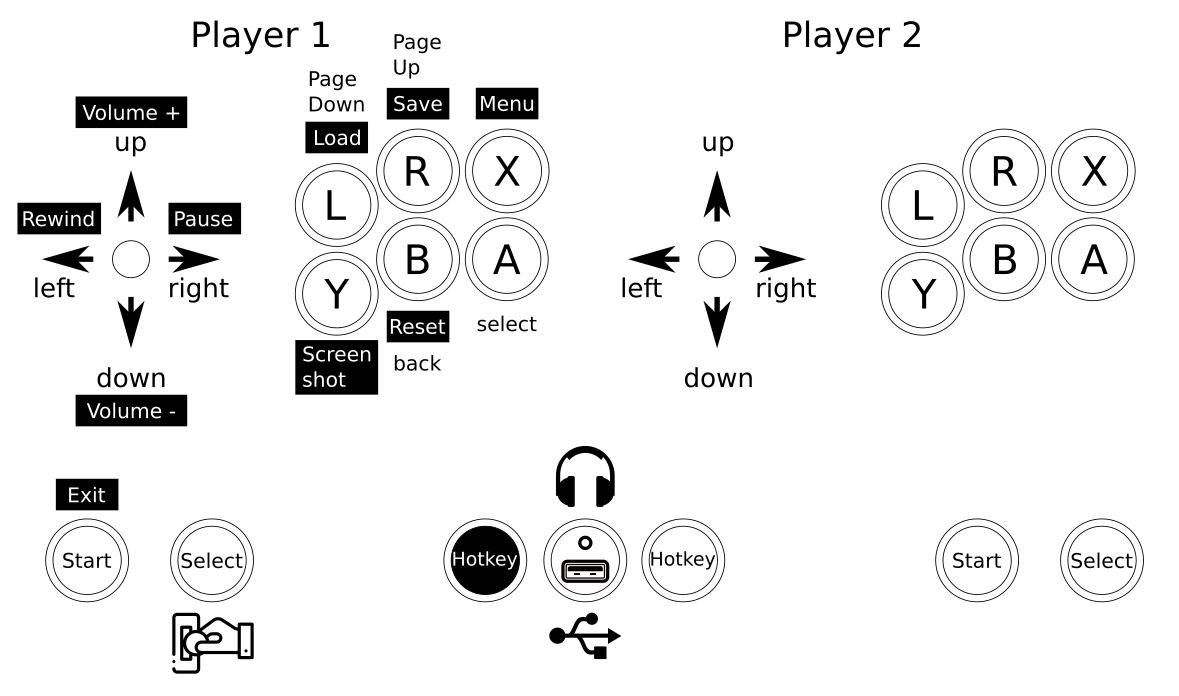
The controls where straight forward. I wanted mainly 4-way games but with enough buttons to switch to some beat-em-ups at will.
So I configured a simple layout into Retroarch with some additional hotkeys added:
I tossed around several design ideas I had. Obviously derived from those games I wanted to play and looked forward to.
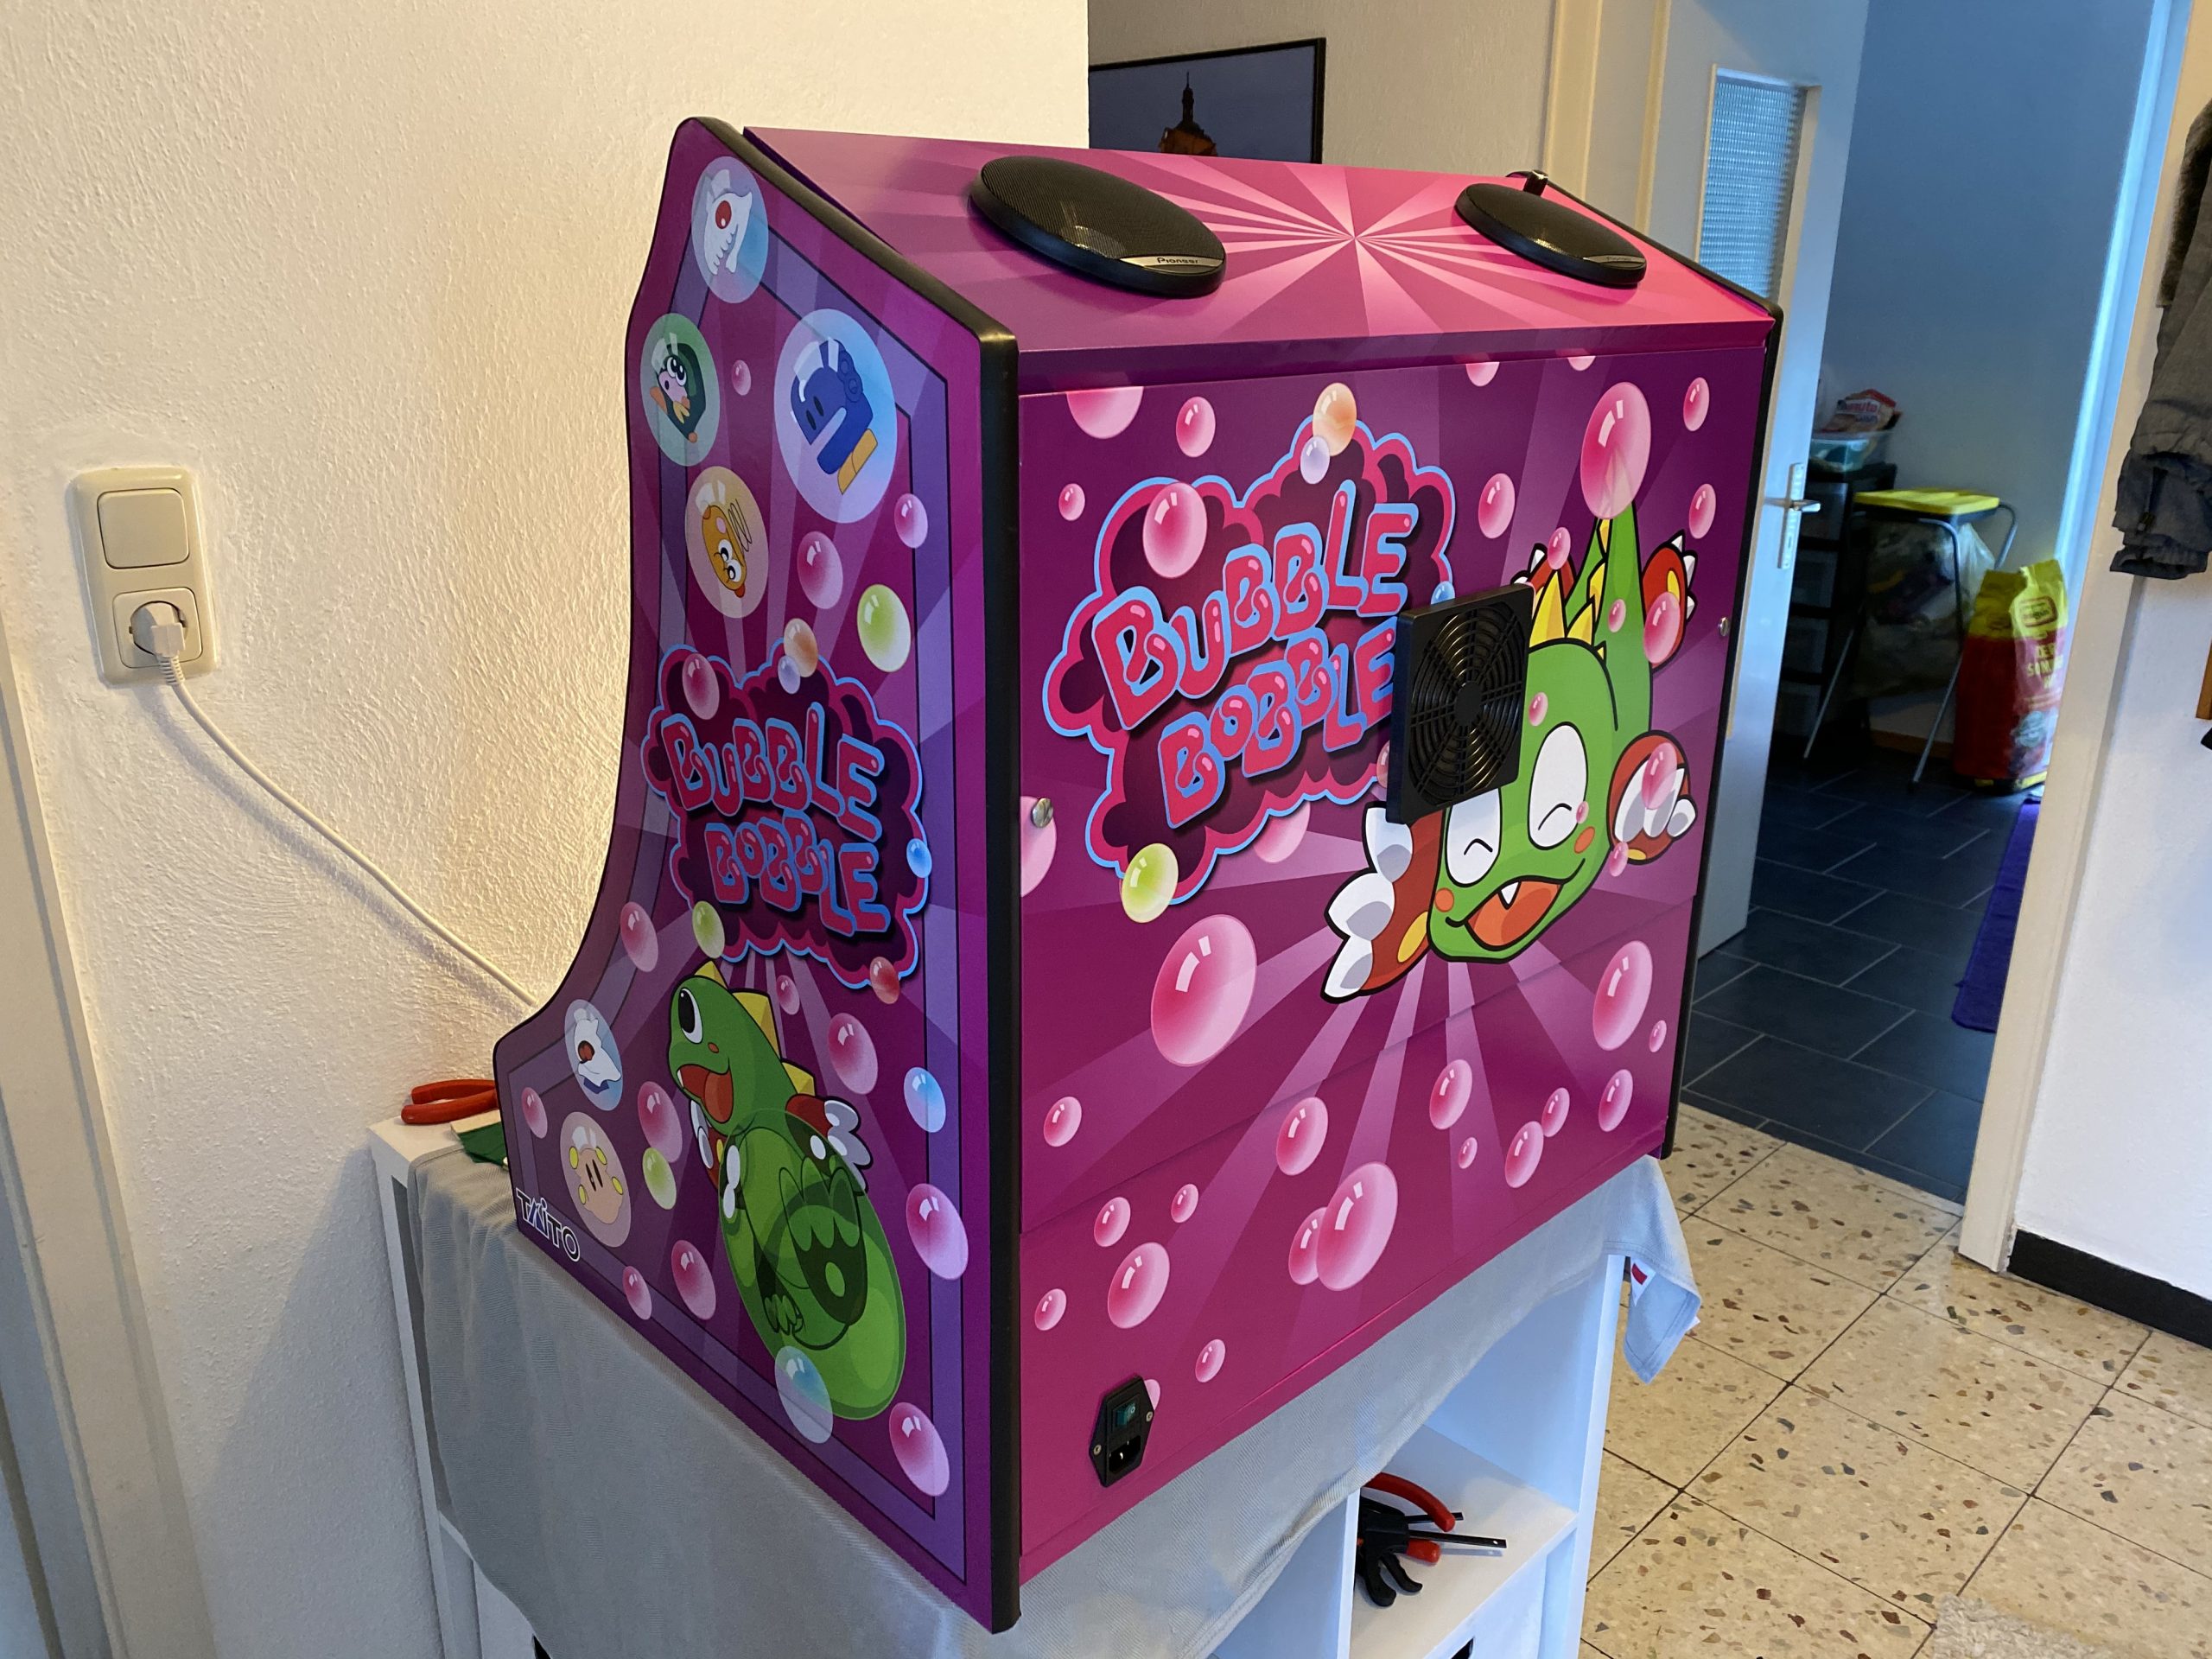
There was some Metal Slug or some Cave shooter related designs I thought of. But then my wife had the best ideas of them all: Bubble Bobble!
So I went and looked for inspiration on Bubble Bobble and found some but none that sticked.
There was one a good inspiration. And I went to design based upon this one – just with a more intense purple color scheme.
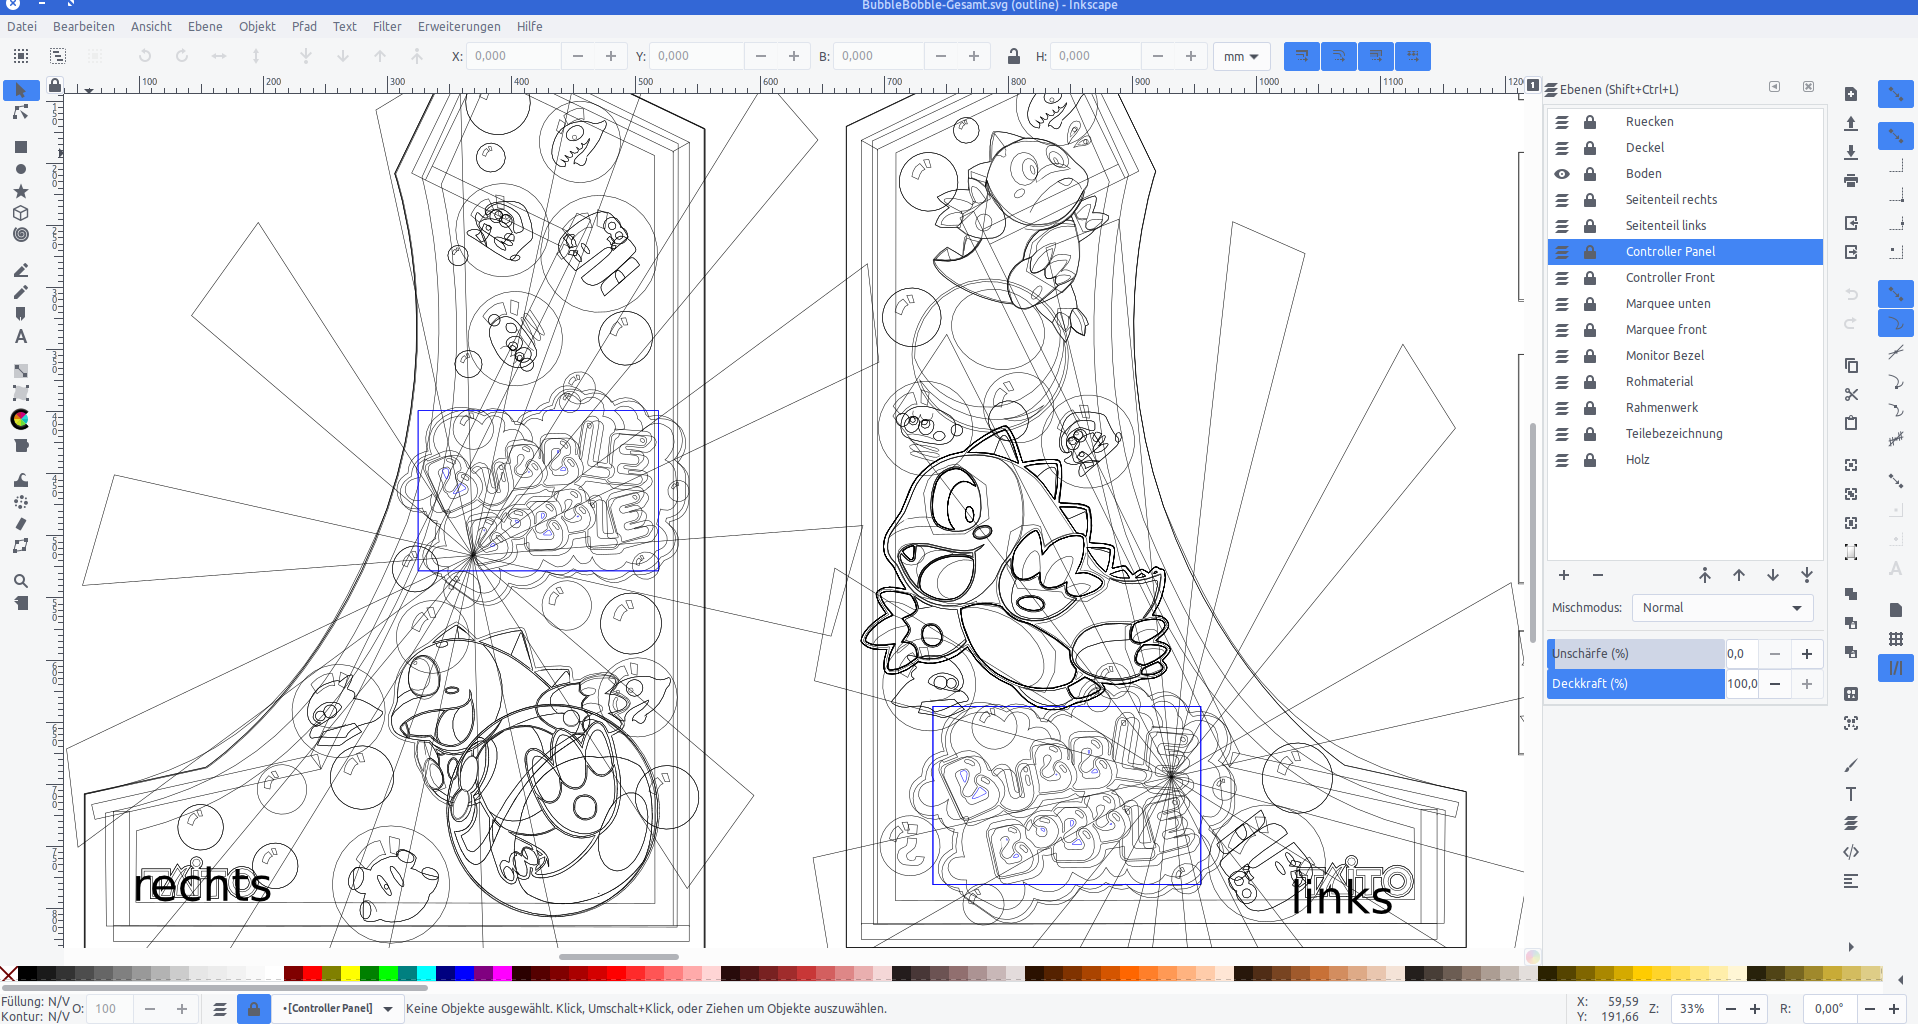
I used Inkscape to pull in bitmap graphics from Bubble Bobble and to vectorize them one by one, eventually ending up with a lot of layers of nice scalable vector graphics.
With all design set I went and sliced it up and found a company that would print my design on vinyl.
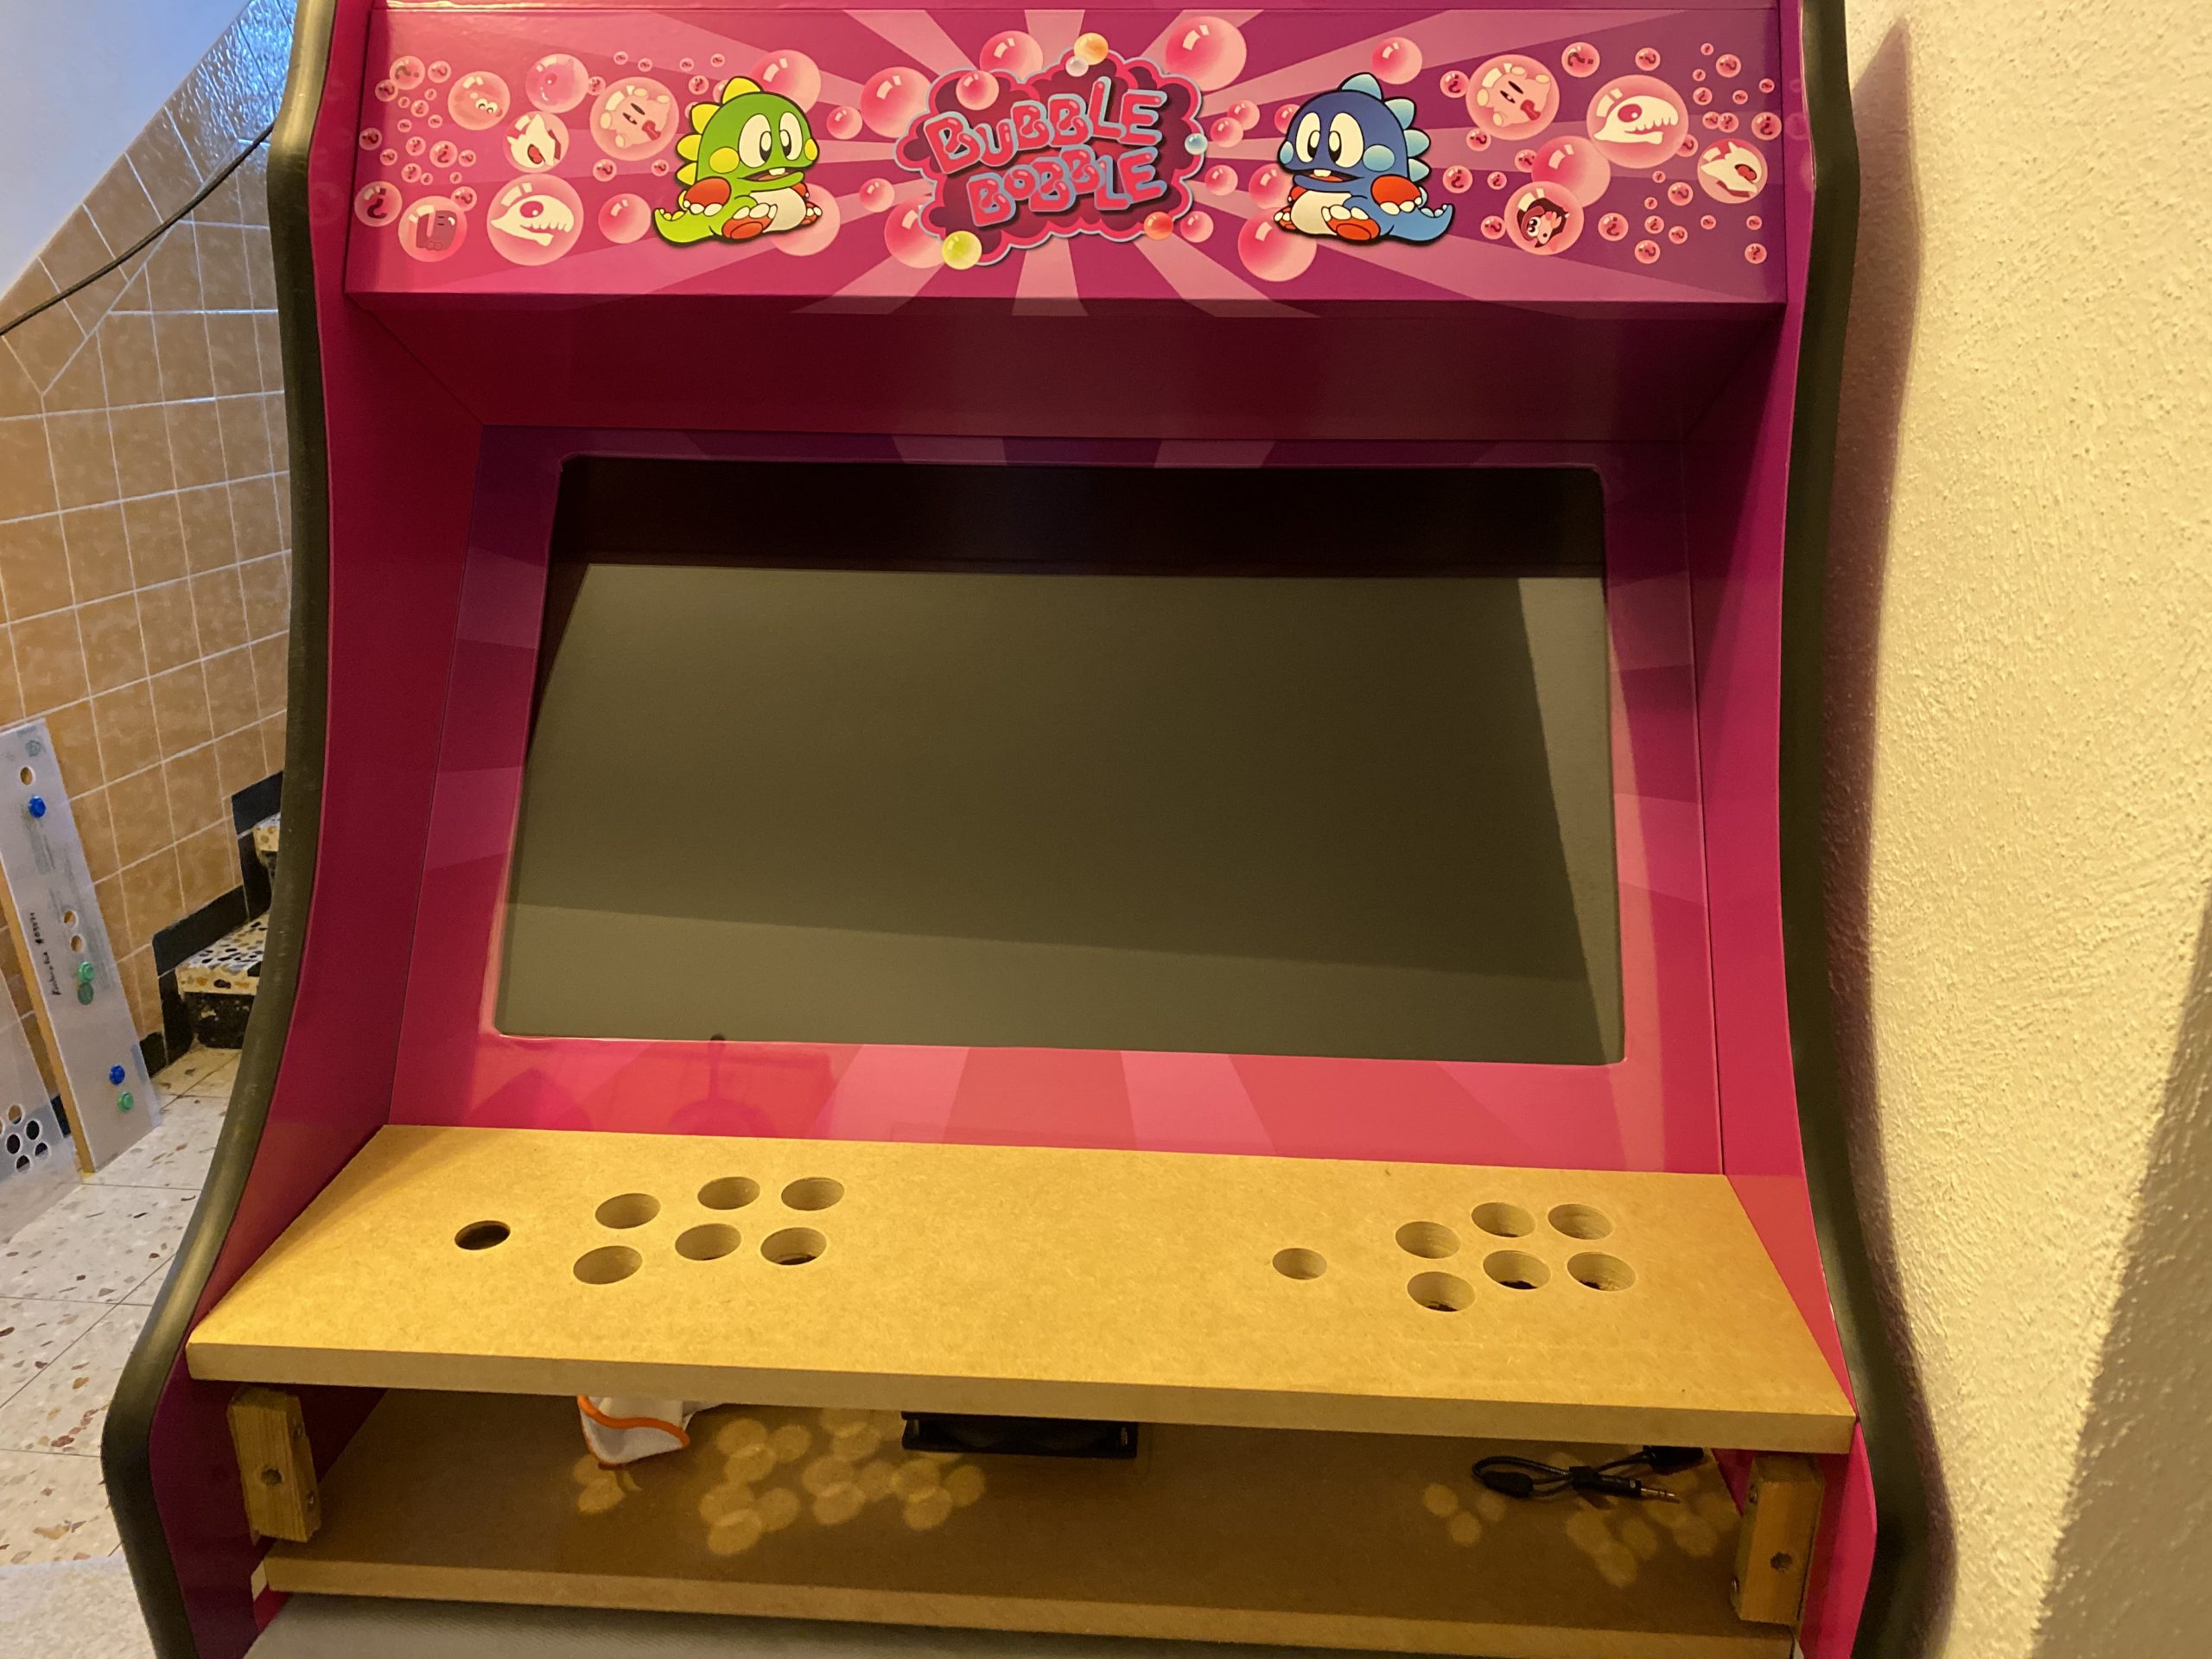
With the final arcade-wood accessible top me I could take actual measurements and add to each element 4cm of margin. This way putting it on would hopefully be easier (it was!).
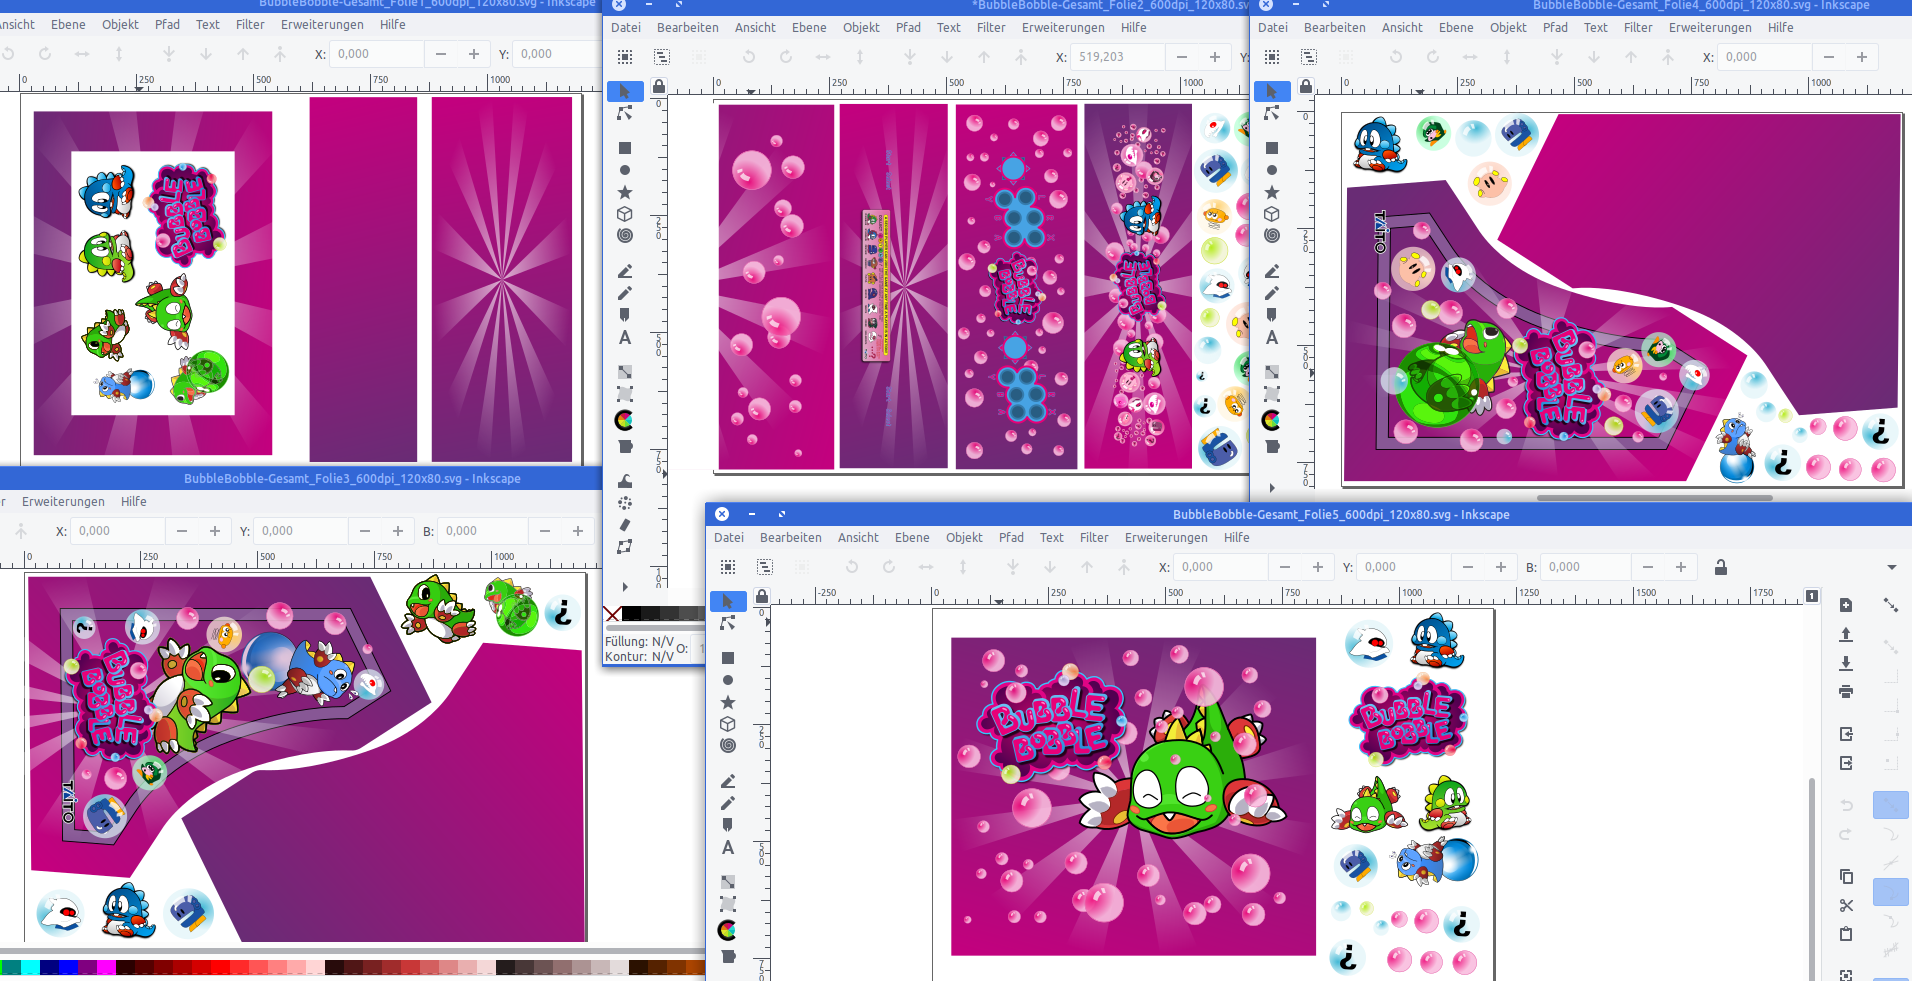
Originally I wanted to have it printed on a 4m by 1,2m sheet of vinyl. It all would have fit there.
But I had to find out that Inkscape was not capable of exporting pixel data at this size and a pixel-density of 600dpi. It just was too large for it to output.
So I had to eventually cut all down into 5 pieces of 1,2m by 80cm each.
After about 7 days all arrived printed on vinyl at my house. I immediately laid everything out and tried if it would fit. It did!
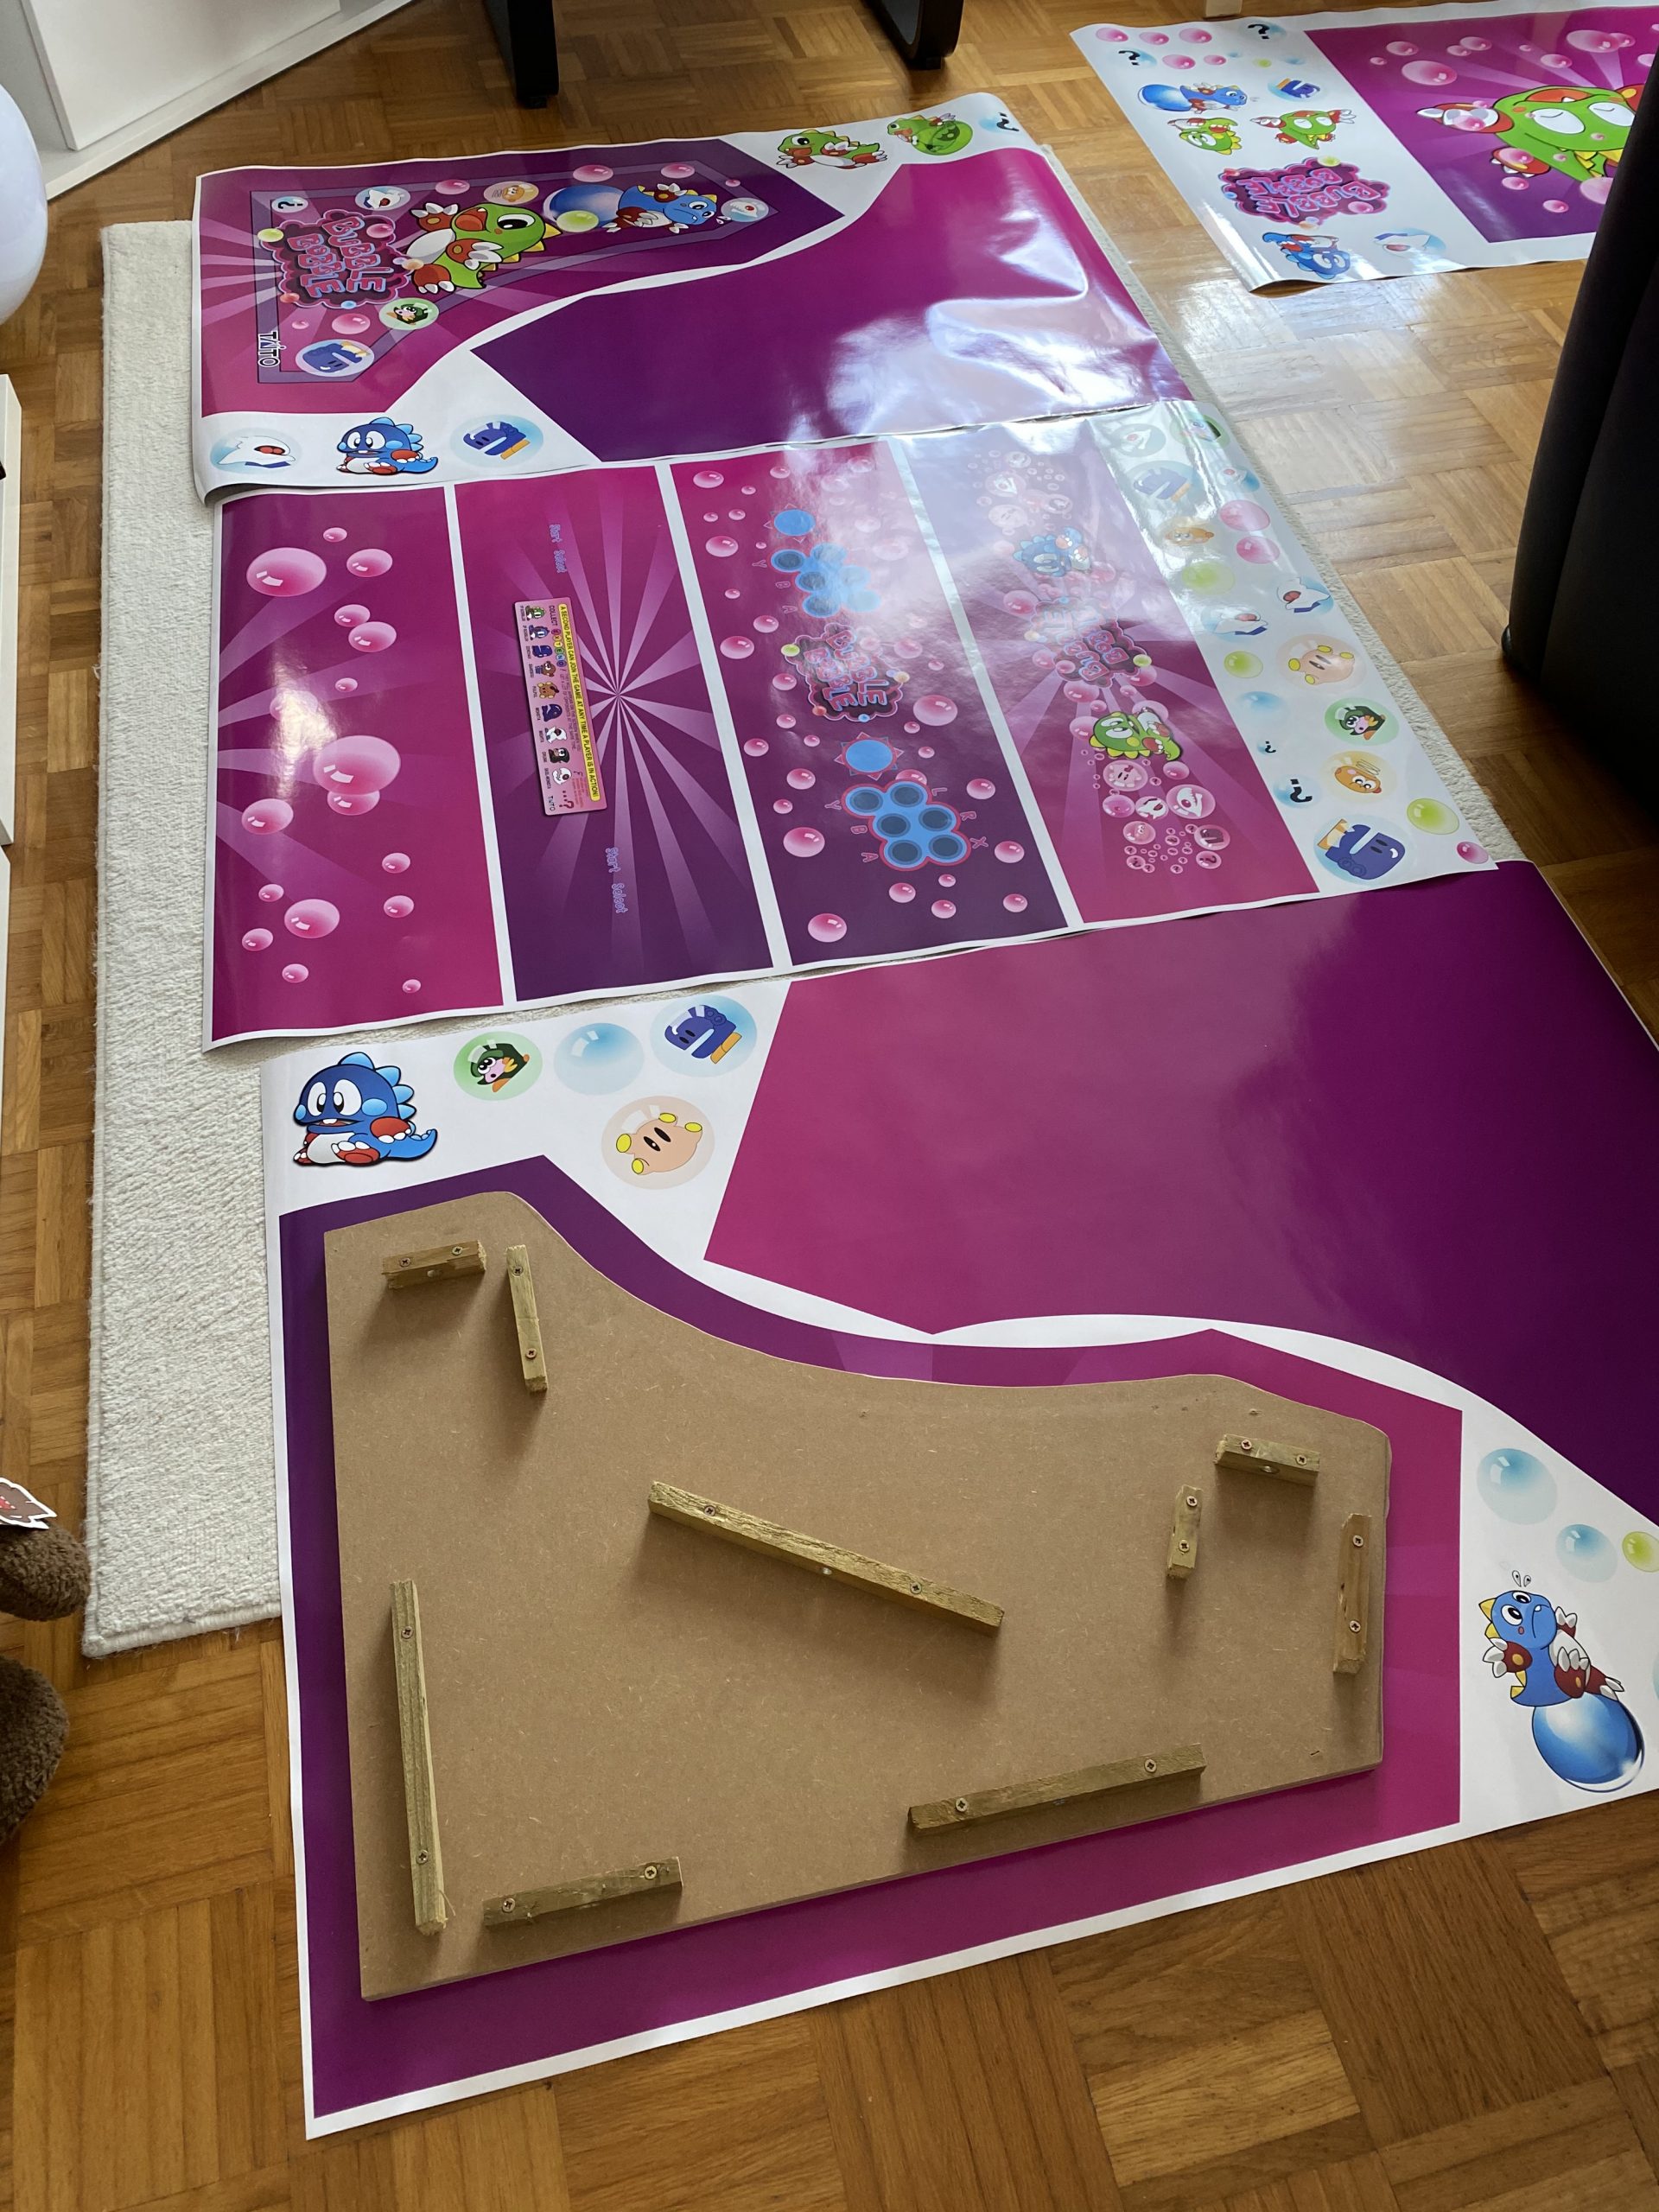
Now everything had to go onto the wood. I did a test run before ordering to check if it would stick securely to the wood. It did stick very nicely. So putting it on was some intense fiddling but it eventually worked out really really great.
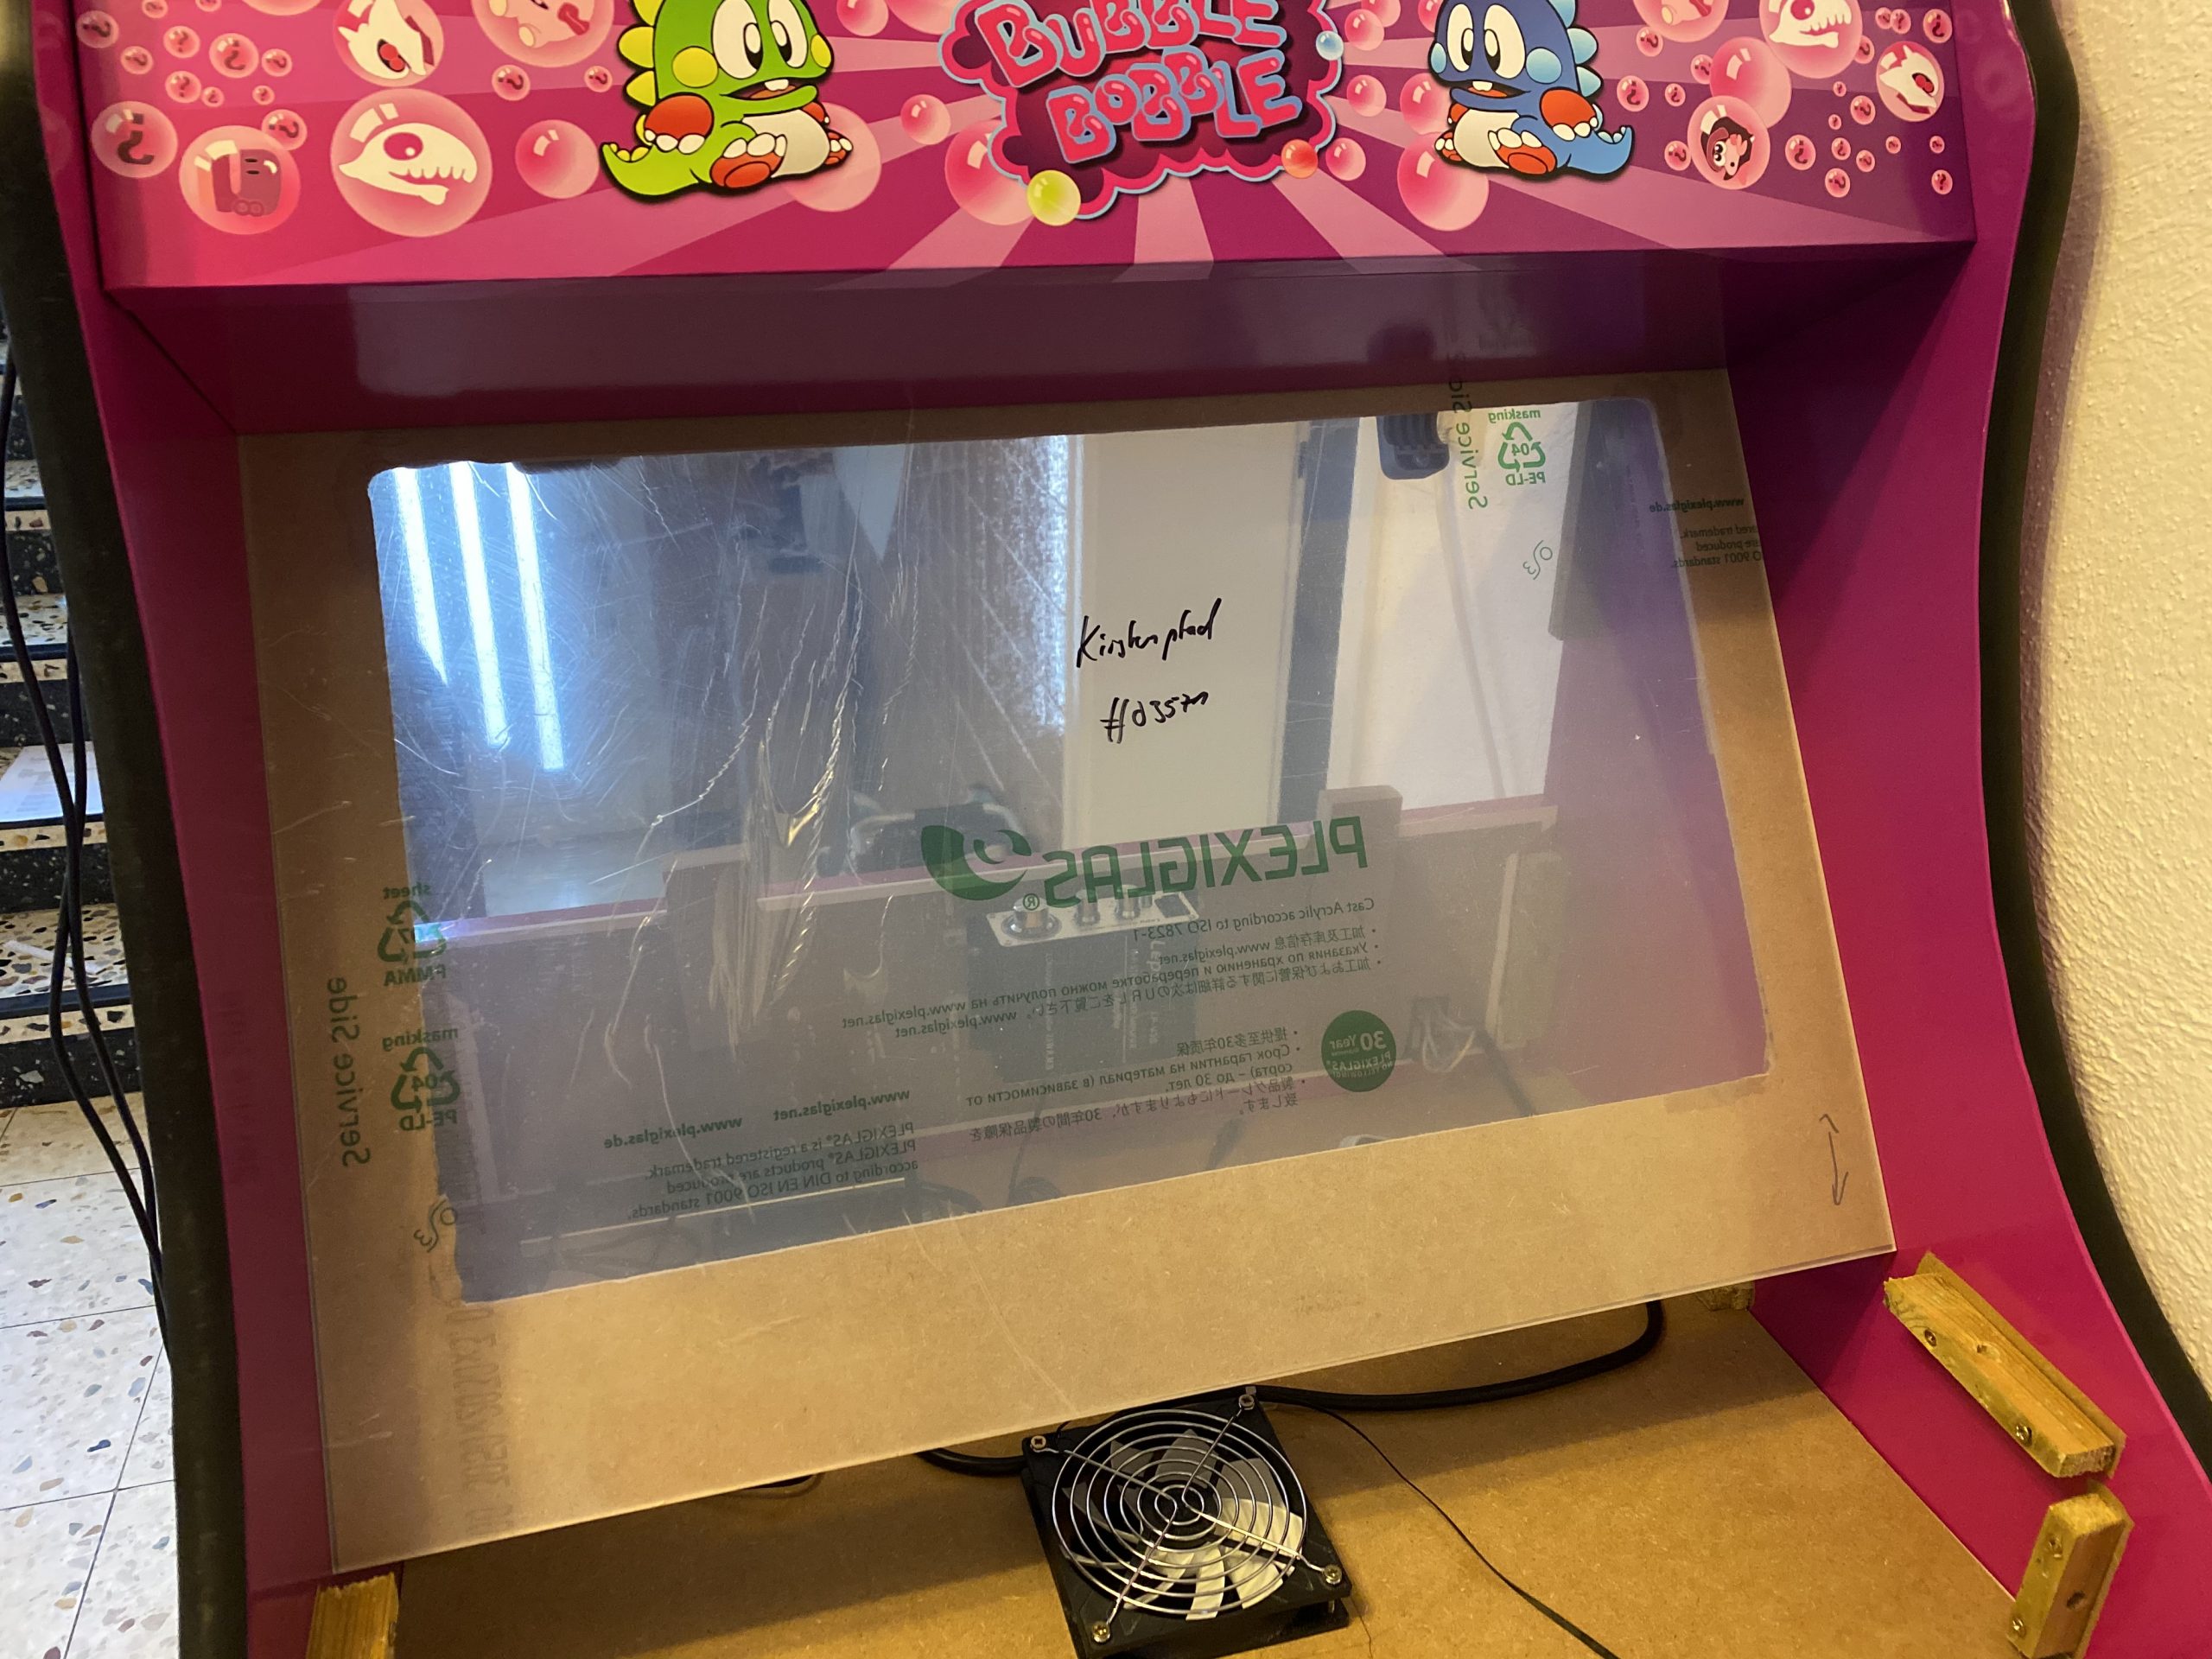
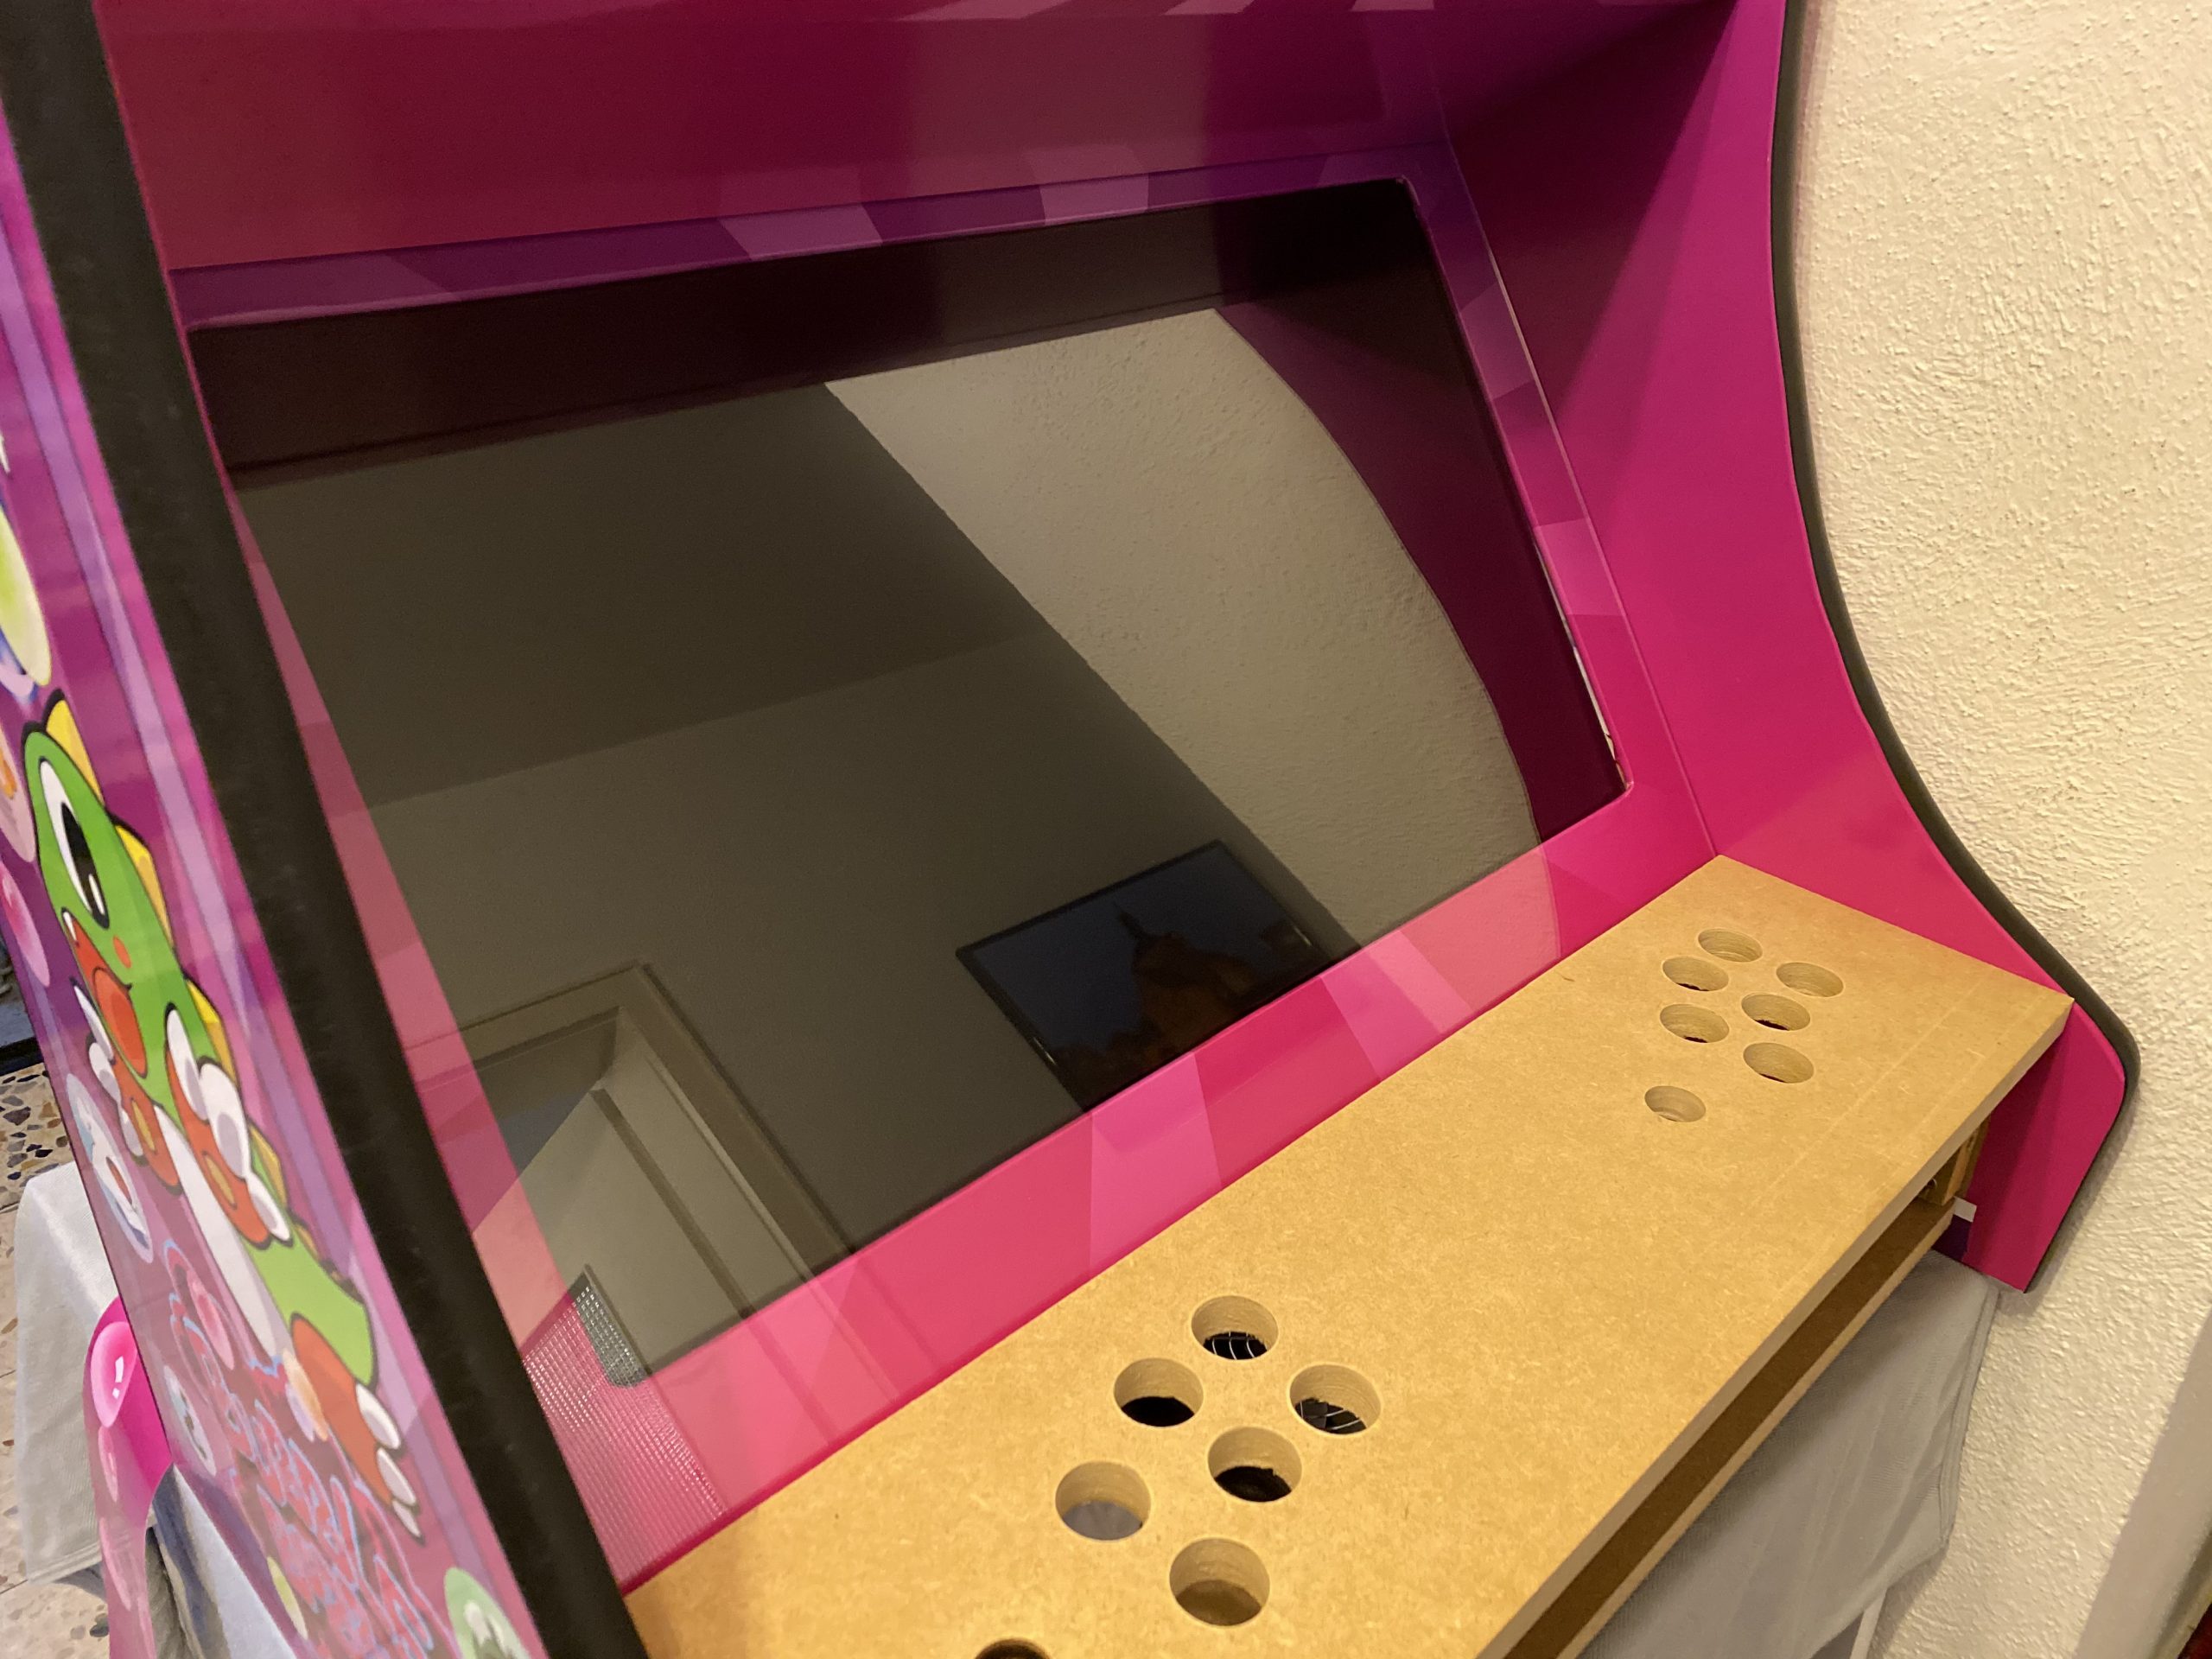
Now it was time for some acrylic. I wanted to get a good bezel and covering of the monitor as well as the handrest and the front buttons.
Cutting acrylic myself was out of questions – so I went with a local company that would laser-cut acrylic for me to my specification.
I’ve sent them the schematics and measurements and the panels for reference and 4 days later the acrylic arrived. We could then put the last bits together for completion!

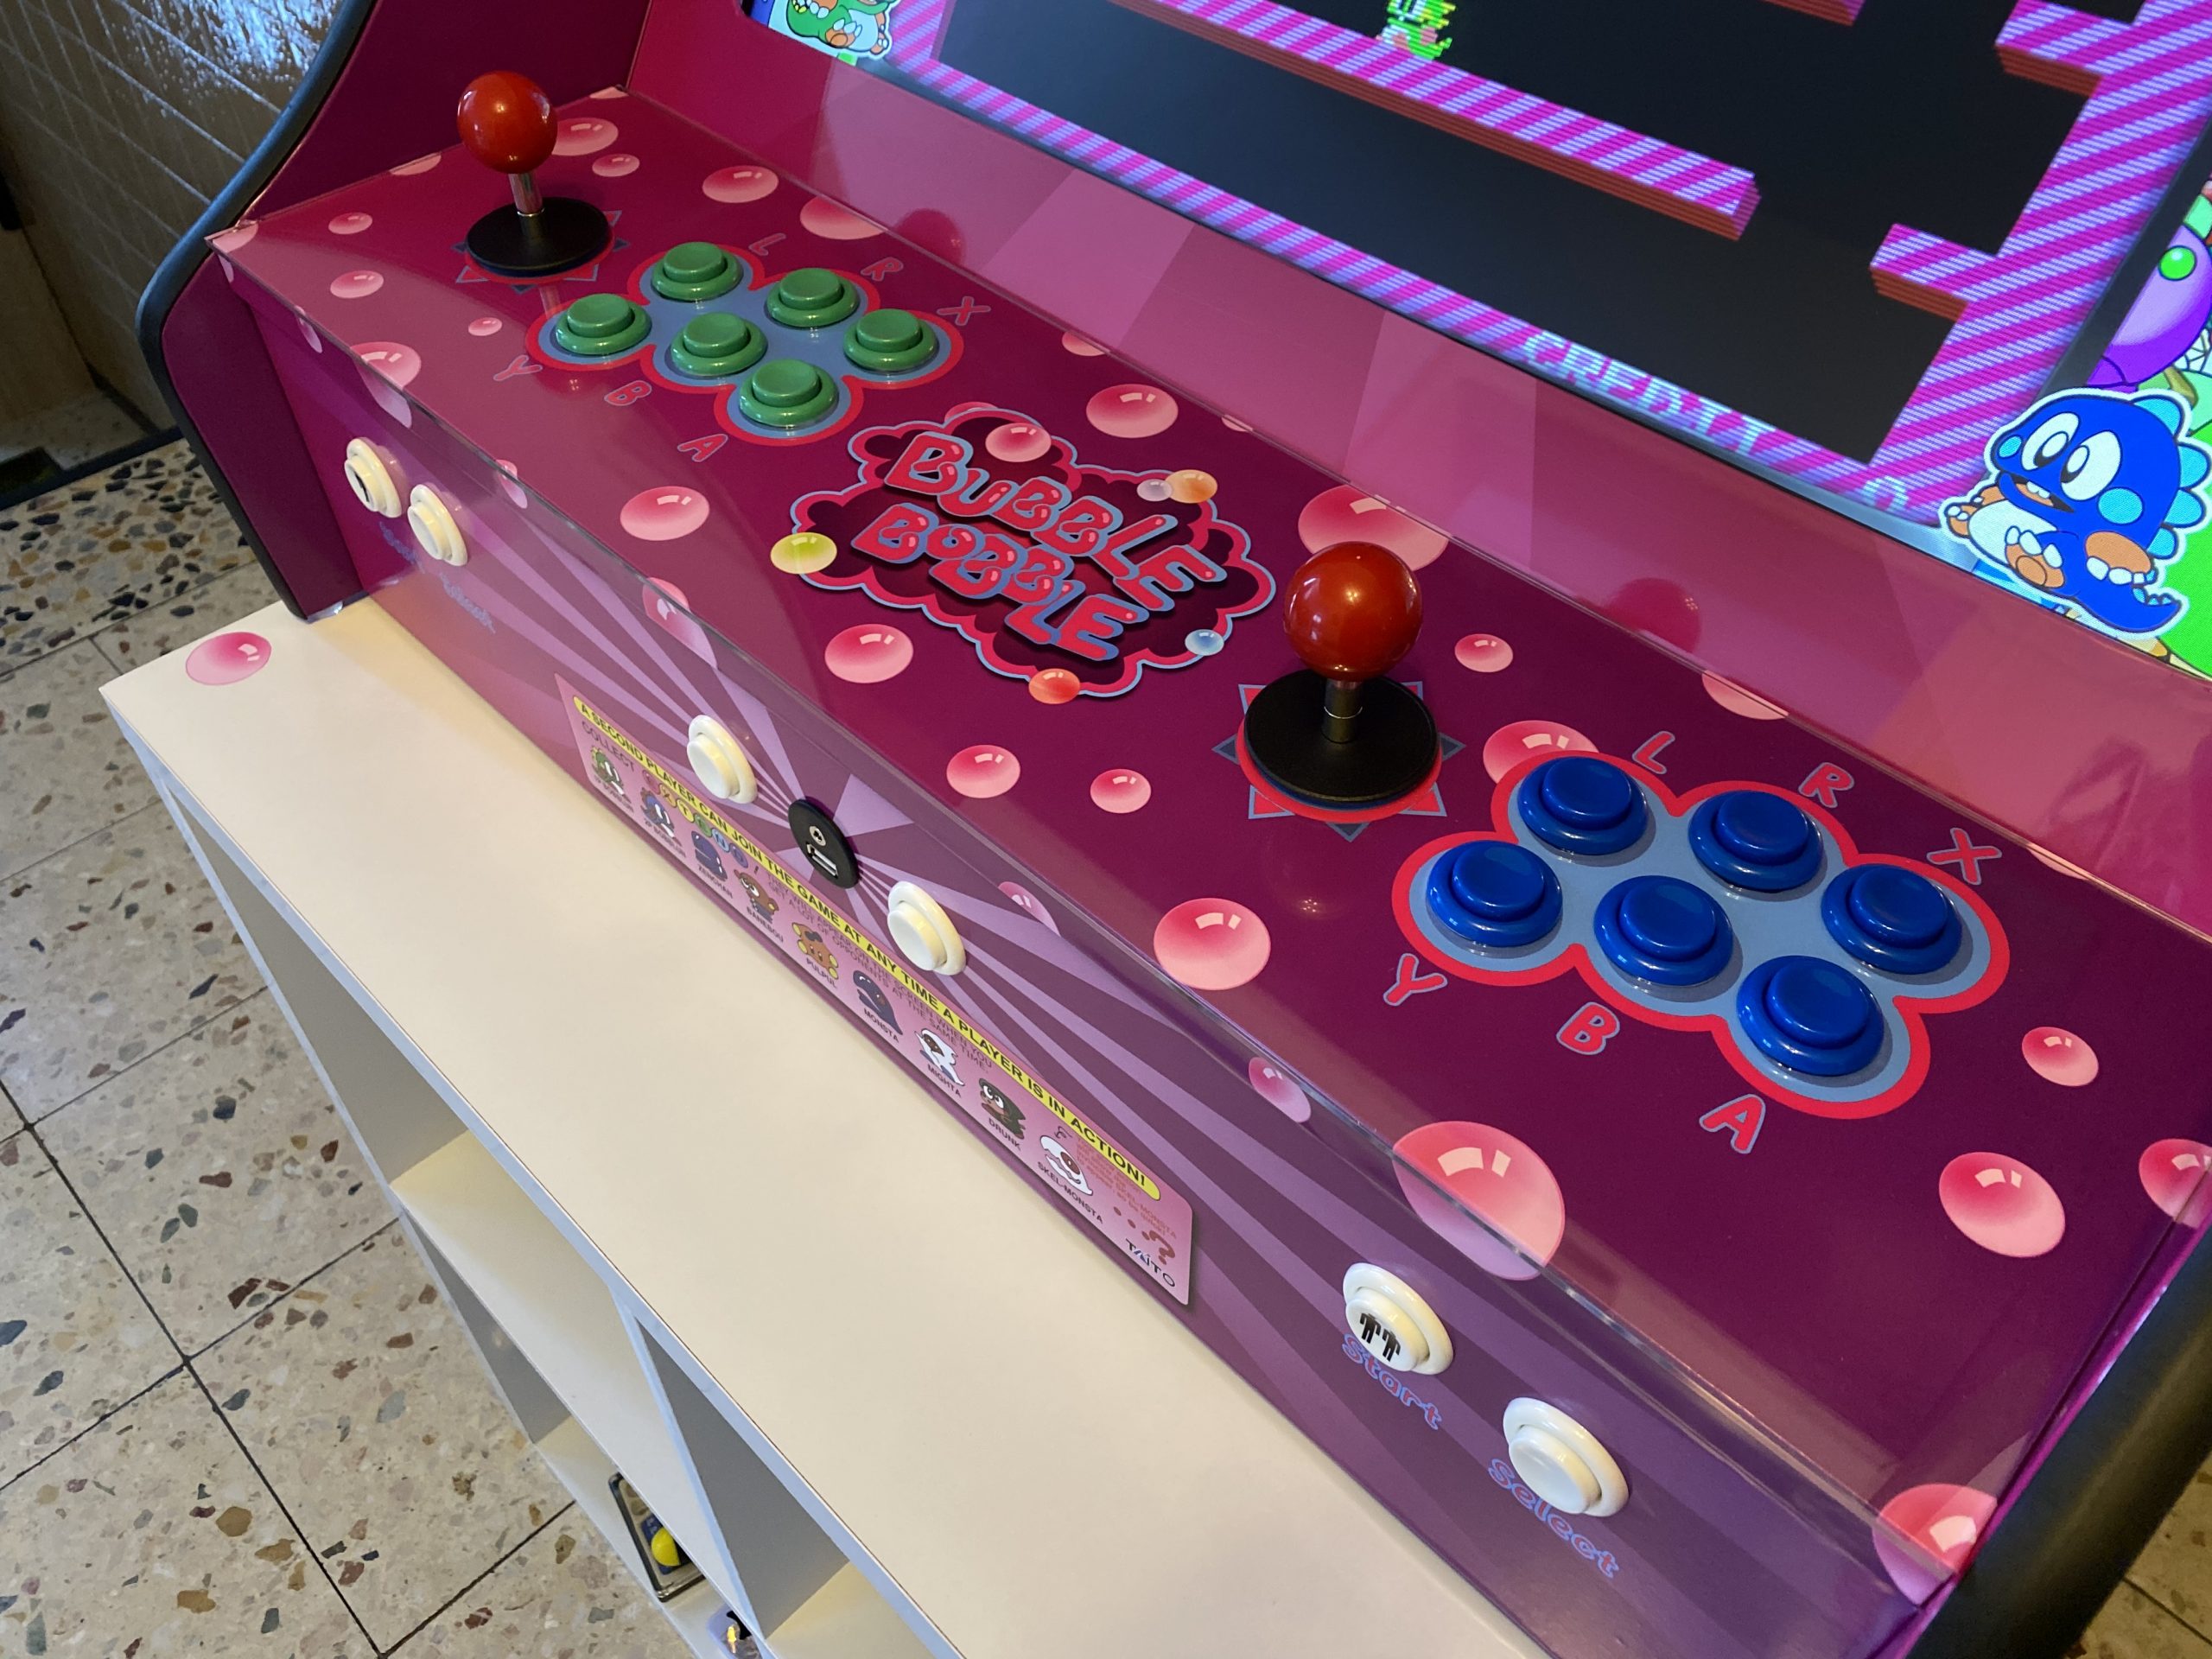
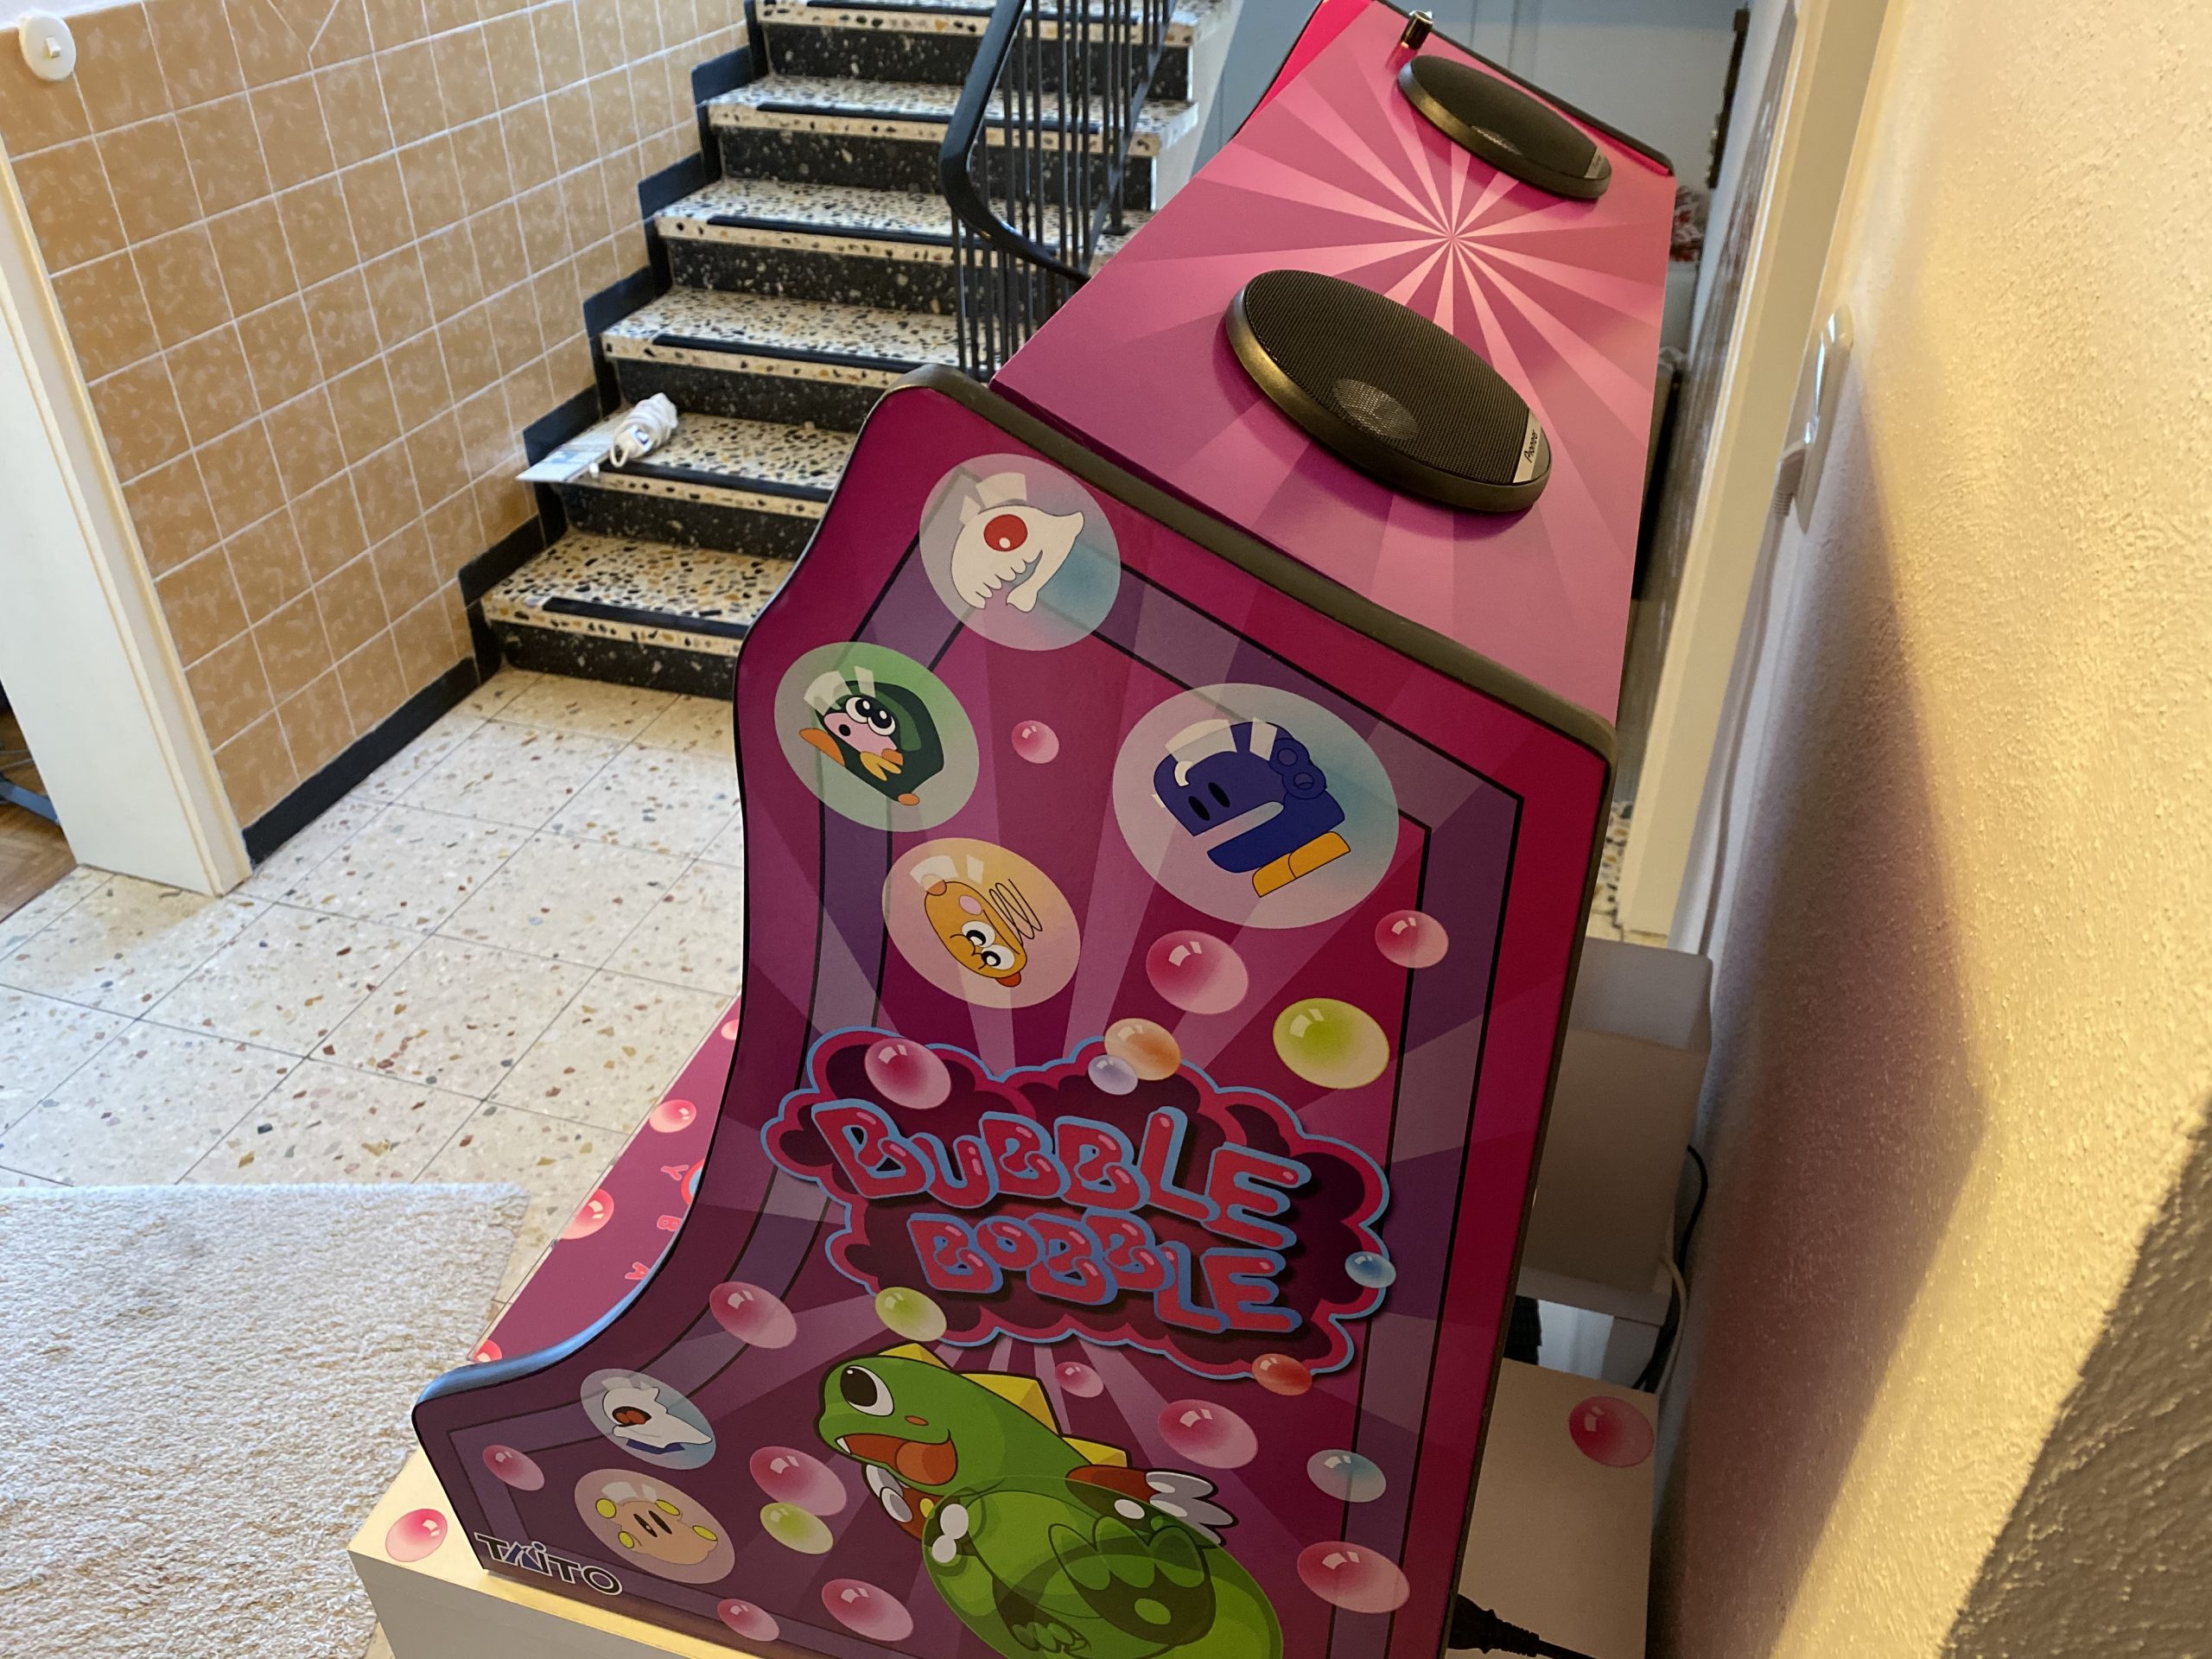

I am really happy how this turned out – especially since with everything that required actual work with hands I am a hopeless case. With this somehow everything worked out.
I still employ the idea of a vertical shoot-em-up centered version… but maybe some day.
If you got any questions or feedback let me know!
After the demise of Skeuomorphism and material-design there’s a new kid on the block to take the trophy: Neumorphism!

Neumorphic card however pretends to extrude from the background. It’s a raised shape made from the exact same material as the background. When we look at it from the side we see that it doesn’t “float”.
uxdesign.cc
As you might have noticed I have already switched the drop-shadows on this blogs theme to also use this very simple shadow-recipe.
And if you want to – you can go here and generate all you need in a handy configurator:

Apparently the german main train operator does offer their regional and nationwide train network in an overall one-pager plan version:
Now, if you take the nationwide one, it looks like this:

It looks okay, but not that great. Given the many examples of proper train network plans.
Someone as well was not satisfied, so this person created one and put it on reddit:
This is so much nicer! Of course this has to be taken with the addition of: there are several “jokes” hidden in the names and lines. Don’t take this as an actual reference – rather go by the official ones.
Video incoorporating image processing via python and BigGAN adversarial artificial neural network to breed new images. There are papers about “high fidelity natural image synthesis”.
Anthony Baldino – Like Watching Ghosts from his recently released album Twelve Twenty Two
Anthony Baldino

It started with this tweet about someone called Ayliean apparently drawing a plant based upon set rules and rolling a dice.

And because generative art in itself is fascinating I am frequently pulled into such things. Like this dungeon generator or these city maps or generated audio or face generators or buildings and patterns…
On the topic of flowers there’s another actual implementation of the above mentioned concept available:
Almost exactly 1 year ago I wrote about transit maps. And it seems to be a recurring topic. And rightfully so – it’s an interesting topic.
Along the presentation of a redesigned Singapore transit map, there’s more content to gather on the “Transit Mapping Symposium” website.

The “Transit Mapping Symposium” will take place in Seoul / South-Korea on 20/21st of April 2020 with researchers and designers meeting up.
The Transit Mapping Symposium is a yearly international gathering of transport networks professionals, a unique opportunity to share achievements, challenges and vision.
Our participants and speakers include experts from all fields of the industry:
– Mapmakers
– Network Operators
– Transport Authorities
– Digital Platforms
– Designers
As I am a bit late to the party on this: There’s, just like last year, a nice generative art tool provided by bleeptrack to generate your very own 36c3 themed headlines/logos:

DSEG is a free font family, which imitate seven and fourteen segment display(7SEG,14SEG). DSEG have special features:
Get it here.

There are lots of inputs into the “procedural generation contest” – yet this one, as yesterdays, is worth a mention:

This application generates a random medieval city layout of a requested size. The generation method is rather arbitrary, the goal is to produce a nice looking map, not an accurate model of a city. Maybe in the future I’ll use its code as a basis for some game or maybe not.
Medieval Fantasy City Generator
A great source of SpaceX related infographics is this page here.
A lot is going on in browsers these days. They are becoming increasingly powerful and resource-demanding.
So it just feels natural to combine high resource usage infrastructure with low resource using graphics to get the worst of both worlds.
Not quite, but you get the idea.
There’s a guy on the internet (haha) who dedicates time to write ASCII / character based graphics engines and games with it.
Meet MrGumix:
Of course, what’s that games and graphics?
Exhibit #1:
And the more advanced Exhibit #2:
As iOS 13 has introduced a system wide dark mode into my workflow I had a good reason to give the CSS of this website a little spin.
Depending on your system settings this website now supports Dark Mode.
If you own a modern age phone it’s very likely that it will store the photos you take in a wonderful format called HEIC – or “High Efficiency Image File Format (HEIF)”.
Now the issue with this format is that your average toolchain is based upon things like Portable Network Graphics (PNG), JPEG and maybe GIF or Scalable Vevtor Graphics (SVG).
So HEIC does not quite fit yet. But you can make it fit with this on Linux.
Imagemagick and current GIMP installations apparently still don’t come pre-compiled with HEIF support. But you can install a tool to easily convert an HEIC image into a JPG file on the command line.
apt install libheif-examplesand then the tool heif-convert is your friend.
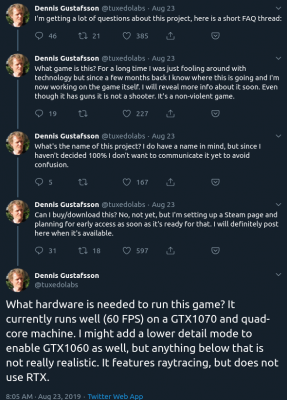
The amount of computing power available in todays hardware is reaching levels where raytracing and high detail physics simulations are in reach.
Dennis Gustafsson shared on his Twitter and blog some insights and videos of his experiments and implementations. Be astonished:
As I am mainly producing text and markdown notes throughout the day I am always interested in ways to quickly create simple text-based flow-charts.
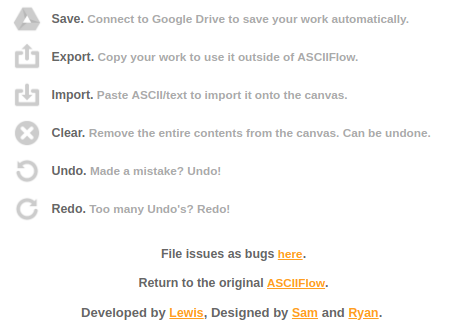
I did write about a couple of tools to accomplish this previously but I want to take note of the most recent addition to the toolbox: ASCIIFlow Infinity.
You open it in your browser and start drawing with the simple tools provided.
When you are done you export it to plain text and do what you feel like with it.
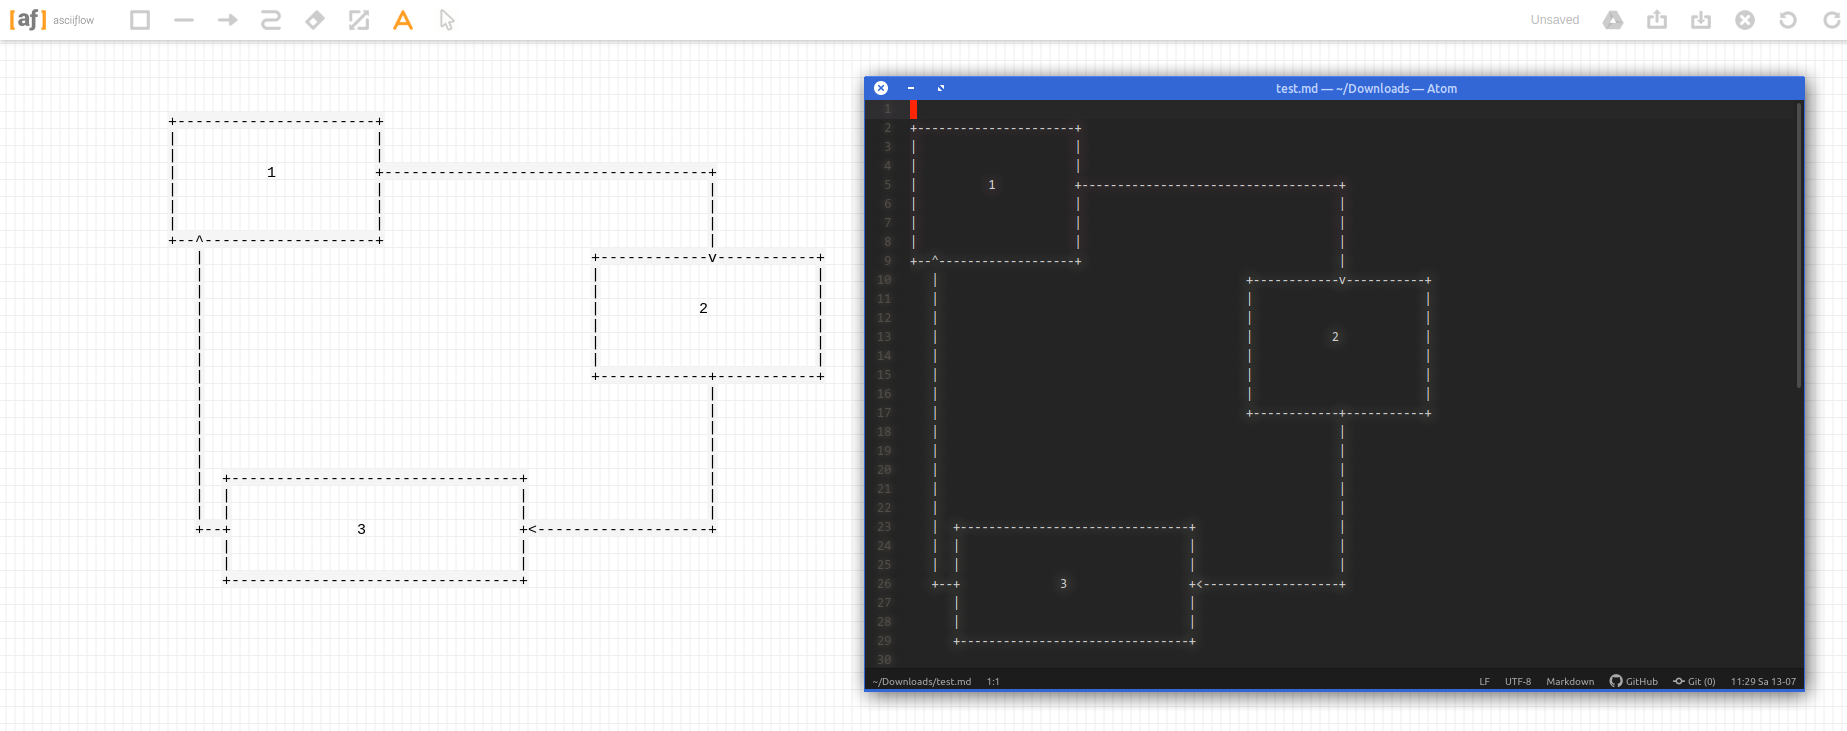
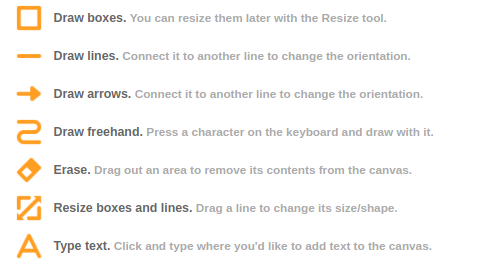
Here’s a feature overview:

The nicest display I own :-)
Think of this: You want to capture a whole, multi-scroll-pages, web-page into one image.
This can be difficult without the right tools. It surely will be a lot of work to accomplish a 10th of thousand pixel height screenshot put together from multiple single screenshots…
CutyCapt is there to help! It’s a command line tool encapsulating the very powerful WebKit browser engine to render a full page and then create a single file screenshot of the whole page for you.
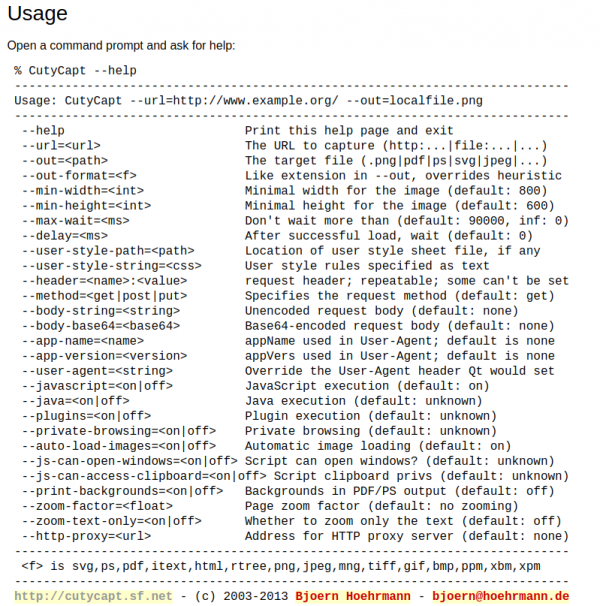
By example, this is what it did when told to screenshot this website:

The first device in my household recently has updated itself to the newest Windows 10 1903 build.
On the very first moment of the login screen appearing and logging in I could tell that I hate one specific change that has made it into this latest update.
And it’s the default mouse cursor.
Back in the Pre-Windows Vista days, when I used to work for Microsoft, I was using the latest internal build of Windows and just around the first RTM (release-to-manufacture) build they touched up on the final designs.
I remember vividly when the mouse cursor had changed from the one we new and used since Windows 3 to a shorter tailed more “high-def” looking one.
Since then there were a couple of changes on the cursor but the general design was kept.
Now apparently with the latest Windows 10 update from 1803 to 1903 I got a new – old default mouse cursor.
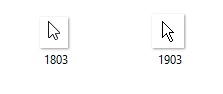
By reflex I changed it back to the one I love and stored safely in a backup. I cannot stand the long tail and the weird pixel-ness of the cursor. It just looks kinda weird to my eyes.


Which one do you like better?
SpriteStack is a voxel editor suited for 2D artists featuring hand crafted retro renderer with animation support. It exports spritesheets, slices and vox models.
SpriteStack
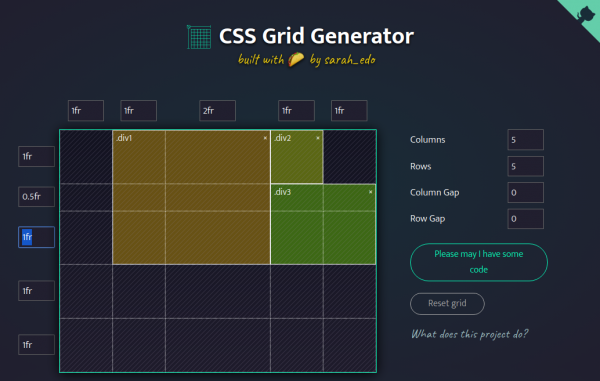
This project is a way for people to use CSS Grid features quickly to create dynamic layouts.
You can set the numbers, and units of your columns and rows, and I’ll generate a CSS grid for you! Drag within the boxes to create divs placed within the grid.
I noticed a lot of people weren’t using Grid because they felt it was too complicated and they couldn’t understand it. Grid is capable of so much, and this small generator only touches on a fraction of the features. The purpose of this is so people get up and running quickly, and create more interesting layouts.
Once you work with this a bit, I suggest checking out resources by Rachel Andrew, Jen Simmons, and Dave Geddes to dive deeper. There is also a CSS Grid Guide on CSS-Tricks, and a fun little game called Grid Garden to help you learn more!
Source
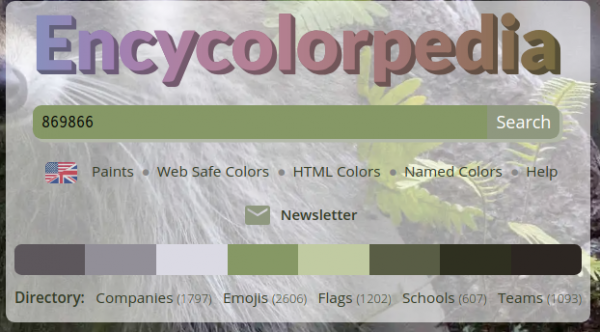
Who would not want to know a place where colors are central. An encyclopedia of color names and many associations to colors.
Like company logos, HTML color codes, named colors, emojis, flags, schools, sport teams, …
Every task you take
my text editor
Every meeting you make
Every keyboard you break
Every note you take
I’ll be storing it for you
Well that was fun! And indeed: a big portion of my professional daily business is taking place in a text editor taking notes and scribbling ideas and thoughts.
I’ve tried many things but the only way that resonated with me was taking notes in Markdown in a text editor that supports markdown. Currently that editor is Atom.io. Mainly because it is not in the way and quite portable. Runs on Linux, Windows, MacOS.
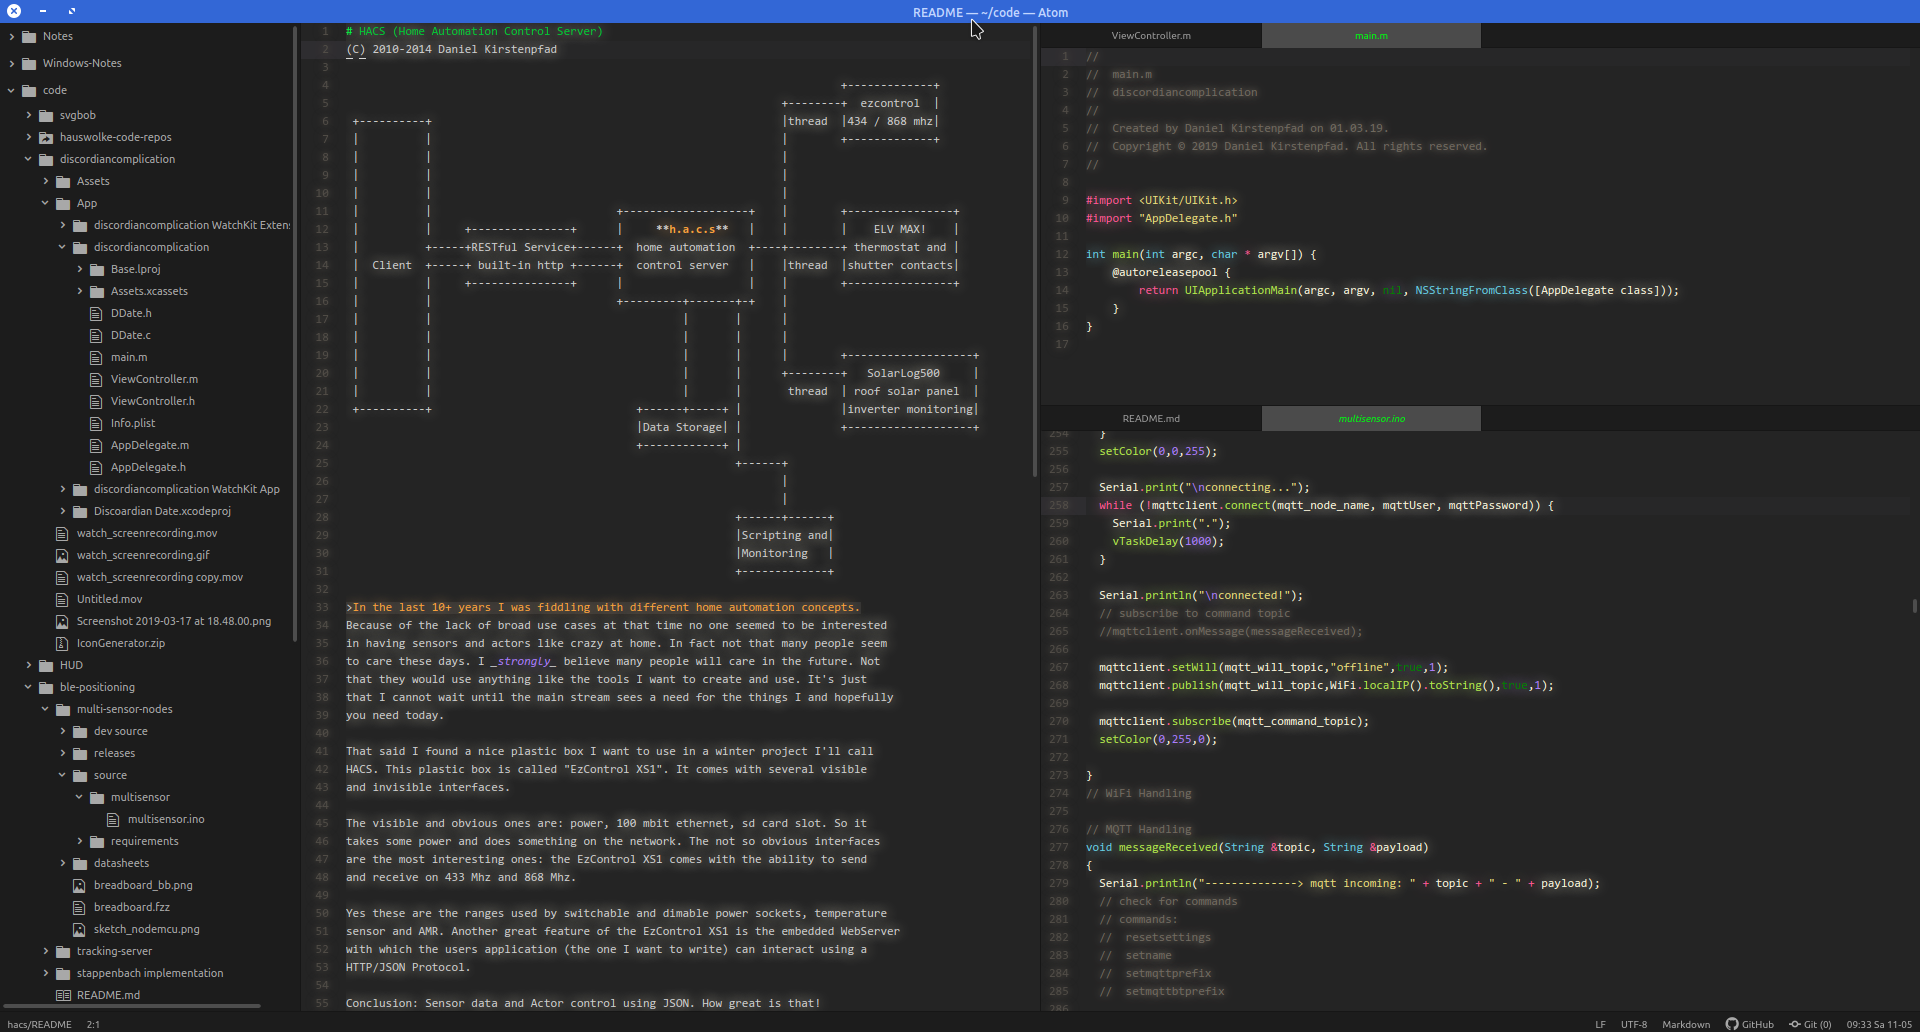
This way – I just took a count – I noted down 364.416 words in the last 1.5 years on my current job (equals to about 46 hours of average speed reading…).
Along side those simple text notes and bullet lists I am doing very simple tables as well as ASCII scribbles in Markdown as well. With the right tools it’s extremely easy and much faster than booting up the Powerpoint or worse.
When you have all in Markdown you then can freely stylesheet away and convert to handy PDF files as well. All even with embedded images if you so desire.
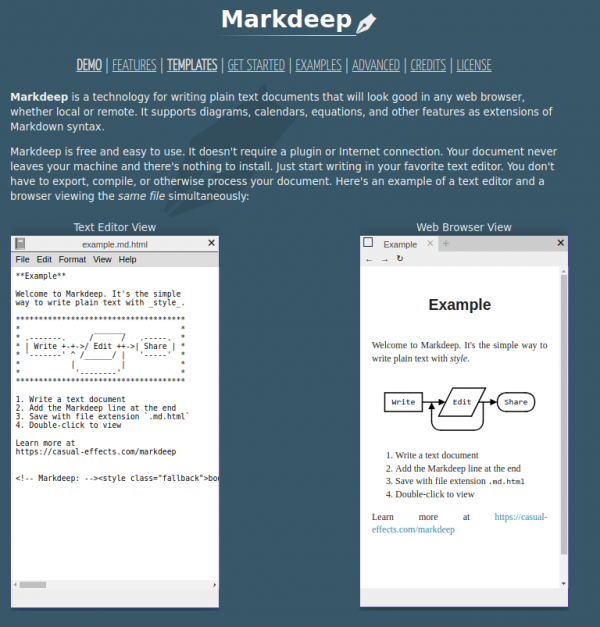
But even if you sit on that treasure trove of Markdown there comes the time when you wish you could convert your scribbles to graphics. Even if it is for the sole reason to not have to draw it again for that fancy Powerpoint slide deck.
You’ve got multiple options to accomplish this:
svgbob is at first a command line tool that got a recent level-up with a proper web-frontend:
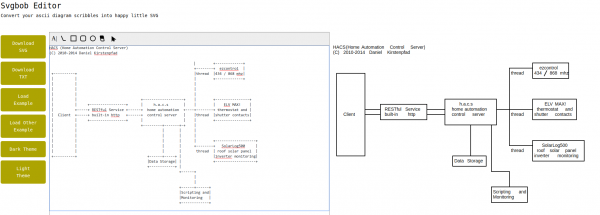
When given Markdown it creates graphics. In the picture above the input is on the left and the svgbob output on the right (as SVG).
Markdeep is the alternative. Which of both work for your case depends on that specific case. Knowing and using both properly is the best way.
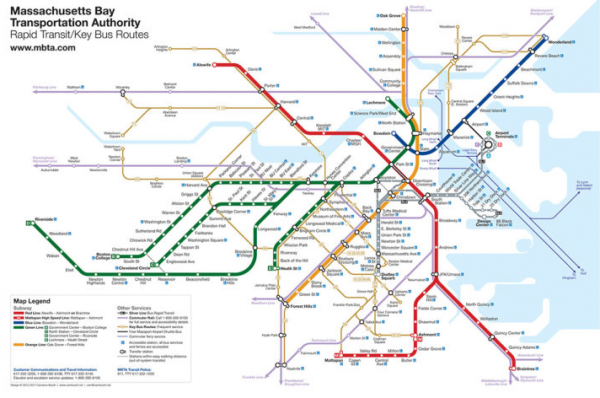
We’ve all used them. And if they are made well they really make life easier: Transit Maps.
Apart from using transit map art style to visualize a train line transit maps can be applied to a lot of data visualization needs.
Take time to consider everything about your diagram. How thick do you want the route lines to be? Are they touching, or is there a slight gap between them? Are you going to use curves or straight edges where a line changes direction? Consider your station markers – will they be ticks, dots or something else? Think about how you would like to differentiate interchange stations or transit centres as well. Consider the typeface you’re going to use for station names – it should be legible and simple. When you’ve considered all these points, you’ve given yourself a set of rules that you will use to construct the diagram. Every design decision you make should be evaluated against these rules: sometimes, you can break them if needed, but it definitely helps to have them in your head as you work.
Tutorial: How to design a Transit Map
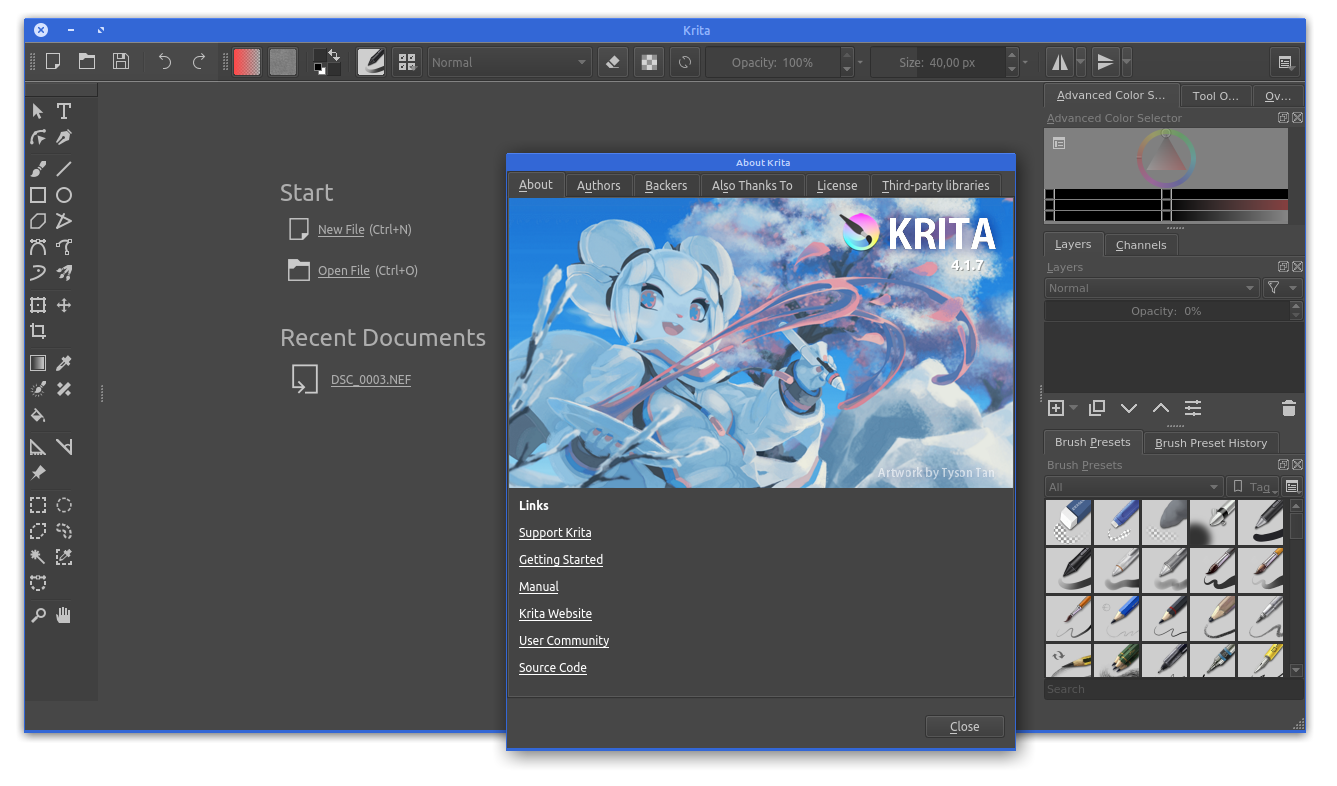
I just recently learned about Krita. An open source drawing application that allows you to… oh well… do free-hand drawings.
Krita is a FREE and open source painting tool designed for concept artists, illustrators, matte and texture artists, and the VFX industry. Krita has been in development for over 10 years and has had an explosion in growth recently. It offers many common and innovative features to help the amateur and professional alike. See below for some of the highlighted features.
Krita highlights
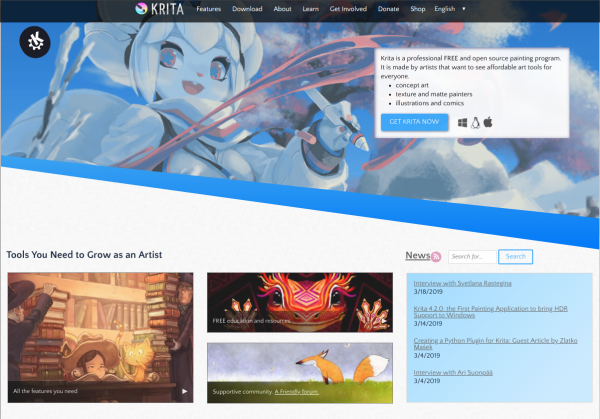
Taking a look at the gallery yields that I cannot draw. Frustration about that is limited because there’s so much nice drawings to gaze at!
Also this is a multi-platform application. It’s available for Windows, macOS and for Linux.
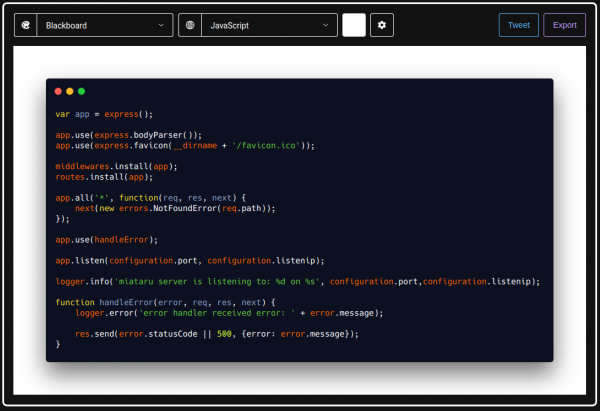
Every once in a while I need to make a good looking screenshot of code. Like really good looking and well colored.
Like this one:
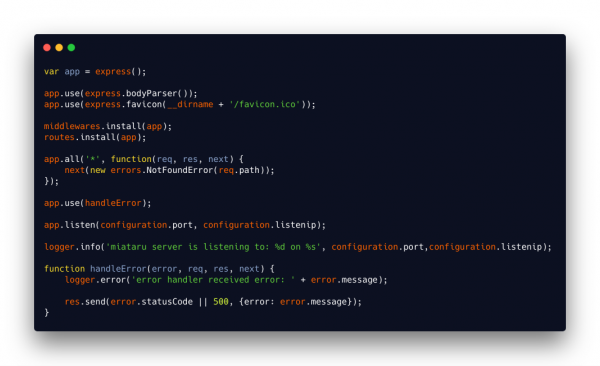
There’s the great “carbon” tool for that now! It’s browser based and you can access it either here or it’s source here.
Oh this is so useful for my head-up-display prototype implementation:

This feature replaces numeral glyphs set on glyph-specific (proportional) widths with corresponding glyphs set on uniform (tabular) widths. Note that some fonts may contain tabular figures by default, in which case enabling this feature may not appear to affect the width of glyphs.
tabular figures: tnum

In the interesting field of IoT a lot of buzz is made around the predictive maintenance use cases. What is predictive maintenance?
The main promise of predictive maintenance is to allow convenient scheduling of corrective maintenance, and to prevent unexpected equipment failures.
The key is “the right information in the right time”. By knowing which equipment needs maintenance, maintenance work can be better planned (spare parts, people, etc.) and what would have been “unplanned stops” are transformed to shorter and fewer “planned stops”, thus increasing plant availability. Other potential advantages include increased equipment lifetime, increased plant safety, fewer accidents with negative impact on environment, and optimized spare parts handling.
Wikipedia
So in simpler terms: If you can predict that something will break you can repair it before it breaks. This improvse reliability and save costs, even though you repaired something that did not yet need repairs. At least you would be able to reduce inconveniences by repairing/maintaining when it still is easy to be done rather than under stress.
You would probably agree with me that these are a very industry-specific use cases. It’s easy to understand when it is tied to an actual case that happened.
Let me tell you a case that happened here last week. It happened to Leela – a 10 year old white British short hair lady cat with gorgeous blue eyes:

Ever since her sister had developed a severe kidney issue we started to unobtrusively monitor their behavior and vital signs. Simple things like weight, food intake, water intake, movement, regularities (how often x/y/z).
I’ve built hardware to allow us to do that in the most simple and automated way. In the case of getting to know their weight we would simply put the kitty litter box on a heavily modified persons scale. I wrote about that already back int 2016.
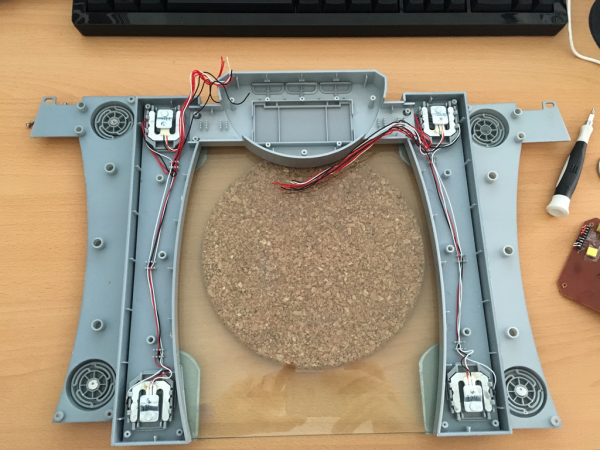
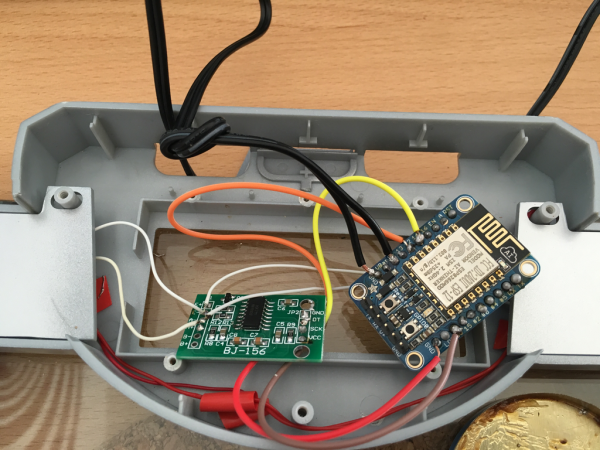
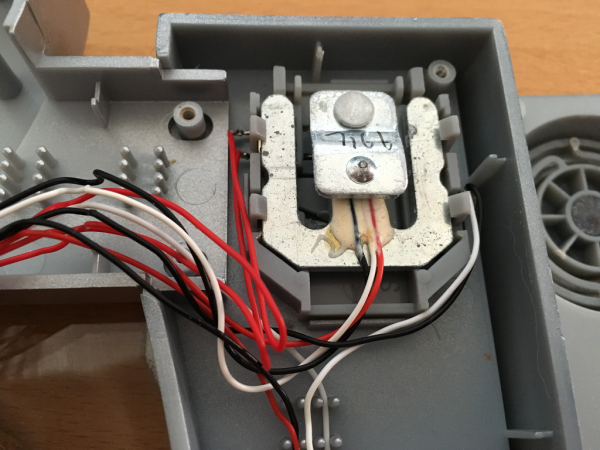
When Leela now visits her litter box she is automatically weighed and it’s taken note that she actually used it.
A lot of data is aggregated on this and a lot of things are being done to that data to generate indications of issues and alerts.
This alerted us last weekend that there could be an issue with Leelas health as she was suddenly visiting the litter box a lot more often across the day.
We did not notice anything with Leela. She behaved as she would everyday, but the monitoring did detect something was not right.
What had happened?
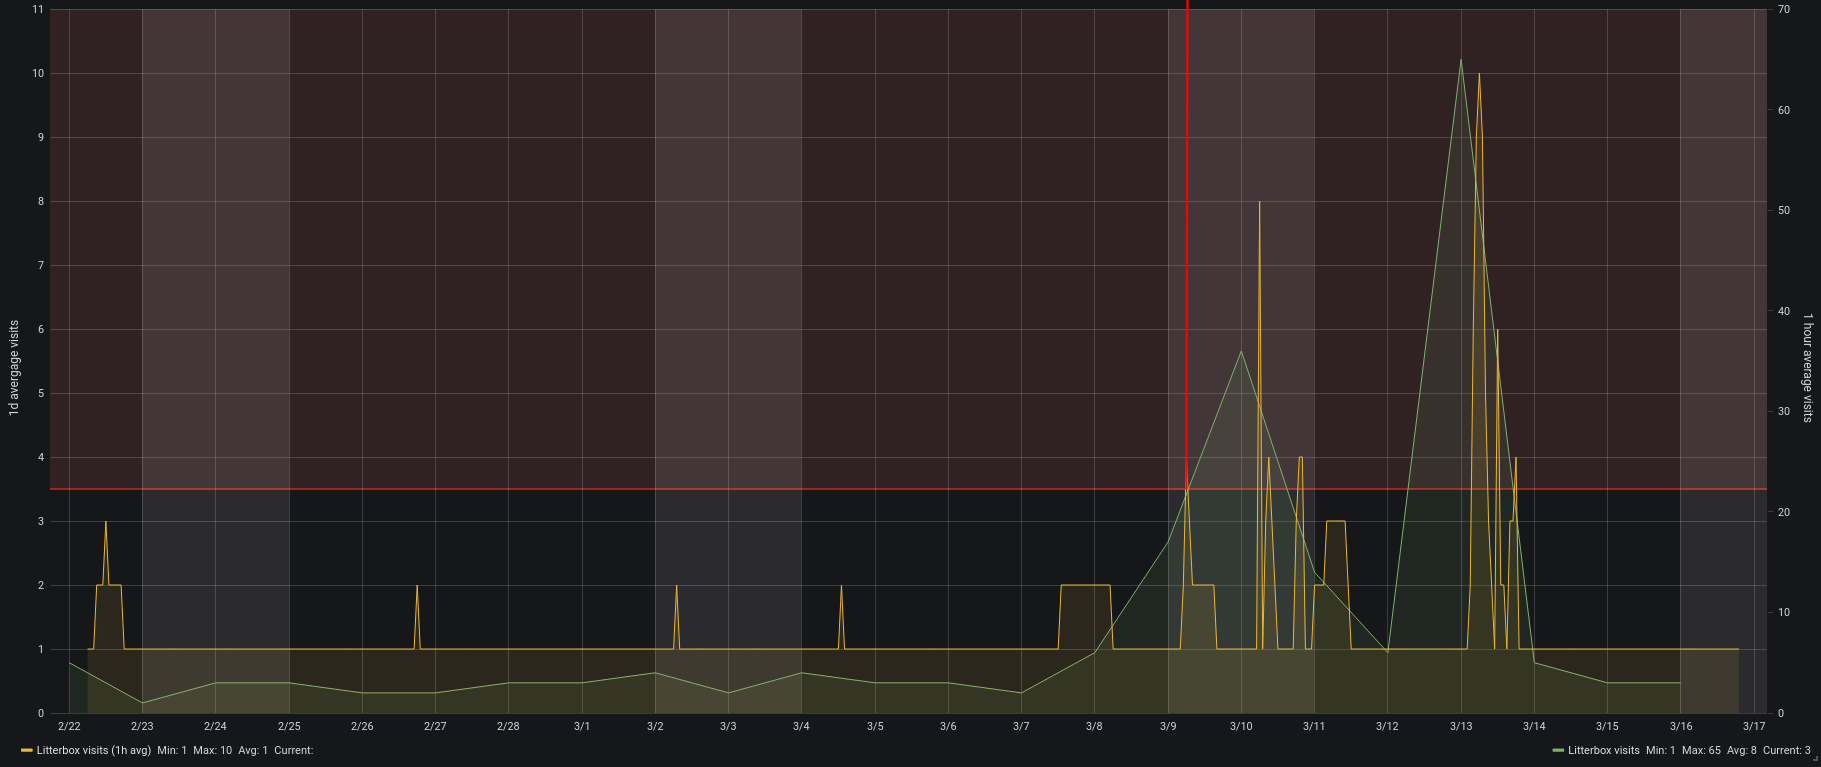
On the morning of March 9th Leela already had been to the litter box above average. So much above average that it tripped the alerting system. You can see the faded read area in the top of the graph above showing the alert threshold. The red vertical line was drawn in by me because this was when we got alerted.
Now what? She behaved totally normal just that she went a lot more to the litter box. We where concerned as it matched her sisters behavior so we went through all the checklists with her on what the issue could be.
We monitored her closely and increased the water supplied as well as changed her food so she could fight a potential bladder infection (or worse).
By Monday she did still not behave different to a degree that anyone would have been suspicious. Nevertheless my wife took her to the vet. And of course a bladder infection was diagnosed after all tests run.
She got antibiotics and around Wednesday (13th March) she actually started to behave much like a sick cat would. By then she already was on day 3 of antibiotics and after just one day of presumable pain she was back to fully normal.
Interestingly all of this can be followed up with the monitoring. Even that she must have felt worse on the 13th.
With everything back to normal now it seems that this monitoring has really lead us to a case of “predictive cat maintenance”. We hopefully could prevent a lot of pain with acting quick. Which only was possible through the monitoring in place.
Monitoring pets is seemingly becoming a thing – which lead to my rather funky post title declaration of the “Internet of Pets”. I know about a certain Volker Weber who even wrote in the current c’t magazine about him monitoring his dogs location.
Health is a huge topic for the future of devices and gadgets. Everyone will casually start to have more and more devices in their daily lifes. Unfortunately most of those won’t be under your own control if you do not insist on being in control.
You do not have to build stuff yourself like I did. You only need to make the right purchase decisions according to things important to you. And one of these things on that checklist should be: “am I in full control of the data flow and data storage”.
If you are not. Do not buy!
By coincidence the idea of having the owner of the data in full control of the data itself is central to my current job at MindSphere. With all the buzz and whistles around the Industry IoT platform it all breaks down to keep the actual owner of the data in control and in charge. A story for another post!
