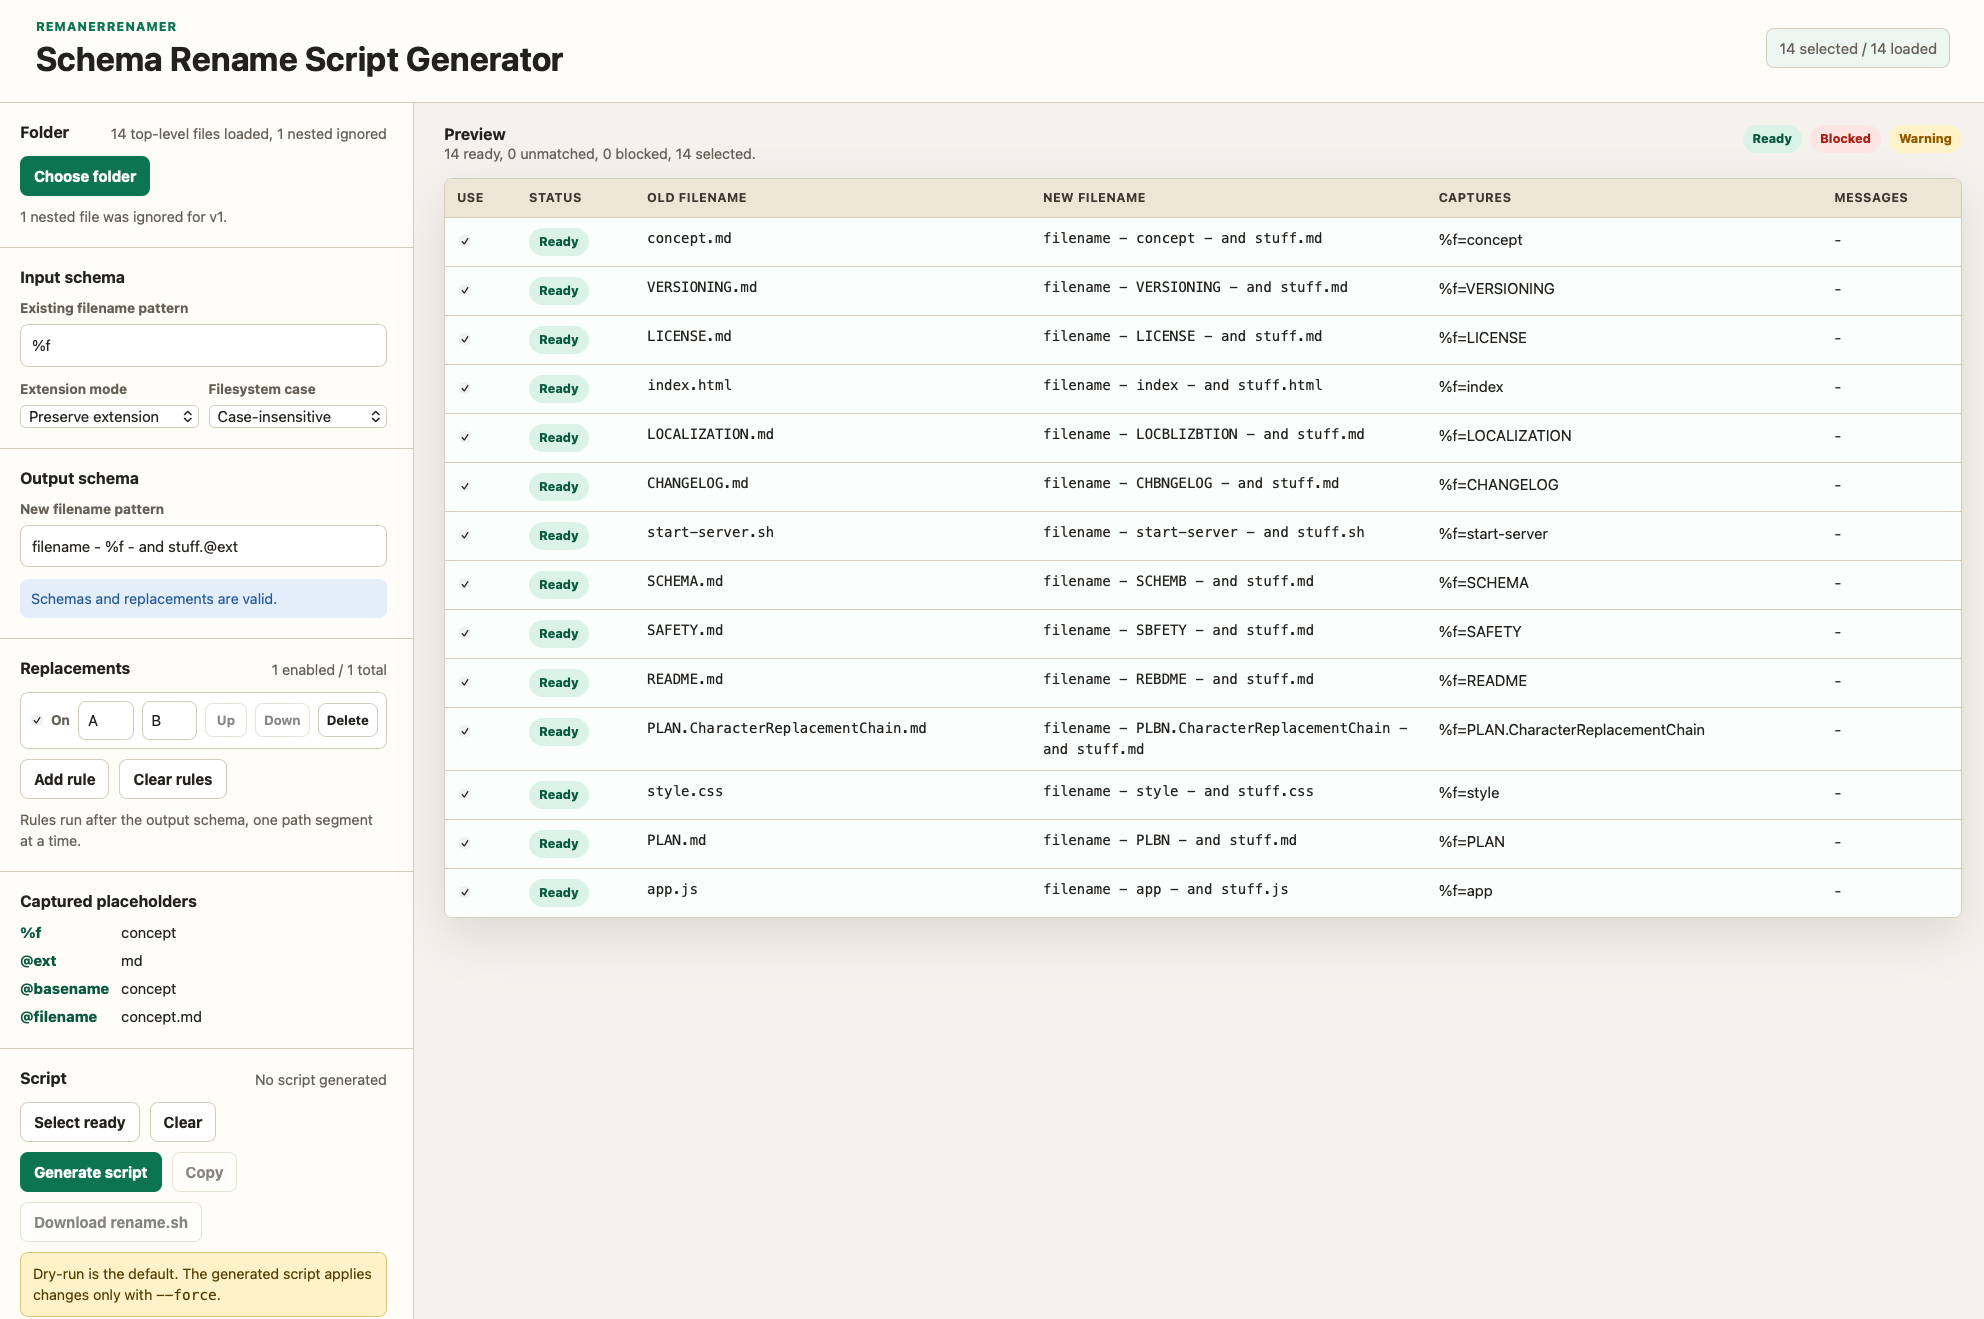
I am finding myself regularly in the position to have to rename lots of files. Like they all have a common naming scheme now but I need them to have another naming scheme or even be distributed into their separate folders.
I’ve found that there are many tools and even your average Explorer, Finder and whatnot does seem to get smarter in renaming file groups these days.
But all of those are rather platform specific and mostly not powerful enough. Then there are renaming tools which are quite powerful, like Rename Master, but those are, well. Very very platform specific and need a certain operating system to work.
I was juggling around with several simulators on my macOS machine and I found that Xcode does not offer any easy way to clone and re-use instances of the simulator with all its settings.
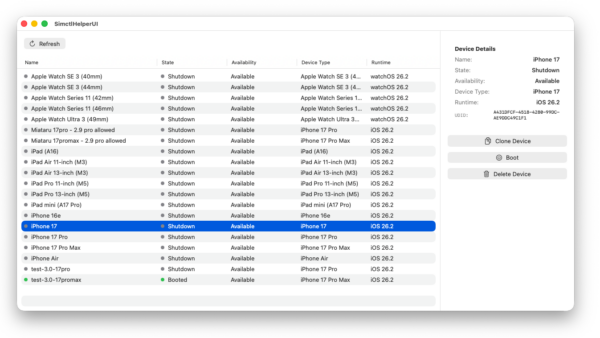
Digging deeper revealed that there is a command line interface that is able to provide these functions. Since CLI is nice but there can be easier ways I made (with the help of vibe coding): SimctlHelperUI.
A macOS SwiftUI application that provides a graphical user interface for managing iOS simulators. SimctlHelperUI wraps the xcrun simctl command-line tool, making it easier to view, clone, delete, and control iOS simulators through an intuitive interface.
Features
Device List View: Browse all available iOS simulators in a sortable table
Device Management:
Clone simulators with custom names
Delete simulators
Boot and shutdown simulators
Device Information: View detailed information including:
Device name and UDID
Current state (Booted/Shutdown)
Availability status
Device type (e.g., iPhone 17 Pro)
Runtime version (e.g., iOS 26.2)
Visual Indicators: Color-coded status indicators for quick device state recognition
Sortable Columns: Sort devices by name, state, availability, device type, or runtime version
Auto-refresh: Automatically refreshes the device list after operations
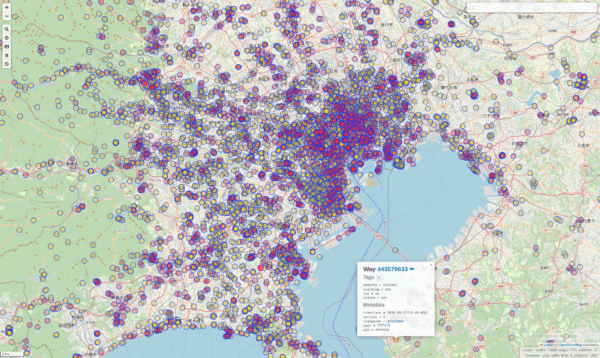
OpenStreetMap data is huge. Like really really huge. Its the whole planet earth afterall. So huge in fact that so far I am using a separate server to host my very own, up-to-date OpenStreetMap planet instance that I can query against with the Overpass-API format.
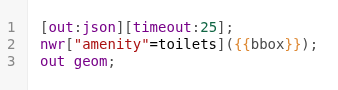
Overpass is quite handy for all sorts of use-cases, like searching for very specific information on the map – like amenities (toilets, benches, ATMs,…).
So a query like this (you have to set bbox to the actual bounding box coordinates):
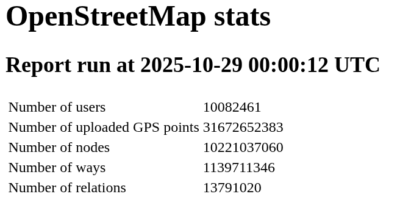
Will produce a data-set representing all toilets inside of that bounding box on the map. This will look a lot like this:
And of course this is lots of effort to sieve through all the millions of nodes inside of the bounding-box and filtering out the right ones.
To produce the example above my server needs roughly 27630 milliseconds or just under 28 seconds to process all that data (which is 13668 toilets….).
For the amount of data and the processing required this isn’t all that bad. The caveat: if you rerun that request it will take the almost exact same time. It’s just a lot of data and the limit here is SSD-read speeds and compute capacity.
Now I happen to have written an app that makes use of Overpass-Queries as its main purpose: It finds you amenities like Toilets. It does implement it’s own caching on client side, so for users the map is fast after the actual load, no matter how often they come back to that section of the map. But that client-side caching does not scale with lots of users.
With the recent rewrite of my app the userbase has expanded. Therefore lots more users actually use my app. And apparently they run lots of overpass queries. To relieve server load and required resources I came up with a simple vibe code prompt:
I have the following idea and would like to develop a plan with you for a specification on how this idea can best be implemented with Codex.
Current situation: So far, I have been running a full OpenStreetMap Overpass Server. This comes with enormous resource requirements because the entire OSM world map, including all metadata, must be managed and kept up to date.
My use case (filtering for toilets/amenities), however, is relatively limited and can be summarized into fixed queries. When I look at how much data is actually affected worldwide, I would estimate that instead of the 500 GB world map, less than 100 MB of real useful data is relevant for my application.
node
  [amenity=toilets]
  ({{bbox}});
out body meta;>;out skel qt;
I want the Overpass API proxy to cache all potential data (with a configurable TTL) and query results from an underlying Overpass API server, fill the cache, and return bounding-box results according to the query.
Any bounding boxes should be queryable — but always with a fixed amenity.
The task: Create a specification, program flow, and implementation instructions for a program that uses Node.js as the base for the Overpass API proxy and Redis as the intermediate storage/cache. The whole thing should be deployable as a Docker container and have both a configurable TTL and a configurable upstream Overpass API server.
Bonus: It would be a plus if the actual amenity could be flexibly chosen. All metadata returned by the Overpass server should be correctly stored and, upon request, reassembled into bounding boxes by the Overpass API proxy.
Several steps with OpenAIs Codex and Cursor led to an actual implementation of that idea.
The result: The exact same query, when run again, takes less than 2 seconds now:
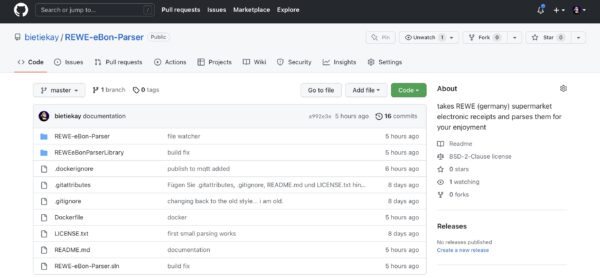
I have, as usual, open sourced that tool. So you can try for yourself, if you happen to have a use case. If you want you can try it out best with Overpass Turbo in your browser, while setting up the Overpass-Proxy on a server (docker instructions included in the box).
I am currently contemplating the development of a mobile application that allows users to discover and collect various Japanese cultural stamps, such as 駅スタンプ (eki stamps), 御朱印 (goshuin), and 鉄印 (tetsuin). Additionally, this app will enable users to share their collections. My plan is to utilize OpenStreetMap data and provide functionality for users to contribute new stamp locations to the OSM database directly from the app. I have prepared a comprehensive “vision-readme” document that outlines the initial version of the application, detailing various aspects like functionalities, design considerations, and target audience.
I am seeking support as I currently lack expertise in adding structured data to OSM. My experience with OSM data and app development includes hosting my own Overpass server with a full global dataset. This server supports two iOS mobile applications I developed: (1) miataru and (2) Toilets around me.
I am in the research and conceptualization phase and am looking for collaborators interested in contributing to the concept, implementation, and operation of this project.
You can find more details on the vision and concept here:
Overview
EkiStamp Quest is an engaging mobile application designed for travelers in Japan. It’s a perfect companion for those who enjoy collecting unique Eki Stamps from train stations and tourist spots across the country. The app also supports the collection of Goshuin and Tetsuin, catering to a wide range of cultural enthusiasts.
Goshuin are traditional seals collected at temples and shrines, symbolizing a visit and prayer. Tetsuin are railway station-specific stamps, often celebrating historic or scenic railway lines. EkiStamp Quest offers a fun and interactive way to explore and appreciate Japan’s cultural landmarks, including temples, shrines, and railway stations.
Features
Stamp Locator: Utilize your location to discover nearby tourist spots, train stations, temples, and shrines with Eki Stamps, Goshuin, and Tetsuin.
Interactive Map: Navigate through different regions and find locations offering these cultural stamps and seals.
Collection Tracker: Keep track of the stamps and seals you’ve collected and the locations you’ve visited.
Stamp and Seal Information: Access detailed information about each stamp and seal, including their design, station history, and cultural insights.
Community Sharing: Share your collection with others and explore collections from various users.
Rewards and Challenges: Engage in challenges such as stamp rallies and historic railway journeys to collect special stamps and earn rewards.
In-App Cropping Tool: Save and personalize your stamp collection with a cropping tool, allowing for cut-out versions of stamps.
Customizable Collection Books: Choose from various designs to display your stamp collection in a style that suits you.
Social Media Integration: Easily share your stamps, overlaid on personal photos, on social networking sites.
Stamp Rally Participation: Join stamp rallies organized by different locations or operators, adding an exciting dimension to your collection experience.
EkiStamp Quest enriches the cultural experience of its users, enabling them to delve into and appreciate the diverse aspects of Japanese heritage through the collection of unique stamps and seals from various locations. This app transforms the traditional hobby of stamp collecting into an interactive and memorable journey through Japan’s rich cultural landscape.
Contact
To ask any question or offer help, please contact me through the comment function of this blog or by email: bietiekay -at- gmail.com
With a „little bit of data sharing“ signed-off just about a couple of seconds after you paid your purchase a PDF file of the receipt you would have gotten at the cashier is in your eMail inbox.
That receipt is a fairly small PDF file looking just like the paper-receipt would have looked like. Additionally you can opt out of the paper receipt – which means less wasted paper as it‘s not even printed out at the cashir.
I had accumulated two years of groceries shopping – over 100 receipts until I finally sat down and coded a parser that takes the pdf-receipt, parses it and publishes the results to respective MQTT topics.
When you start the program this way it’ll go through all pdf files in the directory you point it at. If it finds REWE eBons it will read and parse them in.
It will then order the eBons by date and output all of them in the correct timely order to MQTT.
Then it will start watching the directory for any changes and new files. It’ll pick up those files automatically, read them in and send the data to MQTT of the receipt date is newer than the last one seen and sent.
I‘ve wrapped all of it so it would come with a Dockerfile and can be run anywhere where you‘ve got docker up and running.
Now what do I do with this you may ask?
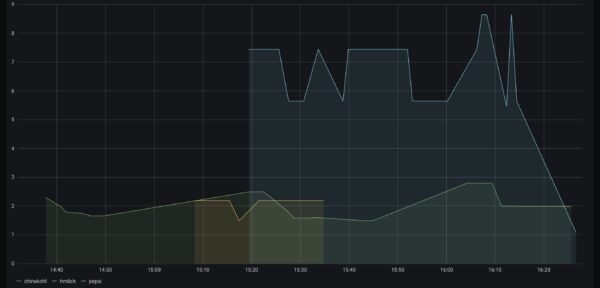
Let me show you an example:
cabbage, milk and pepsi prices plotted out… ignore the hour times – this is from a test import
How I use this is: the tool is running all the time and watching a directory. Whenever a new .PDF file shows up in this directory it will automatically be parsed and it‘s contents pushed out through MQTT. Each item essentially in it‘s own separate topic with price, quantities etc.
Using a combination of Telegraf (to get the data from MQTT to InfluxDB) and InfluxDB (to store time-series) and Grafana (to query and show graphs).
This way it‘s trivial to plot the price development of groceries you regularly purchase. It‘s easy to see what you might have missed.
I am still drilling into the data and there‘s lots of things you can do with it.
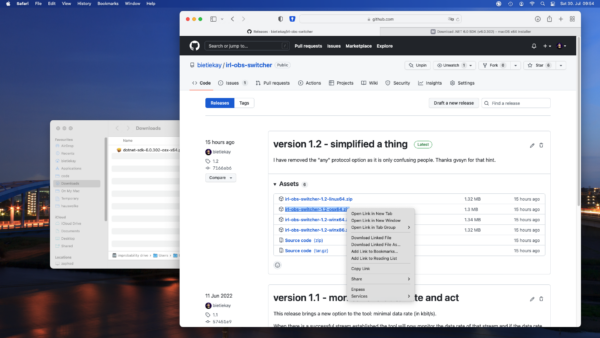
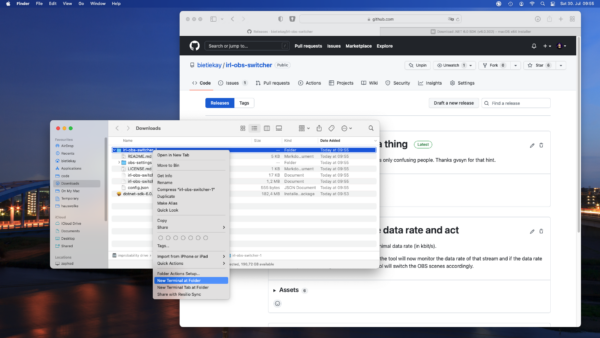
after unzipping right click the folder and select „new Terminal at Folder“. If your menu does not show this item just open a Terminal (search for Terminal) and navigate to the folder you unpacked the binary release to („cd Downloads“)
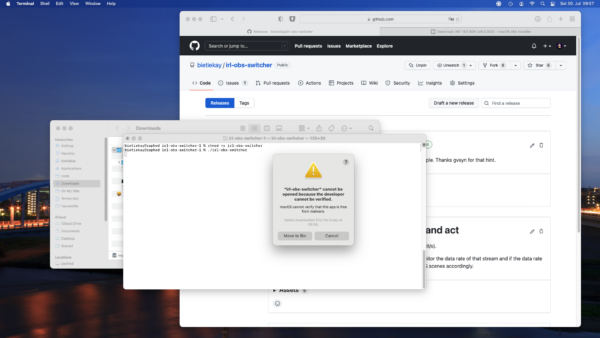
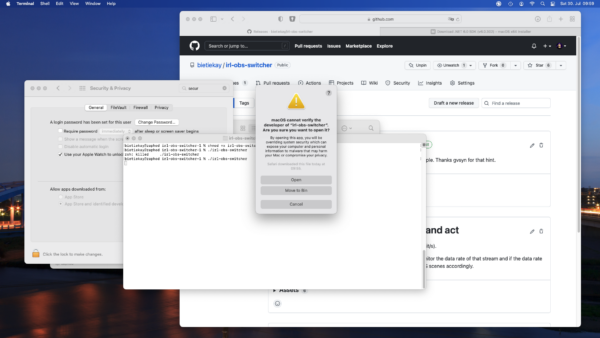
Then mark the irl-obs-switcher executable by running „chmod +x irl-obs-switcher“. Then try to run it with ./irl-obs-switcher. On current macOS you might get a pop-up warning you about the file you are trying to run. This is a default warning as the binary release of irl-obs-switcher is not signed/approved by Apple but just made available by the developer (me) to you. Choose „Cancel“ as might not want to move it to the recycle bin just yet.
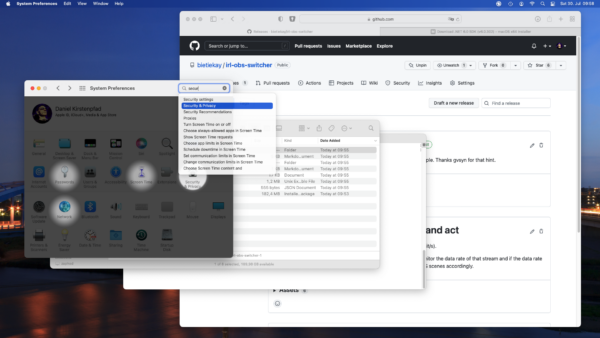
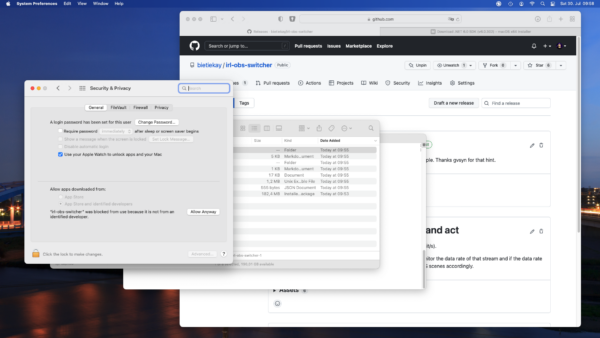
Next we need to tell macOS to anyway allow us to run the irl-obs-switcher file by going to the „Security&Privacy“ section of the System Settings.
You will see a button „Allow Anyway“ that you can click to allow running of irl-obs-switcher.
Now when you try to run irl-obs-switcher again the warning will look different. Click „Open“ and you‘re good to go.
Ever since I stumbled across several IRL streamers I was intrigued by the concept of it.
IRL or “in-real-life” is essentially the art of streaming everyday life. For hours and totally mobile. Of course there are some great gems in the vast sea of content creators. One of them – robcdee – streams for hours live almost every day and shows you his way around in Japan.
Apart from the content – Japan is great – the technical side of this IRL streaming set-ups is quite interesting. Imagine: These streamers wander around with usually a backpack filled with batteries, several modems (4G/5G…) that load balance and bundle a 2-6 Mbit/s video+audio stream that gets sent to a central server either through SRT or RTMP protocol. This central server runs OBS Studio and receives the video stream offering the ability to add overlays and even switch between different scenes and contents.
After I had a basic understanding of the underlying technologies I went ahead and started building my own set-up. I do have plenty of machines with enough internet bandwidth available so they could be the host machine of OBS Studio. I wanted all of this live in a nice docker container.
I went ahead and built a docker container that is based upon the latest Ubuntu 21.04 image and basically sets up a very minimal desktop environment accessible over VNC. In this environment there is OBS Studio running and waiting for the live stream to arrive to then send out to Twitch or YouTube.
How I have set-up this docker desktop environment exactly will be part of another blog article.
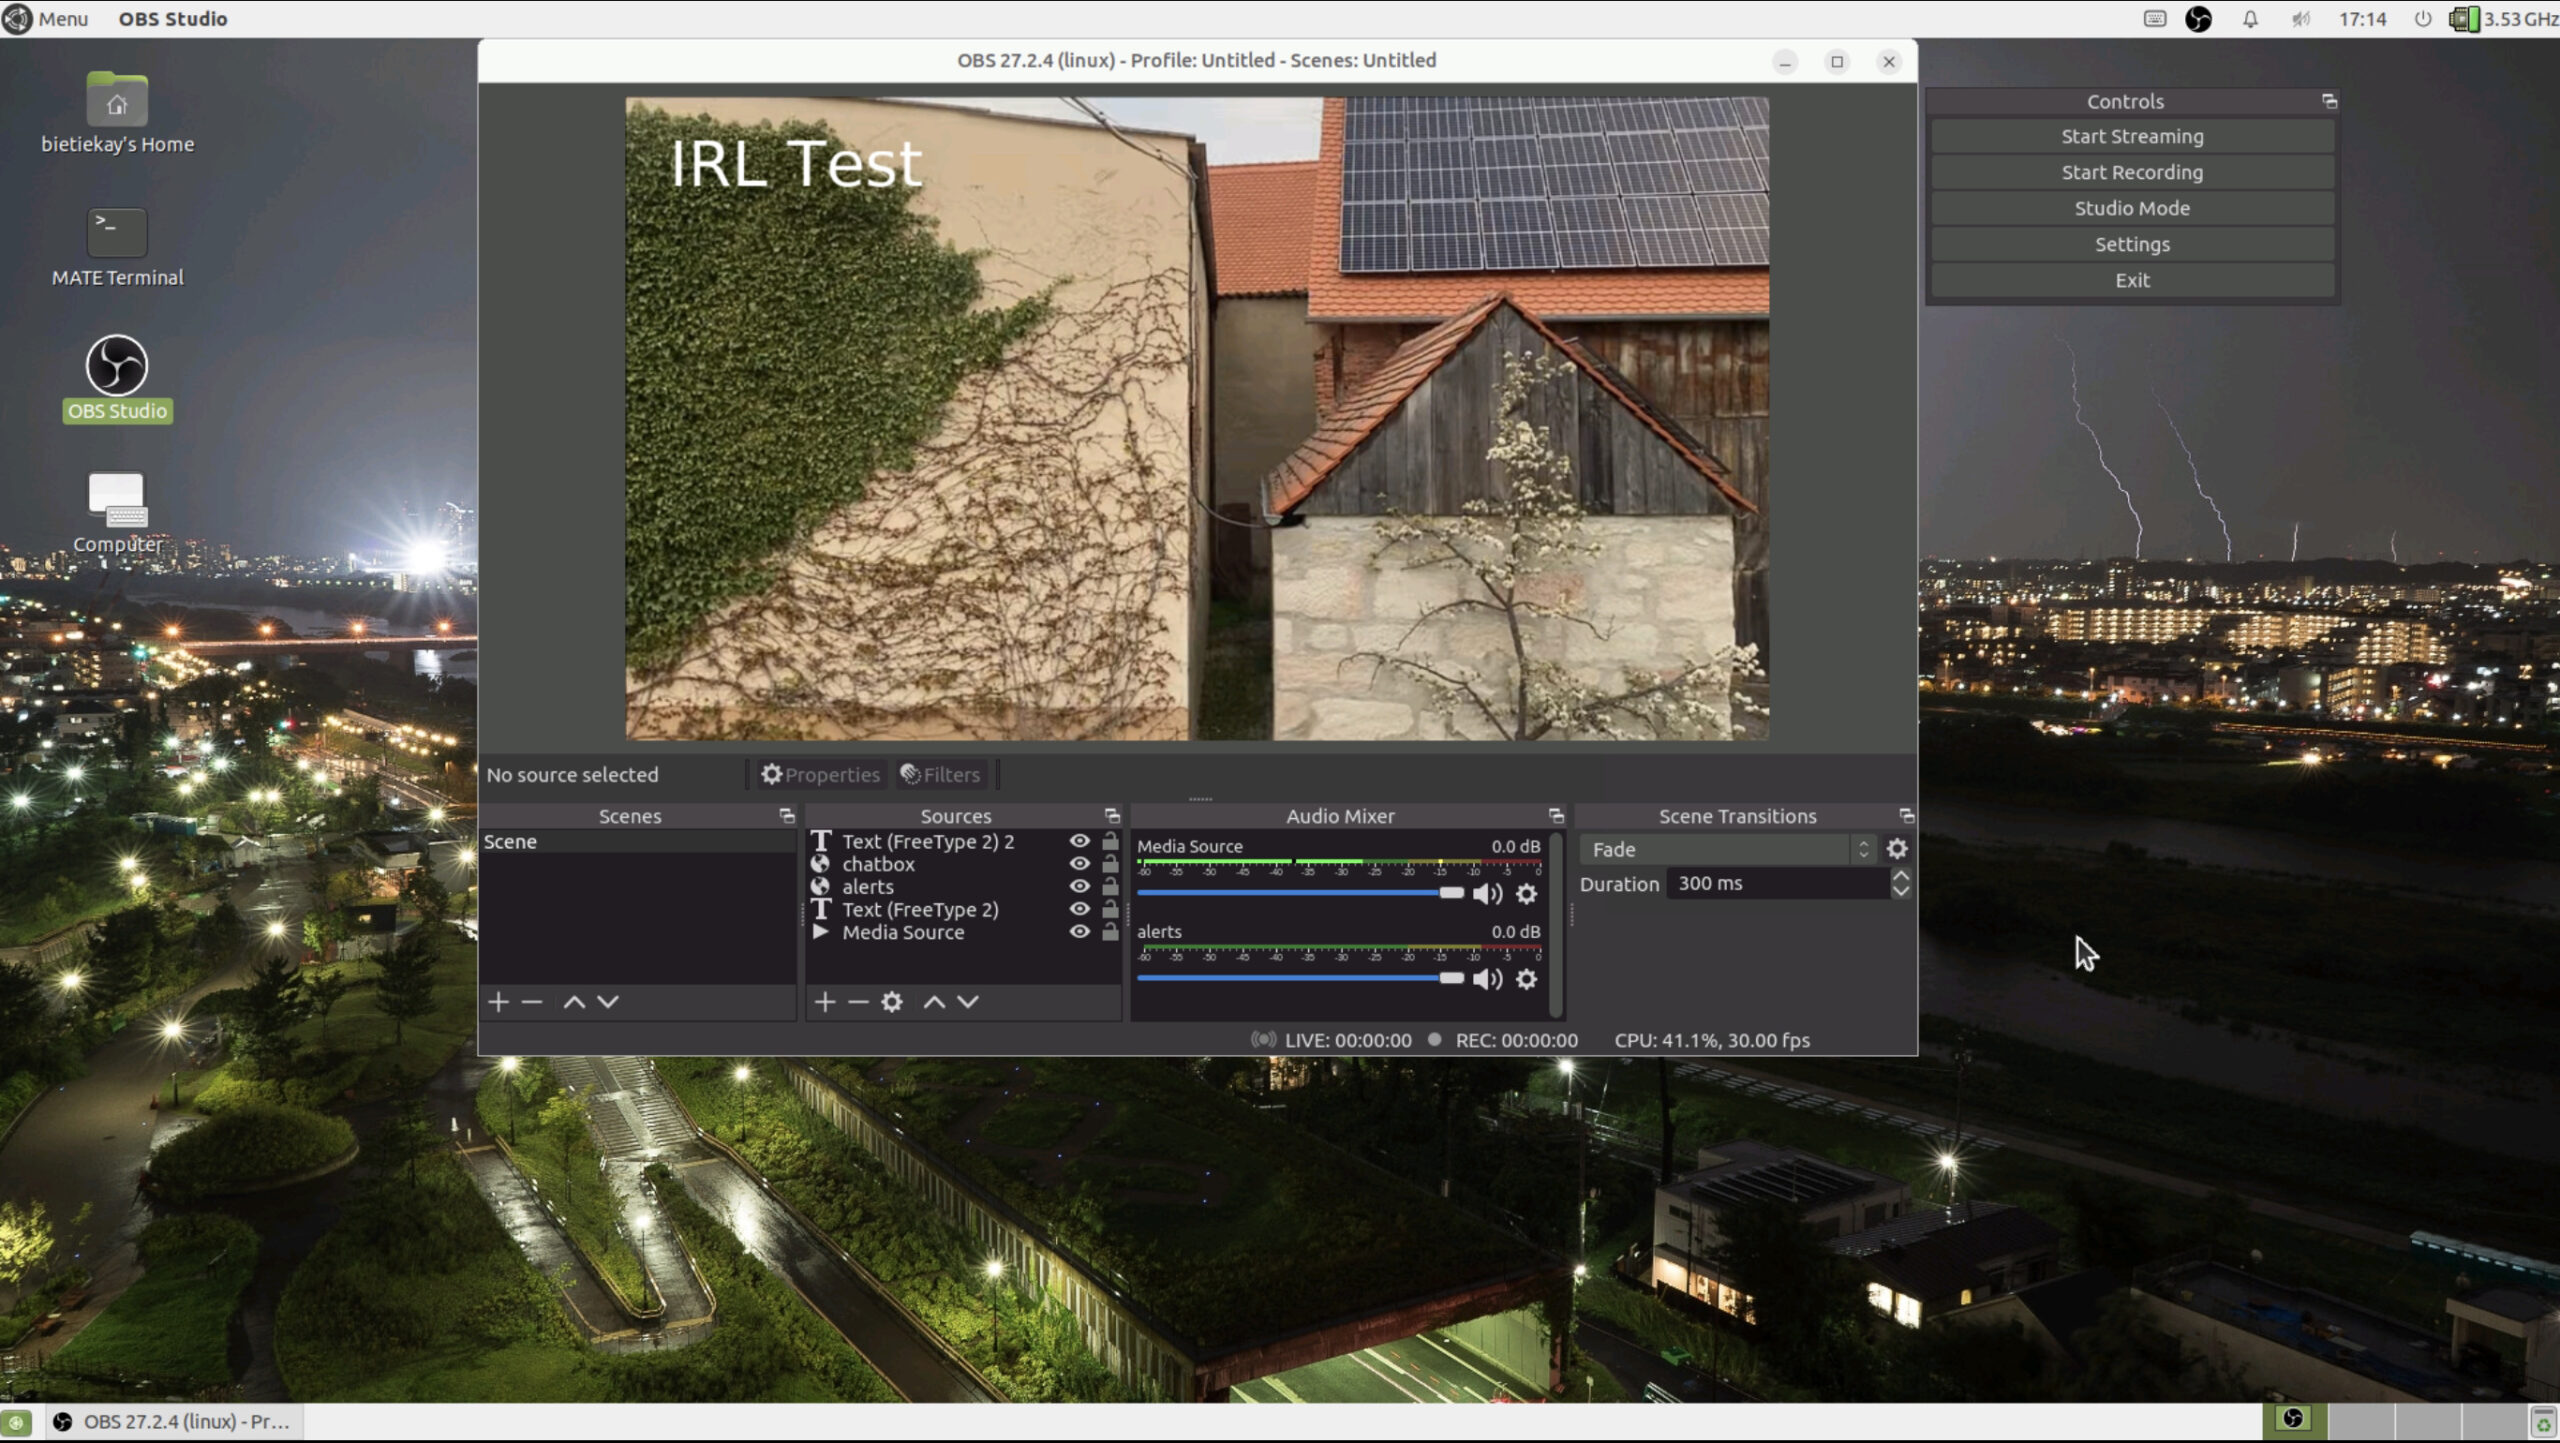
look at this nice OBS Studio running on Linux inside a Docker Container on a root server on the other side of the country…
So far so good. OBS offers the ability to define multiple scenes to switch between during a live stream.
These IRL streamers usually have one scene for when they are starting their stream and two more scenes for when they are having a solid connection from their camera/mobile setup and when they are currently experiencing connection issues.
All of the streamers seemingly use the same tooling when it comes to automatically switch between the different scenes depending on their connectivity state. This tool unfortunately is only available for Windows – not for Linux or macOS.
So I thought I give it a shot and write a platform independent one. Nothing wrong with understanding a bit more about the technicalities of live streaming, right?
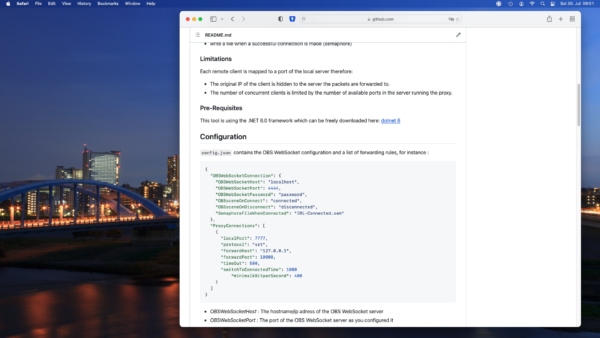
It runs on Linux, Windows, macOS as I have used the .NET framework 6.0 to create it. It is all open source and essentially just a bit of glue and logic around another open source tool called “netproxy” and OBS WebSocket.net.
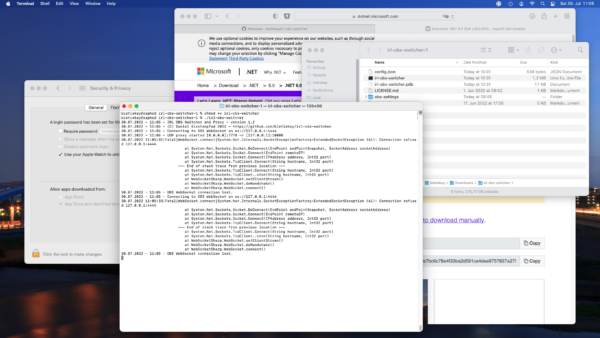
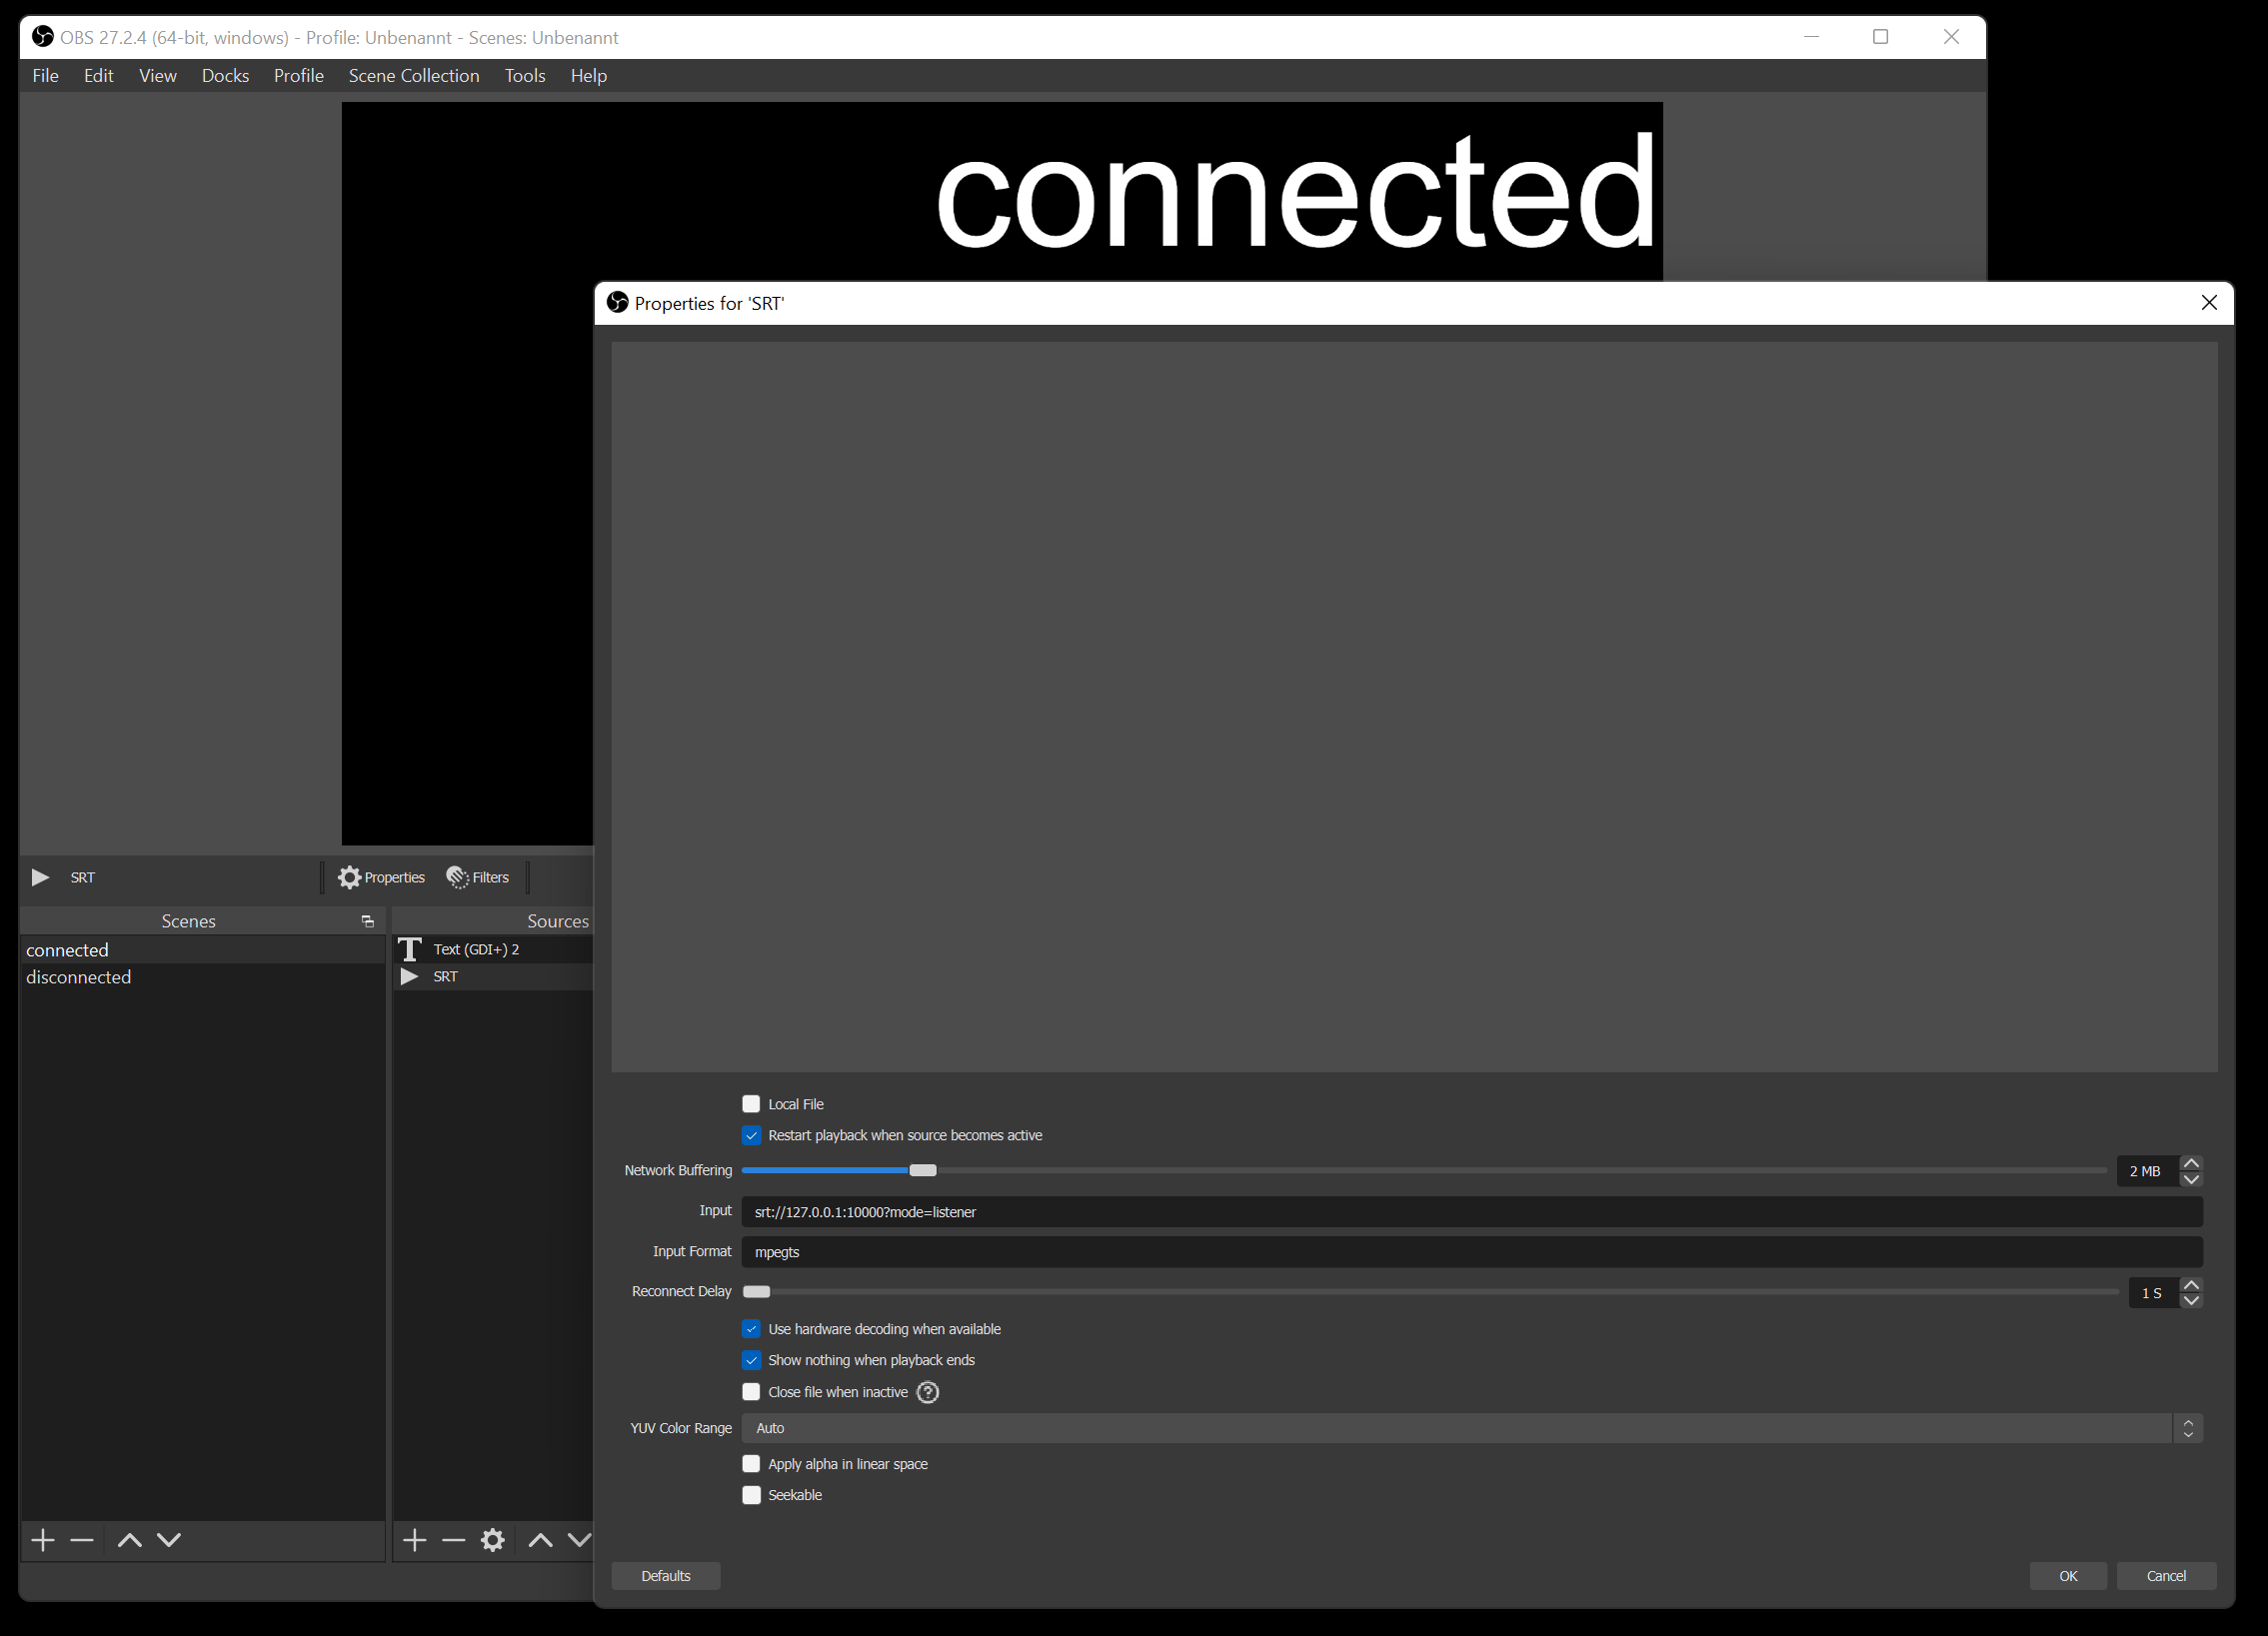
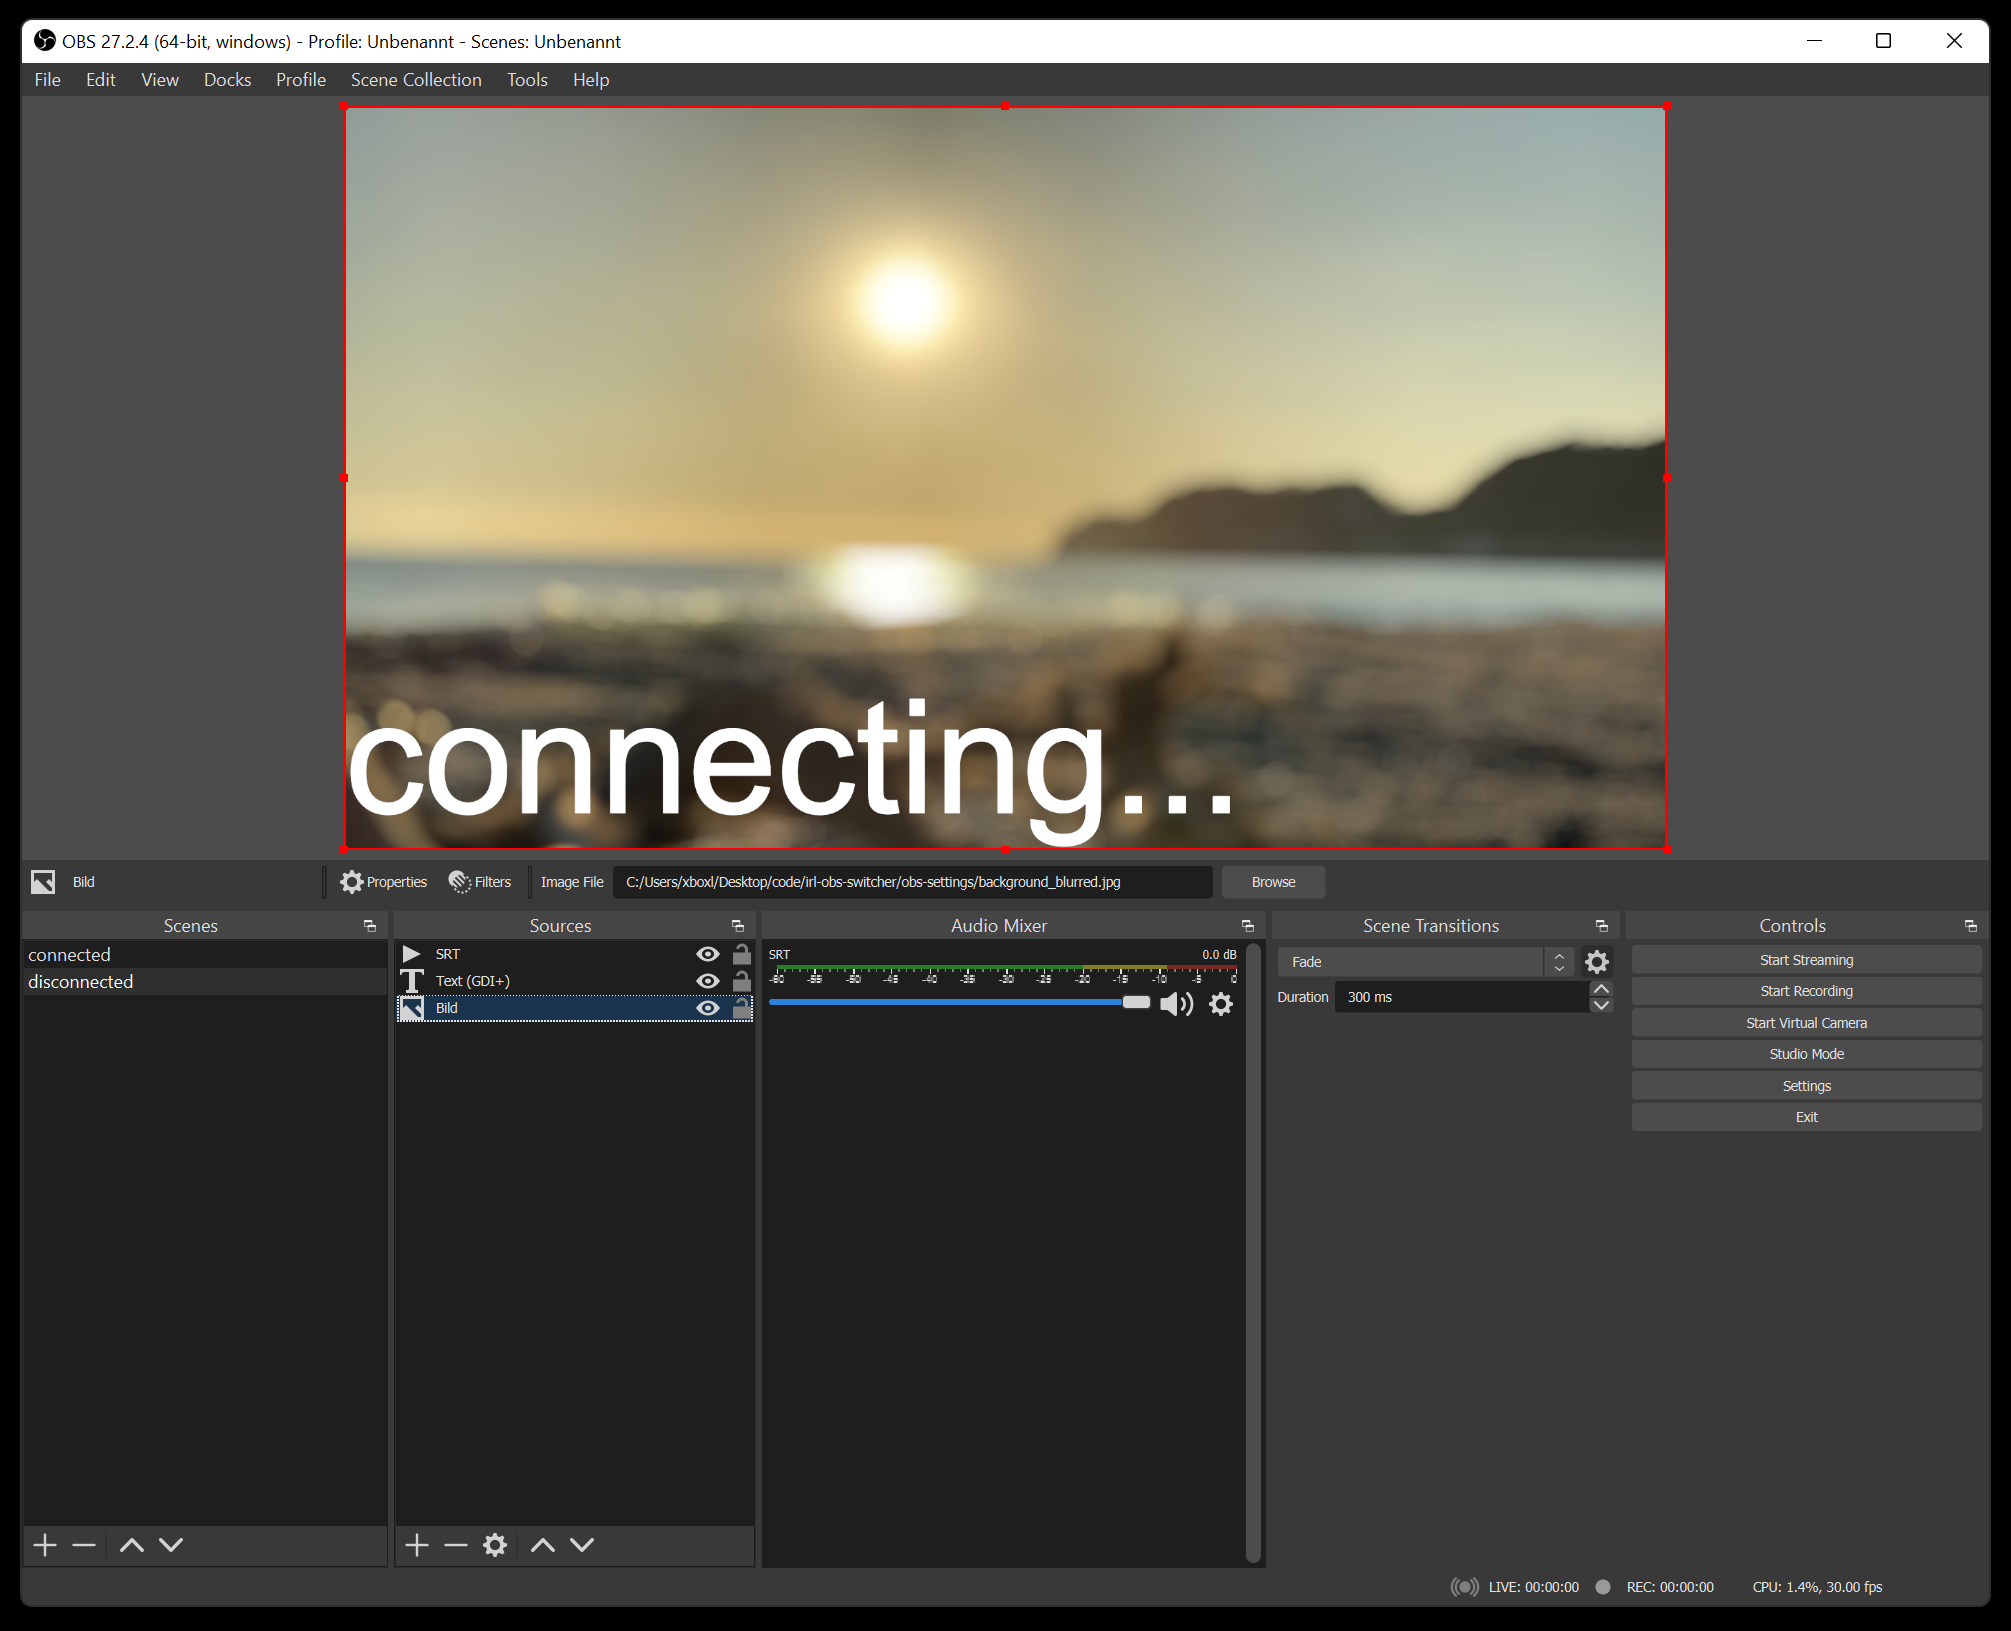
My tool basically runs on all sorts of platforms – including Linux, Windows and macOS. I run it inside the docker container with the OBS Studio. It essentially proxies all data to OBS and monitors wether or not the connection is established or currently disconnected. Furthermore it can be configured to switch scenes in OBS. So depending on wether there is a working connection or not it will switch between a “connected” and “disconnected” scene all automatically.
the “connected” scene configured as an SRT media source
So when you are out and about live streaming your day this little tool takes care of controlling OBS Studio for you.
the “disconnected” scene configured to play a nice beach sunset and quiet music to calm people down as the live streamer reconnects…
Gleich zu Anfang habe ich mir meinen Stream so eingerichtet dass jeweils der aktuelle Spieler-Counter immer im Bild zu sehen war. Ich finde das einfach eine ganze witzige Information vor allem für LuckyV-Interessierte.
rechts oben – die aktuelle Zahl der gleichzeitigen Spieler auf LuckyV
Meine ursprüngliche Implementierung war etwas kompliziert – zu kompliziert um sie einfach mit anderen zu teilen.
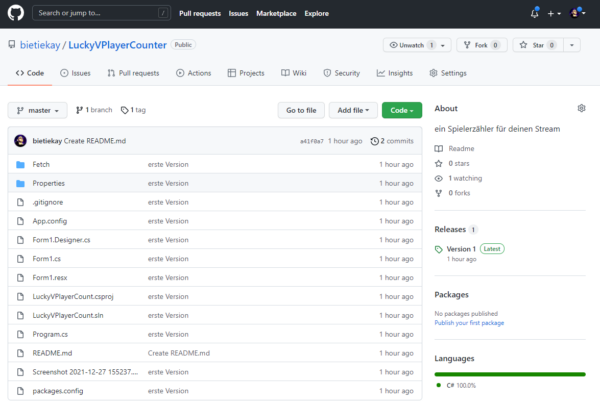
Daher habe ich mich entschlossen den Zähler in eine eigene Windows Applikation zu verpacken die von Streamern einfach verwendet und in OBS eingebunden werden kann.
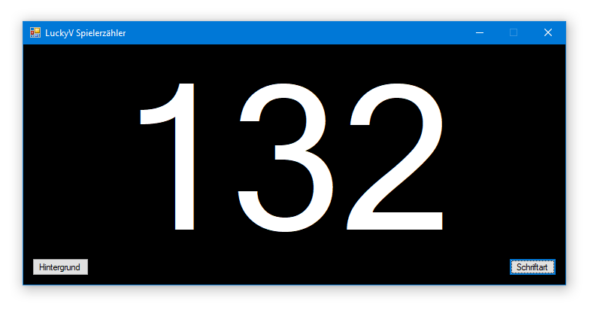
Starten und prüfen ob die Zahl auch angezeigt wird – es sollte ungefähr so aussehen:
Man kann das nun auf zwei Wegen einbinden.
Weg 1: Fensteraufnahme
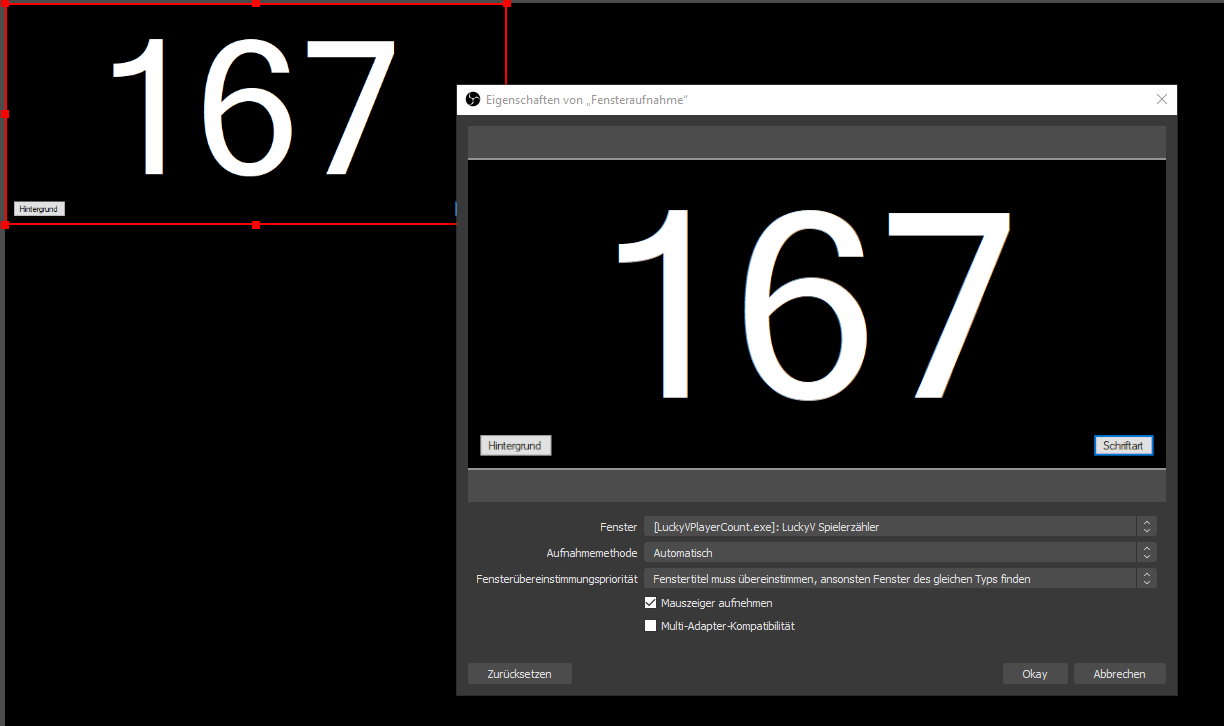
In der Applikation kann man Hintergrundfarben sowie Schriftart und Farbe konfigurieren. Wenn man das erledigt hat wie man es haben will wählt man im Quellenmenü “Fensteraufnahme” und dann das Applikationsfenster.
Fensteraufnahme
Diese Quelle kann man dann wie man möchte konfigurieren. z.B. mit Filtern um bis auf die Schrift alles transparent zu gestalten oder oder oder…
Weg 2: playercount.txt
Wenn die Applikation läuft aktualisiert sie ständig eine Datei “playercount.txt” im gleichen Ordner. Man kann nun OBS so konfigurieren dass diese Datei regelmässig ausgelesen und angezeigt wird.
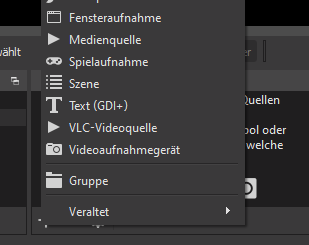
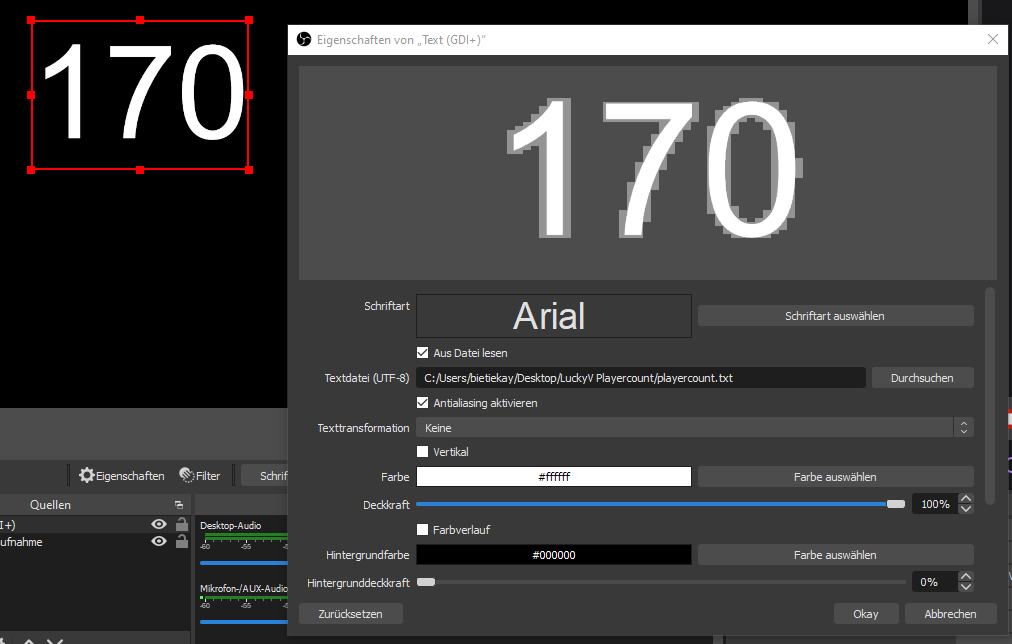
Dazu fügt man ein “Text (GDI+)” im Quellenmenü hinzu und konfiguriert diese Quelle so dass der Text aus einer Datei gelesen wird:
Hier kann man dann auch beliebig Schriftart, Größe und Farbe konfigurieren.
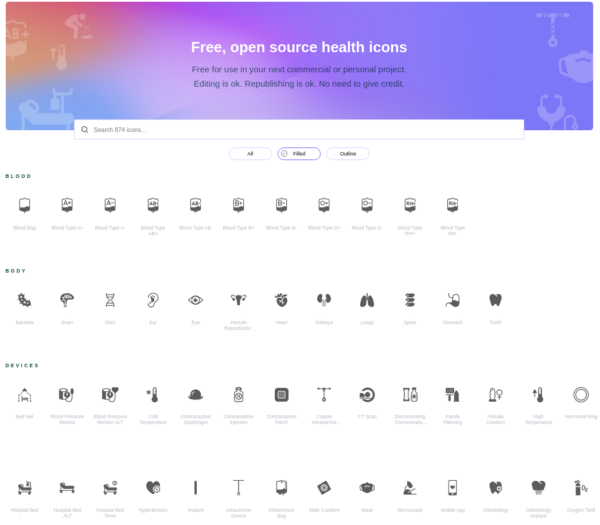
Found that nice heap of Icons that are free to use and high-quality:
Health Icons is a volunteer effort to create a ‘global good’ for health projects all over the world. These icons are available in the public domain for use in any type of project.
The project is hosted by the public health not-for-profit Resolve to Save Lives as an expression of our committment to offer the icons for free, forever.
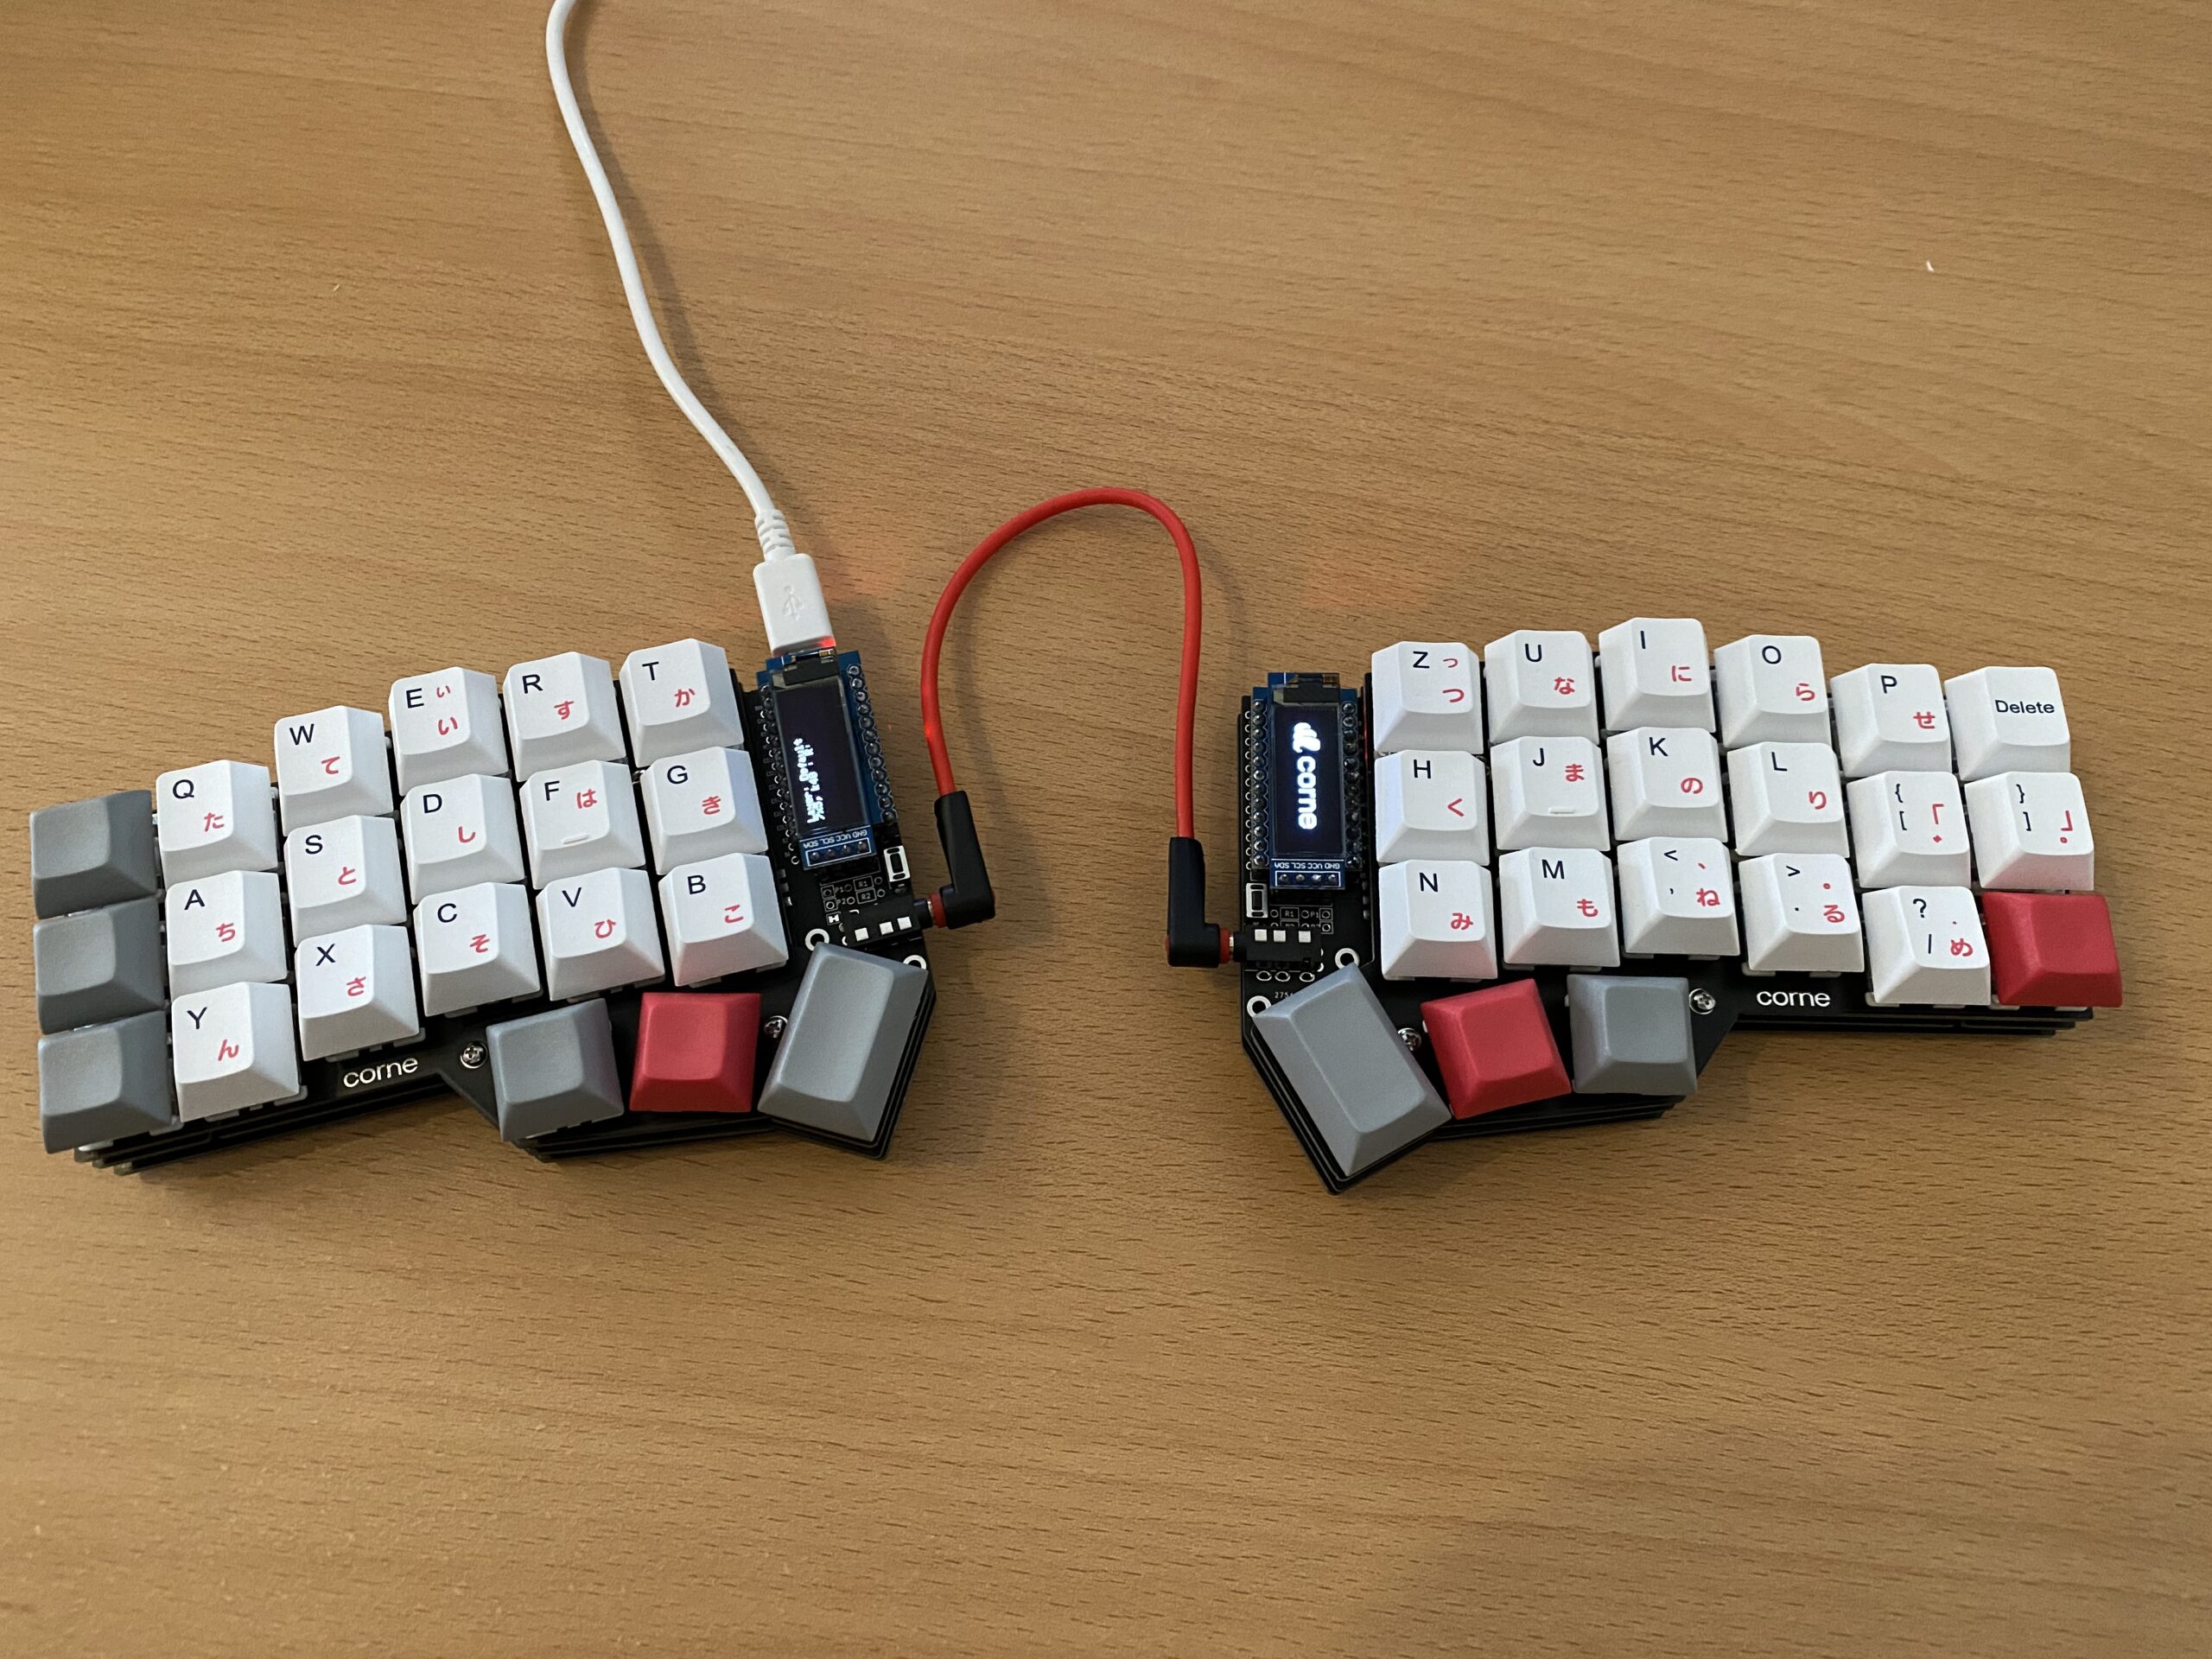
Since a picture says more than a thousand words, I give you the result first:
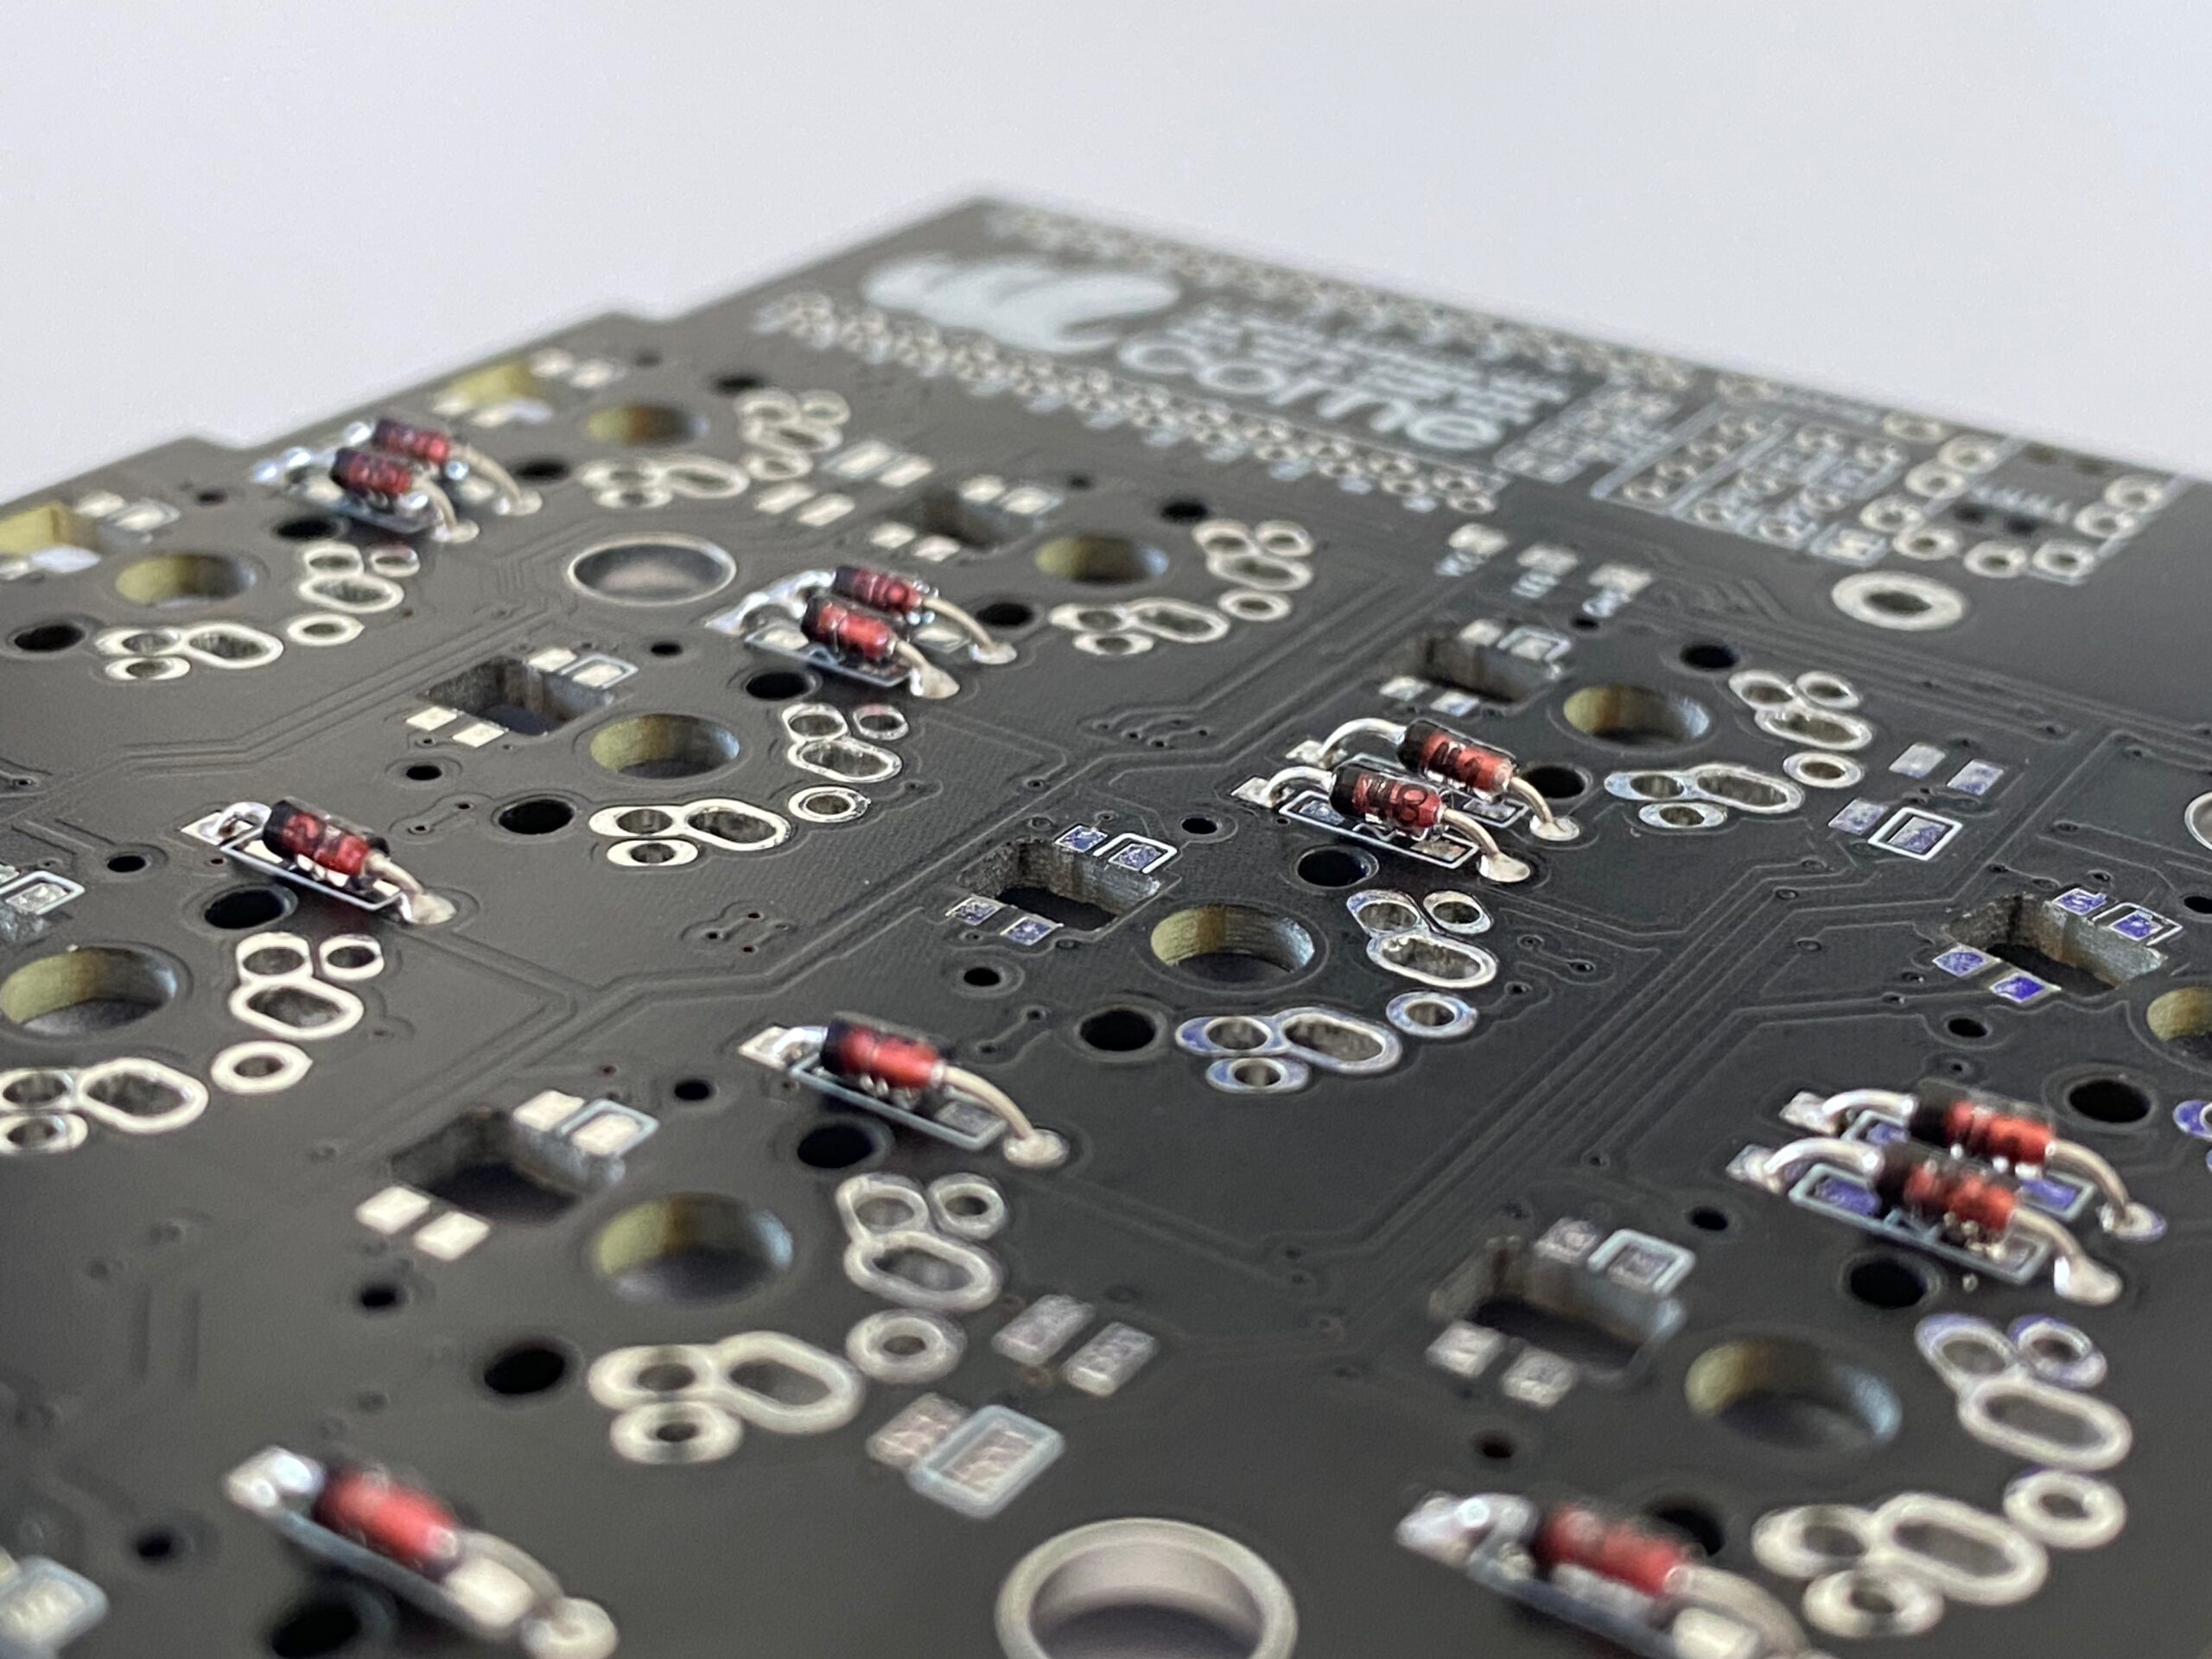
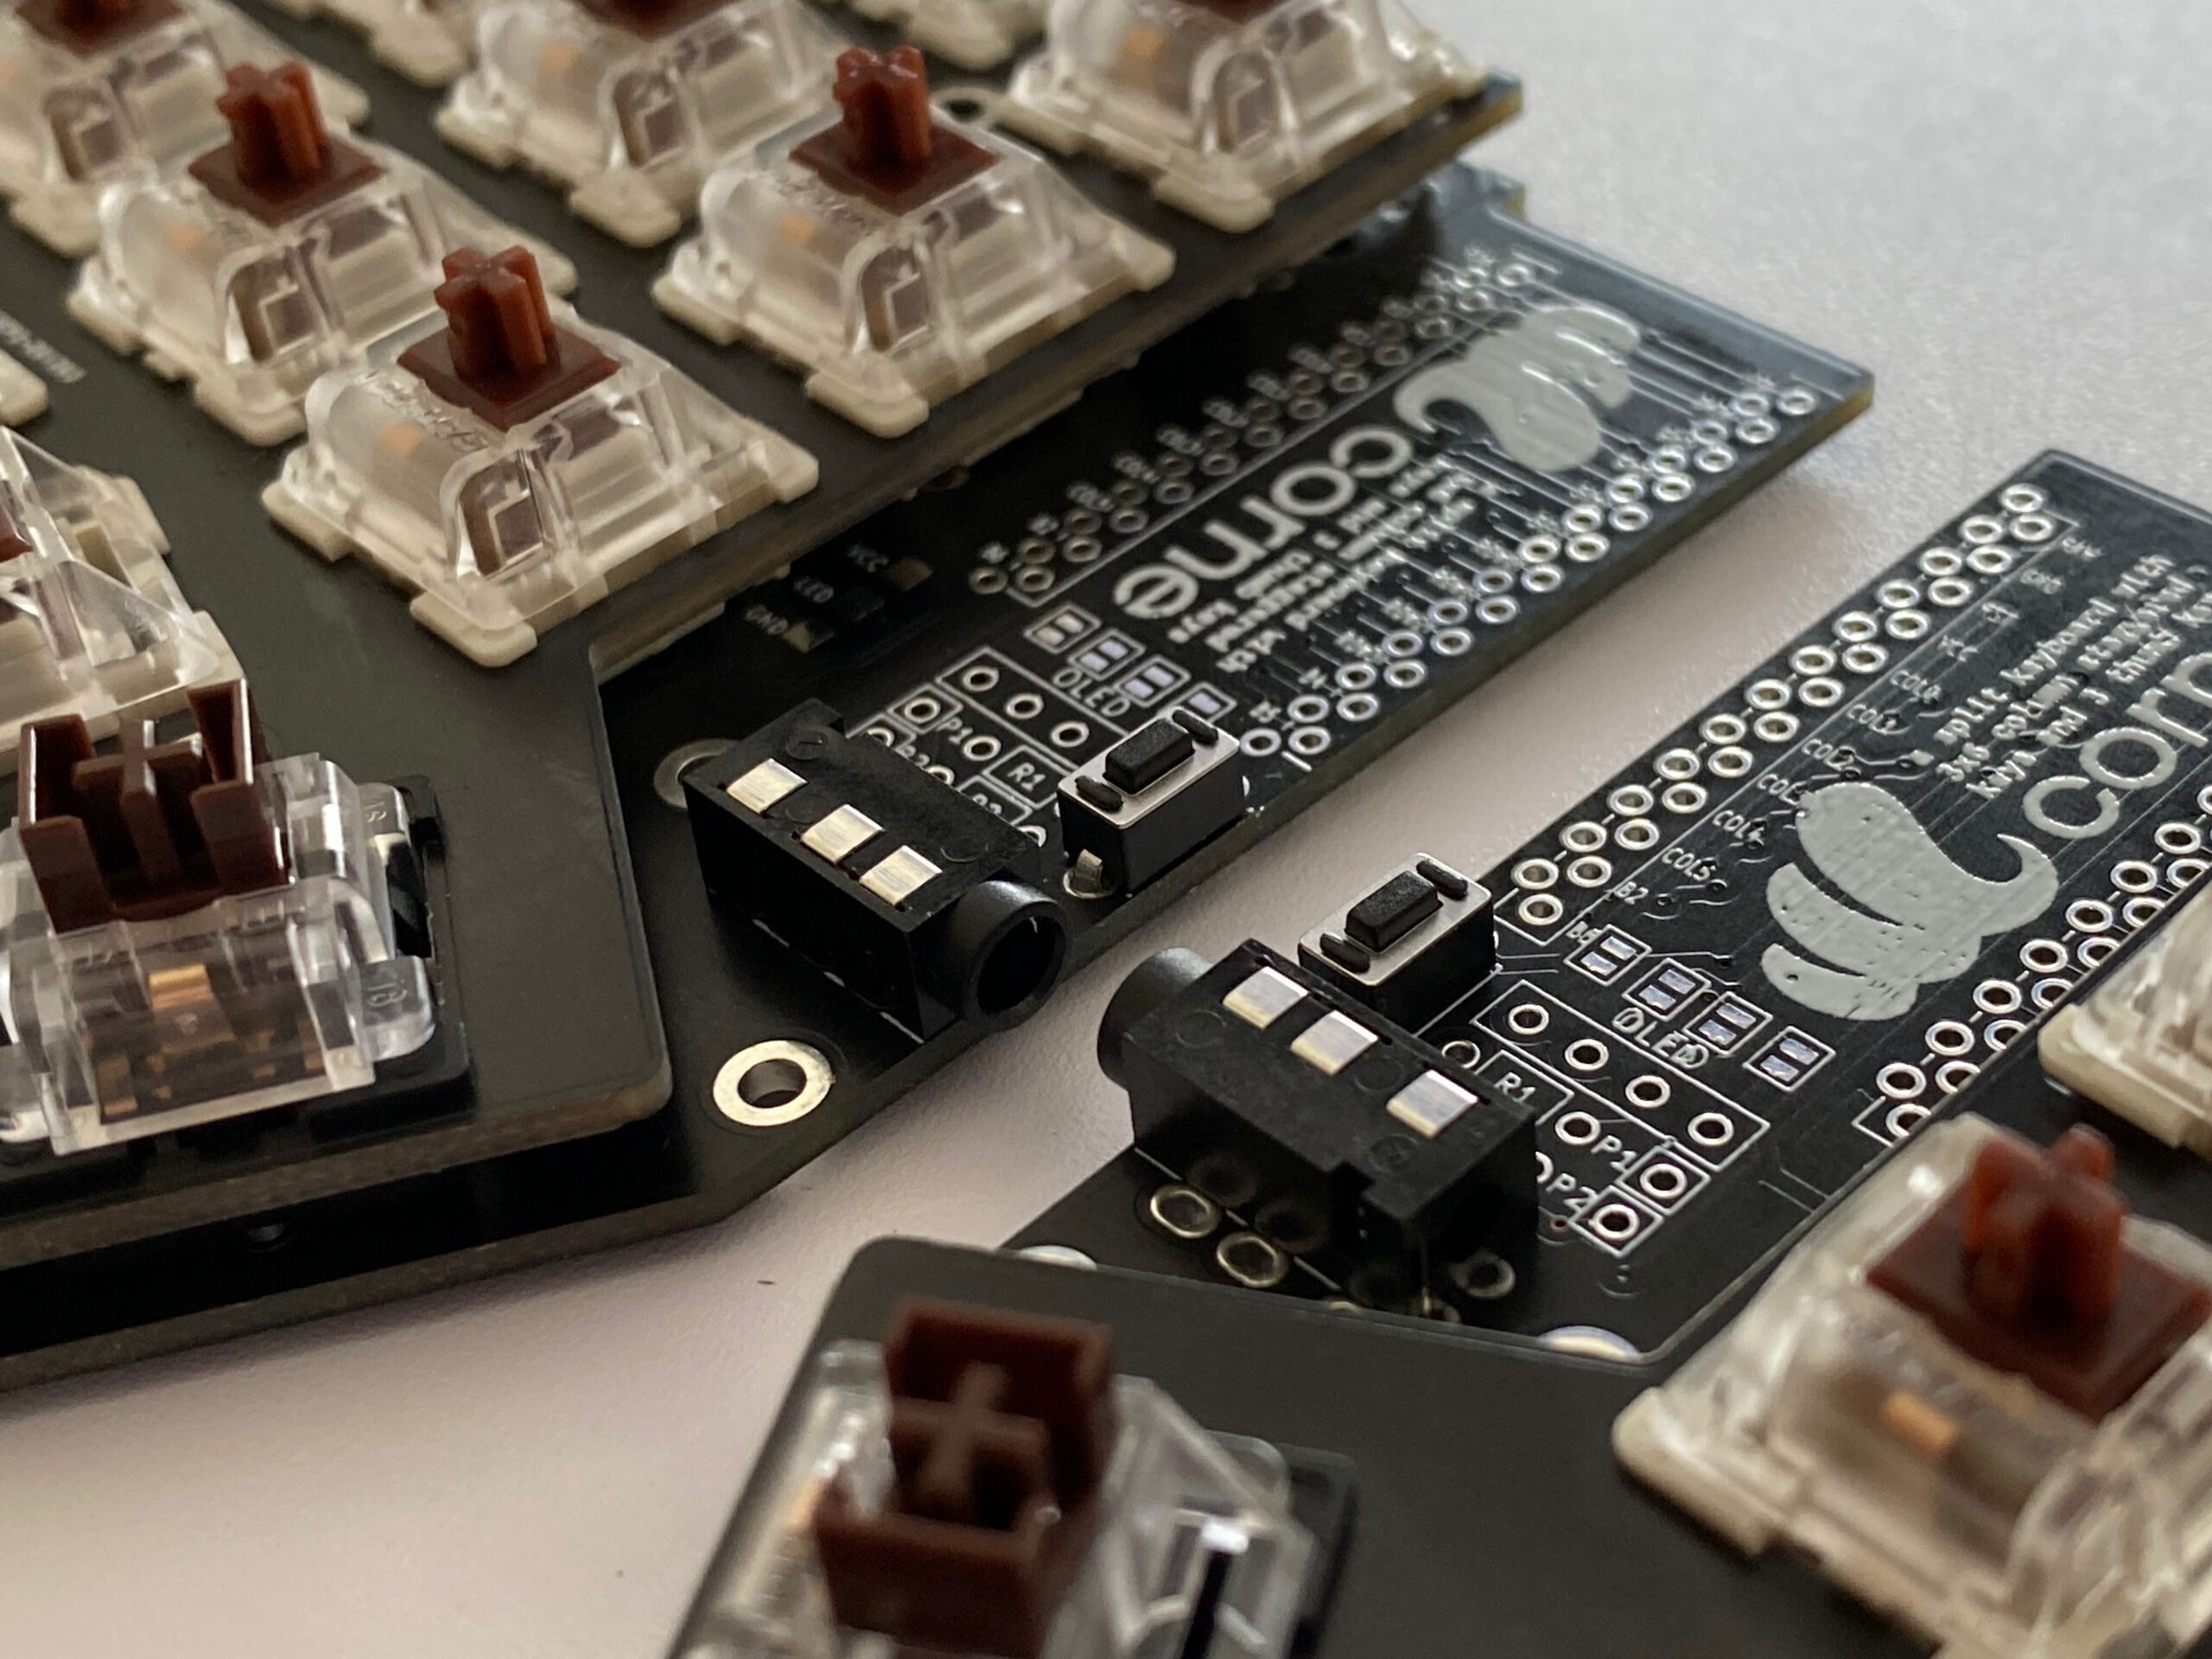
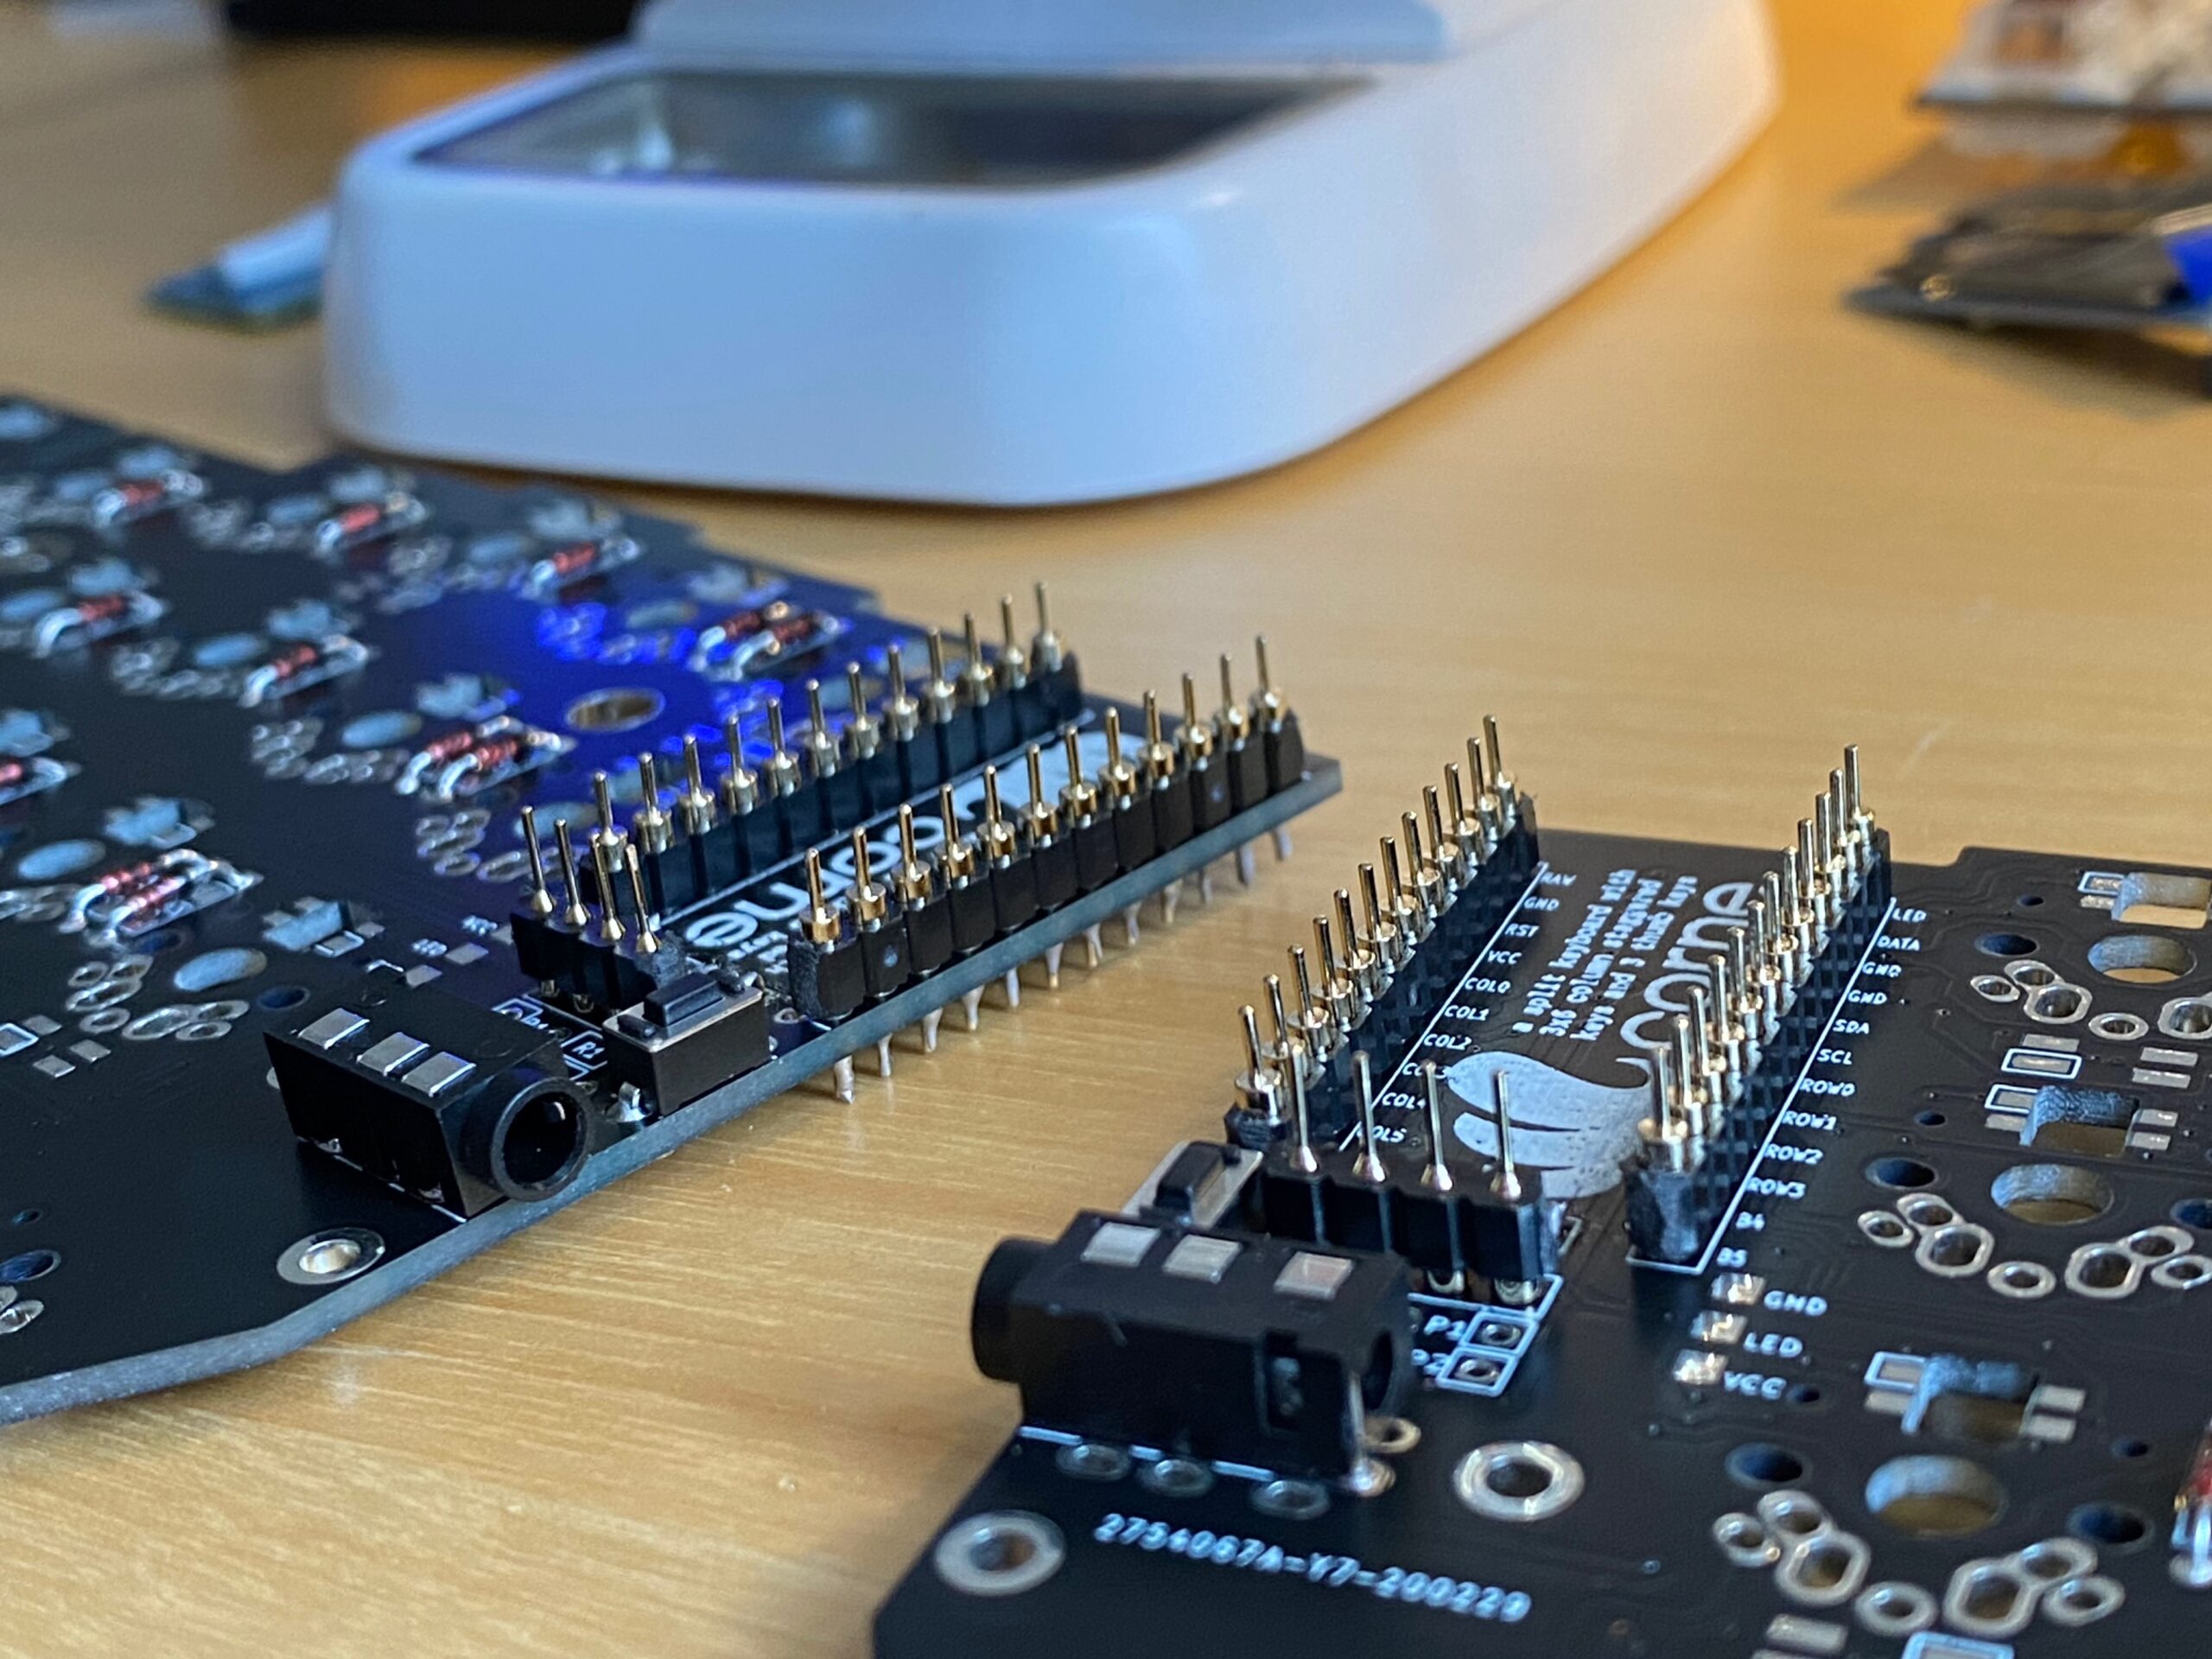
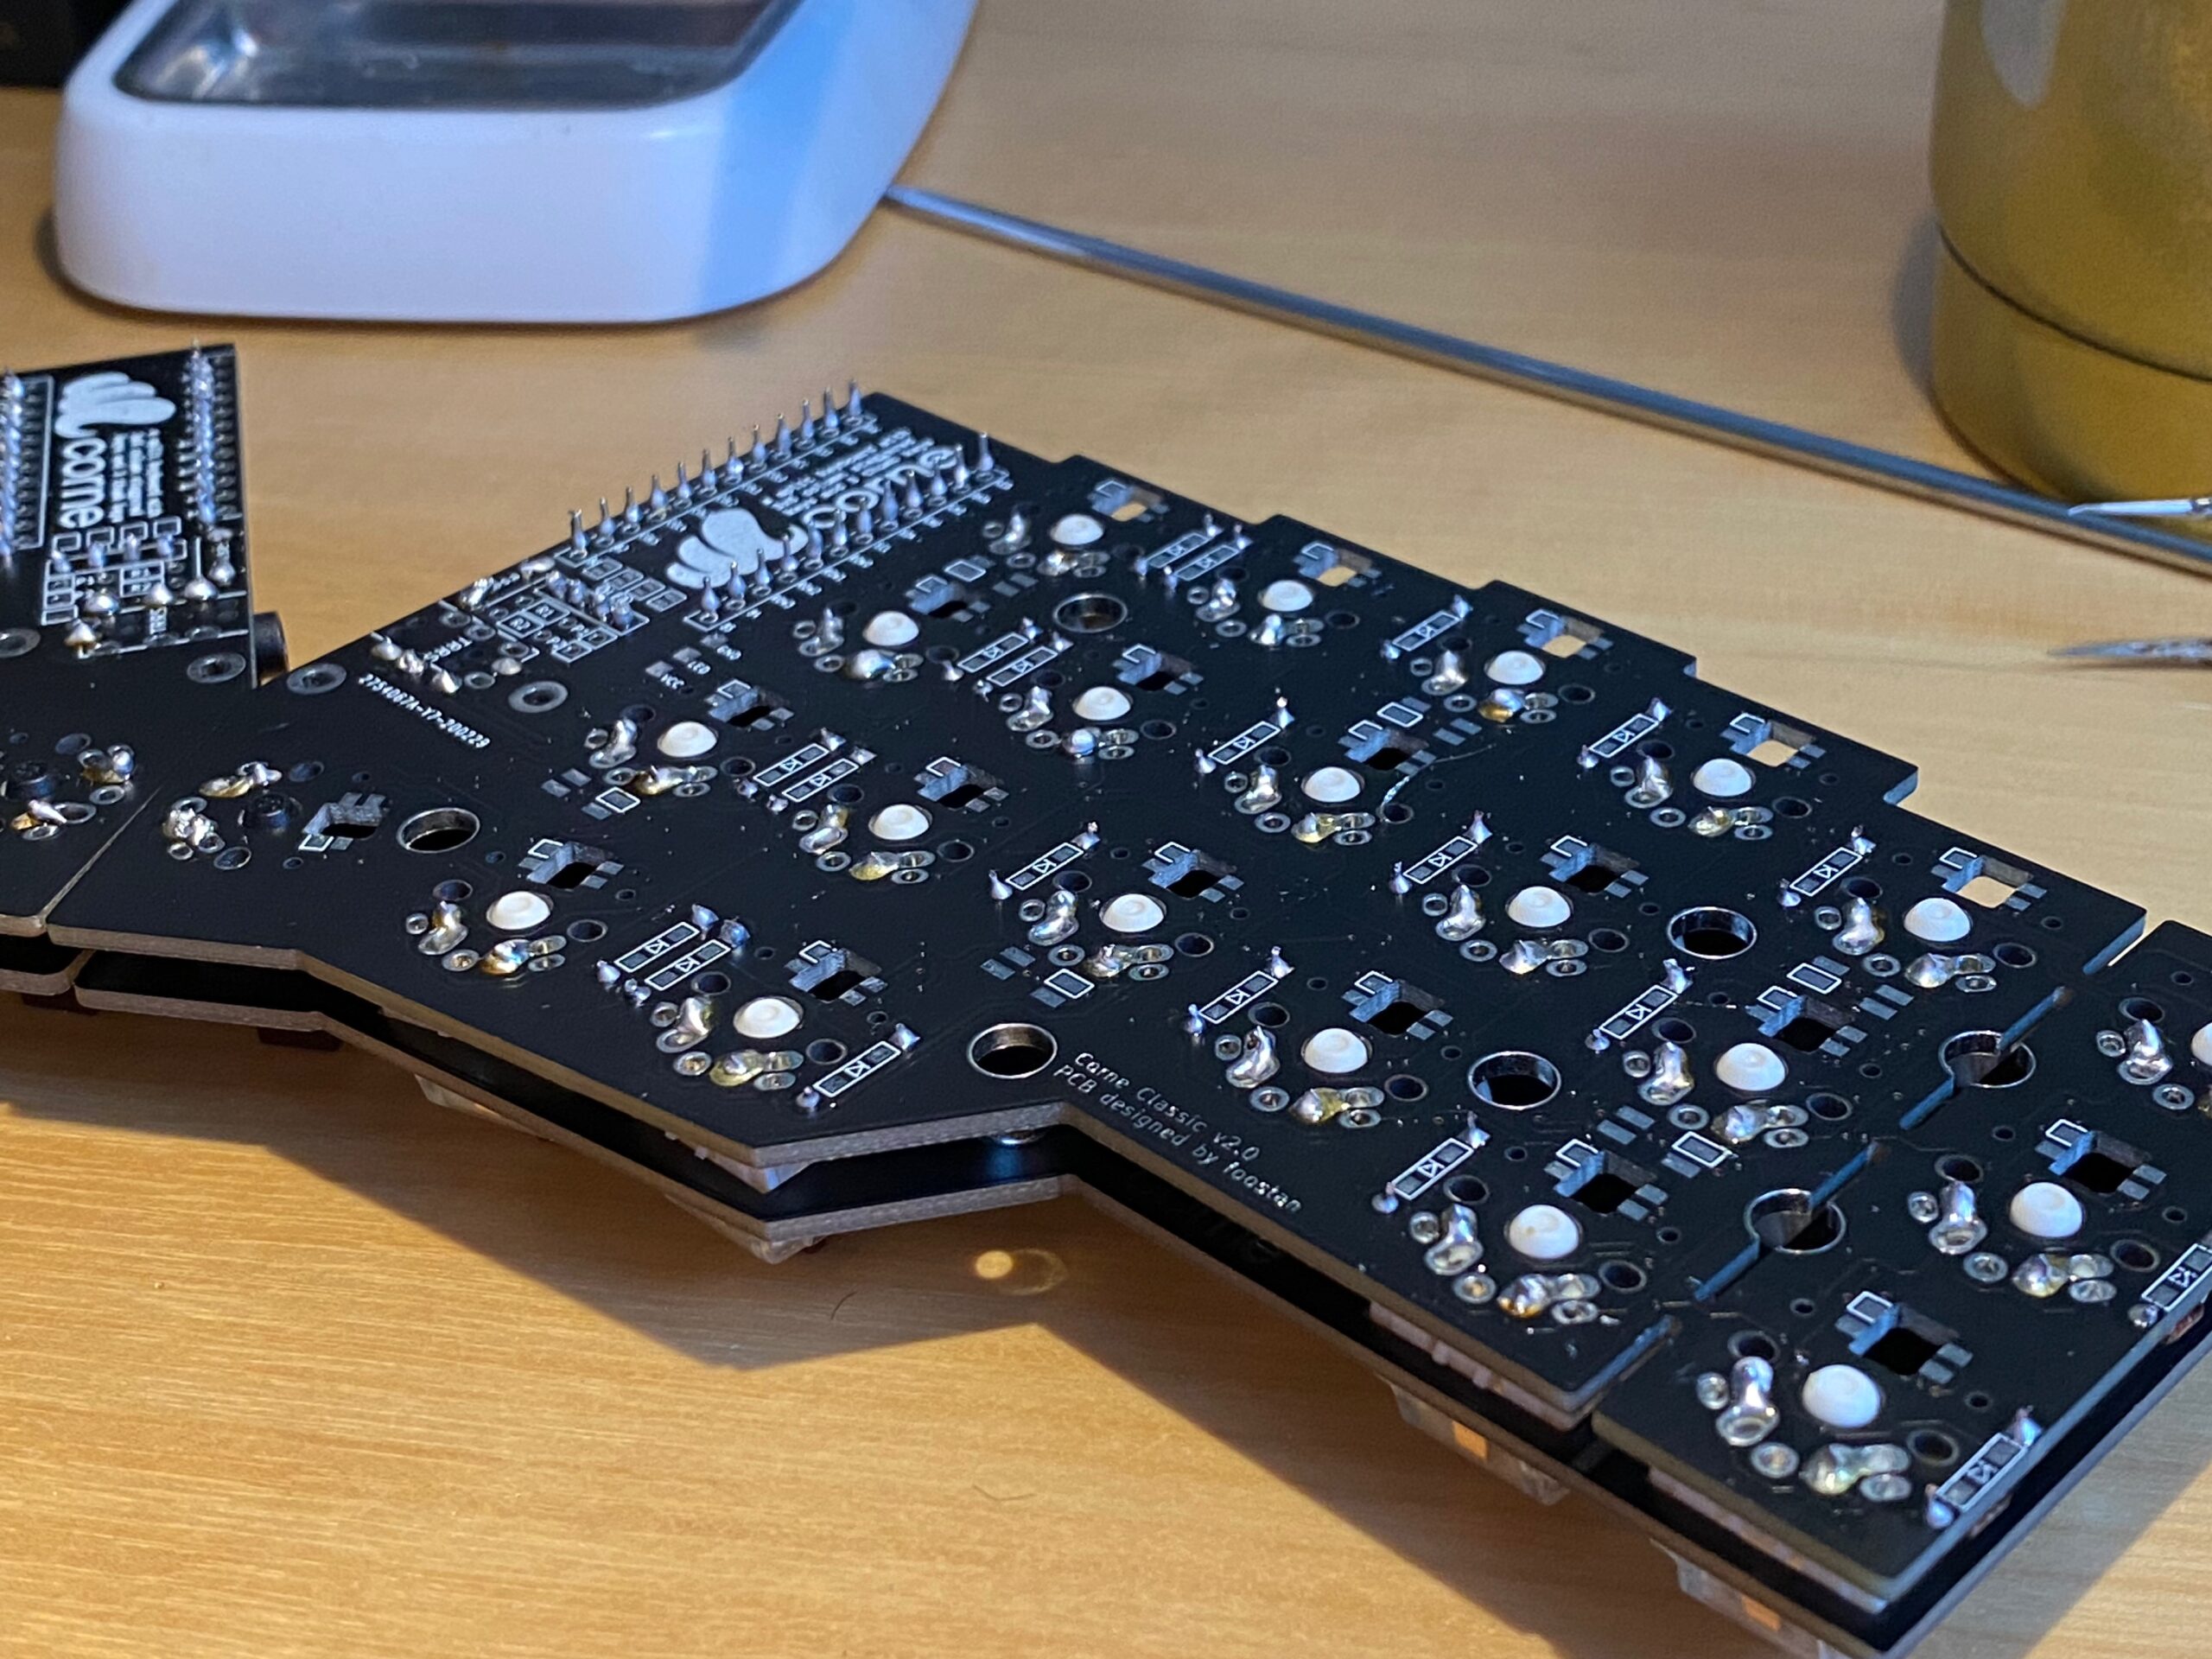
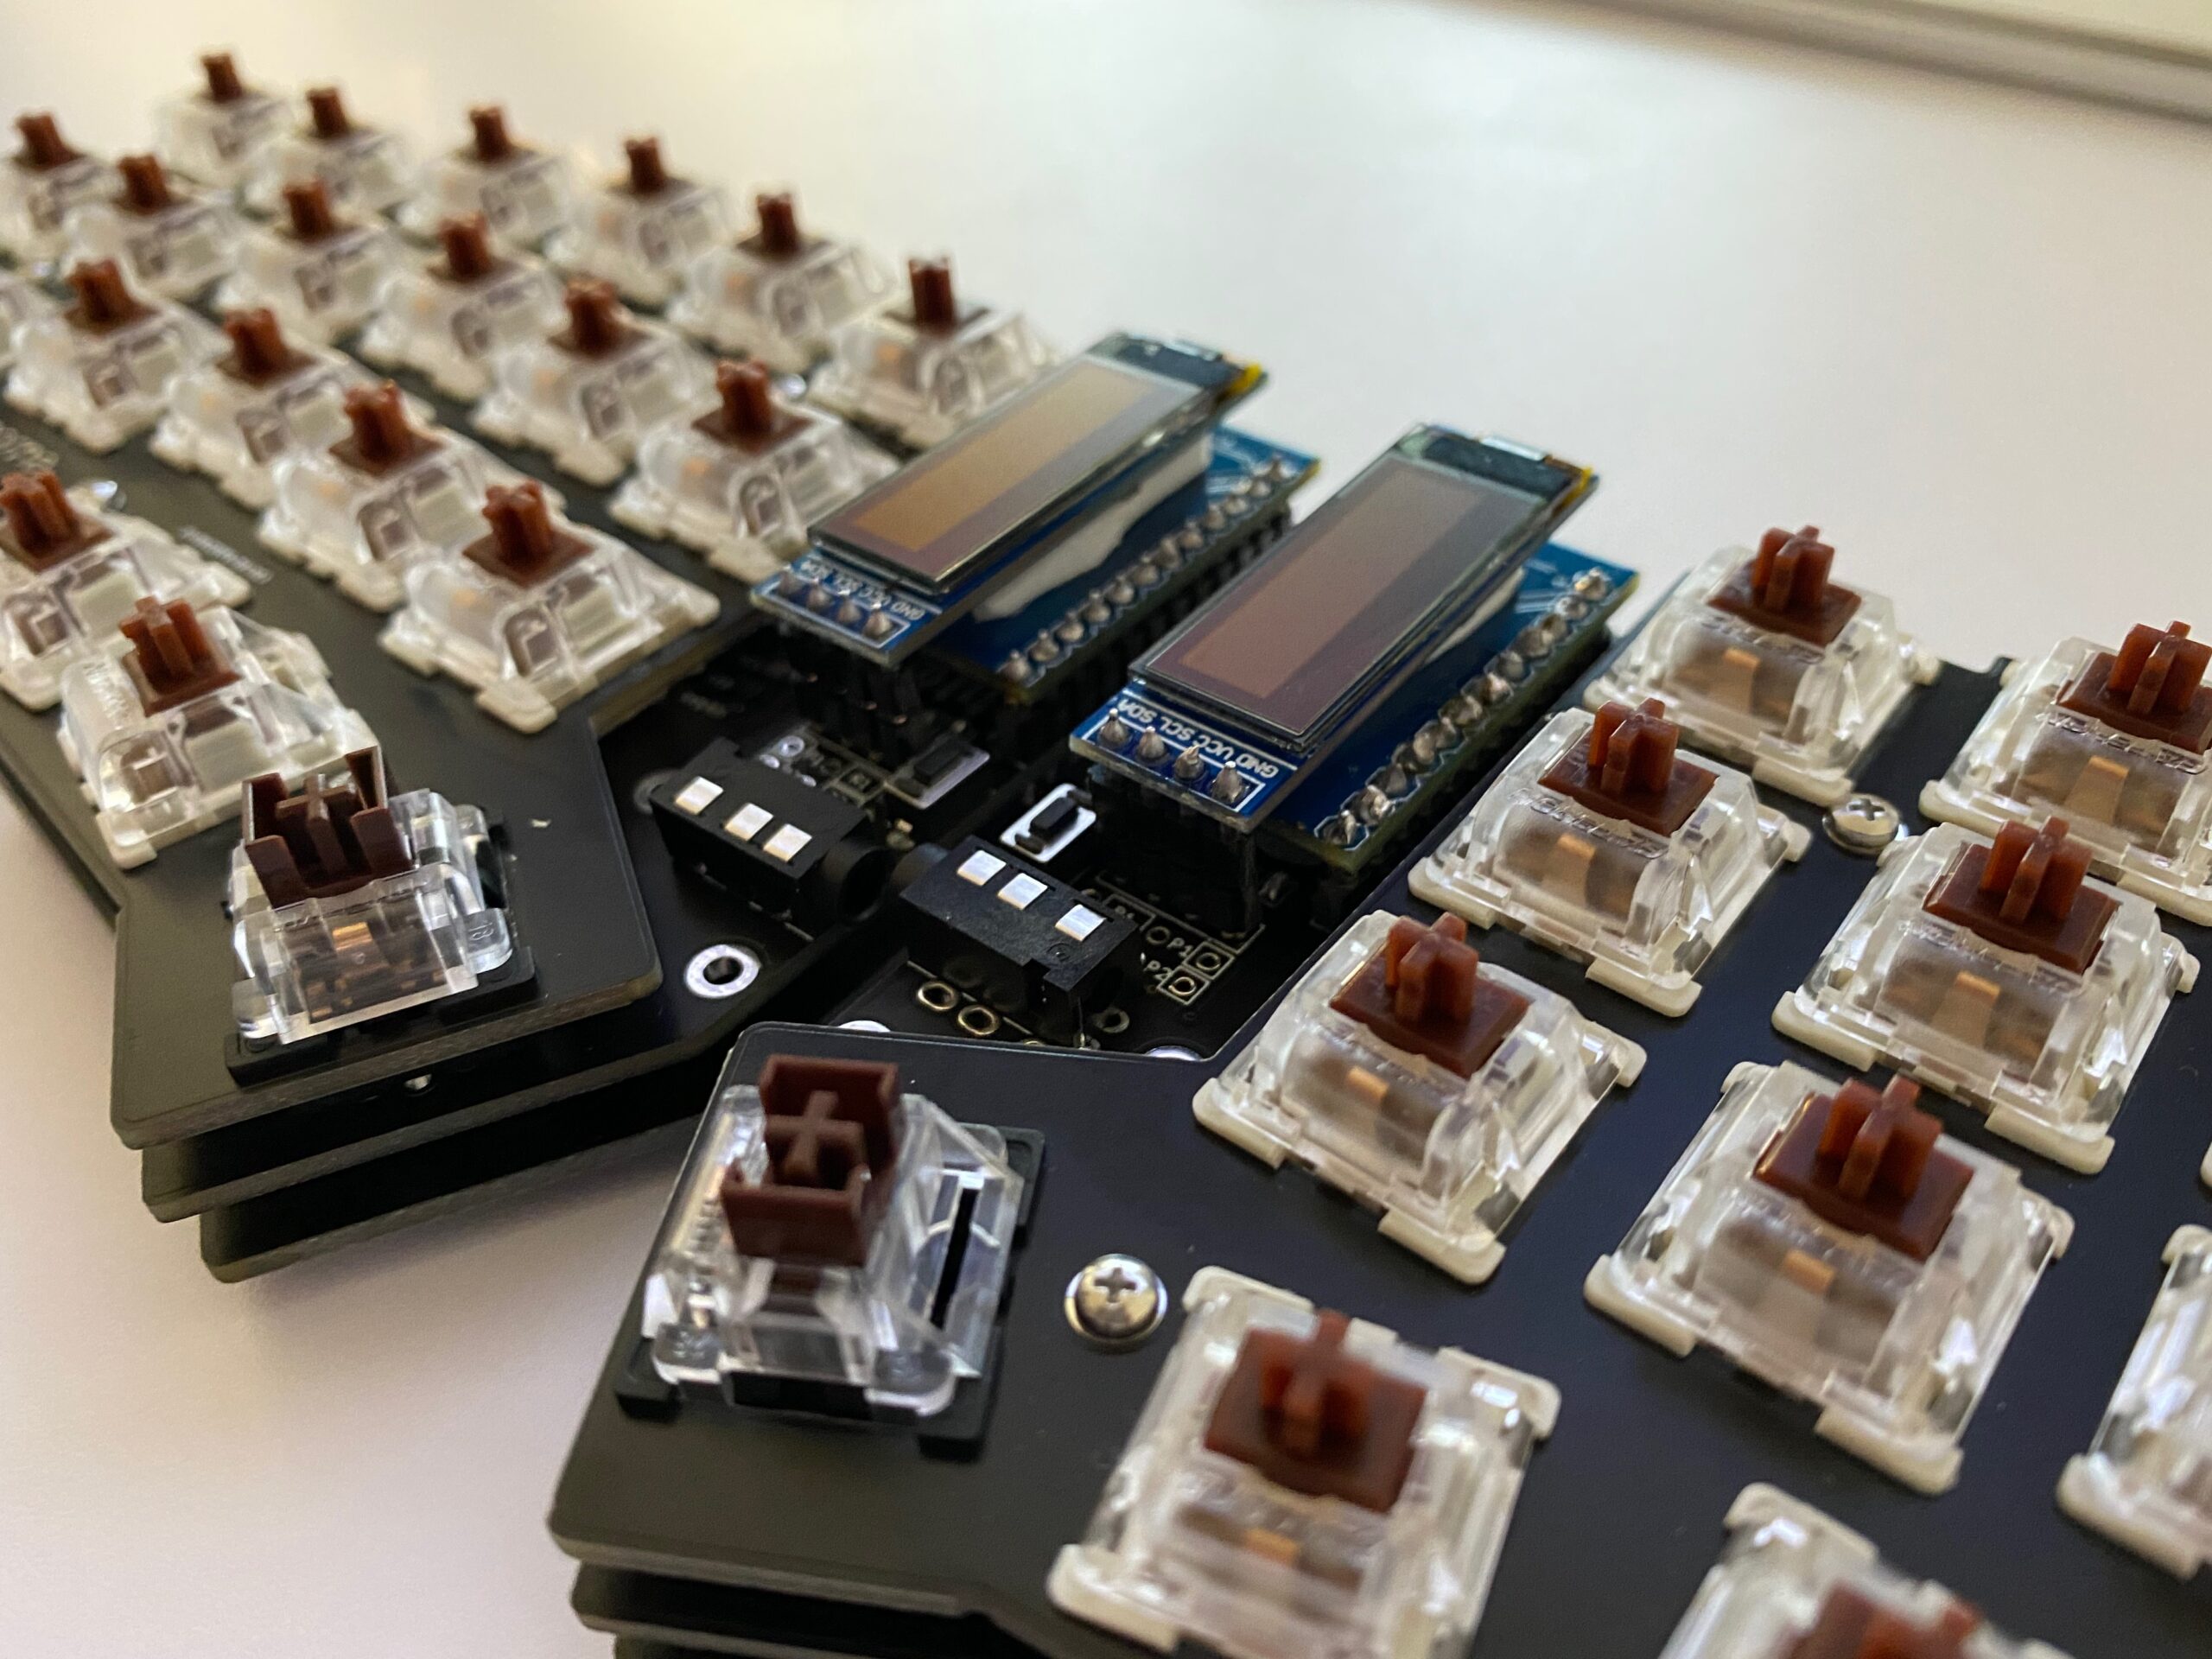
my crkbd based keyboard
This keyboard design is made from the ground up as open source and naturally is fully available as a GIT repository containing everything you need to start: PCB schematics, drawing, documentation and firmware source code.
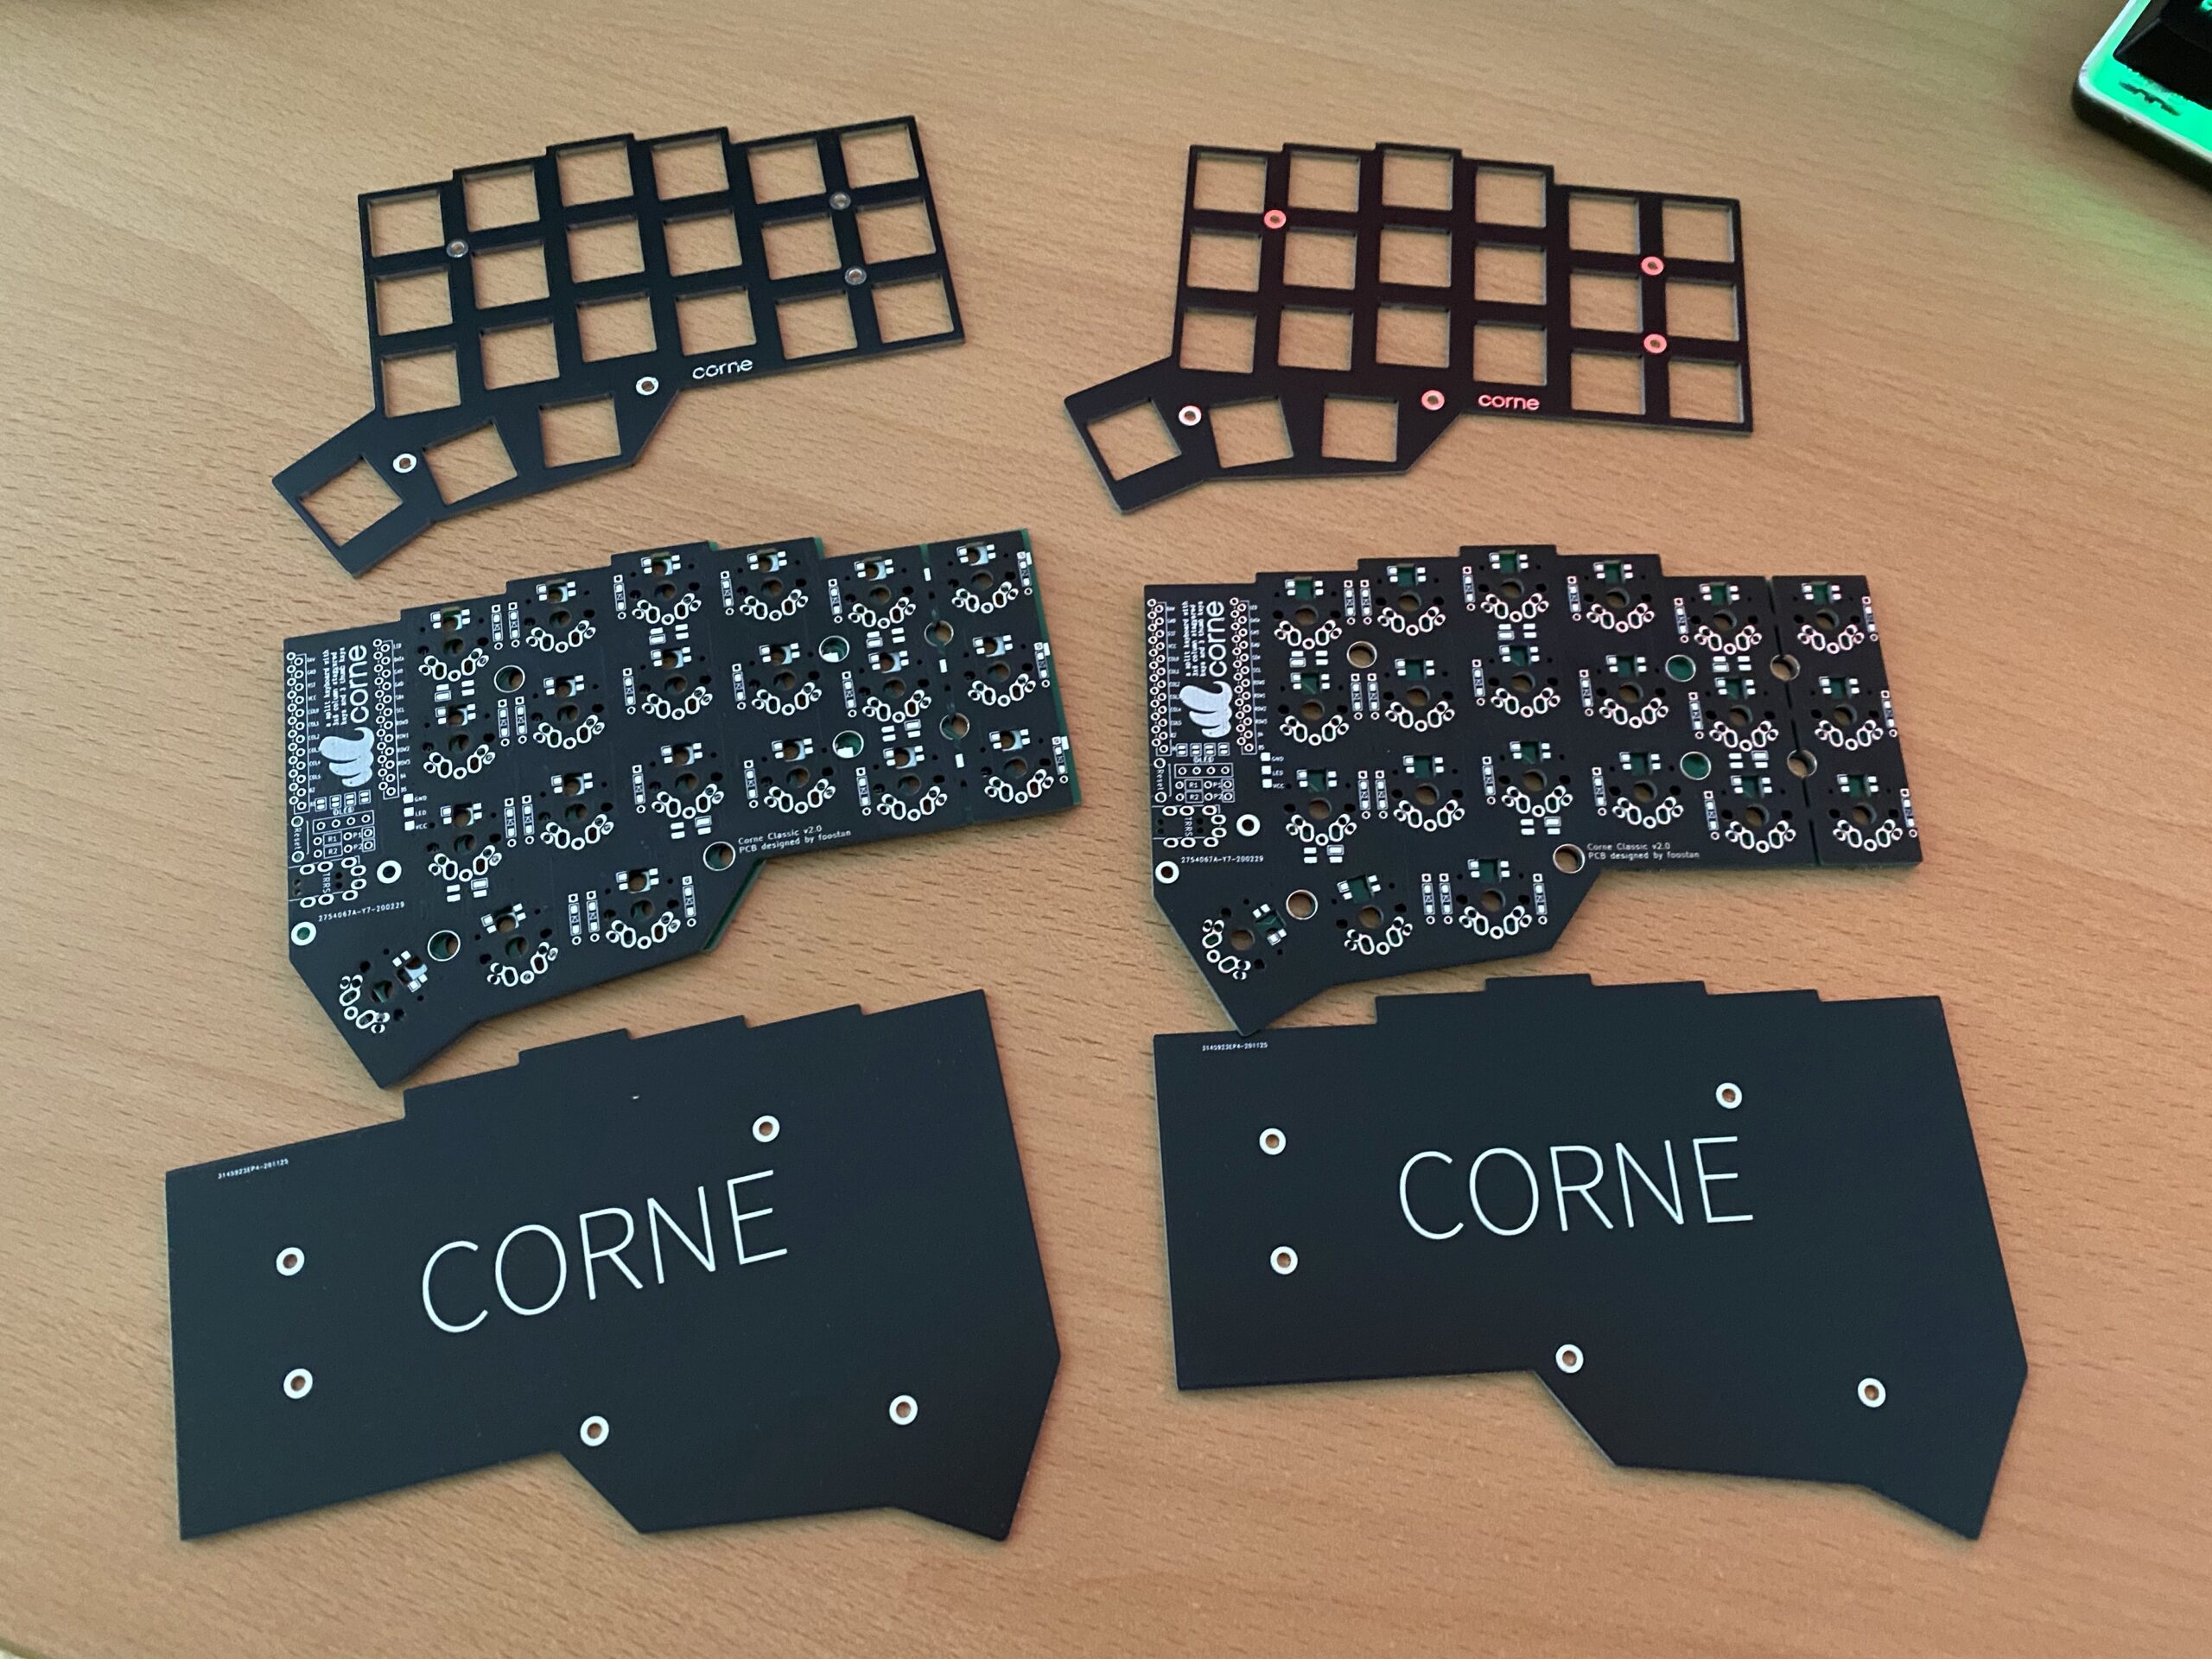
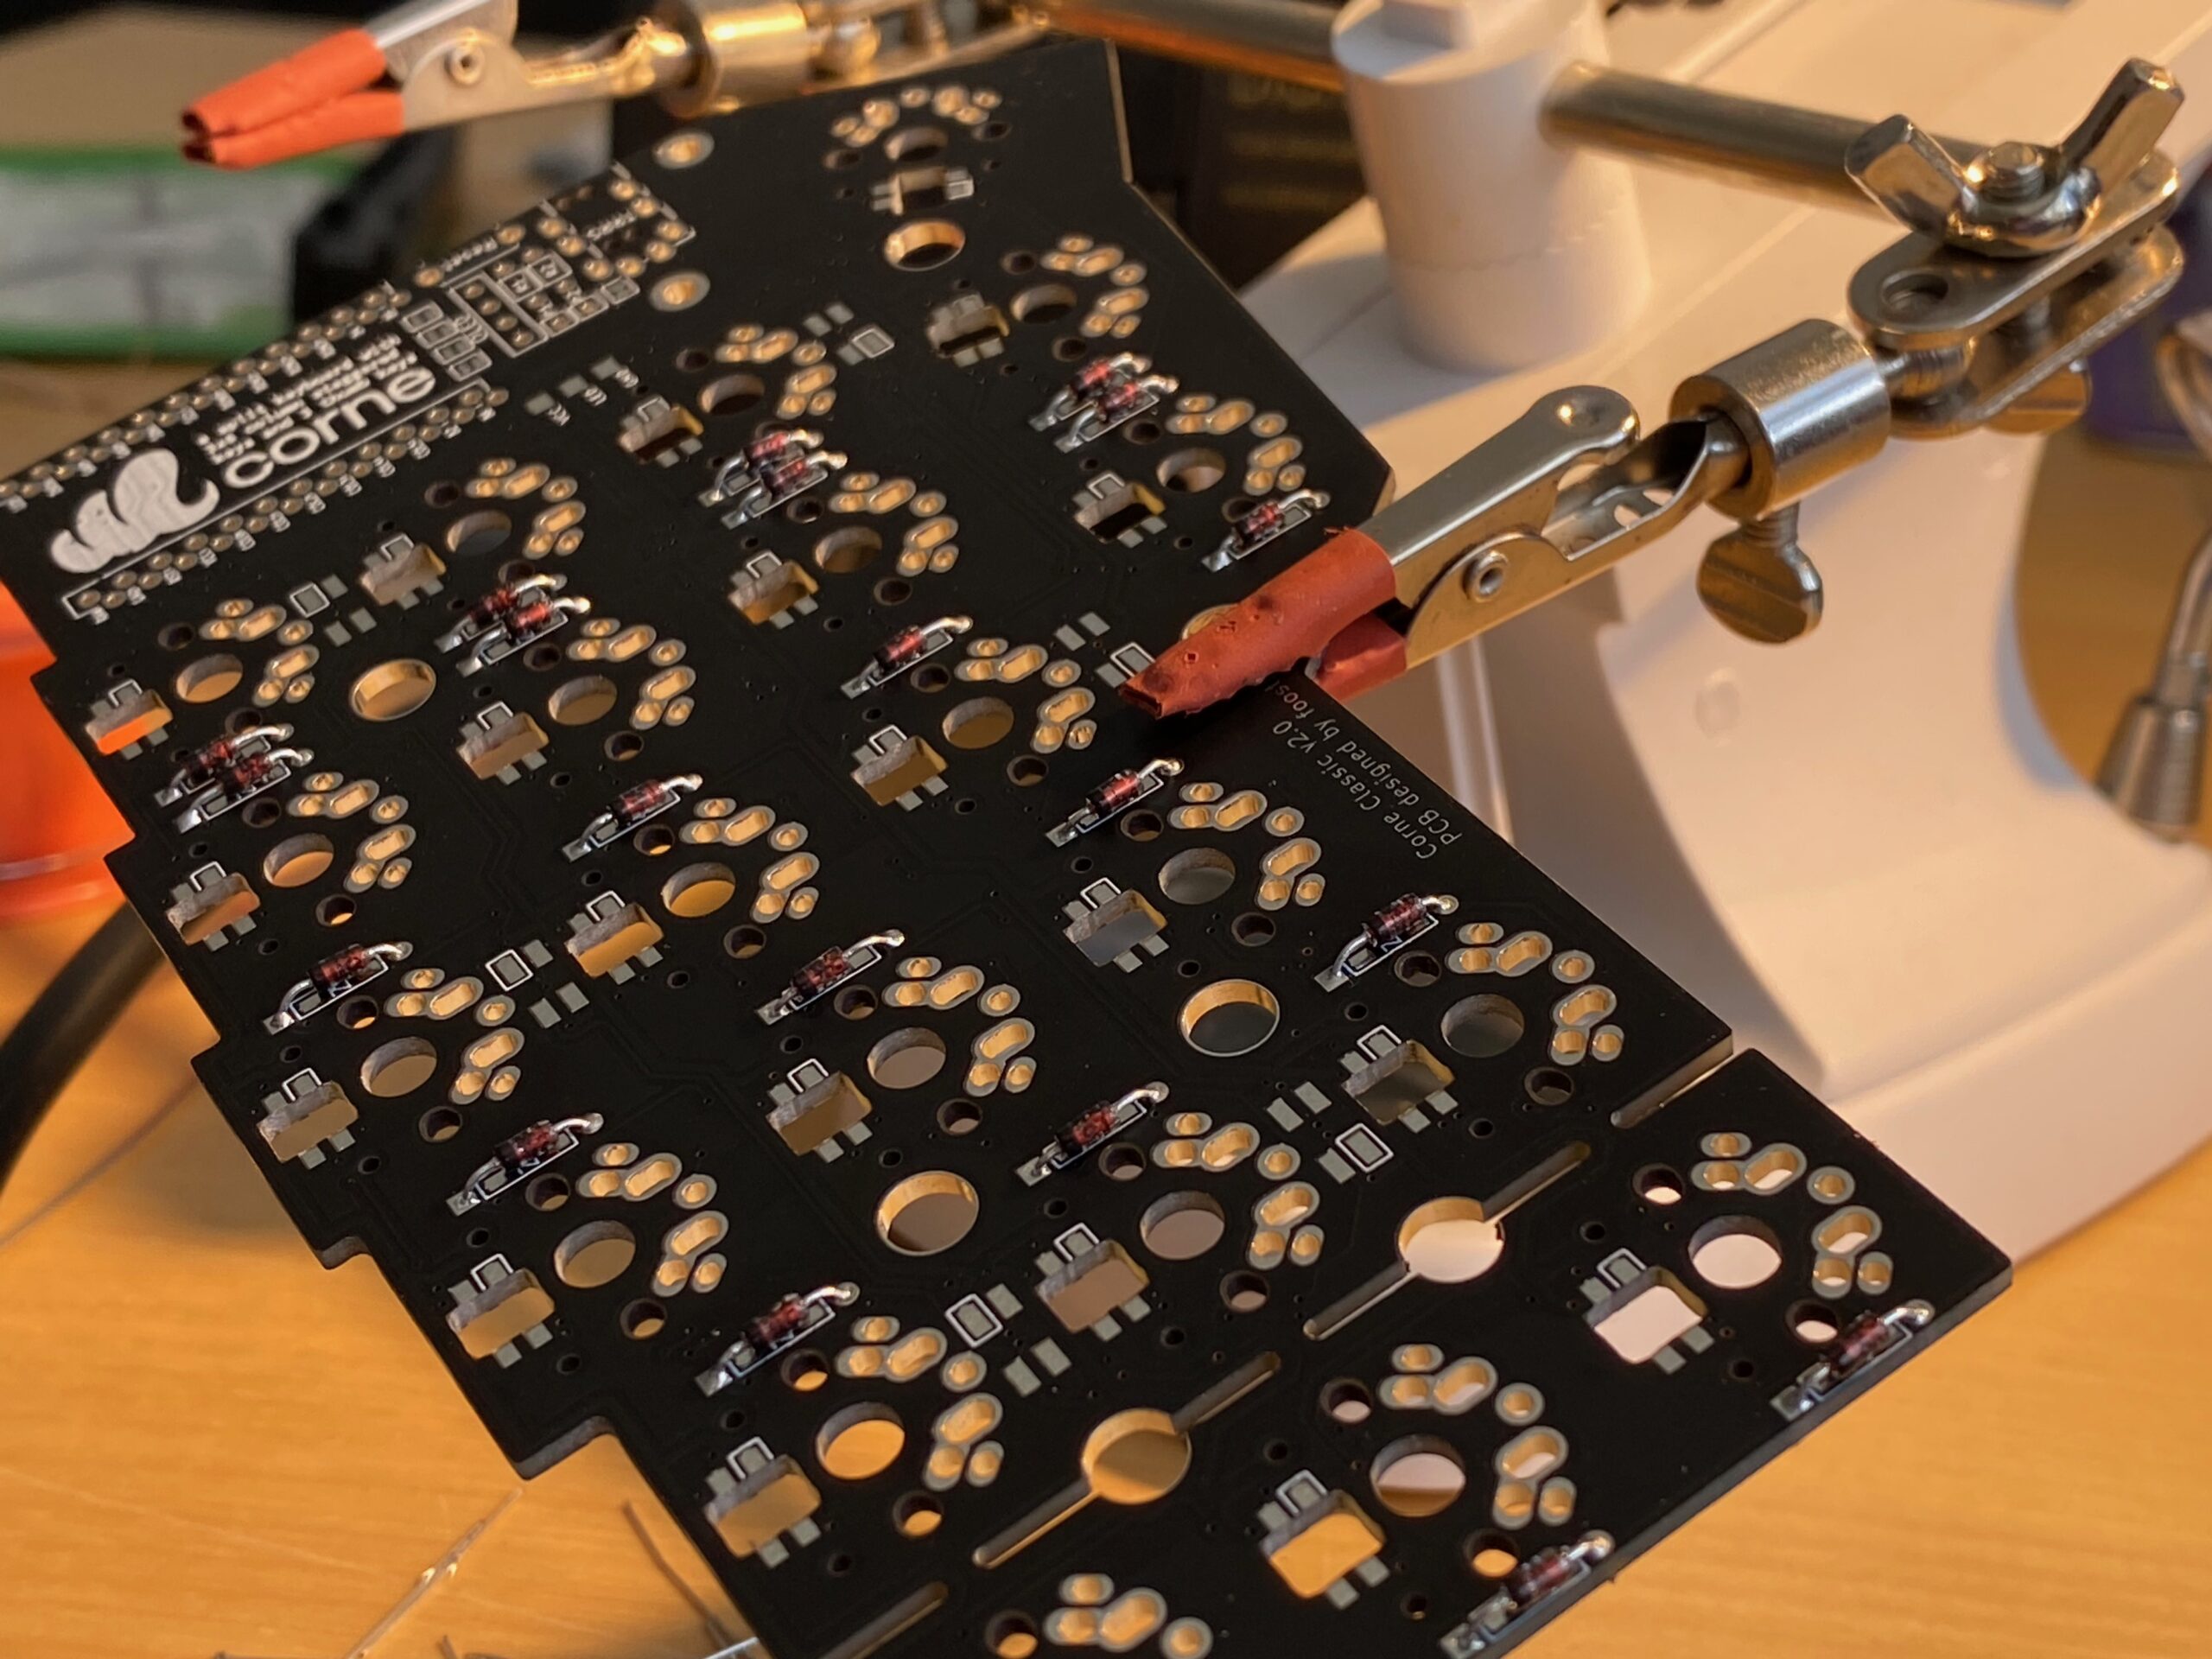
It took me a couple of months to get all the required parts ordered and delivered. Many small envelopes with parts that seemlingly are only produced by a handful of manufacturers. But anyways: After everything had arrived and was checked for completeness my wife took the hardware parts into her hands and started soldering and assembling the keyboard.
And so this project naturally is split up between my wife and me in the most natural (to us) way: My wife did all the hardware parts – whilst I did the software and interfacing portion. (Admittedly there only was to be figured out how to get the firmware compiled and altered to my specific needs)
After putting the hardware together it was time to get the firmware sorted as well. This keyboard design is based upon the open source QMK (Quantum Mechanical Keyboard) firmware.
Conveniently QMK comes with it’s own build tools – so you will be up and running in no time. Since I had purchased Arduino ProMicro controllers I was good with the most basic setup you can imagine. As the base requirements for the toolchain where minimal I went with the machine that I had in front of me – a Raspberry Pi 4 with the standard Raspberry Pi OS.
These where the steps to get going:
get Python 3 and the qmk tool installed – I’ve chosen not to use the tool setup procedure but instead go with a separate clone of the QMK firmware repository.
python3 -m pip install --user qmk
clone the QMK firmware repository and get the QMK tool running (in the /bin folder of the firmware repository – it’s actually just a python script)
git clone https://github.com/qmk/qmk_firmware.git
cd qmk_firmware
git submodule sync --recursive
git submodule update --init --recursive --progress
make crkbd:default
create your own keymap to work with. You gotta use the crkbd firmware options as a default for this keyboard. The command below will generate a subfolder with the name of your keymap in the keyboards/crkbd/keymaps folder with the default settings of the crkbd keyboard firmware.
qmk new-keymap -kb crkbd
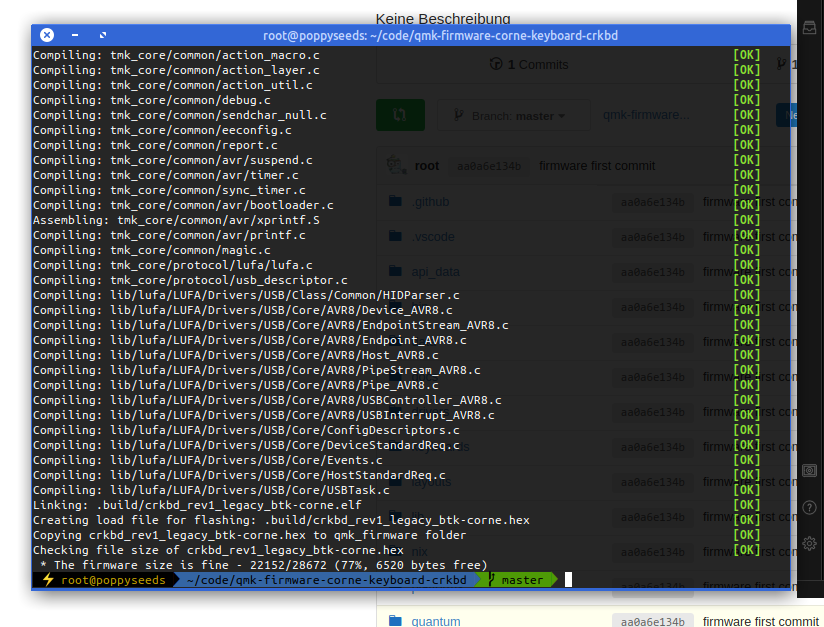
build your first firmware by running the command below (note: btk-corne is the name of my keymap)
now you can flash the firmware to both ProMicro controllers. The most straight forward way for me was using avrdude on the commandline. In my case the device is added as /dev/ttyACM0 and the compiled firmware named crkbd_rev1_legacy_btk-corne.hex.
When you got all this information you need to plug in the ProMicro and trigger a reset by bridging Ground and the Reset Pin. If you added, like we did, a button for reset you can use this. After hitting reset the ProMicro bootloader will enter the state where it’s possible to be flashed. Reset it and THEN run the avrdude commandline.
(alternatively) you can also use QMK Toolbox to flash the firmware. Also works.
So now you know how to get the firmware compiled and running (if not, look here further). But most probably you are not happy with some aspects of your keymap or firmware.
By now you might ask yourself: Hey, I’ve got two ProMicros on one keyboard. Both are flashed with the same firmware. Into which of the two do I plug in the USB cable that then is plugged into the computer?
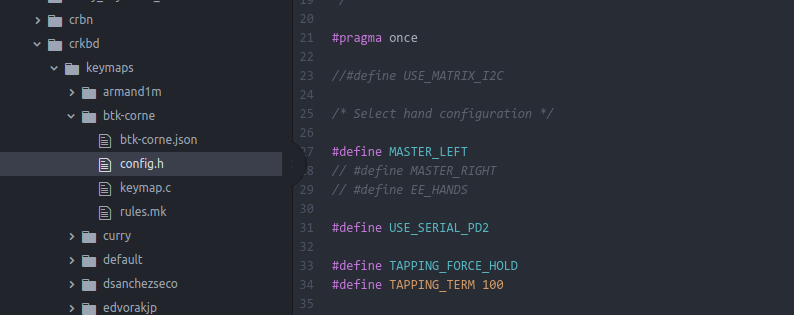
The answer is: by default QMK assumes that you are plugging into the left half of the keyboard making the left half the master. If you prefer to use the right half you can change this behaviour in the config.h file in the firmware:
You have to plug in both of them anyway at times when you want to flash a new firmware to them as you adjust and make changes to your keymap.
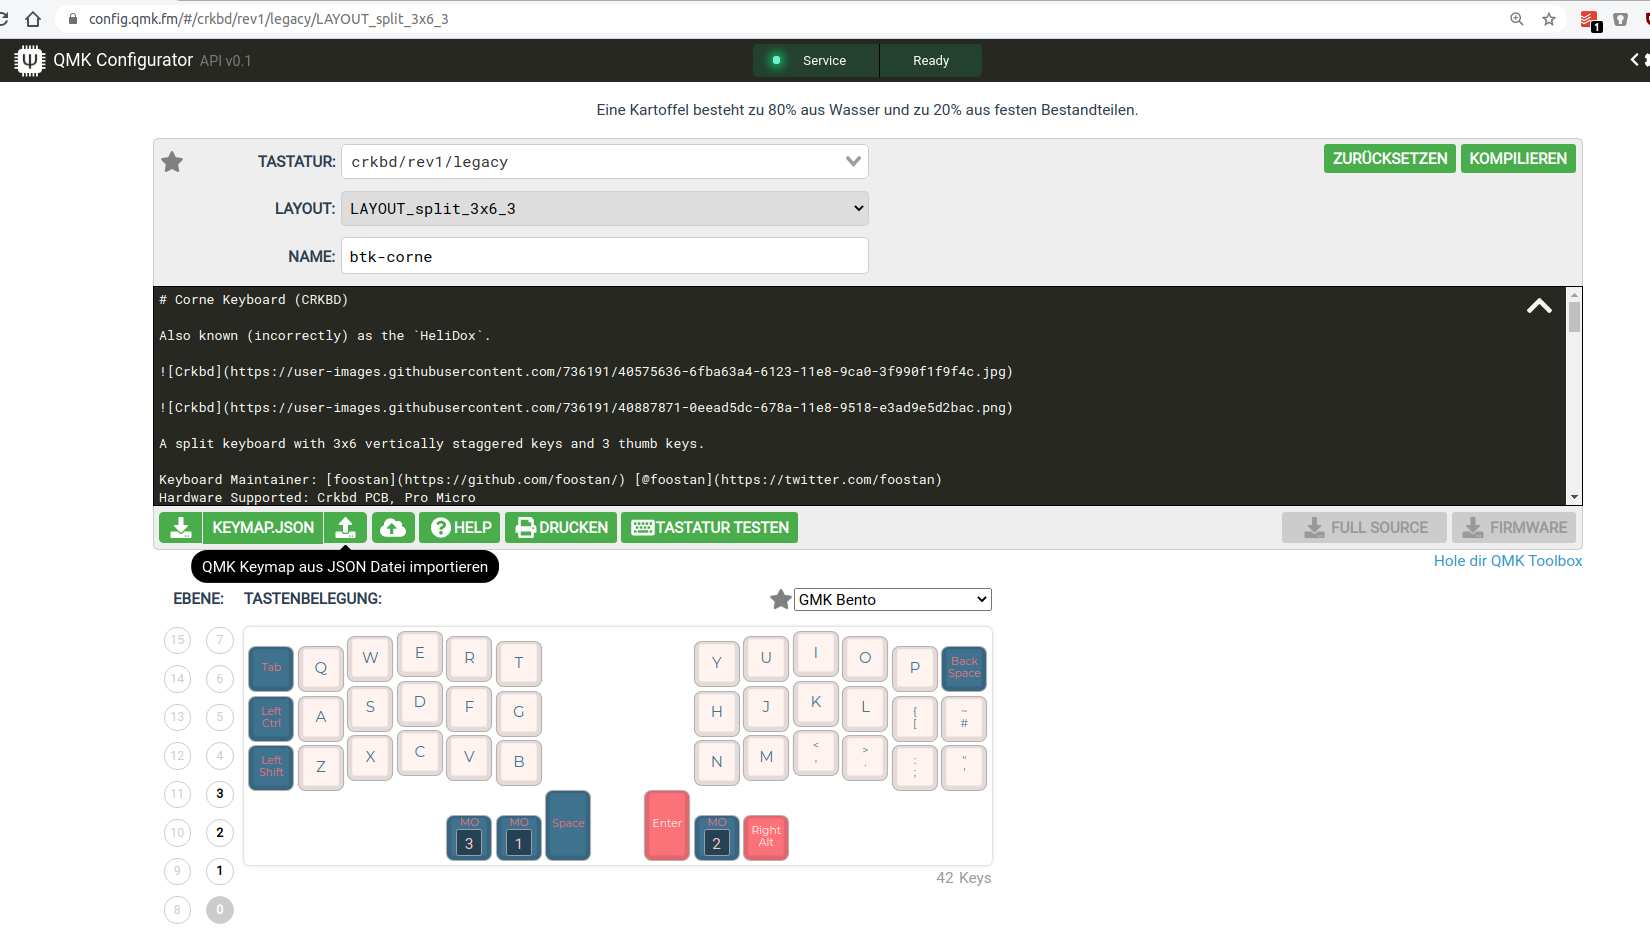
Thankfully QMK comes with loads of options and even a very useful configurator tool. I used this tool to adjust the keymap to my requirements. The process there is straightforward again. Open up the configurator and select the correct keyboard type. In my case that is crkbd/legacy. The basic difference between legacy and common is a different communication protocol between the two halves. This really only is important when features are used that require some sort of sync between the two haves – like some RGB LED effects. Since I did not add any LEDs to the build I go with legacy for now. Maybe I need some features later that require me to go with common.
The configurator allows you to set up the whole keymap and upload/download it as a .json file.
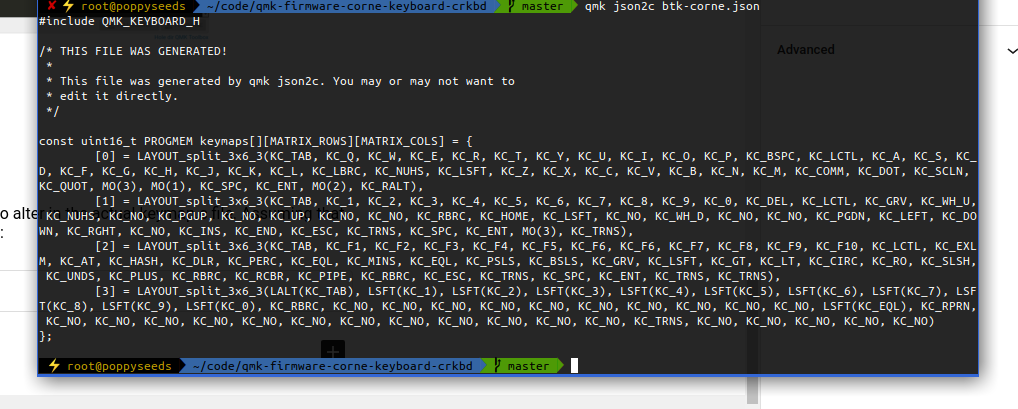
That .json file can easily be converted into the C code that you need to alter in the actual keymap.c file. Assuming that the .json file you got is named btk-corne.json the full commandline is:
qmk json2c btk-corne.json
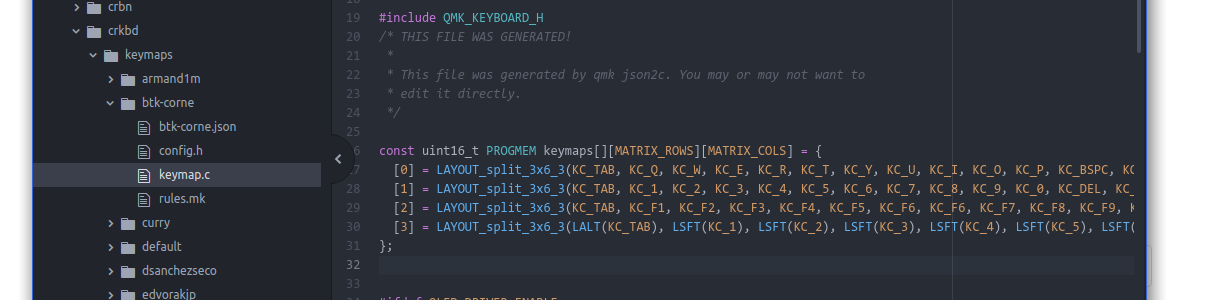
Then simply take this output and replace the stuff in the keymap.c with it:
Now you compile and flash again. And if all went right you’ve got the new keymap and firmware on your keyboard and it’ll work just like that :)
So this is interesting: Normally a Windows program (executable) if you try to run it anywhere else will show a message “cannot be run here” and terminates.
Printing this message is actually done by a little program whos task is to only print out this very message. So it can be overwritten.
Michael Strehovský did exactly this, very impressively. He documented what he did to get the game “snake”, written in C#, running on DOS instead of the “does not run here” stub. In an executable file that would run both, on standard 90s MS-DOS as well as on Windows with the .NET Framework installed.
He used a quite elaborate toolchain – namely DOS64-stub.
You can read all of this in the full thread. I recommend a deeper dive, as it’s a great start to better understand the inner workings of your computer…
When you are dealing with IoT protocols, especially at hobby-level, you probably came across the MQTT protocol and the challenge to have all those different devices that are supposed to be connected actually get connected – preferably using the MQTT protocol.
Recently this little project came to my attention:
OpenMQTTGateway project goal is to concentrate in one gateway different technologies, decreasing by the way the number of proprietary gateways needed, and hiding the different technologies singularity behind a simple & wide spread communication protocol: MQTT.
OpenMQTTGateway support very mature technologies like basic 433mhz/315mhz protocols & infrared (IR) so as to make your old dumb devices “smart” and avoid you to throw then away. These devices have also the advantages of having a lower cost compared to Zwave or more sophisticated protocols. OMG support also up to date technologies like Bluetooth Low Energy (BLE) or LORA.
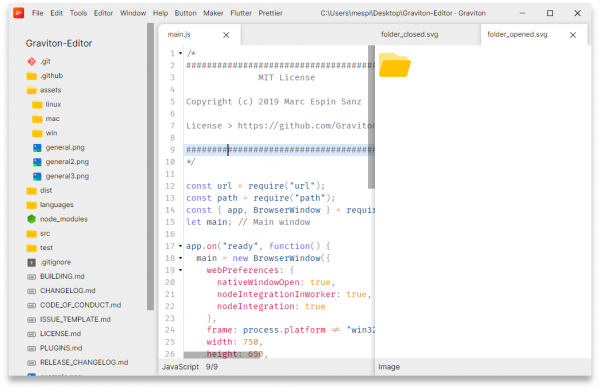
Friend OS, a modular, fully-customizable operating system accessible via any device that can support a modern web browser, or Friend’s Android and iOS apps. Friend OS leverages Internet and blockchain technologies to offer all the features of a commercial operating system, but one that gives you access to a secure and private cloud-based virtual desktop anytime, anywhere, no matter what hardware or software you use.
So what does this all mean? It’s apparently a web application scaled up to behave and be used like an operating system. It encapsulates an application and directory/filesystem like concept and essentially lives in one of your browser windows.
As long as you’ve got a supported browser, all your apps and data will be accessible through this. They claim.
It’s interesting as there is a lot of open source in there and even some docker effort made to get it running. Seems abandoned / not updated at the time of writing, but it’s a nice concept to begin with anyways.
Some things you find on GitHub are more interesting and frightening than others.
This one is both and some more. What is it you ask?
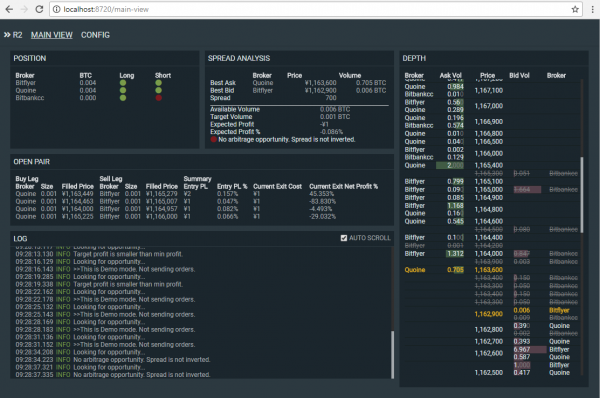
R2 Bitcoin Arbitrager is an automatic arbitrage trading application targeting Bitcoin exchanges.
So it’s buying and selling Bitcoins. And it’s doing this on different markets. On the topic of arbitrage Wikipedia has something to say:
In economics and finance, arbitrage is the practice of taking advantage of a price difference between two or more markets: striking a combination of matching deals that capitalize upon the imbalance, the profit being the difference between the market prices at which the unit is traded.
For example, an arbitrage opportunity is present when there is the opportunity to instantaneously buy something for a low price and sell it for a higher price.
Now this already is the second version of the tool and already 2 years old. See it as some sort of interesting archeological specimem. Please refrain to actually so something harmful with it.
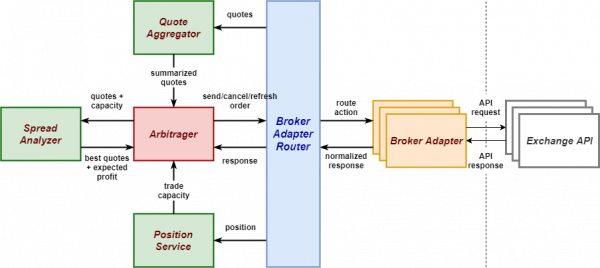
I am writing this down here because apart from it’s obvious horrors this is a good starting point to understand how these computer-trading-systems do work in principle.
Given that an architectural drawing is also included it gives all sorts of starting points to thoughts.
Also. What could possibly go wrong if a tool to buy/sell on actual markets with actual bitcoins is confident enough to include the “maxTargetProfit” configuration option. Effectively setting the top-line of profit you’re going to make!!!111
There is a free and well integrated OpenVPN client for iOS devices already. And as much as this one works quite well it’s also lacking some comfort features that are now made available through alternative iOS client implementations of OpenVPN.
OpenVPN is an open-source commercial software that implements virtual private network techniques to create secure point-to-point or site-to-site connections in routed or bridged configurations and remote access facilities. It uses a custom security protocol that utilizes SSL/TLS for key exchange.
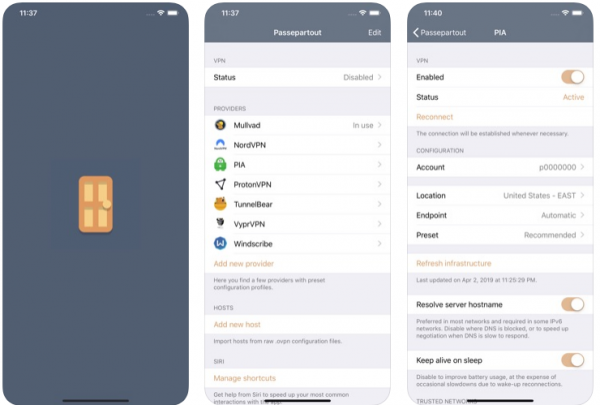
Meet Passepartout. The iOS OpenVPN client that comes with lots of comfort features. Of main interest for me is that Passepartout is aware of the connection you’re currently using and can adopt it’s VPN tunnel status accordingly.
Passepartout is a smart OpenVPN client perfectly integrated with the iOS platform. Passepartout is the only app you need for both well-known OpenVPN providers and your personal OpenVPN servers.
The goal of this book is to document commonly-known and lesser-known methods of doing various tasks using only built-in bash features. Using the snippets from this bible can help remove unneeded dependencies from scripts and in most cases make them faster. I came across these tips and discovered a few while developing neofetch, pxltrm and other smaller projects.
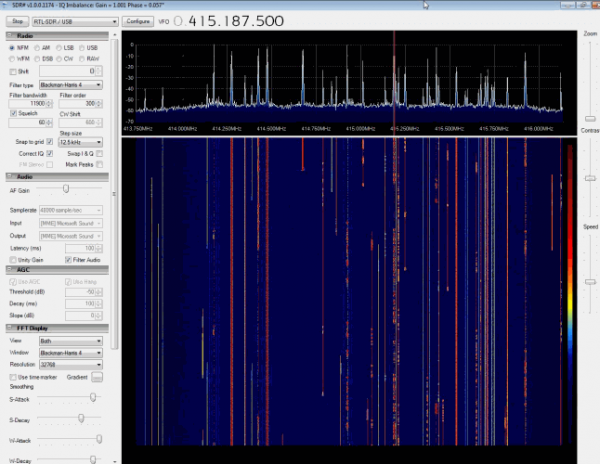
RTL-SDR is a very cheap ~$25 USB dongle that can be used as a computer based radio scanner for receiving live radio signals in your area (no internet required). Depending on the particular model it could receive frequencies from 500 kHz up to 1.75 GHz. Most software for the RTL-SDR is also community developed, and provided free of charge.
The origins of RTL-SDR stem from mass produced DVB-T TV tuner dongles that were based on the RTL2832U chipset. With the combined efforts of Antti Palosaari, Eric Fry and Osmocom (in particular Steve Markgraf) it was found that the raw I/Q data on the RTL2832U chipset could be accessed directly, which allowed the DVB-T TV tuner to be converted into a wideband software defined radio via a custom software driver developed by Steve Markgraf. If you’ve ever enjoyed the RTL-SDR project please consider donating to Osmocom via Open Collective as they are the ones who developed the drivers and brought RTL-SDR to life.
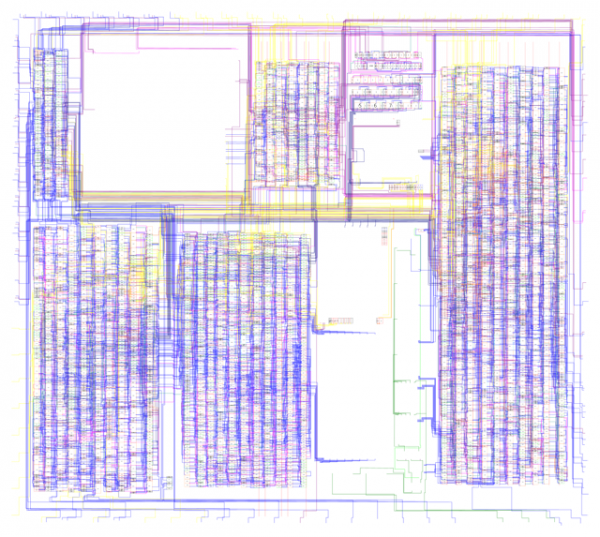
This repo contains an annotated overlay for the Nintendo Game Boy DMG-CPU-B chip die and the extracted schematics.
This was done manually with only a few automated checks so THERE’S A HIGH RISK OF ERRORS. I’m in no way responsible if you made someone’s life depend on this and it fucked up.
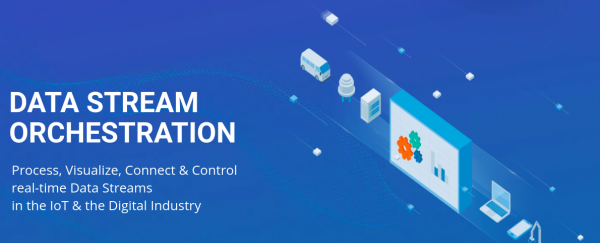
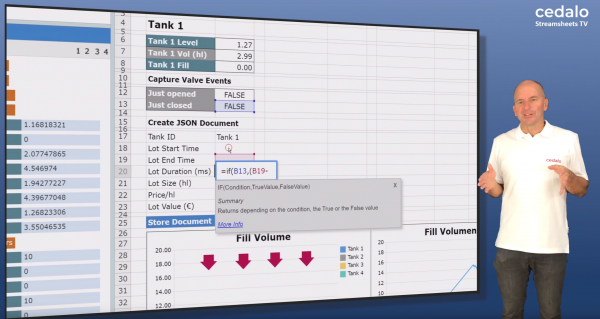
Streamsheets is, similar to NodeRed, a tool to step in between MQTT data coming in and something being done with it. Just other than NodeRed it is not based on flows but on a spreadsheet that executes in it’s entirety everytime a step is made.
Streamsheets are a new spreadsheet technology specifically designed for real-time data stream processing and the opportunities of digitization and the Industrial IoT.
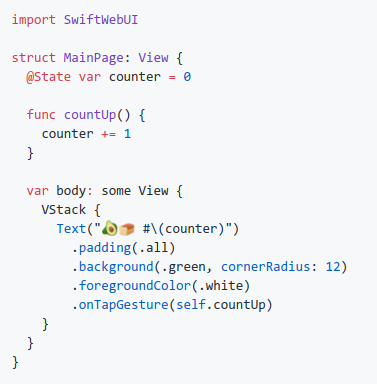
SwiftUI is the new cool kid on the block when it comes to iOS/iPadOS/macOS application development.
As Apple announced SwiftUI early 2019 it’s naturally only focussing on making all the declarative UI goodness available for the Apple operating systems. No non-apple platforms in focus. Naturally.
But there are ways. With the declarative way of creating user interfaces one apparently can simply start to re-implement the UI controls and have them render as HTML / Javascript…
Unlike some other efforts this doesn’t just render SwiftUI Views as HTML. It also sets up a connection between the browser and the code hosted in the Swift server, allowing for interaction – buttons, pickers, steppers, lists, navigation, you get it all!
In other words: SwiftWebUI is an implementation of (many but not all parts of) the SwiftUI API for the browser.
To repeat the Disclaimer: This is a toy project! Do not use for production. Use it to learn more about SwiftUI and its inner workings.
As RISC-V progressively challenges the existing ARM processor ecosystem it’s interesting to see more and more software projects popping up that aim that RISC-V architecture.
Here’s one project that aims to develop (and explain along the way) how to create an operating system from scratch. On top of the RISC-V specifics this tutorial also aims to teach how this all can be done in a programming language called Rust.
Keep in mind that all of this is done on a baremetal system. No other software is running.
RISC-V (“risk five”) and the Rust programming language both start with an R, so naturally they fit together. In this blog, we will write an operating system targeting the RISC-V architecture in Rust (mostly). If you have a sane development environment for RISC-V, you can skip the setup parts right to bootloading. Otherwise, it’ll be fairly difficult to get started.
This tutorial will progressively build an operating system from start to something that you can show your friends or parents — if they’re significantly young enough. Since I’m rather new at this I decided to make it a “feature” that each blog post will mature as time goes on. More details will be added and some will be clarified. I look forward to hearing from you!