How to run the irl-obs-switcher on macOS?

Last week I‘ve received a comment on the initial irl-obs-switcher blog article regarding the use of the tool on macOS.

And good point: Apart from the source code release on GitHub I am generating binary releases for several operating systems and processor architectures.

For Windows it‘s quite straight forward. If you do not have dotnet 6 installed you will be guided automatically.

For Linux you gotta install dotnet 6 basically according to the official documentation and then run the irl-obs-switcher file.

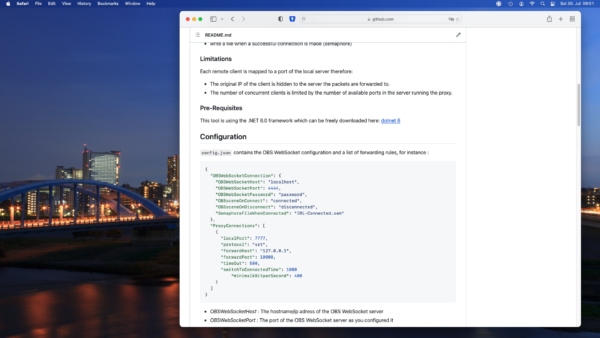
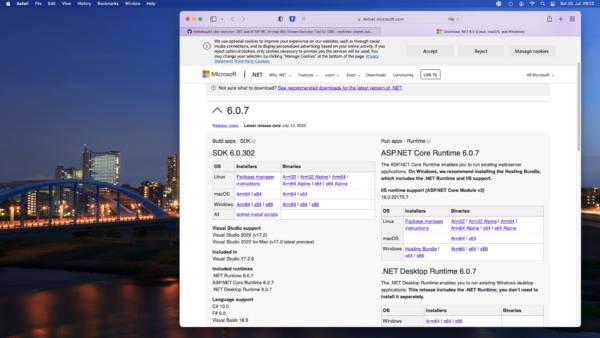
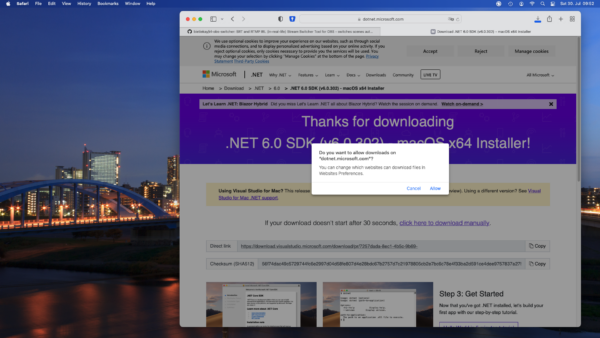
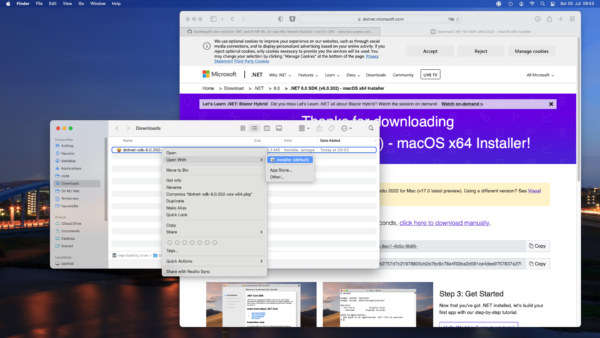
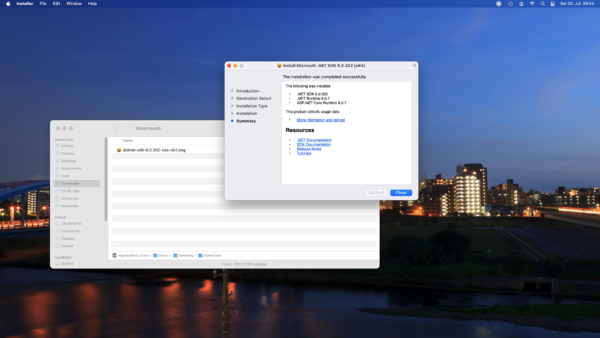
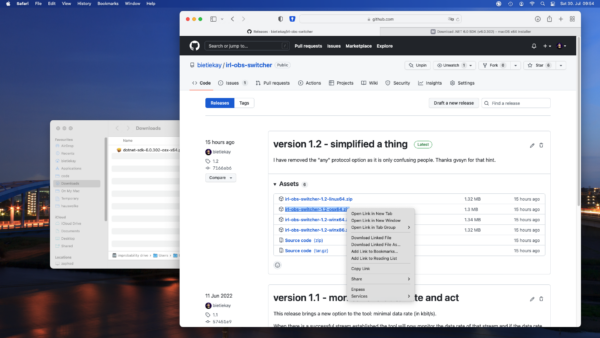
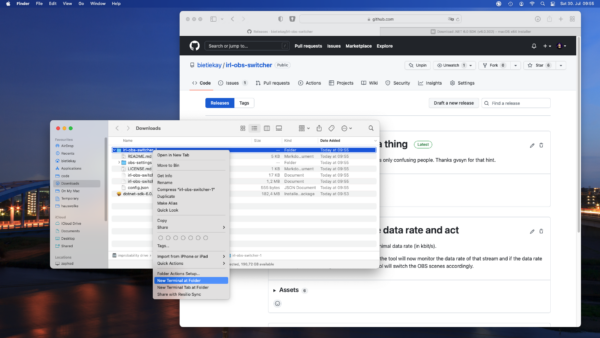
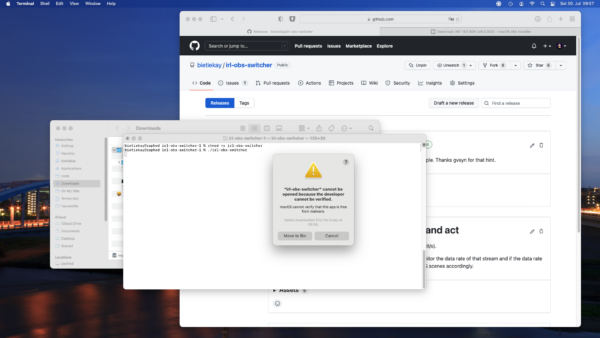
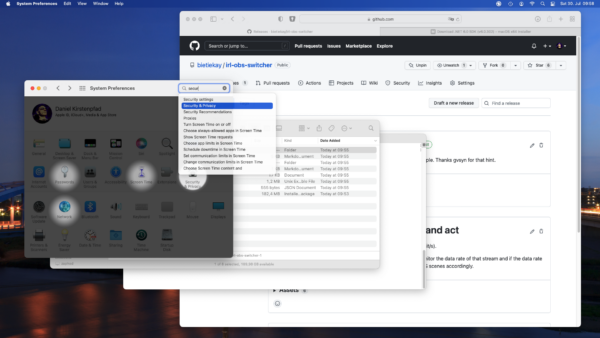
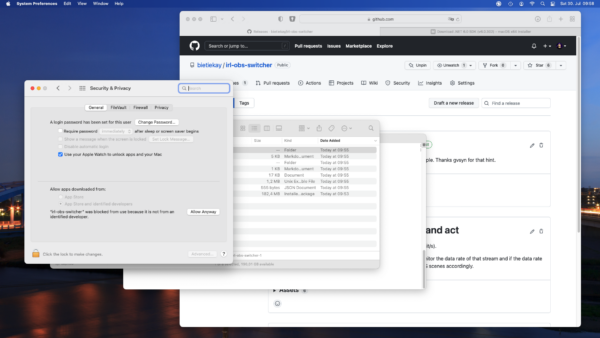
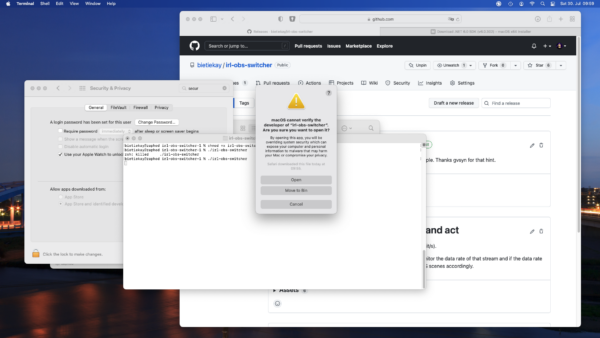
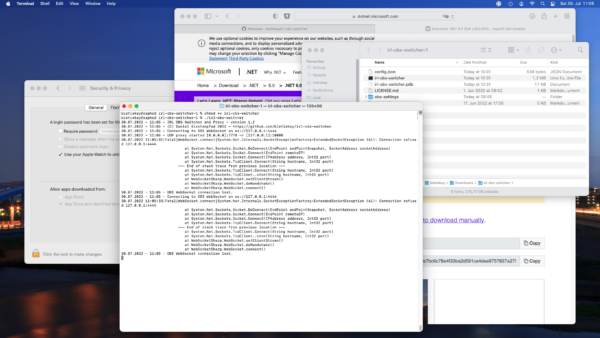
For macOS it‘s a bit less straight forward – so here are screenshots and comments to guide through the process:

first go to the github repository of irl-obs-switcher and check for all pre-requisites.
download the current version 6 sdk for your cpu platform – arm64 if you have Apple Silicon. x64 if you have an Intel Mac.
Allow the download
After the download finished right click and „Open with Installer“…
a successful installation!
in the release page of irl-obs-switcher download the latest macOS binary release.
after unzipping right click the folder and select „new Terminal at Folder“. If your menu does not show this item just open a Terminal (search for Terminal) and navigate to the folder you unpacked the binary release to („cd Downloads“)
Then mark the irl-obs-switcher executable by running „chmod +x irl-obs-switcher“. Then try to run it with ./irl-obs-switcher. On current macOS you might get a pop-up warning you about the file you are trying to run. This is a default warning as the binary release of irl-obs-switcher is not signed/approved by Apple but just made available by the developer (me) to you. Choose „Cancel“ as might not want to move it to the recycle bin just yet.
Next we need to tell macOS to anyway allow us to run the irl-obs-switcher file by going to the „Security&Privacy“ section of the System Settings.
You will see a button „Allow Anyway“ that you can click to allow running of irl-obs-switcher.
Now when you try to run irl-obs-switcher again the warning will look different. Click „Open“ and you‘re good to go.
Now you can go ahead, edit the configuration JSON file. Now you should have OBS running and WebSockets installed and set-up to make proper use of the tool.

I hope this short step-by-step works for you. In fact by making it I‘ve found some bugs and fixed them along the way.