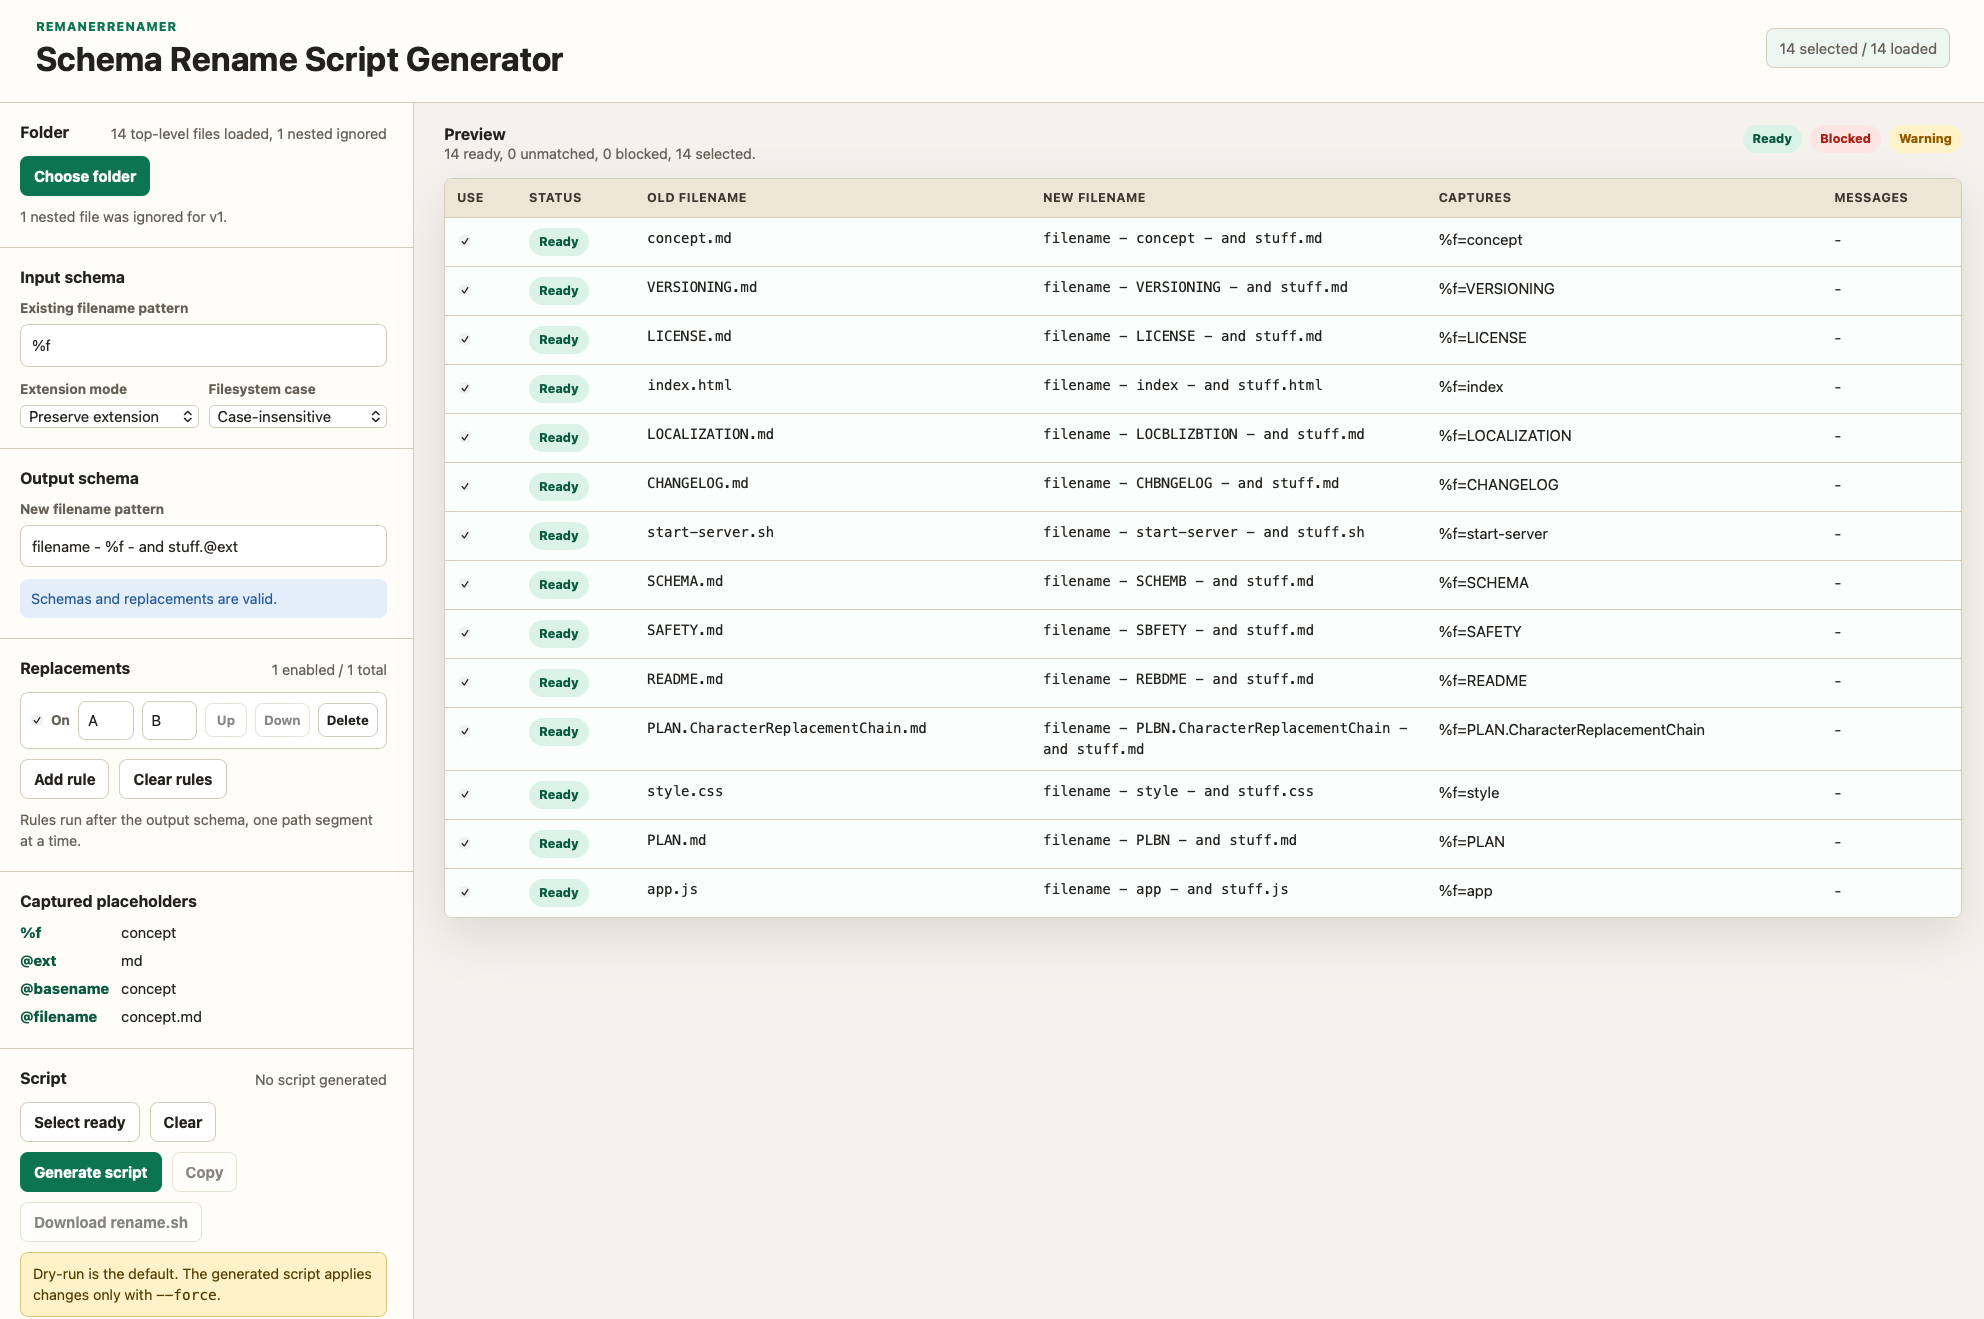
I am finding myself regularly in the position to have to rename lots of files. Like they all have a common naming scheme now but I need them to have another naming scheme or even be distributed into their separate folders.
I’ve found that there are many tools and even your average Explorer, Finder and whatnot does seem to get smarter in renaming file groups these days.
But all of those are rather platform specific and mostly not powerful enough. Then there are renaming tools which are quite powerful, like Rename Master, but those are, well. Very very platform specific and need a certain operating system to work.
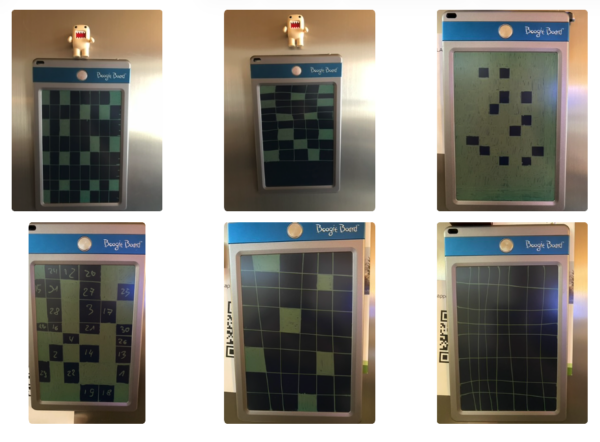
My wife Stephanie and I have a little bit of a tradition: When an important date is known we start a grid on an erasable board that has exactly the number of cells that the important date is away in days. Everyday we then fill out one of the cells and if all are filled, the date is here!
We are doing this for years – like here are just a few ones from the past:
And since the next important day was nearing we thought: It’s the time for anyone to be able to code. They say. But, can we?
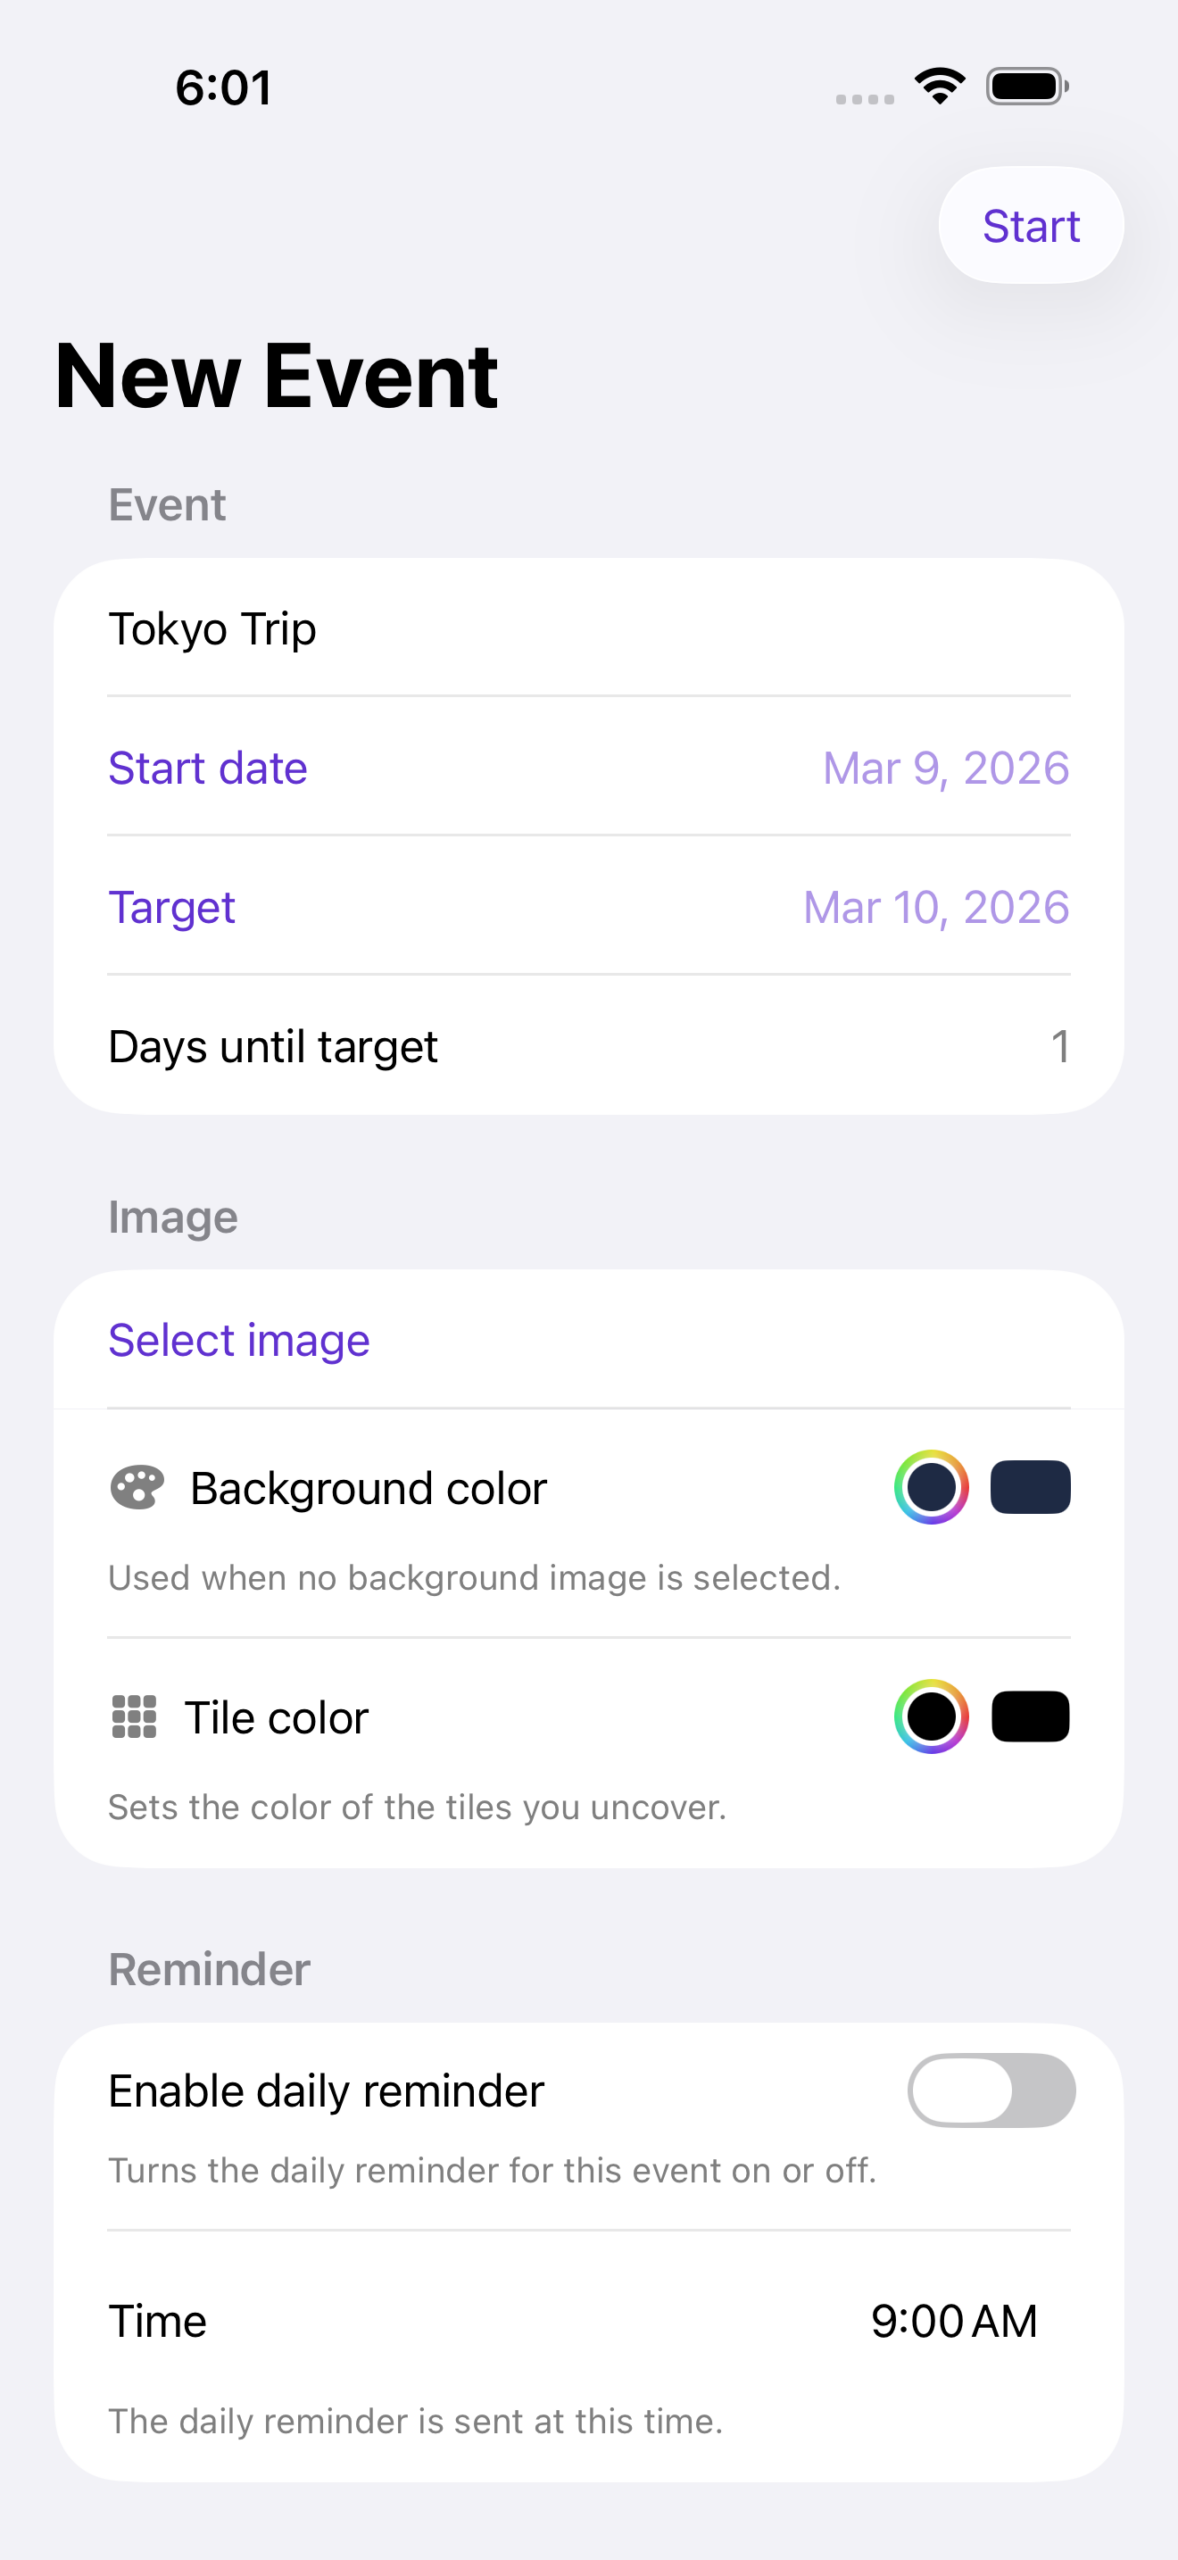
So we sat down and made a bit of concept for an iPhone / iPad app that would do the very same thing. It would allow anyone to set a target date and get a very neat grid to fill out, every day. Be notified to fill a cell and enjoy the celebration and rise till important day arrives.
We started from scratch and not surprisingly my wife got a hang of it quickly, I’d even say she had fun (at least it appeared to me like that).
After just two weeks all was done and the final app was in the App Store. Ready to be installed by anyone (for free).
In the second week we figured: we never tried how in-app purchases work, so we added those on a Sunday. And here you go, we give you: Takamaru – here is the marketing:
The name:
Takamaru (高まる) is an intransitive verb and literally means: to increase / to rise / to become more intense
the icon
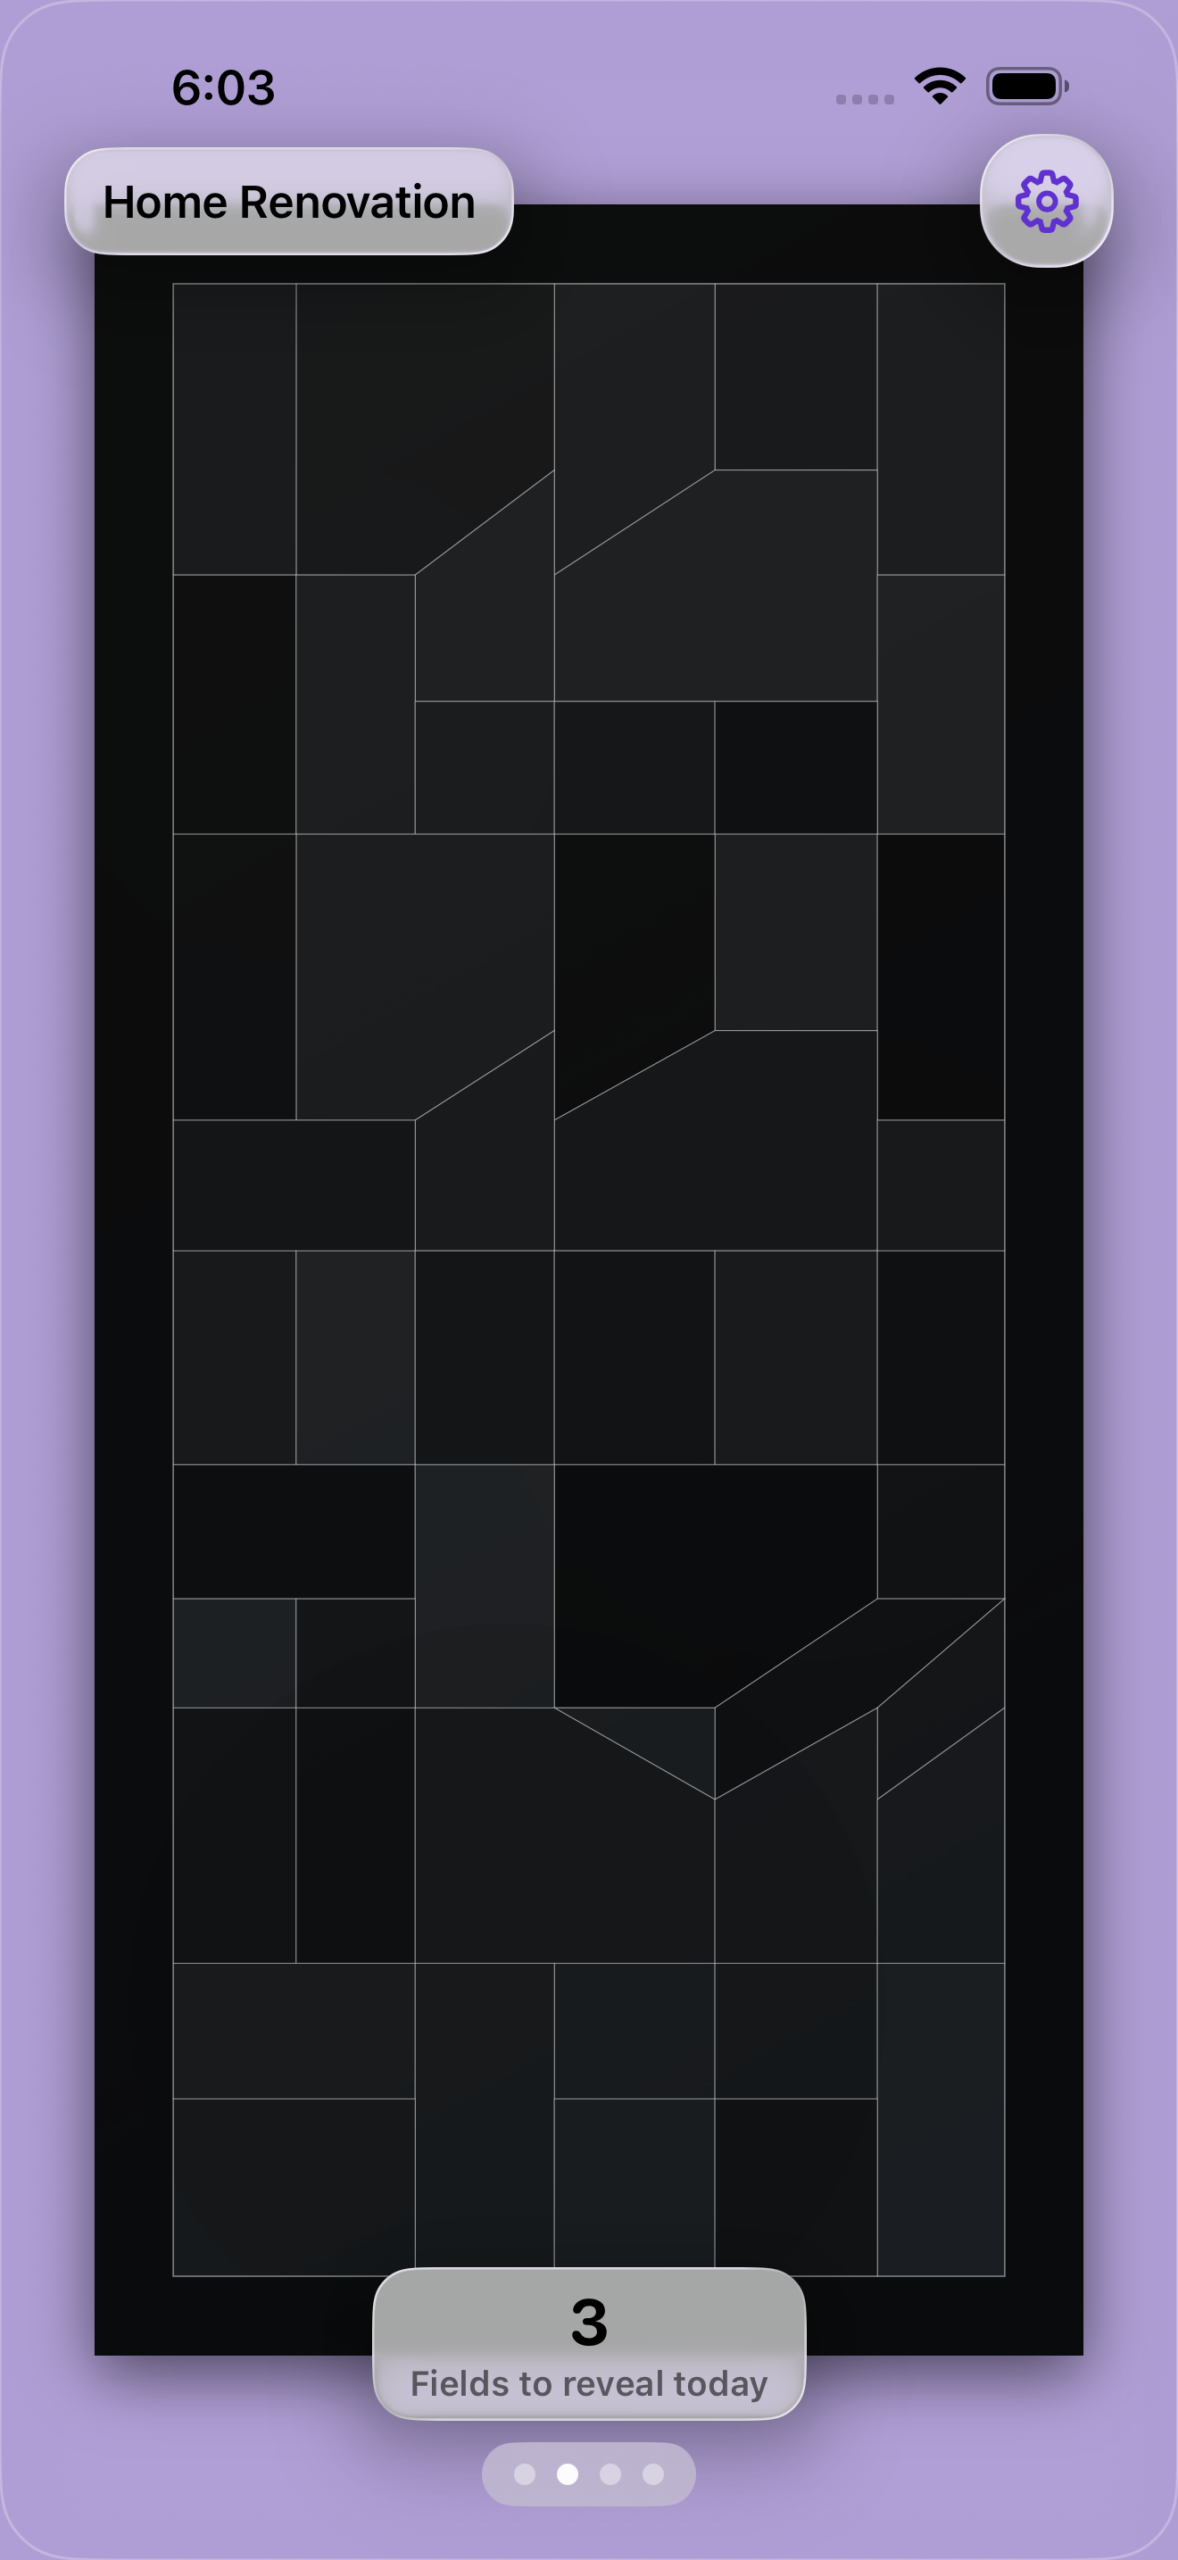
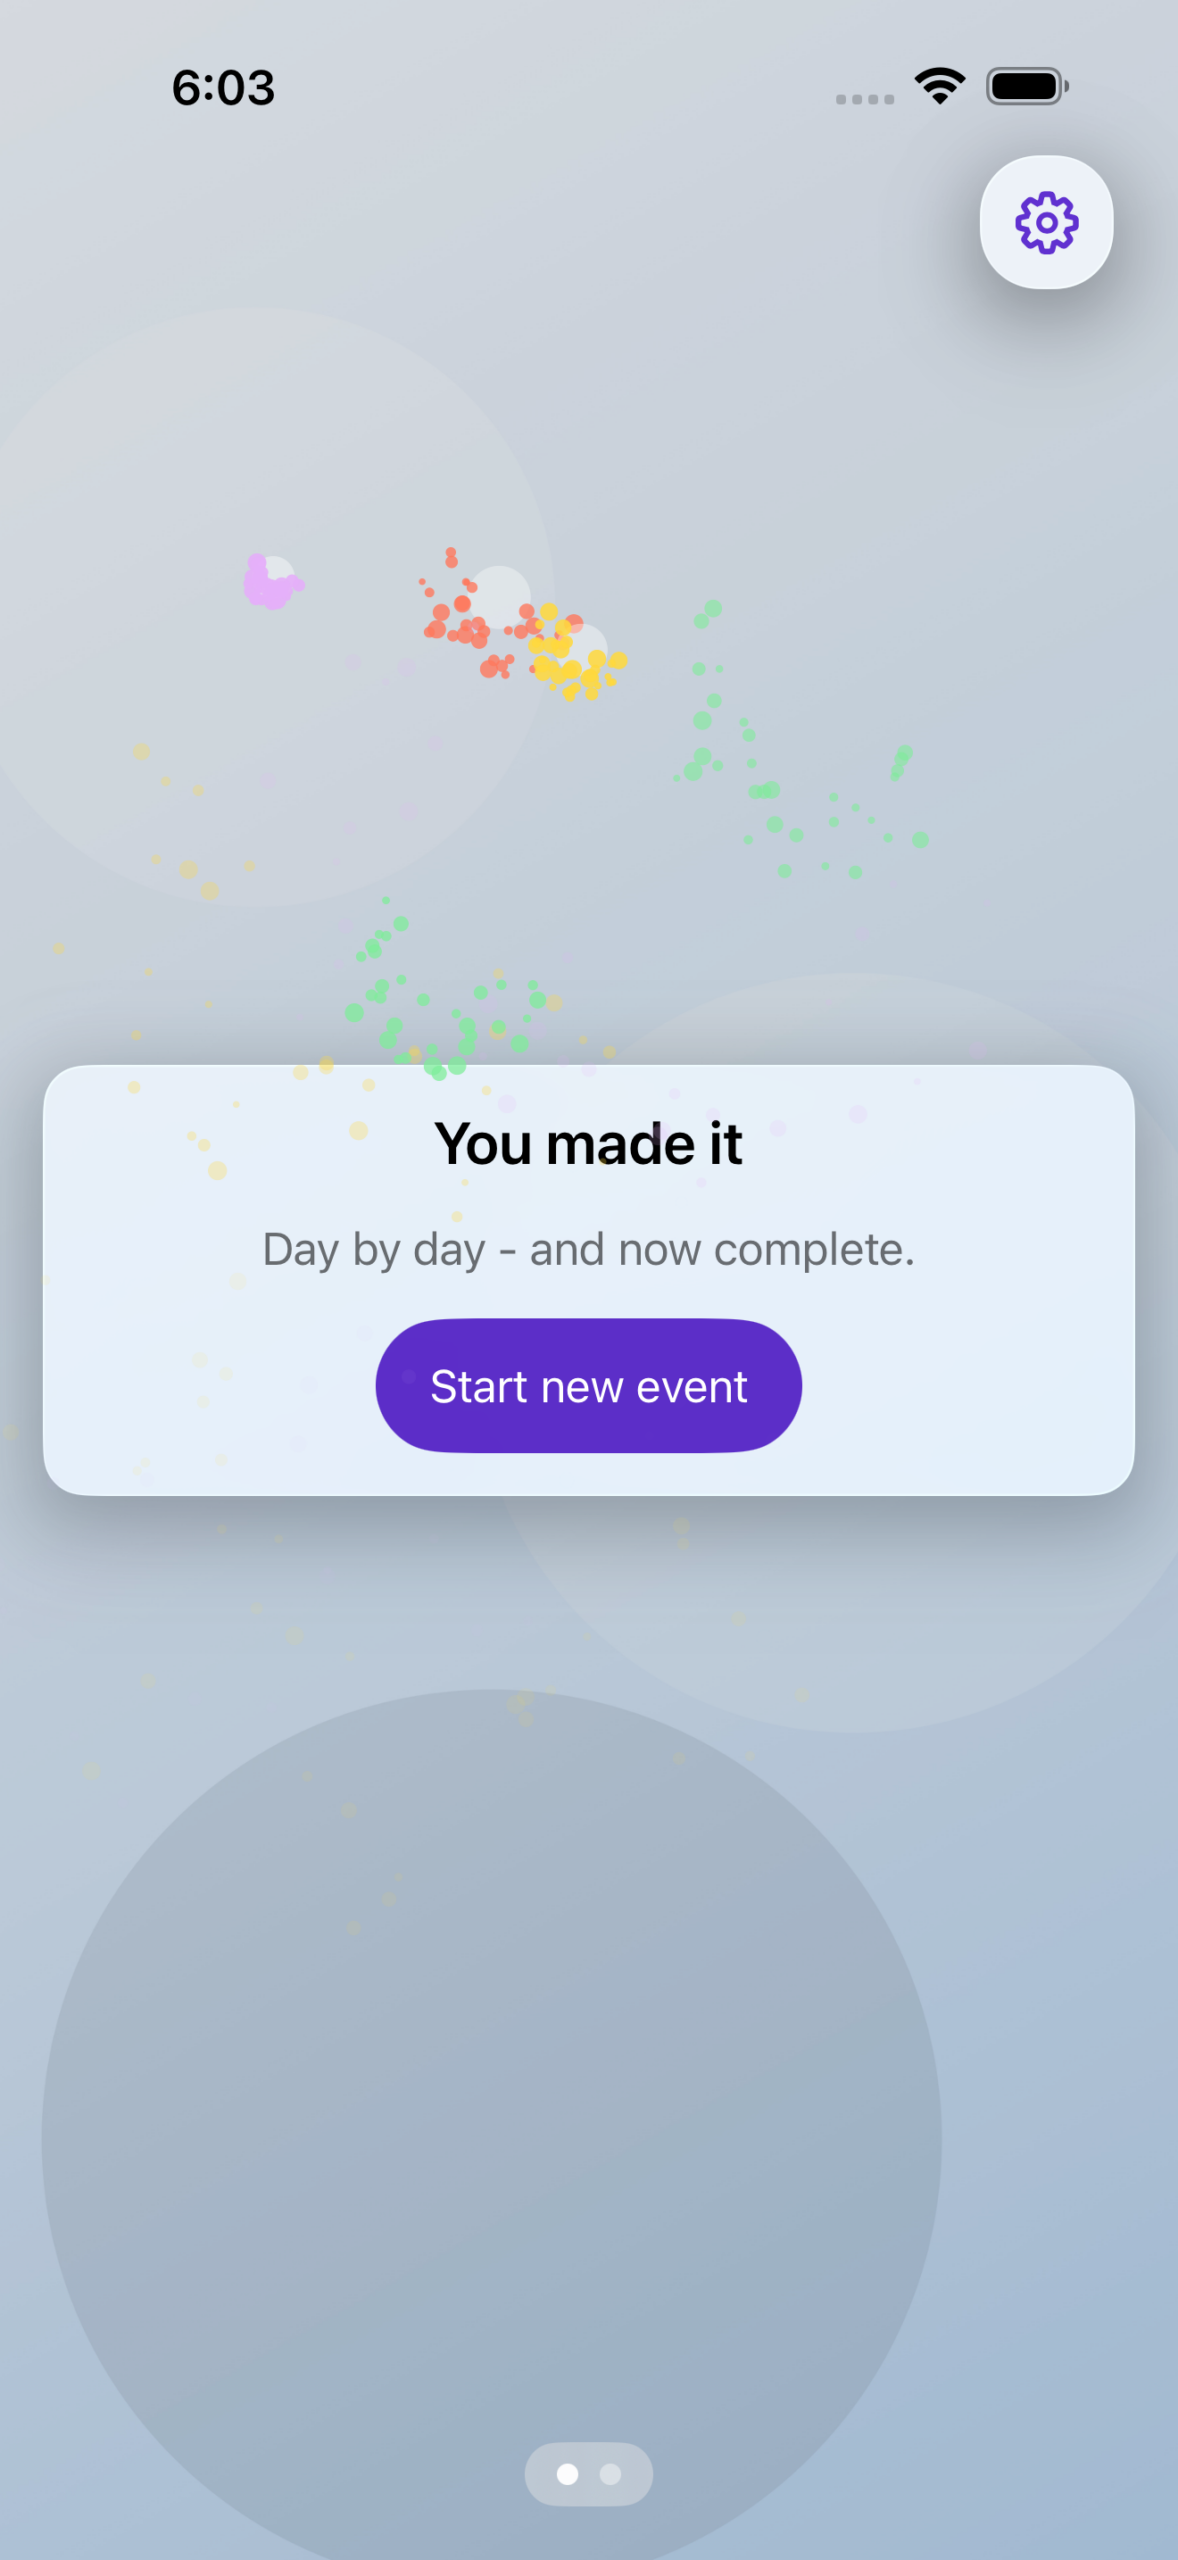
Takamaru is not just a countdown. It is a quiet space to move toward something that matters.
Choose an important date. Add a name. Select an image that represents what you are waiting for. From that moment on, each day reveals one small piece of that image.
One day. One square.
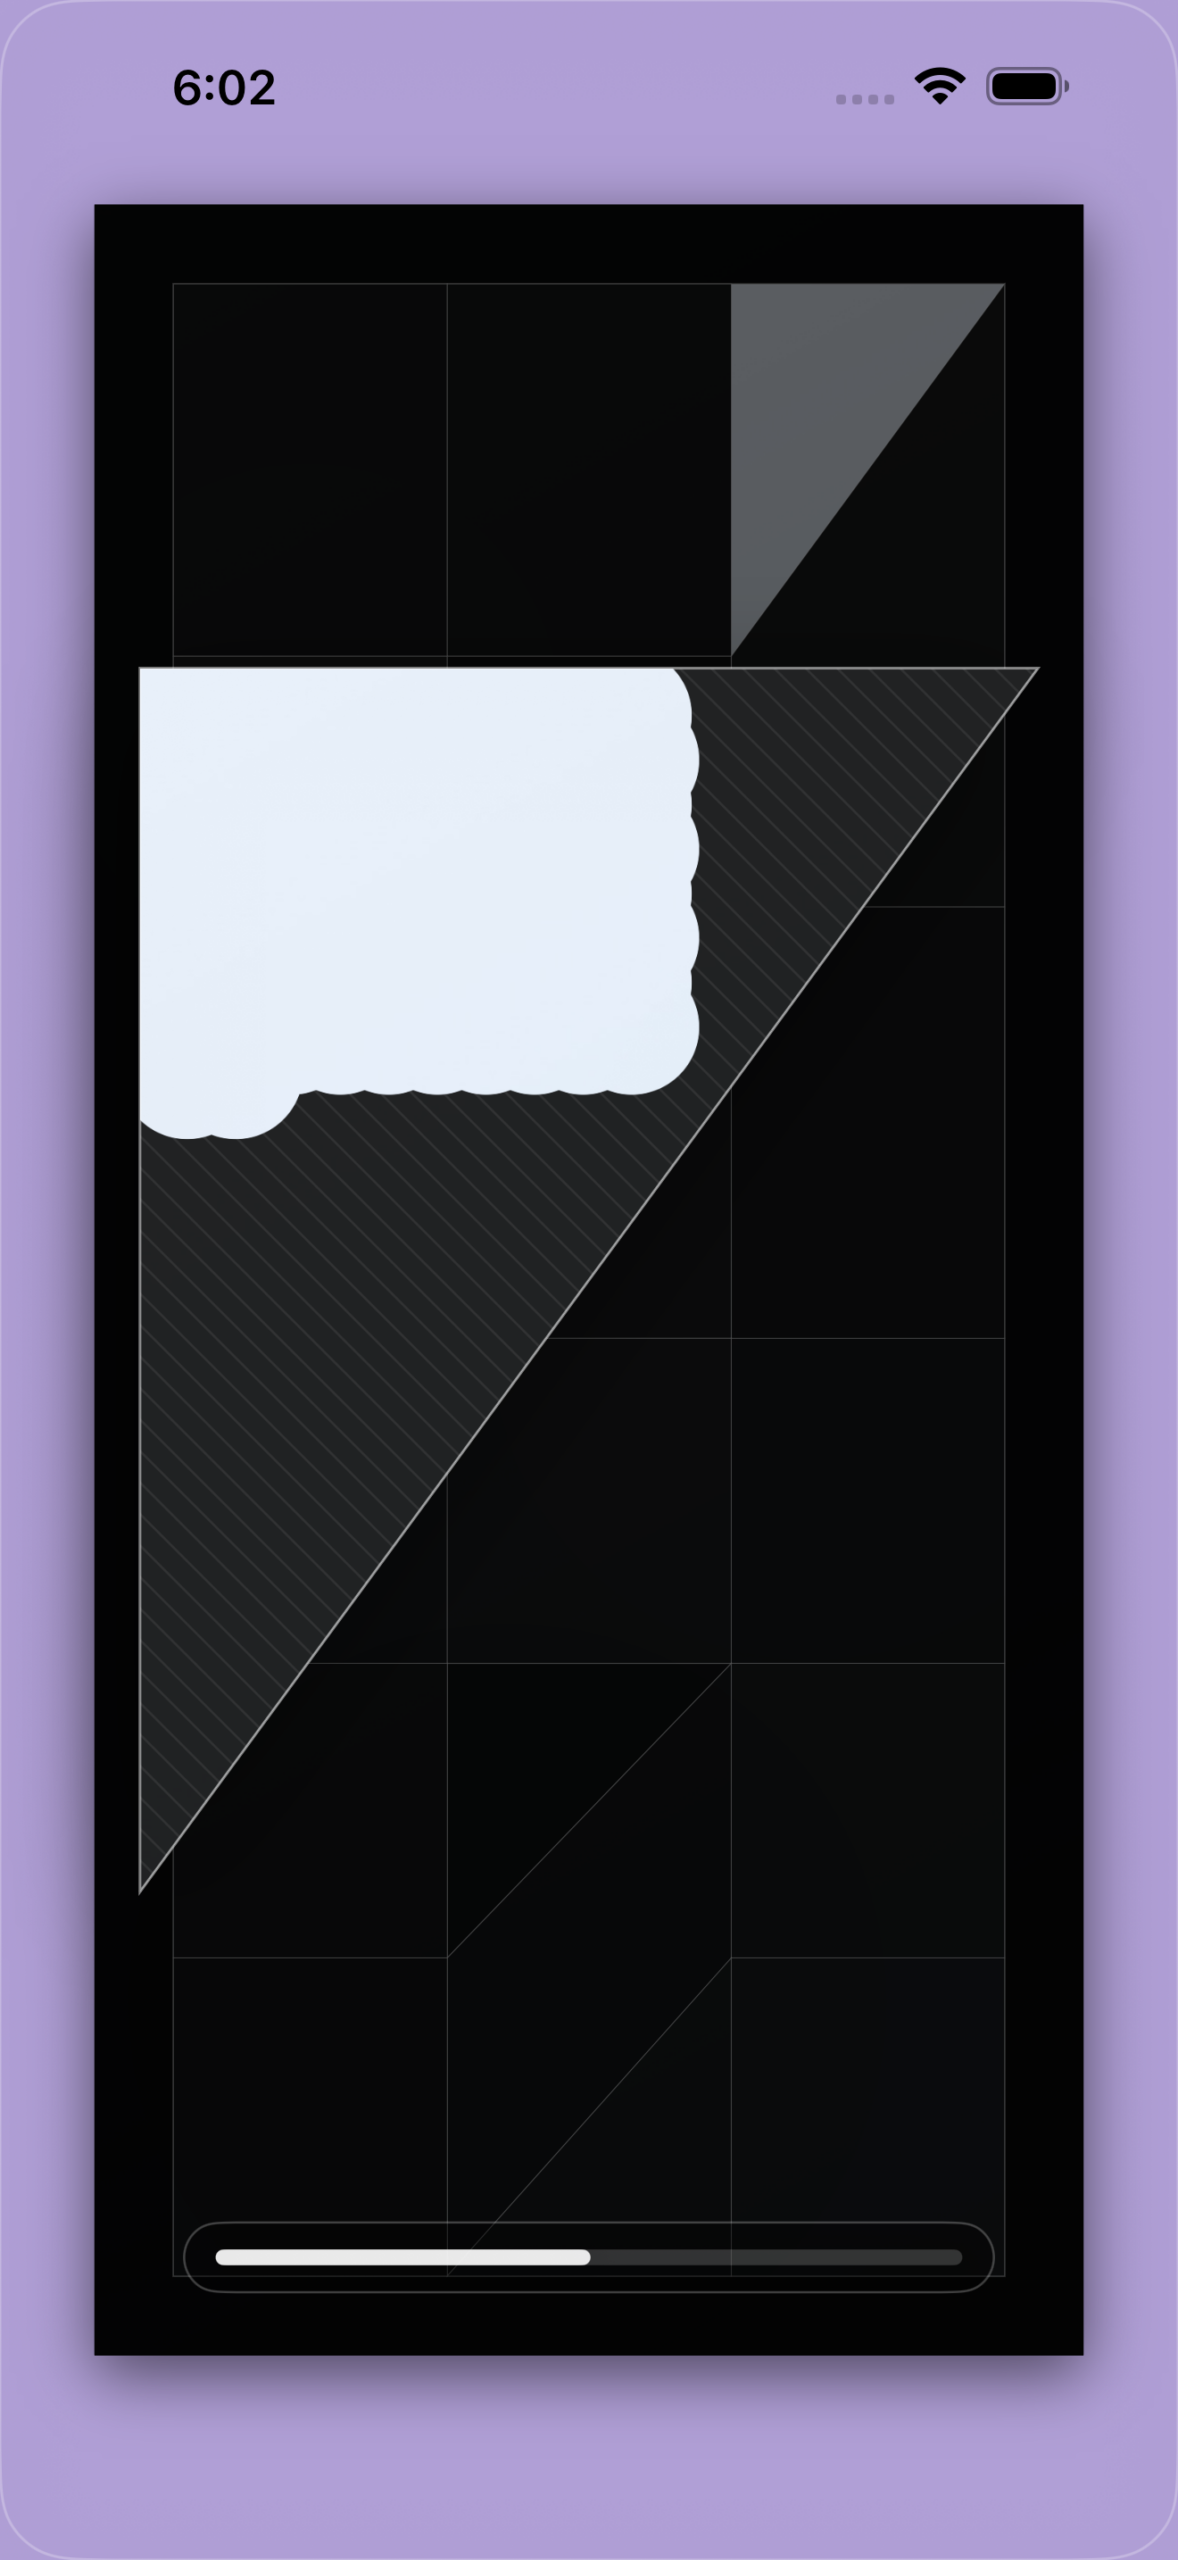
Behind a calm, structured grid lies your chosen picture. As time passes, the grid slowly opens. What once was hidden becomes visible — step by step.
Takamaru is built around a simple idea: Anticipation grows.
Instead of watching numbers drop to zero, you experience progress visually. Every day brings you closer. Every day reveals a little more.
Features:
Create a countdown to a single meaningful date
Add a custom title and personal image
Reveal your image day by day through a clean grid
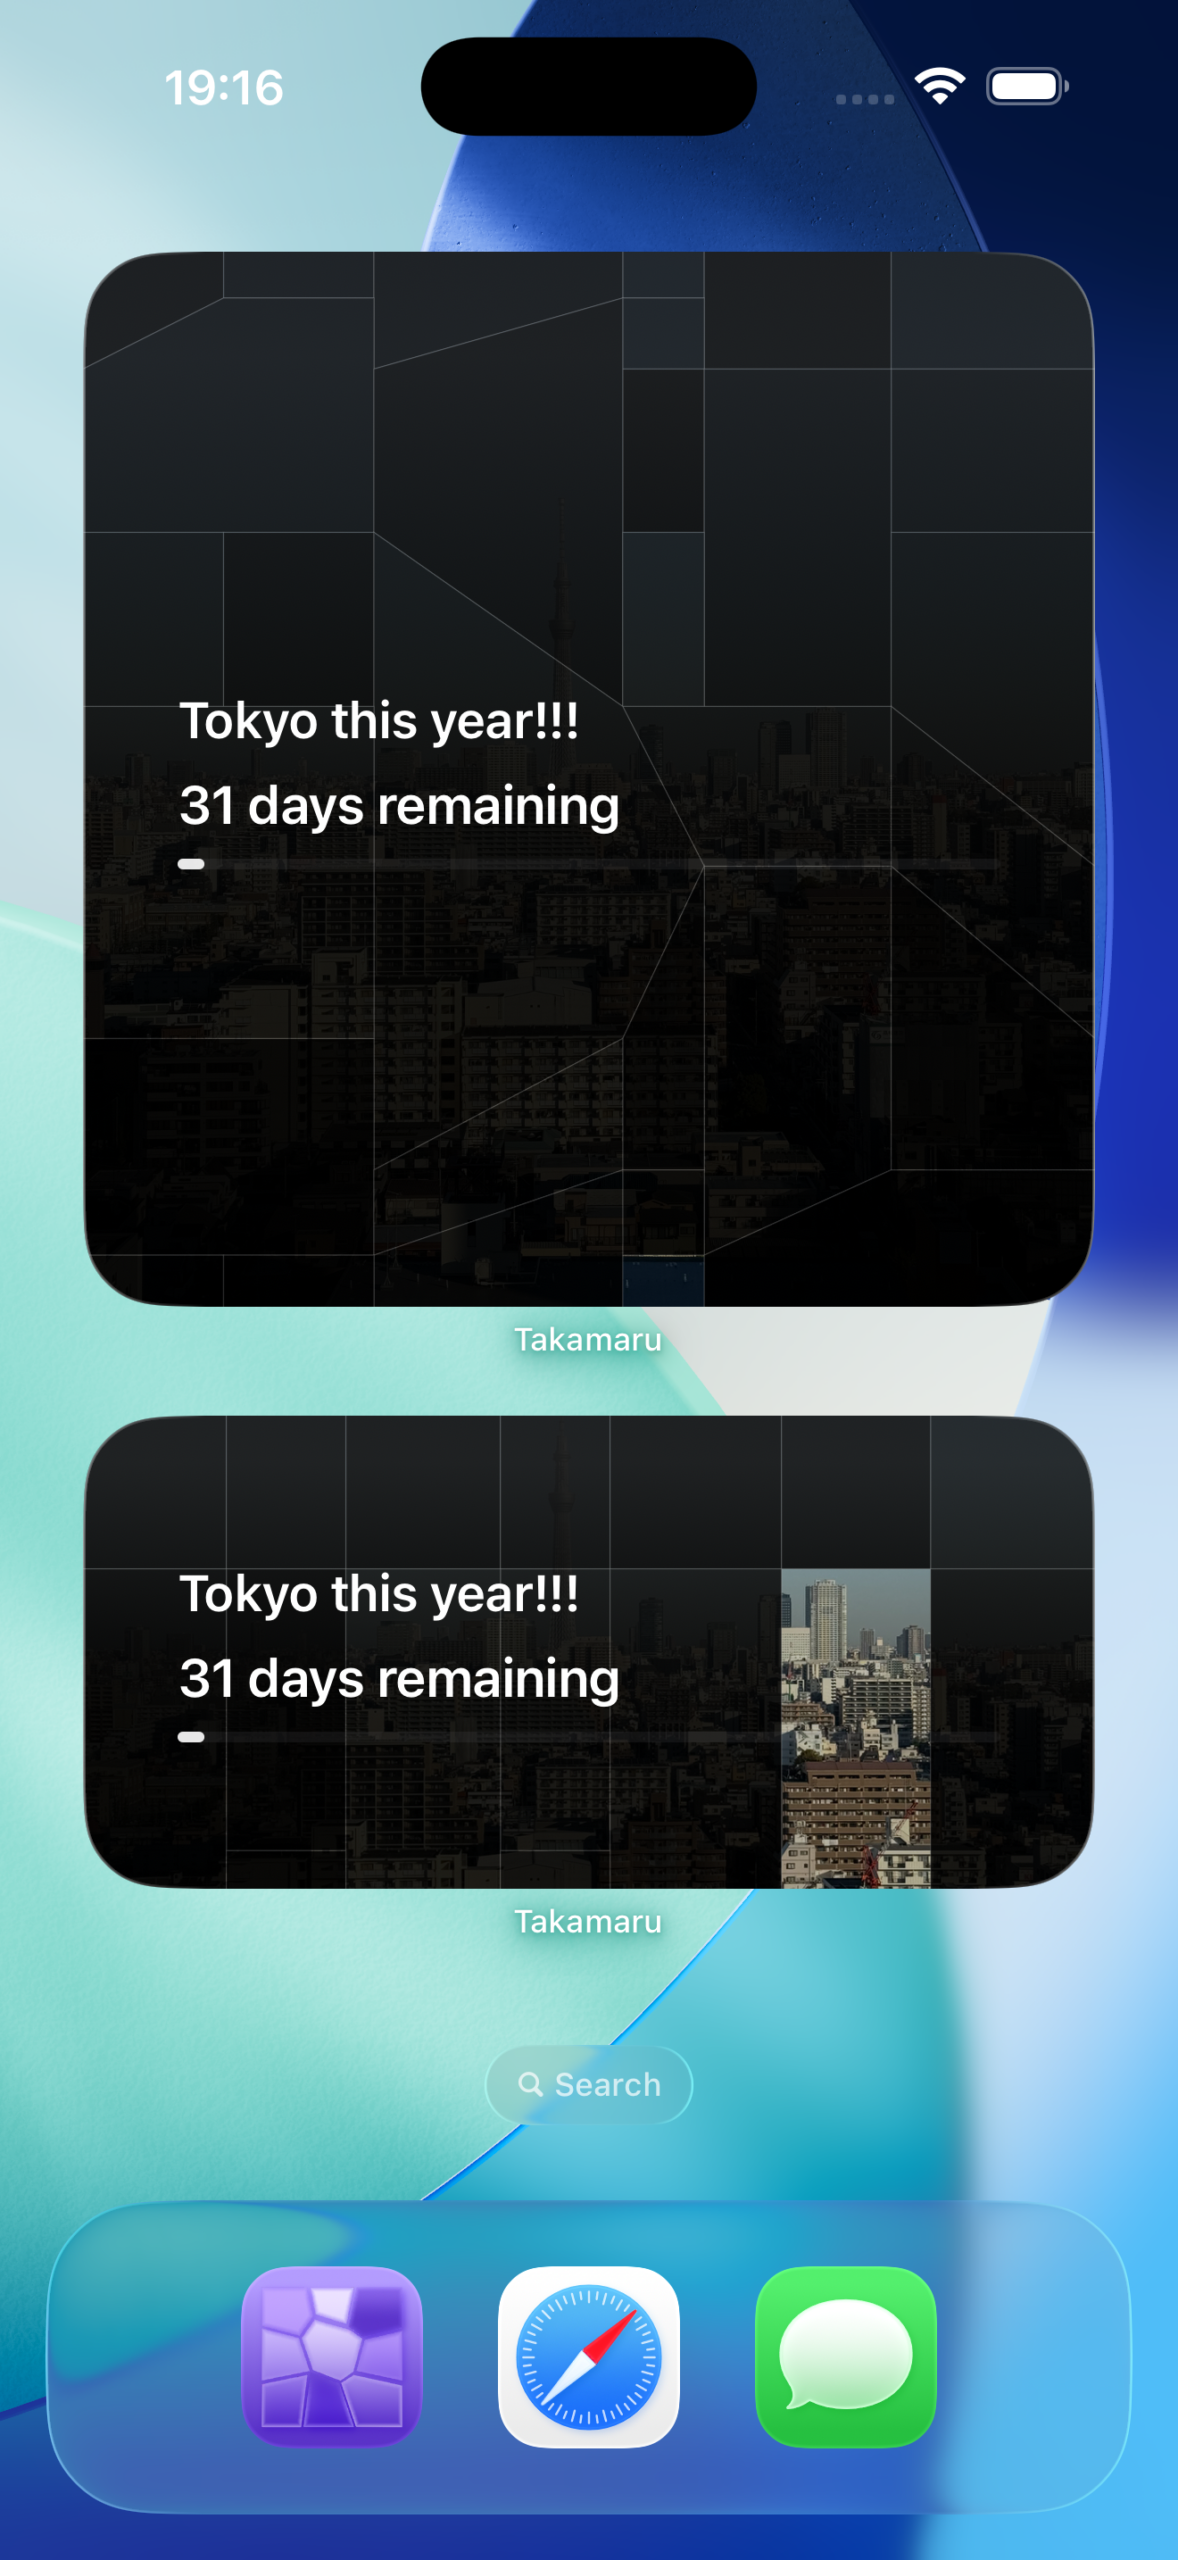
See how many days remain at a glance
Sync across your devices via iCloud
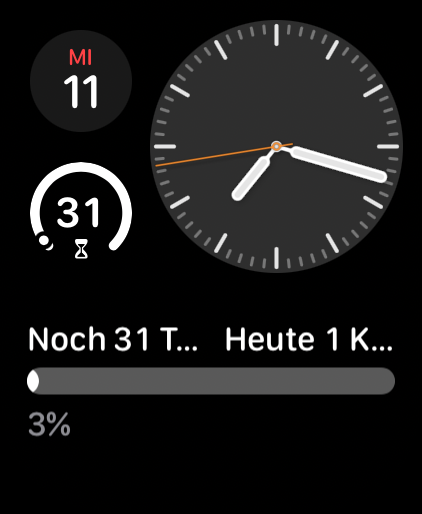
Widgets for Home and Lock Screen
Apple Watch support with complications
Optional daily reminders so you never miss a step
The grid is not just decoration. Each cell represents one calendar day. The logic is precise and stable across time zones and daylight saving changes. If you don’t open the app for a few days, it quietly catches up. Nothing is lost.
Your progress syncs automatically across iPhone, iPad, Apple Watch, and widgets.
Free in this sense, as I have mentioned in-app purchases, means: any event up to 7 days away is free. But not only this, you can also, for free, get special events to cater towards.
Special events you say? Tell me more! Sure thing!
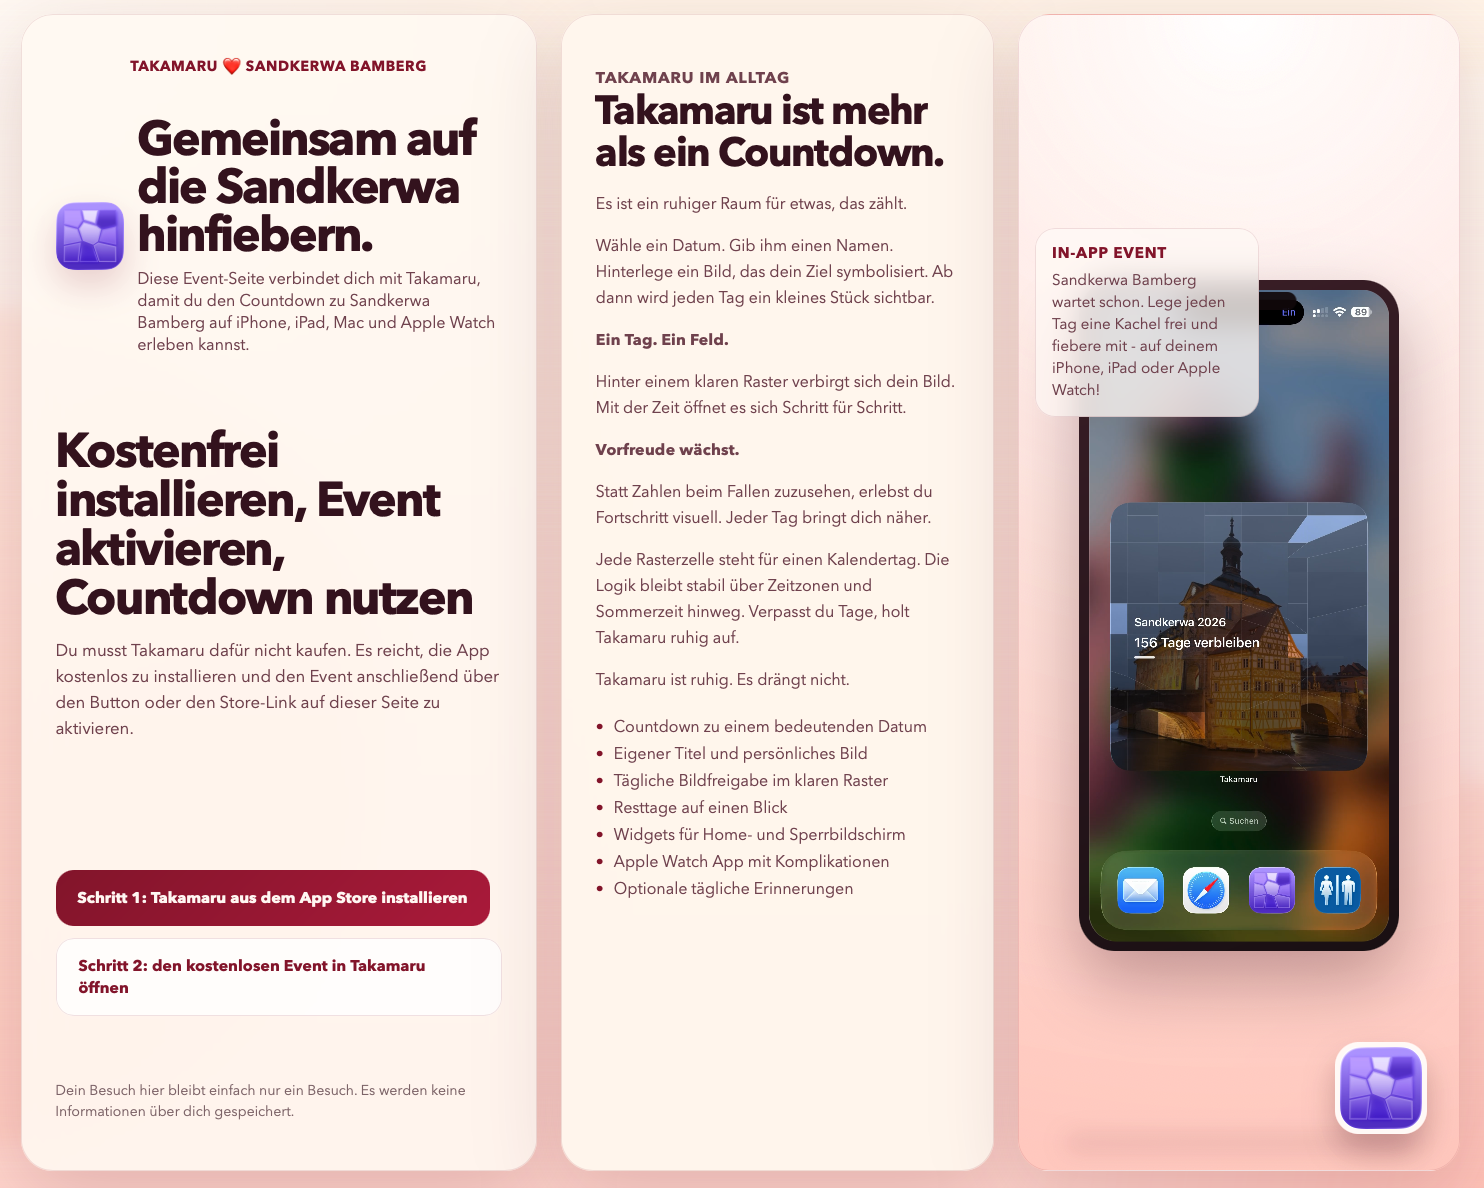
Like where we live we have a yearly festival which the whole area seems to enjoy. It’s quite a spectacle and many people take part in it. The Sandkerwa.
And so as many people can, for free, enjoy the app, the countdown and the event, we made the app handle special events. Basically: You install the app, you tap a link and it automatically adds the special event for free. You can try it right now if you want.
Go to this site and install the app and the event. Or use this direct link if you already have the app installed: takamaru://sandkerwabamberg
I was juggling around with several simulators on my macOS machine and I found that Xcode does not offer any easy way to clone and re-use instances of the simulator with all its settings.
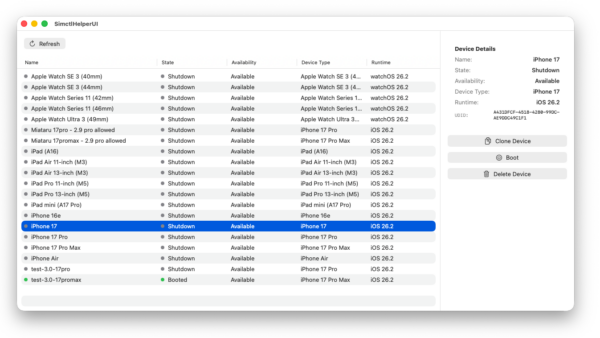
Digging deeper revealed that there is a command line interface that is able to provide these functions. Since CLI is nice but there can be easier ways I made (with the help of vibe coding): SimctlHelperUI.
A macOS SwiftUI application that provides a graphical user interface for managing iOS simulators. SimctlHelperUI wraps the xcrun simctl command-line tool, making it easier to view, clone, delete, and control iOS simulators through an intuitive interface.
Features
Device List View: Browse all available iOS simulators in a sortable table
Device Management:
Clone simulators with custom names
Delete simulators
Boot and shutdown simulators
Device Information: View detailed information including:
Device name and UDID
Current state (Booted/Shutdown)
Availability status
Device type (e.g., iPhone 17 Pro)
Runtime version (e.g., iOS 26.2)
Visual Indicators: Color-coded status indicators for quick device state recognition
Sortable Columns: Sort devices by name, state, availability, device type, or runtime version
Auto-refresh: Automatically refreshes the device list after operations
OpenStreetMap data is huge. Like really really huge. Its the whole planet earth afterall. So huge in fact that so far I am using a separate server to host my very own, up-to-date OpenStreetMap planet instance that I can query against with the Overpass-API format.
Overpass is quite handy for all sorts of use-cases, like searching for very specific information on the map – like amenities (toilets, benches, ATMs,…).
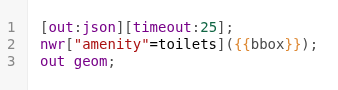
So a query like this (you have to set bbox to the actual bounding box coordinates):
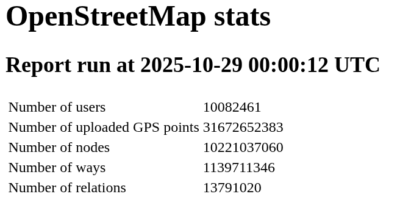
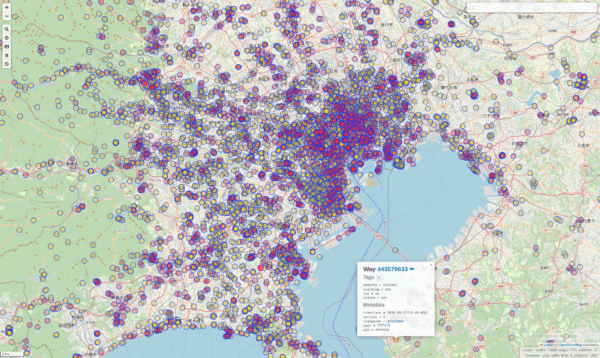
Will produce a data-set representing all toilets inside of that bounding box on the map. This will look a lot like this:
And of course this is lots of effort to sieve through all the millions of nodes inside of the bounding-box and filtering out the right ones.
To produce the example above my server needs roughly 27630 milliseconds or just under 28 seconds to process all that data (which is 13668 toilets….).
For the amount of data and the processing required this isn’t all that bad. The caveat: if you rerun that request it will take the almost exact same time. It’s just a lot of data and the limit here is SSD-read speeds and compute capacity.
Now I happen to have written an app that makes use of Overpass-Queries as its main purpose: It finds you amenities like Toilets. It does implement it’s own caching on client side, so for users the map is fast after the actual load, no matter how often they come back to that section of the map. But that client-side caching does not scale with lots of users.
With the recent rewrite of my app the userbase has expanded. Therefore lots more users actually use my app. And apparently they run lots of overpass queries. To relieve server load and required resources I came up with a simple vibe code prompt:
I have the following idea and would like to develop a plan with you for a specification on how this idea can best be implemented with Codex.
Current situation: So far, I have been running a full OpenStreetMap Overpass Server. This comes with enormous resource requirements because the entire OSM world map, including all metadata, must be managed and kept up to date.
My use case (filtering for toilets/amenities), however, is relatively limited and can be summarized into fixed queries. When I look at how much data is actually affected worldwide, I would estimate that instead of the 500 GB world map, less than 100 MB of real useful data is relevant for my application.
node
  [amenity=toilets]
  ({{bbox}});
out body meta;>;out skel qt;
I want the Overpass API proxy to cache all potential data (with a configurable TTL) and query results from an underlying Overpass API server, fill the cache, and return bounding-box results according to the query.
Any bounding boxes should be queryable — but always with a fixed amenity.
The task: Create a specification, program flow, and implementation instructions for a program that uses Node.js as the base for the Overpass API proxy and Redis as the intermediate storage/cache. The whole thing should be deployable as a Docker container and have both a configurable TTL and a configurable upstream Overpass API server.
Bonus: It would be a plus if the actual amenity could be flexibly chosen. All metadata returned by the Overpass server should be correctly stored and, upon request, reassembled into bounding boxes by the Overpass API proxy.
Several steps with OpenAIs Codex and Cursor led to an actual implementation of that idea.
The result: The exact same query, when run again, takes less than 2 seconds now:
I have, as usual, open sourced that tool. So you can try for yourself, if you happen to have a use case. If you want you can try it out best with Overpass Turbo in your browser, while setting up the Overpass-Proxy on a server (docker instructions included in the box).
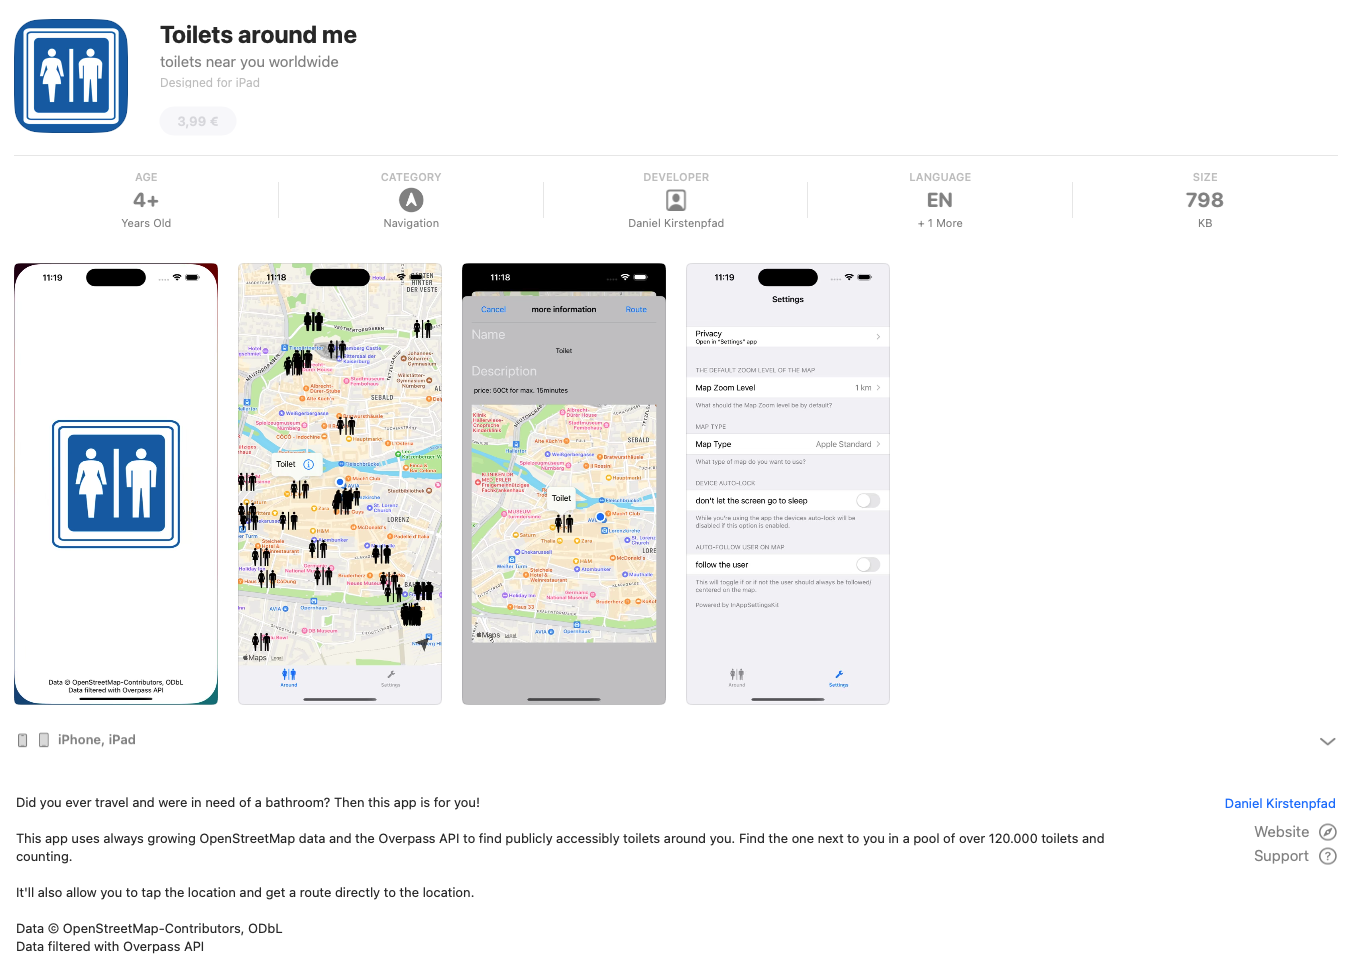
Back in 2015 I built a small app because I was traveling a lot and kept running into the same slightly ridiculous, slightly stressful situation: you never really know where the next public toilet is until it becomes… quite an urgent matter.
So I hacked together a simple iOS app, used OpenStreetMap data, showed nearby toilets, and uploaded it to the App Store. It was called Toilet Finder. It worked. And then it just… stayed that way for almost a decade.
Why a rewrite?
At some point, code just ages out of its time. The original app was built in the early days of iOS development with ObjectiveC as the programming language.
It kept working but every time I tried to fix something, I ended up spelunking through a maze of compatibility shims and ancient delegate patterns. A piece of software that functioned but didn’t feel maintainable anymore.
So I started over.
The same idea, just cleaner
The essence of the app hasn’t changed:
“Show me nearby toilets, instantly, without tracking me, and without subscriptions.”
But everything underneath was rewritten from scratch. The new version is entirely SwiftUI, with structured concurrency and Apple’s MapKit for rendering and routing.
That change alone cut away thousands of lines of glue code. Apple Maps now provides both the background map tiles and the walking routes directly inside the app — no context switch to another app.
Open data, still the foundation
From the very beginning, the data came from OpenStreetMap (OSM), and it still does. It’s hard to overstate how valuable that project is — an open, crowd-maintained map of the entire planet, full of tiny details that commercial datasets rarely bother with. And crowd-maintained means: you can add something anytime yourself (which I do a lot when I am travelling).
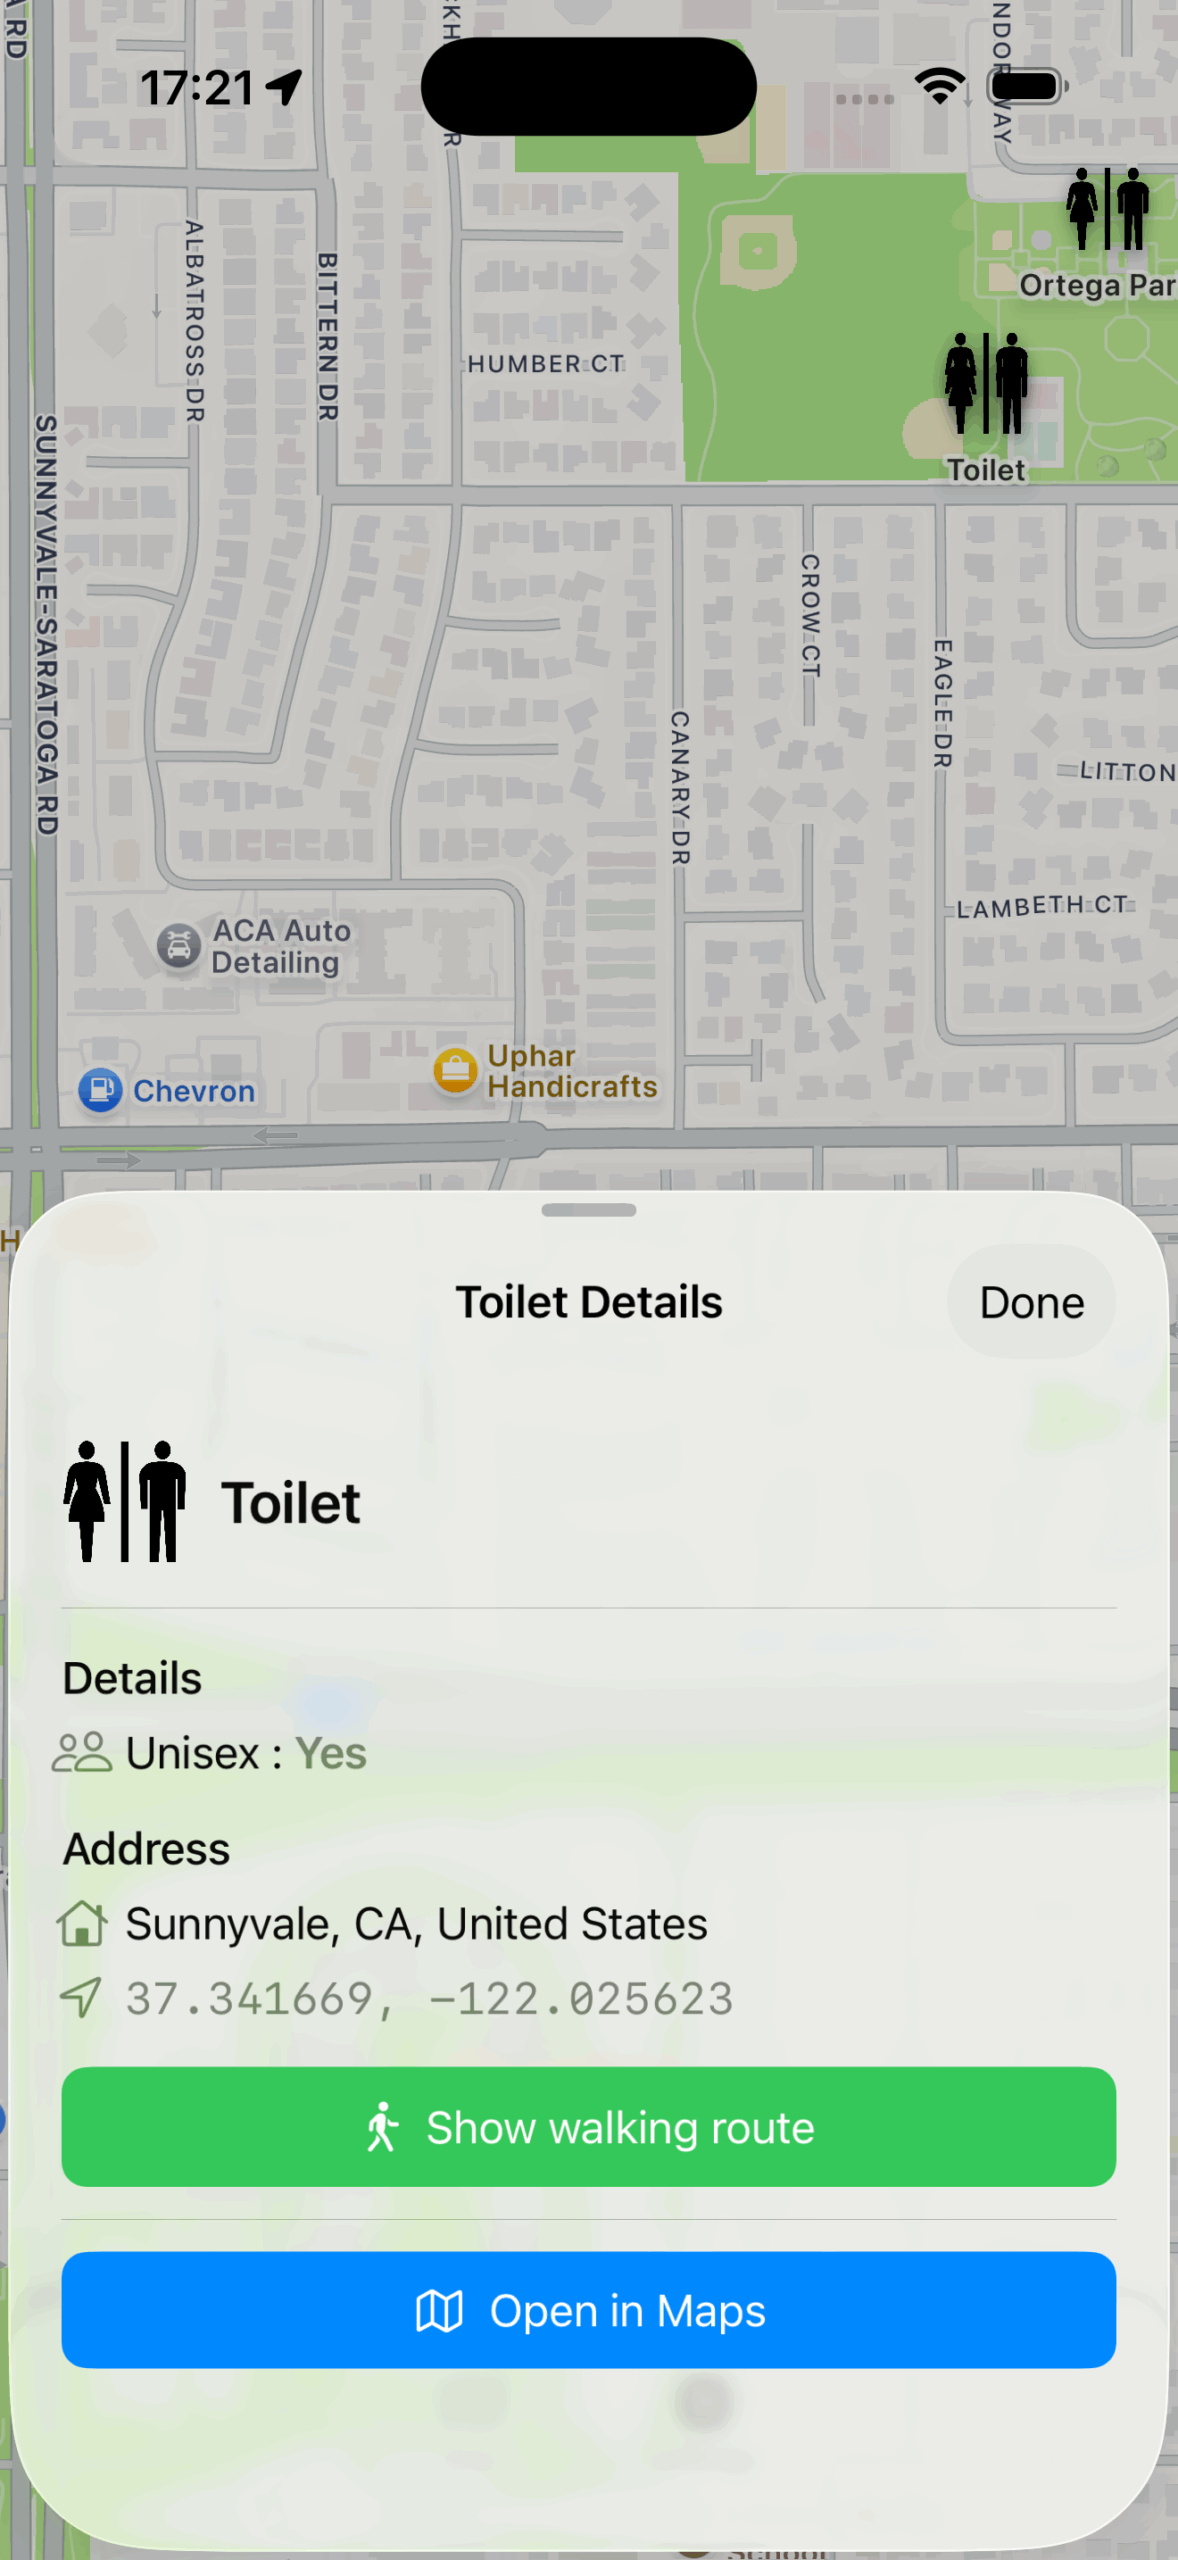
Every public toilet in OSM carries a little bundle of metadata: whether it’s wheelchair accessible (wheelchair=yes), has a baby-changing table (changing_table=yes), costs money (fee=yes), or is unisex.
That richness makes OSM perfect for this use case — but only if you can query it efficiently.
That’s where Overpass comes in. Overpass is a specialized database engine built to answer complex questions about OSM data. Instead of downloading the entire world, you can ask things like:
node
  [amenity=toilets]
  ({{bbox}});
out;
This means: “Give me all objects tagged as toilets within this bounding box.”
The result is a clean JSON structure that contains just what’s needed — coordinates, tags, and nothing else. It’s elegant, but also resource-intensive.
The public Overpass servers are shared by thousands of users worldwide. To avoid adding load or hitting rate limits, I decided early on to operate a dedicated Overpass instance specifically for this app. It runs on my own infrastructure, continuously synchronised with the global OSM database, and tuned for quick bounding-box queries.
That setup means the app never touches the public endpoints. Every user query goes against my own server, which mirrors the OSM planet file and indexes it for exactly this use case. And my servers do not log anything. Every request is stateless and gone after it’s done.
Privacy by design
Because the app directly queries Overpass, there’s no need for user accounts, analytics, or any logging. The app simply constructs a bounding box around your visible map area and sends it to the Overpass instance.
The result is just a list of toilets — which are then drawn locally on the map.
The new logic under the hood
The rewrite gave me a chance to rethink the app’s internal logic. In the old version, every pan or zoom triggered a new request. It worked, but it was noisy — and sometimes slow.
Now, the app uses a spatial cache. It remembers which regions of the map you’ve already seen and reuses them instantly. If you return to the same area later (even offline), the toilets appear immediately, and a background task quietly checks for updates.
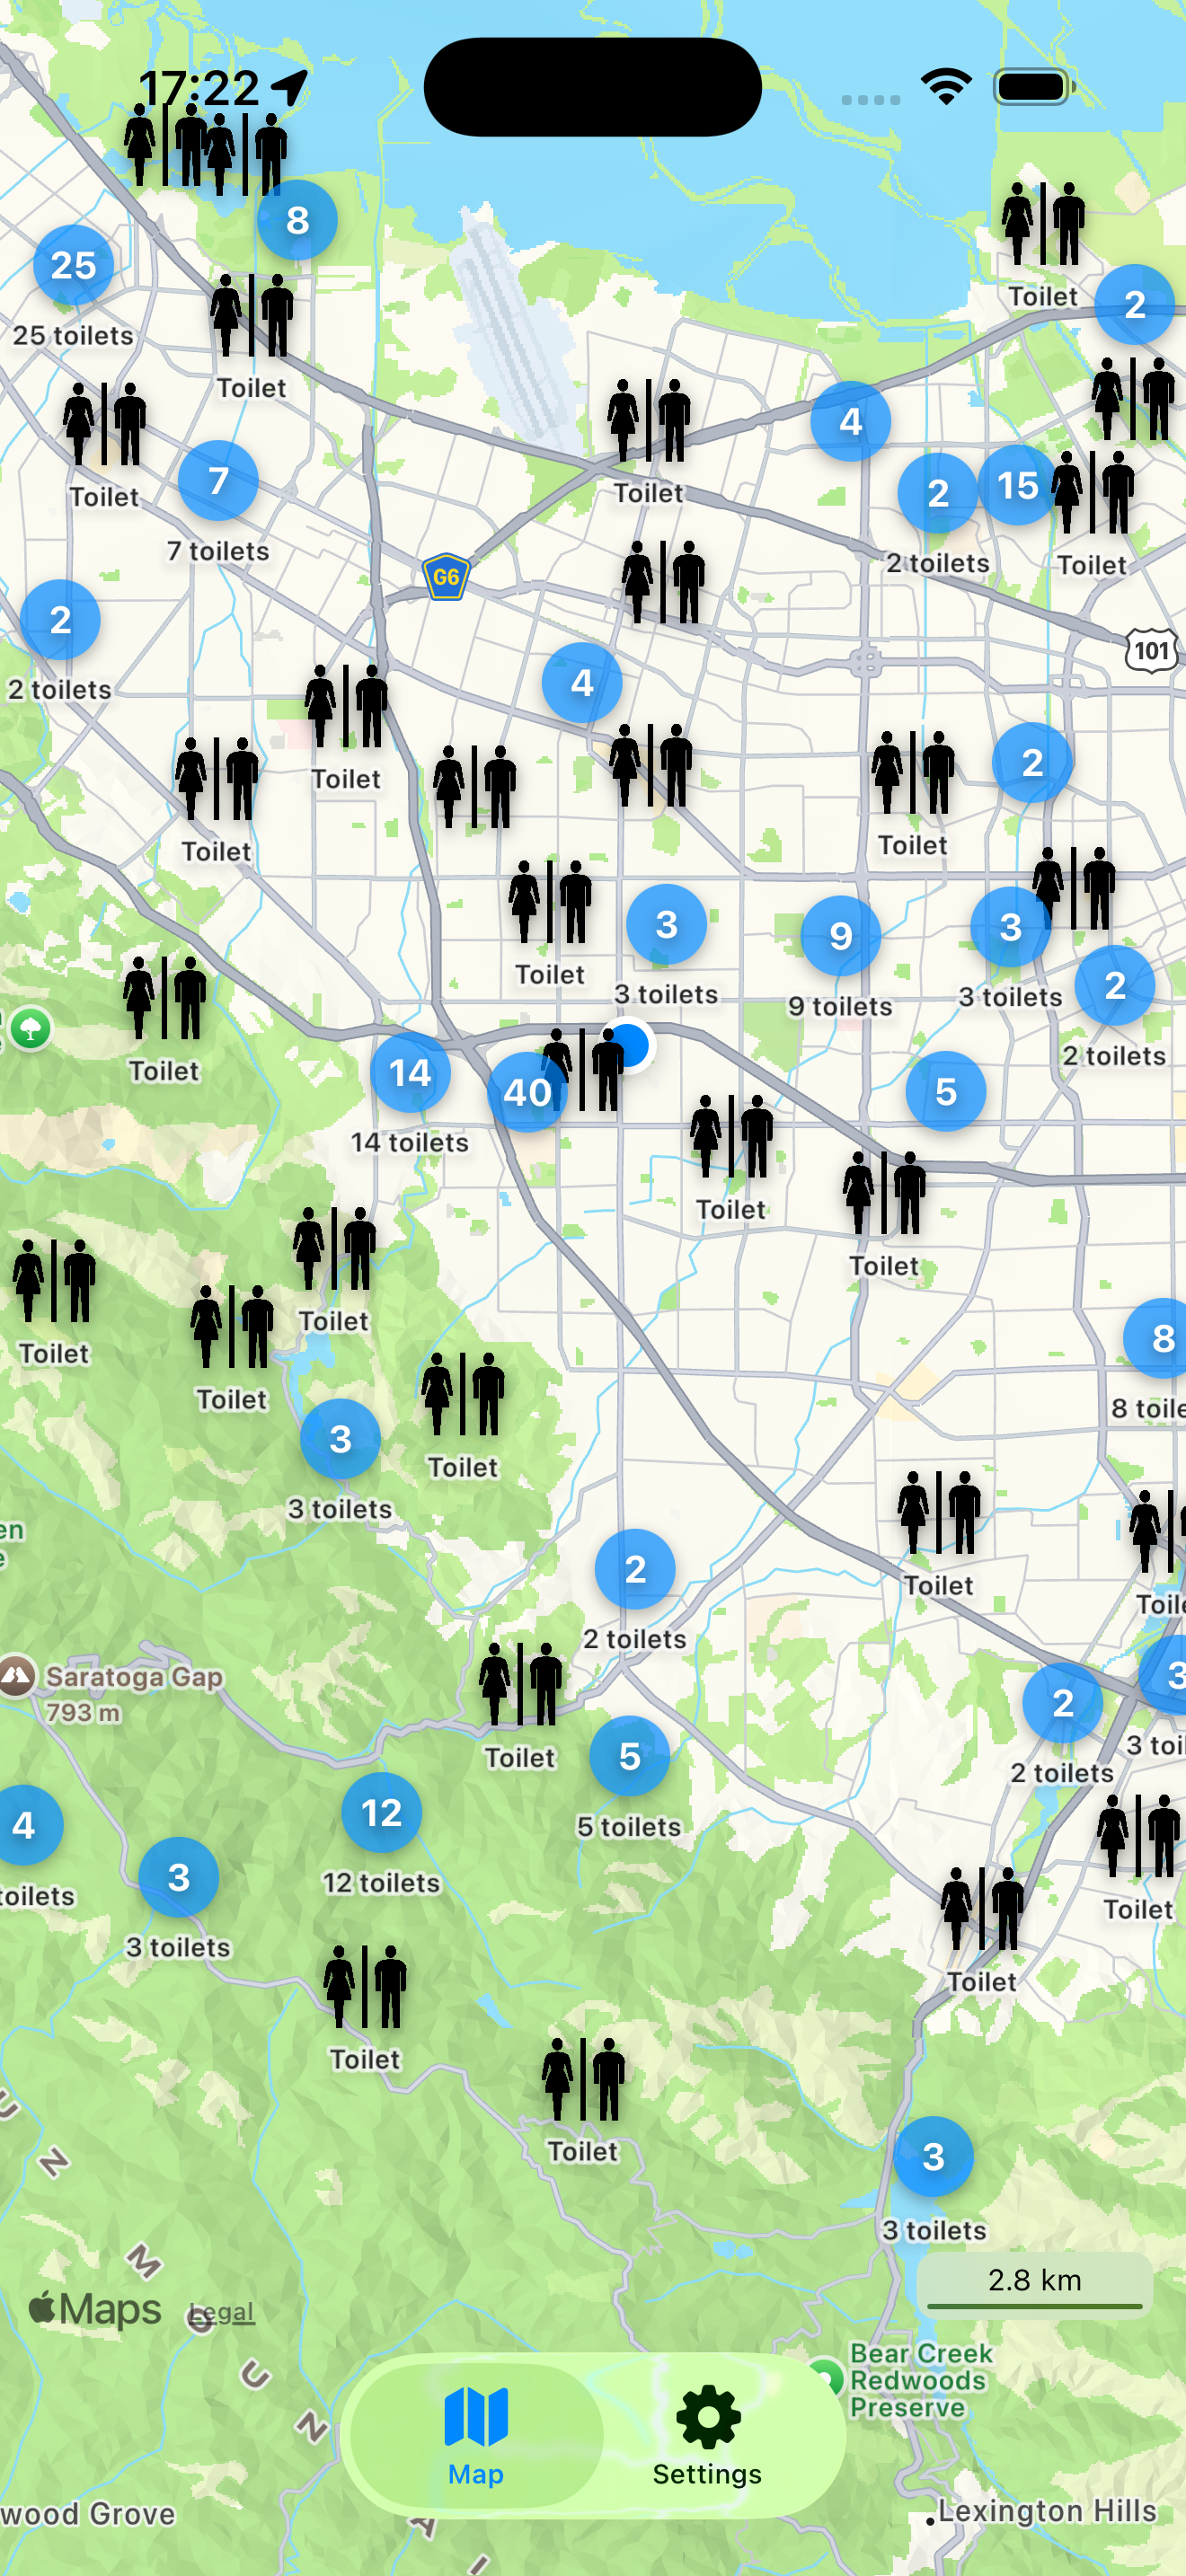
There’s also clustering now. Instead of dropping hundreds of overlapping pins in dense city areas, the app groups nearby toilets into a single marker that expands smoothly as you zoom in. It keeps the map readable — and strangely satisfying to explore.
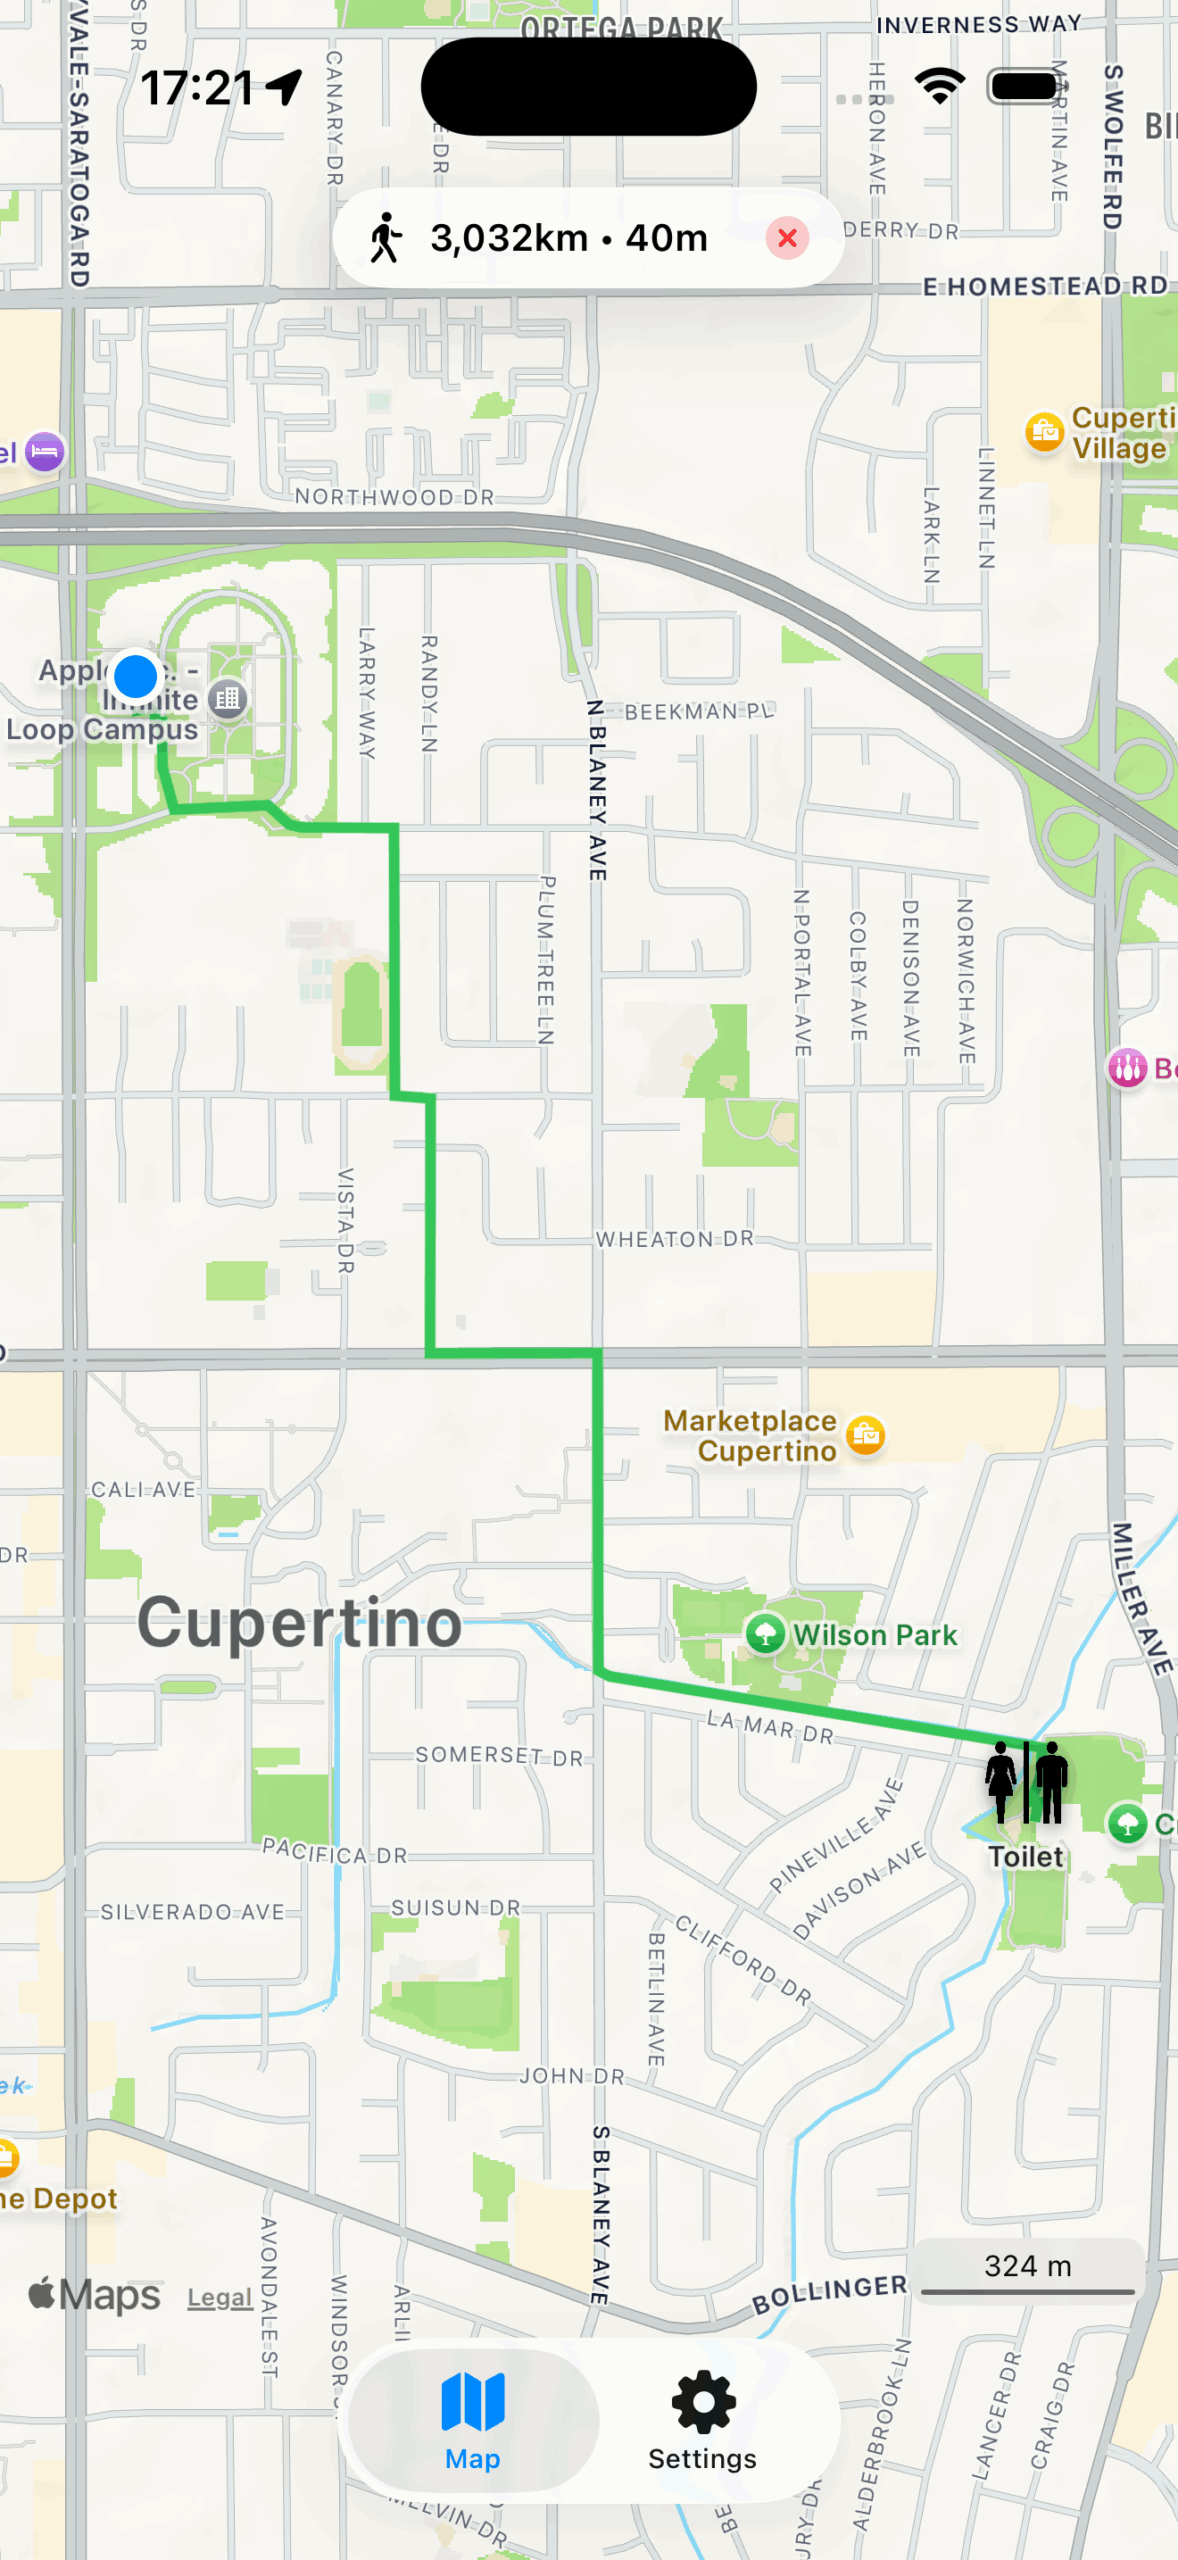
Walking routes, finally in-app
One of the small frustrations with version 1 was that navigation meant switching to the Maps app. Now, when you tap “Show walking route,” the path appears right there, drawn in green on the same map.
That might sound like a detail, but it changes how it feels to use the app. You don’t lose context; the map doesn’t disappear. You tap, it shows, you walk.
Looking back
When I first uploaded Toilet Finder in 2015, I never imagined it would still exist ten years later. It was a small weekend project, built to solve a personal nuisance. But people started to use it and still do. Now the app itself is translated to multiple languages. The old version knew English. Version 2.0 comes with English, German, French, Spanish and Japanese.
Rewriting it in 2025 wasn’t about chasing new trends; it was about giving an old idea a proper modern home. The app feels the same, but lighter, smoother, and more trustworthy.
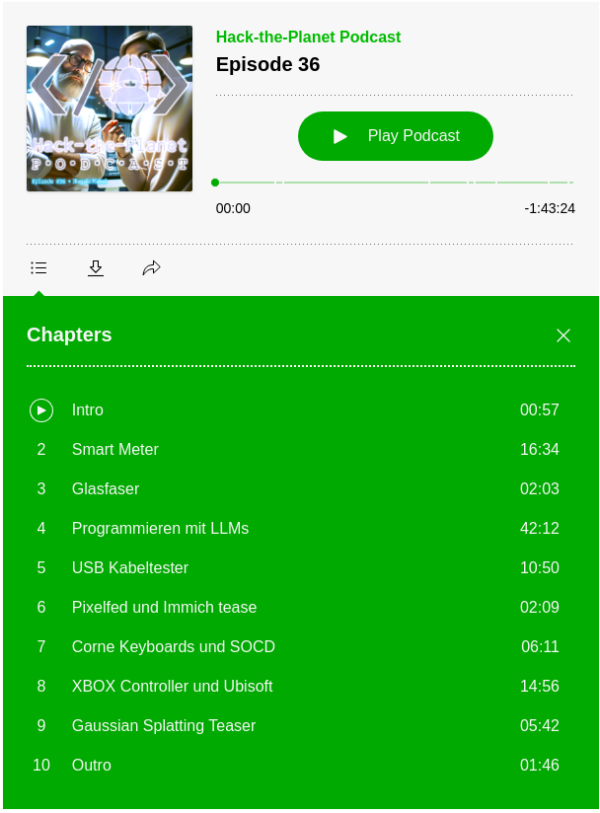
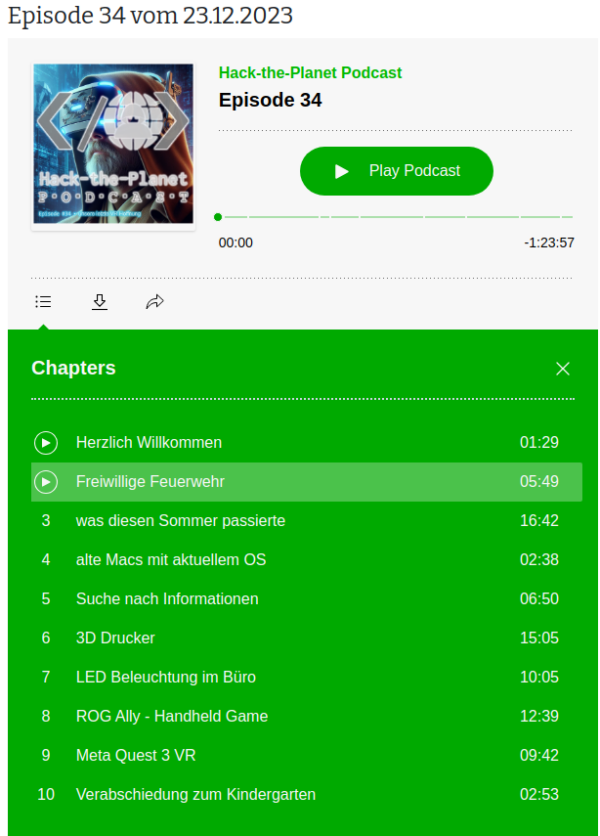
In dieser Folge des „Hack the Planet“ Podcasts diskutieren Daniel und Andreas über Smartmeter, Code mit LLMs, Grafiken (ohne KI), einen USB-Kabeltester, eine teure Gamer-Tastatur, selbstprogrammierte Features und den Xbox Elite Controller. Andreas berichtet über seine Erfahrungen mit Smartmetern und den Herausforderungen, die damit einhergehen, wie z.B. der Kosten und der Umstellung auf neue Technologien. Sie sprechen auch über Photovoltaikanlagen, Batteriespeicher und die Regulierungen, die es erforderlich machen, Smartmeter zu installieren. Außerdem geht es über die Herausforderungen und den Spaß, den sie beim Programmieren mit LLMs hatten, sowie über ihre Erlebnisse mit neuen technologischen Gadgets.
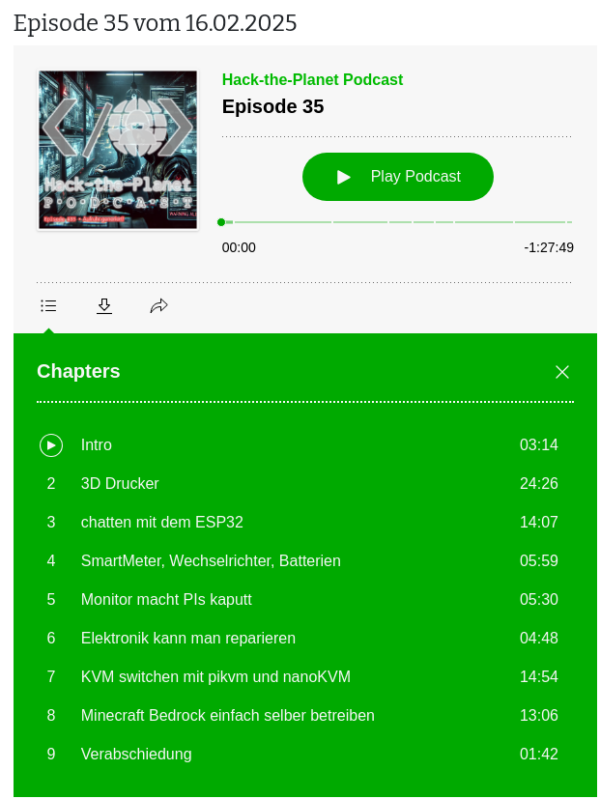
In der 35. Folge des Hack-the-Planet-Podcasts diskutieren Daniel und Andreas eine Vielzahl von Themen rund um Technik, 3D-Druck, persönliche Projekte und Community-Veranstaltungen. Sie beginnen mit einem Rückblick auf die lange Pause seit der letzten Folge und teilen ihre Erfahrungen mit technischen Problemen und Updates an ihren Computern und Software.
Ein zentrales Thema ist der 3D-Druck, wobei Daniel seine Erfahrungen mit verschiedenen 3D-Druckern und Materialien wie PLA und PETG teilt. Er beschreibt die Herausforderungen und Lernkurven beim 3D-Druck sowie die Nachbearbeitung der Drucke. Andreas berichtet von seinen Projekten, darunter der Bau einer kompletten Trooper-Uniform aus Star Wars und eines lebensgroßen B1-Battle-Droiden. Andreas berichtet von Science-Fiction-Treffen und Cosplay-Veranstaltungen, insbesondere dem jährlichen Treffen in Speyer, und beschreibt die Technikmuseen in Speyer und Sinsheim.
Daniel und Andreas diskutieren zudem verschiedene technische Gadgets, einschließlich der Nutzung von ESP32 für Chat-Anwendungen im Flugzeug, und teilen ihre Erfahrungen mit der Sicherheit und Lagerung von Lithium-Polymer-Batterien.
Ein weiteres Thema ist die Einrichtung eines eigenen Minecraft-Servers für die Familie und die Herausforderungen bei der Nutzung von Xbox und anderen Konsolen für Multiplayer-Spiele.
I am currently contemplating the development of a mobile application that allows users to discover and collect various Japanese cultural stamps, such as 駅スタンプ (eki stamps), 御朱印 (goshuin), and 鉄印 (tetsuin). Additionally, this app will enable users to share their collections. My plan is to utilize OpenStreetMap data and provide functionality for users to contribute new stamp locations to the OSM database directly from the app. I have prepared a comprehensive “vision-readme” document that outlines the initial version of the application, detailing various aspects like functionalities, design considerations, and target audience.
I am seeking support as I currently lack expertise in adding structured data to OSM. My experience with OSM data and app development includes hosting my own Overpass server with a full global dataset. This server supports two iOS mobile applications I developed: (1) miataru and (2) Toilets around me.
I am in the research and conceptualization phase and am looking for collaborators interested in contributing to the concept, implementation, and operation of this project.
You can find more details on the vision and concept here:
Overview
EkiStamp Quest is an engaging mobile application designed for travelers in Japan. It’s a perfect companion for those who enjoy collecting unique Eki Stamps from train stations and tourist spots across the country. The app also supports the collection of Goshuin and Tetsuin, catering to a wide range of cultural enthusiasts.
Goshuin are traditional seals collected at temples and shrines, symbolizing a visit and prayer. Tetsuin are railway station-specific stamps, often celebrating historic or scenic railway lines. EkiStamp Quest offers a fun and interactive way to explore and appreciate Japan’s cultural landmarks, including temples, shrines, and railway stations.
Features
Stamp Locator: Utilize your location to discover nearby tourist spots, train stations, temples, and shrines with Eki Stamps, Goshuin, and Tetsuin.
Interactive Map: Navigate through different regions and find locations offering these cultural stamps and seals.
Collection Tracker: Keep track of the stamps and seals you’ve collected and the locations you’ve visited.
Stamp and Seal Information: Access detailed information about each stamp and seal, including their design, station history, and cultural insights.
Community Sharing: Share your collection with others and explore collections from various users.
Rewards and Challenges: Engage in challenges such as stamp rallies and historic railway journeys to collect special stamps and earn rewards.
In-App Cropping Tool: Save and personalize your stamp collection with a cropping tool, allowing for cut-out versions of stamps.
Customizable Collection Books: Choose from various designs to display your stamp collection in a style that suits you.
Social Media Integration: Easily share your stamps, overlaid on personal photos, on social networking sites.
Stamp Rally Participation: Join stamp rallies organized by different locations or operators, adding an exciting dimension to your collection experience.
EkiStamp Quest enriches the cultural experience of its users, enabling them to delve into and appreciate the diverse aspects of Japanese heritage through the collection of unique stamps and seals from various locations. This app transforms the traditional hobby of stamp collecting into an interactive and memorable journey through Japan’s rich cultural landscape.
Contact
To ask any question or offer help, please contact me through the comment function of this blog or by email: bietiekay -at- gmail.com
I have really waited this out. Some “galaxy-sized brains” tell us for decades now that virtual reality is the next big thing. And it might as well have been.
Almost nobody (me included) cared to even try – and with good reason: There’s no way to transport the experience that virtual reality creates in an easy way. Language and “flat-screen-video” is not enough. Even any 3D video is not going to come even close to deliver.
And I knew this was the case. Apart from a 30-second rollercoaster ride years ago I never had any direct contact with virtual reality technology until late this year 2022.
I did of course read about the technology behind all this. About the rendering techniques and the display – sensor – battery – processing hardware. I had read about the requirements for many-frames-per-second to have a believable and enjoyable experience. Would the hardware not be fit for the job the papers said: You will feel sick, very fast.
So I hesitated for years to purchase anything related to this. I wanted to “wait it out” as I had calculated the average spending required for a good set of hardware and software would easily roam into 2k-5k euro territory.
This year the time had come: the prices where down significantly for all components needed. Even better: There where some new hardware releases that tried to compete with existing offerings.
Of course the obvious thing to do would have been to purchase either a Valve Index or some Oculus,eh, Meta VR headsets. But that would have easily blown any budget and actually none of these is technologically interesting in End-2022.
CPU+GPU inside – the headset needs to be able to work stand-alone for video playback and gameplay
battery for at least 1-2 hour wireless play
touch+press controllers
capable of being used as SteamVR / PCVR headset – wireless and wired
Pancake lenses (as in “no fresnel”)
do-not-break-bank price
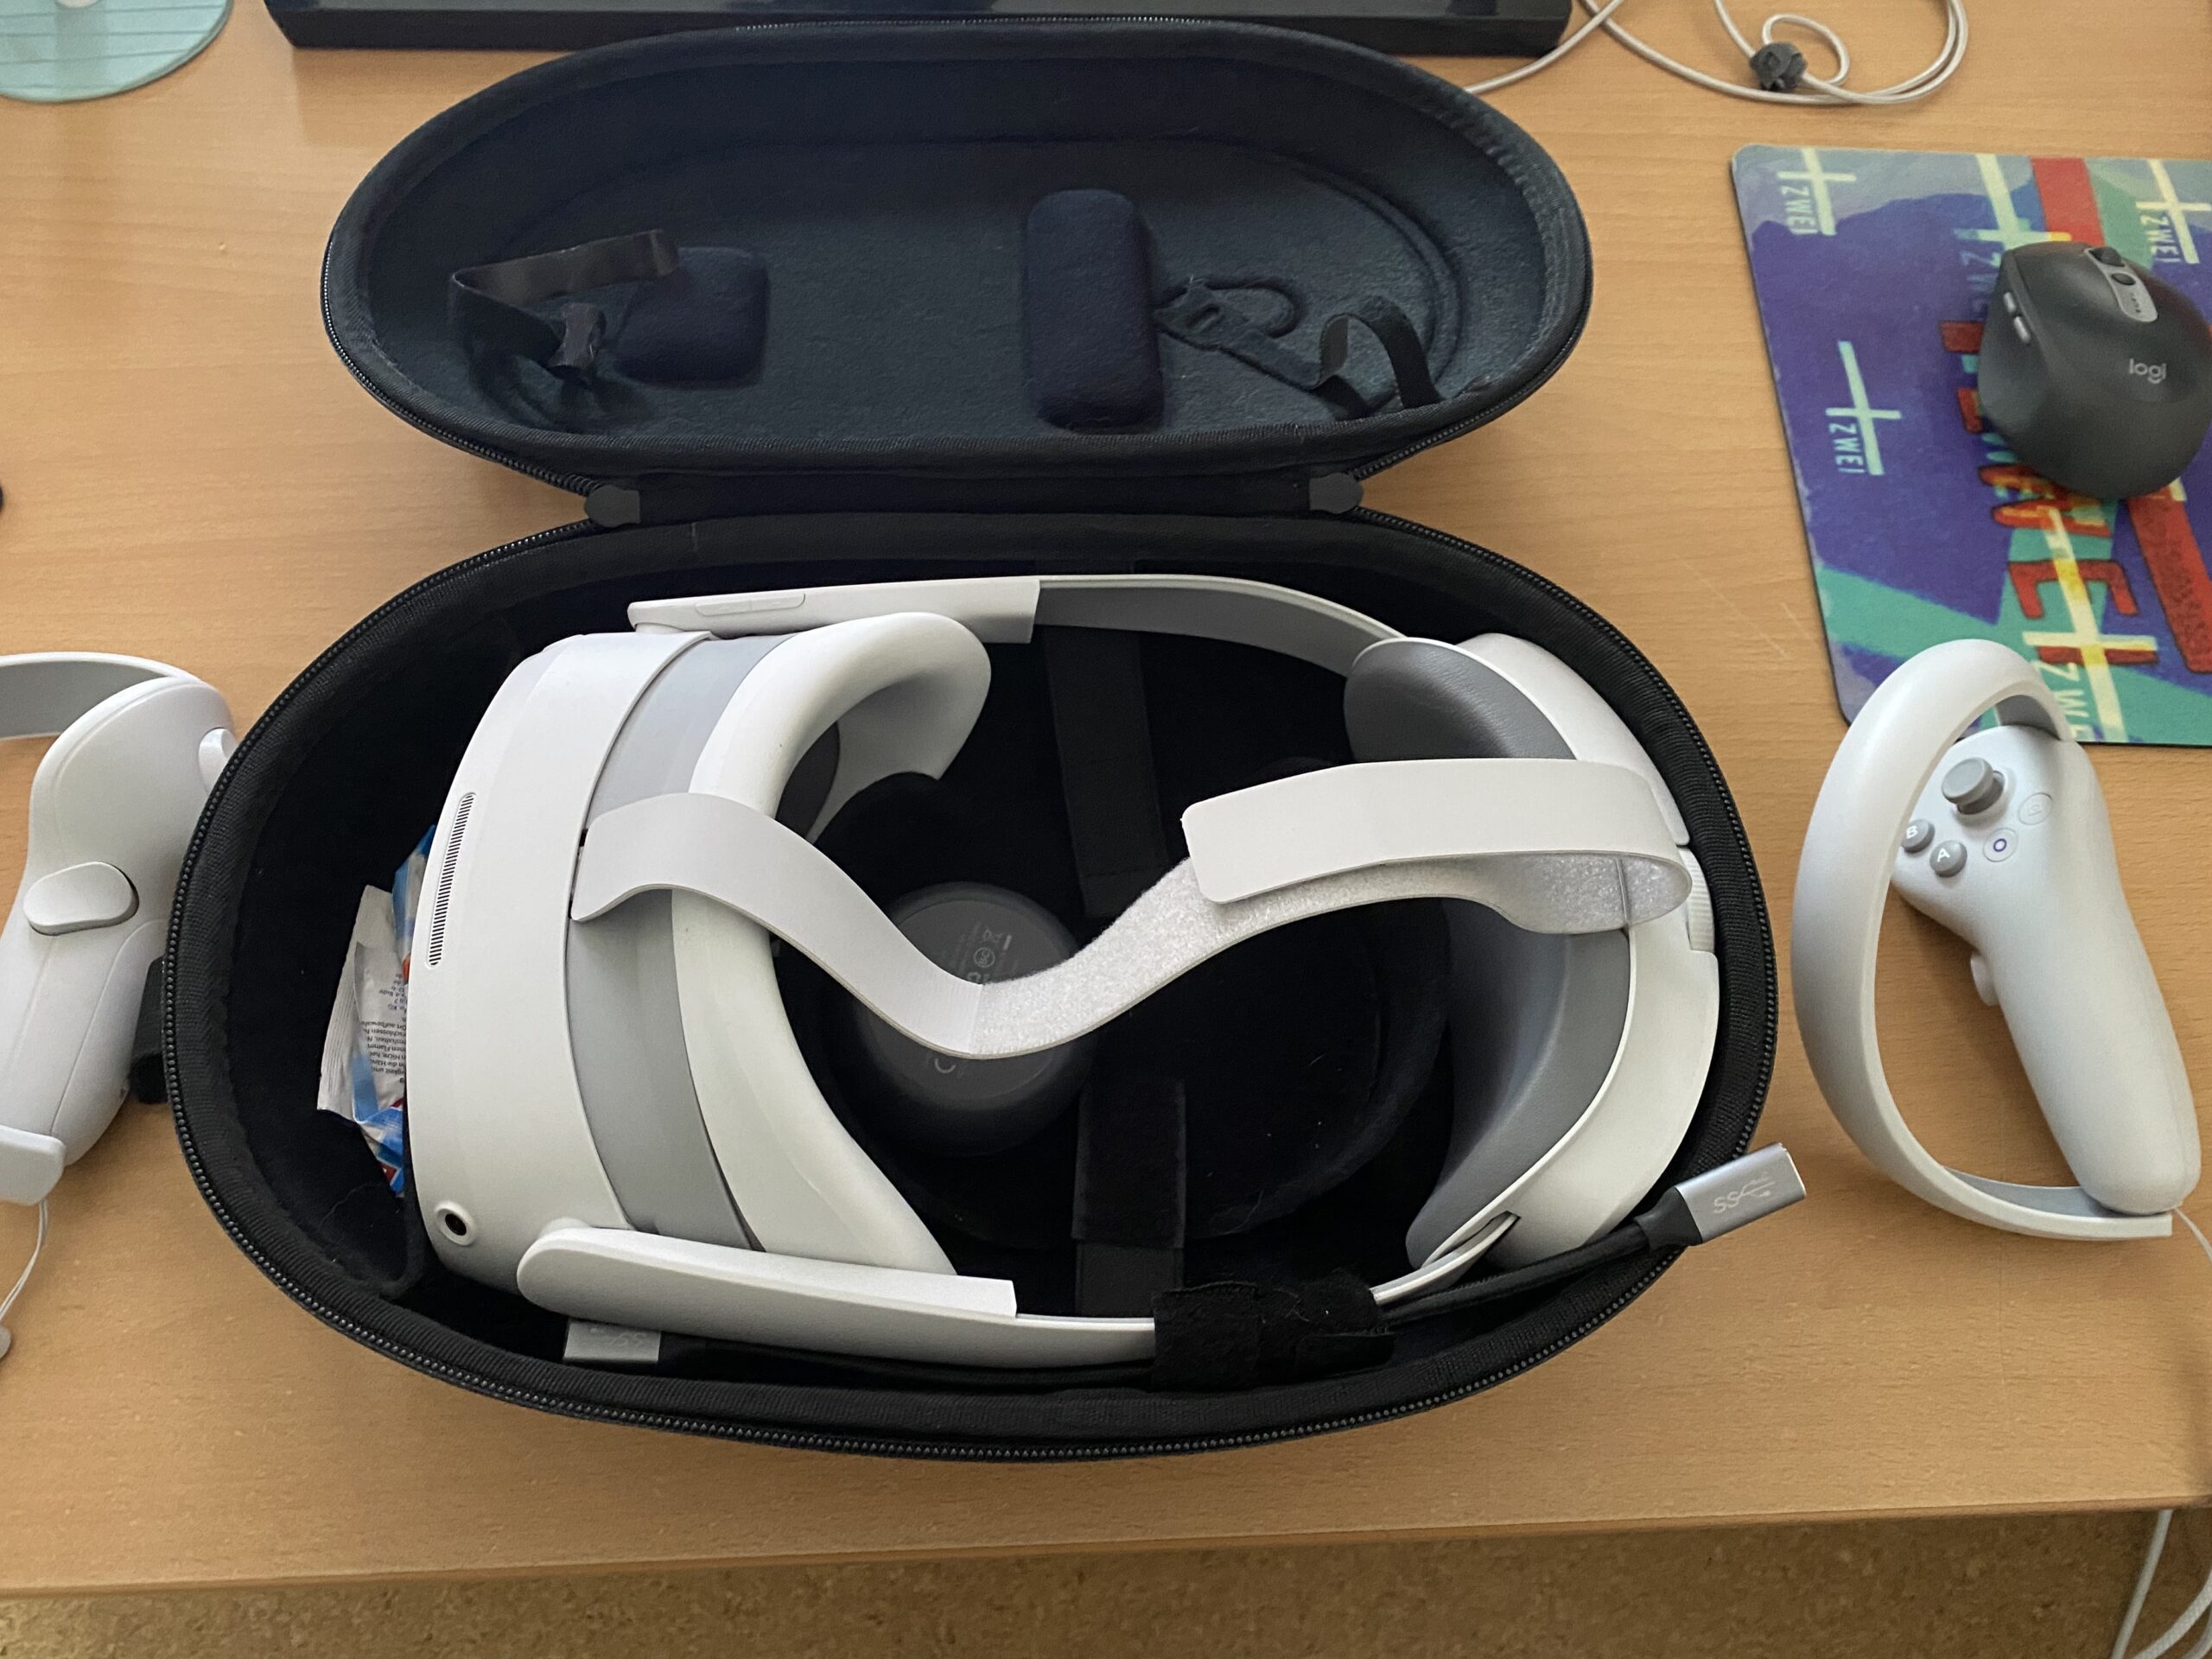
And what can I say. There was at least one VR headset released in december 2022 that fit my requirements: PicoXRs PICO 4 headset.
Pico 4 VR headset
So I went ahead and purchased one – which was delivered promptly. It came with charger, USB-C cable, two controllers and the headset itself. The case I got in addition to carry it around and safely store it when not in use.
At first I tried only applications and games that can be run directly on the headset. Of course some video streaming from YouTube and the likes. There is VR/180/360 content readily available with a huge caveat: I quickly learned that even 8K video is not enough pixels when it’s supposed to fill 360 degress around you. 8K video is rather the minimum that starts to look good.
Then there’s formats of videos. Oh god there are formats. I’d probably spend another blog article just on video formats for VR and 180 or 360 degree formats. Keep in mind that you can add 3D to the equation as well. And if you want decent picture quality you see yourself easily pushing 60 frames of 8K (or more) times 2 (eyes) through to the GPU of the little head mounted displays. The displays can do 2160×2160 per eye. So you can imagine how much video you should be pushing until the displays are at their potential. And then think: 2160 per eye is NOT yet a pixel-density that you would not be able to see pixels sometimes. I do not see a screen-door-effect and the displays are really really good. But more pixels is…well more.
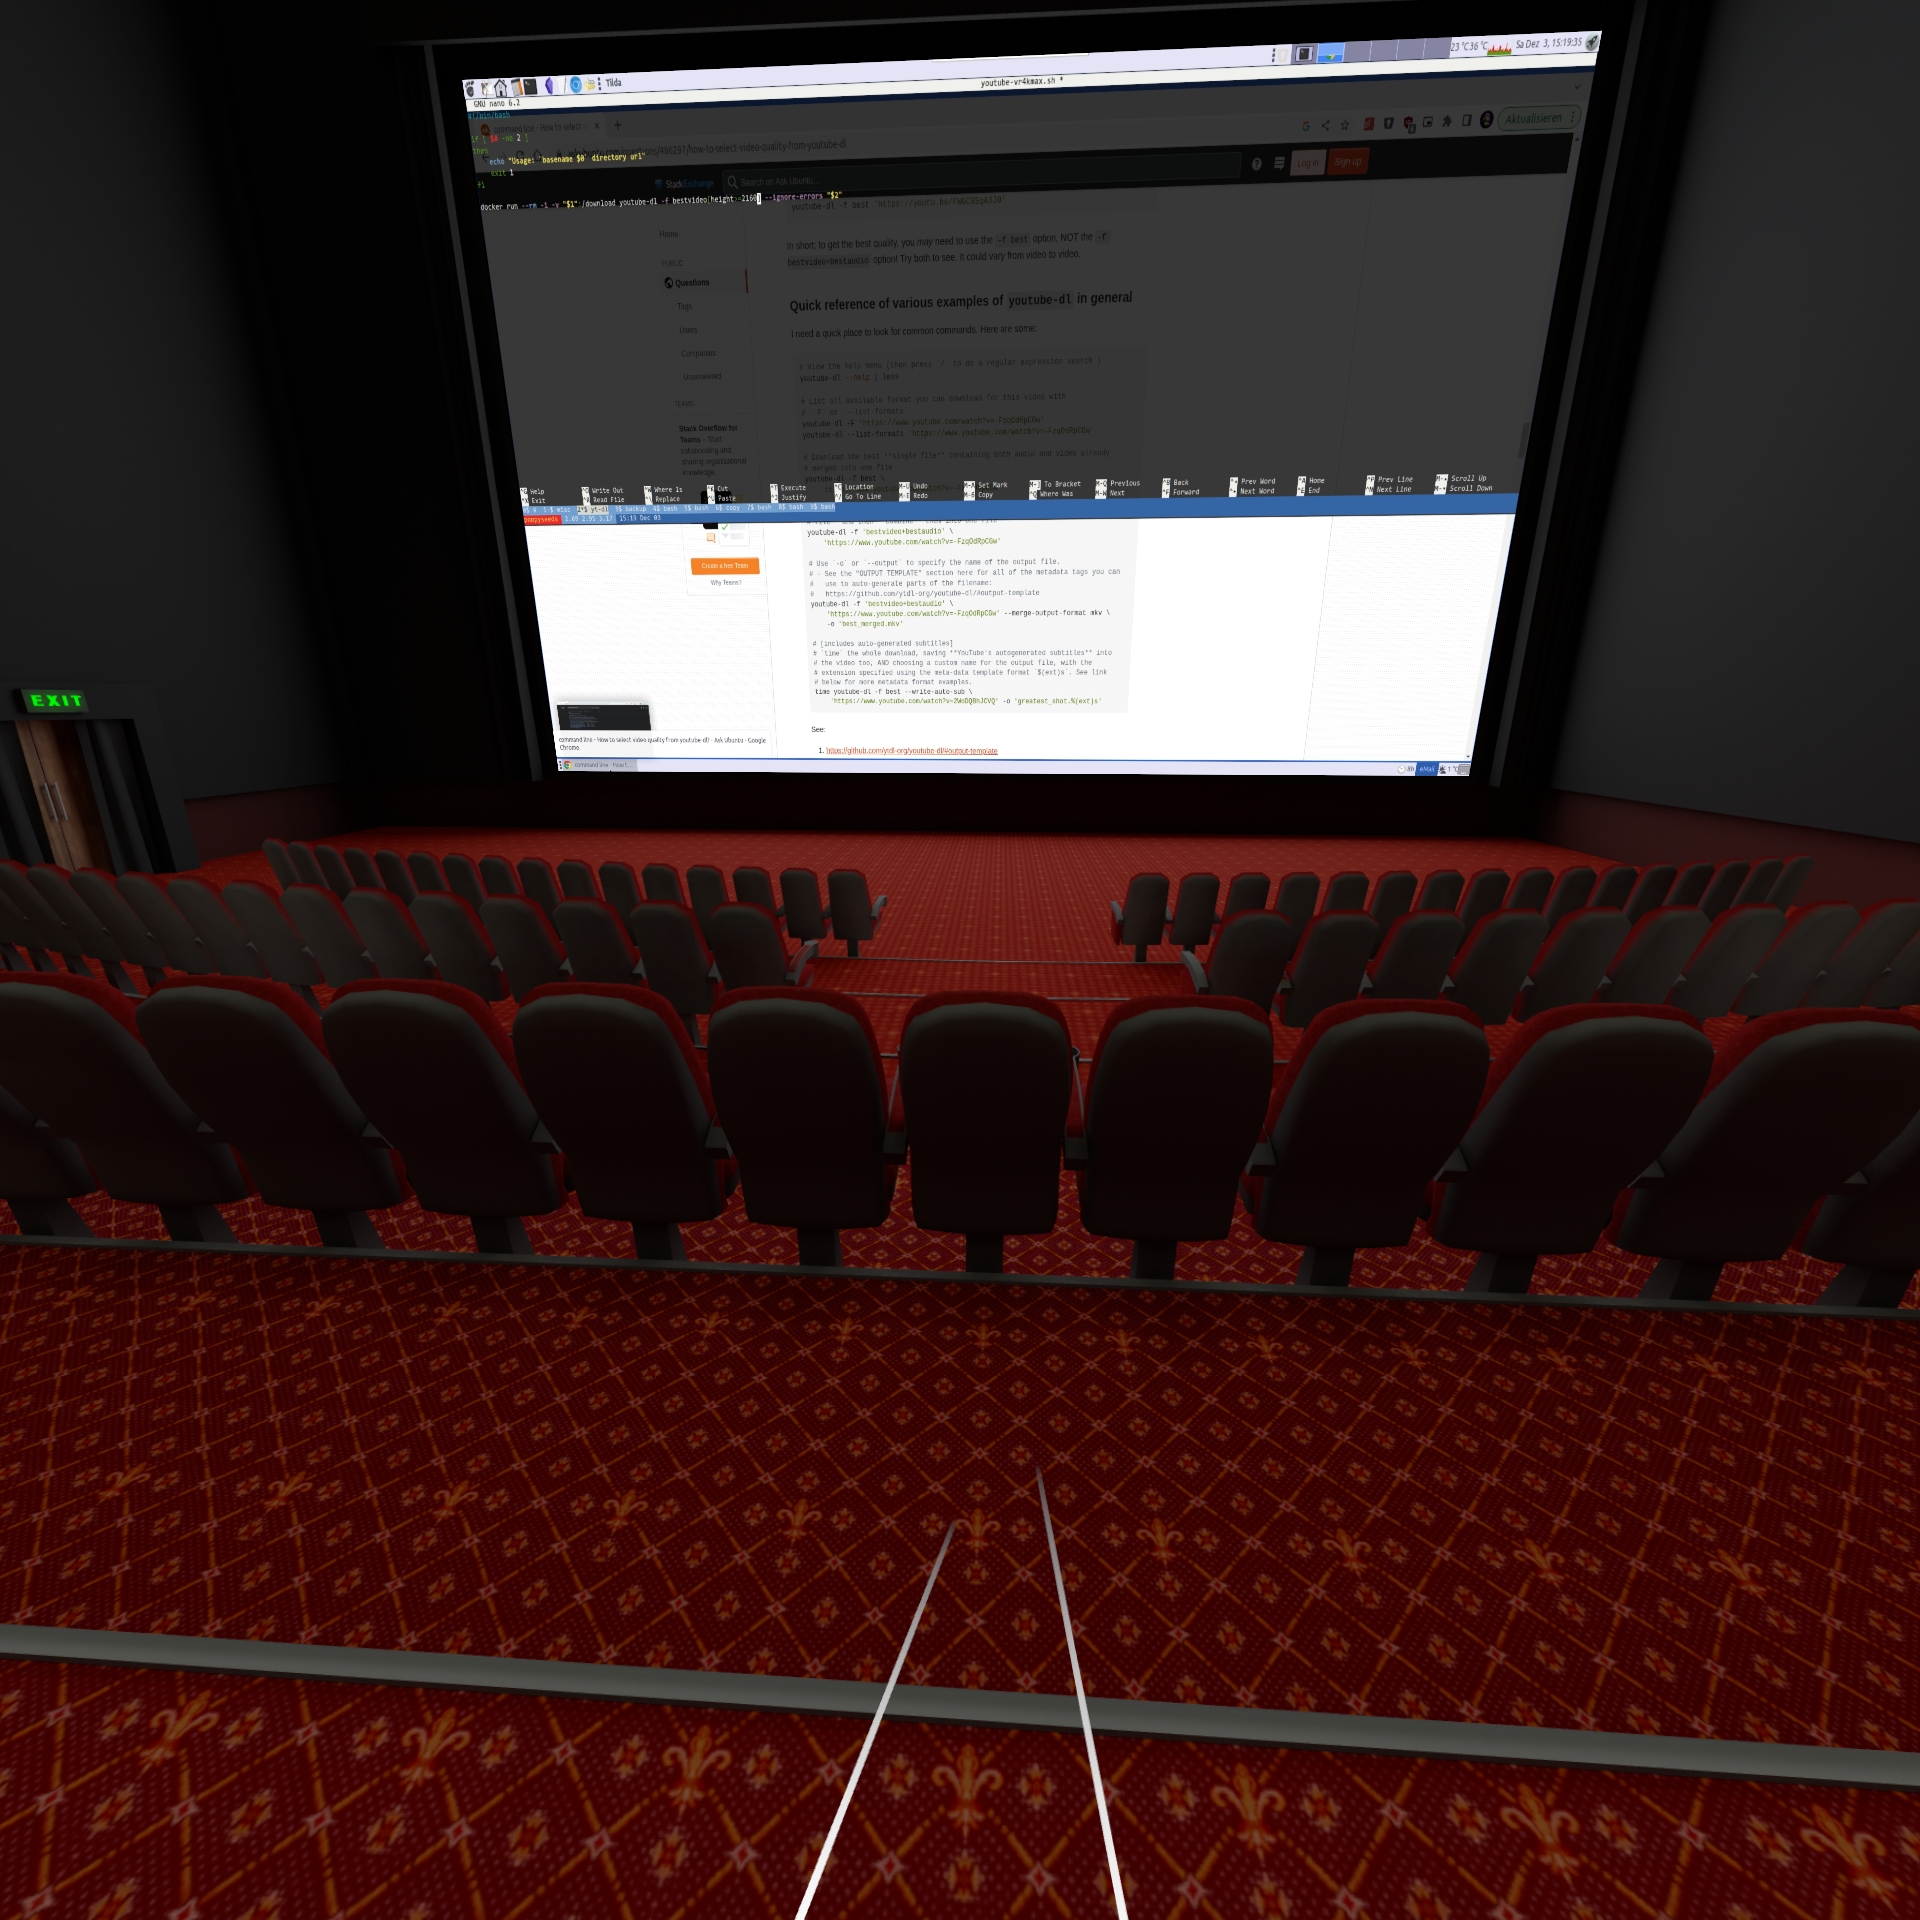
Anyways: There’s plenty of storage on the device itself so on the next airplane trip I can look funny with the headset on and being immersed in a movie…
Or a remote desktop session:
After about a week of testing and playing (Red Matter 1 for example…) I was convinced that I’d like the technology and the experiences it offered.
The conclusion after the first week was as good as I could have hoped with the first 500 euro investment done: I would not get sick moving around in VR. I would enjoy the things offered. I was convinced that I was able to experience things otherwise not possible.
And I was convinced that I could not have come to any conclusion when not actually having owned such a headset and tried myself. It’s just not possible to describe to you what the feeling of being able to walk into a 3-dimensional world that gets rendered by a computer and fools your brain so well. Of course it’s NOT reality. That’s not the point. I do not feel like going to the holo-deck. But it feels like computer games become “3D touchable”. In virtual reality games there is a lot more going on than in non-VR games. And that’s the main reason that there are not more good VR games. It’s hard to build an immersive, believable game world. It’s real effort and I named Red Matter specifically because it was one of the most immersive and approachable puzzle, non-stressing games I have played.
Being convinced brought up the question: Now what?
Until this point there was no computer in our household that could even dream of powering a modern virtual reality PCVR experience. But there was one Windows PC which I could use to do the due dilligence for “what to buy” and if it at all would work as I wanted.
What did I want?
a set-up that would allow me to play any modern PC VR game
play the games with at least high details and with framerates and resolutions that would not make me sick
no wired connection to the computer necessary
ideally the computer would not even be in the same room or floor
So I had to do some testing first to figure out if the most basic requirements would work. So I purchased “Virtual Desktop” on the headset built-in store and installed the streamer app on the one Windows PC in the household that had a very old dedicated GPU.
I did the immediate extreme test. The computer connected to the wired network in the house. The headset connected to the house wifi shared with 80+ other devices. And it worked. It worked beautifully. Just out of the box with my mediocre computer I had the desktop screen of the computer floating in front of me. I was able to launch applications and I was even able to run simple 3D VR applications like Google Earth VR. I literally only had Steam and Virtual Desktop installed, clicked around and got the earth in front and below me in no time.
Apparently the headset was smart enough to connect to the 5ghz Wifi offered in addition to the crowded 2.4ghz. Latencies, bandwidth all in good shape.
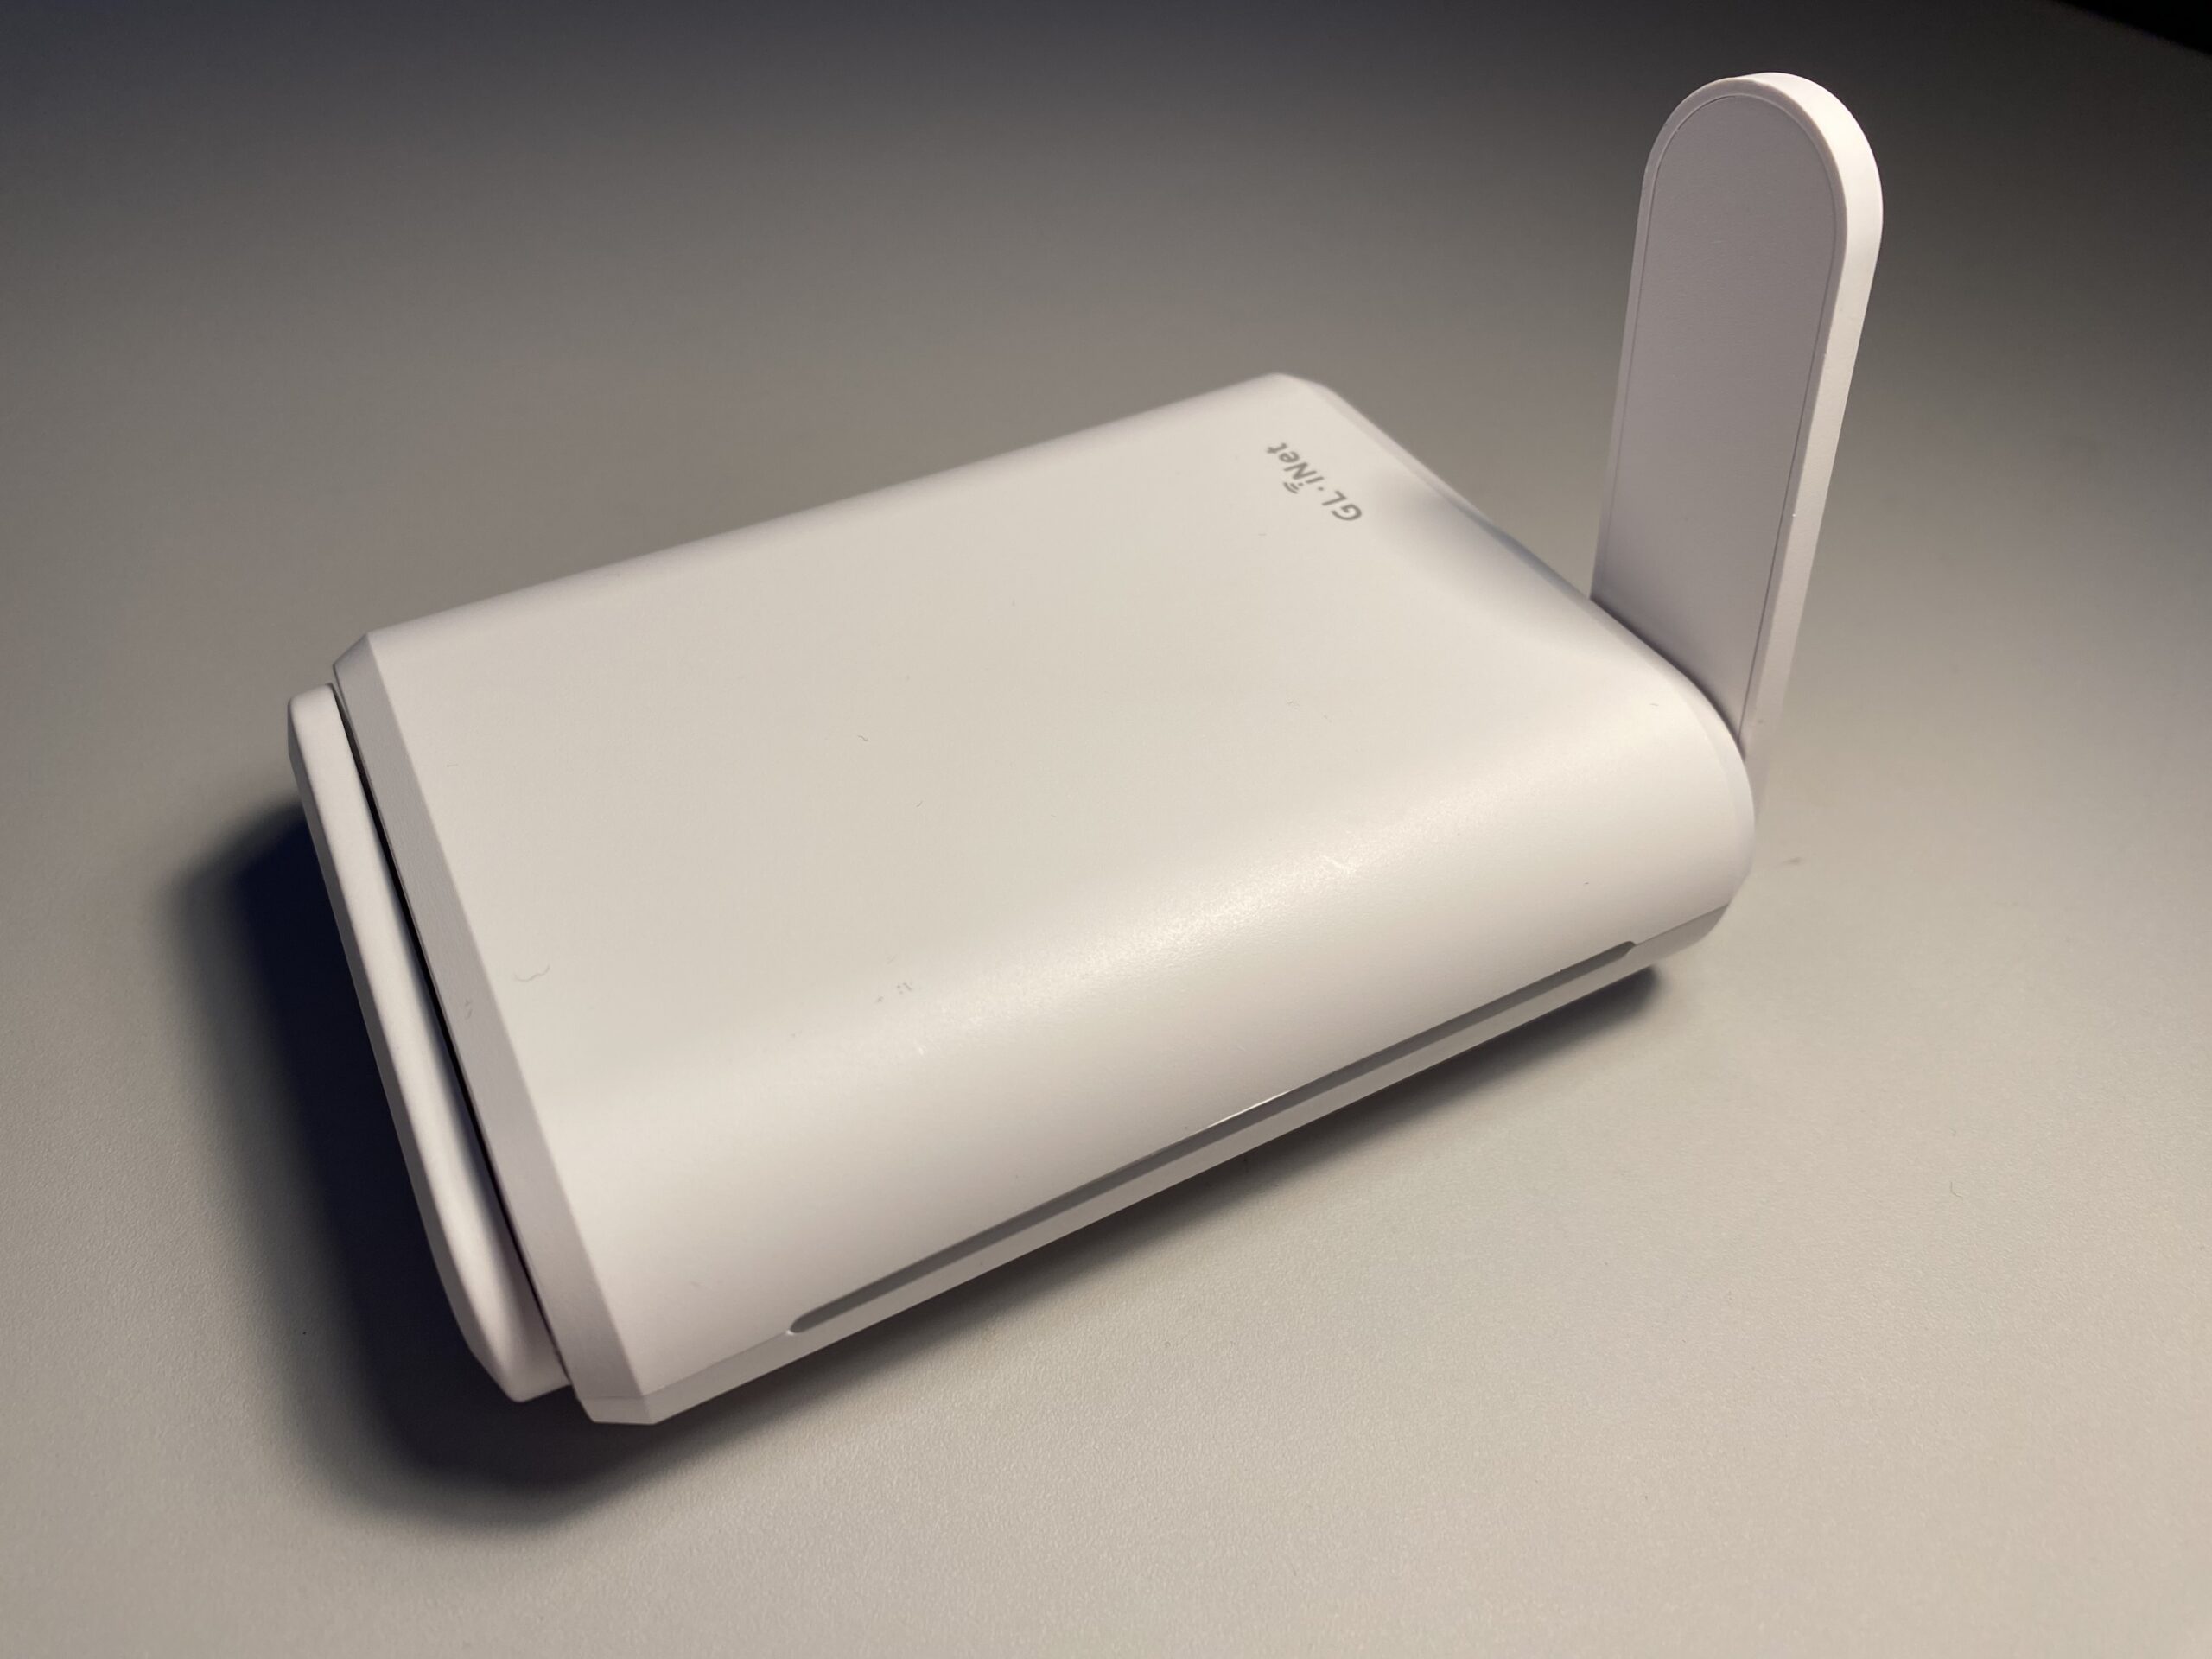
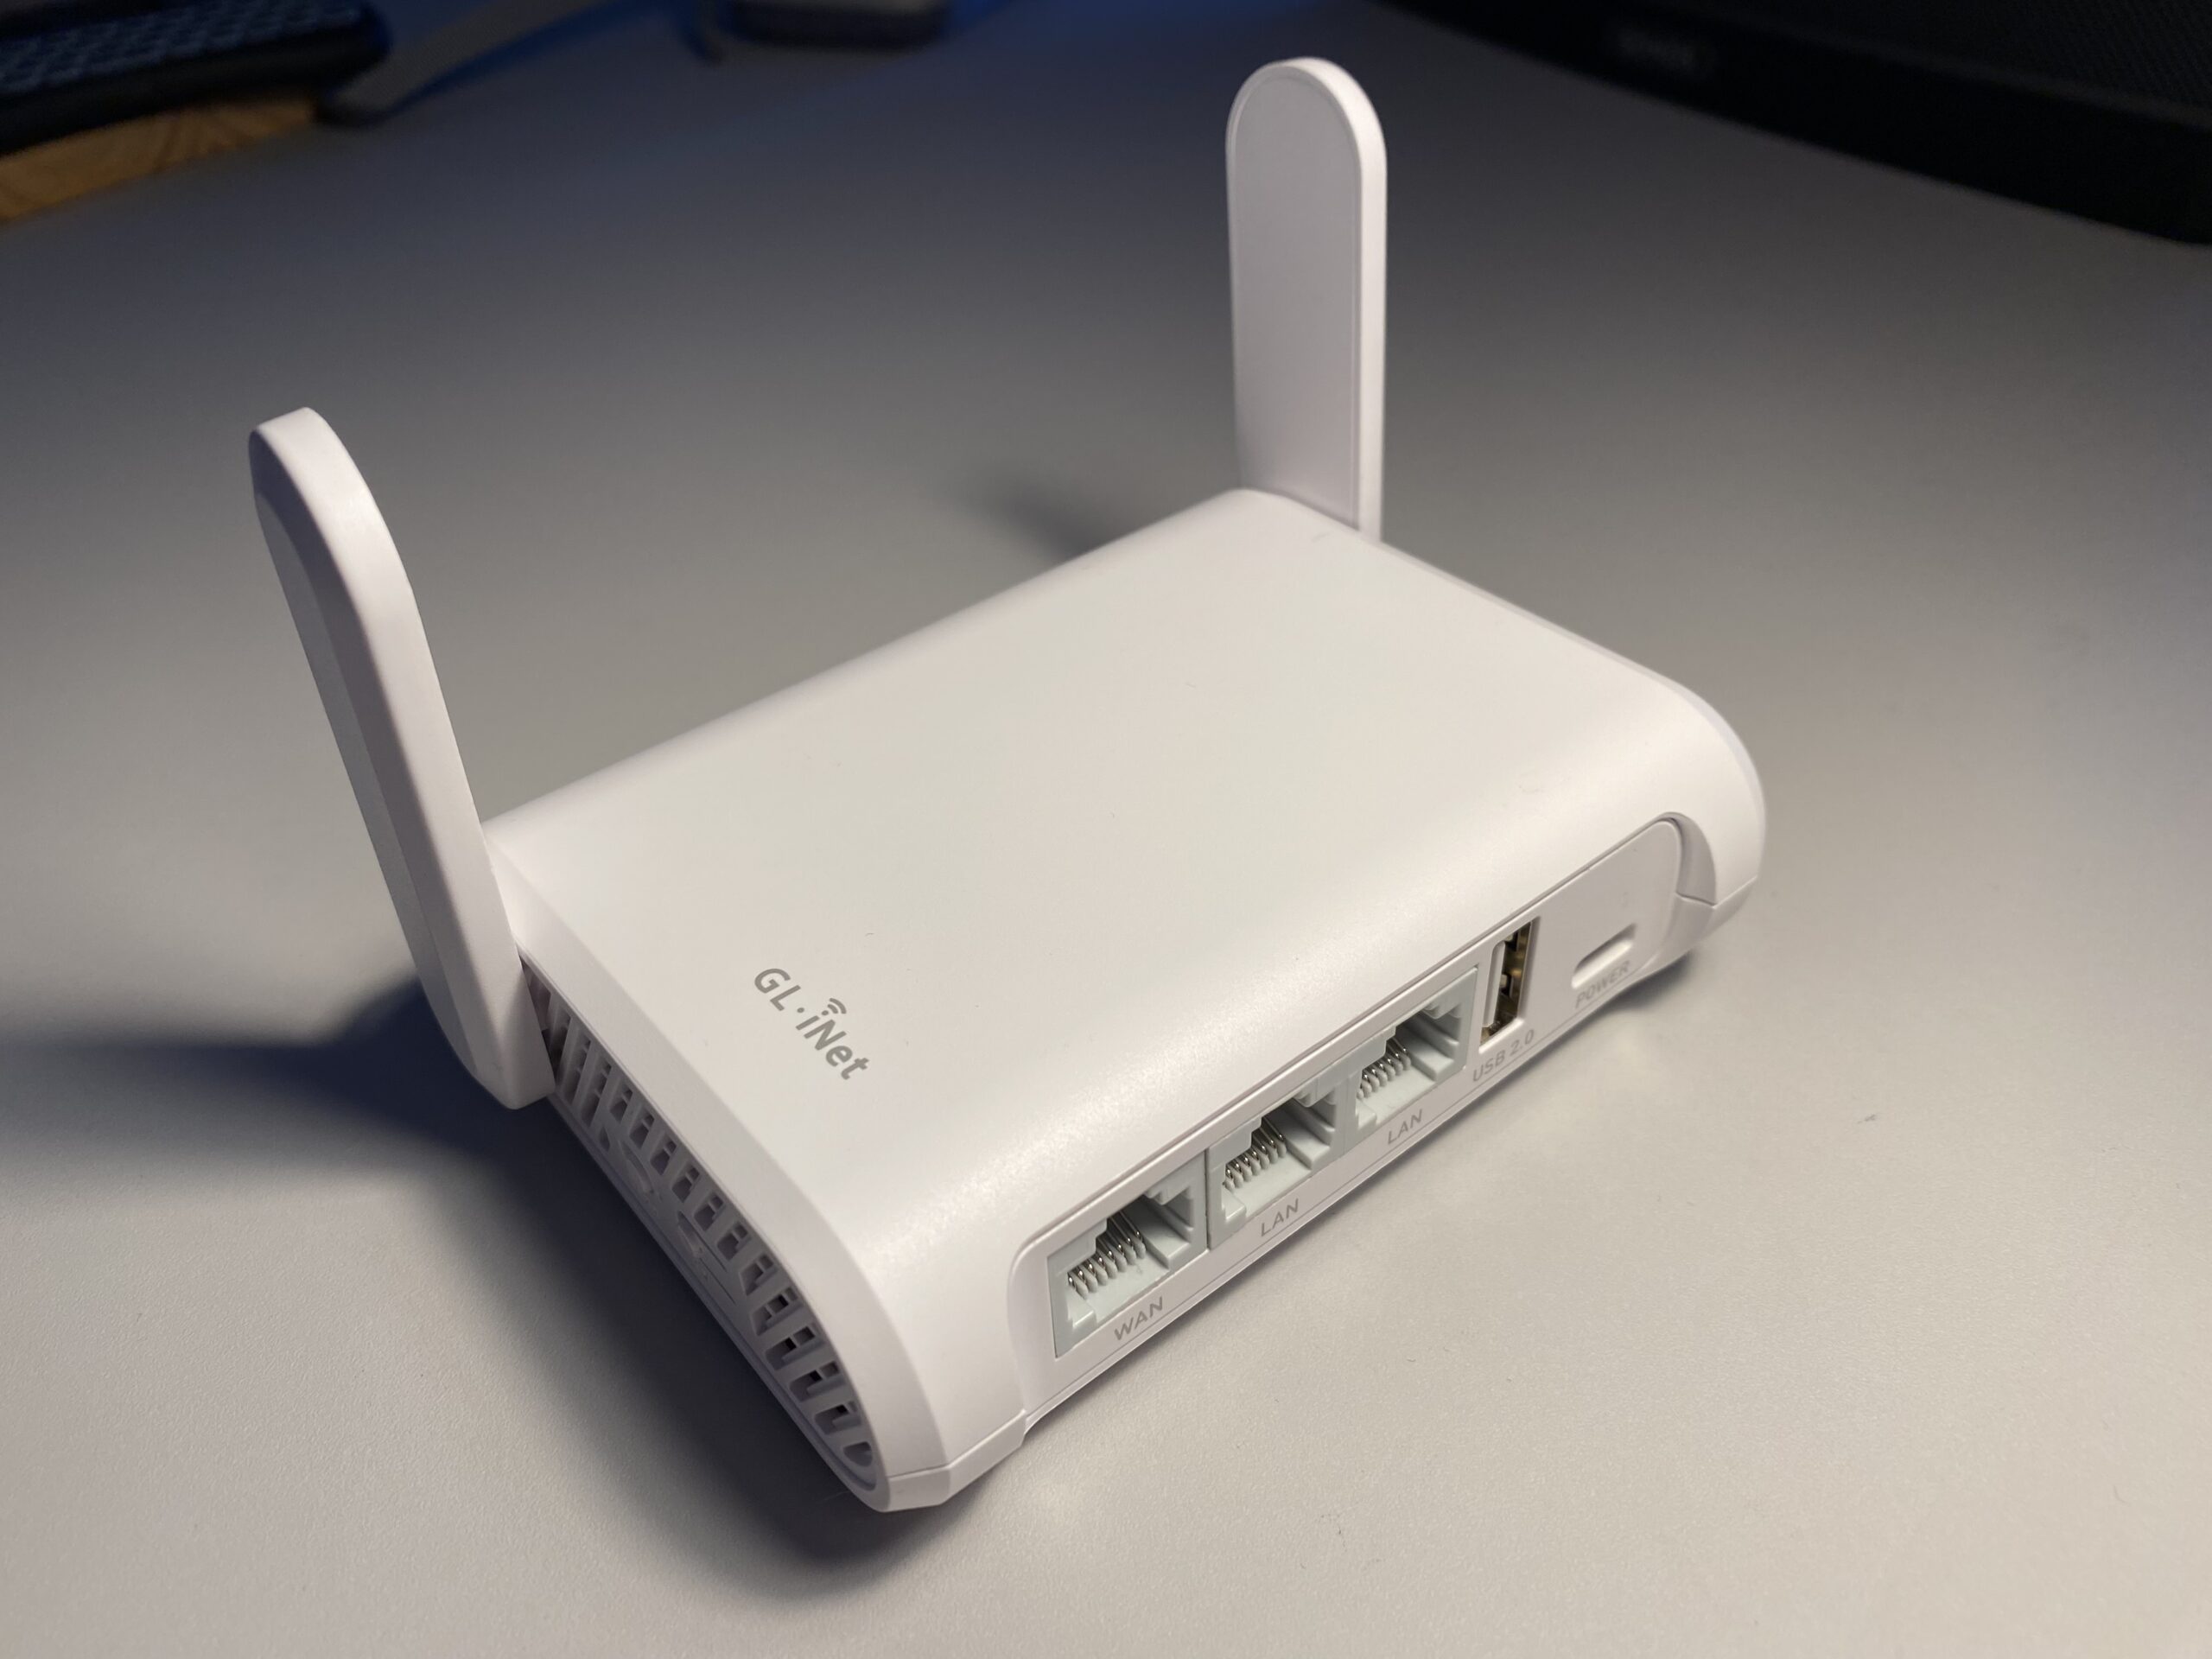
To make things just a bit more forseeable I’ve dedicated a mobile access point to the headset. My usual travel access point (GLinet OPAL) apparently works quite well for this purpose.
It’s connected to the house wired network and creates an access point just for the headset. The headset then has reliable 500+ Mbit/s access to any computer in the household.
After some more playing around and simulating some edge case scenarios I came to the conclusion that his would work. I would not even have to touch a computer to do all this. It could all be done remotely over a fast-enough network connection.
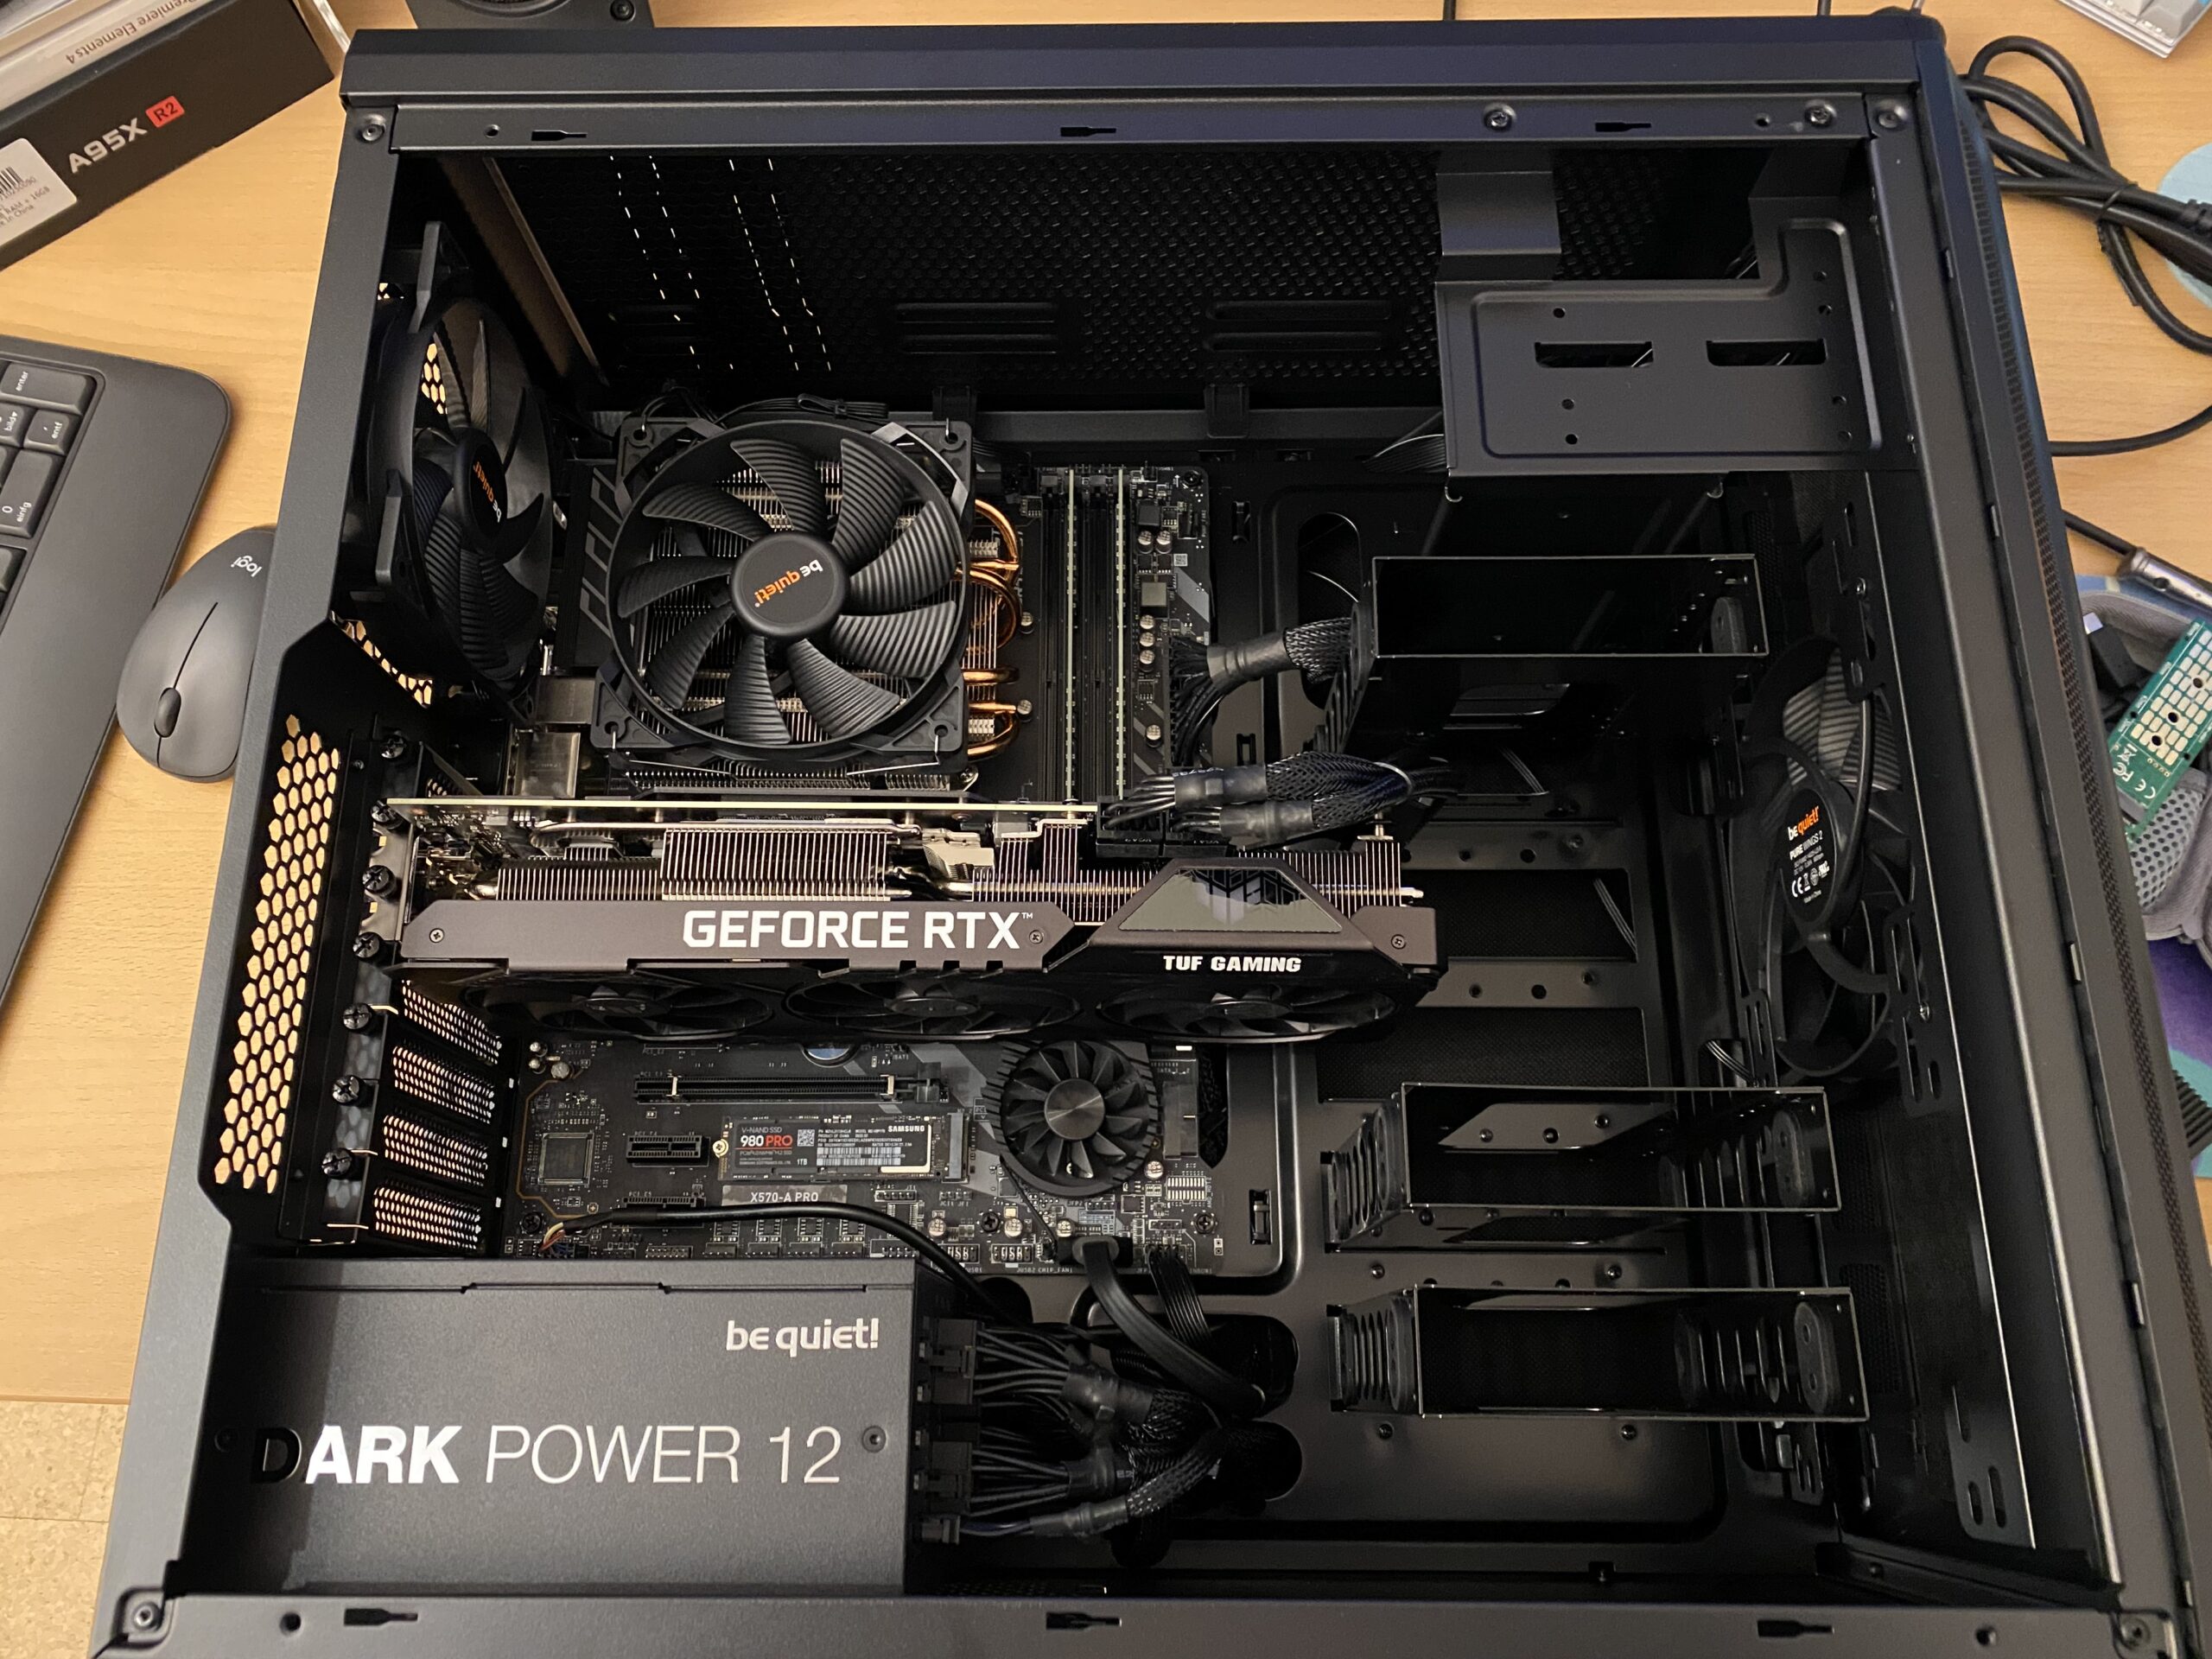
After consulting with my knowledgable brother-in-law I then settled for a budget and had a computer built for the purpose of VR game streaming. After about 2k Euros and 2 weeks of waiting I received the rig and did the most reasonable thing: Put it in the server room in the house basement where it’s cool and most importantly far enough away from my ears.
Ryzen 5800x + 3070ti
So this one is closed up and sitting in the server room. The only thing other than power and ethernet that is plugged into the machine is an HDMI display emulator dongle:
The purpose of this HDMI plug without anything connected to it is to tell the graphics card that there’s display connected. It even tells the graphics card about all those funky resolutions that ghostly display can do… When there’s nothing connected to the HDMI ports the only resolutions that you can work with out-of-the-box are the default resolutions up to 1080p. This device enables you to go beyond 2160p.
I did a bit of setting-up for wake-on-lan and some additional fall-back remote desktop services in case something fails.
To wake-up the machine it’s sufficient to send the “magic packet” – either through the remote play client built-in features (Moonlight can do it…) or through the house-internal dashboard:
yes, the computer is called “Valerian” – the machine I am mostly using to control it (other than the headset) is called “Laureline”…go figure!
streaming games
For VR game streaming it’s as I had tested beforehand: Steam + Virtual Desktop doing their thing. Works, as expected, very pleasently even with high/ultra details set.
The machine can also be used to play normal non-VR games. For this I am using the open source Sunshine (server) / Moonlight (client) combination with great success.
I can either just open up the Moonlight app on my iPad, iPhone, RaspberryPi or Mac computer and connect to the computer in the basement and use it with 60-120fps 1080p to 4k resolutions without even noticing that there is no computer under the desk…
Oh – I do notice that there’s no computer under the desk because of the absence of any noise while using it.
What I have found is really astonishing for me – as I was not expecting a that well integrated and working solution without having to solve problems ahead.
Virtual Reality games are just working. It’s like installing, starting, works. The biggest issue I had run into was the controllers not being correctly mapped for the game – easily solvable by remapping.
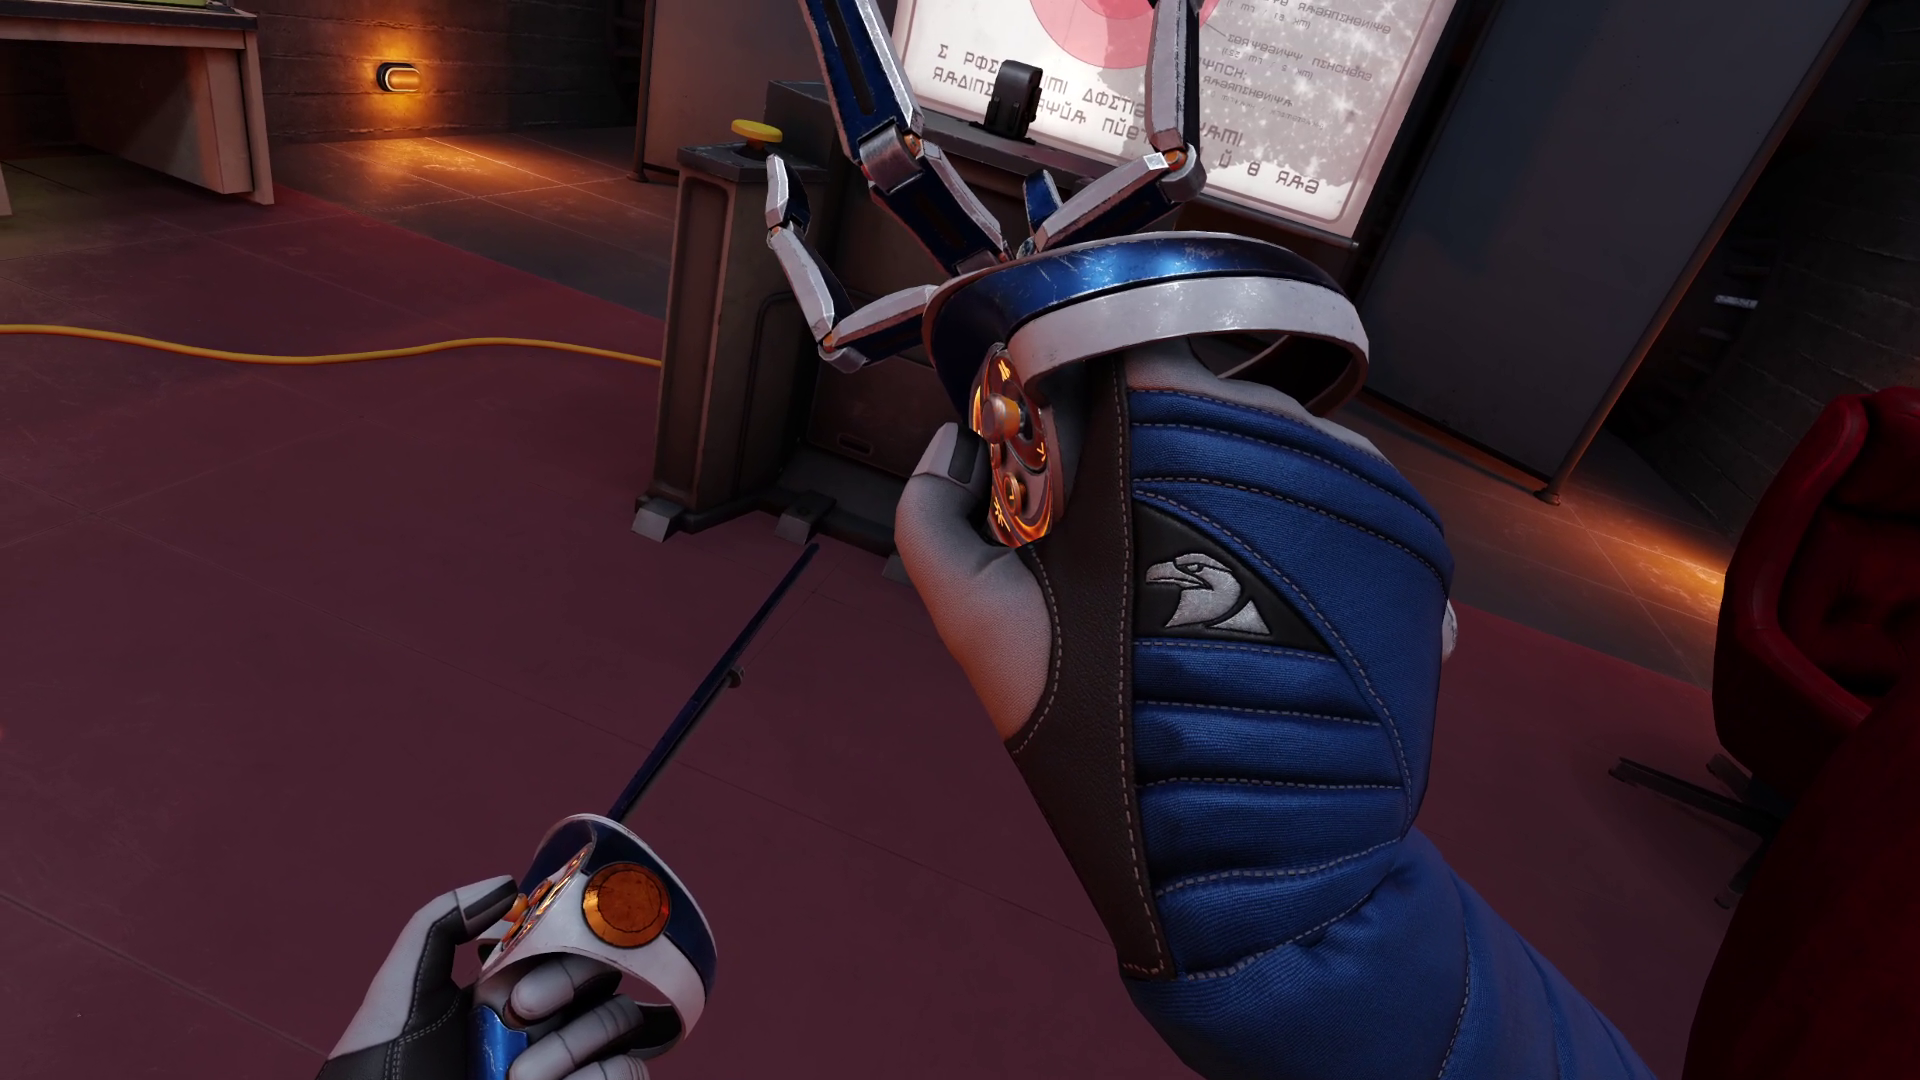
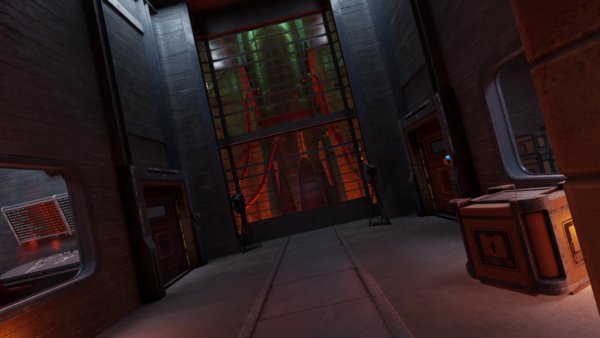
I “upped” the stakes a bit a couple of days ago when I installed OBS Studio to live stream my VR session of playing Red Matter 2 (the sequel…).
resized screenshot of one eye of an impressive scene of the game Red Matter 2. Just having landed on the Neptune moon Triton.
Nice hand tracking…
After installing OBS and setting up the “capture this screen” scene it was very nice to see that not only did OBS record the right displays (when set right) but out of the box it recorded the correct audio AND the correct microphone. Remember: I am playing in a specific room at the top floor of my house. Using the awesome tracking of the head-set for room-scale VR to the fullest.
The computer in the basement means that the only connection from headset to the computer is through Virtual Desktop – 5ghz WiFi – Ethernet – Virtual Desktop Streamer.
I did not expect a microphone to be there but it is. I did not expect the microphone to work well. But it does. I did not expect the microphone being seamlessly forwarded to the computer in the basement and then OBS effortlessly picking it up correctly as a separate microphone for the twitch streaming. I was astounded. It-just-worked.
adding an (usb) gamepad
After a bit of fooling around, especially with standard PC games I found that some games make me miss a game pad. It was out of the question to connect a gamepad directly to the computer the games ran on – that one was in the basement and no USB cable long enough.
I remembered playing with USB-over-IP in recent years just for fun but also remembered not getting it to work properly ever. After investigating any hardware options I decided to give software another look.
Apparently a company called “VirtualHere” had seen their chance since I played around the last time. They offer a server and client software that seemingly can run anywhere.
So I picked an old RaspberryPi 1 out of the drawer and flashed a fresh version of RaspberryPi OS. Booted it up and copied the one Linux ARM7 binary over that VirtualHere offers. It started without issues and further dependencies.
On the Windows Machine you also only have to run a simple application and it’ll scan the network for “VirtualHere USB hubs”.
For me it immediately showed up the RaspberryPi as an USB hub. I plugged in my old Xbox 360 wireless receiver and it showed up and connected on Windows. When I then powered up an Xbox 360 wireless controller it made the well known Windows “device plugged in” sound and I had a working gamepad ready to use in Windows – all over the network.
I cannot notice any added latency for the controller. And essentially anything I had plugged into the USB ports of the RaspberryPi could immediately be used/mounted on the computer in the basement all over the already existing network.
It cannot be overstated how little hassle this solution was over any other way I know and would have tried. The open source USB/IP project is still there and seems to work on modern Windows BUT you have to deal with driver signing and security issues yourself.
VirtualHere does cost money but it’s at least not a subscription but a perpetual license you can purchase after trying out the fully functional 1-device versions. For me it now brings working USB-over-my-existing-network to any device I want around the house. There are some other uses I will look into – like that flatbed scanner I have. That camera that can now connect anywhere via USB… so many options…
conclusion
I went head-first into the virtual reality rabbit hole and it’s quite fun so far. The costs of this came down far enough and I was able to learn a lot of things I would otherwise not have been able to. Looking into the technology-side of how all this comes together and how latencies add up, build or ruin an experience is remarkable.
If you want to get a (albeit clumsy and not 3D) look of what one of the many options to do in VR is – take a look at a VR session recording from two days ago:
Bonus: The GLinet OPAL travel router does have 1 USB port. And you can run the USB VirtualHere hub software as an MIPSEL binary on there and you would not need the RaspberryPi anymore. The only thing you must figure out yourself is how to route the traffic out the right ports.
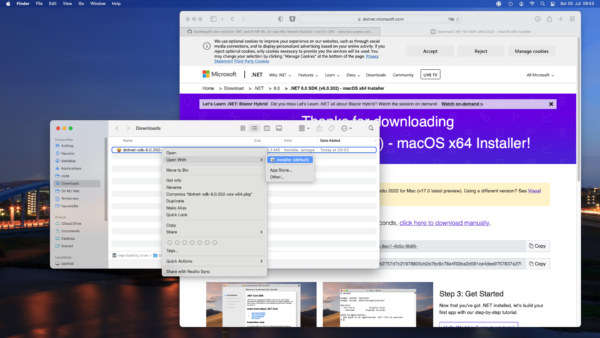
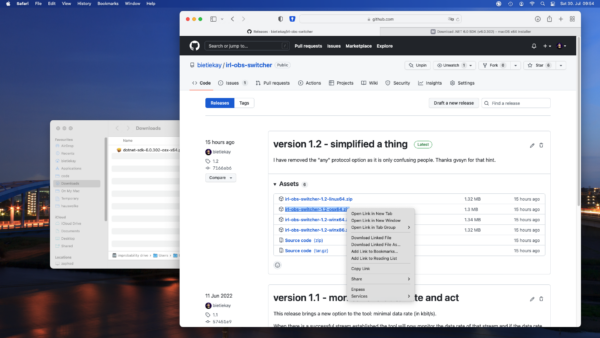
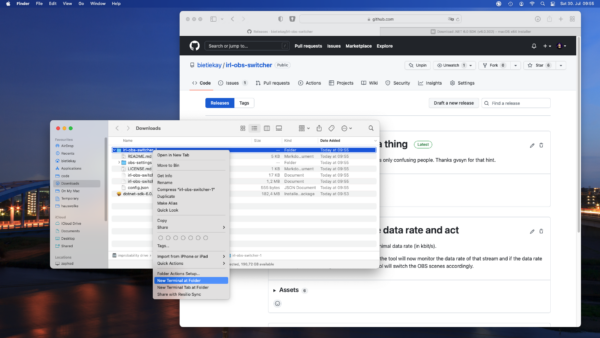
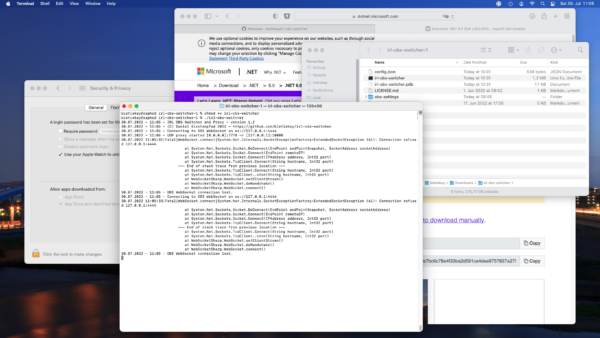
after unzipping right click the folder and select „new Terminal at Folder“. If your menu does not show this item just open a Terminal (search for Terminal) and navigate to the folder you unpacked the binary release to („cd Downloads“)
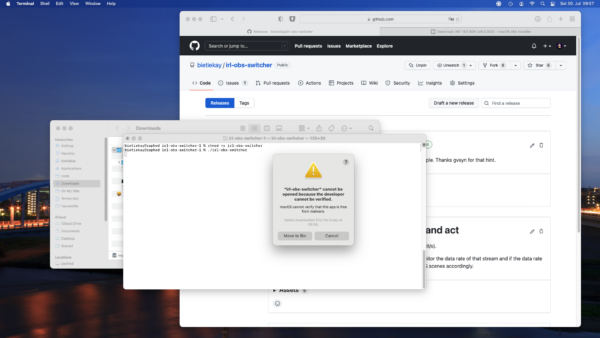
Then mark the irl-obs-switcher executable by running „chmod +x irl-obs-switcher“. Then try to run it with ./irl-obs-switcher. On current macOS you might get a pop-up warning you about the file you are trying to run. This is a default warning as the binary release of irl-obs-switcher is not signed/approved by Apple but just made available by the developer (me) to you. Choose „Cancel“ as might not want to move it to the recycle bin just yet.
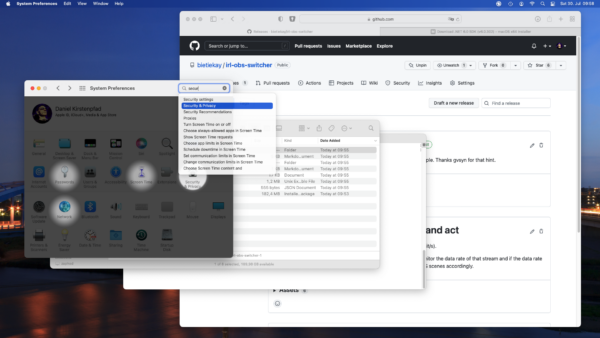
Next we need to tell macOS to anyway allow us to run the irl-obs-switcher file by going to the „Security&Privacy“ section of the System Settings.
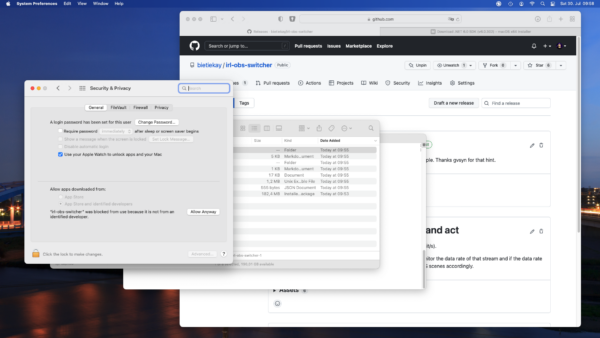
You will see a button „Allow Anyway“ that you can click to allow running of irl-obs-switcher.
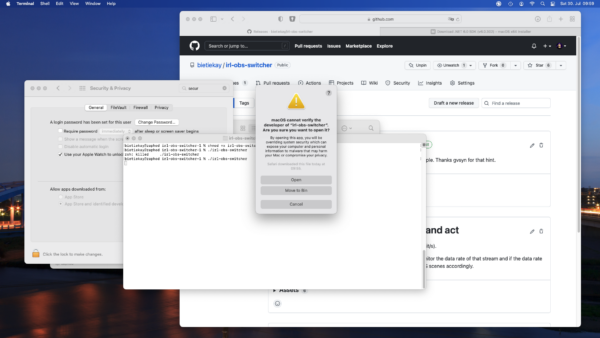
Now when you try to run irl-obs-switcher again the warning will look different. Click „Open“ and you‘re good to go.
Ever since I stumbled across several IRL streamers I was intrigued by the concept of it.
IRL or “in-real-life” is essentially the art of streaming everyday life. For hours and totally mobile. Of course there are some great gems in the vast sea of content creators. One of them – robcdee – streams for hours live almost every day and shows you his way around in Japan.
Apart from the content – Japan is great – the technical side of this IRL streaming set-ups is quite interesting. Imagine: These streamers wander around with usually a backpack filled with batteries, several modems (4G/5G…) that load balance and bundle a 2-6 Mbit/s video+audio stream that gets sent to a central server either through SRT or RTMP protocol. This central server runs OBS Studio and receives the video stream offering the ability to add overlays and even switch between different scenes and contents.
After I had a basic understanding of the underlying technologies I went ahead and started building my own set-up. I do have plenty of machines with enough internet bandwidth available so they could be the host machine of OBS Studio. I wanted all of this live in a nice docker container.
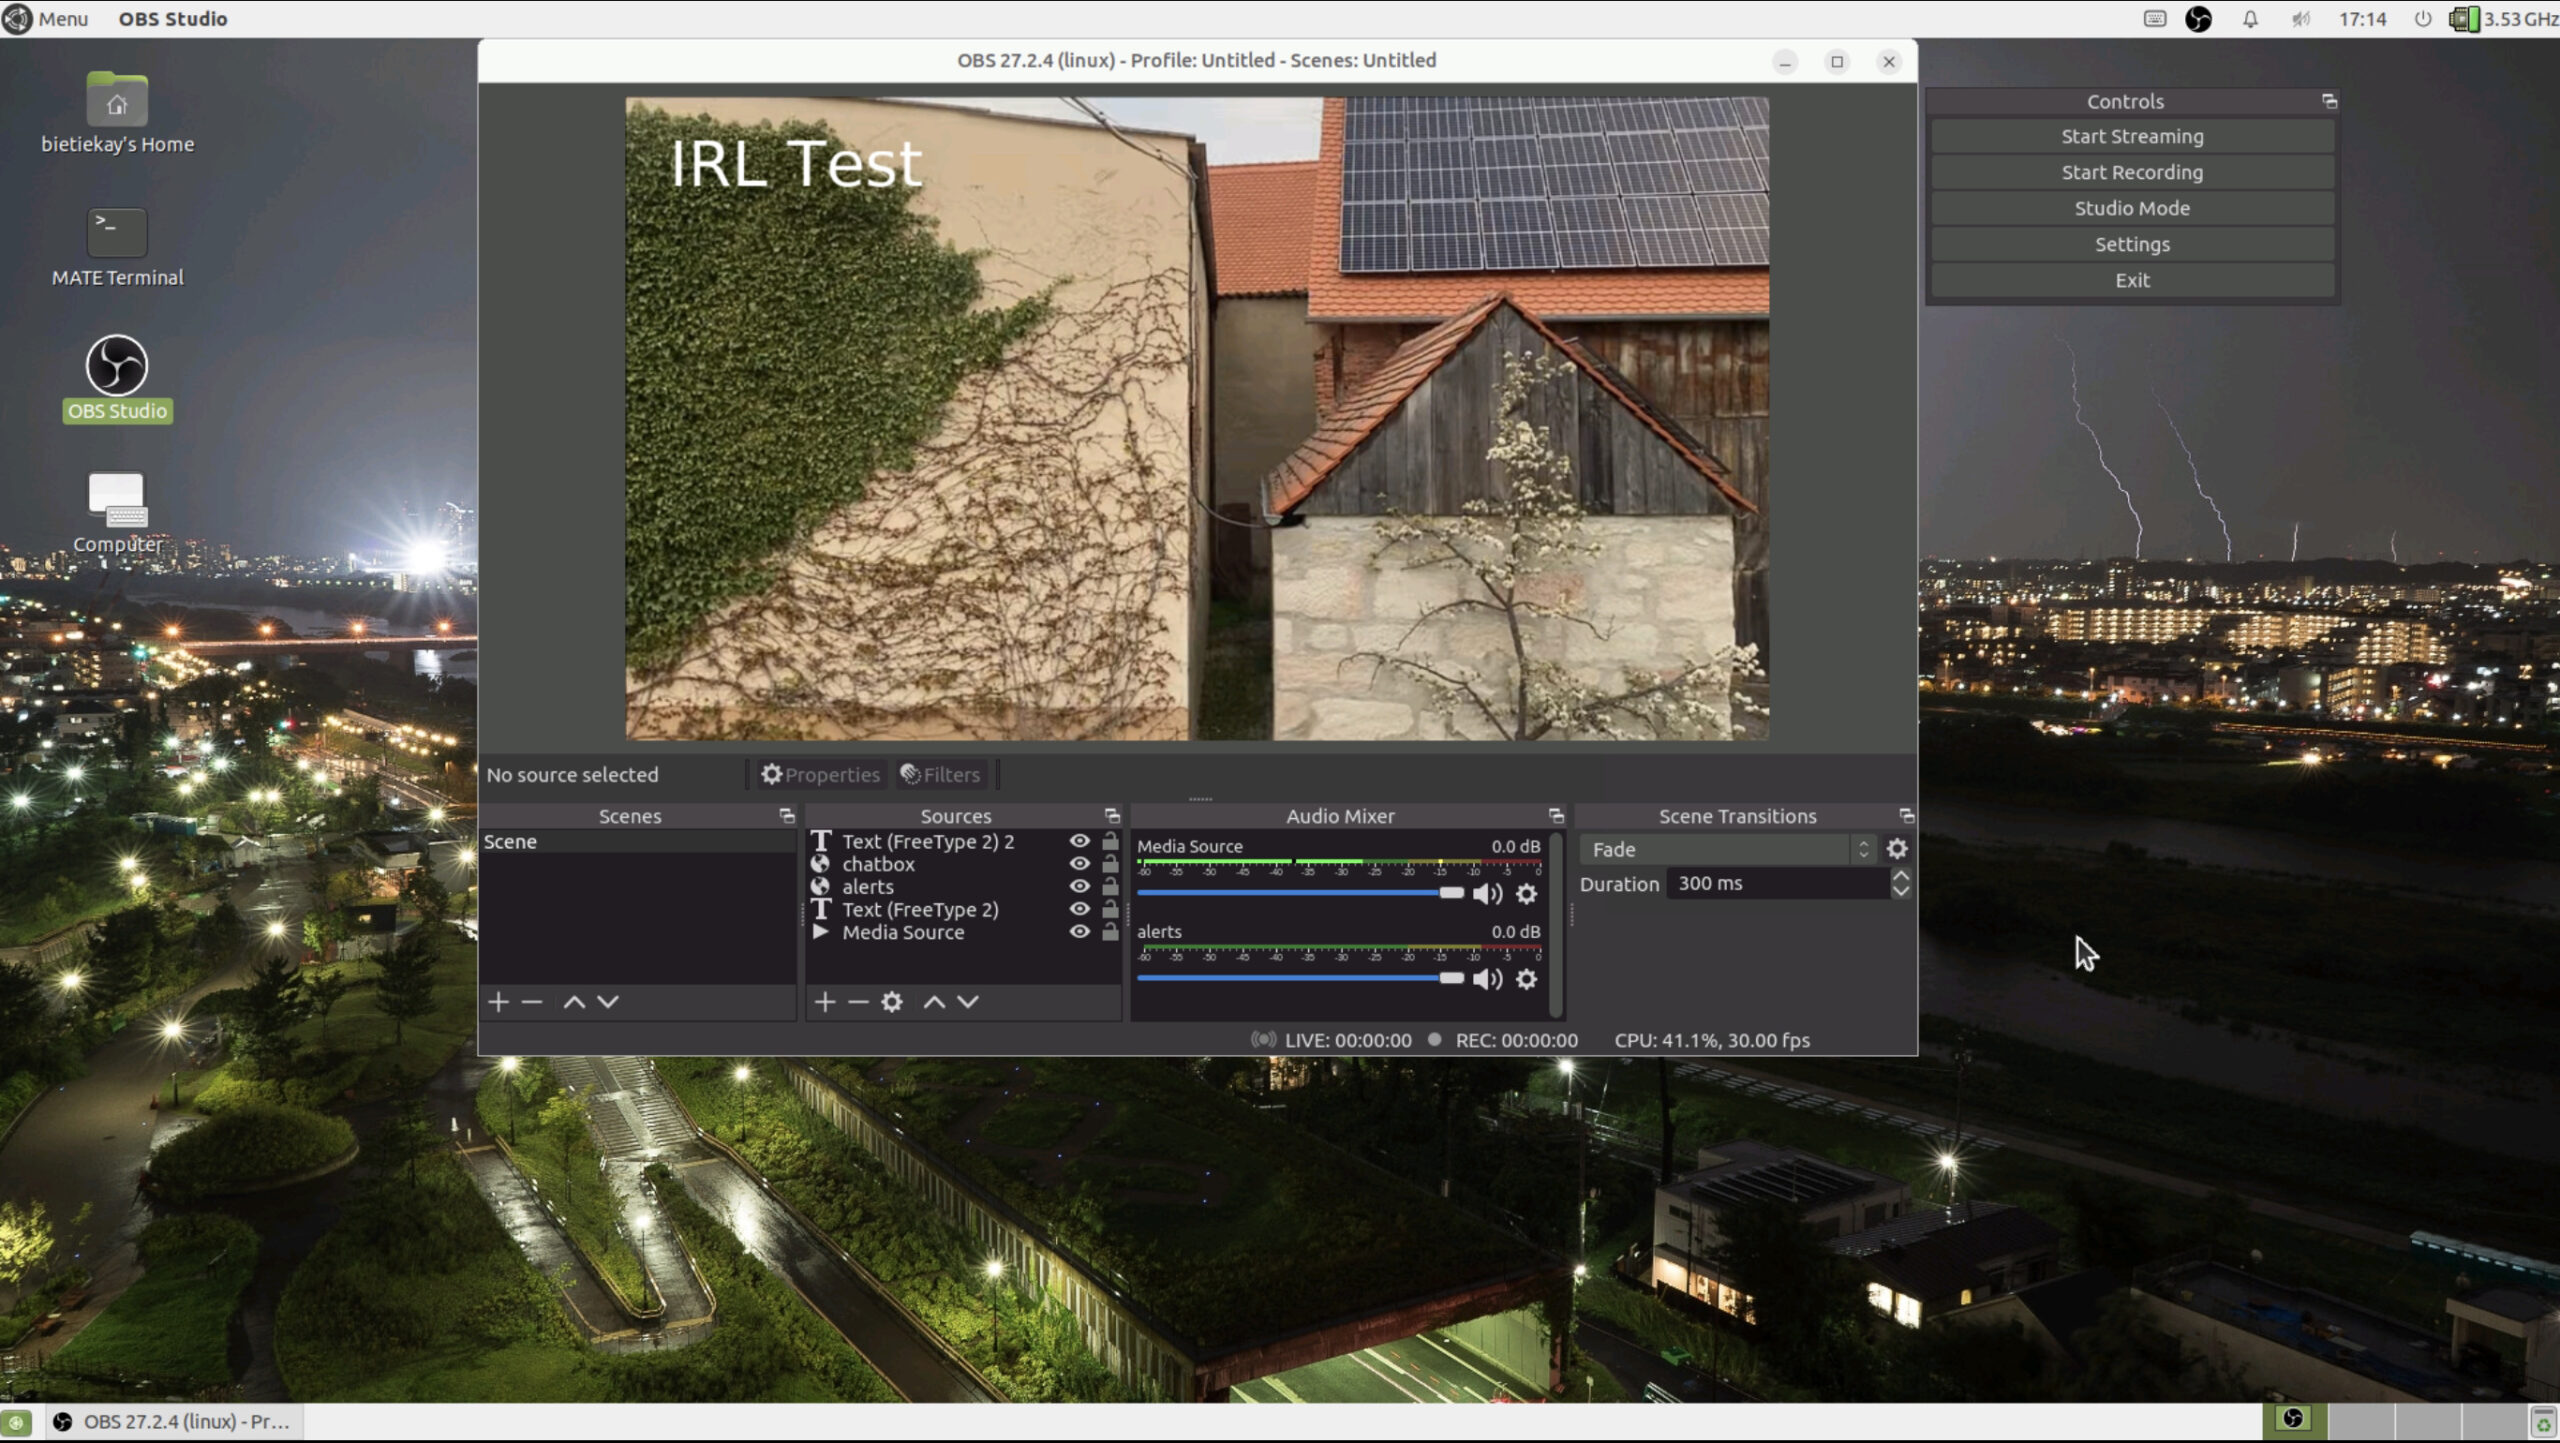
I went ahead and built a docker container that is based upon the latest Ubuntu 21.04 image and basically sets up a very minimal desktop environment accessible over VNC. In this environment there is OBS Studio running and waiting for the live stream to arrive to then send out to Twitch or YouTube.
How I have set-up this docker desktop environment exactly will be part of another blog article.
look at this nice OBS Studio running on Linux inside a Docker Container on a root server on the other side of the country…
So far so good. OBS offers the ability to define multiple scenes to switch between during a live stream.
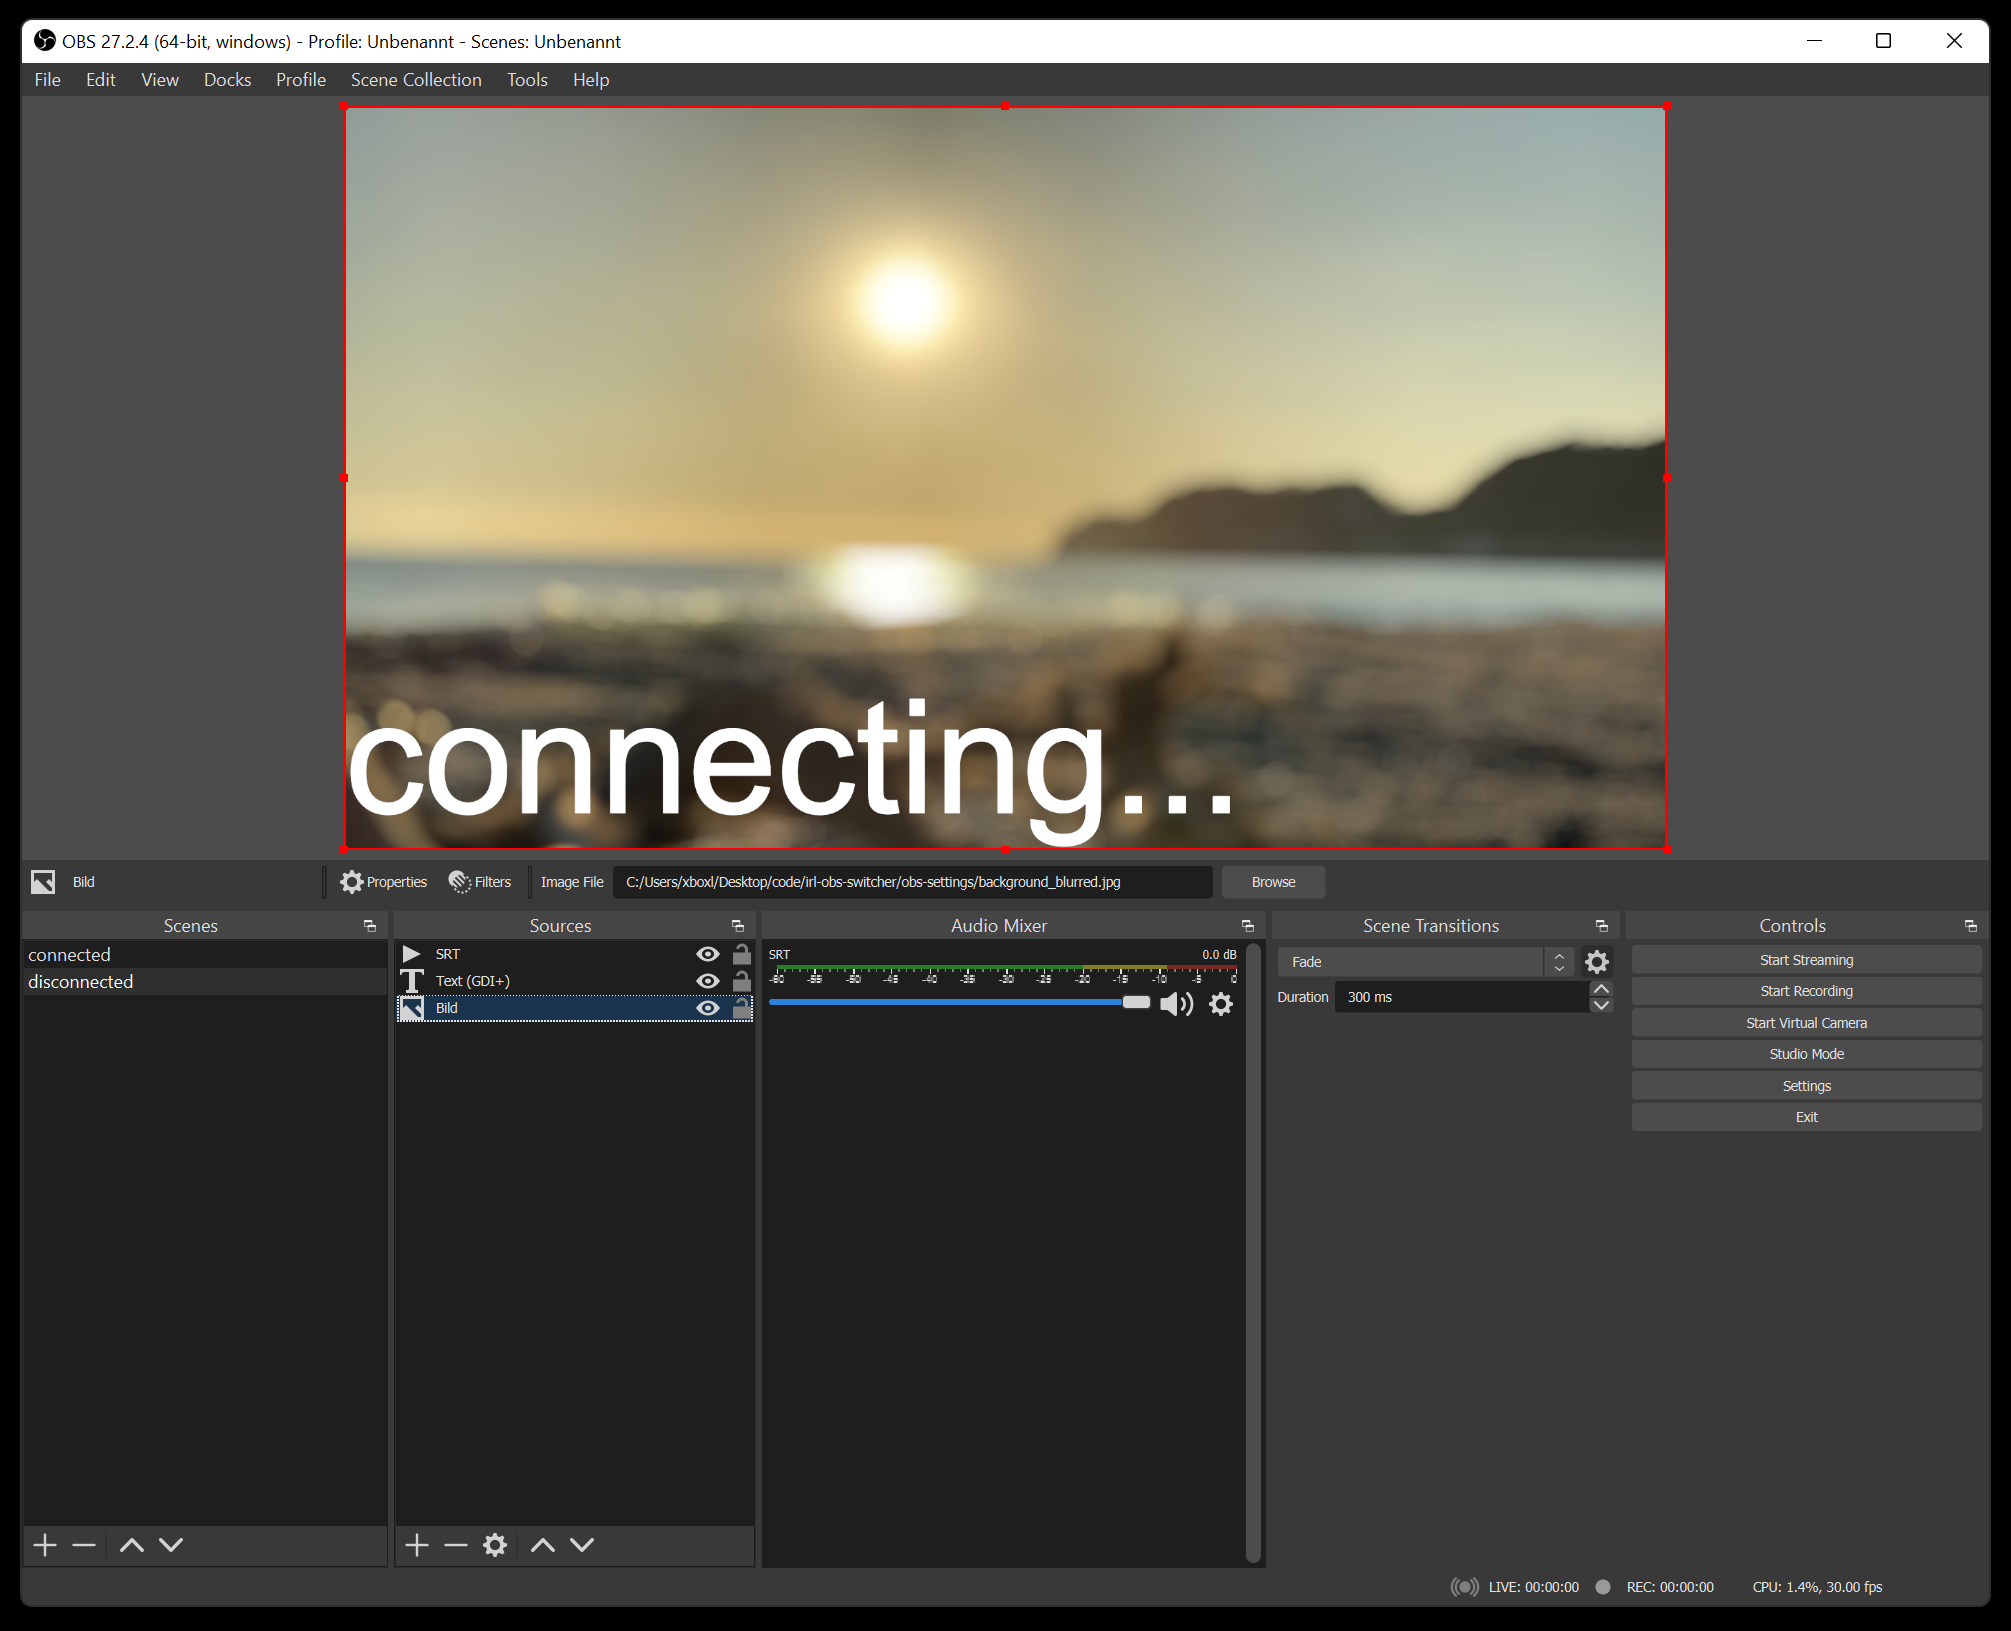
These IRL streamers usually have one scene for when they are starting their stream and two more scenes for when they are having a solid connection from their camera/mobile setup and when they are currently experiencing connection issues.
All of the streamers seemingly use the same tooling when it comes to automatically switch between the different scenes depending on their connectivity state. This tool unfortunately is only available for Windows – not for Linux or macOS.
So I thought I give it a shot and write a platform independent one. Nothing wrong with understanding a bit more about the technicalities of live streaming, right?
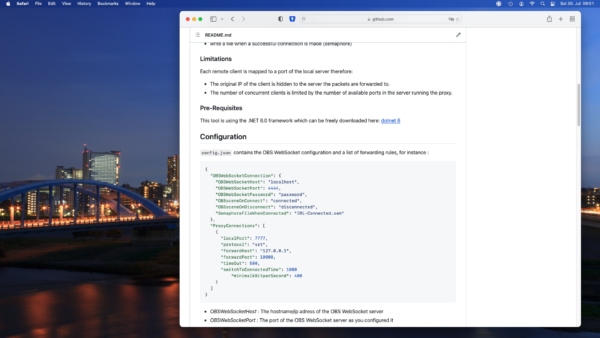
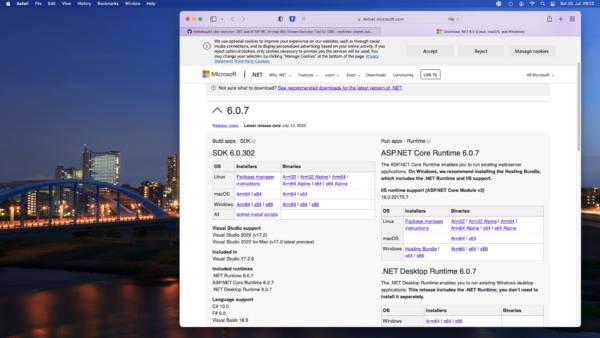
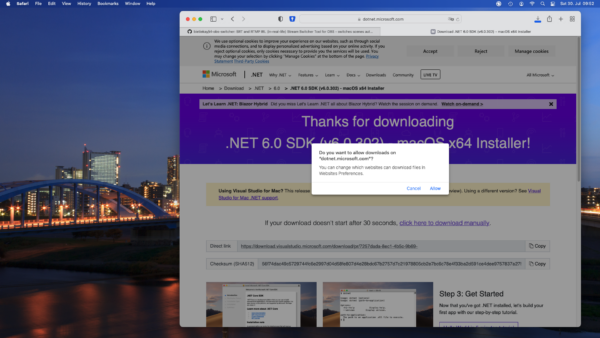
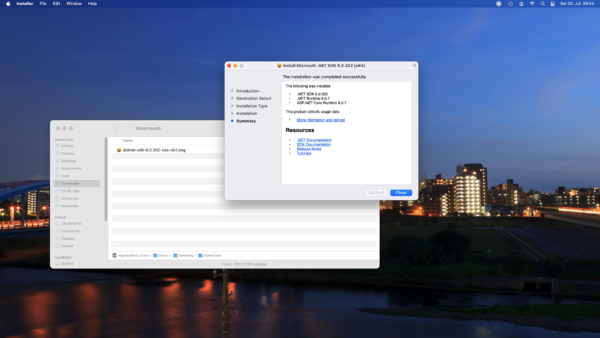
It runs on Linux, Windows, macOS as I have used the .NET framework 6.0 to create it. It is all open source and essentially just a bit of glue and logic around another open source tool called “netproxy” and OBS WebSocket.net.
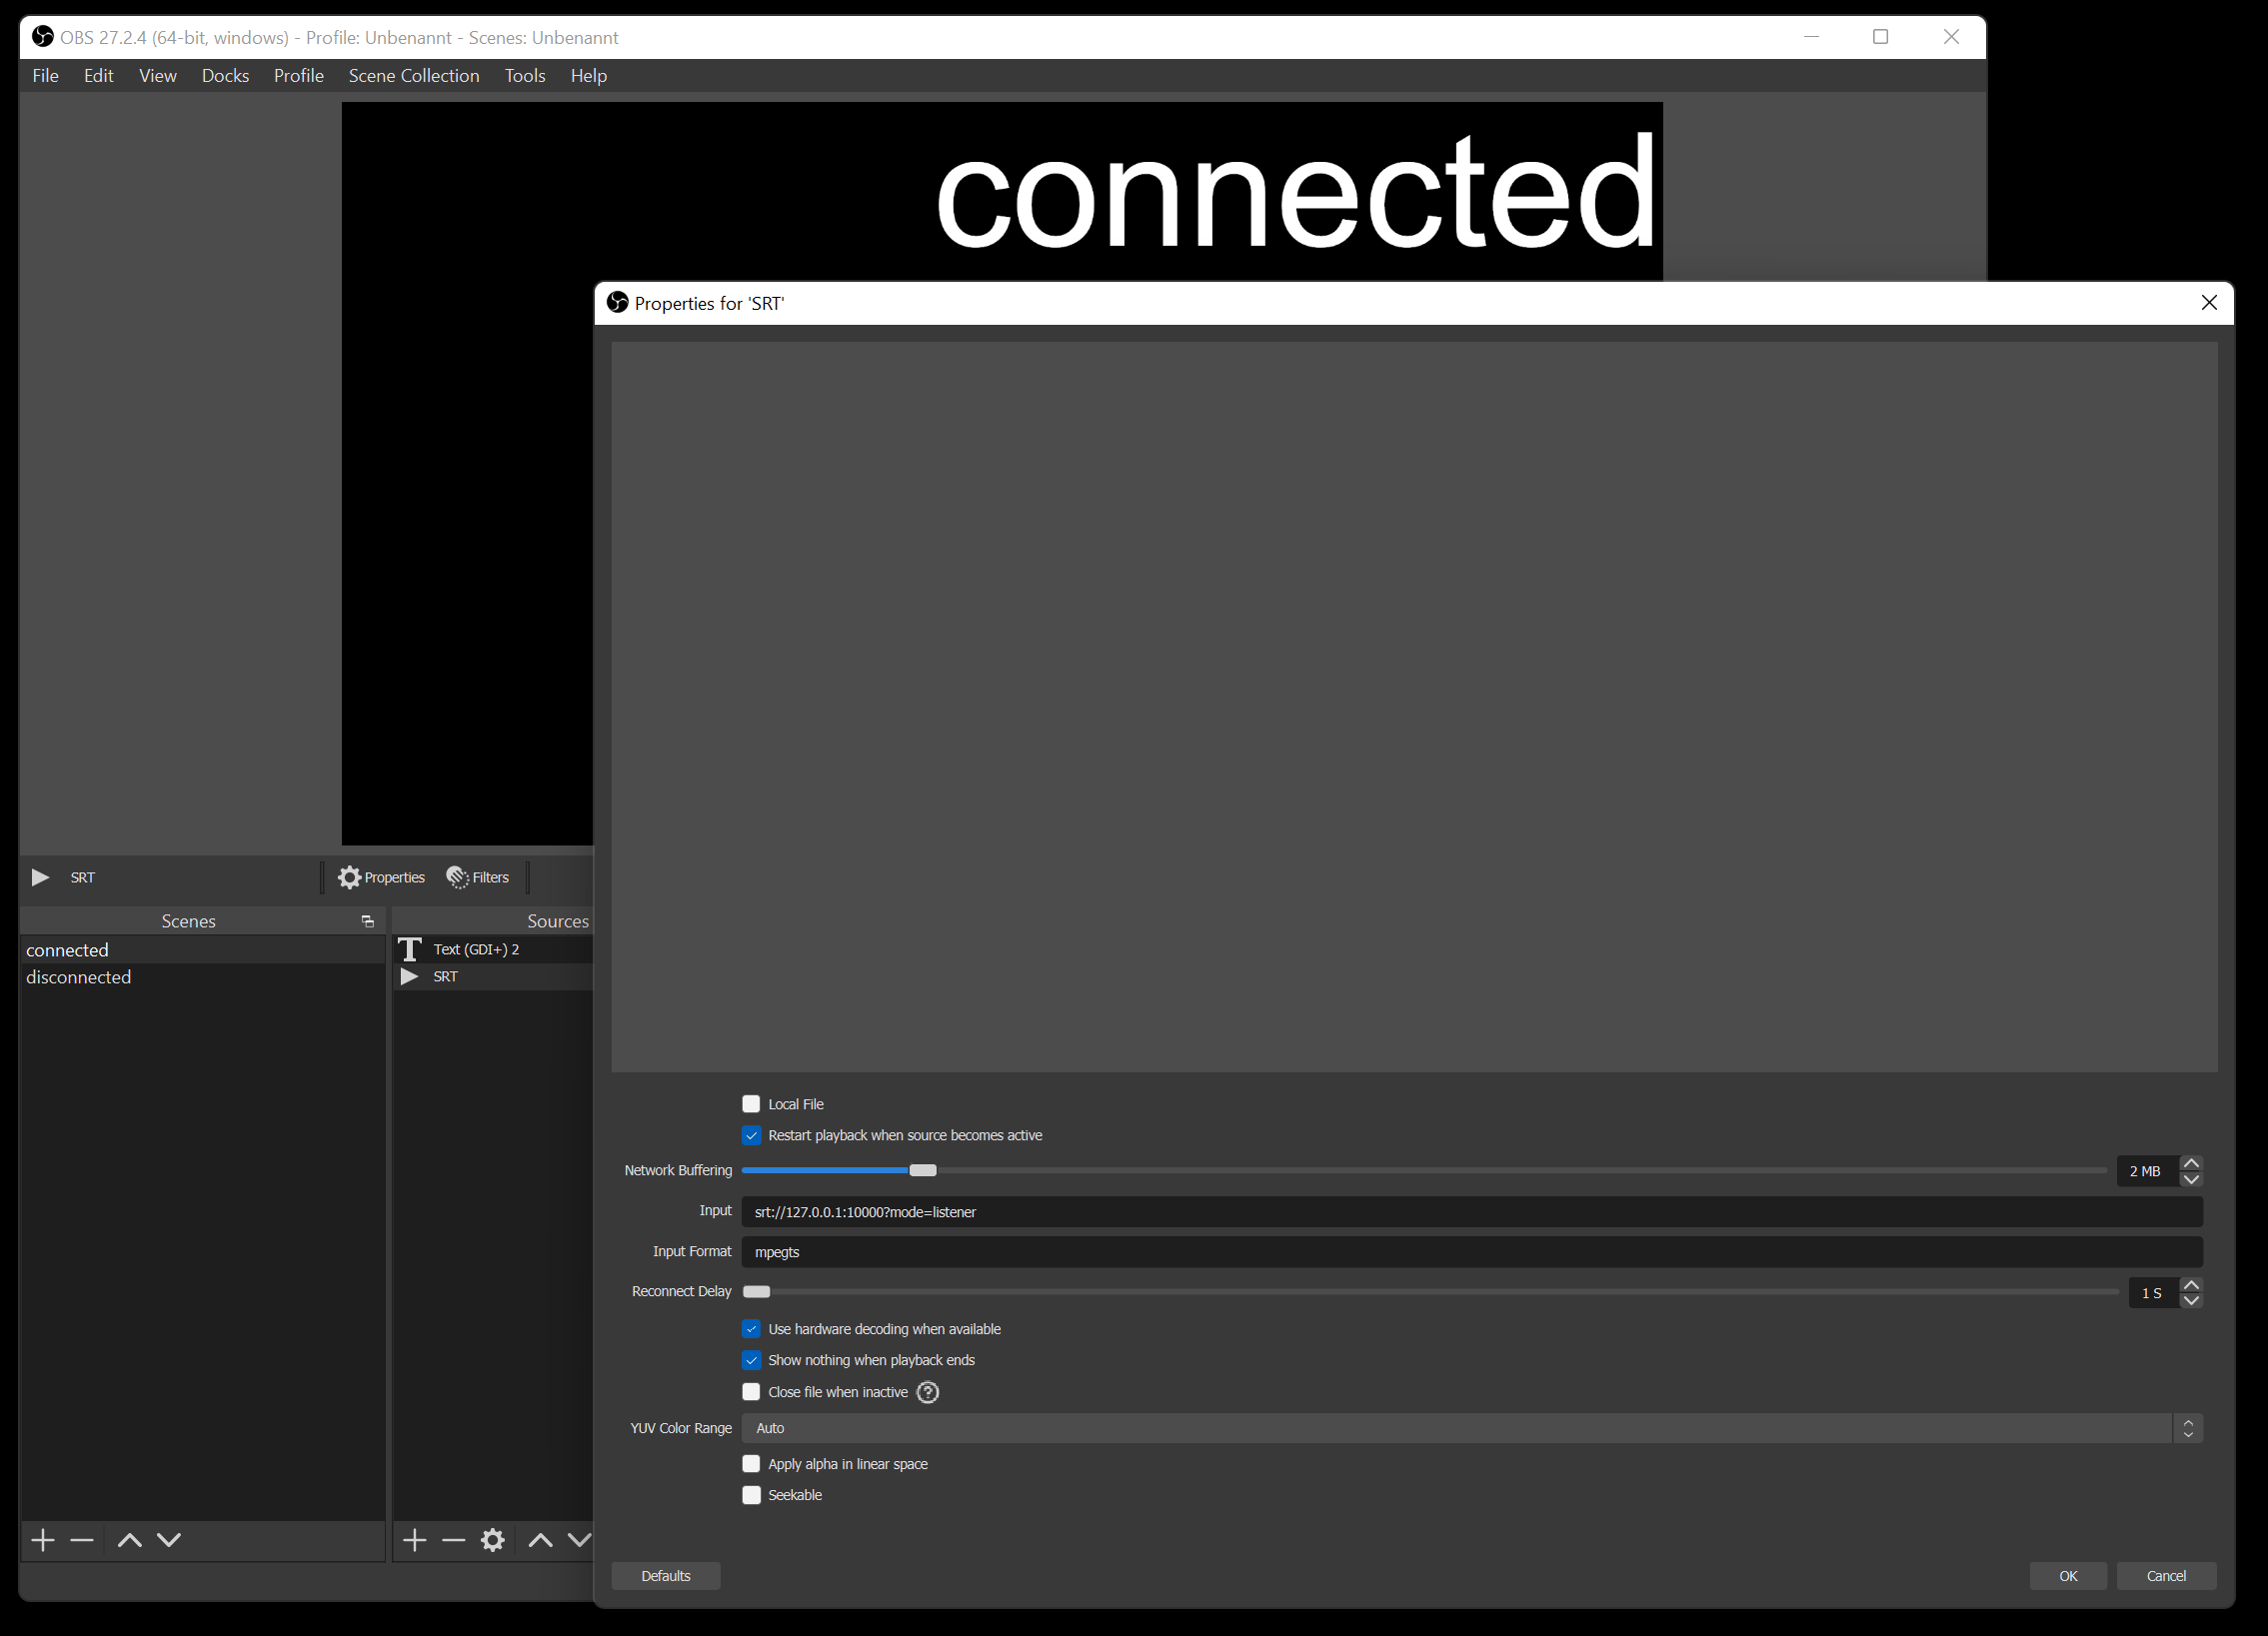
My tool basically runs on all sorts of platforms – including Linux, Windows and macOS. I run it inside the docker container with the OBS Studio. It essentially proxies all data to OBS and monitors wether or not the connection is established or currently disconnected. Furthermore it can be configured to switch scenes in OBS. So depending on wether there is a working connection or not it will switch between a “connected” and “disconnected” scene all automatically.
the “connected” scene configured as an SRT media source
So when you are out and about live streaming your day this little tool takes care of controlling OBS Studio for you.
the “disconnected” scene configured to play a nice beach sunset and quiet music to calm people down as the live streamer reconnects…
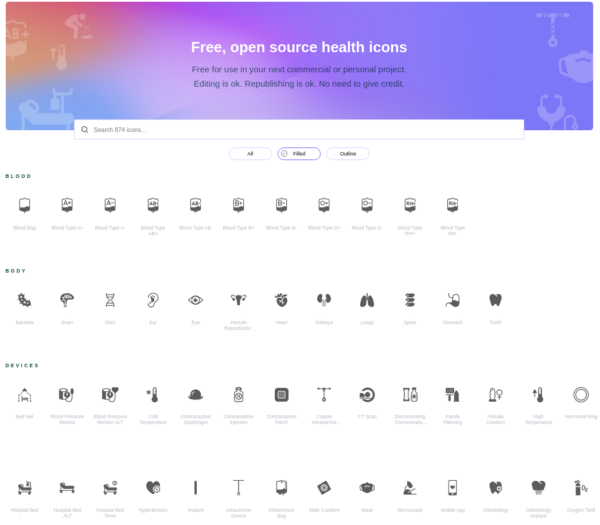
Found that nice heap of Icons that are free to use and high-quality:
Health Icons is a volunteer effort to create a ‘global good’ for health projects all over the world. These icons are available in the public domain for use in any type of project.
The project is hosted by the public health not-for-profit Resolve to Save Lives as an expression of our committment to offer the icons for free, forever.
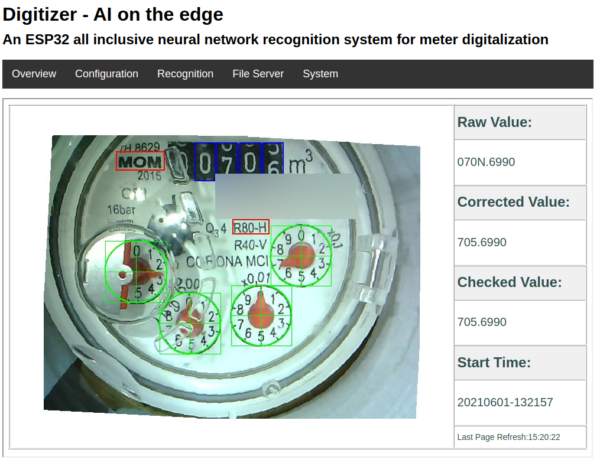
The only meter in our house that I was not yet able to read out automatically was the water meter.
With the help of a great open source project by the name of AI-on-the-edge and an ESP32-Camera Module it is quite simple to regularly take a picture of the meter, convert it into a digital read-out and send it away through MQTT.
The process is quite simple and straightforward.
Flash the ready made Firmware image to the module
Configure the WiFi using a SD card
Put the module directly over the meter
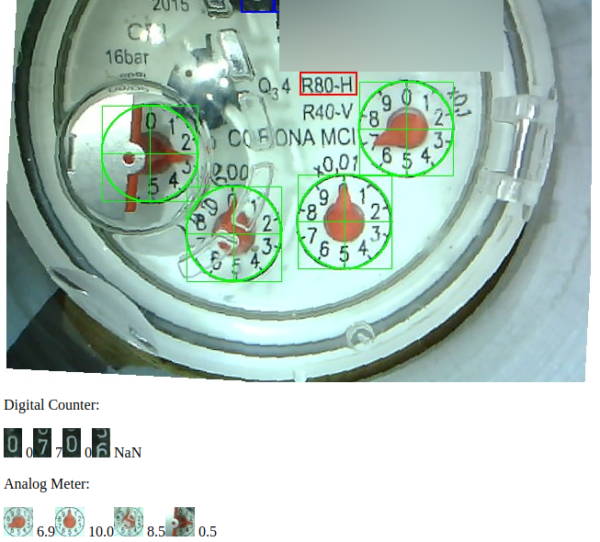
Connect to it and setup the reference points and the meter recognition marks
As you can see above all the recognition is done on the ESP32 module with its 4MByte of RAM.
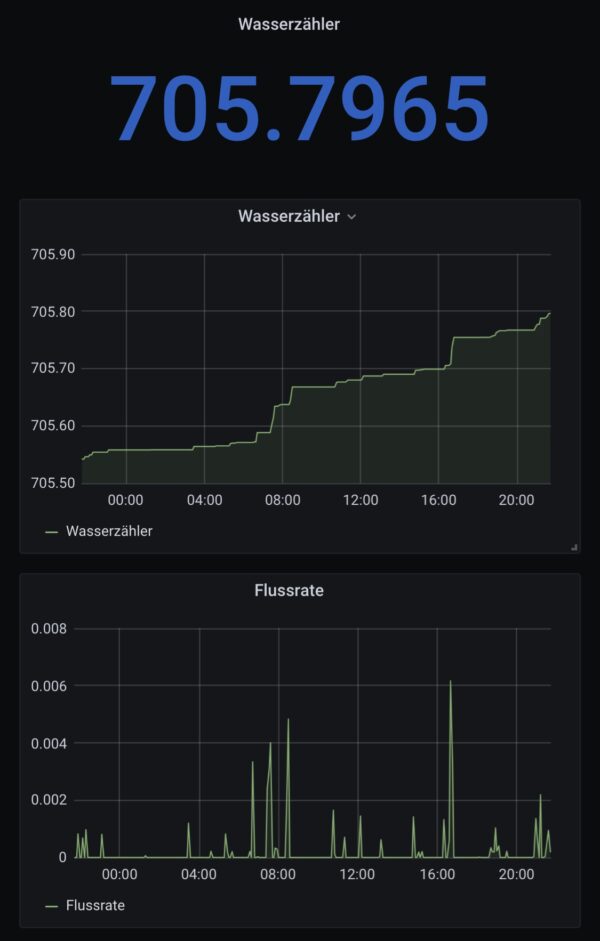
With the data sent through MQTT it’s easy to draw nice graphs:
Since a picture says more than a thousand words, I give you the result first:
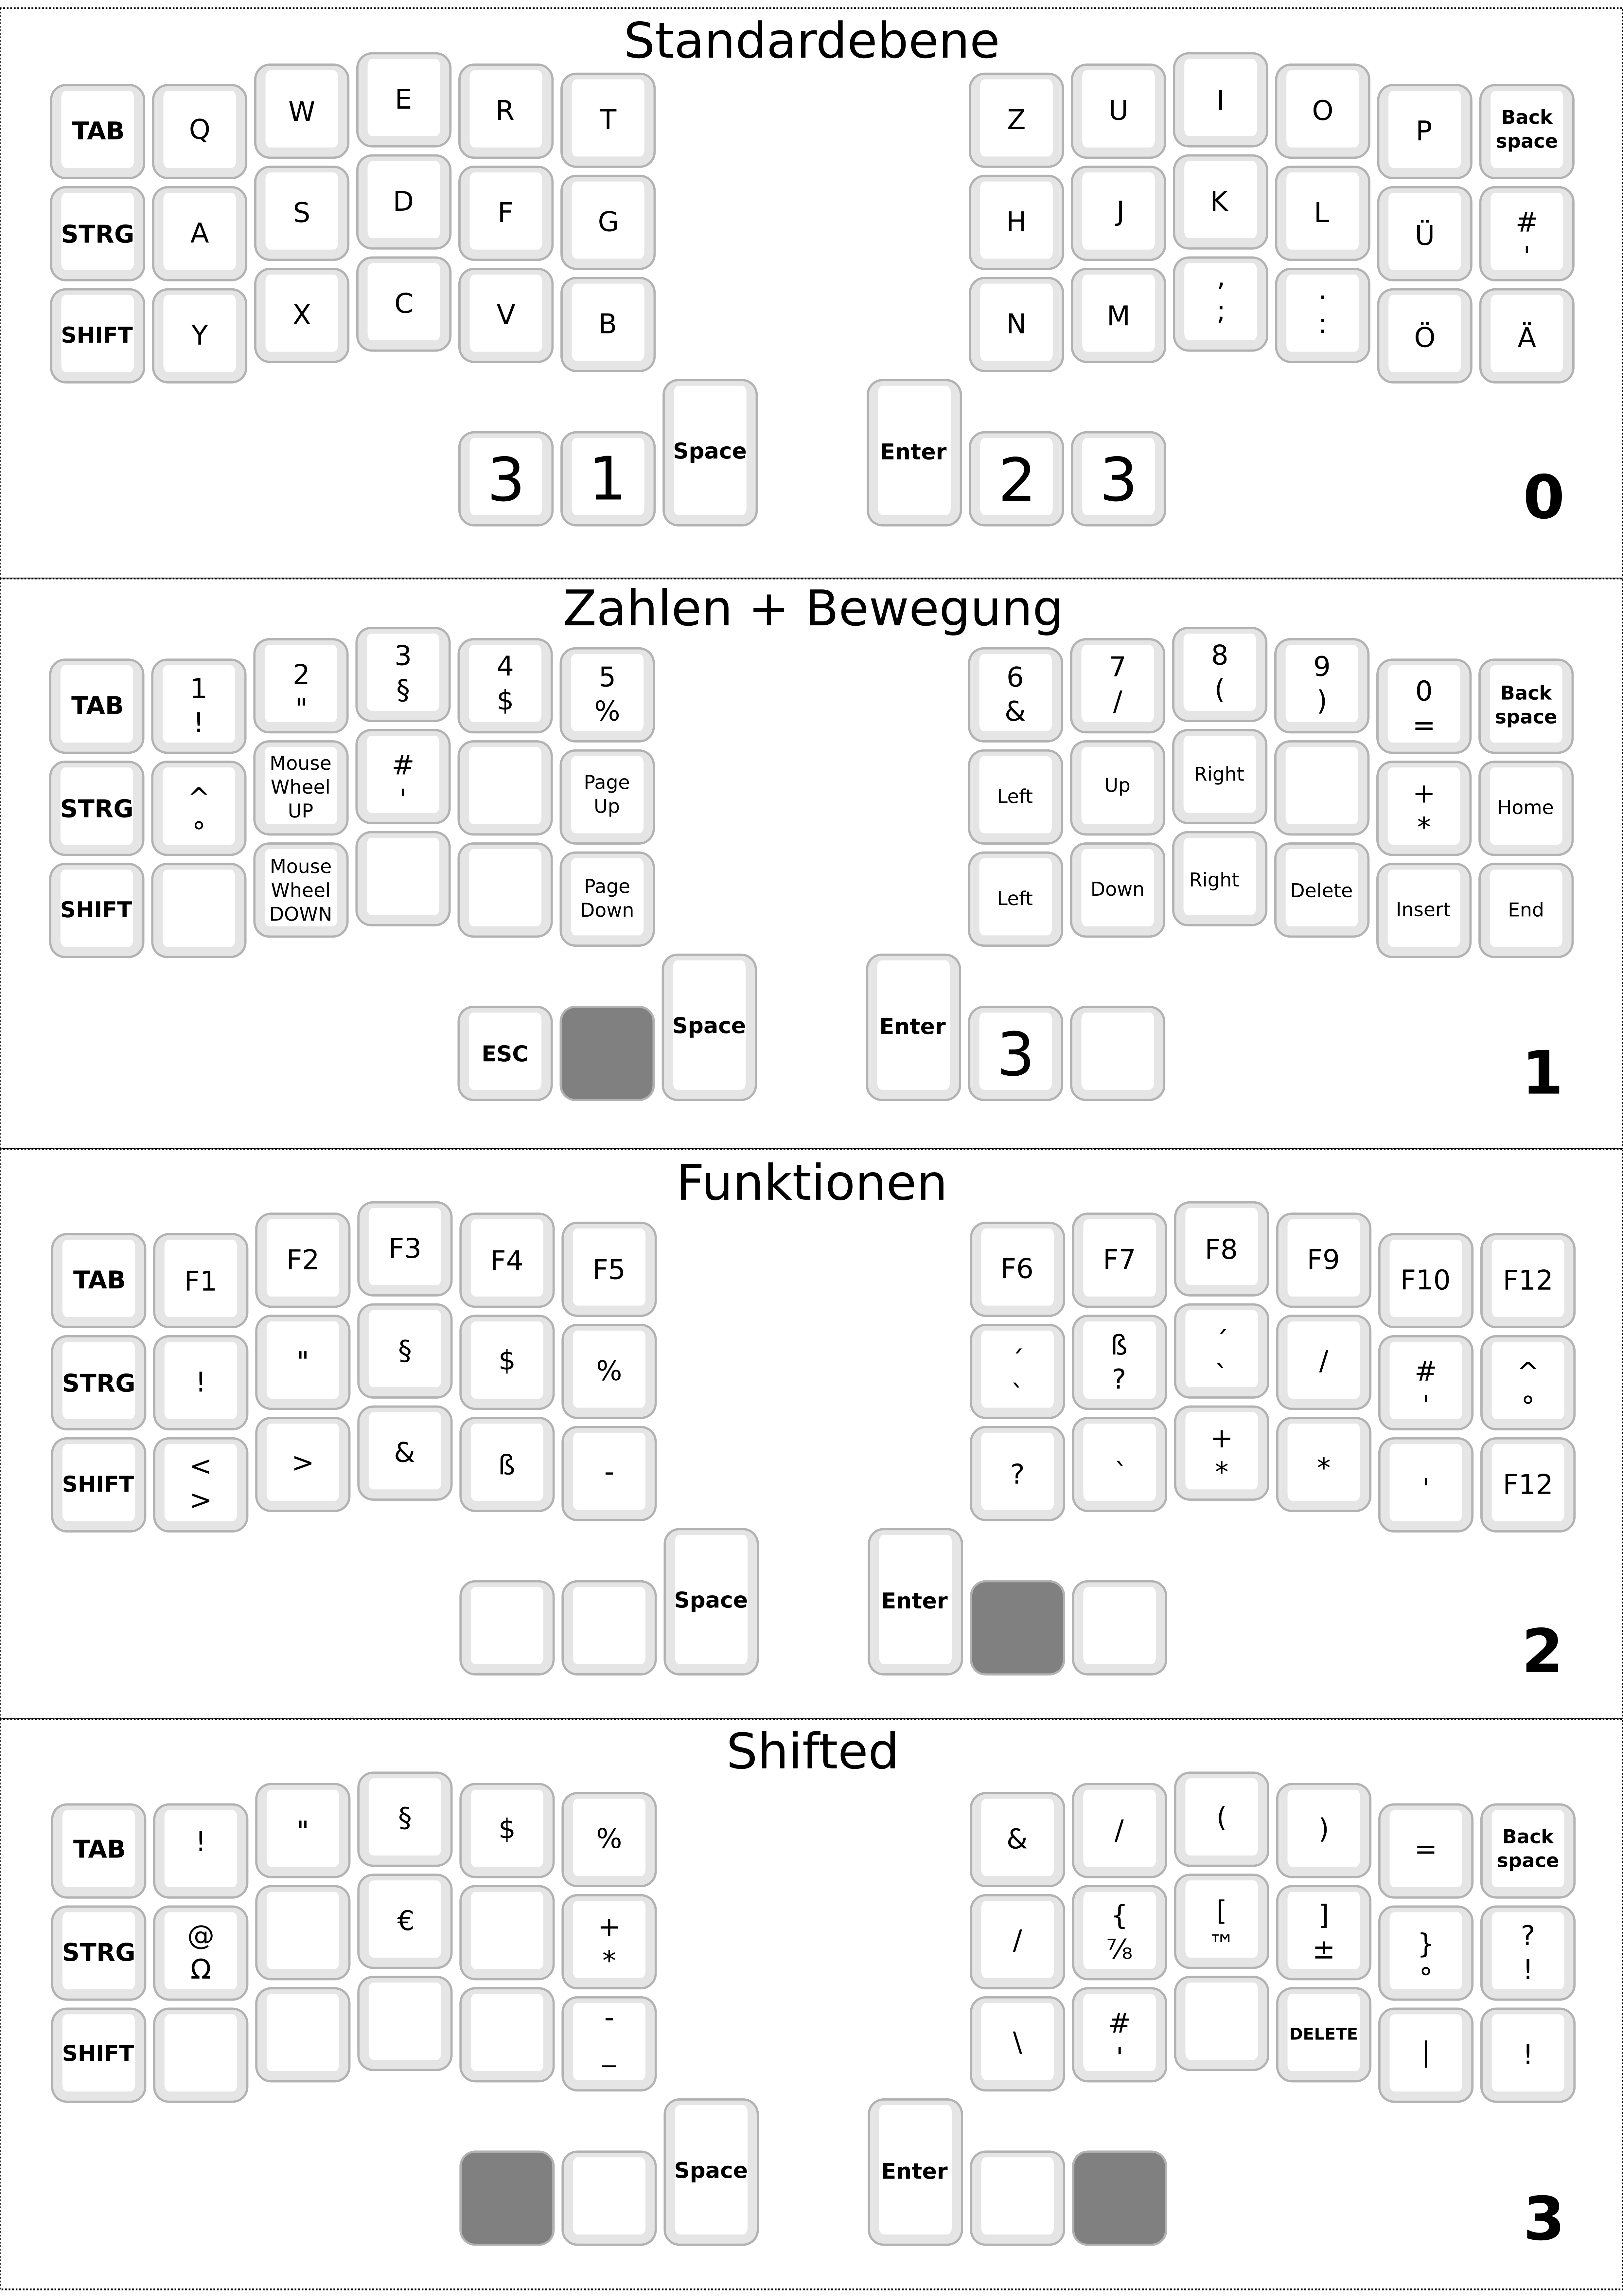
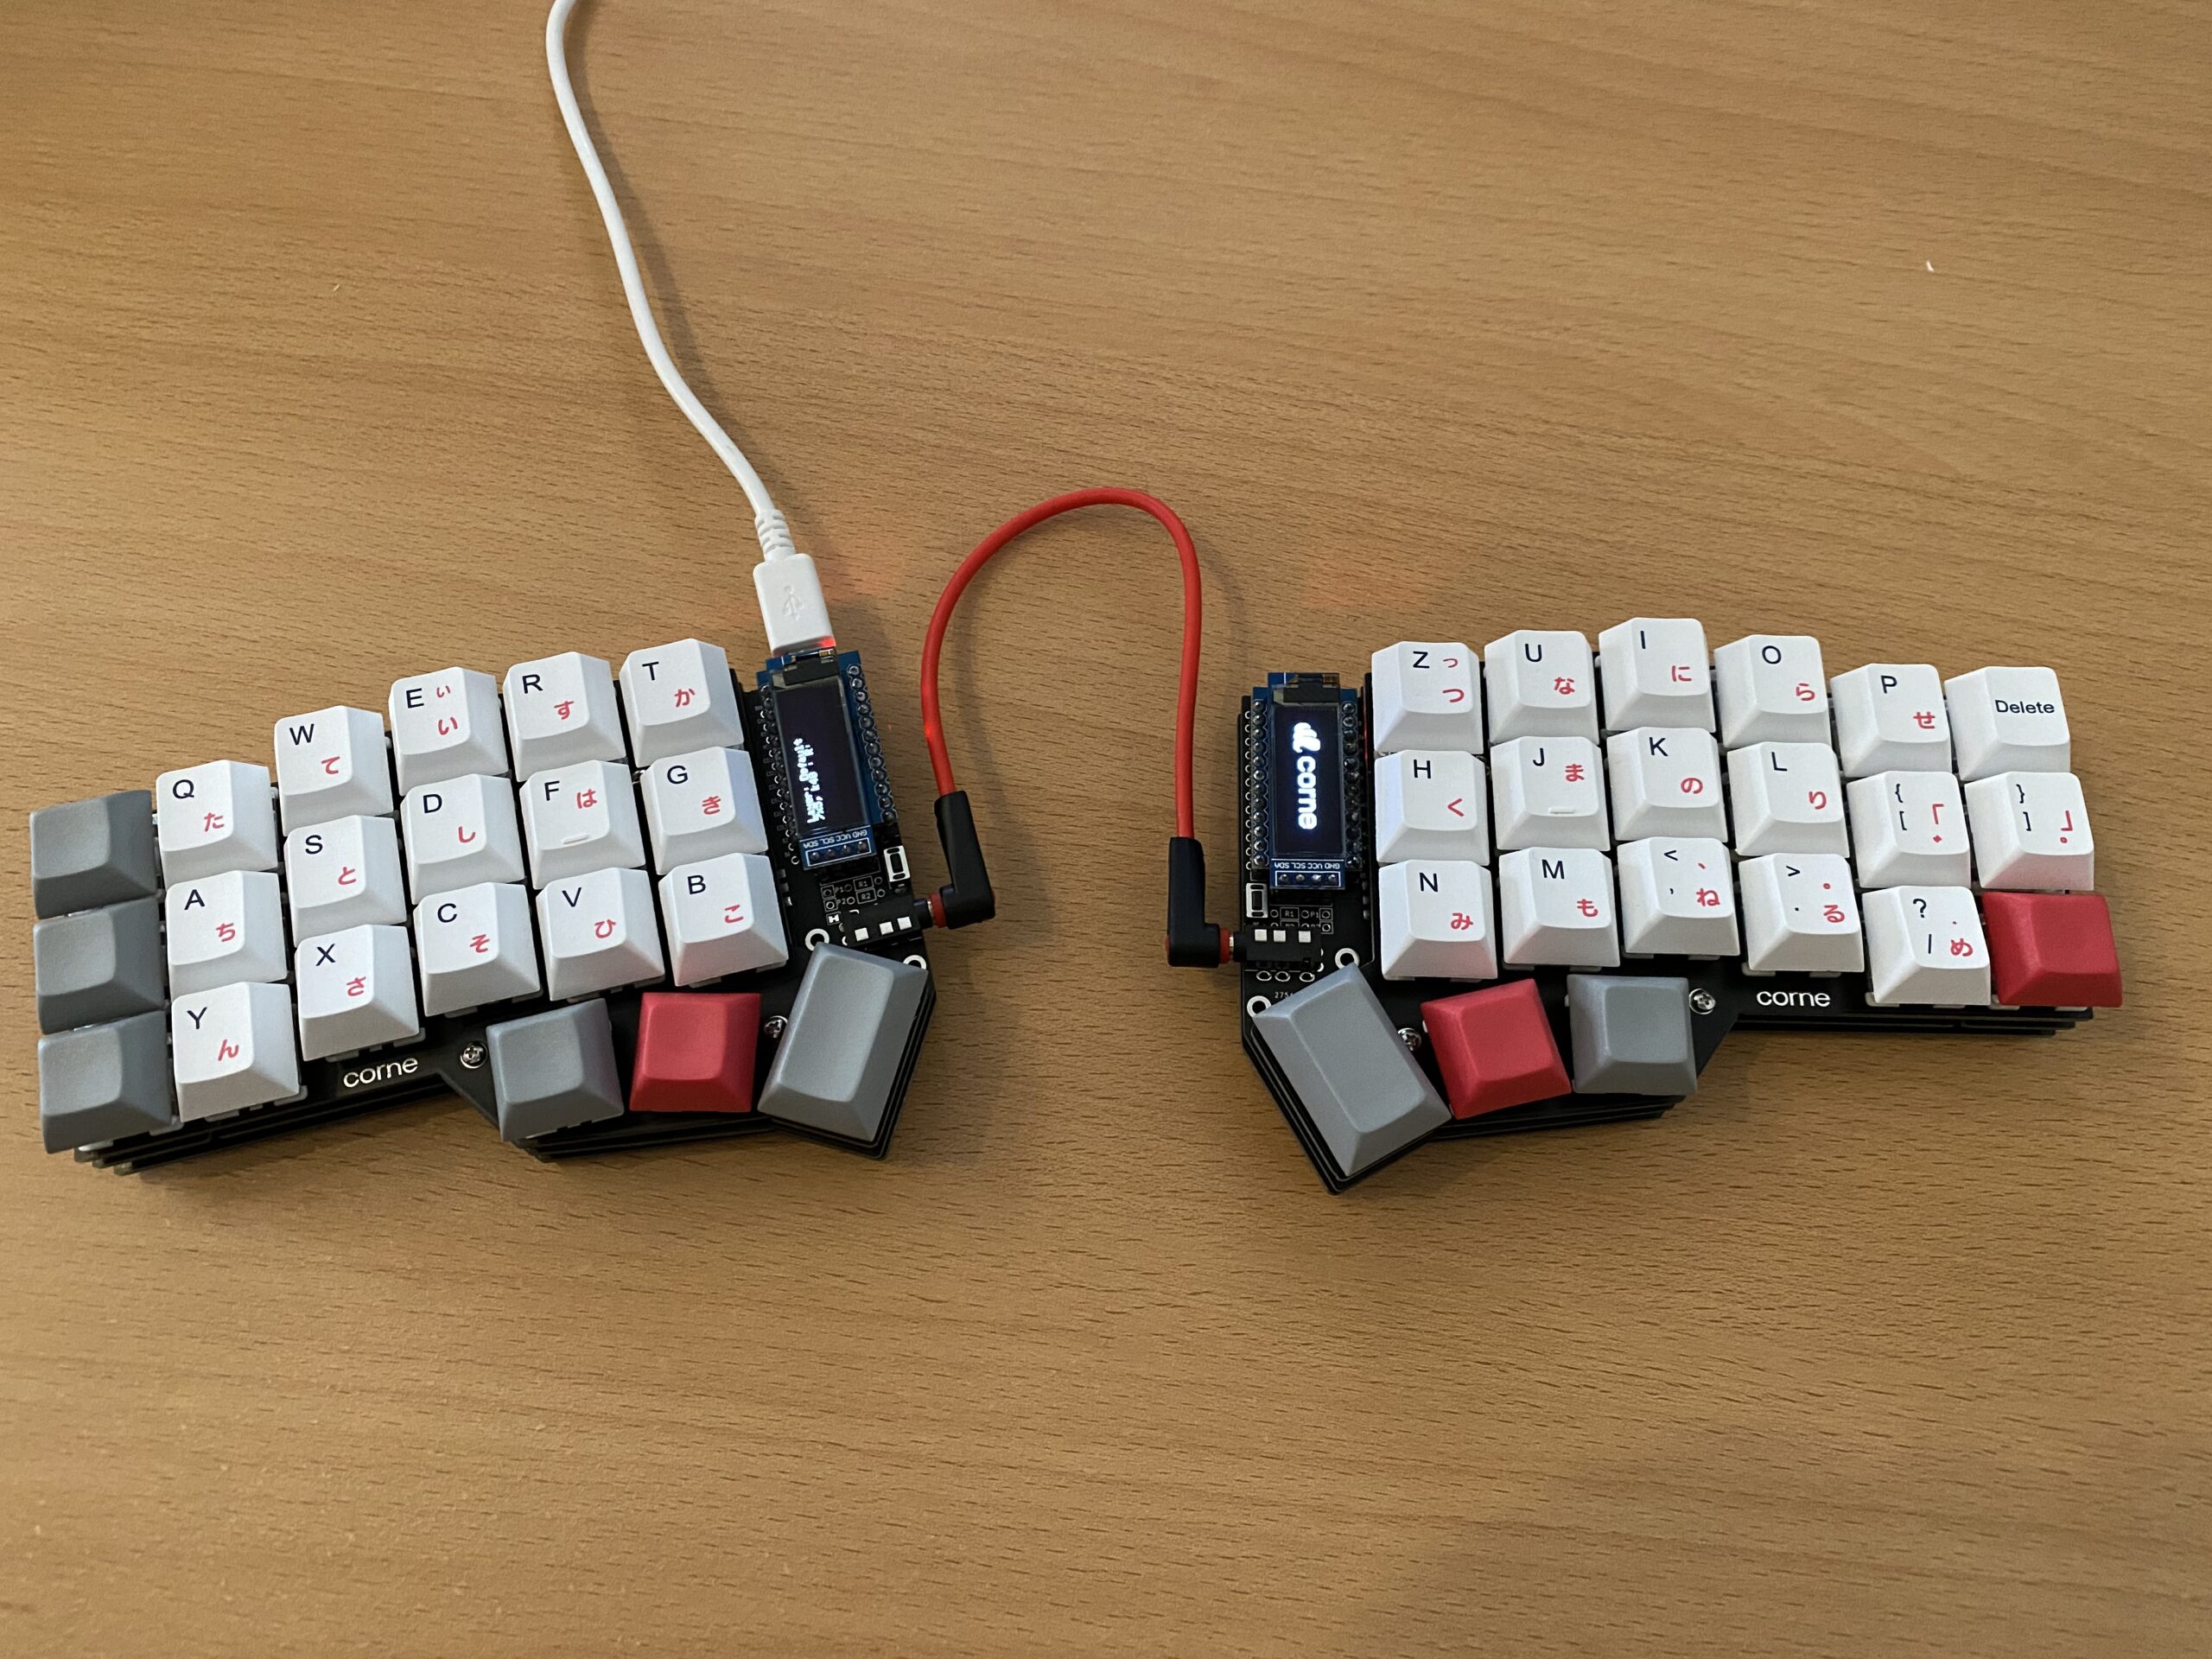
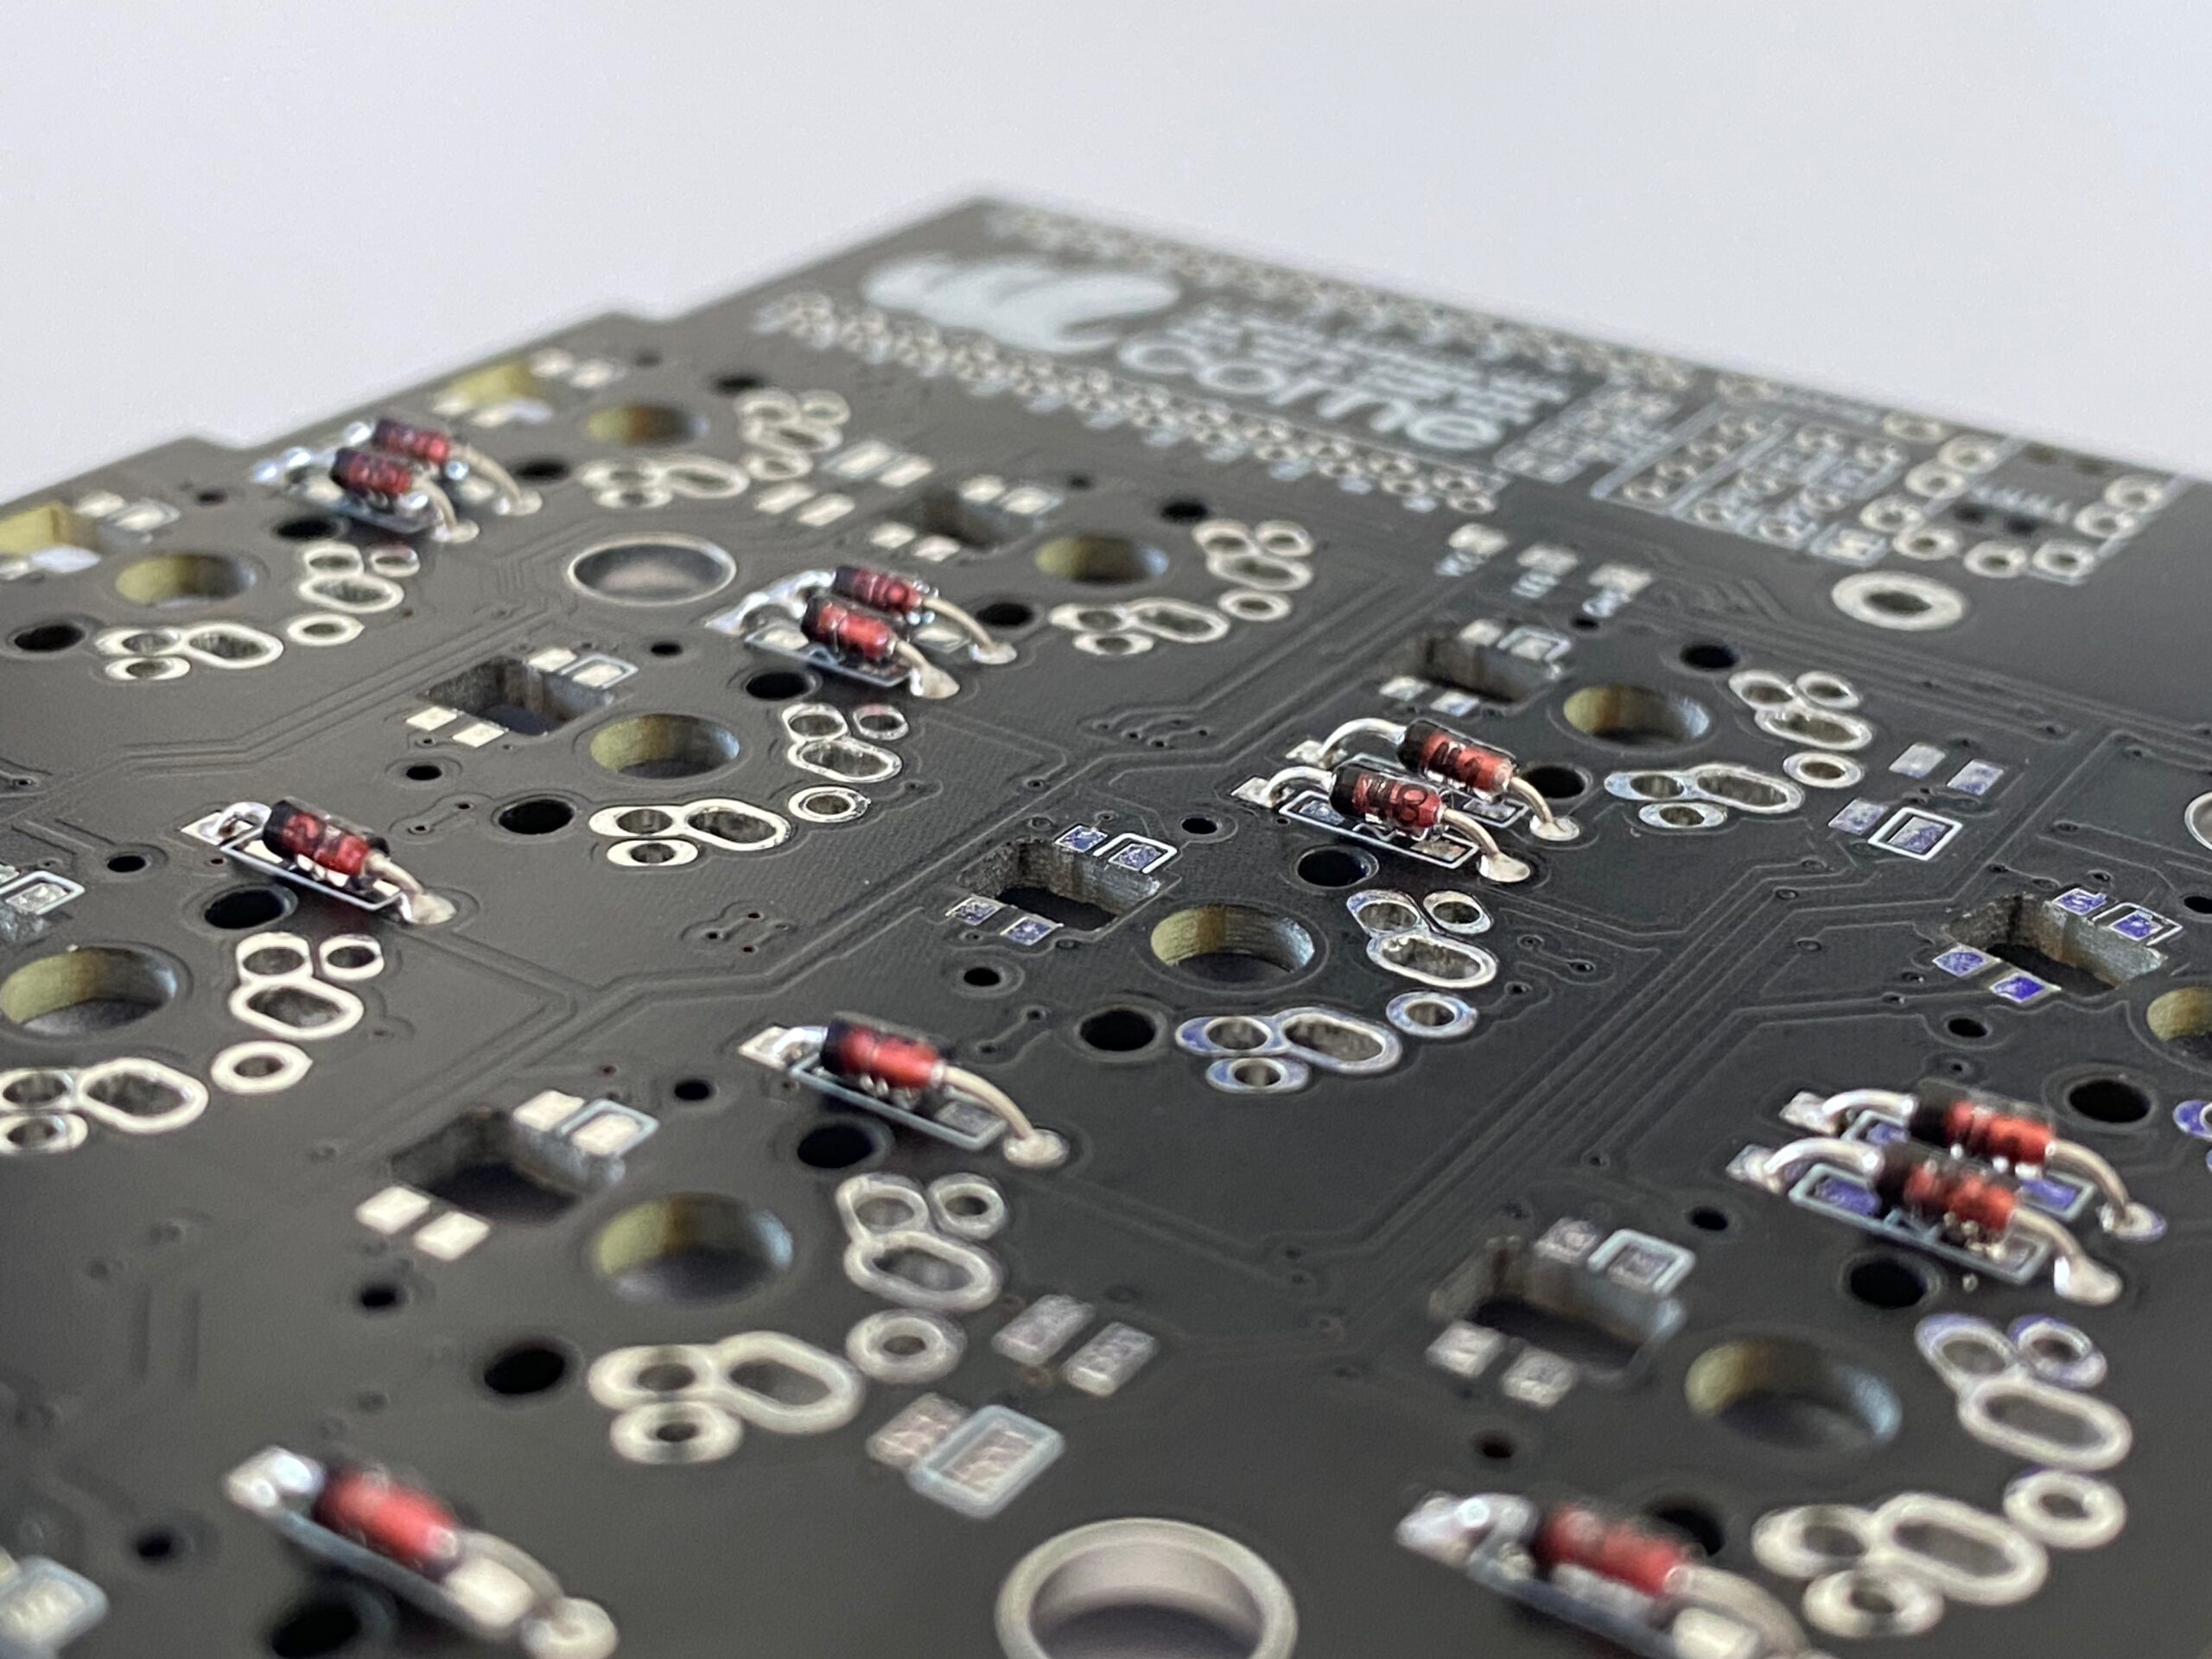
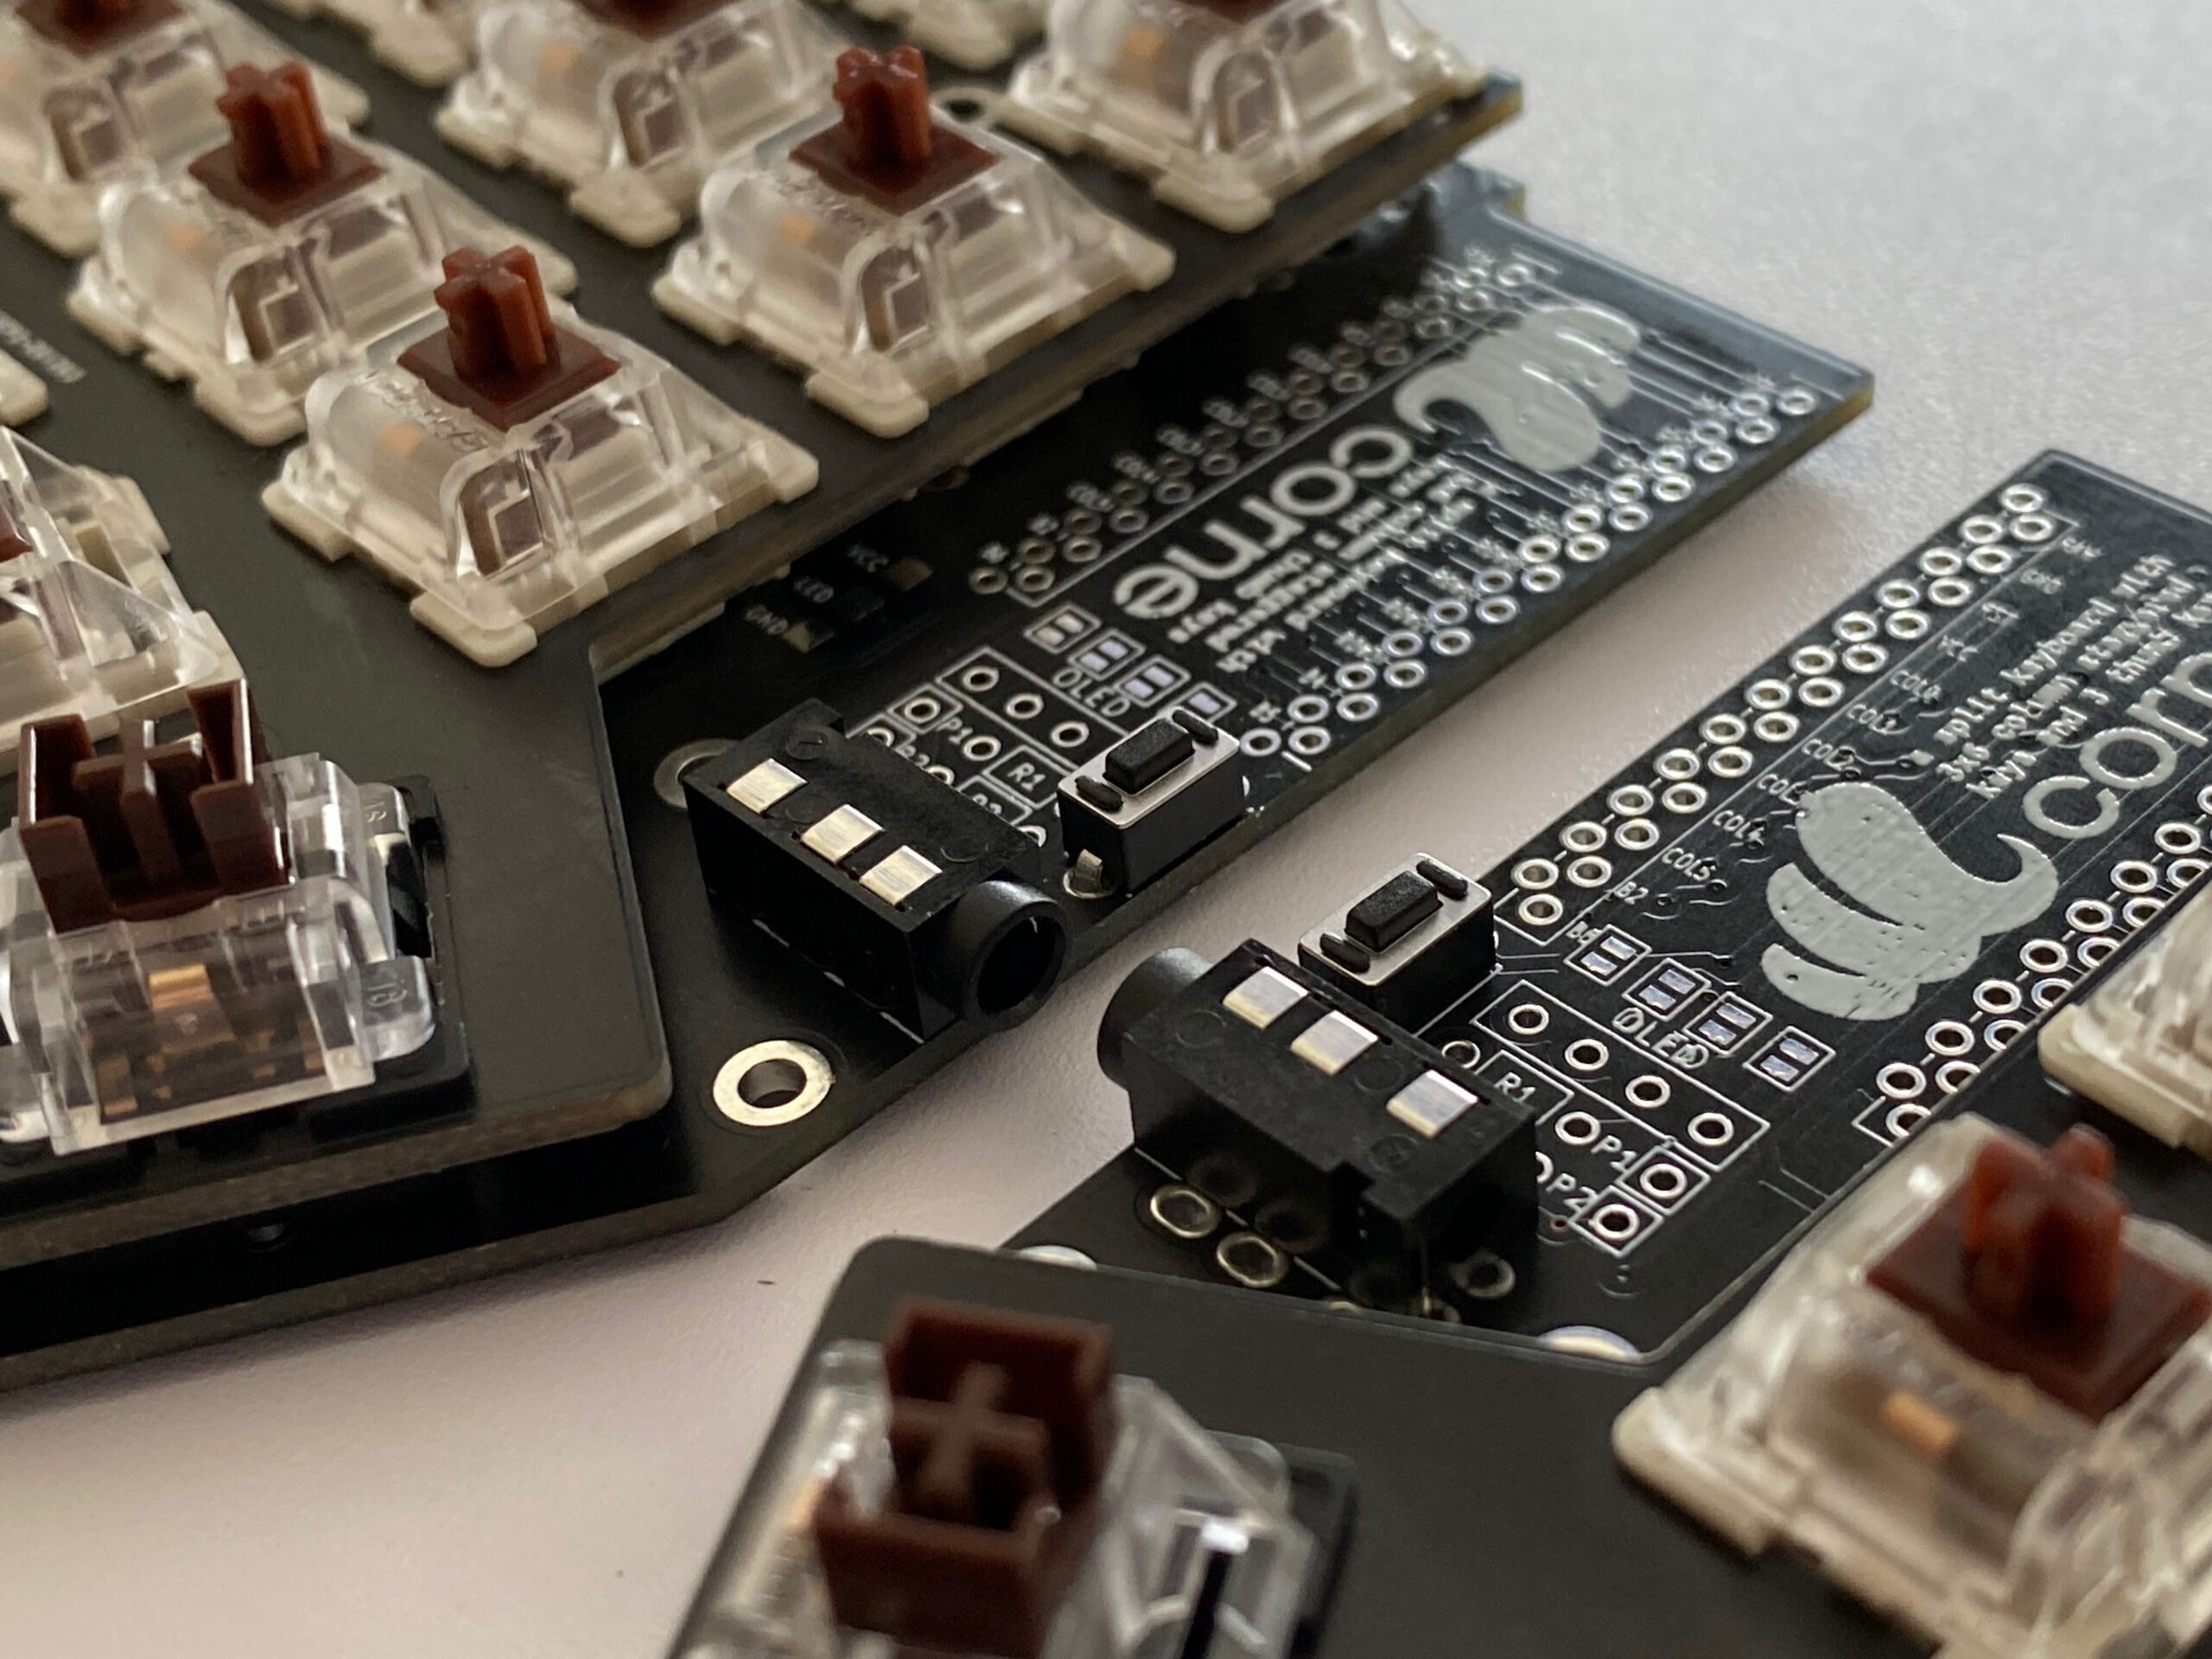
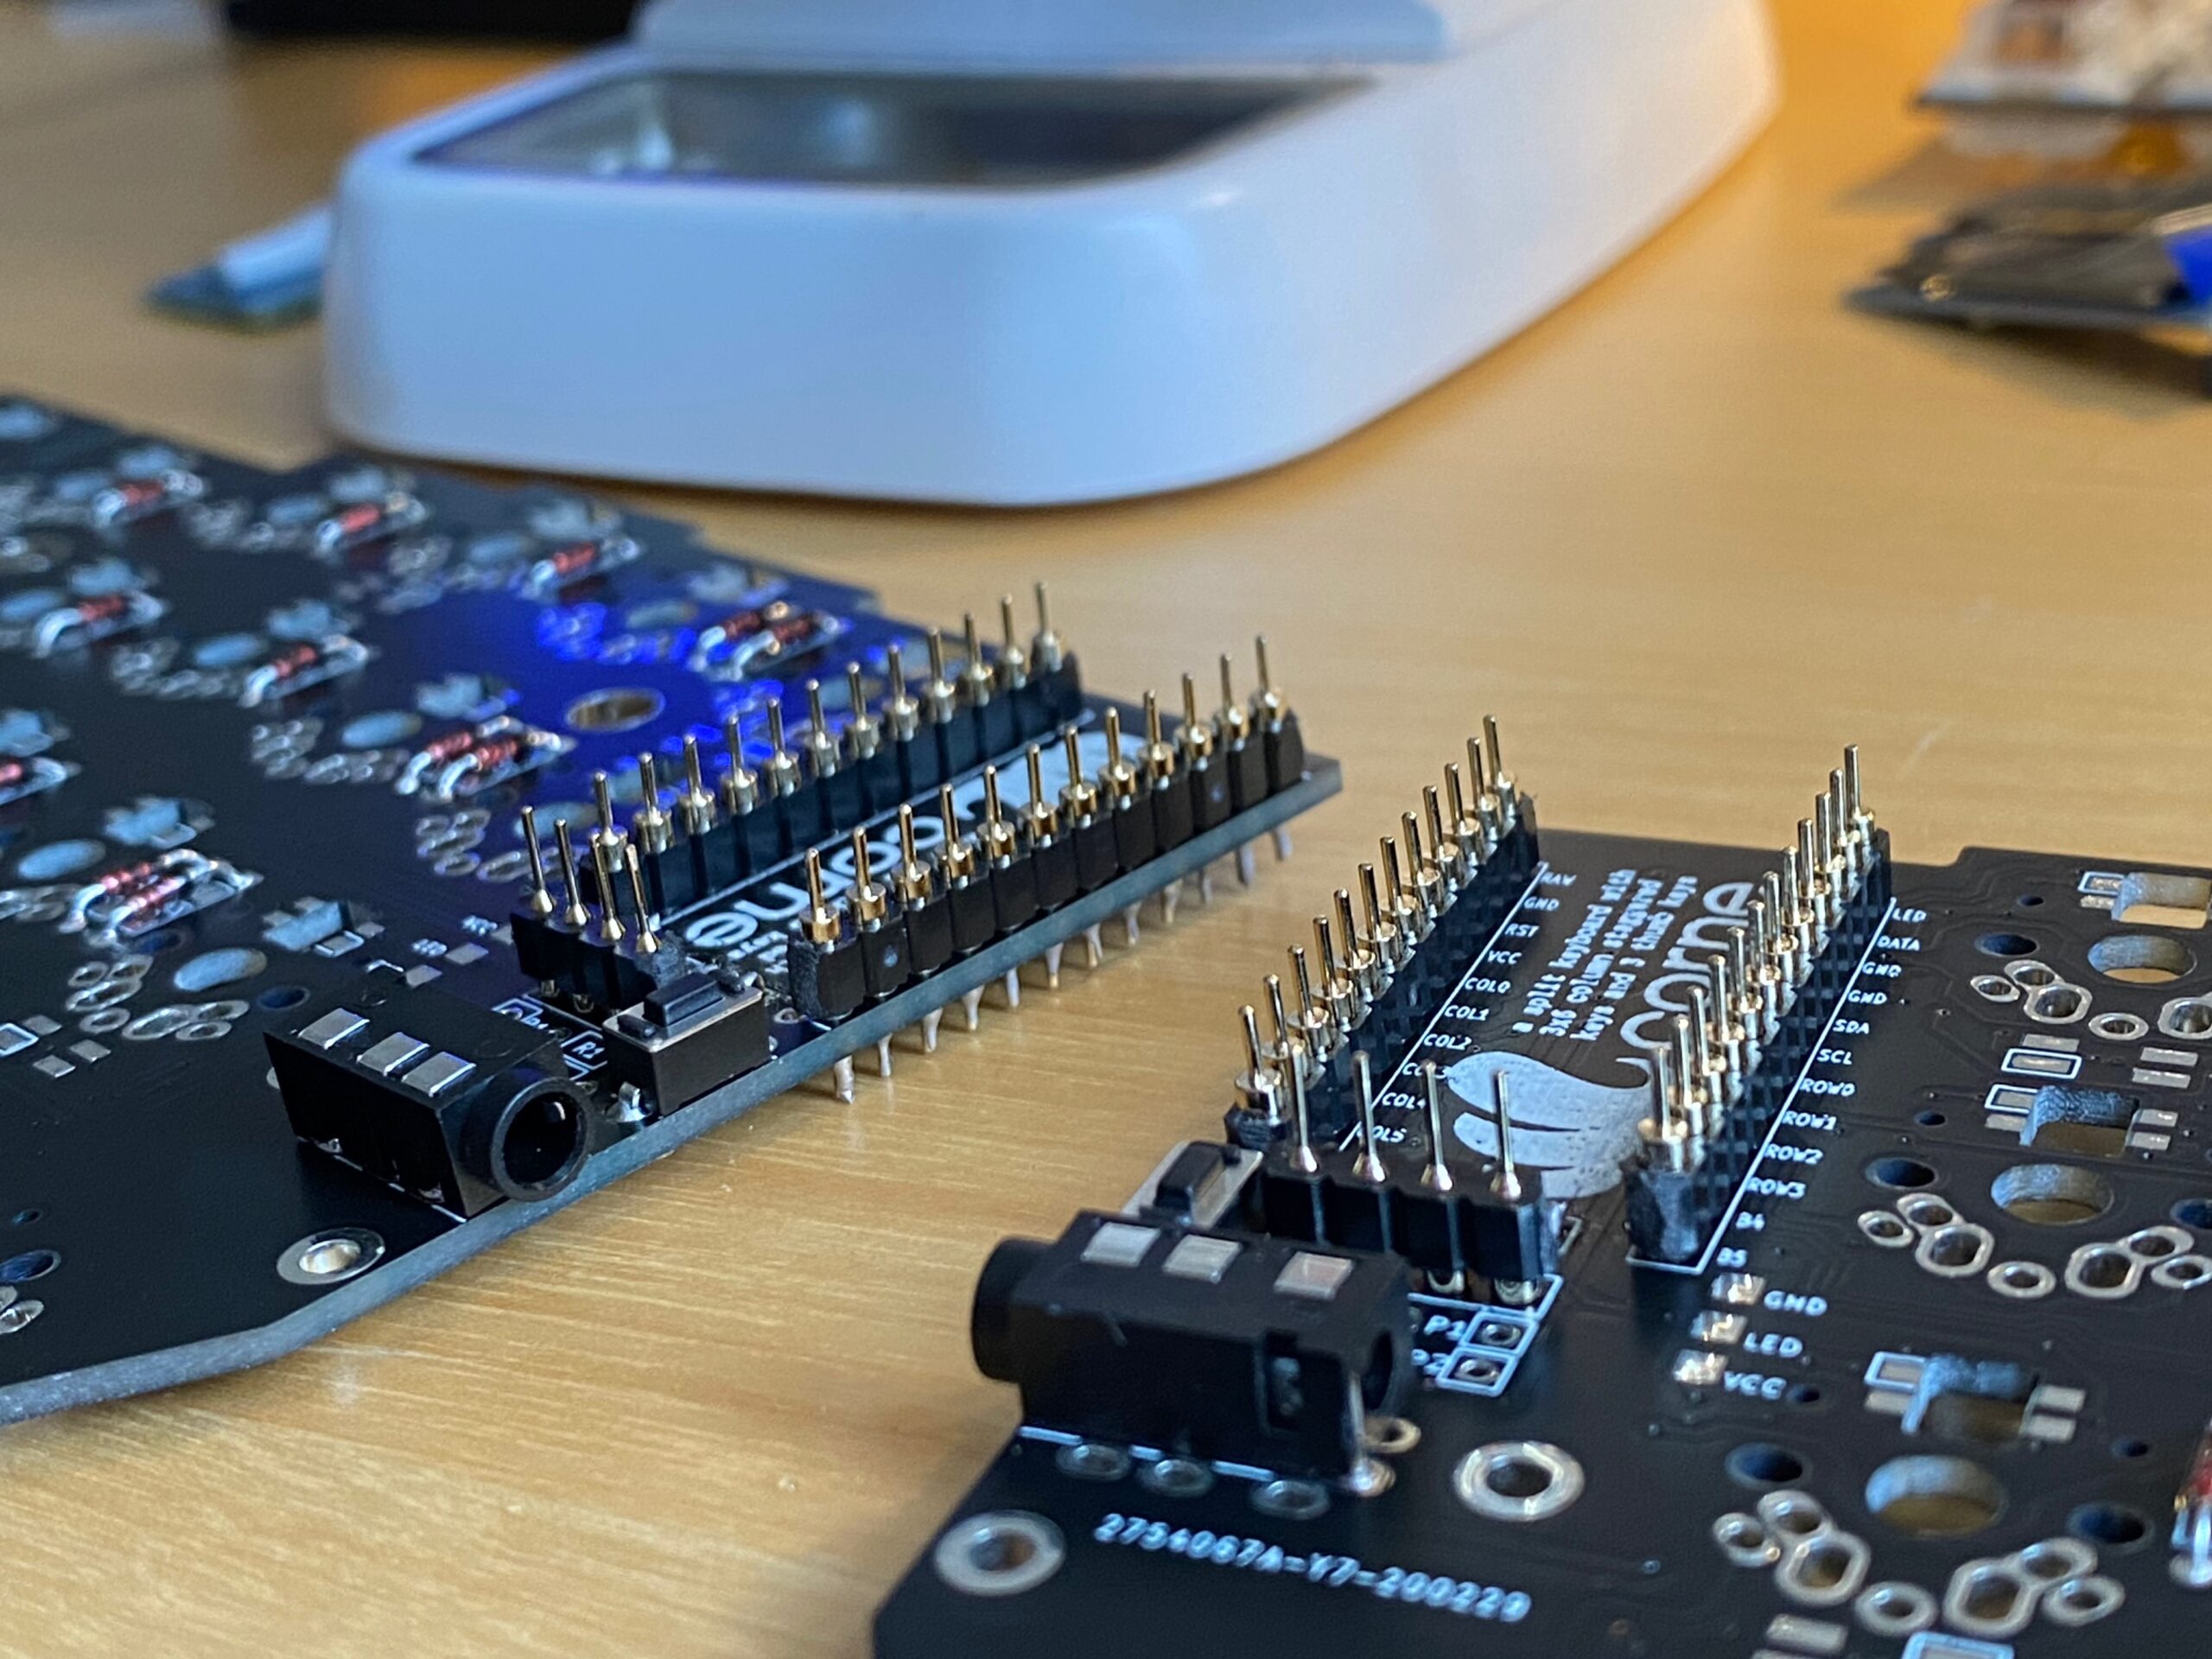
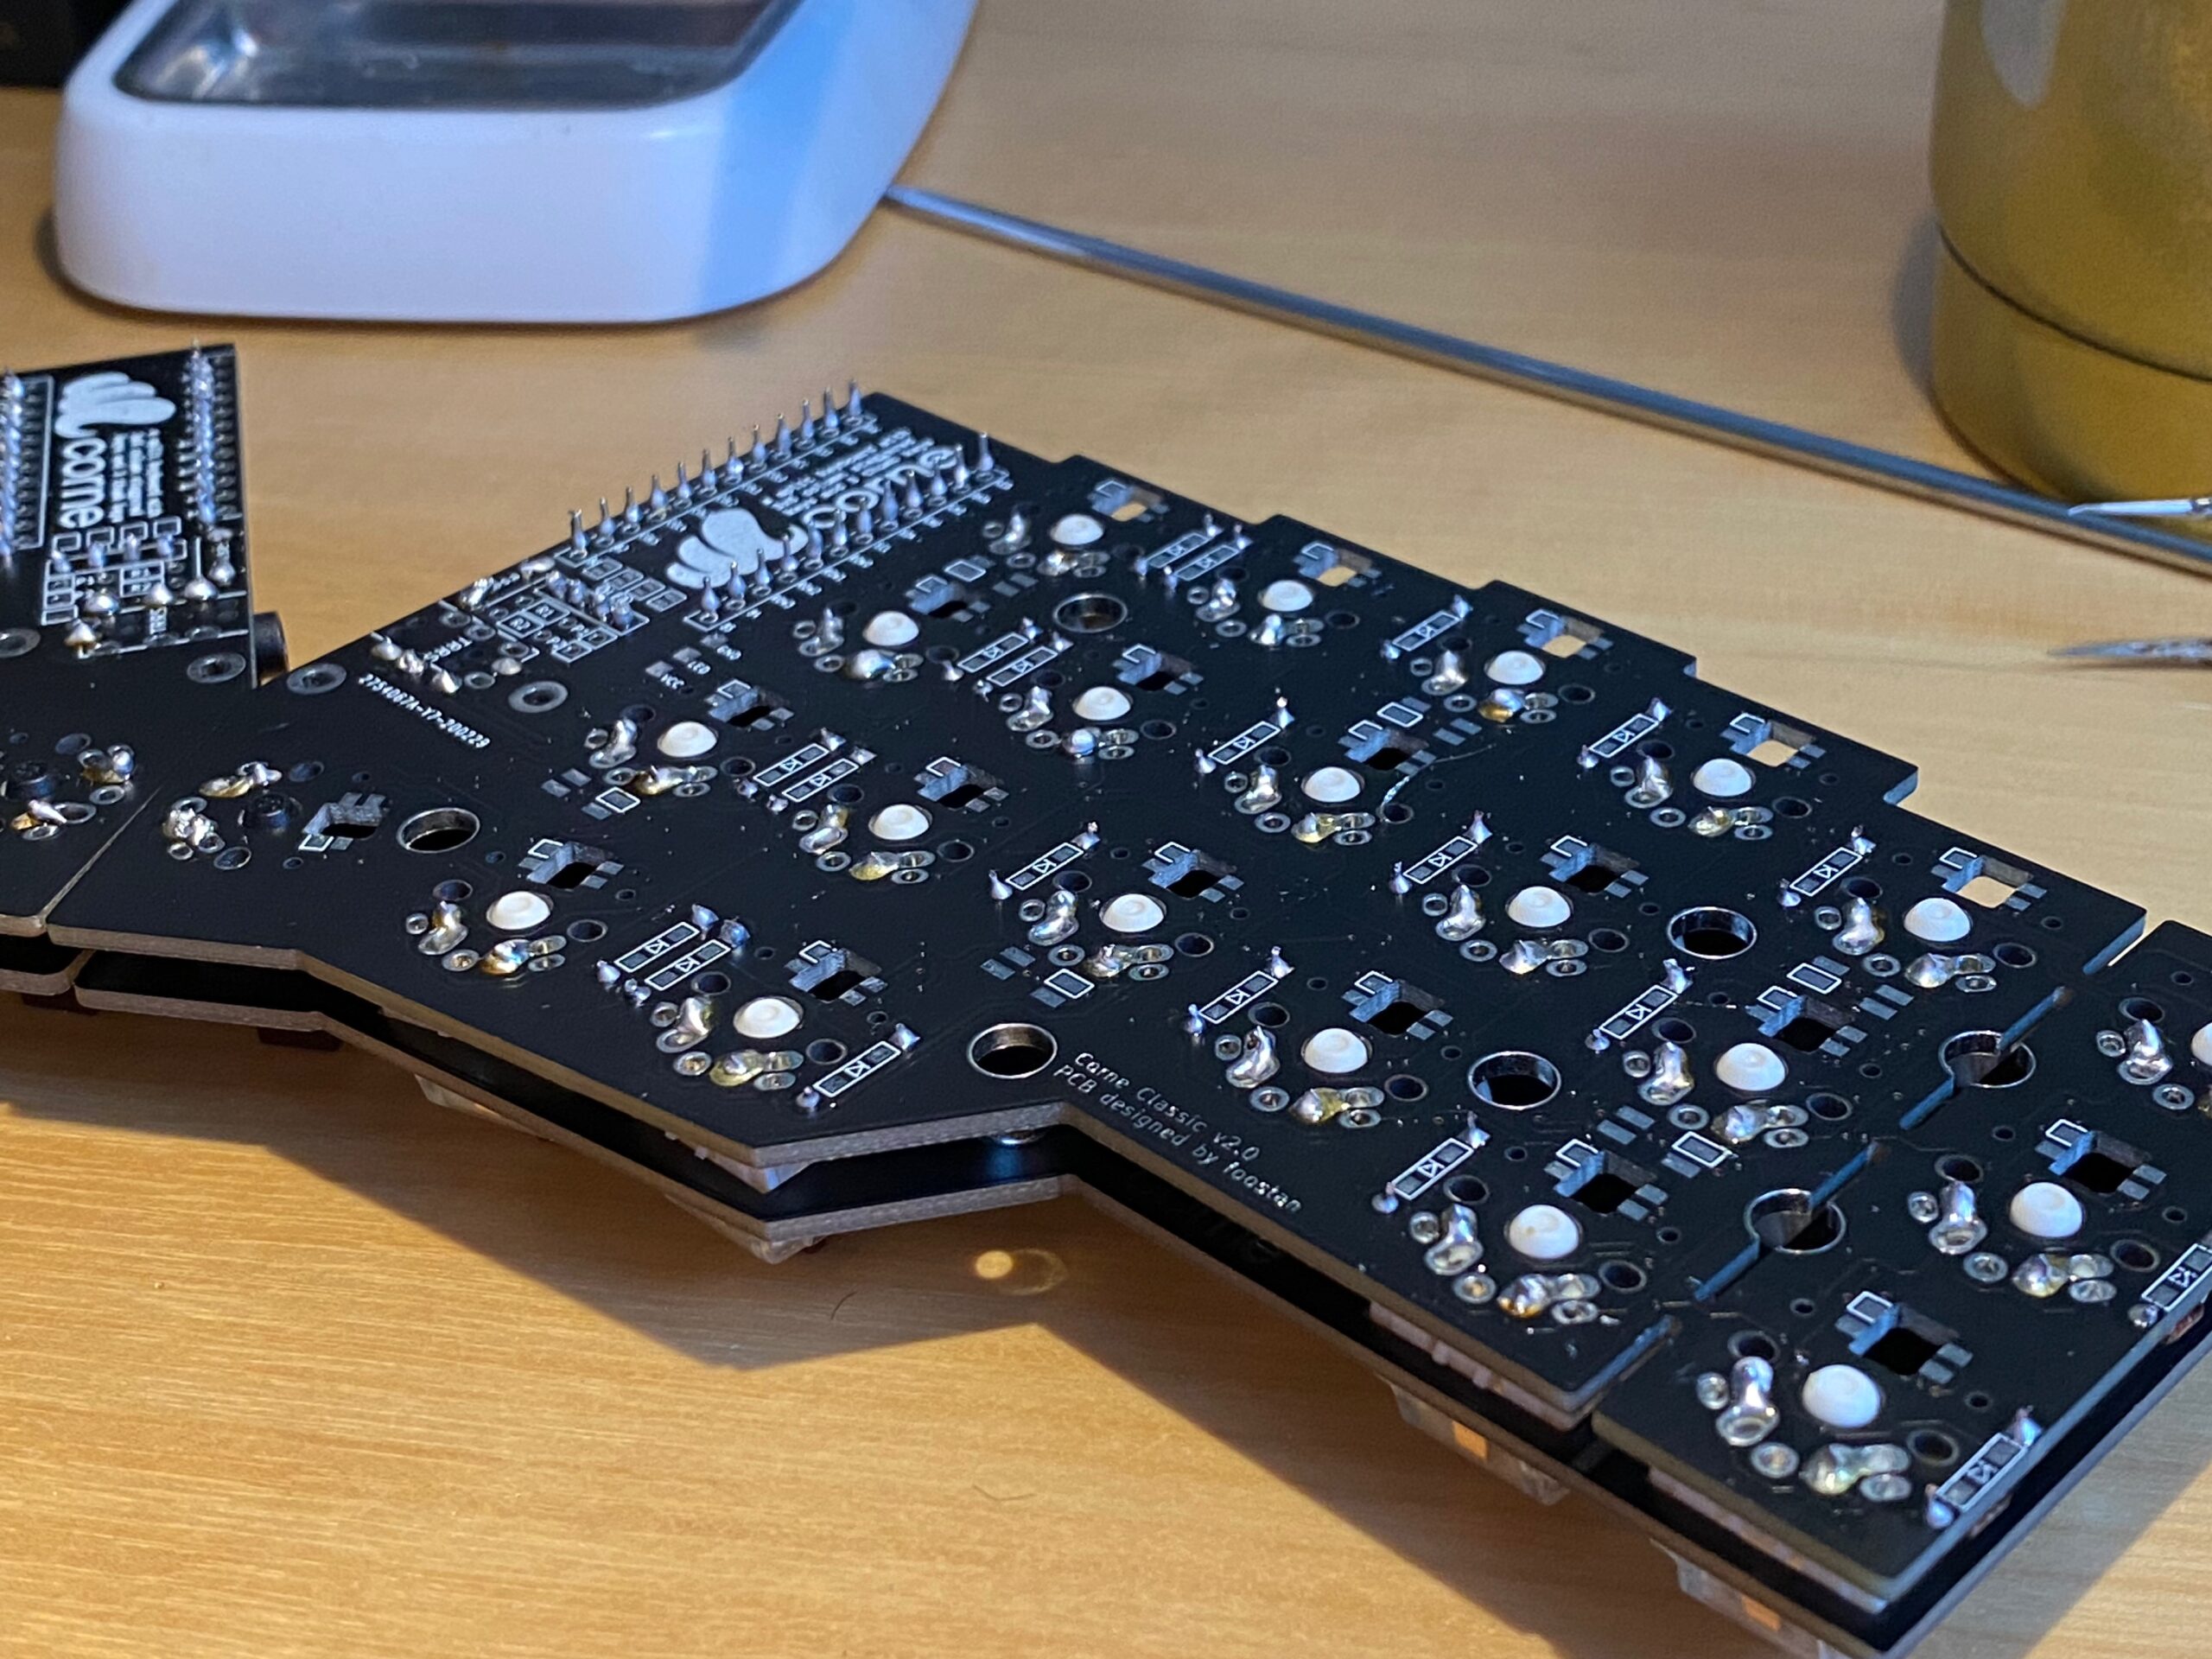
my crkbd based keyboard
This keyboard design is made from the ground up as open source and naturally is fully available as a GIT repository containing everything you need to start: PCB schematics, drawing, documentation and firmware source code.
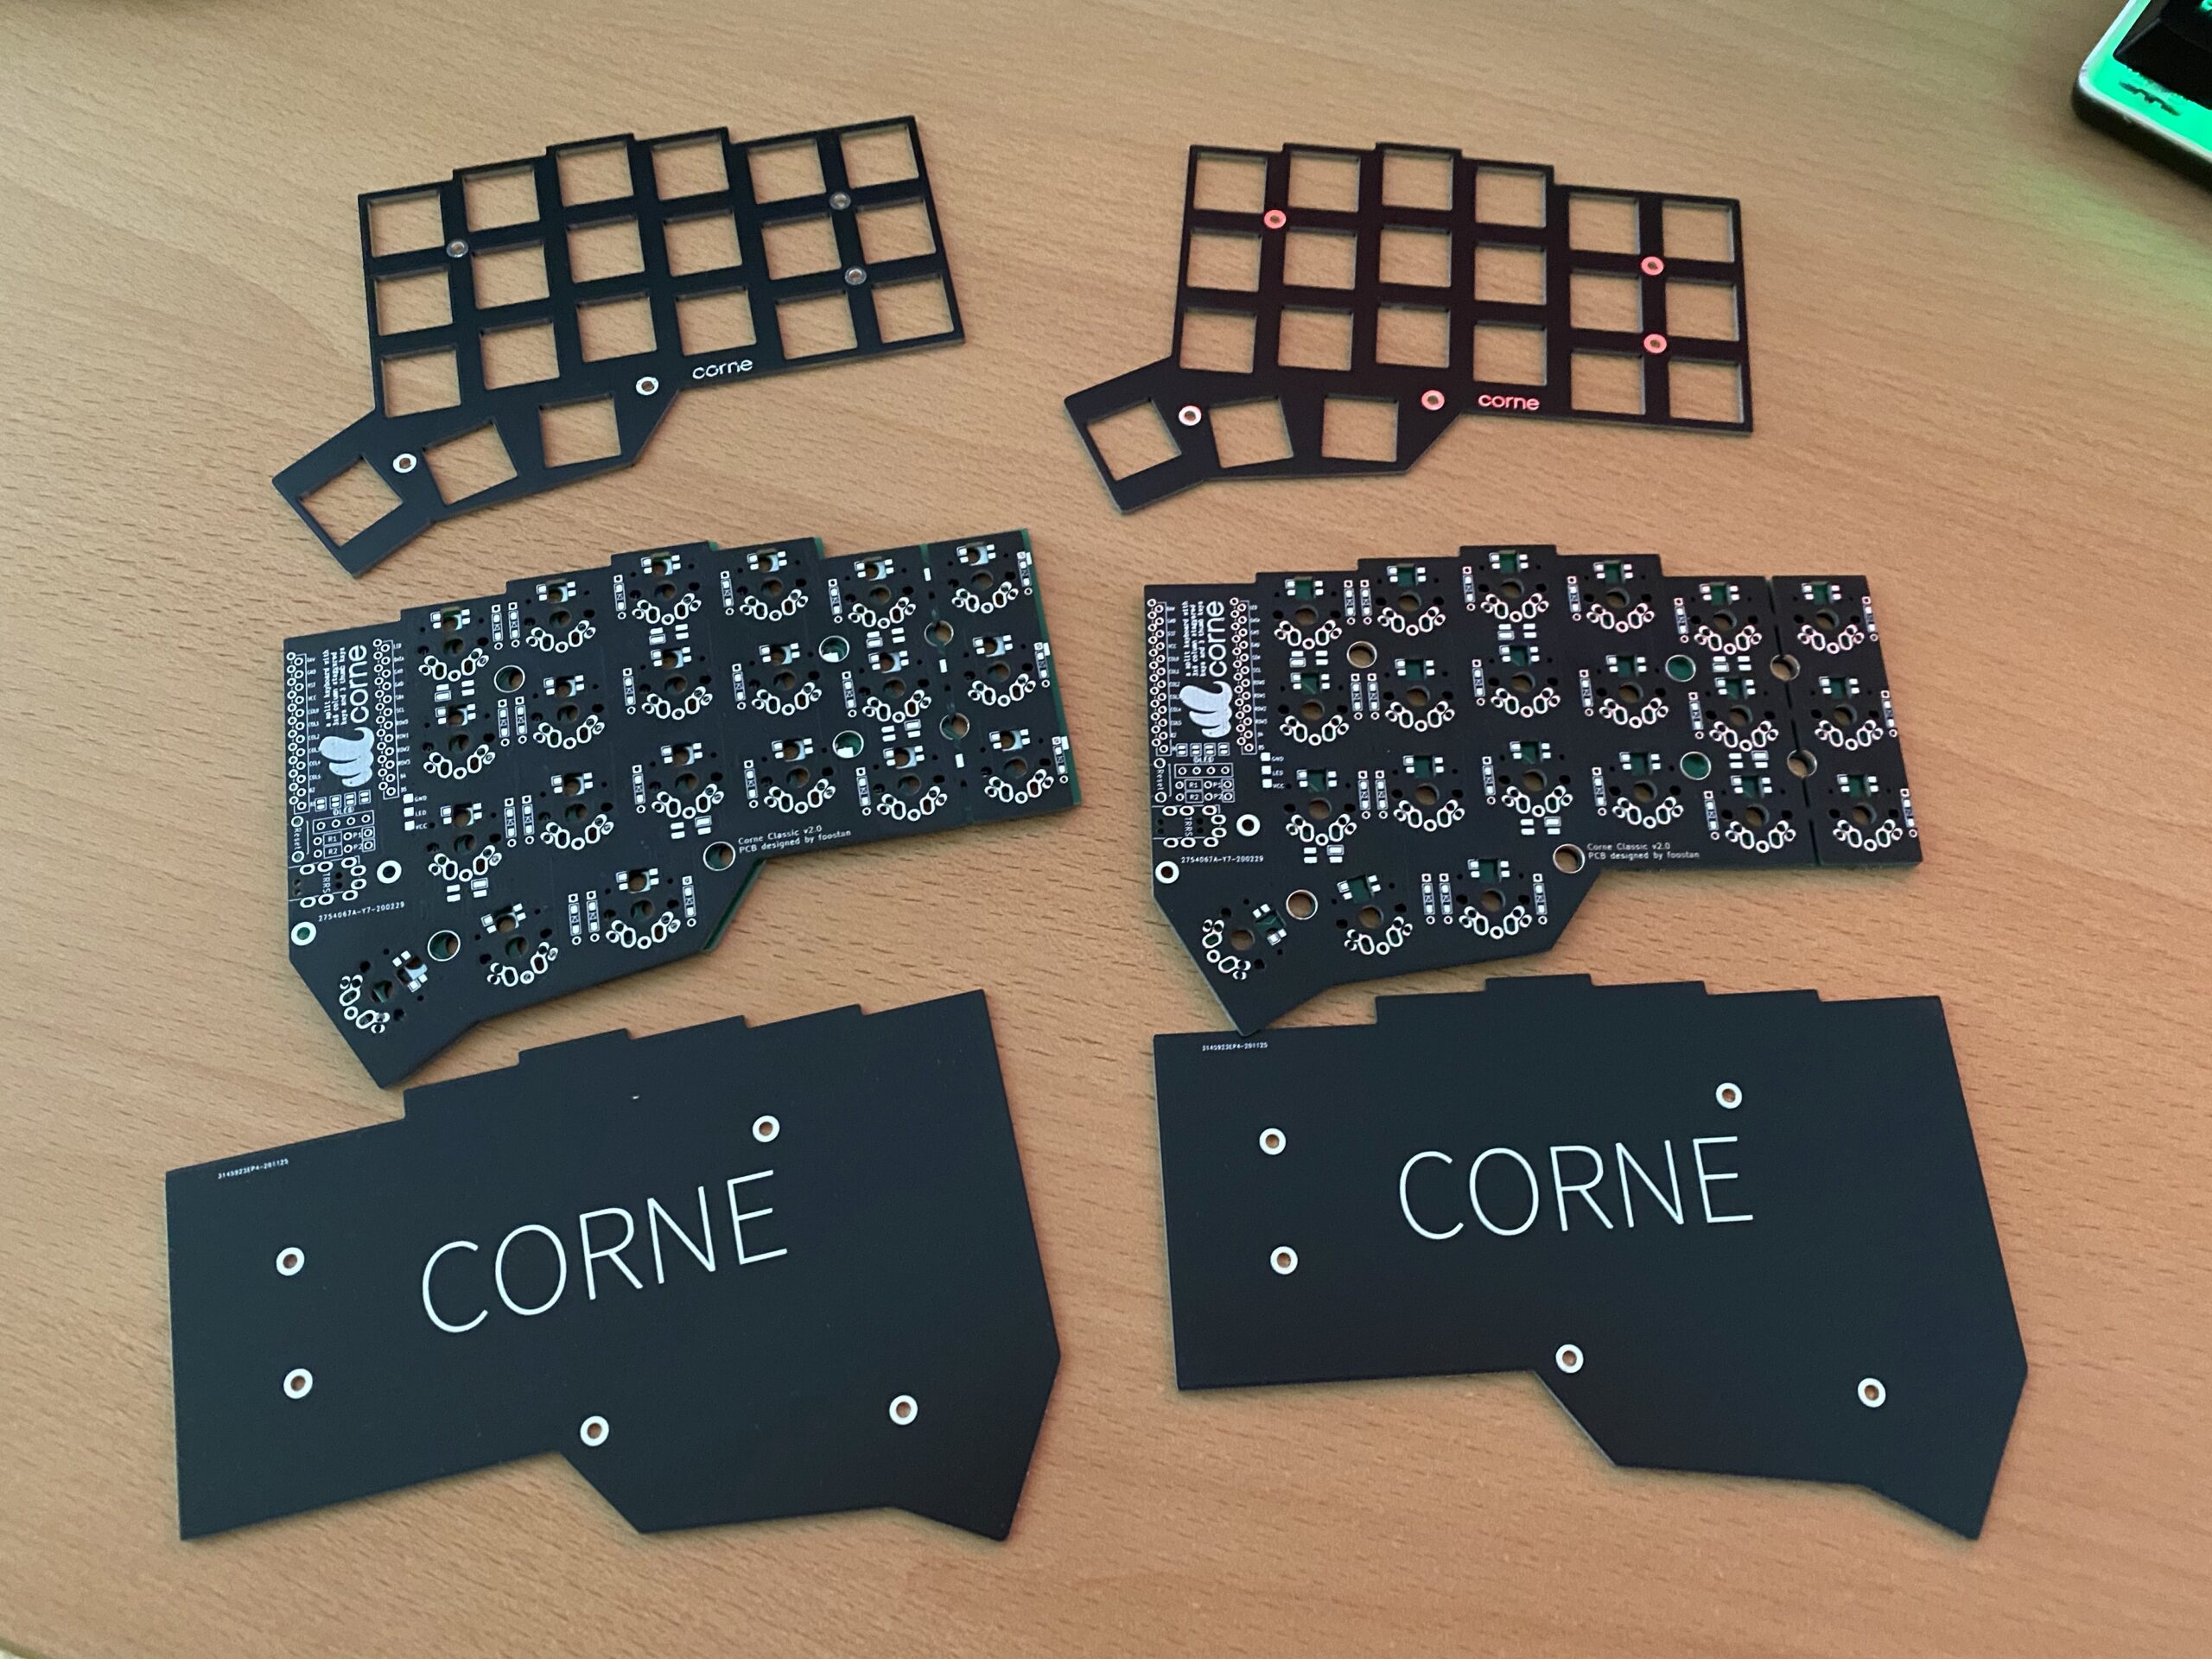
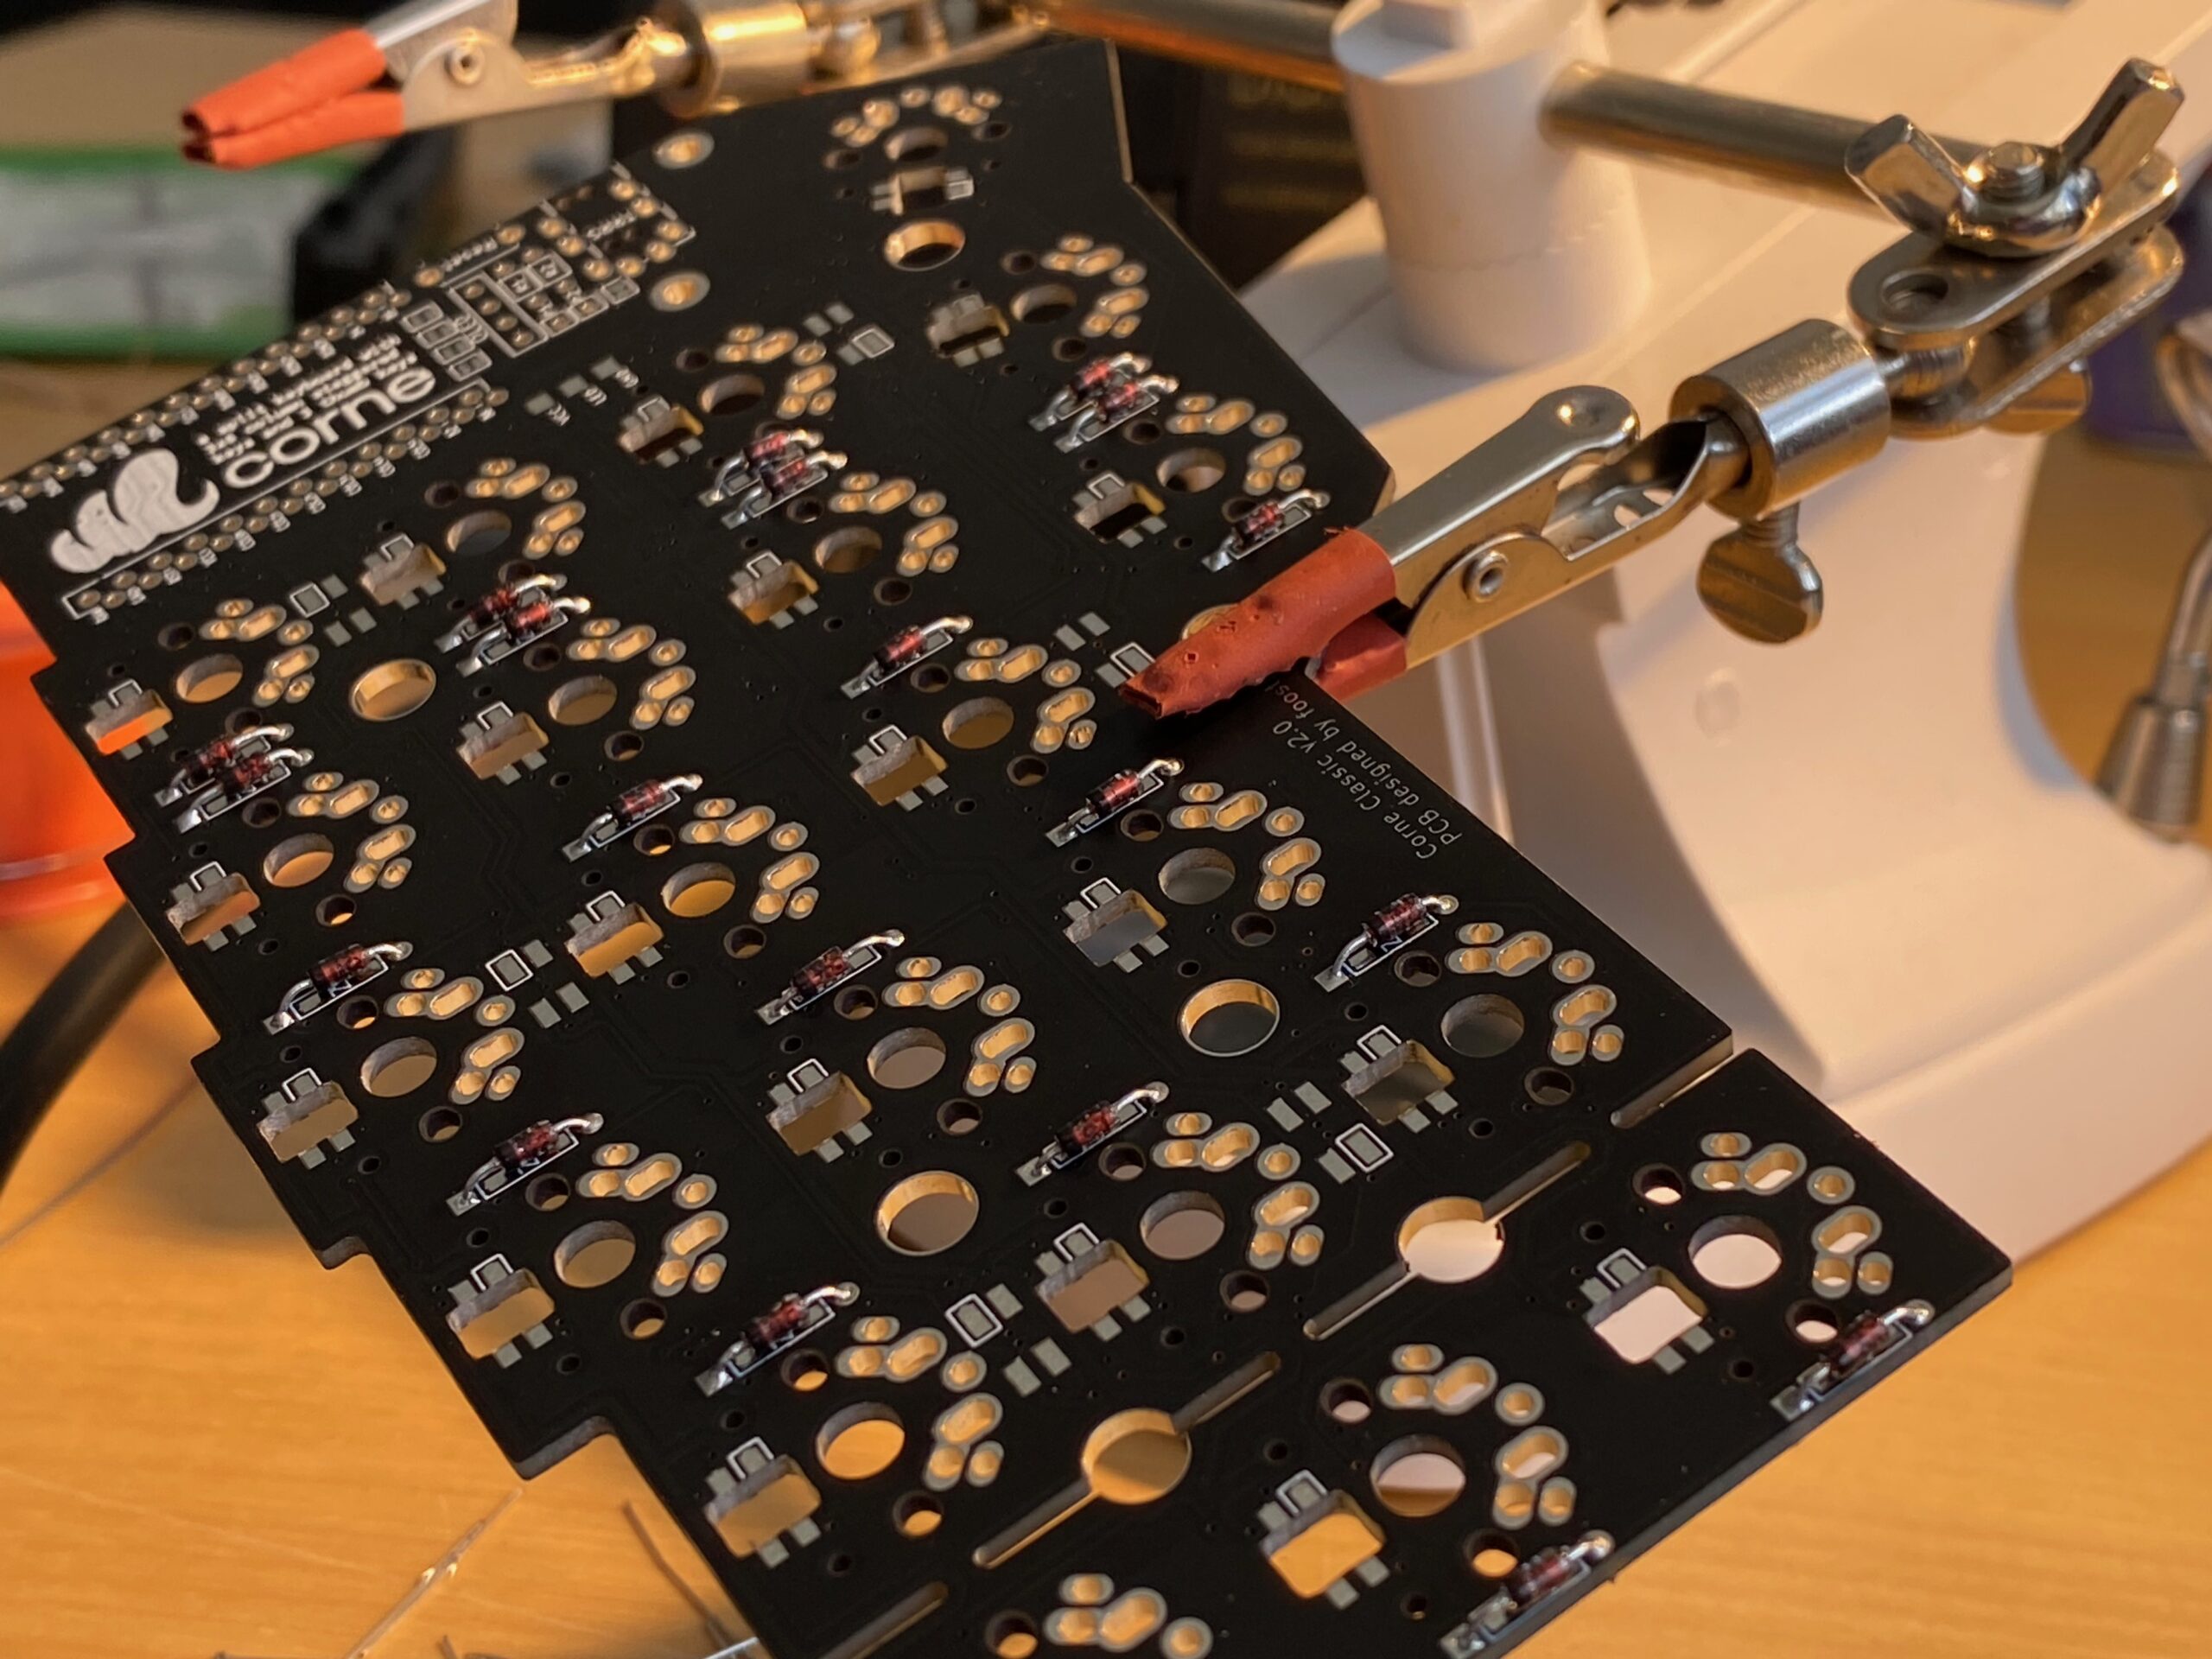
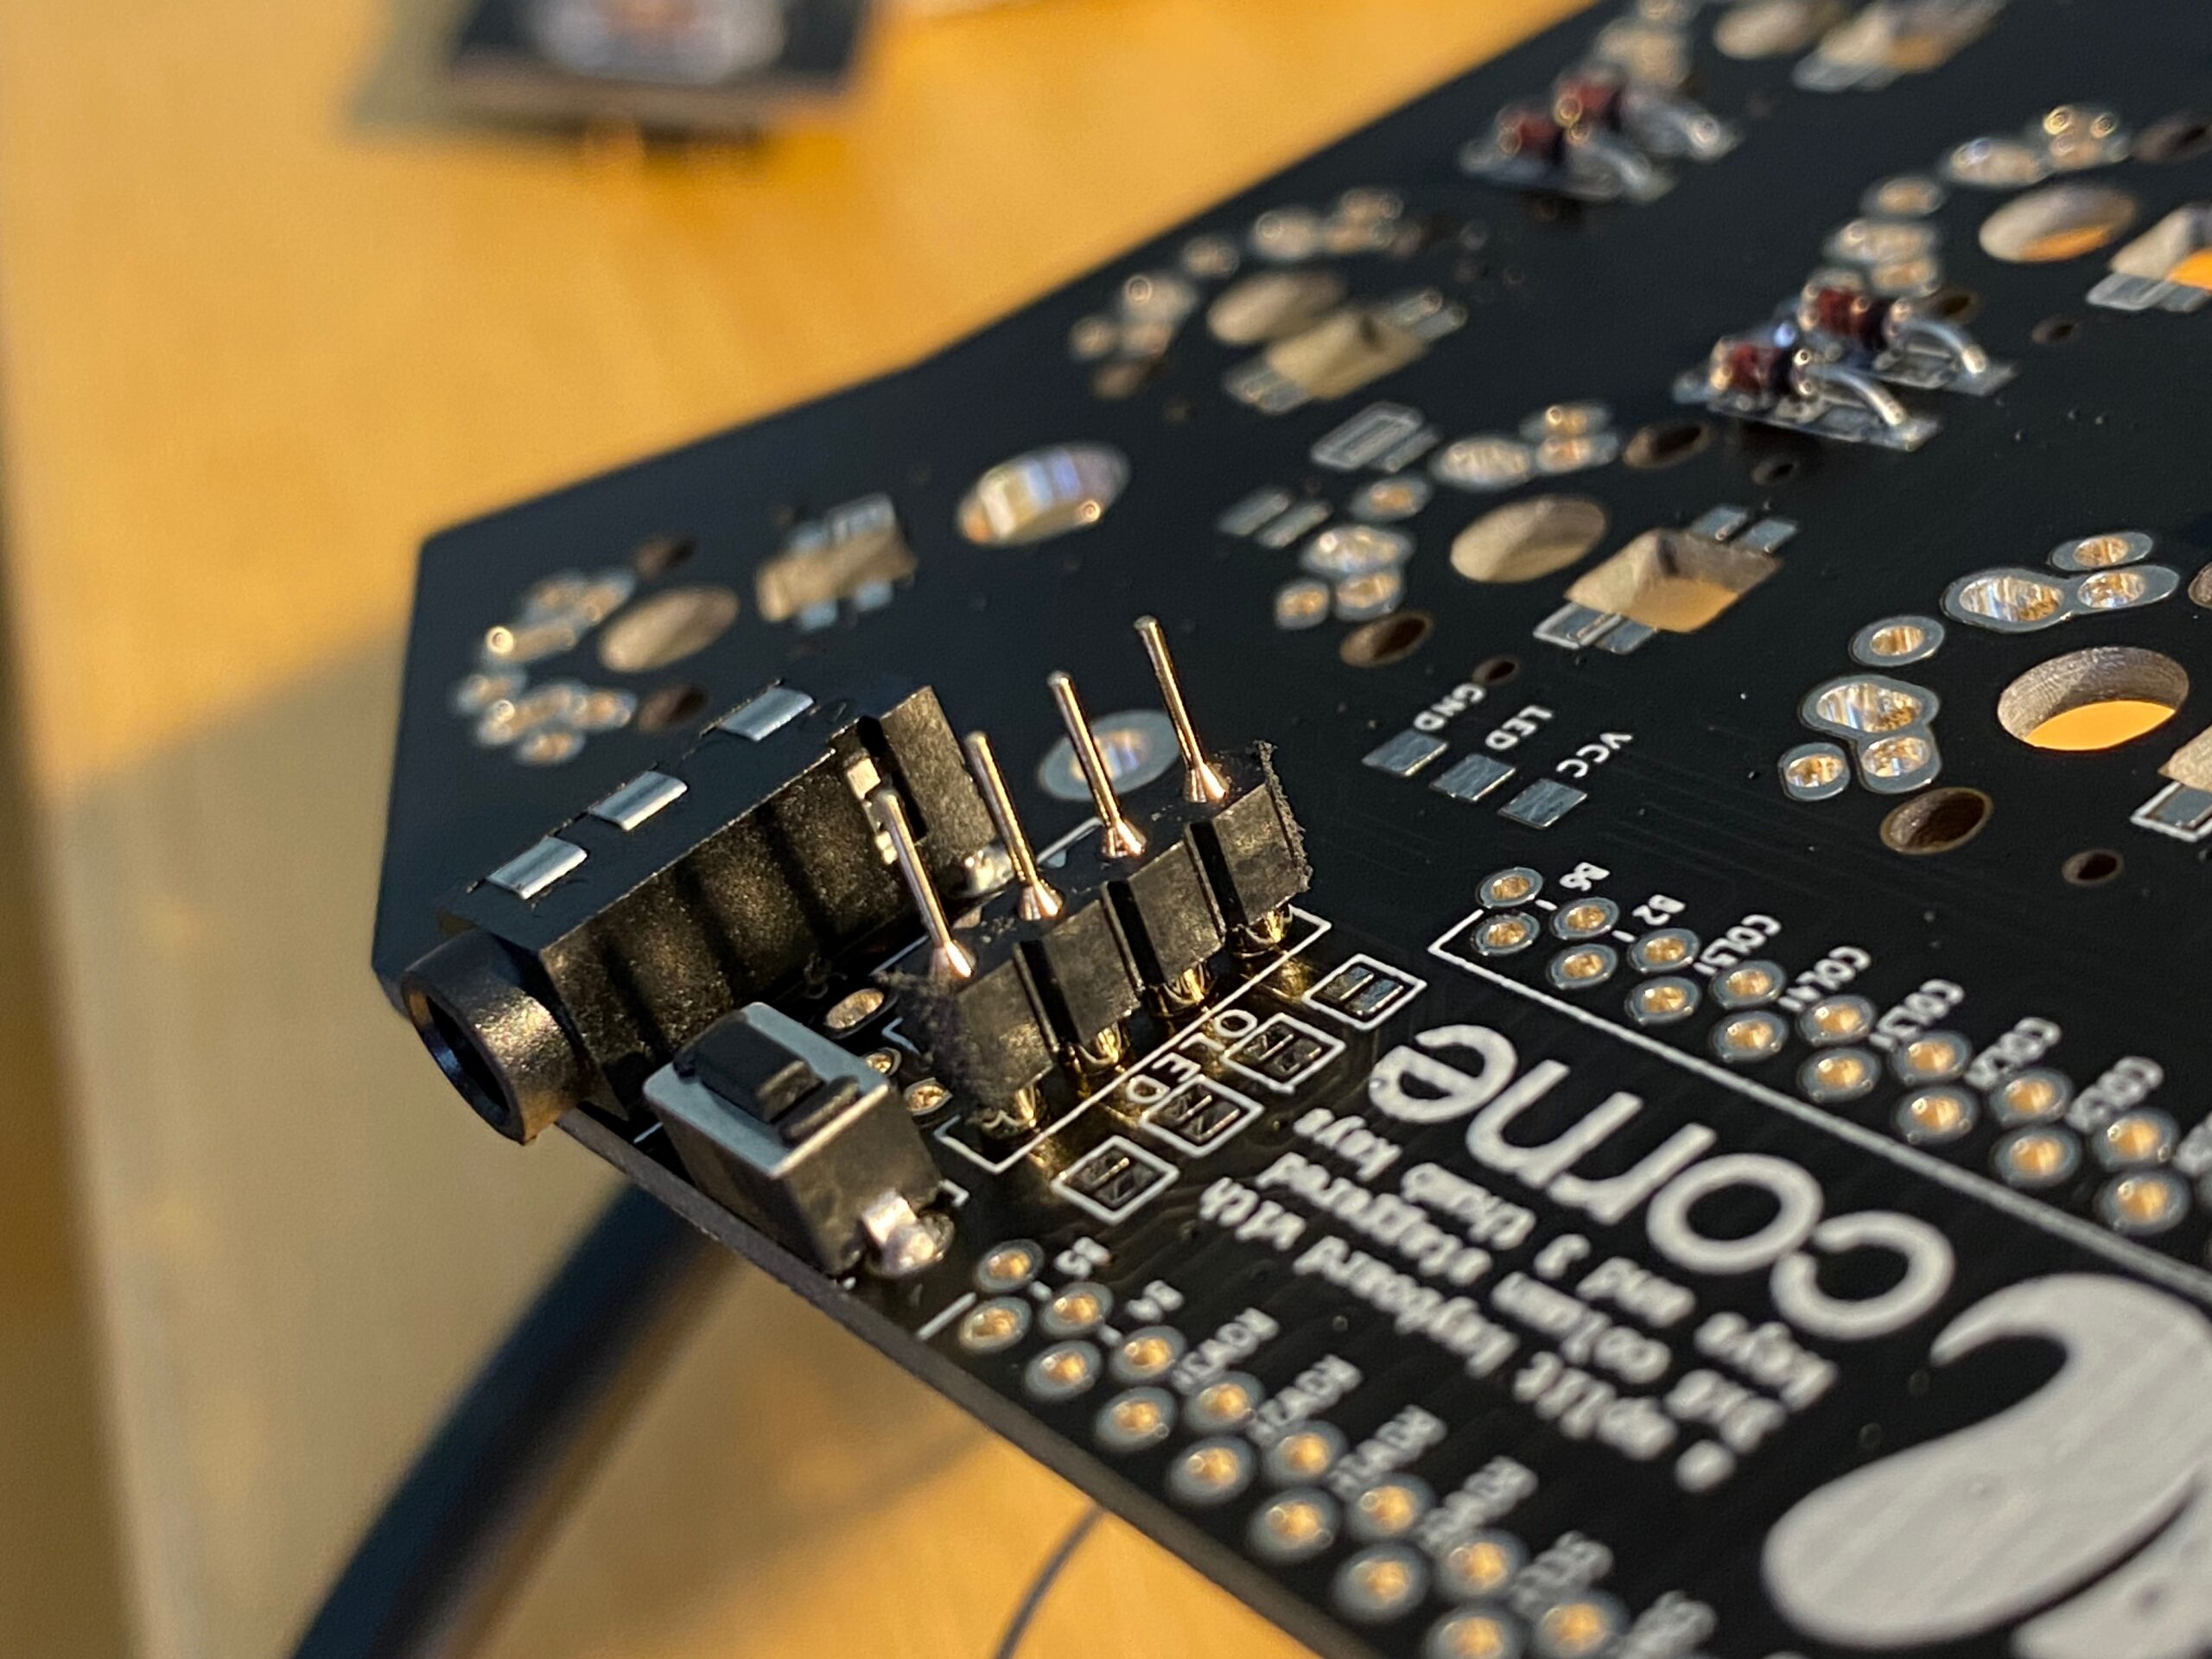
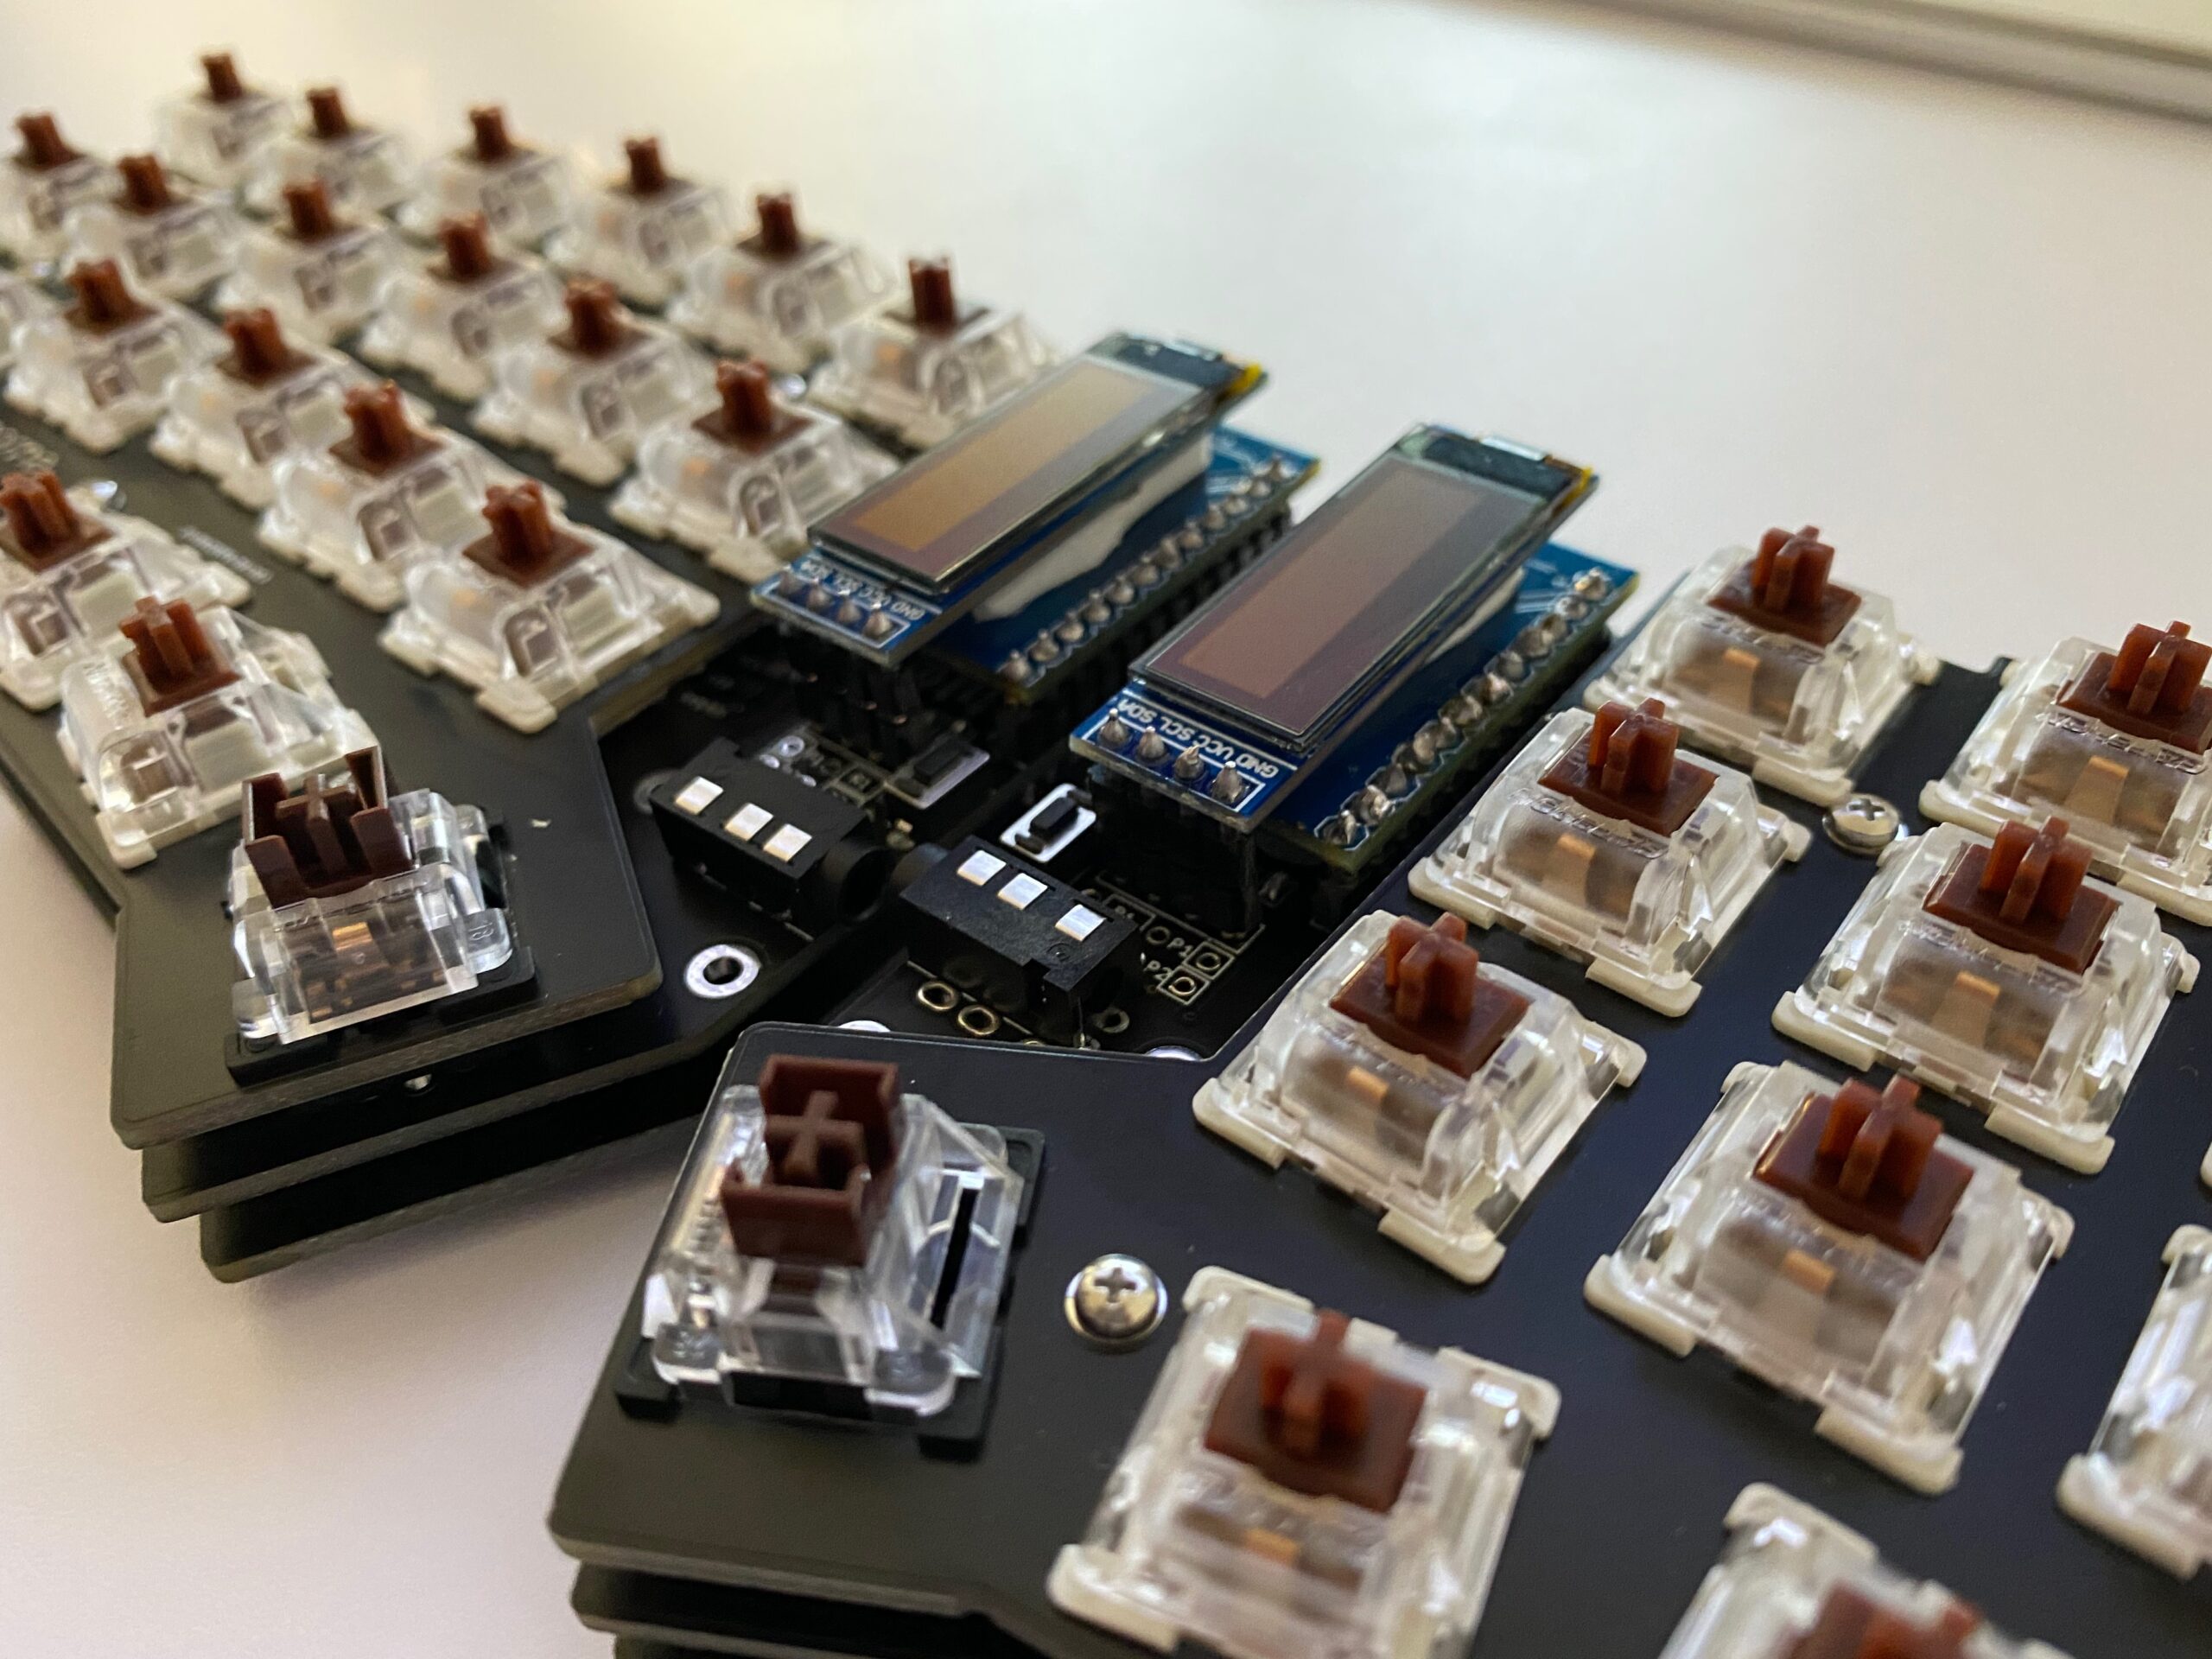
It took me a couple of months to get all the required parts ordered and delivered. Many small envelopes with parts that seemlingly are only produced by a handful of manufacturers. But anyways: After everything had arrived and was checked for completeness my wife took the hardware parts into her hands and started soldering and assembling the keyboard.
And so this project naturally is split up between my wife and me in the most natural (to us) way: My wife did all the hardware parts – whilst I did the software and interfacing portion. (Admittedly there only was to be figured out how to get the firmware compiled and altered to my specific needs)
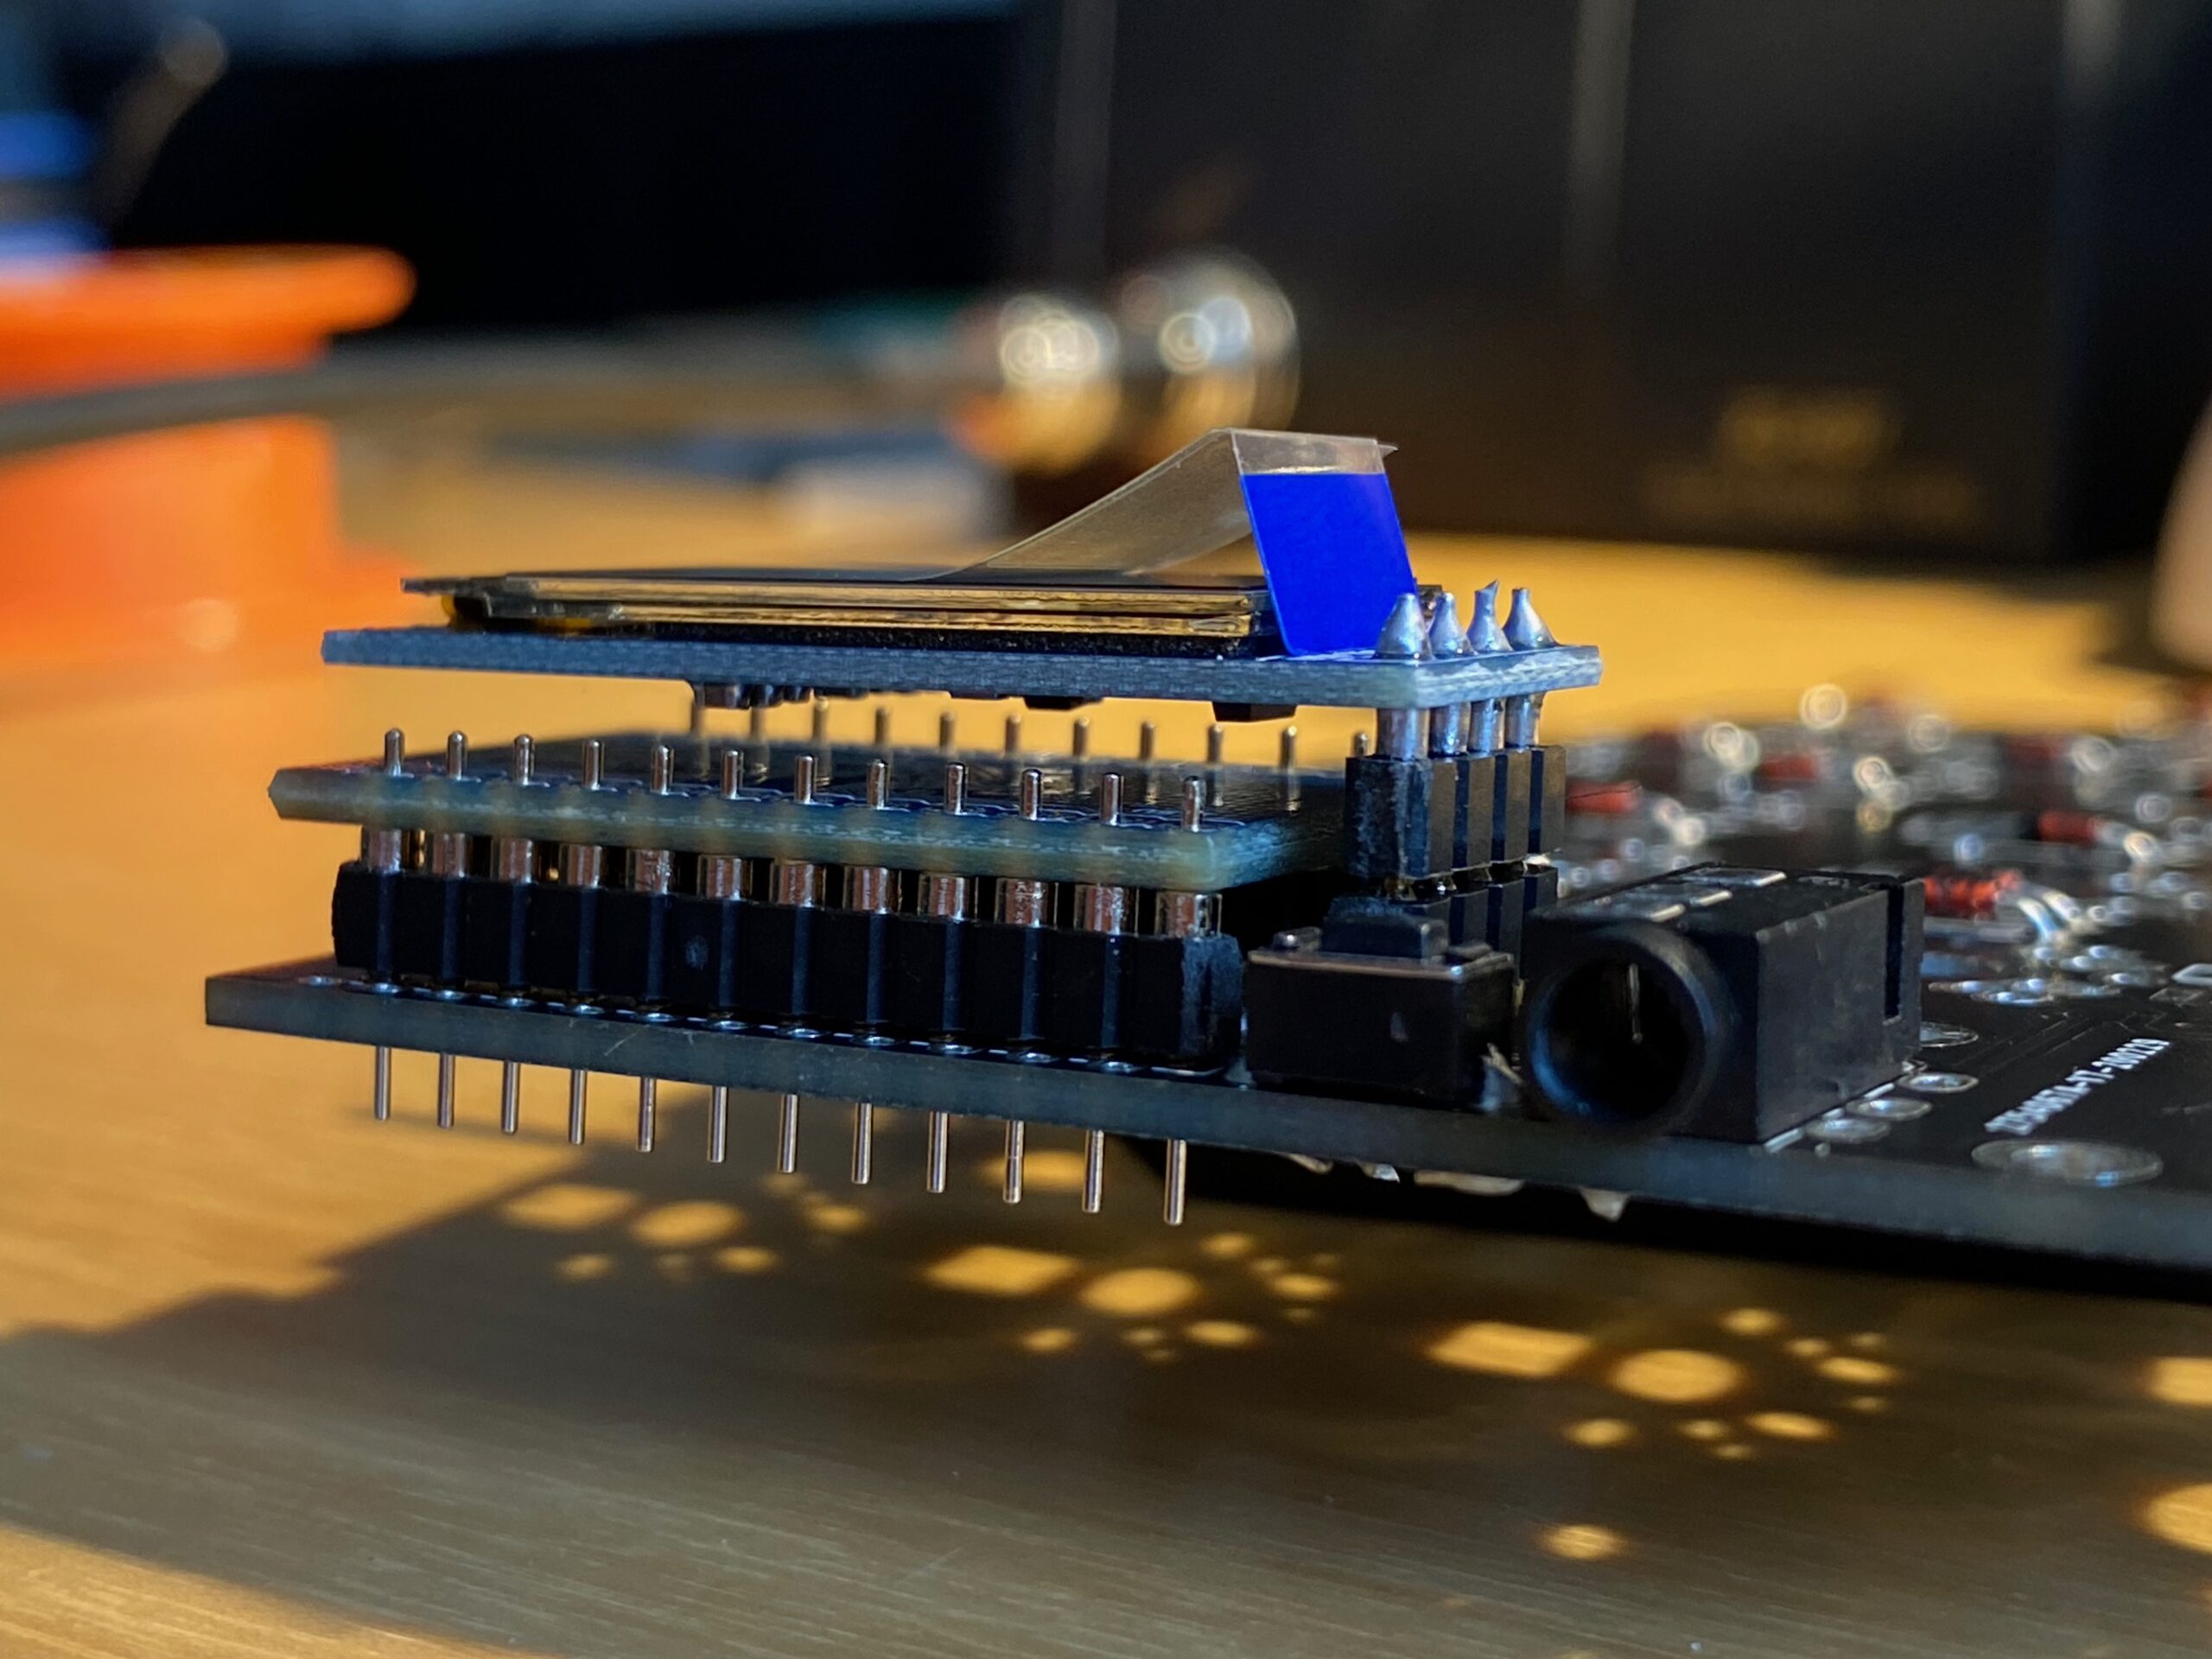
After putting the hardware together it was time to get the firmware sorted as well. This keyboard design is based upon the open source QMK (Quantum Mechanical Keyboard) firmware.
Conveniently QMK comes with it’s own build tools – so you will be up and running in no time. Since I had purchased Arduino ProMicro controllers I was good with the most basic setup you can imagine. As the base requirements for the toolchain where minimal I went with the machine that I had in front of me – a Raspberry Pi 4 with the standard Raspberry Pi OS.
These where the steps to get going:
get Python 3 and the qmk tool installed – I’ve chosen not to use the tool setup procedure but instead go with a separate clone of the QMK firmware repository.
python3 -m pip install --user qmk
clone the QMK firmware repository and get the QMK tool running (in the /bin folder of the firmware repository – it’s actually just a python script)
git clone https://github.com/qmk/qmk_firmware.git
cd qmk_firmware
git submodule sync --recursive
git submodule update --init --recursive --progress
make crkbd:default
create your own keymap to work with. You gotta use the crkbd firmware options as a default for this keyboard. The command below will generate a subfolder with the name of your keymap in the keyboards/crkbd/keymaps folder with the default settings of the crkbd keyboard firmware.
qmk new-keymap -kb crkbd
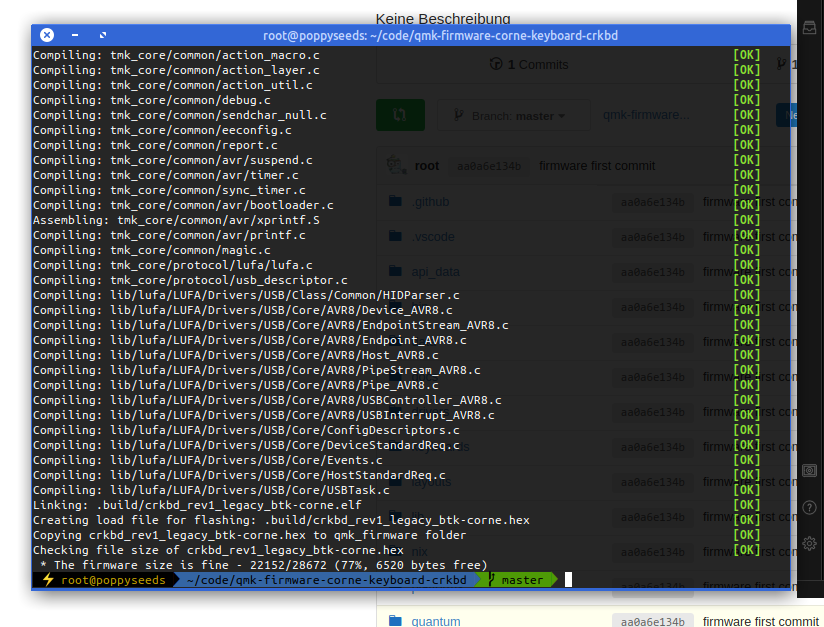
build your first firmware by running the command below (note: btk-corne is the name of my keymap)
now you can flash the firmware to both ProMicro controllers. The most straight forward way for me was using avrdude on the commandline. In my case the device is added as /dev/ttyACM0 and the compiled firmware named crkbd_rev1_legacy_btk-corne.hex.
When you got all this information you need to plug in the ProMicro and trigger a reset by bridging Ground and the Reset Pin. If you added, like we did, a button for reset you can use this. After hitting reset the ProMicro bootloader will enter the state where it’s possible to be flashed. Reset it and THEN run the avrdude commandline.
(alternatively) you can also use QMK Toolbox to flash the firmware. Also works.
So now you know how to get the firmware compiled and running (if not, look here further). But most probably you are not happy with some aspects of your keymap or firmware.
By now you might ask yourself: Hey, I’ve got two ProMicros on one keyboard. Both are flashed with the same firmware. Into which of the two do I plug in the USB cable that then is plugged into the computer?
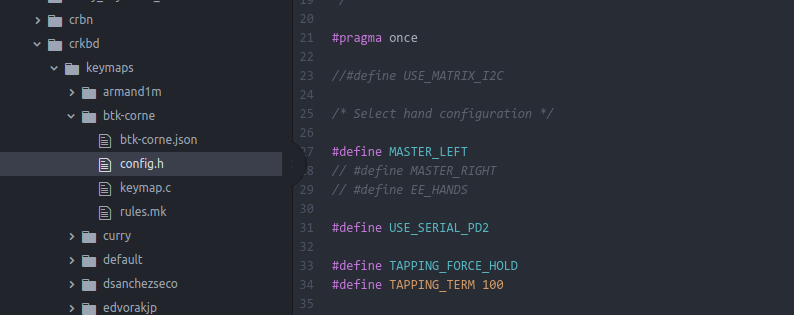
The answer is: by default QMK assumes that you are plugging into the left half of the keyboard making the left half the master. If you prefer to use the right half you can change this behaviour in the config.h file in the firmware:
You have to plug in both of them anyway at times when you want to flash a new firmware to them as you adjust and make changes to your keymap.
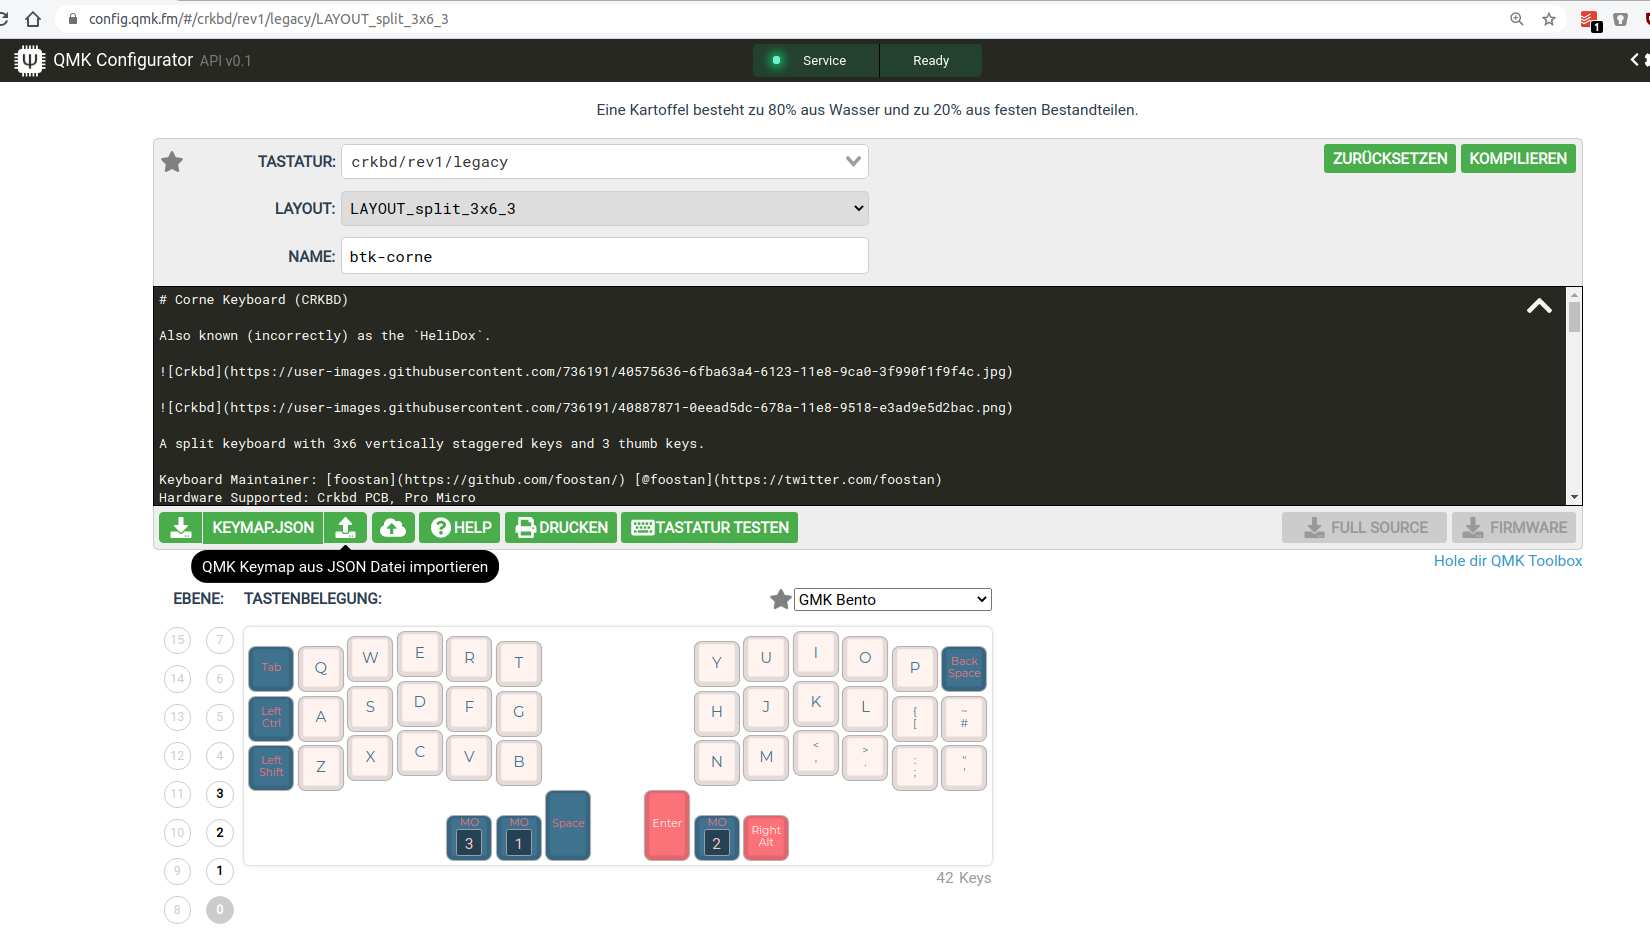
Thankfully QMK comes with loads of options and even a very useful configurator tool. I used this tool to adjust the keymap to my requirements. The process there is straightforward again. Open up the configurator and select the correct keyboard type. In my case that is crkbd/legacy. The basic difference between legacy and common is a different communication protocol between the two halves. This really only is important when features are used that require some sort of sync between the two haves – like some RGB LED effects. Since I did not add any LEDs to the build I go with legacy for now. Maybe I need some features later that require me to go with common.
The configurator allows you to set up the whole keymap and upload/download it as a .json file.
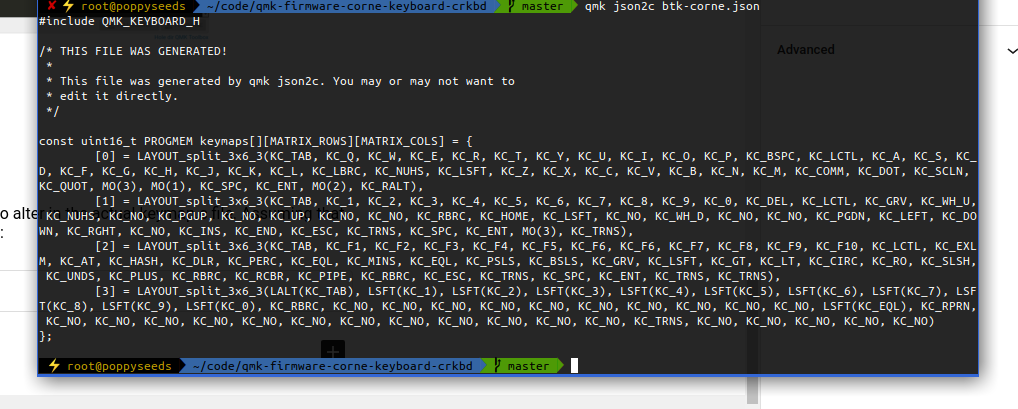
That .json file can easily be converted into the C code that you need to alter in the actual keymap.c file. Assuming that the .json file you got is named btk-corne.json the full commandline is:
qmk json2c btk-corne.json
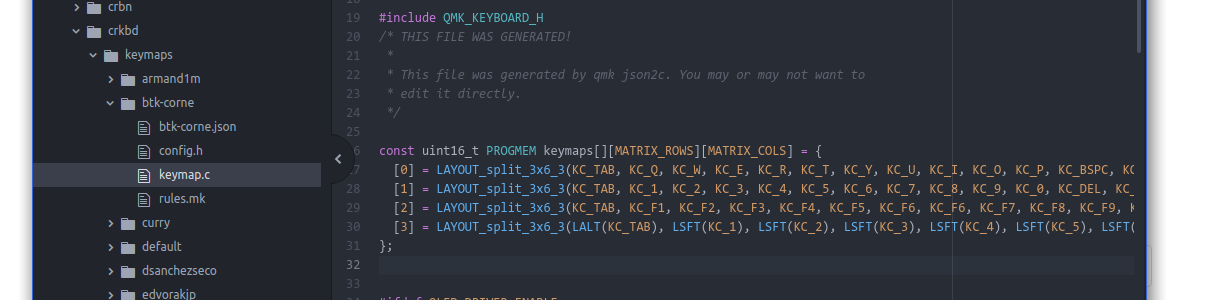
Then simply take this output and replace the stuff in the keymap.c with it:
Now you compile and flash again. And if all went right you’ve got the new keymap and firmware on your keyboard and it’ll work just like that :)
For some weeks now I am working on the design of something that is being built within the next couple of weeks out of wood and metal (and electronics).
It’s hopefully going to be as nice as I dream it up… What could it be?
I did this design based upon some pixel-material and pictures I’ve gathered around the internets – and took a lot of inspiration from them.
Although I had to create everything in vectors from those small pixel templates… But now everything above is going to be printed on vinyl in glorious vectors – no pixeljunk.
So this is interesting: Normally a Windows program (executable) if you try to run it anywhere else will show a message “cannot be run here” and terminates.
Printing this message is actually done by a little program whos task is to only print out this very message. So it can be overwritten.
Michael Strehovský did exactly this, very impressively. He documented what he did to get the game “snake”, written in C#, running on DOS instead of the “does not run here” stub. In an executable file that would run both, on standard 90s MS-DOS as well as on Windows with the .NET Framework installed.
He used a quite elaborate toolchain – namely DOS64-stub.
You can read all of this in the full thread. I recommend a deeper dive, as it’s a great start to better understand the inner workings of your computer…
Jeder kennt das »Periodensystem der Elemente« aus dem Chemieunterricht. Das Periodensystem ist ein intuitiver und schneller »Lego-Baukasten«, der uns unterstützt, komplizierte Zusammenhänge zwischen Bausteinen (Atomen) und Molekülen (Naturstoffe, Steine oder Metalle) intellektuell zu erfassen.
Der amerikanische Informatiker Kristian Hammond hat den Versuch unternommen, eine Lingua Franca für künstliche Intelligenz zu konzipieren. In Anlehnung an die Chemie bezeichnet er sie als »Periodensystem der Künstlichen Intelligenz«.
Das Periodensystem der Künstlichen Intelligenz unterstützt dabei, den Begriff KI auf Geschäftsprozesse abzubilden und ein Verständnis der Elemente aufzubauen – ähnlich wie im Periodensystem der chemischen Elemente. Der Ansatz hilft beim Verständnis und bei der Einschätzung von Marktreife, Aufwänden, benötigtem Maschinentraining sowie Wissen und Erfahrungen der Mitarbeiter.
Video incoorporating image processing via python and BigGAN adversarial artificial neural network to breed new images. There are papers about “high fidelity natural image synthesis”.
Anthony Baldino – Like Watching Ghosts from his recently released album Twelve Twenty Two
When you are dealing with IoT protocols, especially at hobby-level, you probably came across the MQTT protocol and the challenge to have all those different devices that are supposed to be connected actually get connected – preferably using the MQTT protocol.
Recently this little project came to my attention:
OpenMQTTGateway project goal is to concentrate in one gateway different technologies, decreasing by the way the number of proprietary gateways needed, and hiding the different technologies singularity behind a simple & wide spread communication protocol: MQTT.
OpenMQTTGateway support very mature technologies like basic 433mhz/315mhz protocols & infrared (IR) so as to make your old dumb devices “smart” and avoid you to throw then away. These devices have also the advantages of having a lower cost compared to Zwave or more sophisticated protocols. OMG support also up to date technologies like Bluetooth Low Energy (BLE) or LORA.
Every once in a while I need to take an image or duplicate an SSD/SDCard/Harddisk. And it’s gotten quite complicated to get the proper formatting and alignment when you want to achieve certain things.
For example creating a EFI compatible bootable USB stick is not as straight forward as one would think.
For all other cases I am using the HDDGuru tool on Windows.
HDD Raw Copy Tool is a utility for low-level, sector-by-sector hard disk duplication and image creation.
Supported interfaces: S-ATA (SATA), IDE (E-IDE), SCSI, SAS, USB, FIREWIRE.
Big drives (LBA-48) are supported.
Supported HDD/SSD Manufacturers: Intel, OCZ, Samsung, Kingston, Maxtor, Hitachi, Seagate, Samsung, Toshiba, Fujitsu, IBM, Quantum, Western Digital, and almost any other not listed here.
The program also supports low-level duplication of FLASH cards (SD/MMC, MemoryStick, CompactFlash, SmartMedia, XD) using a card-reader.
HDD Raw Copy tool makes an exact duplicate of a SATA, IDE, SAS, SCSI or SSD hard disk drive. Will also work with any USB and FIREWIRE external drive enclosures as well as SD, MMC, MemoryStick and CompactFlash media.
Friend OS, a modular, fully-customizable operating system accessible via any device that can support a modern web browser, or Friend’s Android and iOS apps. Friend OS leverages Internet and blockchain technologies to offer all the features of a commercial operating system, but one that gives you access to a secure and private cloud-based virtual desktop anytime, anywhere, no matter what hardware or software you use.
So what does this all mean? It’s apparently a web application scaled up to behave and be used like an operating system. It encapsulates an application and directory/filesystem like concept and essentially lives in one of your browser windows.
As long as you’ve got a supported browser, all your apps and data will be accessible through this. They claim.
It’s interesting as there is a lot of open source in there and even some docker effort made to get it running. Seems abandoned / not updated at the time of writing, but it’s a nice concept to begin with anyways.
When you own a recent iOS device (iOS 11 and up) you’ve got the choice between “High Efficiency” or “Most Compatible” as the format all pictures are being stored by the camera app.
Most Compatible being the JPEG format that is widely used around the internet and other cameras out there and the “High Efficiency” coming from the introduction of a new file format and compression/reduction algorithms.
A pointer to more information about the format:
High Efficiency Image File Format (HEIF), also known as High Efficiency Image Coding (HEIC), is a file format for individual images and image sequences. It was developed by the Moving Picture Experts Group (MPEG) and is defined by MPEG-H Part 12 (ISO/IEC 23008-12). The MPEG group claims that twice as much information can be stored in a HEIF image as in a JPEG image of the same size, resulting in a better quality image. HEIF also supports animation, and is capable of storing more information than an animated GIF at a small fraction of the size.
As Apple is aware this new format is not compatible with any existing tool chain to work with pictures from cameras. So you would either need new, upgraded tools (the Apple-way) or you would need to convert your images to the “older” – not-so-efficient JPEG format.