“Compressing” JSON to JSON

JSON_logo
JSON Logo

The internet and all those browsers and javascript applications brought data structures that are pretty straight-forward. One of them is JSON.

The wikipedia tells about JSON:

“JSON (/ˈdʒeɪsɒn/ JAY-soun, /ˈdʒeɪsən/ JAY-son), or JavaScript Object Notation, is an open standard format that uses human-readable text to transmit data objects consisting of attribute–value pairs. It is used primarily to transmit data between a server and web application, as an alternative to XML.”

Unfortunately complex JSON can get a bit heavy on the structure itself with over and over repetitions of data-schemes and ids.

There’s RJSON to the rescue on this. It’s backwards compatible and makes your JSON more compressible:

“RJSON converts any JSON data collection into more compact recursive form. Compressed data is still JSON and can be parsed with JSON.parse. RJSON can compress not only homogeneous collections, but also any data sets with free structure.

RJSON is single-pass stream compressor, it extracts data schemes from document, assign each schema unique number and use this number instead of repeating same property names again and again.”

Of course this is all open-source and you can get your hands dirty here.

Source 1: http://en.wikipedia.org/wiki/JSON
Source 2: http://www.cliws.com/e/06pogA9VwXylo_GknPEeFA/
Source 3: https://github.com/dogada/RJSON

IPv6 Migrationsleitfaden für die öffentliche Verwaltung

Die verfügbaren IPv4 Adressen neigen sich dem Ende und IPv6 wird kommen. Da gibt es keinen Zweifel! Dieses Weblog beispielsweise ist seit über zwei Jahren nativ über IPv6 erreichbar. Nun wird es mit jedem Monat der ins Land geht immer ‘brenzliger’ und dementsprechend wichtig ist der Schritt unter anderem auch für die öffentliche Verwaltung. Interessante Einblicke gibt dieses umfangreiche Dokument:

Bildschirmfoto 2013-05-04 um 20.15.28
downloadbares 270 Seiten PDF

“Seit den Anfangstagen des Internets wird zur Übertragung der Daten das Internet Protokoll in der Version 4 (IPv4) verwendet. Heute wird dieses Protokoll überall verwendet auch in den internen Netzen von Behörden und Organisationen. Das Internet und alle Netze, welche IPv4 heute verwenden, stehen vor einem tiefgreifenden technischen Wandel, denn es ist zwingend für alle zum Nachfolger IPv6 zu wechseln.

Auf die oft gestellte Frage, welche wesentlichen Faktoren eine Migration zu IPv6 vorantreiben, gibt es zwei zentrale Antworten:

  • Es gibt einen Migrationszwang der auf die jetzt schon (in Asien) nicht mehr verfügbaren IPv4-Adressen zurückführen ist.
  • Mit dem steigenden Adressbedarf für alle Klein- und Großgeräte, vom Sensor über Smartphones bis zur Waschmaschine, die über IP-Netze kommunizieren müssen verschärft sich das Problem der zur Neige gegangenen IPv4-Adressräume. Das Zusammenkommen beider Faktoren beschleunigt den Antrieb zur IPv6-Migration.

Es wird in Zukunft viele Geräte geben, die nur noch über eine IPv6-Adresse anstatt einer IPv4-Adresse verfügen werden und nur über diese erreichbar sind. Schon heute ist bei den aktuellsten Betriebssystemversionen IPv6 nicht mehr ohne Einschränkungen deaktivierbar. Restliche IPv4-Adressen wird man bei Providern gegen entsprechende Gebühren noch mieten können. Bei einem Providerwechsel im Kontext einer Neuausschreibung von Dienstleistungen wird man diese jedoch nicht mehr ‘mitnehmen’ können. Damit bedeutet eine Migration zu IPv6 nicht nur die garantierte Verfügbarkeit ausreichend vieler IP-Adressen, sondern stellt auch die Erreichbarkeit eigener Dienstleistungen für die Zukunft sicher ohne von einem Anbieter abhängig zu sein.”

Source 1: IPv6 Migrationsleitfaden für die öffentliche Verwaltung
Source 2: IPv6-Best Practice für die öffentliche Verwaltung

a virtual network inside your machine

Did you ever start a horde of virtual machines and a complicated vm-only network set-up just to simulate a medium complex network and the interaction of nodes in that network? Well that’s a tiresome, error-prone and labour intensive process. Fear no more, there’s a tool to the rescue.

“Mininet creates a realistic virtual network, running real kernel, switch and application code, on a single machine (VM, cloud or native), in seconds, with a single command:”

frontpage_diagram

“Because you can easily interact with your network using the Mininet CLI (and API), customize it, share it with others, or deploy it on real hardware, Mininet is useful for development, teaching, and research. Mininet is also a great way to develop, share, and experiment with OpenFlow and Software-Defined Networking systems.

Mininet is actively developed and supported, and is released under a permissive BSD Open Source license. We encourage contribution of code, bug reports/fixes, documentation, and anything else that can improve the system!”

Source: http://mininet.github.com/

new actors to switch power on/off and measure power usage by AVM

Usually the actors that allow you to switch power on/off and who measure power usage use the 434Mhz or 868Mhz wireless bands to communicate with their base station. Now the german manufacturer AVM came up with a solution that allows you to switch on/off (with an actual button on the device itself and wireless!) and to measure the power consumption of the devices connected to it.

The unspectacular it looks the spectacular are the features:

fritz_dect_200_auf_einen_blick

  • switch up to 2300 watts / 10 ampere
  • use different predefined settings to switch on/off or even use Google Calendar to tell it when to switch
  • measure the energy consumption of connected devices
  • it uses the european DECT standard to communicate with a Fritz!Box base station (which is a requirement)

For around 50 Euro it’s quite an investment but maybe I’ll give it a shot – especially the measurement functionality sounds great. Since I do not have one yet I don’t know anything about how to access it through third party software (h.a.c.s.?)

Source 1: www.avm.de/de/News/artikel/2013/start_fritz_dect_200.html
Source 2: www.avm.de/de/Produkte/Smart_Home/FRITZDECT_200/index.php
Source 3: en.wikipedia.org/wiki/Digital_Enhanced_Cordless_Telecommunications

if this than that – simple recipes for home automation

Workflows are important – and having a lot of switching possiblities and even more sensors that measure things it begins to become important to be able to implement workflows behind all that hardware.

It’s nice to be able to switch light on and of when you want to. But isn’t it even better to have some sort of workflow behind all sorts of triggers. Think of the possibilities!

If this then that is a service to help you define very simple workflows:

Want an example?

It knows a lot of ‘this’ and a lot of ‘that’. So give it a try or even better, add your own home automation software as ‘this’ and ‘that’ :-)

Source 1: https://ifttt.com

extending the house storage

In times when mobile phone cameras produce pictures of 2 MBytes each and decent DSLR cameras produce pictures in the range of more than 20 Mbytes each – not speaking of the various sensors around the house the question of how all of this is going to be stored is an interesting one.

Prices for mass storage is dropping for years and sized of hard disks are getting bigger and bigger. 3 Tbyte drives are fairly cheap now. Cheap enough to consider serious redundancy even for home use.

Having that home automation hobby and having very specific needs when it comes to home entertainment or even watching TV (we don’t watch live-tv…) we have a relatively huge demand for storage space. That way we are already storing over 10 Tbyte of data, fully encrypted, redundant and backed-up.

Our file server infrastructure grew with the needs over the years.

It started way back in 2003 when I set-up the first fileserver for my apartment back then. It was a fairly huge 19 inch case with 5 hard disks (100 Gbyte each). This machine was filled in 2005 and needed replacement.
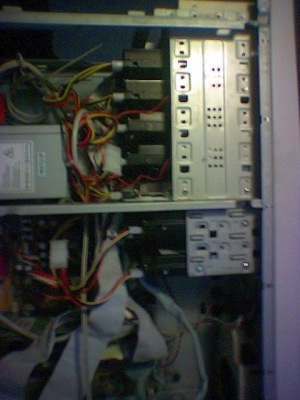
We’re in IDE land back then. Because the system hardware died on me due to a power surge all the disks and a new mainboard were seated in a new case with room for a lot of disks.

One interesting detail might be that I consistently used Windows Server for that purpose.
The machine always wasn’t just a fileserver. It was smtp, imap, nntp and media server all the time. That lead to a growing demand of CPU and memory resources. It started with an 800 Mhz AMD Athlon (which died quickly) and for the next years to come I used a 2.8 Ghz Intel Pentium 4. Everything started with Windows Server 2003 – bought in the Microsoft Store when I was a Microsoft employee.

Diskspace demand kept growing and in 2009 a new case, new mainboard + memory and new disks where due.

Since 2009 a Core4Quad Q9550 with 2.8 Ghz and 16 Gbyte of Memory is the heart of our fileserver. Since we’re frequently live-transcoding video streams to feed iPads and iPhones around the house that machine has plenty of grunt to feed the demand. We can have 2 iPhones and 2 iPads playing 720p content without getting stutters. Back in 2009 we also switched to a mixed IDE and SATA setup as you can see in the picture:
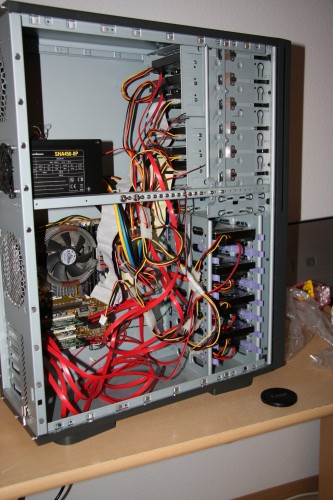
Plenty of room when the new case arrived – it was getting crowded just 2 years later in 2011. Every seat was taken – which means 13 disks are in that case and 1 attached through USB.
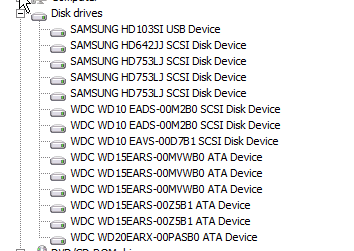
That adds up to more than 16 Tbyte of raw storage. In 2011 we also upgraded to Windows Server 2008. We never lost a bit with that operating system, not under the heaviest load and even through serious hardware malfunctions. A lot of disks of those 13 died throughout the years: Almost 1 every 2 months was replaced – most of them through extended waranties – of course we have a spare always ready to take the place. Only one time I had to rush to a store to get a replacement drive when two disks failed short after each other. That’s why there’s that 2 Tbyte drive in the 1.5 Tbyte compound…
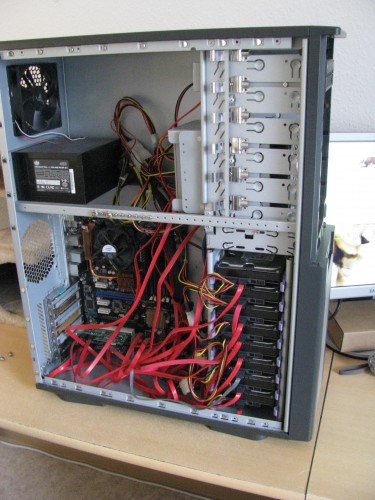
So it’s getting full again. Since that case isn’t really holding more disks and replacing them is getting harder because of the tight fit the idea was born to now add a bigger case but to just add a NAS/SAN which holds between 6 to 8 disks at once, comes with it’s own redundancy management and exports one big iSCSI volume.

That said a network card was added to the fileserver and a QNAP TS-859 Pro+ 8-bay appliance was bought. This one is a shiny black device which uses less power then an aditional case with extra cpu and memory would have use and after calculating through a number of combinations it’s even the cheapest solution for an 8 drive set-up.
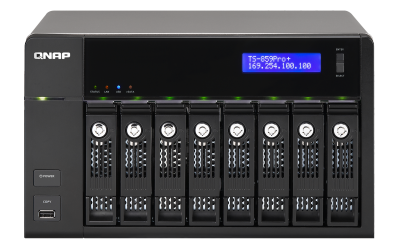
After some intensive testing it seems that the iSCSI approach is the most robust one. Since I am just done with testing the appliance the next step is to buy drives. So stay tuned!

Source 1: http://www.qnap.com/de/index.php?lang=de&sn=375&c=292&sc=528&t=532&n=3486

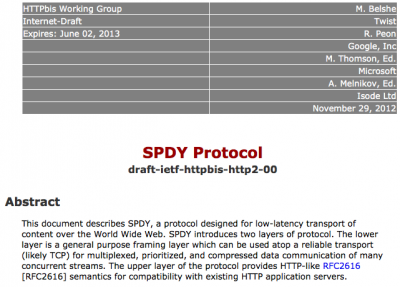
HTTP/2 RFC draft is out

Progress is showing in regards of the next incarnation of the famous Hypertext transport protocol aka http. Despite the fact that those 4 letters got banned from modern browser adress bars it’s still the cornerstone of everything your browser does with the network.

Based upon the work of Google and their SPDY implementation it comes with a lot of things that come in handy when thinking about modern demands for security, performance and multi-channel-data-transport.

Source 1: http://tools.ietf.org/id/draft-ietf-httpbis-http2-00.html
Source 2: http://en.wikipedia.org/wiki/SPDY

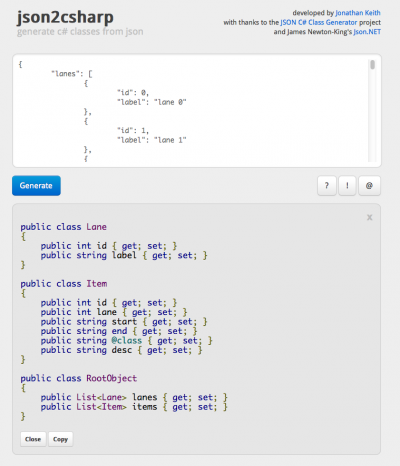
generate C# classes from JSON data

It’s a common use case: you’ve got some JSON formatted data and you want to interface with it using your favourite programming language C#. You can write the appropriate classes yourself, or you could use the fabulous json2csharp helper page.

Source 1: http://json2csharp.com/
Source 2: http://jsonclassgenerator.codeplex.com/
Source 3: http://json.codeplex.com/

das außer-Haus Backup

Irgendwie werden es auch privat immer immer mehr Daten – mit immer zunehmender Geschwindigkeit… Alle paar Jahre tausche ich bei uns im Haushalt die Festplatten/Speicherlösung komplett aus – was zwar immer wieder mal eine Investitions bedeutet, gleichzeitig aber auch dafür sorgt dass Daten nicht irgendwelchen ungünstigen mechanischen, chemischen oder magnetischen Effekten zum Opfer fallen… Ja so etwa alle zwei Jahre wird alles einmal umkopiert… Das dauerte beim letzten Mal zwar gut eine Woche, aber naja so ist das eben…

Aus vielerlei Grund haben wir auch für einen Haushalt recht viel Bedarf an Speicherplatz – teilweise wohl auch weil meine Frau Photographin ist – aber ich als “werf-nix-weg”-Typ werd da auch einen guten Anteil dran haben…

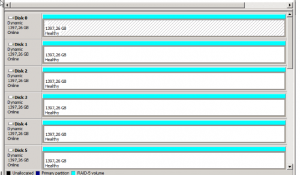
Herr über alle unsere Festplatten (kein Witz, die Rechner bei uns haben ihre Festplatten eigentlich nur um booten zu können) ist seit jeher ein einzelner Rechner welcher ebenso alle paar Jahre komplett ausgetauscht wird. Dieser Rechner verwaltet im Moment zwischen 12-15 Festplatten verschiedener Größe – Hauptarbeit wird zur Zeit durch drei separate (gewachsene) RAID-5 Volumes erledigt…

Nebenbei: Nein ich kann/will da kein RAID-6 fahren ohne entweder Linux zu verwenden (was aus verschiedenen Gründen nicht geht) oder einen Hardware-Controller zu verwenden, was nach einschlägigen Erfahrungen querbeet durch alle möglichen Hardware RAID Controller ausfällt.

Dem ganzen Festplattenstapel liegt dann ein Standard-PC mit Windows Server 2008 zugrunde – zum einen weil ich so eine Lizenz noch herumliegen hatte und zum anderen weil ich in über 10 Jahren File-Server Erfahrungen sammeln noch nie auch nur ein Byte unter Windows verloren habe. Zusätzlich habe ich einen riesigen Haufen Software welche Windows-only ist ud sozusagen ständig laufen muss um Sinn zu machen (Mail-Server Puffer, Newsserver Mirror, Musik und Video Streaming Server, Medienbibliothek, Videorekorder,…

Diese drei großen RAID Volumes schnappt sich dann Truecrypt und ver- und entschlüsselt zuverlässig vor sich hin – im Endeffekt gibt es kein Byte Daten im Haushalt welches nicht verschlüsselt wäre. Gut für uns.

So ein RAID verhindert nun ja aber nicht dass dennoch oben genannte ungünstige Effekte eintreten und man mal eine oder mehrere Defekte zu beklagen hat. Im Normalfall tauscht man die defekte Festplatte, resynct das RAID und alles funktioniert weiter ohne dass man Daten verloren hätte. Allerdings ist das ja kein Backup. Das ist nur eine erste Absicherung gegen mögliche Defekte.

Getreu folgendem kurzen Musikstück:

RAID ist kein Backup

… ist ein RAID eben kein Backup. Backups erledigt bei mir eine Sammlung von Scripten welche jeweils in festen Abständen Vollbackups und Differenz-Backups erstellt. Da kommt dann ein Haufen 1 Gbyte großer Dateien raus welche dann anschliessend per RSync in mühevoller (und dank funktionierendem QoS unbemerkt) Arbeit außer Haus geschafft werden. Die Komplett-Backups dauern aufgrund der großen Menge einfach ewig lang und lassen sich recht einfach dadurch beschleunigen dass man sozusagen das Backup physisch auf einer externen Festplatte zum Server trägt…die Differenz-Backups sind dann meist immer recht flott durchgelaufen. Speicherplatz im Internet wird ja auch immer billiger und so haben wir auch immer ein gutes Off-Site Backup unserer Daten…

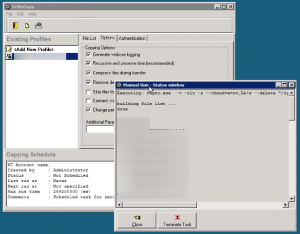
Für Windows gibt es neben den üblichen Cygwin Ports von rsync auch eine gute GUI Version namens DeltaCopy. Das Ding kopiert zuverlässig und auch wenn mal der DSL Router rebootet oder hängt nimmt er selbständig die Kopierarbeit wieder auf sobald Netz wieder verfügbar ist.

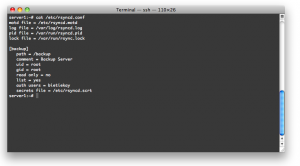
Damit DeltaCopy seine Daten irgendwo abladen kann wird auf der Gegenstelle natürlich ein rsync Server vorrausgesetzt. Die Konfiguration eines solchen ist nicht sonderlich kompliziert – im Grunde muss man nur rsync installieren und die rsyncd.conf Datei anpassen. Zusätzlich dazu muss man eine Konfigurationsdatei anlegen in welchem nach dem Schema “Benutzername:Passwort” entsprechend die Nutzeraccounts angegeben werden – das wars eigentlich schon. Rsync ist sehr robust und vor allem auch gut für geringere Bandbreiten geeignet. Wenn sich an einer Datei nur wenige Bytes geändert haben müssen auch nur die geänderten Bytes übertragen werden.

Source 1: http://www.speichergurke.de
Source 2: http://www.aboutmyip.com/AboutMyXApp/DeltaCopy.jsp
Source 3: http://de.wikipedia.org/wiki/Rsync

Shairport – someone reversed an AirPort Express

Low Latency Network Audio was a dream for the past years (see an article of 2005 and 2008) and with AirPlay it’s finally there.

I am using the Apple AirPlay technology for several years now… after it got implemented into iOS it’s just fantastic to have the option to have whatever sound source I want to playing loud and clear in any room I want to…

Okay it’s not quite as sophisticated as the sonos solution regarding the control of multiple music sources in multiple rooms but it get’s the job done in an apartment.

So back to the topic: Apple integrated the AirPlay technology into their wireless base station “AirPort Express”. Basically AirPlay is a piece of software which receives an encrypted audio stream over the network and outputs the stream to the SPDIF or audio jack.

Back in 2005 there already was an emulator of this protocol called “Fairport” but Apple decided to encrypt the AirPlay traffic. This led to the problem that the encryption key was unkown because it’s baked into the AirPort Express firmware. And this is where the good news start:

“My girlfriend moved house, and her Airport Express no longer made it with her wireless access point. I figured it’d be easy to find an ApEx emulator – there are several open source apps out there to play to them. However, I was disappointed to find that Apple used a public-key crypto scheme, and there’s a private key hiding inside the ApEx. So I took it apart (I still have scars from opening the glued case!), dumped the ROM, and reverse engineered the keys out of it.”

So to keep things short: Someone got an AirPort Express, dumped the firmware, extracted the AirPlay encryption keys and wrote an emulator of the AirPlay protocol which uses the key. Voilá!

ShairPort is available in source code on the site of the guy and obviously it’s unsure if Apple will react by changing the encryption key in the future. But for the time being it works as advertised:

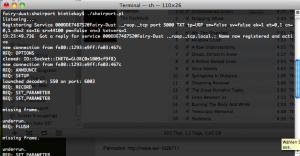
I took one of my computers and followed the instructions to update perl, install Macports and then run ShairPort. So when ShairPort is run it looks not as appealing as expected:

Notably  it uses IPv6 to communicate between iTunes and ShairPort… Oh I almost forgot to show how it looks in iTunes:

On another side note: It works on Linux, Windows and Mac OS X :-)

Source 1: Apple AirPlay
Source 2: Sonos
Source 3: Apple AirPort Express
Source 4: ShairPort

winter 2011 hacking project: Home Automation

In the last 10+ years I was fiddling with different home automation concepts. Mostly without broad use cases because at that time no one seemed to be interested in having sensors and actors like crazy at home. In fact not that many people seem to care these days.

Having more and more hardware and software around us creates the use cases for a broader audience people like me have for 10+ years. Mainstream is a bitch for nerds Smiley

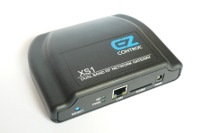
That said I found a nice plastic box I want to use in a winter project. This plastic box is called “EzControl XS1”. It comes with several visible and “invisible” interfaces.

The visible and obvious ones are: power, 100 mbit ethernet, sd card slot. So it takes some power and does something on the network. The not so obvious and therefore “invisible” interfaces are the most interesting ones: the EzControl XS1 comes with the ability to send and receive on 433 Mhz and 868 Mhz.

ezcontrol_xs1-200

Yes that are the ranges used by switchable and dimable power sockets, temperature sensor and AMR. The EzControl XS1 is not that cheap (coming at 189 Euros for the base version and additional 65 Euros per upgrade option). I do not own one yet so it’s the plan to acquire at least one and start of with dimable power sockets and add more sensors and actors on the way

One great feature of the EzControl XS1 is the embedded WebServer with which the users application (the one I want to write) can interact using a HTTP/JSON Protocol. Oh dear: Sensor data and Actor control using JSON. How great is that!

There is some example code available (even a proprietary iPad/iPhone client) but since I want to have some custom features I do not currently see to be available in software I am going to write a set of tools which will get and protocol sensor data and run scripts to controls actors. Oh it’ll be all available as open source (license not yet chosen).

P.S.: If some one from Rose+Herleth is reading this and wants to help – send me a test unit Smiley

Source 1: http://www.ezcontrol.de (in german though)
Source 2: http://en.wikipedia.org/wiki/Automatic_meter_reading
Source 3: http://www.ezcontrol.de/content/view/12/31/

Using Windows Deployment Services (WDS) to install Linux over Network (PXE)

Developing software is hard work – especially when you target several operating systems. One task that you have to perform quite often would be to deploy a new installation of an operating system as fast as possible on a test machine.

Doing this with Windows is easy – you can use the Windows Deployment Services to bootstrap Windows onto almost every machine which can boot over ethernet using PXE. Everything needed to make WDS work on a Windows Boot-Image is located on that image. Since it’s that easy I won’t dive into more detail here.

What I want to show in greater detail is how you can use WDS to deploy even Linux over your network.

Step 1: Get PXELINUX

What’s needed to boot Linux over a network is a dedicated PXE Boot Loader. This one is called PXELINUX and can be downloaded here.

“PXELINUX is a SYSLINUX derivative, for booting Linux off a network server, using a network ROM conforming to the Intel PXE (Pre-Execution Environment) specification.”

On the homepage of PXELINUX is also a short tutorial which files you need and where to copy them.

Step 2: Setup WDS with PXELINUX

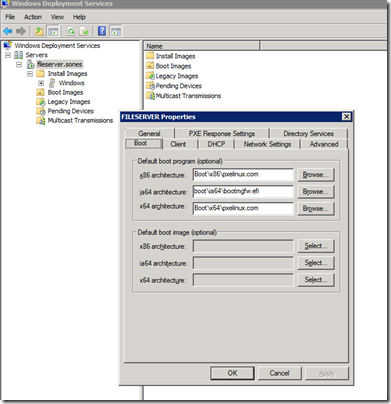
I suppose you got your WDS Installation up and running and you are able to deploy Windows. If that’s the case you can go to your WDS Server Management Tool and right-click on the server name – in my case “fileserver.sones”. If you select “Properties” in the context menu you would see the properties windows like in the screenshot below:

wds_pxelinux

You have to change the Boot-Loader from the standard Windows BootMgr to the newly downloaded PXELINUX bootloader. Since this bootloader comes with it’s own set of config files you can edit this config file to allow booting into Windows.

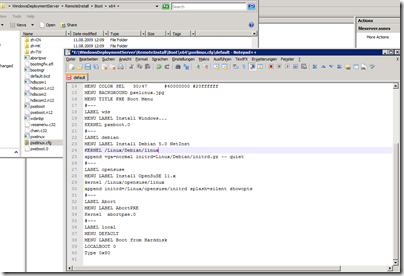
Step 3: Edit PXELINUX configuration filewds-pxelinux-2 

The first entry I made into the boot menu of the PXELINUX boot loader is the “Install Windows…” entry. Since the first thing the users will see after booting is the PXELINUX loader menu they need to be able to continue to their Windows Installation. Since this Windows Installation cannot be handled by the PXELINUX loader you have to define a boot menu entry which looks a lot like this:

LABEL wds
MENU LABEL Install Windows…
KERNEL pxeboot.0

To add OpenSuSE to the menu you would add an entry looking like this:

LABEL opensuse
MENU LABEL Install OpenSuSE 11.x
kernel /Linux/opensuse/linux
append initrd=/Linux/opensuse/initrd splash=silent showopts

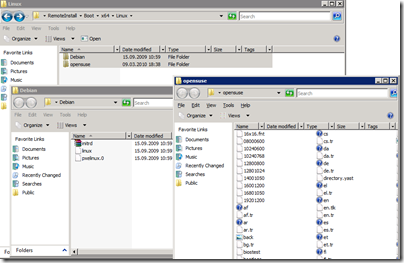
The paths given in the above entry should be altered according to the paths you’re using in your installation. I took the /Linux/opensuse/ files from the network install dvd images of OpenSuSE.

wds-pxelinux-3

That’s basically everything there is about the installation of Linux (Debian works accordingly) over PXE and WDS.

And finally this is what it should look like if everything worked great:


Source 1: http://en.wikipedia.org/wiki/Preboot_Execution_Environment
Source 2: http://syslinux.zytor.com/wiki/index.php/PXELINUX

One step closer to digital nirvana…

Thanks to a podcast I found a great software for my iPhone and iPod touch. It’s a small tool which does cost less than 3 Euro and it’s served by a server tool which runs on Windows and Mac OS X.

It’s called Air Video and it’s frikin’ awesome! ™

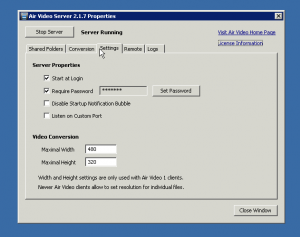
What you do is you install the server software and point it to all your directories / drives that might contain video material. You then take your iPhone and install the client app. If you configured the server to be available over the internet you can now connect from anywhere you want using a pass-pin (which is generated) and a password (which is set by you). And by “from anywhere” they mean “anywhere”. WLAN or 3g didn’t make any difference in my test. You start the client, point to a video file and most of the time you are asked if you a) want to directly play is (if the file is ipod-compatible) or b) if you want to live-convert it and play it (when the file isn’t compatible and needs to be re-encoded live for you) or c) if you want to add the file to a conversion queue which will off-line convert the video for you.

In terms of “finding your video” it does look like this:

Air Video

Simple, eh? Taping a video will bring up this screen:

IMG_0388

As I said – Play directoy, Play with Live Conversion and Offline-Conversion-Queue…

It did work with EVERY Video I tried. When I tried Full-HD Movies my serving PC wasn’t able to handle the load but everyhing in SD worked great which is perfect for me.

onwindows

Therefore I can highly recommend this tool – it really does work better than anything I’ve seen before.

Source: http://www.inmethod.com/air-video/index.html

How to unleash the “Virtual WiFi” feature in Windows 7 in C#

Great stuff ahead – this is just the thing I would want to write if it’s not been written already. This tool is free and open source and it’s the perfect workaround for those usual cases when you want to download a podcast in your holiday and your apple branded device tells you “You can only download files up to 10 Megabyte over 3G connections” – You take your notebook, log into 3G, create a WiFi Hotspot with this tool and off you go.

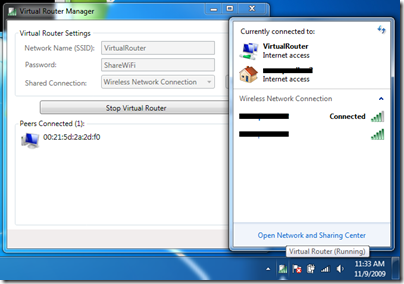
“Over the last week some of you may have heard about Connectify. It’s an app that unleashes the “Virtual WiFi” and Wireless Hosted Network features of Windows 7 to turn a PC into a Wireless Access Point or Hot Spot. Well, I looked into what it would take to build such an app, and it really wasn’t that difficult since Windows 7 has all the API’s built in to do it. After some time of looking things up and referencing the “Wireless Hosted Network” C++ sample within the WIndows 7 SDK, I now have a nice working version of the application to release. I’m calling this project “Virtual Router” since it essentially allows you to host a software based wireless router from your laptop or other PC with a Wifi card. Oh, and did I mention that this is FREE and OPEN SOURCE!”

VirtualRouterScreensshot

“The Wireless Network create/shared with Virtual Router uses WPA2 Encryption, and there is not way to turn off that encryption. This is actually a feature of the Wireless Hosted Network API’s built into Windows 7 and 2008 R2 to ensure the best security possible.
You can give your "virtual" wireless network any name you want, and also set the password to anything. Just make sure the password is at least 8 characters.”

Source: http://virtualrouter.codeplex.com/

Plain-Text Username Password Authentification with WCF

If you got it, it’s easy. If you’re starting from scratch it ain’t as easy. We were in need of such a Username+Password Authentification so I started googling around.

I found several articles but had to mash it all together in a trial-and-error session. Now that I am enlightened I want to share my knowledge:

Step 1: Implement an UserNamePasswordValidator class and override the Validate method.

using System;
using System.Collections.Generic;
using System.Linq;
using System.Text;
using System.IdentityModel.Tokens;
using System.IdentityModel.Selectors;

namespace sones.Pandora.Database.Hosting
{
    public class UserNamePasswordAuthentification: UserNamePasswordValidator
    {

        public override void Validate(string userName, string password)
        {
            if ((userName != "Username") || (password != "Password"))
            {
                throw new SecurityTokenException("Validation Failed!");
            }
        }
    }
}

Step 2: Edit the App.config file to enable the previously implemented UsernamePasswordValidator.

    <bindings>
      <basicHttpBinding>
        <binding name="CustomAuthentication">
          <security mode="TransportCredentialOnly">
            <transport clientCredentialType="Basic" proxyCredentialType="Basic"/>
          security>
        binding>
      basicHttpBinding>
    bindings>
    <behaviors>
      <serviceBehaviors>
        <behavior name="SecurityBehavior">
          <serviceCredentials>
            <userNameAuthentication
            userNamePasswordValidationMode="Custom"
            customUserNamePasswordValidatorType="sones.Pandora.Database.Hosting.UserNamePasswordAuthentification, PandoraDB_WebServiceHost_UsernamePasswordAuth"/>
          serviceCredentials>
        behavior>
      serviceBehaviors>
    behaviors>
    <services>
      <service behaviorConfiguration="SecurityBehavior" name="sones.Pandora.Database.Hosting.PandoraDatabaseHost">
        <endpoint address="" binding="basicHttpBinding" bindingConfiguration="CustomAuthentication"
          name="ep1" contract="sones.Pandora.Database.Hosting.IPandoraDatabaseHost" />
      service>
    services>

In this example the ServiceHost will use no server SSL certificate and therefor allow normal http access instead of just using https ssl. You can configure that behavior with the <security mode=”TransportCredentialOnly”> line. Just change there and define an apropriate certificate and you’re good to go with https / ssl.

Allowing Web Service host to run locally without Administrator rights

If you’re writing WCF Web Services you maybe came to the point when you needed Administrator rights to start the Web ServiceHost. As a matter of fact the only thing you need is the right to use a that URL space.

So for  a WCF Web Service running on http://localhost:80/TestService/Ep2 you would use the netsh command line tool to set the correct rights.

Step 1: Start an Administrator-Commandline

Step 2: run “netsh http add urlacl url=http://+80/TestService/Ep2 user=SONES\bietiekay

(SONES\bietiekay = the Domain+User to grant the right)

netsh