smart home use case #4 – being location aware is important

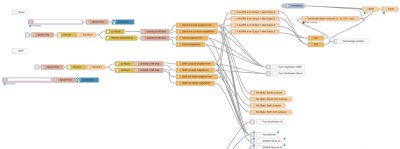
Now that you got your home entertainment reacting to you making a phone call (use case #1) as well as your current position in the played audiobook (use case #3) you might want to add some more location awareness to your house.

If your house is smart enough to know where you are, outside, inside, in what room, etc. – it might as well react on the spot.

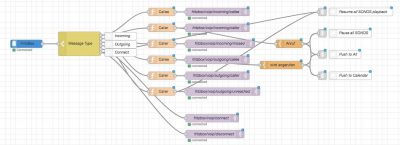
So when you leave/enter the house:

– turn off music playing – pause it and resume when you come back
– shutdown unnecessary equipment to limit power consumption when not used and start-back up to the previous state (tvs, media centers, lights, heating) when back
– arm the cameras and motion sensors 
– start to run bandwidth intense tasks when no people using resources inside the house (like backing up machines, running updates)
– let the roomba do it’s thing
– switch communication coming from the house into different states since it’s different for notifications, managing lists and spoken commands and so on.

There’s a lot of things that that benefit from location awareness.

Bonus points for outside house awareness and representing that like a “Weasly clock”…“xxx is currently at work”.

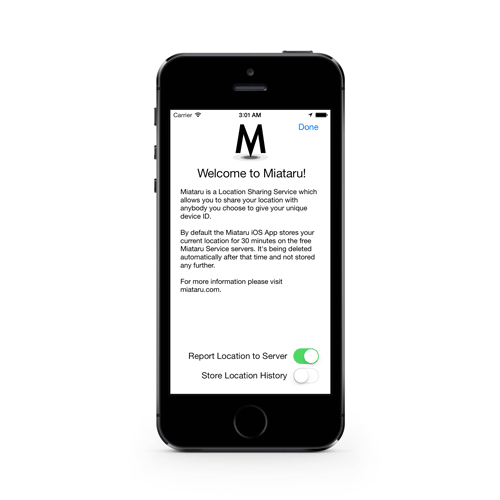
Bonus points combo breaker for using an open-source service like Miataru (http://miataru.com/#tabr3) for location tracking outside the house.

use case #3 – sonos auto bookmarker for audiobooks and podcasts

So you’re listening to this audio book for a while now, it’s quite long but really thrilling. In fact it’s too long for you to go through in one sitting. So you pause it and eventually listen to it on multiple devices.

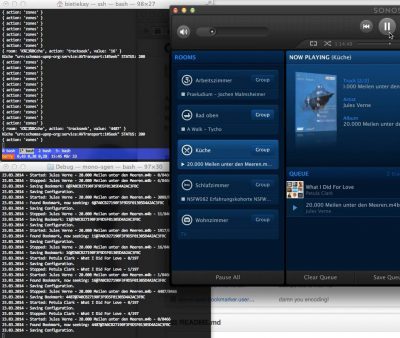
We’ve got SONOS in our house and we’re using it extensively. Nice thing, all that connected goodness. It’s just short of some smart features. Like remembering where you paused and resuming a long audio book at the exact position you stopped the last time. Everytime you would play a different title it would reset the play-position and not remember where you where.

With some simple steps the house will know the state of all players it has. Not only SONOS but maybe also your VCR or Mediacenter (later use-case coming up!).

Putting together the strings and you get this:

Whenever there’s a title being played longer than 10 minutes and it’s paused or stopped the smart house will remember who, where and what has been played and the position you’ve been at.

Whenever that person then is resuming playback the house will know where to seek to. It’ll resume playback, on any system that is supported at that exact position.

Makes listening to these things just so much easier.

Bonus points for a mobile app that does the same thing but just on your phone. Park the car, go into the house, audiobook will continue playback, just now in the house instead of the car. The data is there, why not make use of it?

p.s.: big part of that I’ve opensourced years ago: https://github.com/bietiekay/sonos-auto-bookmarker

“making your home smarter”, use case #2 – measure how much oil is burned

“making your home smarter”, use case #2

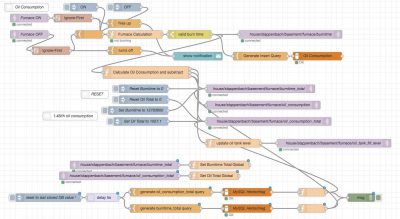
know how much oil your house burns with just measuring the light of the furnace going on/off and calculating oil throughput of the valves with burn-time.

Over the period of 1 year it’s as accurate as +/- 20 liters of oil.

That way you do not have to climb down into the storage space and measure it yourself…smelly job that is.

How to weigh your cat! – the IoT version

This is Leela. She is a 7 year old lilac white British short hair cat that lives with us. Leela had a sister who used to live with us as well but she developed a heart condition and passed away last year. Witnessing how quickly such conditions develop and evaluate we thought that we can do something to monitor Leelas health a bit to just have some sort of pre-alert if something is changing.

Kid in a Candystore

As this Internet of Things is becoming a real thing these days I found myself in a candy store when I’ve encountered that there are a couple of really really cheap options to get a small PCB with input/output connectors into my house WiFi network.

One of the main actors of this story is the so called ESP8266. A very small and affordable system-on-a-chip that allows you to run small code portions and connect itself to a wireless network. Even better it comes with several inputs that can be used to do all sorts of wonderful things.

And so it happened that we needed to know the weight of our cat. She seemed to get a bit chubby over time and having a point of reference weight would help to get her back in shape. If you every tried to weigh a cat you know that it’s much easier said than done.

The alternative was quickly brought up: Build a WiFi-connected scale to weigh her litter box every time she is using it. And since I’ve recently bought an evaluation ESP8266 I just had to figure out how to build a scale. Looking around the house I’ve found a broken human scale (electronics fried). Maybe it could be salvaged as a part donor?

A day later I’ve done all the reading on that there is a thing called “load-cell”. Those load cells can be bought in different shapes and sizes and – when connected to a small ADC they deliver – well – a weight value.

I cracked the human scale open and tried to see what was broken. It luckily turned out to have completely fried electronics but the load-cells where good to go.
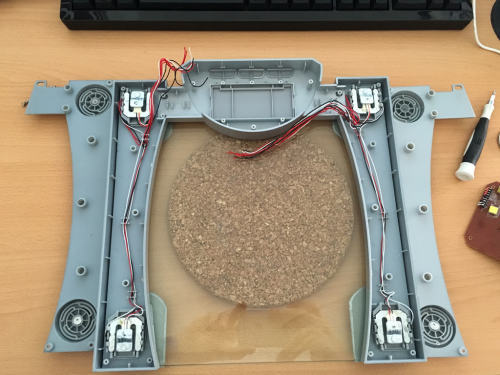
Look at this load cell:
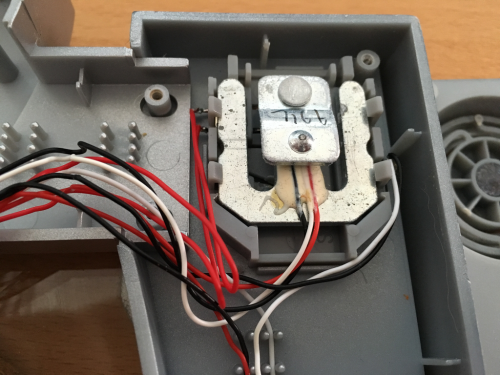
Hardware

That brought down the part list of this project to:

  • an ESP8266 – an Adafruit Huzzah in my case
  • a HX711 ADC board to amplify and prepare the signal from the load-cells
  • a human scale with just enough space in the original case to fit the new electronics into and connect everything.

The HX711 board was the only thing I had to order hardware wise – delivered the next day and it was a matter of soldering things together and throwing in a small Arduino IDE sketch.

My soldering and wiring skills are really sub-par. But it worked from the get-go. I was able to set-up a small Arduino sketch and get measurements from the load-cells that seemed reasonable.
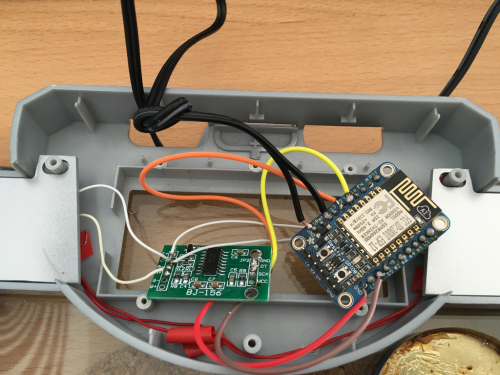
Now the hardware was all done – almost too easy. The software would be the important part now. In order to create something flexible I needed to make an important decision: How would the scale tell the world about it’s findings?

Software

Two basic options: PULL or PUSH?

Pull would mean that the ESP8266 would offer a webservice or at least web-server that exposes the measurements in one way or the other. It would mean that a client needs to poll for a new number in regular intervals.

Push would mean that the ESP8266 would connect to a server somewhere and whenever there’s a meaningful measurement done it would send that out to the server. With this option there would be another decision of which technology to use to push the data out.

Now a bit of history: At that time I was just about to re-implement the whole house home automation system I was using for the last 6 years with some more modern/interoperable technologies. For that project I’ve made the decision to have all events (actors and sensors) as well as some additional information being channeled into MQTT topics.

Let’s refer to Wikipedia on this:

“MQTT1 (formerly MQ Telemetry Transport) is an ISO standard (ISO/IEC PRF 20922) publish-subscribe-based “lightweight” messaging protocol for use on top of the TCP/IP protocol. It is designed for connections with remote locations where a “small code footprint” is required or the network bandwidth is limited. The publish-subscribe messaging pattern requires a message broker. Thebroker is responsible for distributing messages to interested clients based on the topic of a message. Andy Stanford-Clark and Arlen Nipper of Cirrus Link Solutions authored the first version of the protocol in 1999.”

Something build for oil-pipelines can’t be wrong for your house – can it?

So MQTT uses the notation of a “topic” to sub-address different entities within it’s network. Think of a topic as just a simple address like “house/litterbox/weight”. And with that topic MQTT allows you to set a value as well.

The alternative to MQTT would have been things like WebSockets to push events out to clients. The decision for the home-automation was done towards MQTT and so far it seems to have been the right call. More and more products and projects available are also focussing on using MQTT as their main message transport.

For the home automation I had already set-up a demo MQTT broker in the house – and so naturally the first call for the litterbox project was to utilize that.

The folks of Adafruit provide the MQTT library with their hardware and within minutes the scale started to send it’s measurements into the “house/litterbox/weight” topic of the house MQTT broker.

Some tweaking and hacking later the litterbox was put together and the actual litterbox set on-top.

Since Adafruit offers platform to also send MQTT messages towards and create neat little dashboards I have set-up a little demo dashboard that shows a selection of data being pushed from the house MQTT broker to the Adafruit.io MQTT broker.

These are the raw values which are sent into the weight topic:

You can access it here: https://io.adafruit.com/bietiekay/stappenbach

So the implementation done and used now is very simple. On start-up the ESP8622 initialises and resets the weight to 0. It’ll then do frequent weight measurements at the rate it’s configured in the source code. Those weight measurements are being monitored for certain criteria: If there’s a sudden increase it is assumed that “the cat entered the litterbox”. The weight is then monitored and averaged over time. When there’s a sudden drop of weight below a threshold that last “high” measurement is taken as the actual cat weight and sent out to a /weight topic on MQTT. The regular measurements are sent separately to also a configurable MQTT topic.

You can grab the very ugly source code of the Arduino sketch here: litterbox_sourcecode

And off course with a bit of logic this would be the calculated weight topic:
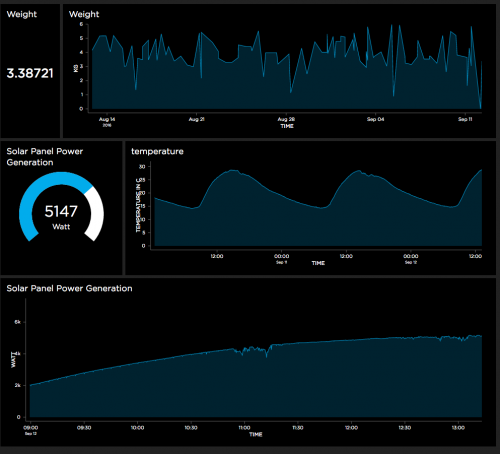
Of course it is not enough to just send data into MQTT topics and be done with it. Of course you want things like logging and data storage. Eventually we also wanted to get some sort of notification when states change or a measurement was taken.

MQTT, the cloud and self-hosted

Since MQTT is enabling a lot of scenarios to implement such actions I am going to touch just the two we are using for our house.

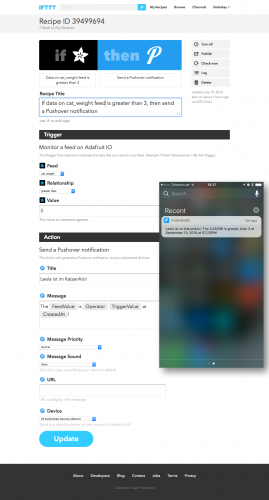
  1. We wanted to get a push notification to our phones whenever a weight measurement was taken – essentially whenever the cat has done something in the litterbox. The easiest solution: Set-Up a recipe on If This Than That (IFTTT) and use PushOver to send out push notifications to whatever device we want.
  2. To log and monitor in some sort of a dashboard the easiest solution seemed to be Adafruits offer. Of course hosted inside our house a combination of InfluxDB to store, Telegraf to gather and insert into InfluxDB and Chronograf to render nice graphs was the best choice.

Since most of the above can be done in the cloud (as of: outside the house with MQTT being the channel out) or inside the house with everything self-hosted. Some additional articles will cover these topics on this blog later.

There’s lots of opportunity to add more logic but as far as our experiments and requirements go we are happy with the results so far – we now regularly get a weight and the added information of how often the cat is using her litterbox. Especially for some medical conditions this is quite interesting and important information to have.
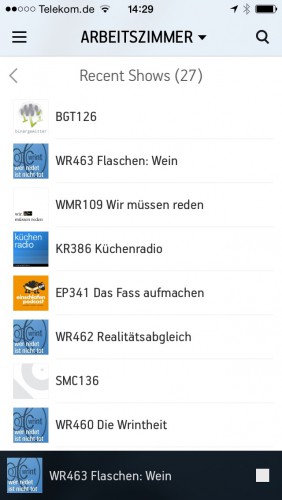
the xenim streaming network SONOS integration now plays recent shows!


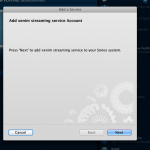
Since I am frequently using the xenim streaming network service but I was missing out on the functionality to replay recent shows. With the wonderful functionality of Re-Live made available through ReliveBot  I have now added this replay feature and I am using it a lot since.
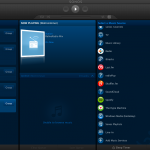
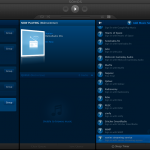
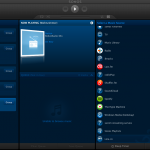
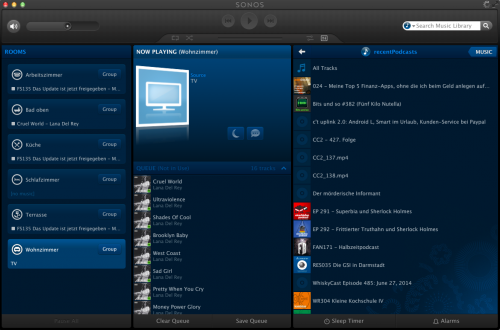
Within the SONOS controller app it looks like this:

Screen Shot 2015-07-31 at 14.22.13

IMG_3551

To set-up this service with your SONOS set-up just follow the instructions shown here: a new Music Service for SONOS

Source 1: xenim streaming network
Source 2: ReliveBot
Source 3: Download the Custom Service
Source 4: a new Music Service for SONOS

I wish there was: cheap network microphones with open source speech recognition

I was on a business trip the other day and the office space of that company was very very nice. So nice that they had all sorts of automation going on to help the people.

For example when you would run into a room where there’s no light the system would light up the room for you when it senses your presence. Very nice!

There was some lag between me entering the room, being detected and the light powering up. So while running into a dark room, knowing I would be detected and soon there would be light, I shouted “Computer! Light!” while running in.

That StarTrek reference brought an old idea back that it would be so nice to be able to control things through omnipresent speech recognition.

I am aware that there’s Siri, Cortana, Google Now. But those things are creepy because they involve external companies. If there are things listening to me all day every day, I want them to be within the premise of the house. I want to know exactly down to the data flow what is going on and sent where. I do not want to have this stuff leave the house at any times. Apart from that those services are working okayish but well…

Let alone the hardware. Usually the existing assistants are carried around in smart phones and such. Very nice if you want to touch things prior to talking to them. I don’t want to. And no, “Hey Siri!” or “OK Google” is not really what I mean. Those things are not sophisticated enough yet. I was using “Hey Siri!” for less than 24 hours. Because in the first night it seemed to have picked up something going on while I was sleeping which made it go full volume “How can I help!” on me. Yes, there’s no “don’t listen when I am sleeping” thing. Oh it does not know when I am sleeping. Well, you see: Why not?

Anyway. What I wish there was:

  • cheap hardware – a microphone(-array) possibly to put into every room. It either needs to have WiFi or LAN. Something that connects it to the network. A device that is carried around is not enough.
  • open source speech recognition – everything that is collected by the microphone is processed through an open source speech recognition tool. Full text dictation is a bonus, more importantly heavy-duty command recognition and simple interactions.
  • open source text to speech – to answer back, if wanted

And all that should be working on a basic level without internet access. Just like that.

So? Any volunteers?

31st Chaos Communication Congress


Like every year the Chaos Communication Congress gathered thousands of people in one place between the Christmas-Holidays and NewYears.

Since I was out-of-order this year to attend I’ve opted for the Attending-by-Stream option. All Lectures are live-streamed by the awesome CCC Video Operations Center (C3VOC) and made available as recordings afterwards.

Since the choice of topics is enormous here are some I can recommend:

Source 1: http://events.ccc.de/congress/2014/wiki/Static:Main_Page
Source 2: http://en.wikipedia.org/wiki/Chaos_Communication_Congress
Source 3: http://c3voc.de/
Source 4: http://media.ccc.de/browse/congress/2014/


Unlock PDF files

The next time you stumble across a PDF file with security and not allowing you to print or copy/paste.

Do this:

qpdf –decrypt

“QPDF is a command-line program that does structural, content-preserving transformations on PDF files. It could have been called something like pdf-to-pdf. It also provides many useful capabilities to developers of PDF-producing software or for people who just want to look at the innards of a PDF file to learn more about how they work.

QPDF is capable of creating linearized (also known as web-optimized) files and encrypted files. It is also capable of converting PDF files with object streams (also known as compressed objects) to files with no compressed objects or to generate object streams from files that don’t have them (or even those that already do). QPDF also supports a special mode designed to allow you to edit the content of PDF files in a text editor. For more details, please see the documentation links below.

QPDF includes support for merging and splitting PDFs through the ability to copy objects from one PDF file into another and to manipulate the list of pages in a PDF file. The QPDF library also makes it possible for you to create PDF files from scratch. In this mode, you are responsible for supplying all the contents of the file, while the QPDF library takes care off all the syntactical representation of the objects, creation of cross references tables and, if you use them, object streams, encryption, linearization, and other syntactic details.

QPDF is not a PDF content creation library, a PDF viewer, or a program capable of converting PDF into other formats. In particular, QPDF knows nothing about the semantics of PDF content streams. If you are looking for something that can do that, you should look elsewhere. However, once you have a valid PDF file, QPDF can be used to transform that file in ways perhaps your original PDF creation can’t handle. For example, programs generate simple PDF files but can’t password-protect them, web-optimize them, or perform other transformations of that type.”

Source 1: http://qpdf.sourceforge.net/
Source 2: https://github.com/qpdf/qpdf

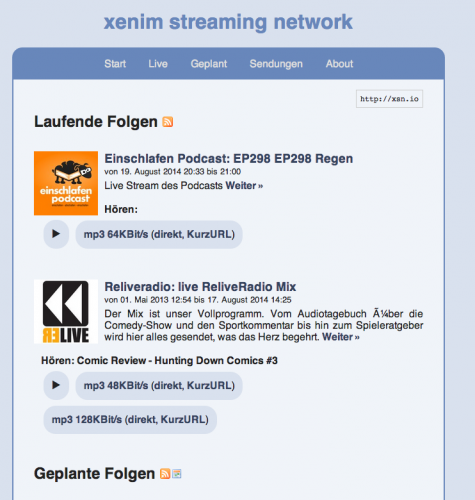
a new Music Service for SONOS: xenim streaming network

I am a frequent podcast live-stream listener. And being that I am enjoying the awesome service called xenim streaming network.

Bildschirmfoto 2014-08-19 um 21.03.21

Any Podcast producer can join the xsn and with that can live-stream his own Podcast while recording. It’s CDN is based on voluntarily provided resources and pretty rock-solid as far as my experience with it goes.

Since I am a frequent user of this – and I’ve got that gorgeous SONOS hardware scattered around my house – I thought I need to have that service integrated into my SONOS set.

The SONOS system knows the concept of “Music Services”. There are quite a lot of them but xsn is missing. But SONOS is awesome and they got an API!

Unfortunately the API documentation is hidden behind a NDA wall so that would be a no-go. What’s not hidden is what the SONOS controllers have to discuss with all the existing services. Most of the time these do not use HTTPS so we’re free to listen to the chatters. I did just that and was able, for the sake of interoperability, to reverse engineer the SONOS SMAPI as far as it is necessary to make my little xsn Music Service work.

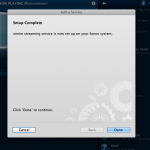
As usual you can get the source-code distributed freely through Github. If you’re not into that sort of compiling and programming things, you are invited to use my free-of-charge provided service. To set it up on your home SONOS just follow these simple steps:

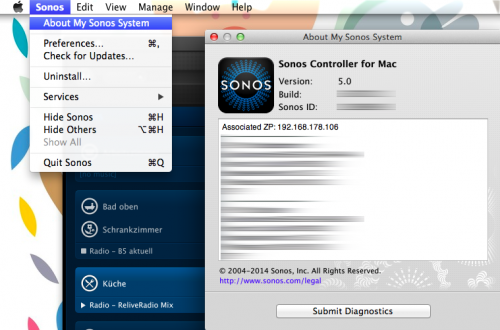
Step 1: Start your SONOS Controller Application and find out the IP address of your SONOS.

Click on “About My Sonos System” and check the IP address written next to the “Associated ZP”.

Screen Shot 2014-08-19 at 19.45.56

Step 2: Add the xsn Music Service.

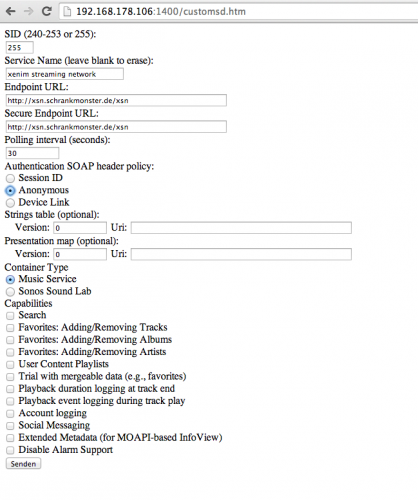
By opening a browser window and browsing to: http://<your-associated-zp-ip>:1400/customsd.htm

When you’re there – fill out the fields as below. The SID is either 255, or if you used that previously, something between 240-253. The service name is “xenim streaming network”. The Endpoint URL and Secure Endpoint URL both are http://xsn.schrankmonster.de/xsn

Set the Polling interval to 30 seconds. Click on the Anonymous Authentication SOAP header policy and you’re good to go. Click on “send” to finish.

Bildschirmfoto 2014-08-19 um 21.16.27

Step 3: Add the new Music Service to your SONOS Controller.

Click on “Add Music Services” and click through until you see “xenim streaming network”. Add the service and you’re set!

p.s.: It’s normal that the service icon is a question mark.

Step 4: Enjoy Live Podcasts!

Source 1: https://github.com/bietiekay/sonos-xsn-service
Source 2: http://streams.xenim.org/

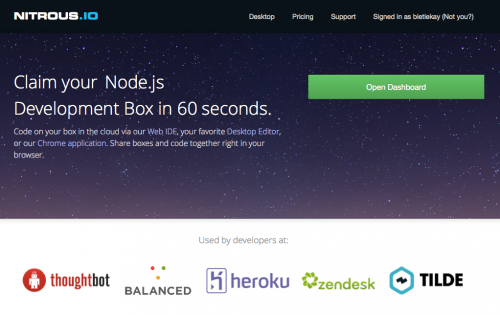
Nitrous – full IDE in your browser – with Collaboration!

“Nitrous is a backend development platform which helps software developers save time by cutting out the repetitive parts of creating development environments and automating them.

Once you create your first development environment, there are many features which will make development easier.”

Bildschirmfoto 2014-07-06 um 11.38.49

So what you’re getting is:

  • a virtual machine operated for you and set-up with a single click
  • A full-featured IDE in your browser
  • Code-Collaboration by inviting others to edit your project
  • a debugging environment in which you can test-run and work with your code

Here are some screenshots to get you a feel for it:

Source: https://www.nitrous.io/

How to get a list of all recent Podcasts on SONOS

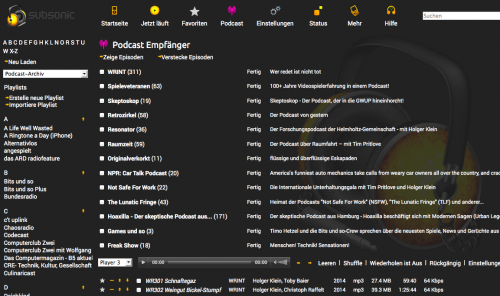
I am using an external podcast download tool to stay updated on all podcasts I subscribed to. For this purpose SubSonic is a good choice – actually for a lot more also.

Screen Shot 2014-07-02 at 18.56.52

One of the quirks of the SONOS products is that Podcasts are not really well supported. In fact there is no support at all.

So I wrote a tool that extends the SONOS players with the functionality to “remember” play positions within audiobooks and podcasts. Now what’s left to properly have podcasts supported is a view of the most recently updated podcasts. Wouldn’t it be nice to have a “Folder View” in the SONOS controller of what’s new across all the different podcasts you are subscribed to?

Now here’s the trick:

Use a small script on any RaspberryPi in the house to dynamically create hardlinks to the podcasts files in a “Recently Updated Podcasts” folder.

The script is something like this:

find /where-your-podcasts-are/ -type f -printf ‘%TY-%Tm-%Td %TT %p\n’ | sort | tail -n 25 | cut -c 32- | sed -e “s/^/ln \”/” -e “s/$/\”/” -e “s/$/ \”\/recentPodcasts\/\”/” | sh

This short line will go through all folders and subfolders in /where-your-podcasts-are/ and then create Hardlinks in /recentPodcasts to the most recent 25 files.

That way, and when /recentPodcasts/ is made accessible to your SONOS controllers, you’ll have something like this:

Screen Shot 2014-07-02 at 19.17.24

Source 1: http://www.subsonic.org
Source 2: play position bookmarker

Boblight Alternative: Hyperion

After setting up Boblight on two TVs in the house – one with 50 and one with 100 LEDs – I’ve used it for the last 5 months on a daily basis almost.

First of all now every screen that does not come with “added color-context” on the wall seems off. It feels like something is missing. Second of all it has made watching movies in a dark room much more enjoyable.

The only concerning factor of the past months was that the RaspberryPi does not come with a lot of computational horse-power and thus it has been operating at it’s limits all the time. With 95-99% CPU usage there’s not a lot of headroom for unexpected bitrate spikes and what-have-you.

So from time to time the Pis where struggling. With 10% CPU usage for the 50 LEDs and 19% CPU usage for the 100 LEDs set-up there was just not enough CPU power for some movies or TV streams in Full-HD.

Hyperion

So since even overclocking only slightly improved the problem of Boblight using up the precious CPU cycles for a fancy light-show I started looking around for alternatives.

“Hyperion is an opensource ‘AmbiLight’ implementation controlled using the RaspBerry Pi running Raspbmc. The main features of Hyperion are:

  • Low CPU load. For a led string of 50 leds the CPU usage will typically be below 1.5% on a non-overclocked Pi.
  • Json interface which allows easy integration into scripts.
  • A command line utility allows easy testing and configuration of the color transforms (Transformation settings are not preserved over a restart at the moment…).
  • Priority channels are not coupled to a specific led data provider which means that a provider can post led data and leave without the need to maintain a connection to Hyperion. This is ideal for a remote application (like our Android app).
  • HyperCon. A tool which helps generate a Hyperion configuration file.
  • XBMC-checker which checks the playing status of XBMC and decides whether or not to capture the screen.
  • Black border detector.
  • A scriptable effect engine.
  • Generic software architecture to support new devices and new algorithms easily.

More information can be found on the wiki or the Hyperion topic on the Raspbmc forum.”

Especially the Low CPU load did raise interest in my side.

Setting Hyperion up is easy if you just follow the very straight-forward Installation Guide. On Raspbmc the set-up took me 2 minutes at most.

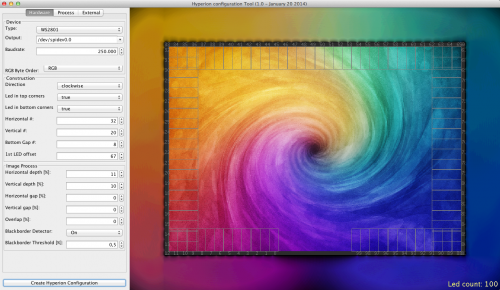
If you got everything set-up on the Pi you need to generate a configuration file. It’s a nice JSON formatted config file that you do not need to create on your own – Hyperion has a nice configuration tool. Hypercon:

Screen Shot 2014-06-28 at 08.52.51

So after 2 more minutes the whole thing was set-up and running. Another 15 minutes of tweaking here and there and Hyperion replaced Boblight entirely.

What have I found so far?

  1. Hyperions network interfaces are much more controllable than those from Boblight. You can use remote clients like on iPhone / Android to set colors and/or patterns.
  2. It’s got effects for screen-saving / mood-lighting!
  3. It really just uses a lot less CPU resources. Instead of 19% CPU usage for 100 LEDs it’s down to 3-4%. That’s what I call a major improvement
  4. The processing filters that you can add really add value. Smoothing everything so that you do not get bright flashed when content flashes on-screen is easy to do and really helps with the experience.

All in all Hyperion is a recommended replacement for boblight. I would not want to switch back.

Source 1: Setting up Boblight
Source 2: https://github.com/tvdzwan/hyperion/wiki/Installation

using the RaspberryPi to make all SONOS speakers support Apple Airplay

Airplay allows you to conveniently play music and videos over the air from your iOS or Mac OS X devices on remote speakers.

Since we just recently “migrated” almost all audio equipment in the house to SONOS multi-room audio we were missing a bit the convenience of just pushing a button on the iPad or iPhones to stream audio from those devices inside the household.

To retrofit the Airplay functionality there are two options I know of:

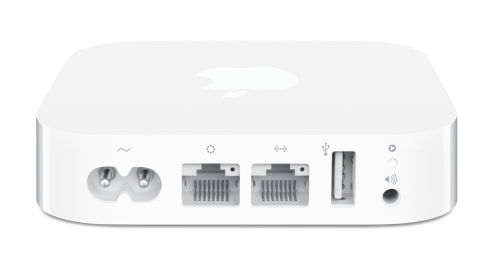
1: Get Airplay compatible hardware and connect it to a SONOS Input.

airportexpress_2012_back-285111You have to get Airplay hardware (like the Airport Express/Extreme,…) and attach it physically to one of the inputs of your SONOS Set-Up.  Typically you will need a SONOS Play:5 which has an analog input jack.
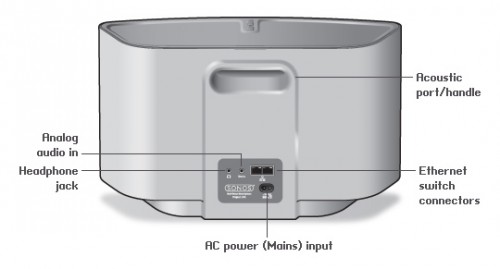
PLAY5_back

2: Set-Up a RaspberryPi with NodeJS + AirSonos as a software-only solution

You will need a stock RaspberryPi online in your home network. Of course this can run on virtually any other device or hardware that can run NodeJS. For the Pi setting it up is a fairly straight-forward process:

You start with a vanilla Raspbian Image. Update everything with:

sudo apt-get update

sudo apt-get upgrade

Then install NodeJS according to this short tutorial. To set-up the AirSonos software you will need to install additional avahi software. Especially this was needed for my install:

sudo apt-get install git-all libavahi-compat-libdnssd-dev

You then need to get the AirSonos software:

sudo npm install airsonos -g

After some minutes of wait time and hard work by the Pi you will be able to start AirSonos.

sudo airsonos

And it’ll come up with an enumeration of all active rooms.

Screen Shot 2014-06-25 at 11.38.47

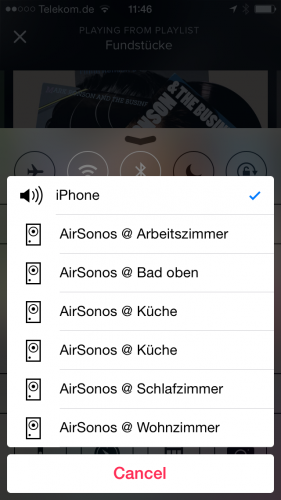
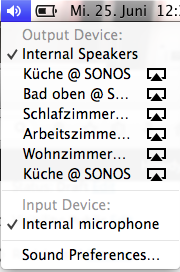
And on all your devices it’ll show up like this:

IMG_1046

and

Screen Shot 2014-06-25 at 12.38.27


Source: https://github.com/stephen/airsonos

Brackets: a multi-platform editor written in javascript – including NodeJS

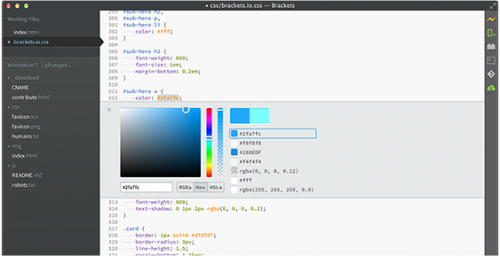
“Brackets is an open source code editor for web designers and front-end developers.”

hero

On the first tries it’s an awesome thing to have all that JavaScript debugging, Live HTML editing and what-not in one place. Give it a spin.

[youtube]https://www.youtube.com/watch?v=T6d5C3rLeFY[/youtube]

Source 1: http://brackets.io/

weave your net of things that have internet…ehm – internet of things

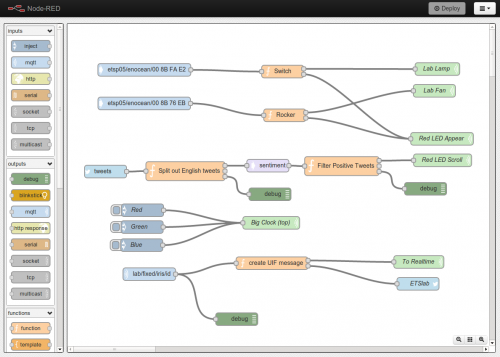
node-red-screenshot

The internet of things” is a buzzword used more and more. It means that things around you are connected to the (inter)network and therefore can talk to each other and, when combined, offer fantastic new opportunities.

Yeah right.

So NodeRed is a NodeJS based toolset that allows you to create so called “flows” (see picture above). Those flows determine what reacts and happens when things happen. Fantastic, told you!

Source 1: http://nodered.org/
Source 2: http://en.wikipedia.org/wiki/Internet_of_ThingsSource 3: http://nodejs.org/

I give you: the SONOS Audiobook / Podcast Auto Bookmarker – never lose your Listening Progress again…

Since the SONOS system I’ve bought turned out to be highly hackable I’ve spent some quality-time this weekend fixing the worst downside I’ve found so far that the SONOS system had for me

I am listening to a lot of Podcasts and Audiobooks. And it turns out that those two Genre are not particularly good supported by SONOS. When you’re listening to a 4 hour podcast and you stop it to play a song in between (since you stretch the listening of that podcast to several days) the next time you start that 4 hour podcast the SONOS system did not remember the position that you stopped at the last time and restarts the podcast from the beginning.

If you did not remember where you left of the last time, you’re lost. The same goes for Audiobooks.

Now this is the first feature I am teaching my SONOS system. And I am opensourcing it so you can do it as well.

SONOS Auto Bookmark Tool

Everything you need can be run on a RaspberryPi:

  1. You need NodeJS and node-sonos-http-api installed and running.
  2. You need MONO and sonos-auto-bookmarker (change the configuration.json file in bin/Debug after you xbuilded the .sln file)

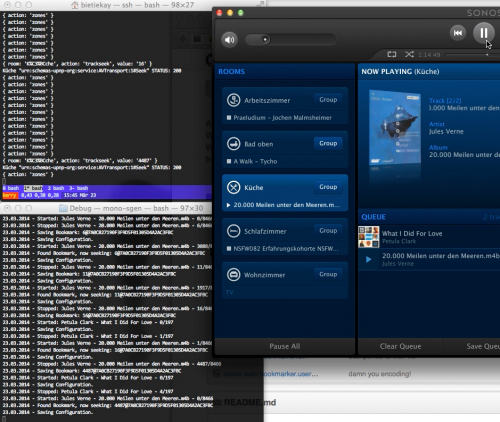
Now the Auto Bookmarker Tool will, with the help of the sonos-http-api, monitor your household and whenever something longer than 10 minutes is played and stopped it bookmarks the last played position. Whenever you restart that track it will then seek to the last known position automatically.

[youtube]https://www.youtube.com/watch?v=Eqk3SyNv8sE[/youtube]

Source 1: https://github.com/bietiekay/sonos-auto-bookmarker

setting up boblight with a Raspberry Pi and RaspBMC

Some might know AmbiLight – a great invention by Philips that projects colored light around a TV screen based upon the contents shown. It’s a great addition to a TV but naturally only available with Philips TV sets.

Not anymore. There are several open-source projects that allow you to build your very own AmbiLight clone. I’ve built one using a 50-LEDs WS2801 stripe, a 5V/10A power supply, a RaspberryPi, and the BobLight integration in RaspBMC (this is a nice XBMC distribution for the Pi).

Boblight is a collection of tools for driving lights connected to an external controller.

Its main purpose is to create light effects from an external input, such as a video stream (desktop capture, video player, tv card), an audio stream (jack, alsa), or user input (lirc, http). Boblight uses a client/server model, where clients are responsible for translating an external input to light data, and boblightd is responsible for translating the light data into commands for external light controllers.”

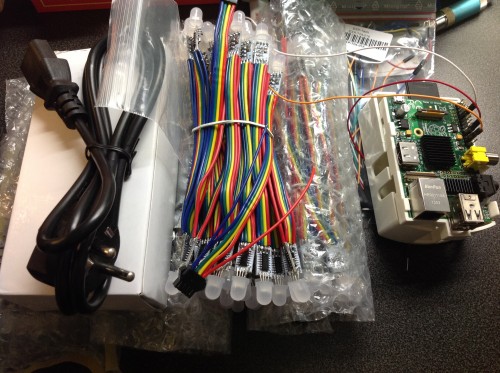
The hardware to start with looks like this:

pre_requisites

I’ve fitted some heat-sinks to the Pi since the additional load of controlling 50 LEDs will add a little bit of additional CPU usage which is desperately needed when playing Full HD High-Bitrate content.

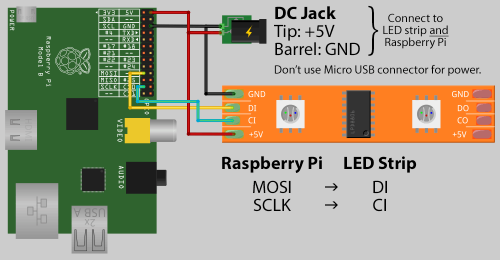
The puzzle pieces need to be put together as described by the very good AdaFruit diagram:

diagramAs you can see the Pi is powered directly through the GPIO pins. You’re not going to use the MicroUSB or the USB ports to power the Pi. It’s important that you keep the cables between the Pi and the LEDs as short as possible. When I added longer / unshielded cables everything went flickering. You do not want that – so short cables it is :-)

leds

When you look at aboves picture closely you will find a CO and DO on the PCB of the LED. on the other side of the PCB there’s a CI and DI. Guess what: That means Clock IN and Clock OUT and Data IN and Data OUT. Don’t be mistaken by the adapter cables the LED stripes comes with. My Output socket looked damn close to something I thought was an Input socket. If nothing seems to work on the first trials – you’re holding it wrong! Don’t let the adapters fitted by the manufacturer mislead you.

Depending on the manufacturer of your particular LED stripe there are layouts different from the above image possible. Since RaspBMC is bundled with Boblight already you want to use something that is compatible with Boblight. Something that allows Boblight to control each LED in color and brightness separately.

I opted for WS2801 equipped LEDs. This pretty much means that each LED sits on it’s own WS2801 chip and that chip takes commands for color and brightness. There are other options as well – I hear that LDP8806 chips also work with Boblight.

My power supply got a little big to beefy – 10 Amps is plenty. I originally planned to have 100 LEDs on that single TV. Each LED at full white brightness would consume 60mA  – which brings us to 6Amps for a 100 – add to that the 2 Amps for the PI and you’re at 8A. So 10A was the choice.

To connect to the Pi GPIO Pins I used simple jumper wires. After a little bit of boblightd compilation on a vanilla Raspbian SD card (how-to here). Please note that with current RaspBMC versions you do not need to compile Boblight yourself – I’ve just taken for debugging purposes as clean Raspbian Image and compiled it myself to do some boblight-constant tests. Boblight-constant is a tool that comes with Boblight which allows you to set all LEDs to one color.

If everything is right, it should look like this:

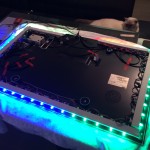
working_first_timeNow everything depends on how your LED stripes look like and how your TVs backside looks like. I wanted to fit my setup to a 42″ Samsung TV. This one already is fitted with a Ultra-Slim Wall mount which makes it pretty much sitting flat on the wall like a picture. I wanted the LEDs to sit right on the TVs back and I figured that cable channels when cut would do the job pretty nicely.

To get RaspBMC working with your setup the only things you need to do are:

  1. Enable Boblight support in the Applications / RaspBMC tool
  2. Login to your RaspBMC Pi through SSH with the user pi password raspberry and copy your boblight.conf file to /etc/boblight.conf.

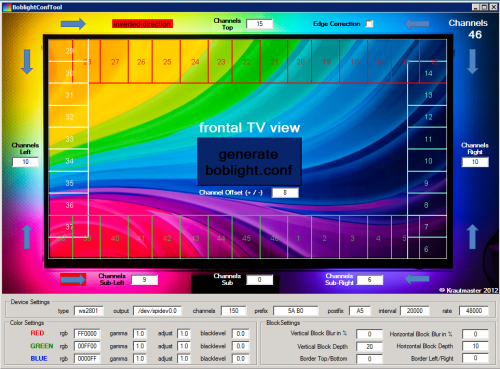
The configuration file can be obtained from the various tutorials that deal with the boblight configuration. You can choose the hard way to create a configuration or a rather easy one by using the boblight configuration tool.

I’ve used the tool :-)

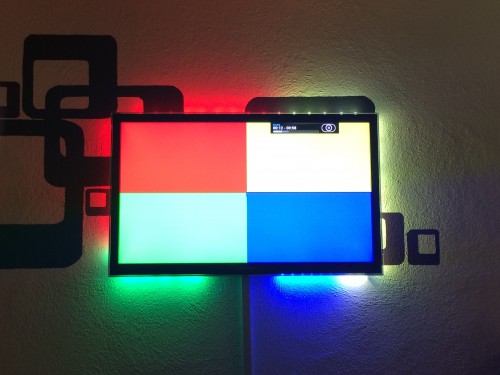
Boblight Config ToolNow if everything went right you don’t have flickering, the TV is on the wall and you can watch movies and what-not with beautiful light effects around your TV screen. If you need to test your set-up to tweak it a bit more, go with this or this.

result_1

Source 1: http://en.wikipedia.org/wiki/Ambilight
Source 2: http://www.raspberrypi.org/
Source 3: https://code.google.com/p/boblight/
Source 4: http://www.raspbmc.com/
Source 5: http://learn.adafruit.com/light-painting-with-raspberry-pi/hardware
Source 6: How-To-Compile-Boblight
Source 7: Boblight Config Generator
Source 8: Boblight Windows Config Creation Tool
Source 9: Test-Video 1
Source 10: Test-Video 2

Instruction-less computing: Doing stuff with a CPU without actually executing instructions

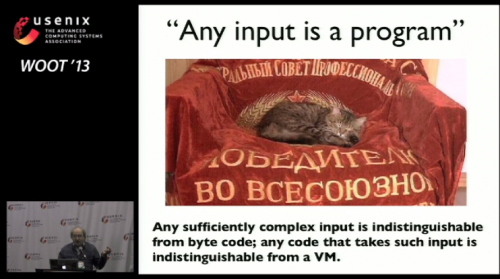
Having fun with hardware is a good way to learn about the machines which soon will become our new overlords. With this pretty interesting presentation you can dive deep into what a CPU does and how it can be exploited to run code by not running it.

Trust Analysis, i.e. determining that a system will not execute some class of computations, typically assumes that all computation is captured by an instruction trace. We show that powerful computation on x86 processors is possible without executing any CPU instructions. We demonstrate a Turing-complete execution environment driven solely by the IA32 architecture’s interrupt handling and memory translation tables, in which the processor is trapped in a series of page faults and double faults, without ever successfully dispatching any instructions. The “hard-wired” logic of handling these faults is used to perform arithmetic and logic primitives, as well as memory reads and writes. This mechanism can also perform branches and loops if the memory is set up and mapped just right. We discuss the lessons of this execution model for future trustworthy architectures.

Bildschirmfoto 2013-11-02 um 01.04.31

Source 1: https://www.usenix.org/conference/woot13/page-fault-weird-machine-lessons-instruction-less-computation

when DVB-T is not interesting, use the hardware for fun and SDR!

SDR – or Software Defined Radio is relatively cheap and fun way to dive deeper into radio communication.

“Software-defined radio (SDR) is a radio communication system where components that have been typically implemented in hardware (e.g. mixers, filters, amplifiers, modulators/demodulators, detectors, etc.) are instead implemented by means of software on a personal computer or embedded system. While the concept of SDR is not new, the rapidly evolving capabilities of digital electronics render practical many processes which used to be only theoretically possible.” (Wikipedia)

So with cheap hardware it’s possible to receive radio transmissions on all sorts of frequencies and modulations. Since everything after the actual “receiving stuff”-phase happens in software the things you can do are sort of limitless.

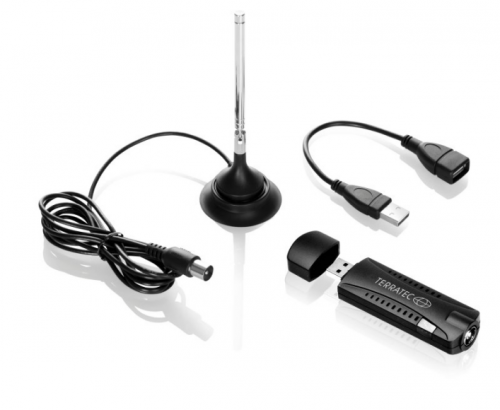
Now what about the relatively cheap factor? – The hardware you’re going to need to start with this is a DVB-T USB stick widely available for about 25 Euro. The important feature you’re going to look for is that it comes with a Realtek RTL2832U chip.

“The RTL2832U is a high-performance DVB-T COFDM demodulator that supports a USB 2.0 interface. The RTL2832U complies with NorDig Unified 1.0.3, D-Book 5.0, and EN300 744 (ETSI Specification). It supports 2K or 8K mode with 6, 7, and 8MHz bandwidth. Modulation parameters, e.g., code rate, and guard interval, are automatically detected.

The RTL2832U supports tuners at IF (Intermediate Frequency, 36.125MHz), low-IF (4.57MHz), or Zero-IF output using a 28.8MHz crystal, and includes FM/DAB/DAB+ Radio Support. Embedded with an advanced ADC (Analog-to-Digital Converter), the RTL2832U features high stability in portable reception.” (RealTek)

You’ll find this chip in all sorts of cheap DVB-T USB sticks like this one:

3948543_b6f7670bc7To use the hardware directly you can use open source software which comes pre-packaged with several important/widely used demodulator moduls like AM/FM. Gqrx SDR is available for all sorts of operating systems and comes with a nice user interface to control your SDR hardware.
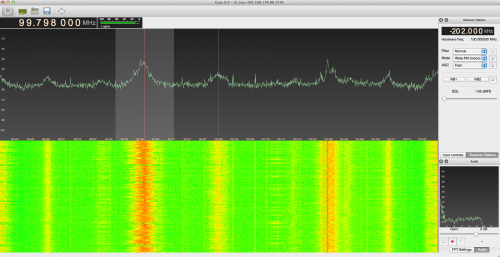
The neat idea about SDR is that you, depending on the capabilities of your SDR hardware, are not only tuned into one specific frequency but a whole spectrum several Mhz wide. With my device I get roughly a full 2 Mhz wide spectrum out of the device allowing me to see several FM stations on one spectrum diagram and tune into them individually using the demodulators:

Bildschirmfoto 2013-11-01 um 23.28.56The above screenshot shows the OS X version of Gqrx tuned into an FM station. You can clearly see the 3 stations that I can receive in that Mhz range. One very strong signal, one very weak and one sort of in the middle. By just clicking there the SDR tool decodes this portion of the data stream / spectrum and you can listen to a FM radio station.

Of course – since those DVB-T sticks come with a wide spectrum useable – mine comes with an Elonics E4000 tuner which allows me to receive – more or less useable – 53 Mhz to 2188 Mhz (with a gap from 1095 to 1248 Mhz).

Whatever your hardware can do can be tested by using the rtl_test tool:

root@berry:~# rtl_test -t
Found 1 device(s):
0:  Terratec T Stick PLUS

Using device 0: Terratec T Stick PLUS
Found Elonics E4000 tuner
Supported gain values (14): -1.0 1.5 4.0 6.5 9.0 11.5 14.0 16.5 19.0 21.5 24.0 29.0 34.0 42.0
Benchmarking E4000 PLL…
[E4K] PLL not locked for 52000000 Hz!
[E4K] PLL not locked for 2189000000 Hz!
[E4K] PLL not locked for 1095000000 Hz!
[E4K] PLL not locked for 1248000000 Hz!
E4K range: 53 to 2188 MHz
E4K L-band gap: 1095 to 1248 MHz

Interestingly when you plug the USB stick into an Raspberry Pi and you follow some instructions you can use the Raspberry Pi as an SDR server allowing you to place it on the attic while still sitting comfortably at your computer downstairs to have better reception.

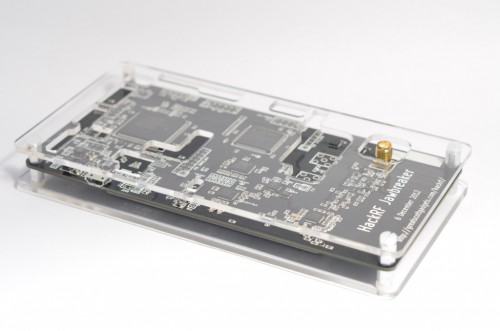
If you want to upgrade your experience with more professional hardware – and in fact if you got a sender license – you can take a look at the HackRF project which currently is creating a highly sophisticated SDR hardware+software solution:

jawbreaker-fd0-145436

Source 1: http://www.realtek.com.tw/products/productsView.aspx?Langid=1&PFid=35&Level=4&Conn=3&ProdID=257
Source 2: http://gqrx.dk/
Source 3: www.hamradioscience.com/raspberry-pi-as-remote-server-for-rtl2832u-sdr/
Source 4: http://ossmann.blogspot.de/2012/06/introducing-hackrf.html
Source 5: https://github.com/mossmann/hackrf

Miataru for iOS is available in the iOS AppStore

After roughly 1,5 months of learning Javascript and Objective-C the iOS application and the publicly available Miataru service launched this week.

If you want to interface with the publicly available instance of the miataru server you can use the URL: http://service.miataru.com. This URL also is pre-configured with the iOS client that got recently available in the AppStore.

featurerette-1

appstorebadge_small

Source 1: Miataru for iOS
Source 2: iOS AppStore

SMS Alarming for h.a.c.s.

I’ve added Alarming to hacs a while ago and I’ve now extended the built-in SMS gateway providers with the german telekom services called “Global SMS API”.

This API is offered through the Telekom own portal called developer garden and is as easy to use as it can possibly be. You only need to set-up the account with developergarden and after less than 5 minutes you can send and receive SMS and do a lot more. They got APIs for nearly everything you possible want to do … fancy some “talk to your house”-action? Would be easy to integrate into h.a.c.s. using their Speech2Text APIs.

They have a short video showing how to set it all up:

[youtube]http://www.youtube.com/watch?v=caRSafzMDK0[/youtube]

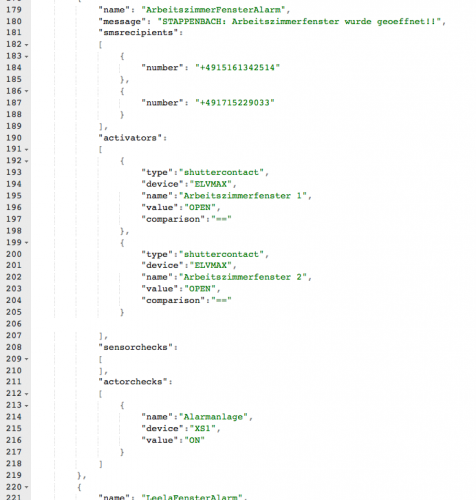
So I’ve added the SMS-send capabilities to the hacs internal alarming system with it’s own JSON configuration file looking like this:

Bildschirmfoto 2013-07-11 um 23.08.46

And this simple piece of configuration leads to SMS getting sent out as soon as – in this example – a window opens:

sms-alarming-ahcs

Before the Telekom Global SMS API I’ve used a different provider (SMS77) but since the delivery times of this provider varied like crazy (everything from 30 seconds to 5 minutes) and the provider had a lot of downtimes my thought was to give the market leader a try.

So now here it is – integrated. Get the source here.

Source 1: https://github.com/bietiekay/hacs
Source 2: https://www.developergarden.com/de/apis/apis-sdks/global-sms-api/

Hyperlapse – a streetview experiment

More and more javascript experiments bubble up on the internets and a particularly interesting one is called “Hyperlapse”:

“Hyper-lapse photography – a technique combining time-lapse and sweeping camera movements typically focused on a point-of-interest – has been a growing trend on video sites. It’s not hard to find stunning examples on Vimeo. Creating them requires precision and many hours stitching together photos taken from carefully mapped locations. We aimed at making the process simpler by using Google Street View as an aid, but quickly discovered that it could be used as the source material. It worked so well, we decided to design a very usable UI around our engine and release Google Street View Hyperlapse.

[vimeo]https://vimeo.com/63653873[/vimeo]

Source 1: http://hyperlapse.tllabs.io/
Source 2: http://labs.teehanlax.com/project/hyperlapse

Adobe Photoshop version 1 source code

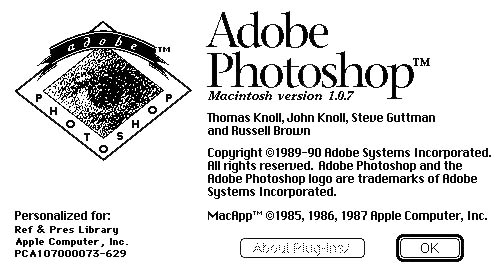
It’s becoming a fashion lately to release the source code of older but legendary commercial products to the public. Now Adobe decided to gift the source code of their flagship product Photoshop in it’s first version from 1990 to the Computer History Museum.

splashscreen

“That first version of Photoshop was written primarily in Pascal for the Apple Macintosh, with some machine language for the underlying Motorola 68000 microprocessor where execution efficiency was important. It wasn’t the effort of a huge team. Thomas said, “For version 1, I was the only engineer, and for version 2, we had two engineers.” While Thomas worked on the base application program, John wrote many of the image-processing plug-ins.”

Source: http://www.computerhistory.org/atchm/adobe-photoshop-source-code/

Automated Picture Tank and Gallery for a photographer

Since my wife started working as a photographer on a daily basis the daily routine of getting all the pictures off the camera after a long day filled with photo shootings got her bored quickly.

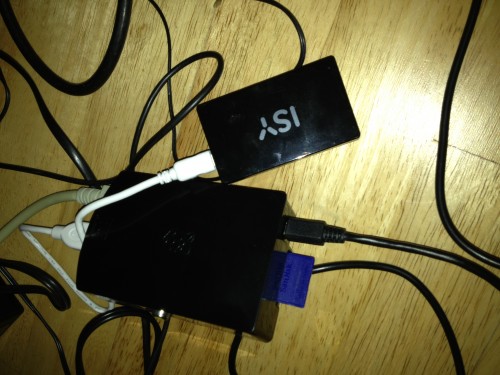
Since we got some RaspberryPis to spare I gave it a try and created a small script which when the Pi gets powered on automatically copies all contents of the attached SD card to the houses storage server. Easy as Pi(e) – so to speak.

IMG_2322

So this is now an automated process for a couple of weeks – she comes home, get’s all batteries to their chargers, drops the sd cards into the reader and poweres on the Pi. After it copied everything successfully the Pi sends an eMail with a summary report of what has been done. So far so good – everything is on our backuped storage server then.

Now the problem was that she often does not immediately starts working on the pictures. But she wants to take a closer look without the need to sit in front of a big monitor – like taking a look at her iPad in the kitchen while drinking coffee.

So what we need was a tool that does this:

  • take a folder (the automated import folder) and get all images in there, order them by day
  • display an overview per day of all pictures taken
  • allow to see the fullsized picture if necessary
  • work on any mobile or stationary device in the household – preferably html5 responsive design gallery
  • it should be fast because commonly over 200 pictures are done per day
  • it should be opensource because – well opensource is great – and probably we would need to tweak things a bit

Since I did not find anything near what we had in mind I sat down this afternoon and wrote a tool myself. It’s opensourced and available for you to play with it. Here’s a short description what it does:

It’s called GalleryServer and basically is an embedded http server which takes all .jpg files from a folder (configurable) and offers you some handy tool urls which respons with JSON data for you to work with. I’ve written a very small html user interface with a bit of javascript (using the great html5 kickstart) that allows you to see all available days and get a nice thumbnail overview of each day – when you click on it it opens the full-size image in a new window.

It’s pretty fast because it’s not actively resizing the images – instead it’s taking the thumbnail picture from the original jpg file which the camera placed there during storing the picture. It’s got some caching and can be run on any operating system where mono / .net is available – which is probably anything – even the RaspberryPi.

Source 1: my wifes page
Source 2: 99lime html5 kickstart boilerplate
Source 3: https://github.com/bietiekay/GalleryServer

the ZIP file that never ends…

Everybody knows ZIP files. It’s what comes out when you compress something on windows and on OS X. It’s the commonly used format to store and exchange compressed data.

Now there’s a lot of things you can do when you know file formats, especially those with many algorithms involved, inside out. There is a lot of text explaining the ZIP file format, like this one.

With that knowledge it is possible to create a valid ZIP file that never ends. You might already know ZIP bombs bit this one is a different animal. You computer won’t stop decompressing…

Source 1: http://research.swtch.com/zip
Source 2: http://steike.com/code/useless/zip-file-quine/
Source 3: http://en.wikipedia.org/wiki/Zip_bomb

new actors to switch power on/off and measure power usage by AVM

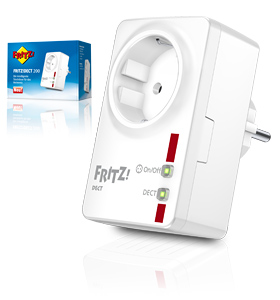
Usually the actors that allow you to switch power on/off and who measure power usage use the 434Mhz or 868Mhz wireless bands to communicate with their base station. Now the german manufacturer AVM came up with a solution that allows you to switch on/off (with an actual button on the device itself and wireless!) and to measure the power consumption of the devices connected to it.

The unspectacular it looks the spectacular are the features:

fritz_dect_200_auf_einen_blick

  • switch up to 2300 watts / 10 ampere
  • use different predefined settings to switch on/off or even use Google Calendar to tell it when to switch
  • measure the energy consumption of connected devices
  • it uses the european DECT standard to communicate with a Fritz!Box base station (which is a requirement)

For around 50 Euro it’s quite an investment but maybe I’ll give it a shot – especially the measurement functionality sounds great. Since I do not have one yet I don’t know anything about how to access it through third party software (h.a.c.s.?)

Source 1: www.avm.de/de/News/artikel/2013/start_fritz_dect_200.html
Source 2: www.avm.de/de/Produkte/Smart_Home/FRITZDECT_200/index.php
Source 3: en.wikipedia.org/wiki/Digital_Enhanced_Cordless_Telecommunications

N.O-T/MY-D/E.PA/R.T-ME

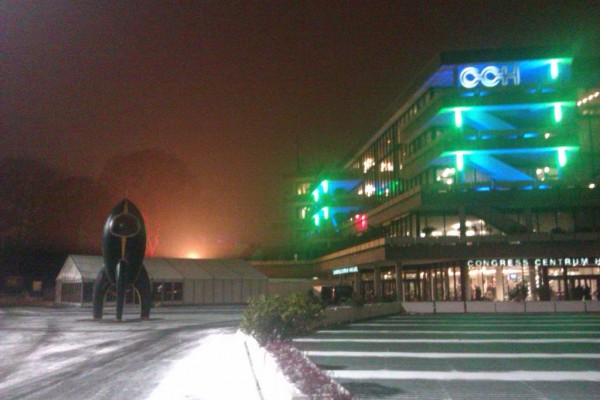
Every year between Christmas and New Years the hackers of the (mostly european) world gather for the Chaos Communication Congress. This year for the 29th time. The 29c3 takes place where it all started – in Hamburg. This years subtitle is:

Bildschirmfoto 2012-12-25 um 22.14.48

Since the reports are already in that the fairydust has landed successfully in Hamburg there’s even a proof picture for it:

A-voJ9DCEAAp8RH

Since FeM is already preparing it will be great to ‘attend’ the congress via live streams of all lectures.

Source 1: https://events.ccc.de/congress/2012/wiki/Main_Page
Source 2: http://blog.fem.tu-ilmenau.de/archives/836-Reisetagebuch-Mal-kurz-Hamburg.html

there’s a hackerspace in Bamberg

The other day I found out that there is an actual hackerspace in Bamberg – the city where I work and live nearby. For some strange reason it never occurred to me to search for an hackerspace nearby. But now since the 29c3 is at the gates I found them on the “Congress everywhere” pages (beware, it’s having a hard time right now).

Richterprodukt_v2_banner
cc-by richterprodukt

Since I just found it and christmas duties take their toll I wasn’t able to go by and talk to the people there in person – i’ve just contacted them over their IRC channel (#backspace on freenode). Eventually I will have time to visit them and I’ll have a report up here then.

For the time being enjoy their website and the projects they already did. Apparently there are some very interesting LED lighting experiments.

Source: http://www.hackerspace-bamberg.de/

ELV MAX! Cube C# Library – control your cube!

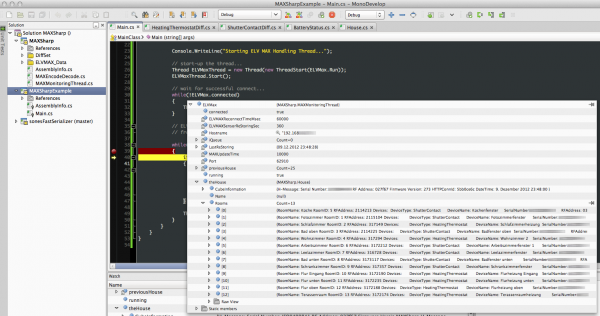
I was asked if it would be possible to get the ELV MAX! Cube interfacing functionality outside of h.a.c.s. – maybe as a library. Sure! That is possible. And to speed up things I give you the ELV MAX! Cube C# Library called: MAXSharp

It’s a plain and simple library without much dependencies – in fact there’s only some threading and the FastSerializer. Since I am using this library with h.a.c.s. as well I did not remove the serializer implementation.

There’s a small demo program included which is called MAXSharpExample. The library itself contains the abstractions necessary to get information from the ELV MAX! Cube. It does not contain functionality to control the cube – if you want to add, feel free it’s all open sourced and I would love to see pull requests!

The architecture is based upon polling – I know events would make a cleaner view but for various reasons I am using queues in h.a.c.s. and therefore MAXSharp does as well. The example application spins up the ELV MAX interfacing / handling thread and as soon as you’re connected you can access all house related information and get diff-events from the cube.

Any comment is appreciated!

Source 1: State of Reverse Engineering
Source 2: https://github.com/bietiekay/MAXSharp

Blogroll: Nerdcore NC-Sources OPML

A couple of days ago the well known and much read Nerdcore weblog author created a page he calls NC-Sources which lists all the sources he has in his RSS reader to get new information from. As you can imagine, this is pure gold for those who want to get interesting links to all-nerd pages.

Unfortunately NC-Sources is just available as a web-page which lists the name and the RSS feed URL. You cannot import that into your RSS Reader to use it for your own informational needs.

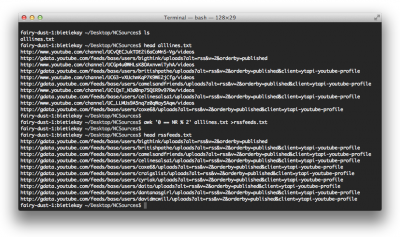
Here I am to the rescue. I’ve taken all the URLs from that NC Source page. That resulted in a file that lists the page url and the rss-feed url in alternating lines. A short trip to the command line and the use of awk helped to filter just the rss-feed urls to a new file and that was filled into an opml generator.

So now you can download the OPML file to import it into your own RSS reader. Get it here.

Source 1: NC-Sources
Source 2: NC-Sources OPML File
Source 3: OPMLBuilder

Realtime Video Effects: Time Remap

With todays processing power and the faults of current generation digital video cameras you can have a lot of fun – if you know how:

The above demonstrated effect is called Time Remapping. The description of the video tells us more about the effect itself:

The effect was discovered accidentally by a photographer called Jacques Henri Lartigues at the beginning of the 20th century (in 1912 to be precise). He took a picture of a race car with eliptical deformed tires – an effect caused by the characteristics of the camera he was using.

Source 1: http://vimeo.com/7878518
Source 2: http://en.wikipedia.org/wiki/Jacques_Henri_Lartigue
Source 3: http://bokeh.fr/blog/photographes/la-voiture-deformee-de-jacques-henri-lartigue/

practical filesystem design

In November 1998 there was a book released about file system design taking the Be File System as the central example.

“This is the new guide to the design and implementation of file systems in general, and the Be File System (BFS) in particular. This book covers all topics related to file systems, going into considerable depth where traditional operating systems books often stop. Advanced topics are covered in detail such as journaling, attributes, indexing and query processing. Built from scratch as a modern 64 bit, journaled file system, BFS is the primary file system for the Be Operating System (BeOS), which was designed for high performance multimedia applications.

You do not have to be a kernel architect or file system engineer to use Practical File System Design. Neither do you have to be a BeOS developer or user. Only basic knowledge of C is required. If you have ever wondered about how file systems work, how to implement one, or want to learn more about the Be File System, this book is all you will need.”

If you’re interested in the matter I definitely recommend reading it – it’s available for free in PDF format and will help to understand what those file system patterns are all about – even in terms of things we still haven’t gotten from our ‘modern filesystems’ today.

Source 1: http://www.nobius.org/~dbg/