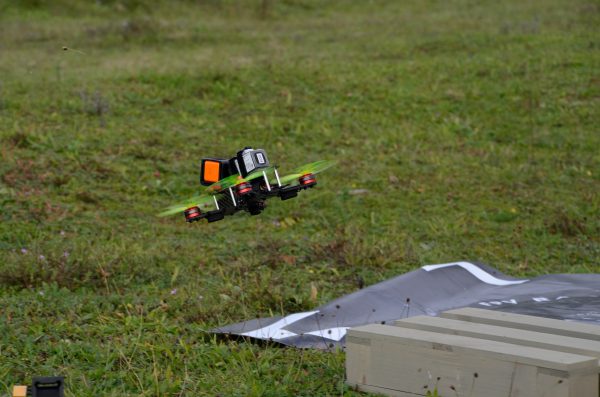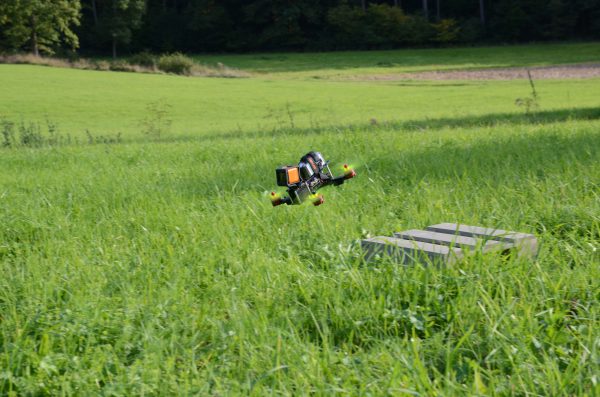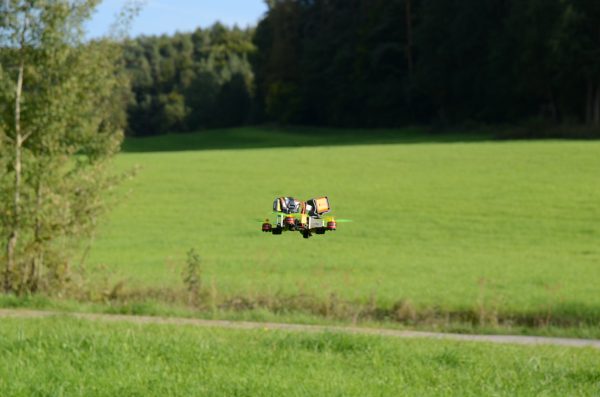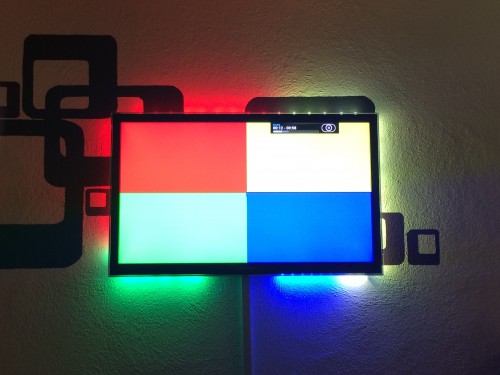
idea: in-flight convertible mini-quadcopter (add wings!)

About a year ago there were some very interesting reports about a german inventor and his invention: a highly futuristic, transforming smartphone airbag.

It would be attached to your phone and when you drop it, it would automatically deploy and dampen the impact.

Like so:

Impressive, right? There’s now a Kickstarter campaign behind this to deliver it as a product. All very nice and innovative.

I have no usue of a smartphone airbag of some sort. But hear me out on my train of thought:

I do partake in the hobby of quadcopter flying. I’ve built some myself in the past.

Now these quadcopters are very powerful and have very short flight times due to their power-dynamics. 4-5 Minutes and you’ve emptied a LiPo pack.

Model airplanes, essentially everything with wings, flys much much longer.

My thought now: Why not have a convertible drone.

When the pilot wants a switch could be flipped and it would convert a low-profile quadcopter to a low-profile quadcopter with wings. Similar to how the above mentioned smartphone “airbag”.

I don’t know anything about mechanics. I have no clue whatsoever. So go figure. But what I do know: the current path of the mini-quad industry is to create more powerful and bigger “mini”-quadcopters. And this is a good direction for some. It’s not for me. Having a 10kg 150km/h 50cm projectile in the air that also delivers a 1kg Lithium-Polymer, highly flammable and explosion-ready battery pack does frighten me.

Why not turn the wheel of innovation into the convertible-in-air-with-much-longer-flight-times direction and make the mini-quadcopters even more interesting?

Digital Daily Routine as an Experiment – “Digitaler Alltag als Experiment”

Last week we were approached by Prof. Dr. Nicole Zillien from Justus-Liebig-University in Gießen/Germany. She explained to us that she currently is working on a book.

In this book an empirical analysis is carried out on “quantified-self” approaches to real life problems.

With the lot of information and data we had posted on our personal website(s) like this blog and the “loosing weight” webpage apparently we qualified for being mentioned. We were asked if it would be okay to be named in the book or if we wanted to be pseudonymized.

Since everything we have posted online and which is publicly accessible right now can and should be quoted we were happy to give a go-ahead. We’re publishing things because we want it to spur further thoughts.

It will be out at the end of 2019 / beginning of 2020. As soon as it is out we hope to have a review copy to talk about it in this blog once again.

We do not know what exactly is being written and linked to us – we might as well end up as the worst example of all time. But well, then there’s something to learn in that as well.

IoP – the internet of pets – predictive maintenance of a cat

In the interesting field of IoT a lot of buzz is made around the predictive maintenance use cases. What is predictive maintenance?

The main promise of predictive maintenance is to allow convenient scheduling of corrective maintenance, and to prevent unexpected equipment failures.

The key is “the right information in the right time”. By knowing which equipment needs maintenance, maintenance work can be better planned (spare parts, people, etc.) and what would have been “unplanned stops” are transformed to shorter and fewer “planned stops”, thus increasing plant availability. Other potential advantages include increased equipment lifetime, increased plant safety, fewer accidents with negative impact on environment, and optimized spare parts handling.

Wikipedia

So in simpler terms: If you can predict that something will break you can repair it before it breaks. This improvse reliability and save costs, even though you repaired something that did not yet need repairs. At least you would be able to reduce inconveniences by repairing/maintaining when it still is easy to be done rather than under stress.

You would probably agree with me that these are a very industry-specific use cases. It’s easy to understand when it is tied to an actual case that happened.

Let me tell you a case that happened here last week. It happened to Leela – a 10 year old white British short hair lady cat with gorgeous blue eyes:

Ever since her sister had developed a severe kidney issue we started to unobtrusively monitor their behavior and vital signs. Simple things like weight, food intake, water intake, movement, regularities (how often x/y/z).

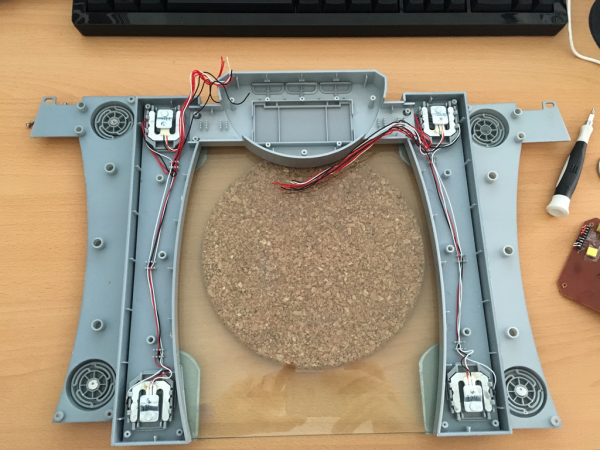
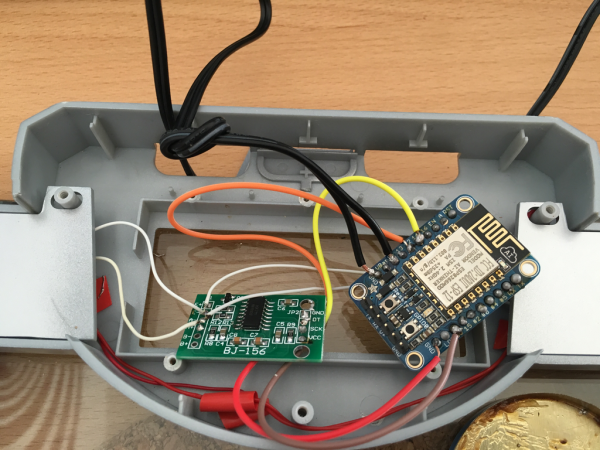
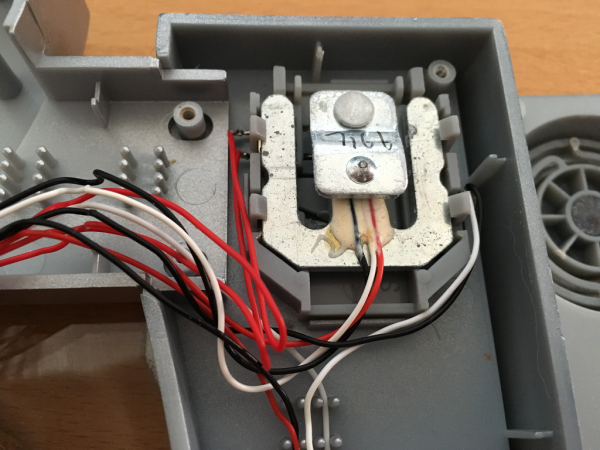
I’ve built hardware to allow us to do that in the most simple and automated way. In the case of getting to know their weight we would simply put the kitty litter box on a heavily modified persons scale. I wrote about that already back int 2016.

When Leela now visits her litter box she is automatically weighed and it’s taken note that she actually used it.

A lot of data is aggregated on this and a lot of things are being done to that data to generate indications of issues and alerts.

This alerted us last weekend that there could be an issue with Leelas health as she was suddenly visiting the litter box a lot more often across the day.

We did not notice anything with Leela. She behaved as she would everyday, but the monitoring did detect something was not right.

What had happened?

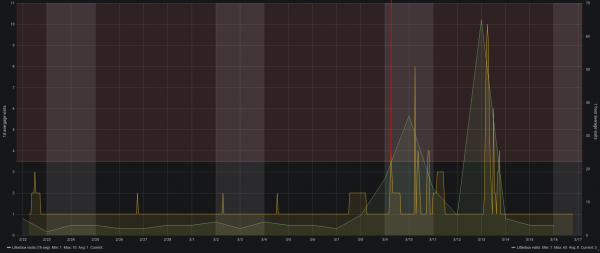
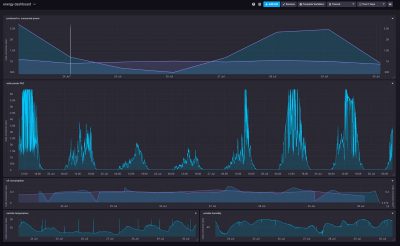
The chart shows the hourly average and daily total visits to the litterbox.

On the morning of March 9th Leela already had been to the litter box above average. So much above average that it tripped the alerting system. You can see the faded read area in the top of the graph above showing the alert threshold. The red vertical line was drawn in by me because this was when we got alerted.

Now what? She behaved totally normal just that she went a lot more to the litter box. We where concerned as it matched her sisters behavior so we went through all the checklists with her on what the issue could be.

We monitored her closely and increased the water supplied as well as changed her food so she could fight a potential bladder infection (or worse).

By Monday she did still not behave different to a degree that anyone would have been suspicious. Nevertheless my wife took her to the vet. And of course a bladder infection was diagnosed after all tests run.

She got antibiotics and around Wednesday (13th March) she actually started to behave much like a sick cat would. By then she already was on day 3 of antibiotics and after just one day of presumable pain she was back to fully normal.

Interestingly all of this can be followed up with the monitoring. Even that she must have felt worse on the 13th.

With everything back to normal now it seems that this monitoring has really lead us to a case of “predictive cat maintenance”. We hopefully could prevent a lot of pain with acting quick. Which only was possible through the monitoring in place.

Monitoring pets is seemingly becoming a thing – which lead to my rather funky post title declaration of the “Internet of Pets”. I know about a certain Volker Weber who even wrote in the current c’t magazine about him monitoring his dogs location.

Health is a huge topic for the future of devices and gadgets. Everyone will casually start to have more and more devices in their daily lifes. Unfortunately most of those won’t be under your own control if you do not insist on being in control.

You do not have to build stuff yourself like I did. You only need to make the right purchase decisions according to things important to you. And one of these things on that checklist should be: “am I in full control of the data flow and data storage”.

If you are not. Do not buy!

By coincidence the idea of having the owner of the data in full control of the data itself is central to my current job at MindSphere. With all the buzz and whistles around the Industry IoT platform it all breaks down to keep the actual owner of the data in control and in charge. A story for another post!

something is coming up…

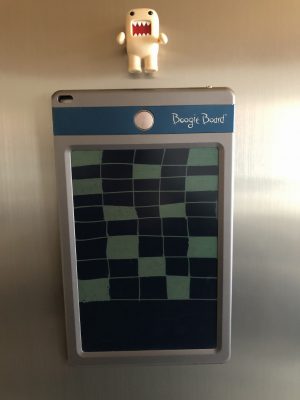
Since 2011 we’ve got this Boogie Board in the household. It’s simply a passive LCD panel on which you can write with a plastic pen. When you do you’re interacting with the liquid crytals and you switch their state. So what was black becomes white.

So we got this tablet and it’s magnetically pinned to our fridge. And whenever we’ve booked the next trip we’re crossing off days by coloring them in a grid.

How do you do such countdowns?

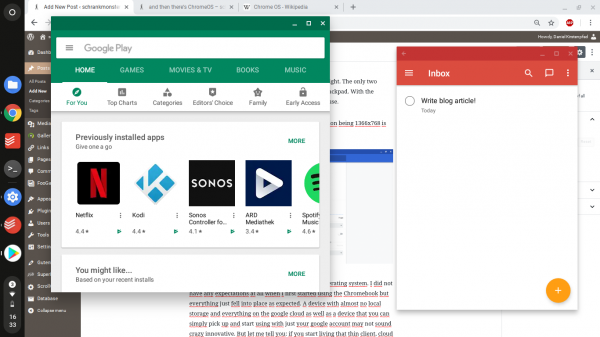
and then there’s Chrome OS.

I recently wrote about how I am using ThinClients in our house to always have a ready-to-use working environment that get’s shared across different desks and work places.

To complete the zoo of devices I wanted to take the chance and write about another device we’re using when the purpose fits: ChromOS devices.

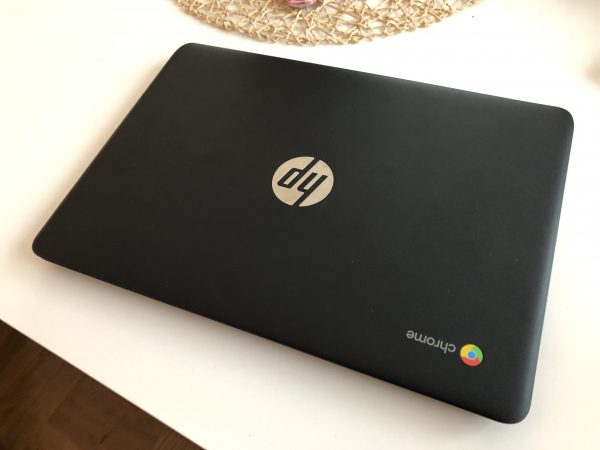
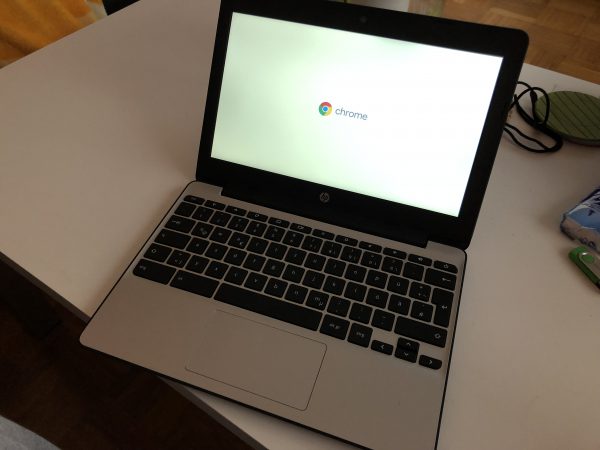
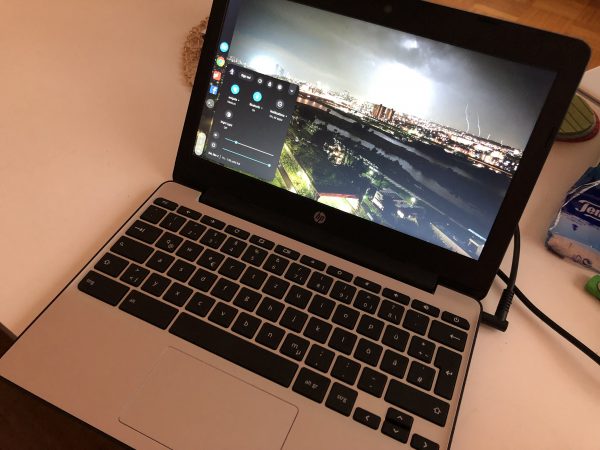
A little bit over a year ago I was given a HP Chromebook 11 G5 and this little thing is in use ever since.

The hardware itself is very average and works just right. The only two things that could be better are the display and the trackpad. With the trackpad you can help yourself with an external mouse.

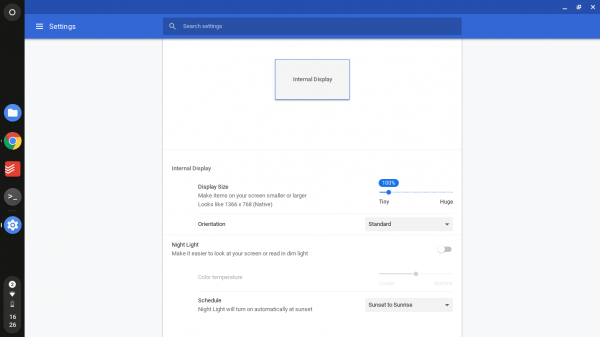
The display works for the device size but the resolution being 1366×768 is definitely a limiting factor for some tasks.

What is not a limiting factor, astonishingly, is the operating system. I did not have any expectations at all when I first started using the Chromebook but everything just fell into place as expected. A device with almost no local storage and everything on the google cloud as well as a device that you can simply pick up and start using with just your google account may not sound crazy innovative. But let me tell you: if you start living that thin client, cloud stored life these Chrome OS devices hit the spot perfectly.

Everything updates in the background and as long as you are okay with web based applications or Android based applications you are good to go.

being productive?

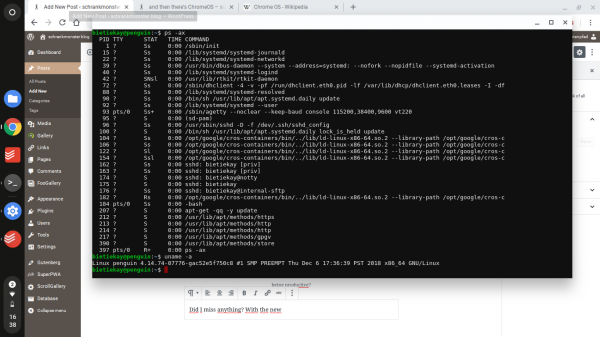
Did I miss anything functionwise? Yes. At the beginning there was no real shell or Linux tools available for Chrome OS natively. This has changed.

Chrome OS comes with linux inside and exposed now.

Would I buy another one or do I recommend it and for whom? I would buy another one and I would recommend it for certain audiences.

I would recommend it for anyone who does not need to game anything not available in the Google Playstore – anything that can be done on the web can be done with the Chromebook. And as long as there is not the requirement of anything native or higher-spec that requires you to have “Windows-as-a-hobby” or a beefy MacOS device sitting around I guess these inexpensive Chrome OS devices really have their niche.

For kids – I guess this would make a great “my-first-notebook” as it works when you need it and does not lock you in too much if you wanted to start exploring. But then again: what do I know – I do not have kids.

“kachung” + shutter sound

When you take a picture with an iPhone these days it does generate haptic feedback – a “kachung” you can feel. And a shutter sound.

Thankfully the shutter sound can be disabled in many countries. I know it can’t be disabled on iPhones sold in Japan. Which kept me from buying mine in Tokyo. Even when you switch the regions to Europe / Germany it’ll still produce the shutter sound.

Anyway: With my iPhone, which was purchased in Germany, I can disable the shutter sound. But it won’t disable the haptic “kachung”.

look ma! no mirror! (yes this is an iPhone 6)

It’s interesting that Apple added this vibration to the activity of taking a picture. Other camera manufactures go out of their way to decouple as much vibration as possible even to the extend that they will open the shutter and mirror in their DSLRs before actually making the picture – just so that the vibration of the mirror movement and shutter isn’t inducing vibrations to the act of taking the picture.

With mirror less cameras that vibration is gone. But now introduced back again?

Am I the only one finding this strange?

wireless mesh network

Since AVM has started to offer wireless mesh network capabilities in their products through software updates I started to roll it out in our house.

Wireless mesh networks often consist of mesh clients, mesh routers and gateways. Mobility of nodes is less frequent. If nodes constantly or frequently move, the mesh spends more time updating routes than delivering data. In a wireless mesh network, topology tends to be more static, so that routes computation can converge and delivery of data to their destinations can occur. Hence, this is a low-mobility centralized form of wireless ad hoc network. Also, because it sometimes relies on static nodes to act as gateways, it is not a truly all-wireless ad hoc network.

Wikipedia

With the rather complex physical network structure and above-average number of wireless and wired clients the task wasn’t an easy one.

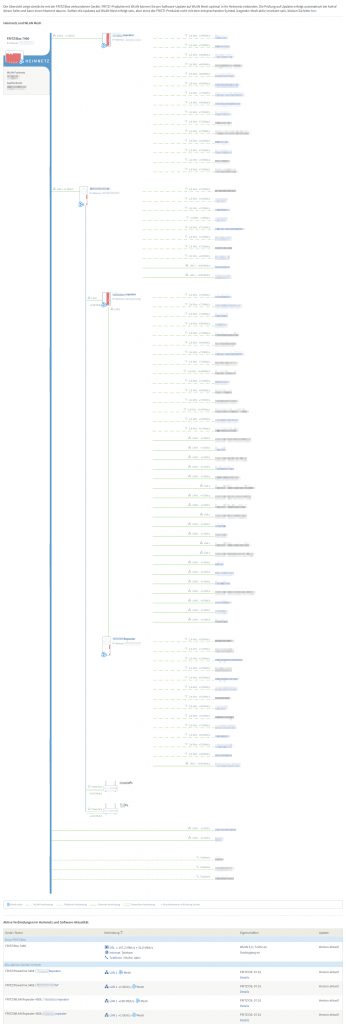
To give an impression of what is there right now:

So there’s a bit of almost everything. There’s wired connections (1Gbit to most places) and there is wireless connections. There are 5 access points overall of which 4 are just mesh repeaters coordinated by the Fritz!Box mesh-master.

There’s also powerline used for some of the more distant rooms of the mansion. All in all there are 4 powerline connections all of them are above 100 Mbit/s and one even is used for video streaming.

All is managed by a central Fritz!Box and all is well.

Like without issues. Even interesting spanning-tree implementations like from SONOS are being properly routed and have always worked without issues.

The only other-than-default configuration I had made to the Fritz!Box is that all well-known devices have set their v4 IPs to static so they are not frequently switching around the place.

How do I know it works? After enabling the Mesh things started working that have not worked before. Before the Mesh set-up I had several accesspoints independently from each other on the same SSID. Which would lead to hard connection drops if you walked between them. Roaming did not work.

With mesh enabled I’ve not seen this behavior anymore. All is stable even when I move actively between all floors and rooms.

can your kitchen scale do this trick? – ESP8266+Load Cell+MQTT

Ever since we had changed our daily diet we started to weigh everything we eat or cook. Like everything.

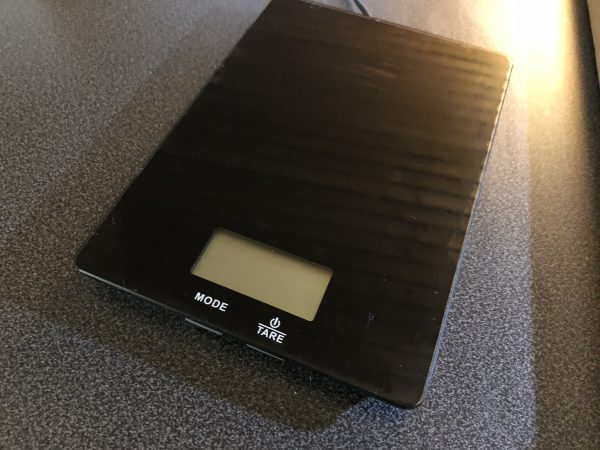
Quickly we found that those kitchen scale you can cheaply buy are either not offering the convenience we are looking for or regularly running out of power and need battery replacements.

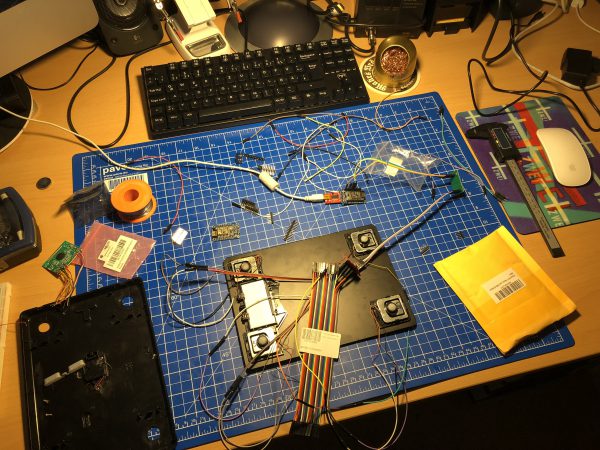
As we already have all sorts of home automation in place anyway the idea was born to integrate en ESP8266 into two of those cheap scales and – while ripping out most of their electronics – base the new scale functionality on the load cells already in the cheap scale.

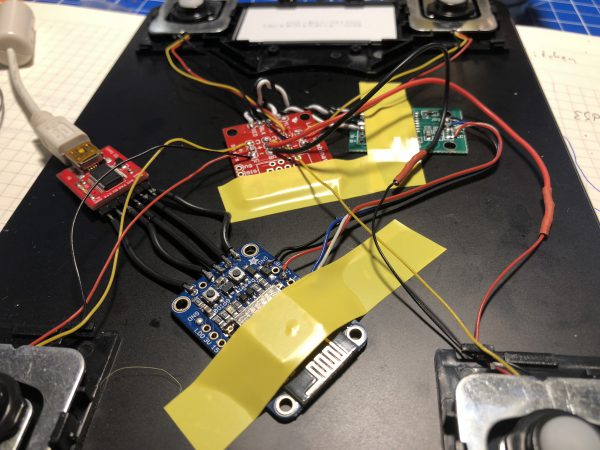
So one afternoon in January 2018 I sat down and put all the parts together:

ESP8266 + HX711 + 4 Load Cells
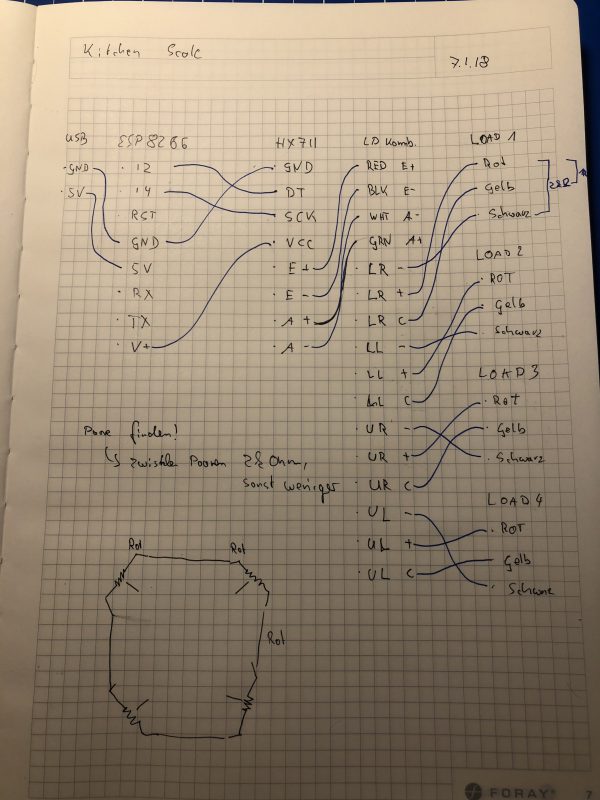
my notes of the wiring… this might be different for your load cells…

After the hardware portion I sat down and programmed the firmware of the ESP8266. The simple idea: It should connect to wifi and to the house MQTT broker.

It would then send it’s measures into a /raw topic as well as receive commands (tare, calibration) over a /cmd topic.

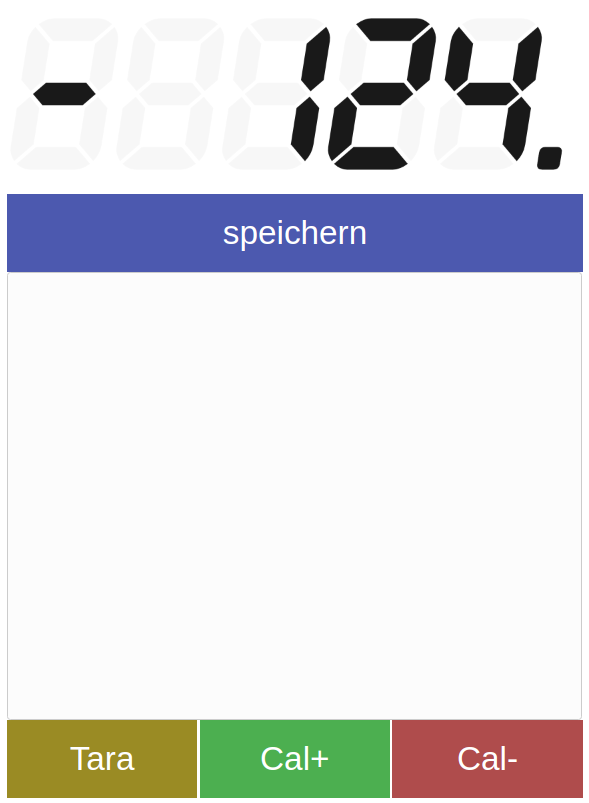
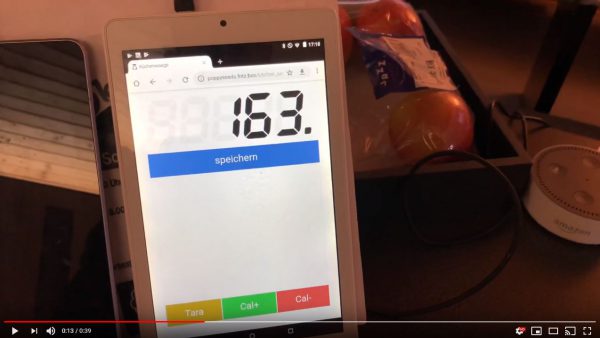
Now the next step was to get the display of the measured weights sorted. The idea for this: write a web application that would connect to the MQTT brokers websocket and receive the stream of measurements. It would then add some additional logic like a “tare” button in the web interface as well as a list of recent measurements that can be stored for later use.

the web app. I am not a web designer – help me if you can! ;-)

An additional automation would be that if the tare button is pressed and the weight is bigger than 10g the weight would automatically be added to the measurements list in the web app – no matter which of the tare buttons where used. The tare button in the web app or the physical button on the actual scale. Very practical!

Here’s a short demo of the logic, the scale and the web app in a video:

You can grab the sourcecode for the Arduino ESP8266 firmware as well as the source code for the web application here.

active noise cancellation does not suck on your eardrums

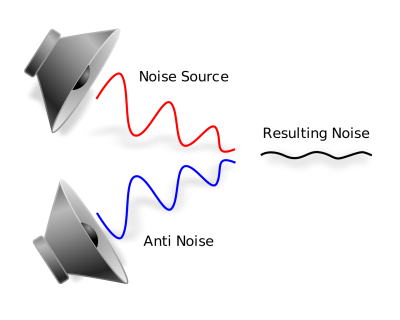
If you ever traveled on a train or plane with good active noise cancellation headphones you might agree how much more pleasant the trip was with much less noise reaching your ears.

When I tried active noise cancellation for the first time I had that weird sensation as if the pressure around suddenly changed. Like being in a very fast elevator or going for a quick dive. It felt weird but luckily it went away and the aww of joy replaced it. Quietness. Bliss.

Now there seem to be people for whom that feeling won’t go away. They get headaches and cannot stand the feeling when using active noise cancellation.

I’ve never had any explanation to this phenomena – until now. I ran across an article on SoundStage describing that in fact the feeling is not caused by actual changes of pressure but…

According to the engineer, eardrum suck, while it feels like a quick change in pressure, is psychosomatic. “There’s no actual pressure change. It’s caused by a disruption in the balance of sound you’re used to hearing,” he explained. 

eardrum suck – the mystery solved

Aha! The brain gets confused by signals reaching your ears that naturally would not exists. Those signals make no sense so the brain tries to make sense of it. And voilá something is sucking your ear drum!

LED projector for your home automation needs

In 2017 Texas Instruments had released a line of cheap industry grade LED projectors meant to be used in production lines and alike:

DLP® LightCrafter Display 2000 is an easy-to-use, plug-and-play evaluation platform for a wide array of ultra-mobile and ultra-portable display applications in consumer, wearables, industrial, medical, and Internet of Things (IoT) markets. The evaluation module (EVM) features the DLP2000 chipset comprised of the DLP2000 .2 nHD DMD, DLPC2607 display controller and DLPA1000 PMIC/LED driver. This EVM comes equipped with a production ready optical engine and processor interface supporting 8/16/24-bit RGB parallel video interface in a small-form factor.

Texas Instruments

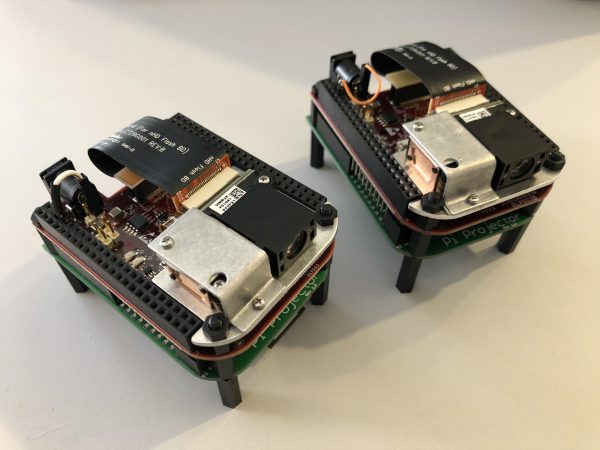
And of course this got picked up by the makers. In the hands of people like MickMake who designed an adapter PCB for the RaspberryPi Zero W to the smallest projector available from TI.

After I had learned about the existence of those small projectors I had to get a couple and try for myself. There would be so many immediate and potential applications in our house.

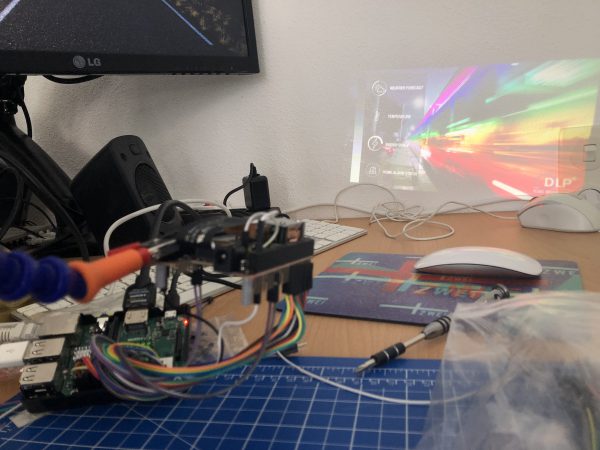
2x DLPLDCR2000EVM with MickMake adapter and RaspberryPi Zero W

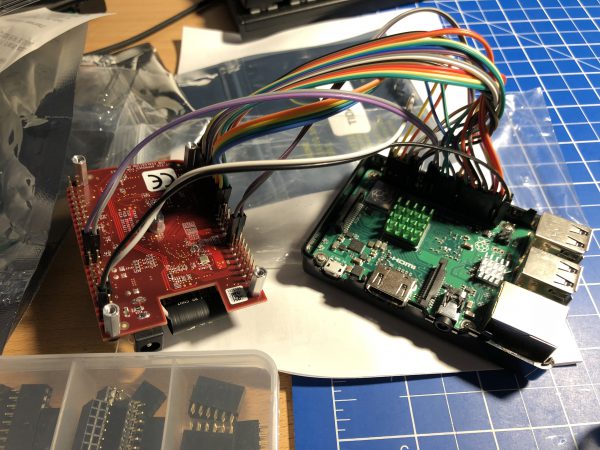
After having them delivered I did the first trial with just a breadboard and the Raspberry Pi 3.

first light!

The projector module has a native resolution of 640×360 – so not exactly high-pixel-density. And of course if the image is projected bigger the screen-door effect is quite noticeable. Also it’s not the brightest of images depending on the size. For the usual use-cases the brightness is definitely sufficient.

Downsides

  • too low brightness for large projection size – no daylight projection
  • low resolution is an issue for text and web content – it is not so much of an issue for moving pictures as you might think. Video playback is well usable.
  • flimsy optics that you need to set focus manually – works but there is no automatic focus or alike.

Upsides

  • very low powered – 2.5A/5V USB power supply is sufficient for Pi Zero + Projector on full brightness (30 lumen)
  • low brightness is not always bad – one of our specific use cases requires an as dim as possible image with fine grain control of thr brightness which this projector has.
  • extremely small footprint / size allows to integrate this device into places you would not have thought of.
  • almost fully silent operation – the only moving part that makes a sound is the color wheel inside the DLP module. You have to put your ear right onto it to hear anything.
  • passive cooling sufficient – even at full brightness an added heat sink is enough to dissipate the heat generated by the LED.

So what are these use cases that require such a projector you ask?

Night status display:

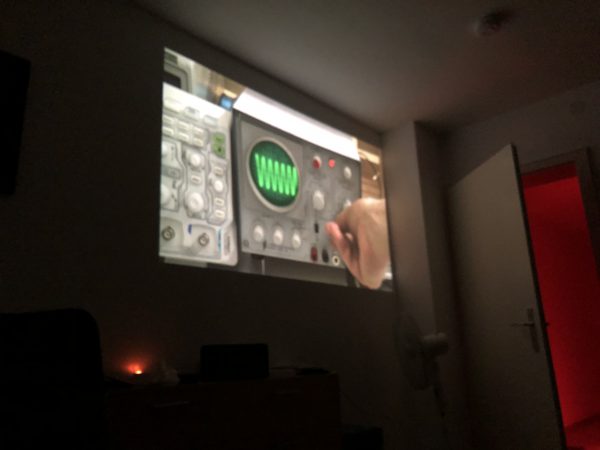
For the last 20+ years I am used to sleep with a “night playlist” running. So far a LED TV was used at the lowest brightness possible. Still it was pretty bright. The projector module allows to dim the brightness down to almost “moon brightness” and also allows to adjust the color balance towards the reds. This means: the perfect night projection is possible! And the power consumption is extremely low. A well watchable lowest brightness red-shifted image also means much lower temperatures on the projector module – it’s crazy how low powered, low temperature.

at 75% brightness (camera did not properly focus…)

Season Window Projection:

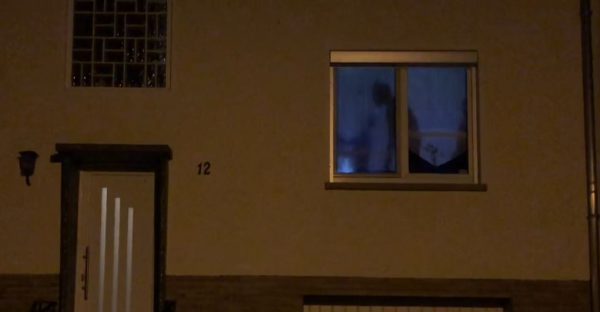
Because the projector is small, low-powered and bright enough for back-lit projection we tried and succeeded with a Halloween window projection scene the last season.

outside view
inside view

It really looks funky from the outside – funky enough to have several people stop in front of the house and point fingers. All that while power consumption was really

House overall status projections:

When projecting information is that cheap and power efficient it really shines when used to display overall status information like house-alarm status, general switch maps, locations of family members and so on. I’ve left those to your imagination as these kind of status displays are more or less giving away a lot of personal information that isn’t well suited for the internet.

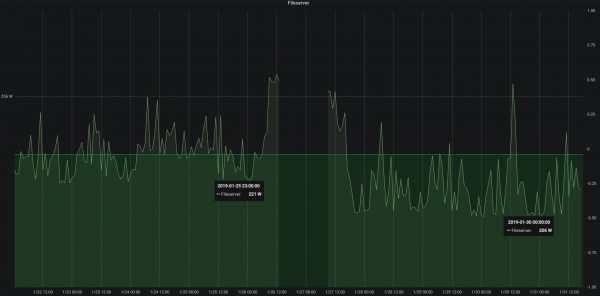
power consumption after the ssd swap

A week after swapping out mechanical hard drives for SSDs it’s time to look at what it meant in the longer run for the power consumption of the server.

15 watt less at least

Depending on what the server is asked to do – high or low cpu load and so on – the power consumption fluctuates but it’s very visible that the averages are about 15 watt lower at all times. Great!

out with the old, in with the new – house gets ssd upgrade

A week ago I had written about another mechanical hard drive that was about to bite the dust in our houses elaborate set-up.

Not having time for a full-day-of-focus I postponed the upgrade to this saturday. With the agreement of the family as they are suffering through the maintenance period as well.

The upgrade would need cautious preparation in order to be doable in one sitting. And this was also meant to be some sort of disaster-recovery-drill. I would restore the house central docker and service infrastructure from scratch along this.

And this would need to happen:

  • all services, zfs pools, docker containers, configurations needed to be double checked for full backup – as this would be used to restore all (ZFS snapshots are just the bomb for these things!)
  • the main central docker server would have to go down
  • get all hard disks ripped out
  • SSDs put in and properly configured
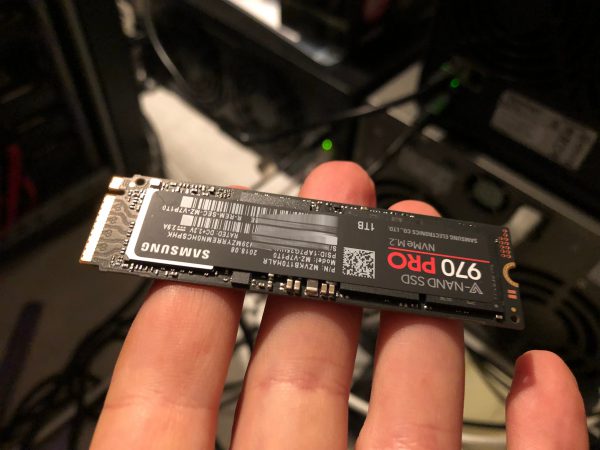
  • get a fresh Ubuntu 18.04 LTS set-up and booting from ZFS on a NVMe SSD (bios update(s)!, secure boot disabling, ahci enabling, m.2 instead of sata express switching…you get the idea)
  • get the network set-up in order: upgrading from Ubuntu 16.04 to 18.04 means ifupdown networking was replaced by netplan. Hurray! Not.
  • get docker-ce and docker-compose ready and set-up and all these funky networkings aligned – figure out in this that there are major issues with IPv6 in docker currently.
  • pull in the small number of still needed mechanical hard disks and import the ZFS pools
  • start the docker builds from the backup (one script \o/)
  • start the docker containers in their required order (one script \o/)

Apart from some hardware/bios related issues and the rather unexpected netplan introduction everything went fairly good. It just takes ages to see data copied.

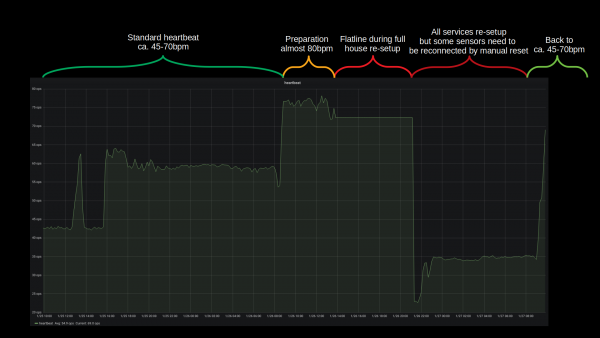
the “heartbeat” is a general term in our house for busy everything is. It’s an artificial value calculated from sensor inputs/s and actions taken and so on. Good indication if there are issues. During the time of maintenance (organge/red) it hasn’t been updated and was stuck at the pre-given value.

Bandwidth was the only real issue with this disaster recovery. All building blocks seemed to fall into place and no unplanned measure had to be taken. The house systems went partially down at around 12:30 and were back up 10 hours later 22:00. Of course non-automated things like internet kept working and all switches were only manual push-buttons. So everything could be done still but with a lot less convenience.

All in all there are more than 40 vital docker container based services that get started one after the other and interconnect to deliver a full house home automation. With the added SSD performance this whole ship is much much more responsive to activities. And hopefully less prone to mechanical defects.

Backup and Disaster-Preparations showed to be practical and working well. There was no beat missed (except sensor measure values during the 10 hours downtime) and no data lost.

Core i3 with 3.7 Ghz and 32 Gbyte RAM is sufficient and tuned for power consumption

What could be done better: It could be much more straight forward when there were less dependencies on external repositories / docker-hub. Almost all issues that came up with containers where from the fact that the maintainers had just a day before introduced something that kept them from spinning up naturally. Bad luck. But that can be helped! There’s now a multi-page disaster-recovery-procedure document that will be used and updated in the future.

Oh and what speeds am I seeing? The promissed 3 Gbyte/s read and write speeds are real. It’s quite impressive to see 4-digit megabyte/s values in iotop frequently.

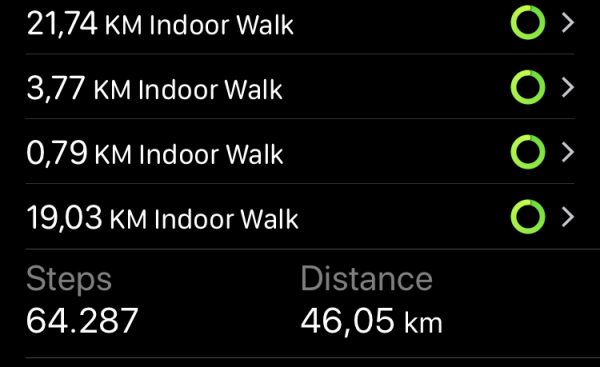
I almost forgot! During this exercise I had been in the server room less than 30 minutes. But I was on a warm and nice work-desk set-up I am using in the house as much as I can – and I will tell you about it in another article. But the major feature of this work-desk set-up is that it is (a) a standing desk and (b) has a treadmill under it. Yes. Treadmill.

You will get pictures of the set-up in that mentioned article, but since I had spent more than 10 hours walking on saturday doing the disaster recovery I want to give you a glimpse of what such a set-up means:

46 km while doing disaster recovery successfully.

hard drive reliability stats 2018

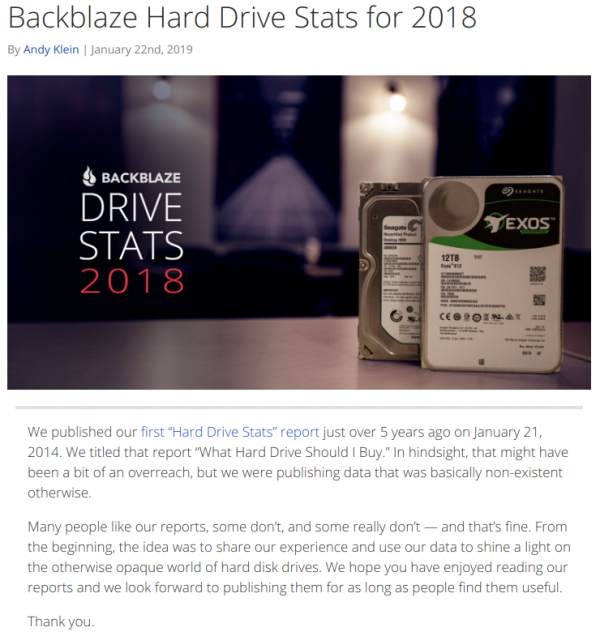
Backblaze is a company that offers cloud storage space and therefore operates a large amount of storage arrays.

In their own words:

As of December 31, 2018, we had 106,919 spinning hard drives. 

https://www.backblaze.com/blog/hard-drive-stats-for-2018/

This large amount of spinning disks means that there are also failing drives that stop spinning once every while. Backblaze saw the need to take note about what hard-drive series fails more of less often and started to generate a yearly report on the reliability of these hard drives.

Yesterday they published their report for 2018 – if you got storage requirements or if you are in the market to purchase storage space for your operation – it probably is very helpful to take a look at the report.

making your home smarter use case #13 – correlations happen

There are a lot of things that happen in the smart house that are connected somehow.

And the smart house knows about those events happening and might suggest, or even act upon the knowledge of them.

A simple example:

In our living room we’ve got a nice big aquarium which, depending on the time of the day and season, it is simulating it’s very own little dusk-till-dawn lightshow for the pleasure of the inhabitants.
Additionally the waterquality is improved by an air-pump generating nice bubbles and enriching the water with oxygen. But that comes a cost: When you are in the room those bubbles and the hissing sound of the inverter for the “sun” produces sounds that are distracting and disturbing to the otherwise quiet room.

Now the smart home comes to the rescue:

It detects that whenever someone is entering the room and staying for longer, or powering up the TV or listening to music. Also it will log that regularly when these things happen also the aquarium air and maybe lights are turned off. Moreso they are turned back on again when the person leaves.

These correlations are what the smart house is using to identify groups of switches, events and actions that are somehow tied together. It’ll prepare a report and will recommend actions which at the push of a button can become a routine task always being executed when certain characteristics are lining up.

And since the smart house is a machine, it can look for correlations in a lot more dimensions a human could: Date, Time, Location, Duration, Sensor and Actor values (power up TV, Temperature in room < 22, Calendar = November, Windows closed => turn on the heating).

“making your home smarter” – use case #12 – How much time do I have until…?

Did you notice that most calendars and timers are missing an important feature. Some information that I personally find most interesting to have readily available.

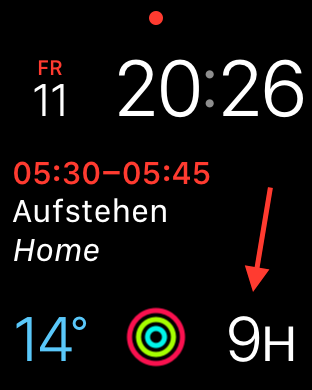
It’s the information about how much time is left until the next appointment is coming up. Even smartwatches, which should should be jack-of-all-trades in regards of time and schedule, do not display the “time until the next event”.

Now I came across this shortcoming when I started to look for this information. No digital assistant can tell me right away how much time until a certain event is left.

But the connected house also is based upon open technologies, so one can add these kind of features easily ourselves. My major use cases for this are (a) focussed work, plan quick work-out breaks and of course making sure there’s enough time left to actually get enough sleep.

As you can see in the picture attached my watch will always show me the hours (or minutes) left until the next event. I use separate calendars for separate displays – so there’s actually one for when I plan to get up and do work-outs.

Having the hours left until something is supposed to happen at a glance – and of course being able to verbally ask through chat or voice in any room of the house how long until the next appointment gives peace of mind :-).


“making your home smarter”, use case #10 – Fire and Water alarm system

Water! Fire! Whenever one of those are released uncontrolled inside the house it might mean danger to life and health.

Having a couple of fish and turtle tanks spread out in the house and in addition a server rack in the basement it’s important to know when there’s a leak of water at moments notice.

As the server-room also is housing some water pumps for a well you got all sorts of dangers mixed in one location: Water and Fire hazard.

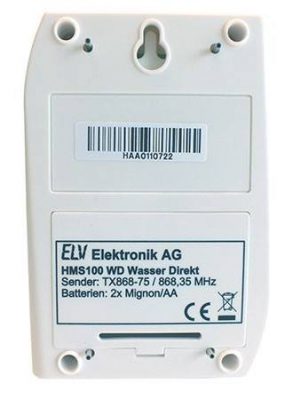
To detect water leaks all tanks and the pumps for the well are equipped with water sensors which send out an alerting signal as soon as water is detected. This signal is picked up and pushed to MQTT topics and from there centrally consumed and reacted upon.

Of course the server rack is above the water level so at least there is time to send out alerts while even power is out for the rest of the house (all necessary network and uplink equipment on it’s own batteries).

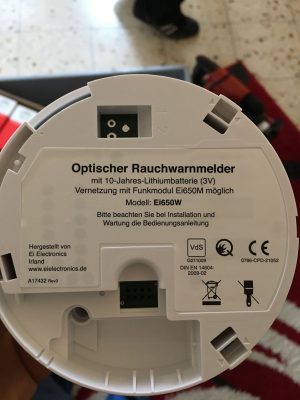
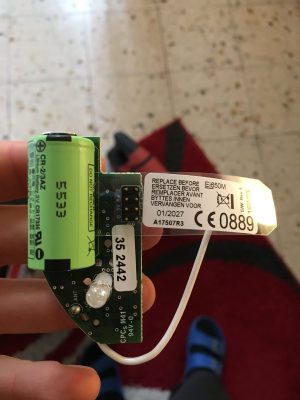
For alerting when there is smoke or a fire, the same logic applies. But for this some loud-as-hell smoke detectors are used. The smoke detectors interconnect with each other and make up a mesh for alerting. If one goes off. All go off. One of them I’ve connected to it’s very own ESP8266 which sends a detected signal to another MQTT topic effectively alerting for the event of a fire.

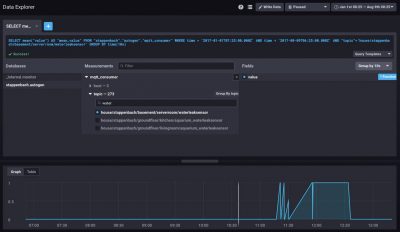
In one of the pictures you can see what happened when the basement water detector did detect water while the pump was replaced.

“making your home smarter”, use case #9 – weights about to drop

A lot of things in a household have weight, and knowing it’s weight might be crucial to health and safety.

Some of those weight applications might tie into this:

– your own body weight over a longer timespan
– the weight of your pets, weighed automatically (like on a kitty litter box)
– the weight of food and ingredients for recipes as well as their caloric and nutrition values
– keeping track of fill-levels on the base of weights

All those things are easily done with connected devices measuring weights. Like the kitty-litter box at our house weighing our cat every time. Or the connected kitchen-scale sending it’s gram measurements into an internal MQTT topic which is then displayed and added more smarts through an App on the kitchen-ipad consuming that MQTT messages as well as allowing recipe-weigh-in functions.

It’s not only surveillance but pro-active use. There are beekeepers who monitor the weight of their bee hives to see what’s what. You can monitor all sorts of things in the garden to get more information about it’s wellbeing (any plants, really).

“making your home smarter”, use case #8 – it’s all about the power consumption

Weekend is laundry time! The smart house knows and sends out notifications when the washing machine or the laundry dryer are done with their job and can be cleared.

Of course this can all be extended with more sensory data, like power consumption measurements at the actual sockets to filter out specific devices much more accurate. But for simple notification-alerting it’s apparently sufficient to monitor just at the houses central power distribution rack.

On the sides this kind of monitoring and pattern-matching is also useful to identify devices going bad. Think of monitoring the power consumption of a fridge. When it’s compressor goes bad it’s going to consume an increasing amount of power over time. You would figure out the malfunction before it happens.

Same for all sorts of pumps (water, oil, aquarium,…).

All this monitoring and pattern matching the smart house does so it’s inhabitants don’t have to.

“make your home smarter”, use case #7 – hear that doorbell ringing!

We love music. We love it playing loud across the house. And when we did that in the past we missed some things happening around.

Like that delivery guy ringing the front doorbell and us missing an important delivery.

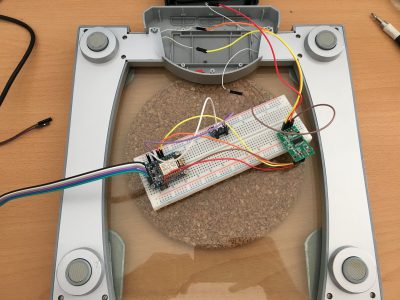
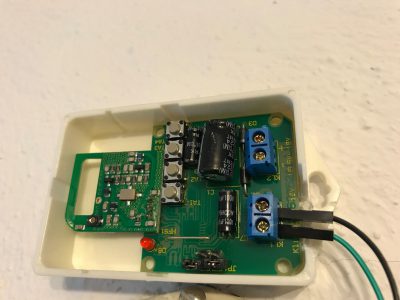
This happened a lot. UNTIL we retrofitted a little PCB to our doorbell circuit to make the house aware of ringing doorbells.

Now everytime the doorbell rings a couple of things can take place.

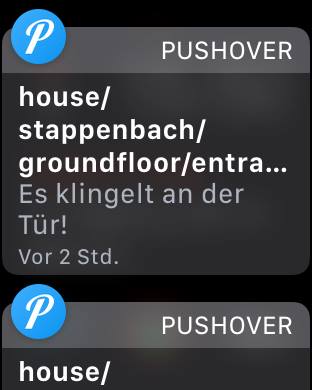
– push notifications to all devices, screens, watches – that wakes you up even while doing workouts
– pause all audio and video playback in the house
– take a camera shot of who is in front of the door pushing the doorbell

And: It’s easy to wire up things whatever those may be in the future.

“make your home smarter”, use case #5 – the submarine light (it’s red!)

We all know it: After a long day of work you chilled out on your bean bag and fell asleep early. You gotta get up and into your bed upstairs. So usually light goes on, you go upstairs, into bed. And there you have it: You’re not sleepy anymore.

Partially this is caused by the light you turned on. If that light is bright enough and has the right color it will wake you up no matter what.

To fight this companies like Apple introduced things like “NightShift” into iPhones, iPads and Macs.

“Night Shift uses your computer’s clock and geolocation to determine when it’s sunset in your location. It then automatically shifts the colors in your display to the warmer end of the spectrum.”

Simple, eh?. Now why does your house not do that to prevent you being ripped out of sleepy state while tiptoeing upstairs?

Right! This is where the smart house will be smart.

Nowadays we’ve got all those funky LED bulbs that can be dimmed and even their colours set. Why none of those market offerings come with that simple feature is beyond me:

After sunset, when turned on, default dim to something warmer and not so bright in general.

I did implement and it’s called appropriately the “U-Boot light”. Whenever we roam around the upper floor at night time, the light that follows our steps (it’s smart enough to do that) will not go full-blast but light up dim with redish color to prevent wake-up-calls.

The smart part being that it will take into account:

– movement in the house
– sunset and dawn depending on the current geographic location of the house (more on that later, no it does not fly! (yet))
– it’ll turn on and off the light according to the path you’re walking using the various sensors around anyways

smart home use case #4 – being location aware is important

Now that you got your home entertainment reacting to you making a phone call (use case #1) as well as your current position in the played audiobook (use case #3) you might want to add some more location awareness to your house.

If your house is smart enough to know where you are, outside, inside, in what room, etc. – it might as well react on the spot.

So when you leave/enter the house:

– turn off music playing – pause it and resume when you come back
– shutdown unnecessary equipment to limit power consumption when not used and start-back up to the previous state (tvs, media centers, lights, heating) when back
– arm the cameras and motion sensors 
– start to run bandwidth intense tasks when no people using resources inside the house (like backing up machines, running updates)
– let the roomba do it’s thing
– switch communication coming from the house into different states since it’s different for notifications, managing lists and spoken commands and so on.

There’s a lot of things that that benefit from location awareness.

Bonus points for outside house awareness and representing that like a “Weasly clock”…“xxx is currently at work”.

Bonus points combo breaker for using an open-source service like Miataru (http://miataru.com/#tabr3) for location tracking outside the house.

carbon neutral house – when the sun is shining.

7 day and 30 day graphs for solar power generation, power consumption, oil burn to heat water and outside temperatures to go along with.

Having everything in a time-series-database makes such things a real blast… data wandering around all the telemetry. There are almost 300 topics to pick from and combine.

Yes, generally the solar array produces more than the whole household consumes. Except that one 26th.

Thinking about building a display showing when we are closing in to consume what has been produced in terms of electricity… something like a traffic light getting more red towards the use-up of electricity generated carbon-neutral.

How to weigh your cat! – the IoT version

This is Leela. She is a 7 year old lilac white British short hair cat that lives with us. Leela had a sister who used to live with us as well but she developed a heart condition and passed away last year. Witnessing how quickly such conditions develop and evaluate we thought that we can do something to monitor Leelas health a bit to just have some sort of pre-alert if something is changing.

Kid in a Candystore

As this Internet of Things is becoming a real thing these days I found myself in a candy store when I’ve encountered that there are a couple of really really cheap options to get a small PCB with input/output connectors into my house WiFi network.

One of the main actors of this story is the so called ESP8266. A very small and affordable system-on-a-chip that allows you to run small code portions and connect itself to a wireless network. Even better it comes with several inputs that can be used to do all sorts of wonderful things.

And so it happened that we needed to know the weight of our cat. She seemed to get a bit chubby over time and having a point of reference weight would help to get her back in shape. If you every tried to weigh a cat you know that it’s much easier said than done.

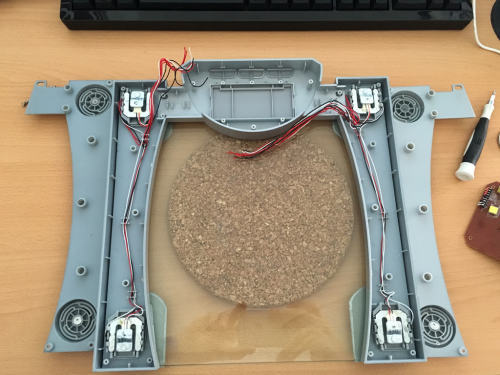
The alternative was quickly brought up: Build a WiFi-connected scale to weigh her litter box every time she is using it. And since I’ve recently bought an evaluation ESP8266 I just had to figure out how to build a scale. Looking around the house I’ve found a broken human scale (electronics fried). Maybe it could be salvaged as a part donor?

A day later I’ve done all the reading on that there is a thing called “load-cell”. Those load cells can be bought in different shapes and sizes and – when connected to a small ADC they deliver – well – a weight value.

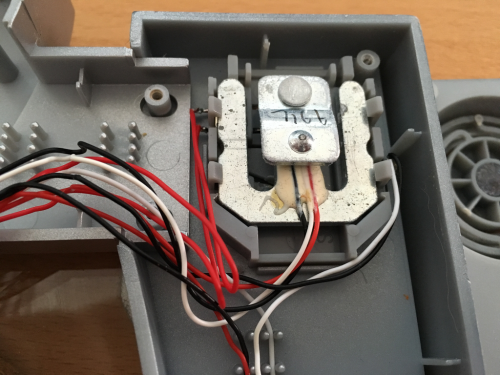
I cracked the human scale open and tried to see what was broken. It luckily turned out to have completely fried electronics but the load-cells where good to go.
Look at this load cell:
Hardware

That brought down the part list of this project to:

  • an ESP8266 – an Adafruit Huzzah in my case
  • a HX711 ADC board to amplify and prepare the signal from the load-cells
  • a human scale with just enough space in the original case to fit the new electronics into and connect everything.

The HX711 board was the only thing I had to order hardware wise – delivered the next day and it was a matter of soldering things together and throwing in a small Arduino IDE sketch.

My soldering and wiring skills are really sub-par. But it worked from the get-go. I was able to set-up a small Arduino sketch and get measurements from the load-cells that seemed reasonable.
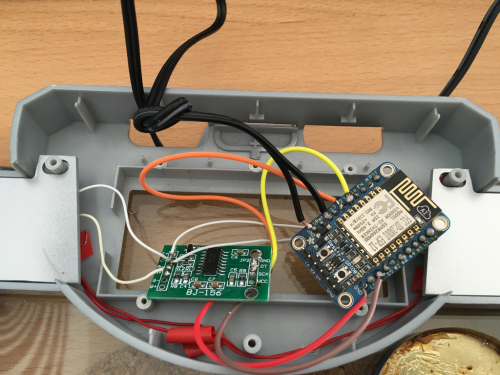
Now the hardware was all done – almost too easy. The software would be the important part now. In order to create something flexible I needed to make an important decision: How would the scale tell the world about it’s findings?

Software

Two basic options: PULL or PUSH?

Pull would mean that the ESP8266 would offer a webservice or at least web-server that exposes the measurements in one way or the other. It would mean that a client needs to poll for a new number in regular intervals.

Push would mean that the ESP8266 would connect to a server somewhere and whenever there’s a meaningful measurement done it would send that out to the server. With this option there would be another decision of which technology to use to push the data out.

Now a bit of history: At that time I was just about to re-implement the whole house home automation system I was using for the last 6 years with some more modern/interoperable technologies. For that project I’ve made the decision to have all events (actors and sensors) as well as some additional information being channeled into MQTT topics.

Let’s refer to Wikipedia on this:

“MQTT1 (formerly MQ Telemetry Transport) is an ISO standard (ISO/IEC PRF 20922) publish-subscribe-based “lightweight” messaging protocol for use on top of the TCP/IP protocol. It is designed for connections with remote locations where a “small code footprint” is required or the network bandwidth is limited. The publish-subscribe messaging pattern requires a message broker. Thebroker is responsible for distributing messages to interested clients based on the topic of a message. Andy Stanford-Clark and Arlen Nipper of Cirrus Link Solutions authored the first version of the protocol in 1999.”

Something build for oil-pipelines can’t be wrong for your house – can it?

So MQTT uses the notation of a “topic” to sub-address different entities within it’s network. Think of a topic as just a simple address like “house/litterbox/weight”. And with that topic MQTT allows you to set a value as well.

The alternative to MQTT would have been things like WebSockets to push events out to clients. The decision for the home-automation was done towards MQTT and so far it seems to have been the right call. More and more products and projects available are also focussing on using MQTT as their main message transport.

For the home automation I had already set-up a demo MQTT broker in the house – and so naturally the first call for the litterbox project was to utilize that.

The folks of Adafruit provide the MQTT library with their hardware and within minutes the scale started to send it’s measurements into the “house/litterbox/weight” topic of the house MQTT broker.

Some tweaking and hacking later the litterbox was put together and the actual litterbox set on-top.

Since Adafruit offers platform to also send MQTT messages towards and create neat little dashboards I have set-up a little demo dashboard that shows a selection of data being pushed from the house MQTT broker to the Adafruit.io MQTT broker.

These are the raw values which are sent into the weight topic:

You can access it here: https://io.adafruit.com/bietiekay/stappenbach

So the implementation done and used now is very simple. On start-up the ESP8622 initialises and resets the weight to 0. It’ll then do frequent weight measurements at the rate it’s configured in the source code. Those weight measurements are being monitored for certain criteria: If there’s a sudden increase it is assumed that “the cat entered the litterbox”. The weight is then monitored and averaged over time. When there’s a sudden drop of weight below a threshold that last “high” measurement is taken as the actual cat weight and sent out to a /weight topic on MQTT. The regular measurements are sent separately to also a configurable MQTT topic.

You can grab the very ugly source code of the Arduino sketch here: litterbox_sourcecode

And off course with a bit of logic this would be the calculated weight topic:
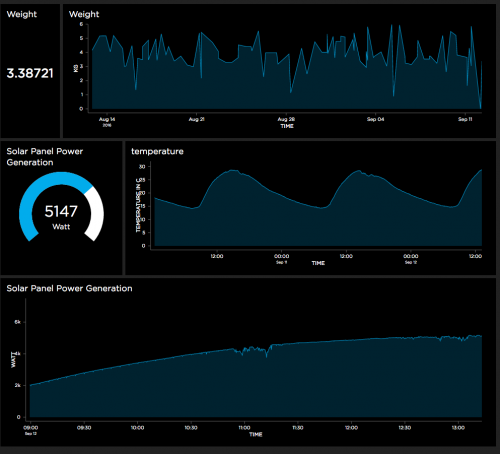
Of course it is not enough to just send data into MQTT topics and be done with it. Of course you want things like logging and data storage. Eventually we also wanted to get some sort of notification when states change or a measurement was taken.

MQTT, the cloud and self-hosted

Since MQTT is enabling a lot of scenarios to implement such actions I am going to touch just the two we are using for our house.

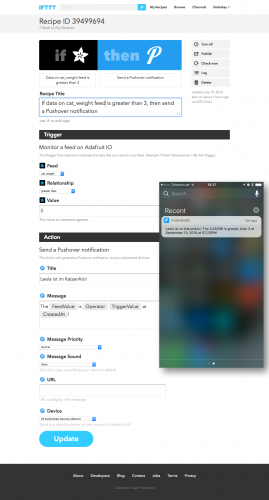
  1. We wanted to get a push notification to our phones whenever a weight measurement was taken – essentially whenever the cat has done something in the litterbox. The easiest solution: Set-Up a recipe on If This Than That (IFTTT) and use PushOver to send out push notifications to whatever device we want.
  2. To log and monitor in some sort of a dashboard the easiest solution seemed to be Adafruits offer. Of course hosted inside our house a combination of InfluxDB to store, Telegraf to gather and insert into InfluxDB and Chronograf to render nice graphs was the best choice.

Since most of the above can be done in the cloud (as of: outside the house with MQTT being the channel out) or inside the house with everything self-hosted. Some additional articles will cover these topics on this blog later.

There’s lots of opportunity to add more logic but as far as our experiments and requirements go we are happy with the results so far – we now regularly get a weight and the added information of how often the cat is using her litterbox. Especially for some medical conditions this is quite interesting and important information to have.

I wish there was: cheap network microphones with open source speech recognition

I was on a business trip the other day and the office space of that company was very very nice. So nice that they had all sorts of automation going on to help the people.
For example when you would run into a room where there’s no light the system would light up the room for you when it senses your presence. Very nice!

There was some lag between me entering the room, being detected and the light powering up. So while running into a dark room, knowing I would be detected and soon there would be light, I shouted “Computer! Light!” while running in.

That StarTrek reference brought an old idea back that it would be so nice to be able to control things through omnipresent speech recognition.

I am aware that there’s Siri, Cortana, Google Now. But those things are creepy because they involve external companies. If there are things listening to me all day every day, I want them to be within the premise of the house. I want to know exactly down to the data flow what is going on and sent where. I do not want to have this stuff leave the house at any times. Apart from that those services are working okayish but well…

Let alone the hardware. Usually the existing assistants are carried around in smart phones and such. Very nice if you want to touch things prior to talking to them. I don’t want to. And no, “Hey Siri!” or “OK Google” is not really what I mean. Those things are not sophisticated enough yet. I was using “Hey Siri!” for less than 24 hours. Because in the first night it seemed to have picked up something going on while I was sleeping which made it go full volume “How can I help!” on me. Yes, there’s no “don’t listen when I am sleeping” thing. Oh it does not know when I am sleeping. Well, you see: Why not?

Anyway. What I wish there was:

  • cheap hardware – a microphone(-array) possibly to put into every room. It either needs to have WiFi or LAN. Something that connects it to the network. A device that is carried around is not enough.
  • open source speech recognition – everything that is collected by the microphone is processed through an open source speech recognition tool. Full text dictation is a bonus, more importantly heavy-duty command recognition and simple interactions.
  • open source text to speech – to answer back, if wanted

And all that should be working on a basic level without internet access. Just like that.

So? Any volunteers?

when you’re working late: grant your eyes a rest

“Ever notice how people texting at night have that eerie blue glow?

Or wake up ready to write down the Next Great Idea, and get blinded by your computer screen?

During the day, computer screens look good—they’re designed to look like the sun. But, at 9PM, 10PM, or 3AM, you probably shouldn’t be looking at the sun.

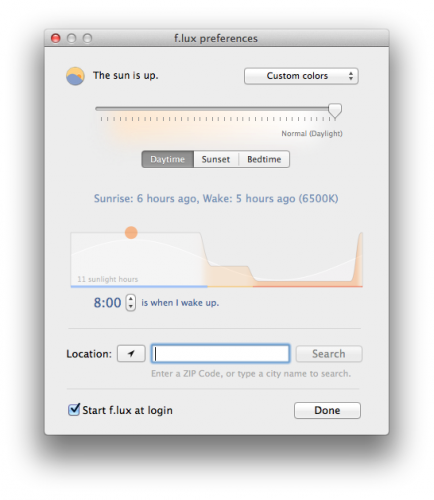
f.lux fixes this: it makes the color of your computer’s display adapt to the time of day, warm at night and like sunlight during the day.

It’s even possible that you’re staying up too late because of your computer. You could use f.lux because it makes you sleep better, or you could just use it just because it makes your computer look better.”

Bildschirmfoto 2014-09-27 um 12.58.33

Source: https://justgetflux.com/

When your VU+ DUO just shows a red light and does not start up

So it happened to one of the VU+ Duos in the house. After a clean shutdown it did not boot up as expected but instead just showed the red light. It still blinked on remote keypresses and the harddisk spun up. Nothing else happened with it.

So it was bricked.

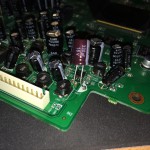
Reading the forums about that pointed to a capacitor on the board that quite regularly seems to fail. C807 is it’s name and it’s located near the Harddisk and the power-supply part of the VU+ Duo.

When I looked at the capacitor it did not seem to be faulty or anything. So without the right tools to measure I’ve decided to just give it a shot and replace the original 16V 220uF 85 degrees celsius capacitor with a 105 degrees celsius 16V 330uF one.

In my case I’ve taken out the board, to have a little bit of extra space, and cut of the old capacitor. Desoldering would be nicer looking but, well …

Replacing it on the left-over pins of the old capacitor was a matter of seconds.

After putting the board back in, the VU+ Duo powered up and booted as new. Brilliant!

Next step: Holodeck.

“The Infinadeck is the world’s first affordable omnidirectional treadmill that is designed to work both in augmented and virtual reality.  This revolutionary device provides the missing link making it now possible to have a true Holodeck experience. You might say, “Reality just got bigger”.”

[youtube]https://www.youtube.com/watch?v=GoVAOfU8UJQ[/youtube]

Source: http://www.infinadeck.com/

Nitrous – full IDE in your browser – with Collaboration!

“Nitrous is a backend development platform which helps software developers save time by cutting out the repetitive parts of creating development environments and automating them.

Once you create your first development environment, there are many features which will make development easier.”

Bildschirmfoto 2014-07-06 um 11.38.49

So what you’re getting is:

  • a virtual machine operated for you and set-up with a single click
  • A full-featured IDE in your browser
  • Code-Collaboration by inviting others to edit your project
  • a debugging environment in which you can test-run and work with your code

Here are some screenshots to get you a feel for it:

Source: https://www.nitrous.io/

Boblight Alternative: Hyperion

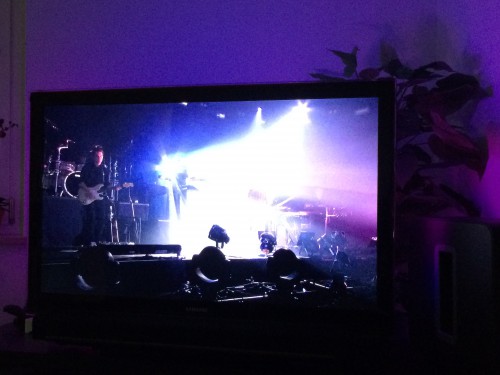
After setting up Boblight on two TVs in the house – one with 50 and one with 100 LEDs – I’ve used it for the last 5 months on a daily basis almost.

First of all now every screen that does not come with “added color-context” on the wall seems off. It feels like something is missing. Second of all it has made watching movies in a dark room much more enjoyable.

The only concerning factor of the past months was that the RaspberryPi does not come with a lot of computational horse-power and thus it has been operating at it’s limits all the time. With 95-99% CPU usage there’s not a lot of headroom for unexpected bitrate spikes and what-have-you.

So from time to time the Pis where struggling. With 10% CPU usage for the 50 LEDs and 19% CPU usage for the 100 LEDs set-up there was just not enough CPU power for some movies or TV streams in Full-HD.

Hyperion

So since even overclocking only slightly improved the problem of Boblight using up the precious CPU cycles for a fancy light-show I started looking around for alternatives.

“Hyperion is an opensource ‘AmbiLight’ implementation controlled using the RaspBerry Pi running Raspbmc. The main features of Hyperion are:

  • Low CPU load. For a led string of 50 leds the CPU usage will typically be below 1.5% on a non-overclocked Pi.
  • Json interface which allows easy integration into scripts.
  • A command line utility allows easy testing and configuration of the color transforms (Transformation settings are not preserved over a restart at the moment…).
  • Priority channels are not coupled to a specific led data provider which means that a provider can post led data and leave without the need to maintain a connection to Hyperion. This is ideal for a remote application (like our Android app).
  • HyperCon. A tool which helps generate a Hyperion configuration file.
  • XBMC-checker which checks the playing status of XBMC and decides whether or not to capture the screen.
  • Black border detector.
  • A scriptable effect engine.
  • Generic software architecture to support new devices and new algorithms easily.

More information can be found on the wiki or the Hyperion topic on the Raspbmc forum.”

Especially the Low CPU load did raise interest in my side.

Setting Hyperion up is easy if you just follow the very straight-forward Installation Guide. On Raspbmc the set-up took me 2 minutes at most.

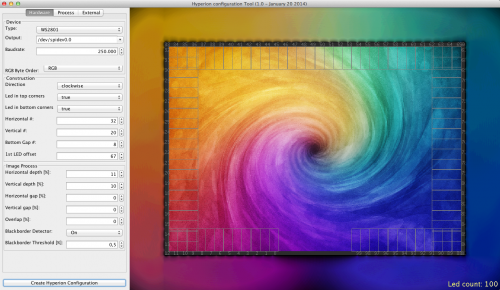
If you got everything set-up on the Pi you need to generate a configuration file. It’s a nice JSON formatted config file that you do not need to create on your own – Hyperion has a nice configuration tool. Hypercon:

Screen Shot 2014-06-28 at 08.52.51

So after 2 more minutes the whole thing was set-up and running. Another 15 minutes of tweaking here and there and Hyperion replaced Boblight entirely.

What have I found so far?

  1. Hyperions network interfaces are much more controllable than those from Boblight. You can use remote clients like on iPhone / Android to set colors and/or patterns.
  2. It’s got effects for screen-saving / mood-lighting!
  3. It really just uses a lot less CPU resources. Instead of 19% CPU usage for 100 LEDs it’s down to 3-4%. That’s what I call a major improvement
  4. The processing filters that you can add really add value. Smoothing everything so that you do not get bright flashed when content flashes on-screen is easy to do and really helps with the experience.

All in all Hyperion is a recommended replacement for boblight. I would not want to switch back.

Source 1: Setting up Boblight
Source 2: https://github.com/tvdzwan/hyperion/wiki/Installation

ZFS Tutorial

“ZFS is really the final word in filesystems. With a feature set longer than this tutorial, it can take a while to master. You can set many more options per dataset, enable disk usage quotes and much more. Once you’ve used it and seen the benefits, you’ll probably never want to use anything else. Hopefully this has been helpful to get you on your way to becoming a FreeBSD ZFS master.”

Source: http://www.bsdnow.tv/tutorials/zfs

setting up boblight with a Raspberry Pi and RaspBMC

Some might know AmbiLight – a great invention by Philips that projects colored light around a TV screen based upon the contents shown. It’s a great addition to a TV but naturally only available with Philips TV sets.

Not anymore. There are several open-source projects that allow you to build your very own AmbiLight clone. I’ve built one using a 50-LEDs WS2801 stripe, a 5V/10A power supply, a RaspberryPi, and the BobLight integration in RaspBMC (this is a nice XBMC distribution for the Pi).

Boblight is a collection of tools for driving lights connected to an external controller.

Its main purpose is to create light effects from an external input, such as a video stream (desktop capture, video player, tv card), an audio stream (jack, alsa), or user input (lirc, http). Boblight uses a client/server model, where clients are responsible for translating an external input to light data, and boblightd is responsible for translating the light data into commands for external light controllers.”

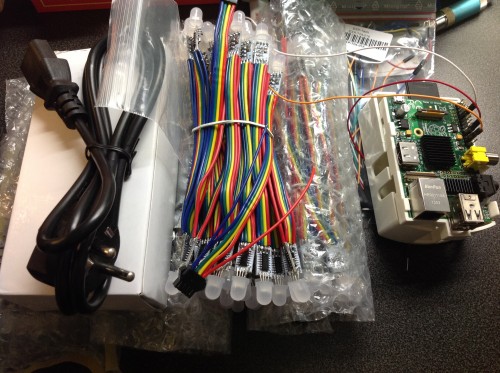
The hardware to start with looks like this:

pre_requisites

I’ve fitted some heat-sinks to the Pi since the additional load of controlling 50 LEDs will add a little bit of additional CPU usage which is desperately needed when playing Full HD High-Bitrate content.

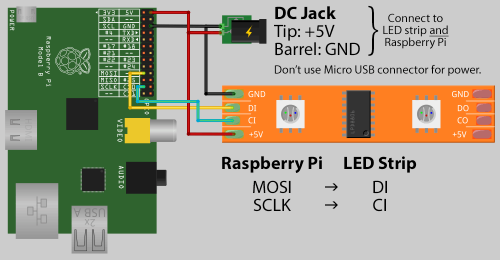
The puzzle pieces need to be put together as described by the very good AdaFruit diagram:

diagramAs you can see the Pi is powered directly through the GPIO pins. You’re not going to use the MicroUSB or the USB ports to power the Pi. It’s important that you keep the cables between the Pi and the LEDs as short as possible. When I added longer / unshielded cables everything went flickering. You do not want that – so short cables it is :-)

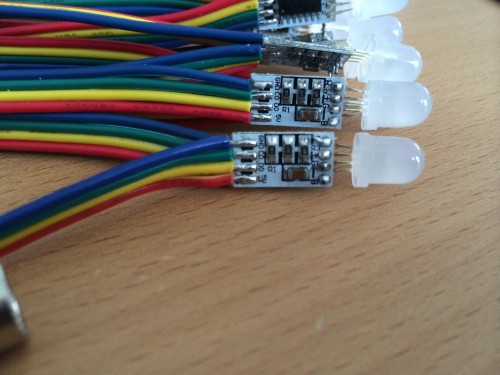
leds

When you look at aboves picture closely you will find a CO and DO on the PCB of the LED. on the other side of the PCB there’s a CI and DI. Guess what: That means Clock IN and Clock OUT and Data IN and Data OUT. Don’t be mistaken by the adapter cables the LED stripes comes with. My Output socket looked damn close to something I thought was an Input socket. If nothing seems to work on the first trials – you’re holding it wrong! Don’t let the adapters fitted by the manufacturer mislead you.

Depending on the manufacturer of your particular LED stripe there are layouts different from the above image possible. Since RaspBMC is bundled with Boblight already you want to use something that is compatible with Boblight. Something that allows Boblight to control each LED in color and brightness separately.

I opted for WS2801 equipped LEDs. This pretty much means that each LED sits on it’s own WS2801 chip and that chip takes commands for color and brightness. There are other options as well – I hear that LDP8806 chips also work with Boblight.

My power supply got a little big to beefy – 10 Amps is plenty. I originally planned to have 100 LEDs on that single TV. Each LED at full white brightness would consume 60mA  – which brings us to 6Amps for a 100 – add to that the 2 Amps for the PI and you’re at 8A. So 10A was the choice.

To connect to the Pi GPIO Pins I used simple jumper wires. After a little bit of boblightd compilation on a vanilla Raspbian SD card (how-to here). Please note that with current RaspBMC versions you do not need to compile Boblight yourself – I’ve just taken for debugging purposes as clean Raspbian Image and compiled it myself to do some boblight-constant tests. Boblight-constant is a tool that comes with Boblight which allows you to set all LEDs to one color.

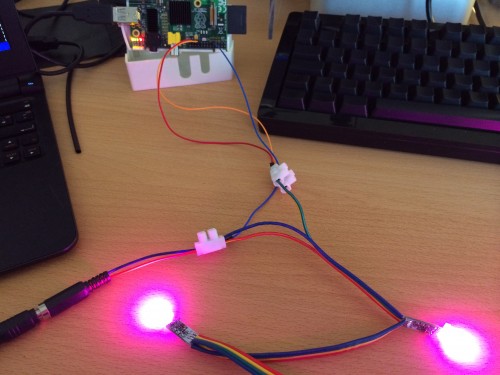
If everything is right, it should look like this:

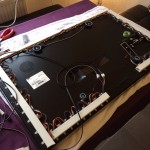
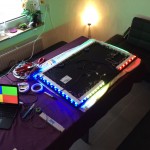
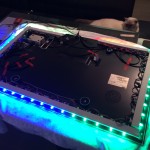
working_first_timeNow everything depends on how your LED stripes look like and how your TVs backside looks like. I wanted to fit my setup to a 42″ Samsung TV. This one already is fitted with a Ultra-Slim Wall mount which makes it pretty much sitting flat on the wall like a picture. I wanted the LEDs to sit right on the TVs back and I figured that cable channels when cut would do the job pretty nicely.

To get RaspBMC working with your setup the only things you need to do are:

  1. Enable Boblight support in the Applications / RaspBMC tool
  2. Login to your RaspBMC Pi through SSH with the user pi password raspberry and copy your boblight.conf file to /etc/boblight.conf.

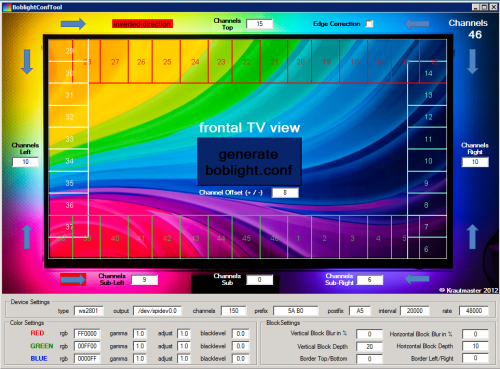
The configuration file can be obtained from the various tutorials that deal with the boblight configuration. You can choose the hard way to create a configuration or a rather easy one by using the boblight configuration tool.

I’ve used the tool :-)

Boblight Config ToolNow if everything went right you don’t have flickering, the TV is on the wall and you can watch movies and what-not with beautiful light effects around your TV screen. If you need to test your set-up to tweak it a bit more, go with this or this.

result_1

Source 1: http://en.wikipedia.org/wiki/Ambilight
Source 2: http://www.raspberrypi.org/
Source 3: https://code.google.com/p/boblight/
Source 4: http://www.raspbmc.com/
Source 5: http://learn.adafruit.com/light-painting-with-raspberry-pi/hardware
Source 6: How-To-Compile-Boblight
Source 7: Boblight Config Generator
Source 8: Boblight Windows Config Creation Tool
Source 9: Test-Video 1
Source 10: Test-Video 2

Instruction-less computing: Doing stuff with a CPU without actually executing instructions

Having fun with hardware is a good way to learn about the machines which soon will become our new overlords. With this pretty interesting presentation you can dive deep into what a CPU does and how it can be exploited to run code by not running it.

Trust Analysis, i.e. determining that a system will not execute some class of computations, typically assumes that all computation is captured by an instruction trace. We show that powerful computation on x86 processors is possible without executing any CPU instructions. We demonstrate a Turing-complete execution environment driven solely by the IA32 architecture’s interrupt handling and memory translation tables, in which the processor is trapped in a series of page faults and double faults, without ever successfully dispatching any instructions. The “hard-wired” logic of handling these faults is used to perform arithmetic and logic primitives, as well as memory reads and writes. This mechanism can also perform branches and loops if the memory is set up and mapped just right. We discuss the lessons of this execution model for future trustworthy architectures.

Bildschirmfoto 2013-11-02 um 01.04.31

Source 1: https://www.usenix.org/conference/woot13/page-fault-weird-machine-lessons-instruction-less-computation

when DVB-T is not interesting, use the hardware for fun and SDR!

SDR – or Software Defined Radio is relatively cheap and fun way to dive deeper into radio communication.

“Software-defined radio (SDR) is a radio communication system where components that have been typically implemented in hardware (e.g. mixers, filters, amplifiers, modulators/demodulators, detectors, etc.) are instead implemented by means of software on a personal computer or embedded system. While the concept of SDR is not new, the rapidly evolving capabilities of digital electronics render practical many processes which used to be only theoretically possible.” (Wikipedia)

So with cheap hardware it’s possible to receive radio transmissions on all sorts of frequencies and modulations. Since everything after the actual “receiving stuff”-phase happens in software the things you can do are sort of limitless.

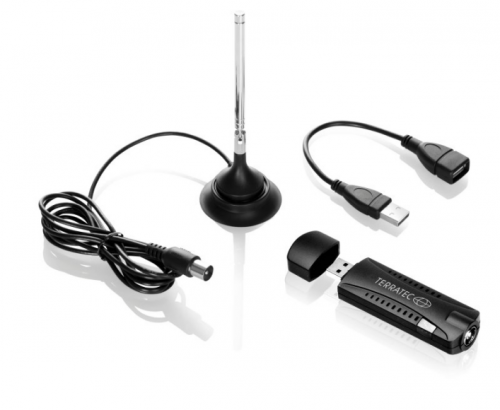
Now what about the relatively cheap factor? – The hardware you’re going to need to start with this is a DVB-T USB stick widely available for about 25 Euro. The important feature you’re going to look for is that it comes with a Realtek RTL2832U chip.

“The RTL2832U is a high-performance DVB-T COFDM demodulator that supports a USB 2.0 interface. The RTL2832U complies with NorDig Unified 1.0.3, D-Book 5.0, and EN300 744 (ETSI Specification). It supports 2K or 8K mode with 6, 7, and 8MHz bandwidth. Modulation parameters, e.g., code rate, and guard interval, are automatically detected.

The RTL2832U supports tuners at IF (Intermediate Frequency, 36.125MHz), low-IF (4.57MHz), or Zero-IF output using a 28.8MHz crystal, and includes FM/DAB/DAB+ Radio Support. Embedded with an advanced ADC (Analog-to-Digital Converter), the RTL2832U features high stability in portable reception.” (RealTek)

You’ll find this chip in all sorts of cheap DVB-T USB sticks like this one:

3948543_b6f7670bc7To use the hardware directly you can use open source software which comes pre-packaged with several important/widely used demodulator moduls like AM/FM. Gqrx SDR is available for all sorts of operating systems and comes with a nice user interface to control your SDR hardware.
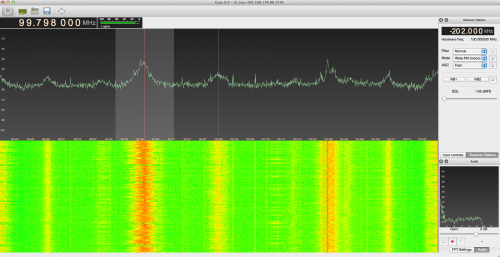
The neat idea about SDR is that you, depending on the capabilities of your SDR hardware, are not only tuned into one specific frequency but a whole spectrum several Mhz wide. With my device I get roughly a full 2 Mhz wide spectrum out of the device allowing me to see several FM stations on one spectrum diagram and tune into them individually using the demodulators:

Bildschirmfoto 2013-11-01 um 23.28.56The above screenshot shows the OS X version of Gqrx tuned into an FM station. You can clearly see the 3 stations that I can receive in that Mhz range. One very strong signal, one very weak and one sort of in the middle. By just clicking there the SDR tool decodes this portion of the data stream / spectrum and you can listen to a FM radio station.

Of course – since those DVB-T sticks come with a wide spectrum useable – mine comes with an Elonics E4000 tuner which allows me to receive – more or less useable – 53 Mhz to 2188 Mhz (with a gap from 1095 to 1248 Mhz).

Whatever your hardware can do can be tested by using the rtl_test tool:

root@berry:~# rtl_test -t
Found 1 device(s):
0:  Terratec T Stick PLUS

Using device 0: Terratec T Stick PLUS
Found Elonics E4000 tuner
Supported gain values (14): -1.0 1.5 4.0 6.5 9.0 11.5 14.0 16.5 19.0 21.5 24.0 29.0 34.0 42.0
Benchmarking E4000 PLL…
[E4K] PLL not locked for 52000000 Hz!
[E4K] PLL not locked for 2189000000 Hz!
[E4K] PLL not locked for 1095000000 Hz!
[E4K] PLL not locked for 1248000000 Hz!
E4K range: 53 to 2188 MHz
E4K L-band gap: 1095 to 1248 MHz

Interestingly when you plug the USB stick into an Raspberry Pi and you follow some instructions you can use the Raspberry Pi as an SDR server allowing you to place it on the attic while still sitting comfortably at your computer downstairs to have better reception.

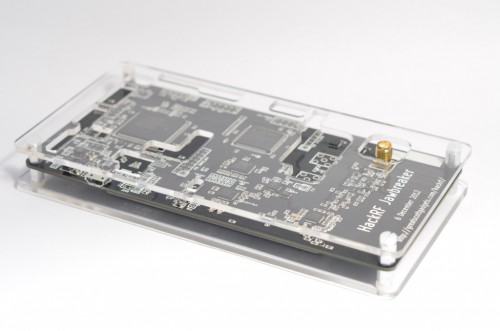
If you want to upgrade your experience with more professional hardware – and in fact if you got a sender license – you can take a look at the HackRF project which currently is creating a highly sophisticated SDR hardware+software solution:

jawbreaker-fd0-145436

Source 1: http://www.realtek.com.tw/products/productsView.aspx?Langid=1&PFid=35&Level=4&Conn=3&ProdID=257
Source 2: http://gqrx.dk/
Source 3: www.hamradioscience.com/raspberry-pi-as-remote-server-for-rtl2832u-sdr/
Source 4: http://ossmann.blogspot.de/2012/06/introducing-hackrf.html
Source 5: https://github.com/mossmann/hackrf