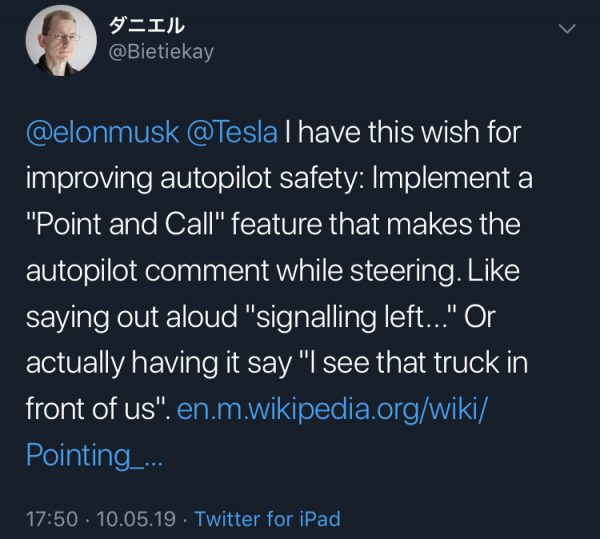
Tesla autopilot feature request
{Shan, Shui}* is inspired by traditional Chinese landscape scrolls (such as this and this) and uses noises and mathematical functions to model the mountains and trees from scratch. It is written entirely in javascript and outputs Scalable Vector Graphics (SVG) format.
https://github.com/LingDong-/shan-shui-inf
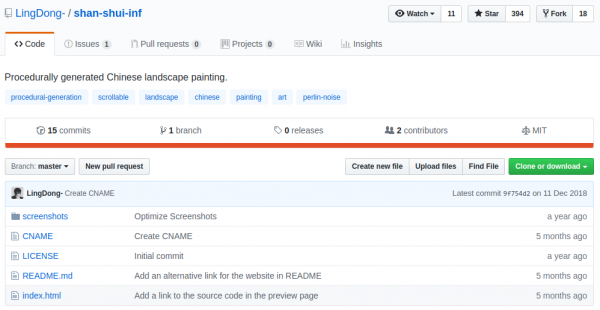
This is quite impressive and I am thinking about pushing that into the header of this blog :-) It’s just too nice looking to pass on.
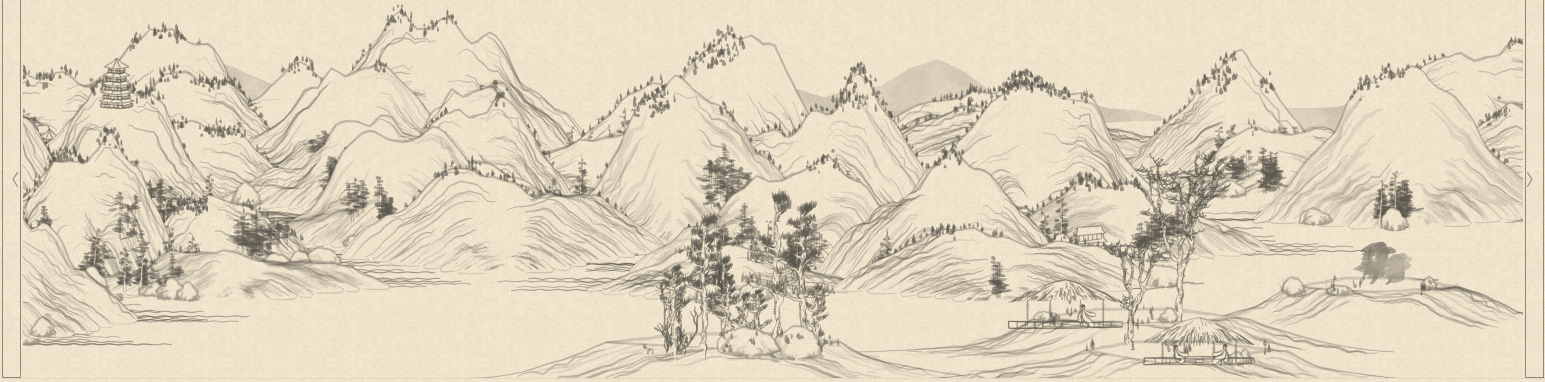
I ran a VVV job to catalog a storage array I have. To my surprise at least one file had a very very strange timestamp:
Apparently the file in question was generated on an action cam which had lost its correct date and time setting at the time of recording…
The tool I am using to catalogue the storages is also worth a mention:
VVV is an application that catalogs the content of removable volumes like CD and DVD disks for off-line searching. Folders and files can also be arranged in a single, virtual file system. Each folder of this virtual file system can contain files from many disks so you can arrange your data in a simple and logical way.
about VVV
VVV also stores metadata information from audio files: author, title, album and so on. Most audio formats are supported.
Artificial Intelligence is used more and more to achieve tasks only humans could do before. Especially in the areas that need a certain technique to be mastered AI goes above and beyond what humans would be able to do.
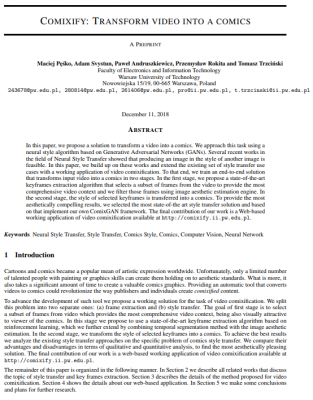
In this case a team has implemented something that takes video inputs and generates a comic strip from this input. Imagine it to look like this:
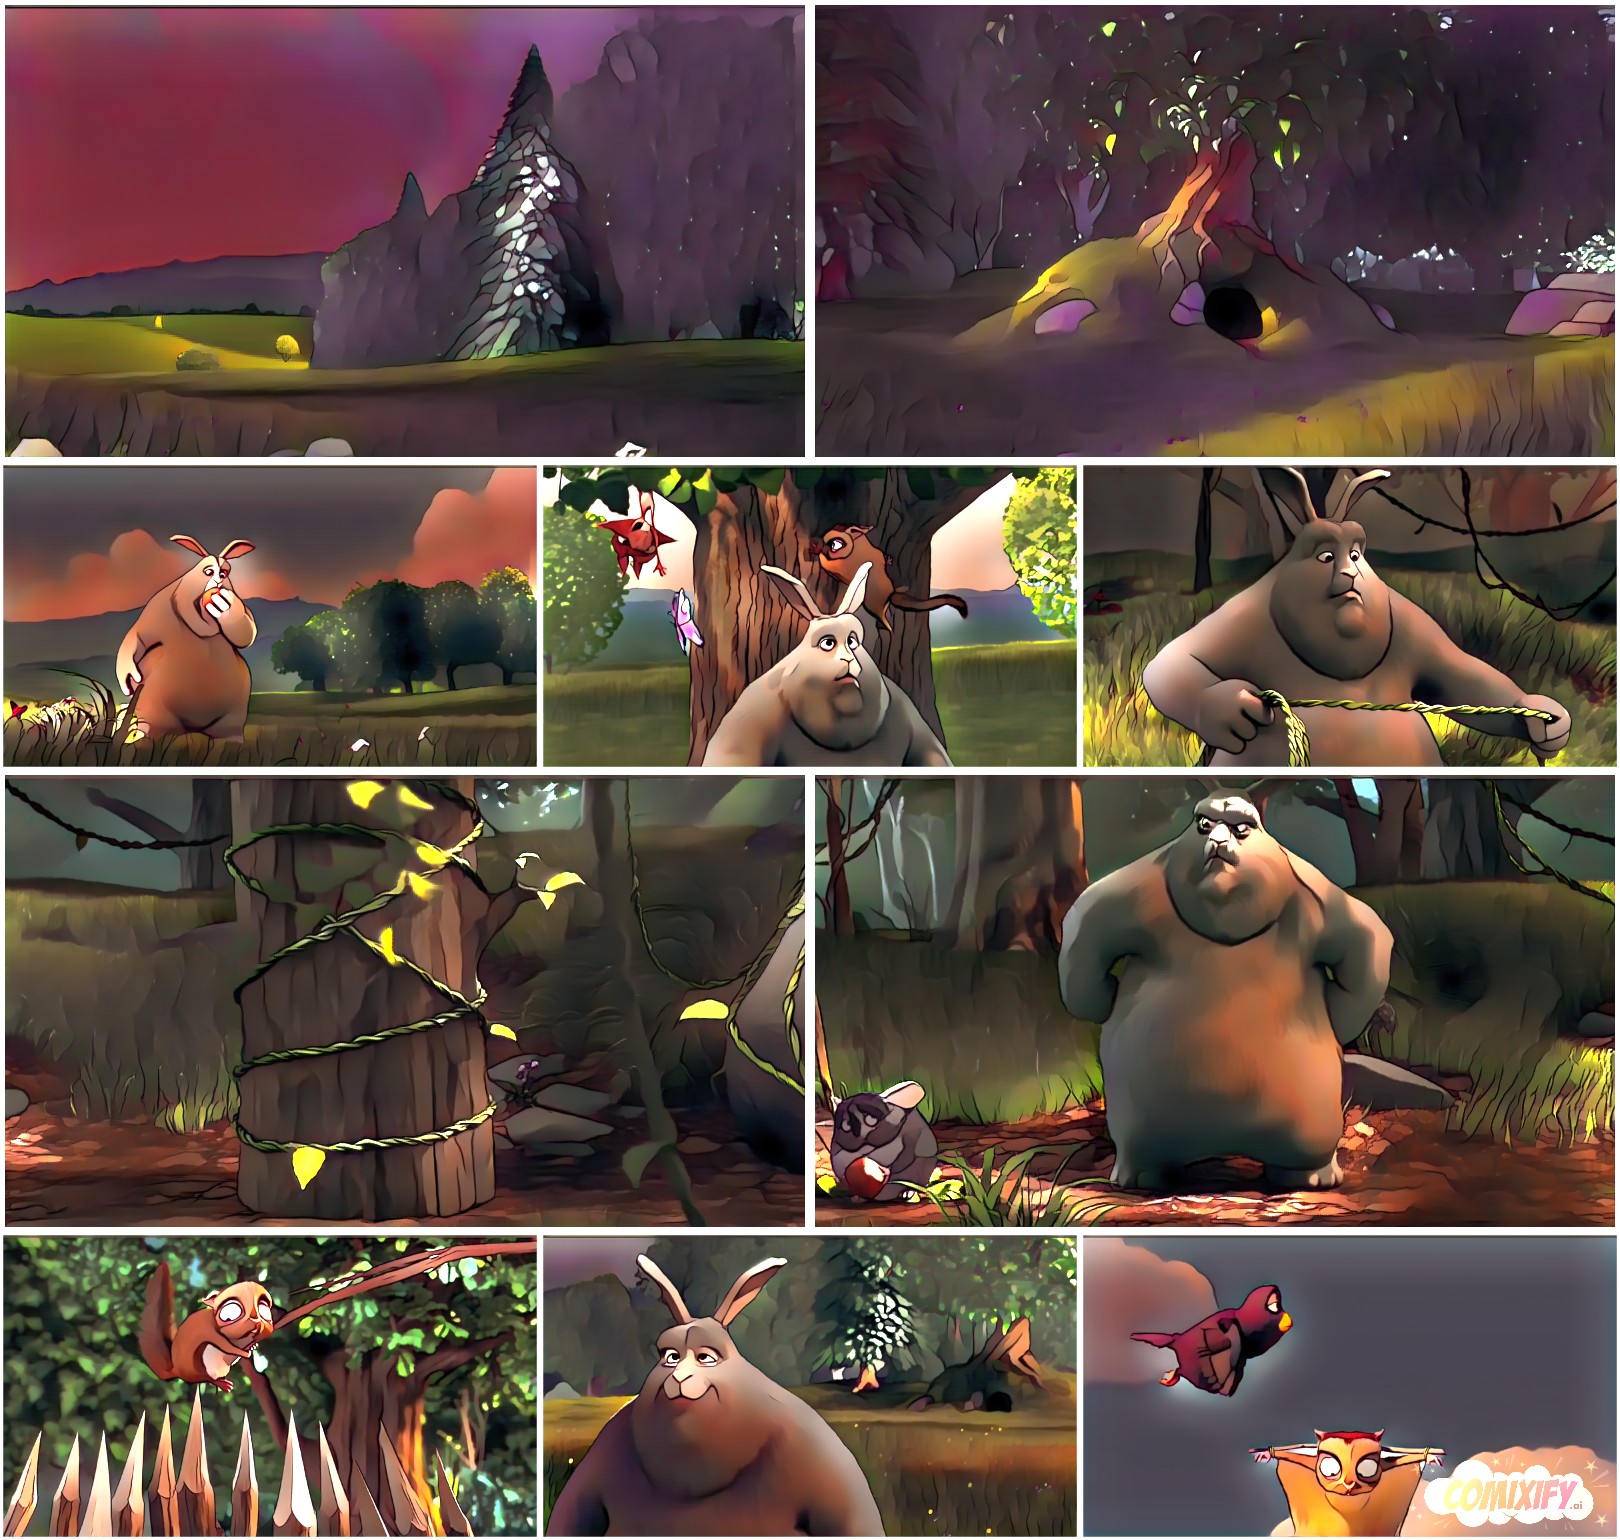
In this paper, we propose a solution to transform a video into a comics. We approach this task using a
Paper
neural style algorithm based on Generative Adversarial Networks (GANs).
They even made a nice website you can try it yourself with any YouTube Video you want:

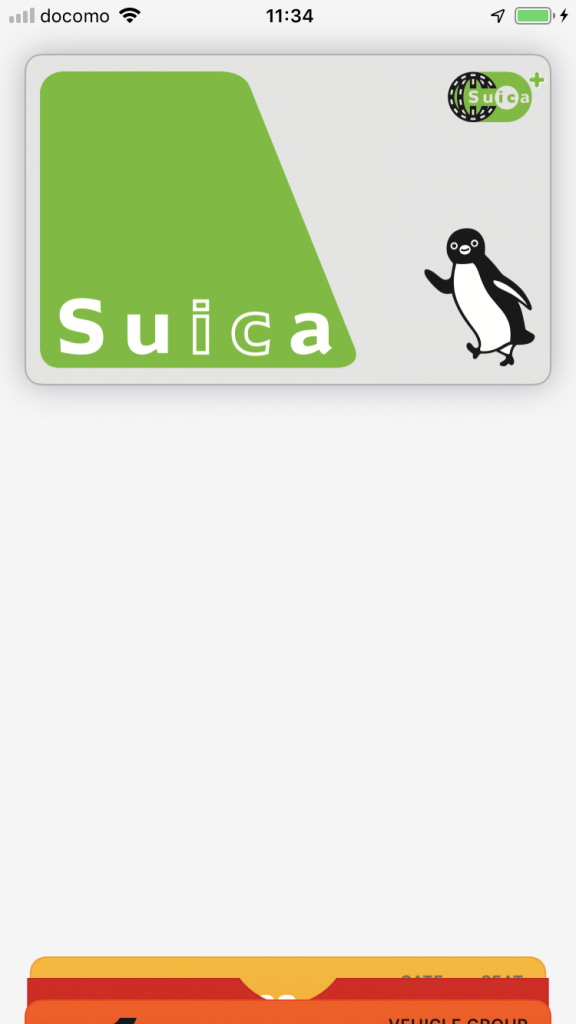
Suica (スイカ Suika) is a rechargeable contactless smart card, electronic money used as a fare card on train lines in Japan, launched on November 18, 2001. The card can be used interchangeably with JR West’s ICOCA in the Kansai region and San’yō region in Okayama, Hiroshima, and Yamaguchi Prefectures, and also with JR Central’s TOICA starting from spring of 2008, JR Kyushu’s SUGOCA, Nishitetsu’s Nimoca, and Fukuoka City Subway’s Hayakaken area in Fukuoka City and its suburb areas, starting from spring of 2010. The card is also increasingly being accepted as a form of electronic money for purchases at stores and kiosks, especially within train stations. As of October 2009, 30.01 million Suica are in circulation.
https://en.wikipedia.org/wiki/Suica
This time around we really made use of electronic payment and got around using cash whenever possible.
There where only a few occasions when we needed the physical credit card. Of course on a number of tourist spots further away from Tokyo centre cash was still king.
From my first trip to Japan to today a lot has changed and electronic payment was adopted very quickly. Compared to Germany: Lightning fast adoption in Japan!
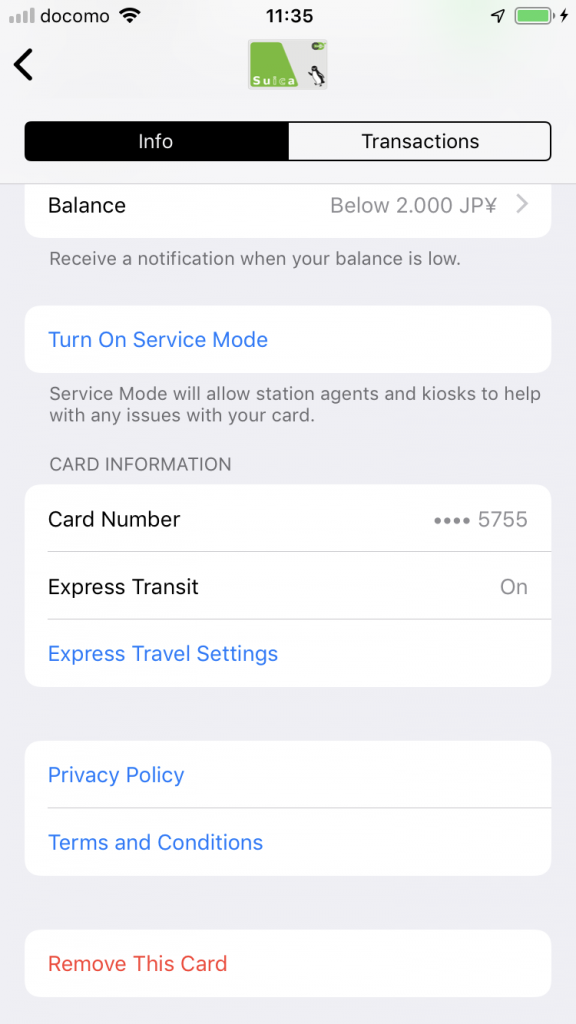
The single best thing that has happened recently in this regard was that Apple Pay got available in Germany earlier this year. With the iPhone and Watch supporting SUICA already (you can get a card on the phone/watch) the availability of Apple Pay bridged the gap to add money to the SUICA card on the go. As a visitor to Japan you would mostly top up the SUICA card in convenience stores and train stations and mostly by cash. With the Apple Pay method you simply transfer money in the app from your credit card to the SUICA in an instant.
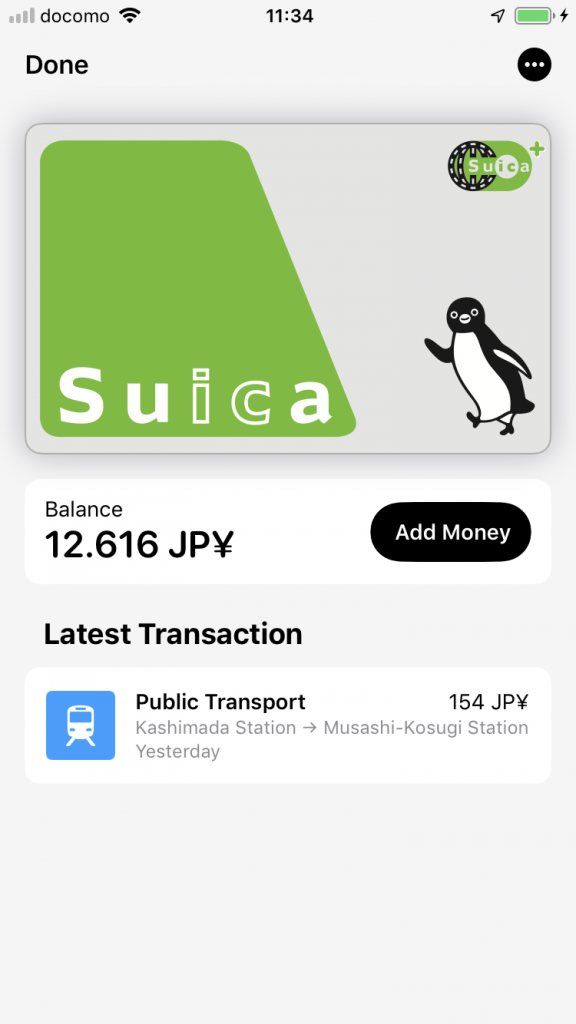
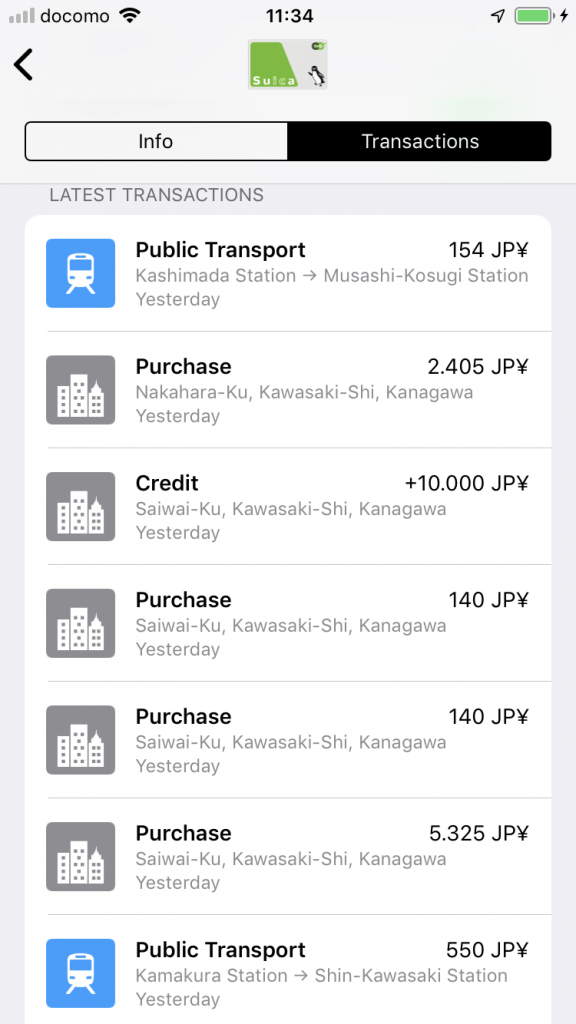

This whole electronic money concept is working end-2-end in Japan. Almost every shop takes it. You wipe your SUICA and be done. And not only for small amounts. Everything up to 20.000 JPY will work (about 150 Euro).
And when you run through a train station gate to pay for your trip it you hold your phone/watch up to the gate while walking past and this is it in realtime screen recorded:
I wish Germany would adopt this faster.
Oh, important fact: This whole SUICA thing is 100% anonymous. You get a card without giving out any information. You can top it up with cash without any link to you.
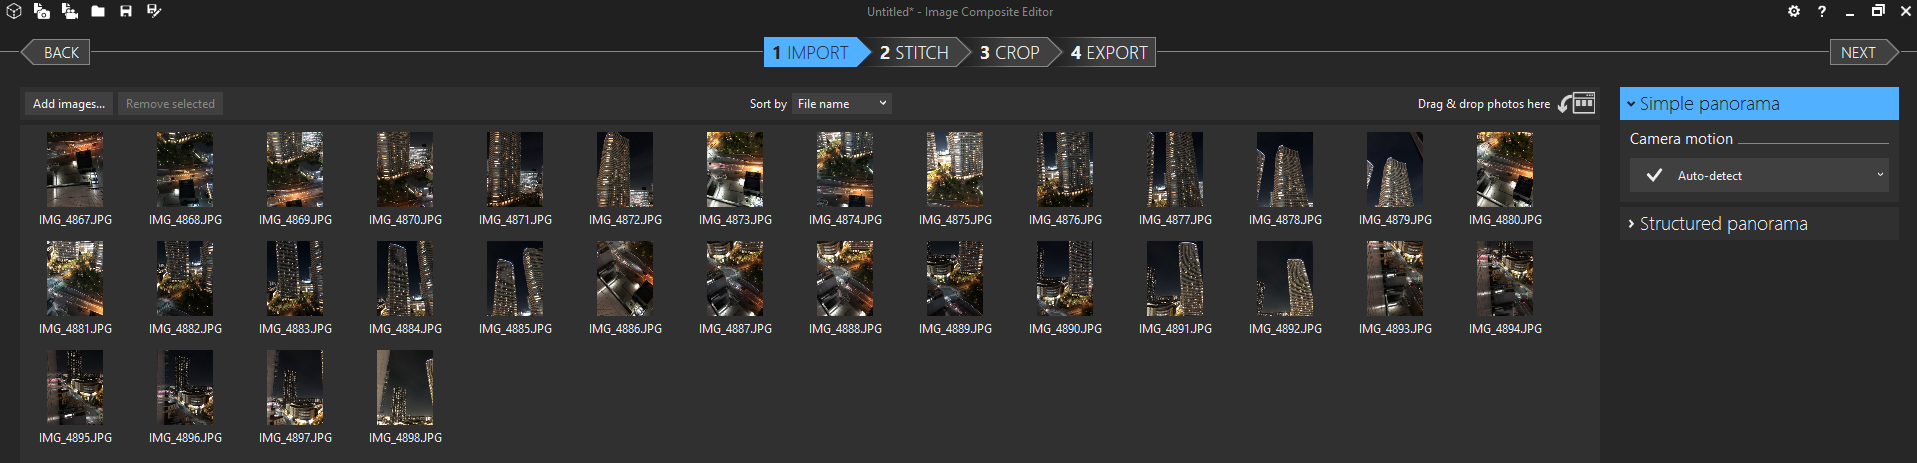
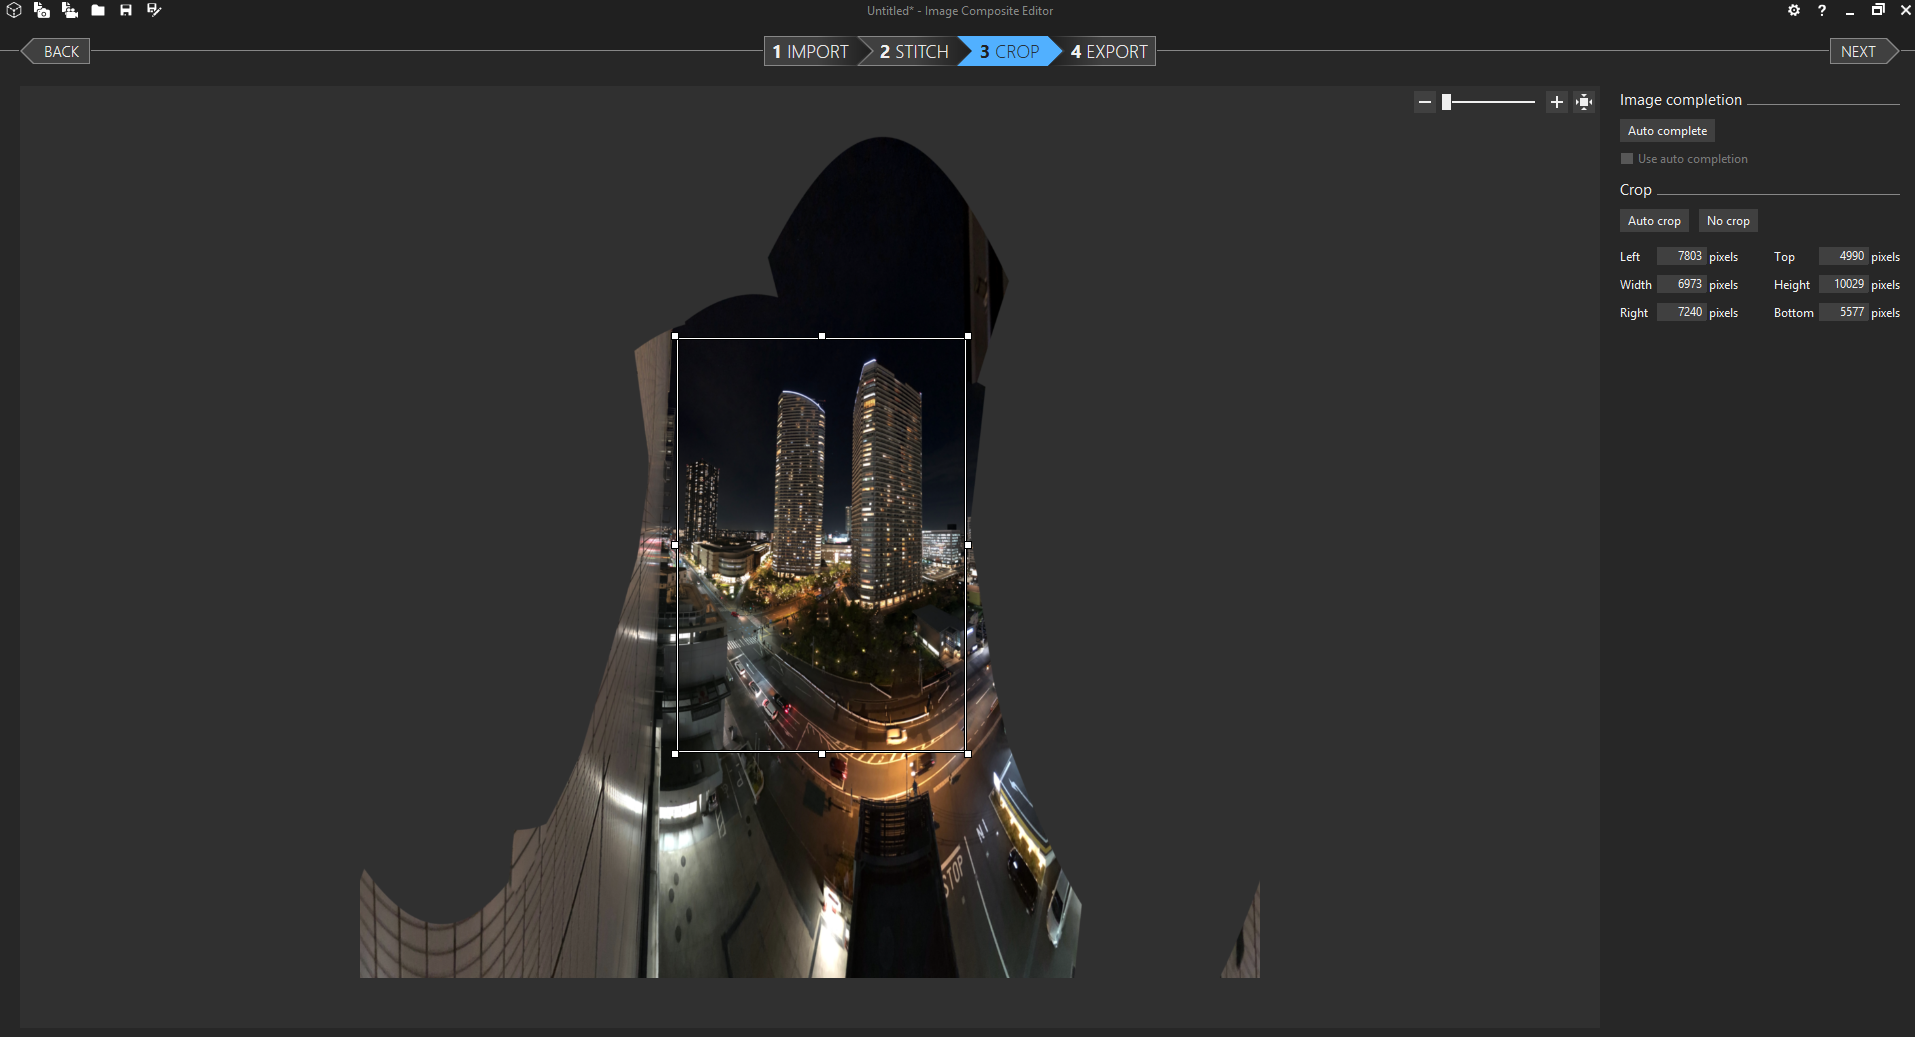
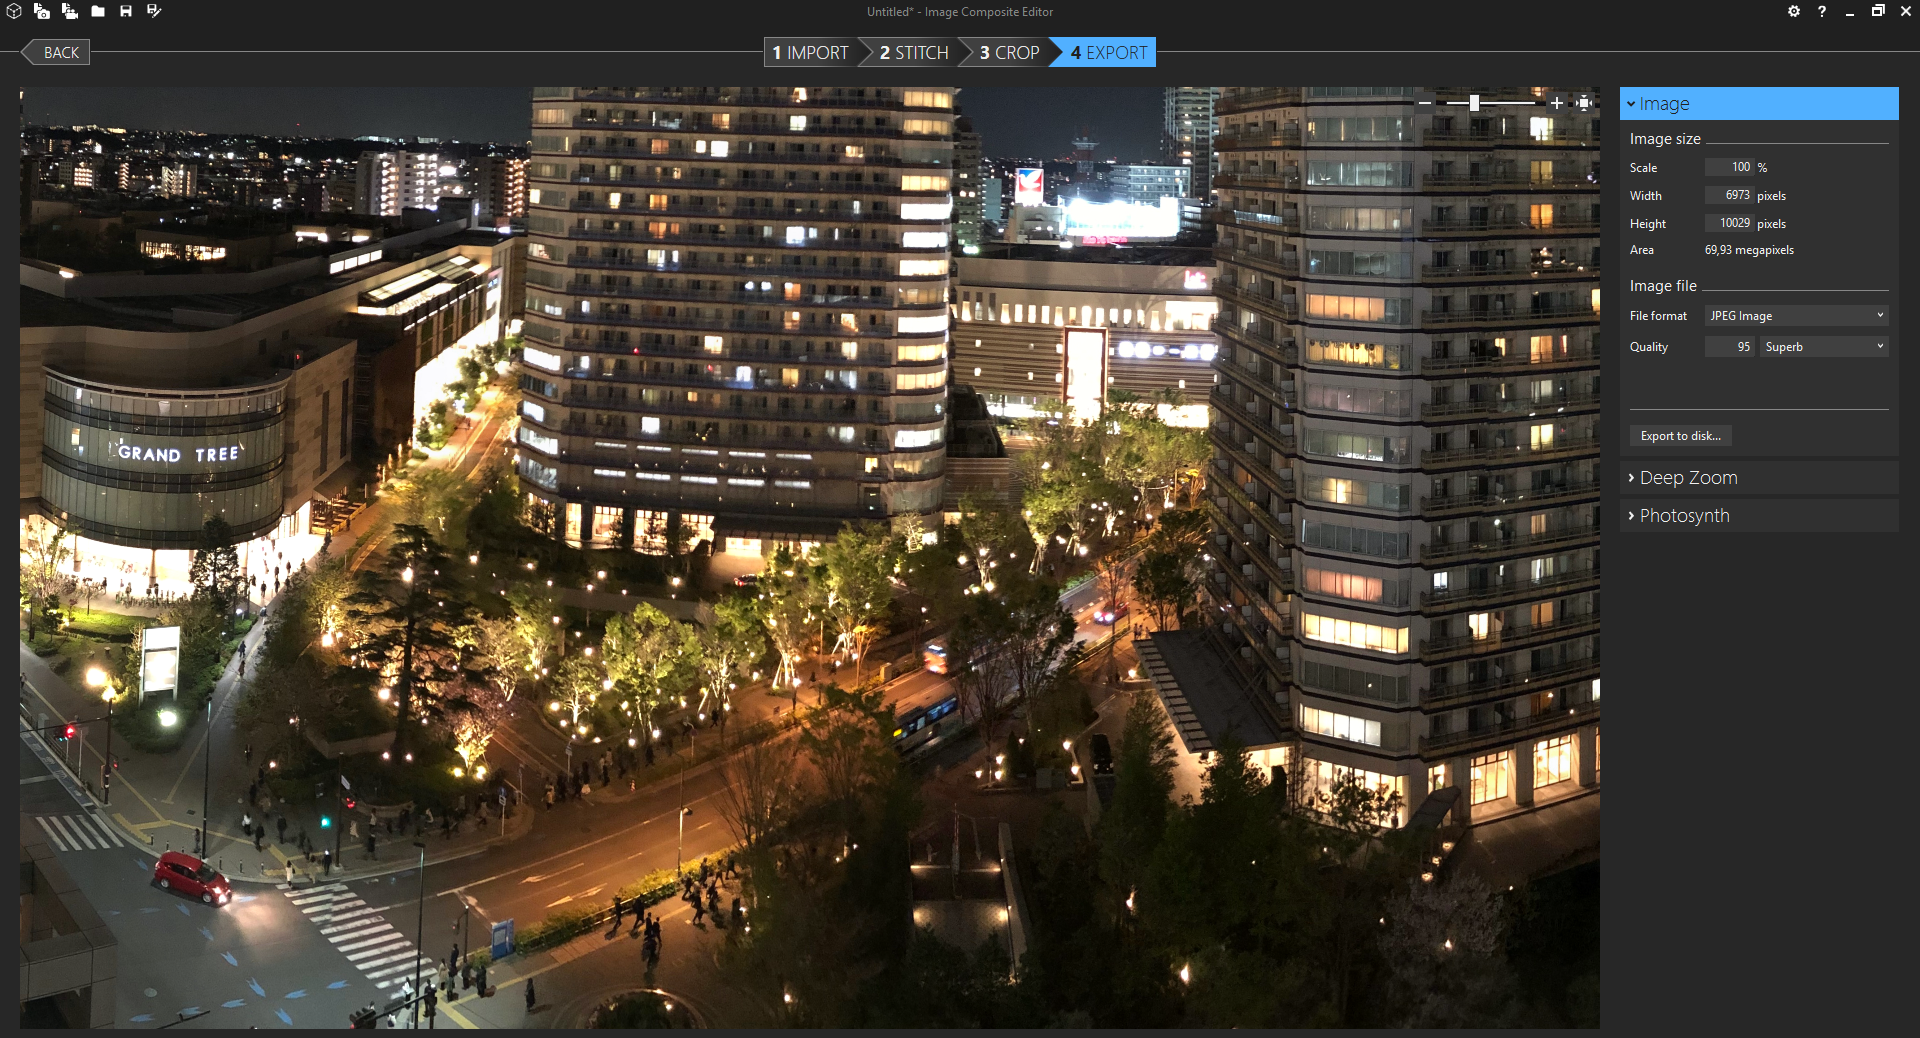
I really like taking panoramic images whenever I can. They convey a much better impression of the situation I’ve experienced then a single image. At least for me. And because of the way they are made – stitched together from multiple images – they are most of the time very big. A lot of pixels to zoom into.
The process to take such a panoramic image is very straight forward:
The tools used are all free. So my recommendation is the Microsoft Image Composite Editor. Which in itself was a Microsoft Research project.
Image Composite Editor (ICE) is an advanced panoramic image stitcher created by the Microsoft Research Computational Photography Group. Given a set of overlapping photographs of a scene shot from a single camera location, the app creates high-resolution panoramas that seamlessly combine original images. ICE can also create panoramas from a panning video, including stop-motion action overlaid on the background. Finished panoramas can be saved in a wide variety of image formats,
Image Composite Editor

Here’s how the stitching process of the Musashi-kosugi Park City towers night image looked like:


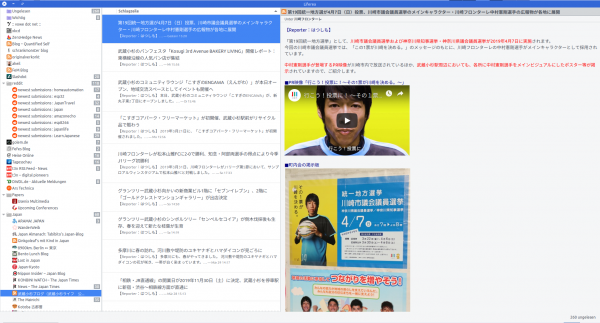
RSS aka RDF Site Summary aka Rich Site Summary aka Really Simple Syndication is a standardized web format that works for you.
At least it would work for you if you would use a a tool which would allow you to “subscribe” to RSS feeds from all sorts of websites. These tools are called feed-reader.
The website you are reading this on offers such a link. By subscribing to its feed you will be able to see all content but without having to actually go to each of your subscriptions one by one. That is done by the feed reader. This process of aggregation is it why feed readers are also called aggregator.
Invented exactly 20 years ago this month on the back-end of a feverish dot-com boom, RSS (Real Simple Syndication) has persisted as a technology despite Google’s infamous abandonment with the death of Google Reader and Silicon Valley social media companies trying and succeeding to supplant it. In the six years since Google shut down Reader, there have been a million words written about the technology’s rise and apparent fall.
RSS is Better Than Twitter
Here’s what’s important: RSS is very much still here. Better yet, RSS can be a healthy alternative…
I am using Liferea as my feed reader on desktop and Reeder on all that is iOS/macOS.
I’ve found that by using RSS feeds and not following a pre-filtered timeline I would not “follow” 1000 sources of information but choose more carefully whom to follow.
Some do not offer any feeds – so my decision in these cases is wether or not I would invest the time to create a custom parser for their content to pull in.
After RSS being just another XML format you quickly realize that HTML is just another XML format as well. There are simple ways to convert between both on the fly. Like fetchrss.com or your command-line.
Of course RSS is not the only feed format: ATOM would be another one worth mentioning.
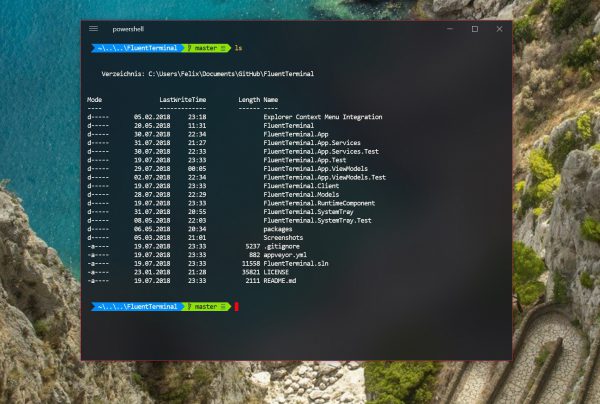
As Windows lately tends to make an effort to stay out of the way as an operating system and user-experience it seems that it regains more attention by developers.
For me this all is quite strange as I’ve personally would prefer switching from macOS to Linux rather than Windows.
But for those occasions you need to go with Windows. There’s a Terminal application now that gives you, well, a good terminal. Try FluentTerminal.
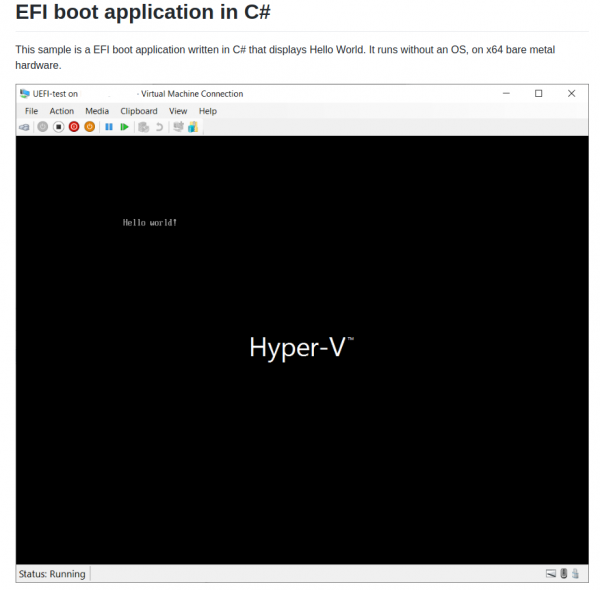
Zero-Sharp is using the CoreRT runtime to very impressively demonstrate how to get down to bare-metal application operation using C#. It compiles programs into native code…
Everything you wanted to know about making C# apps that run on bare metal, but were afraid to ask:
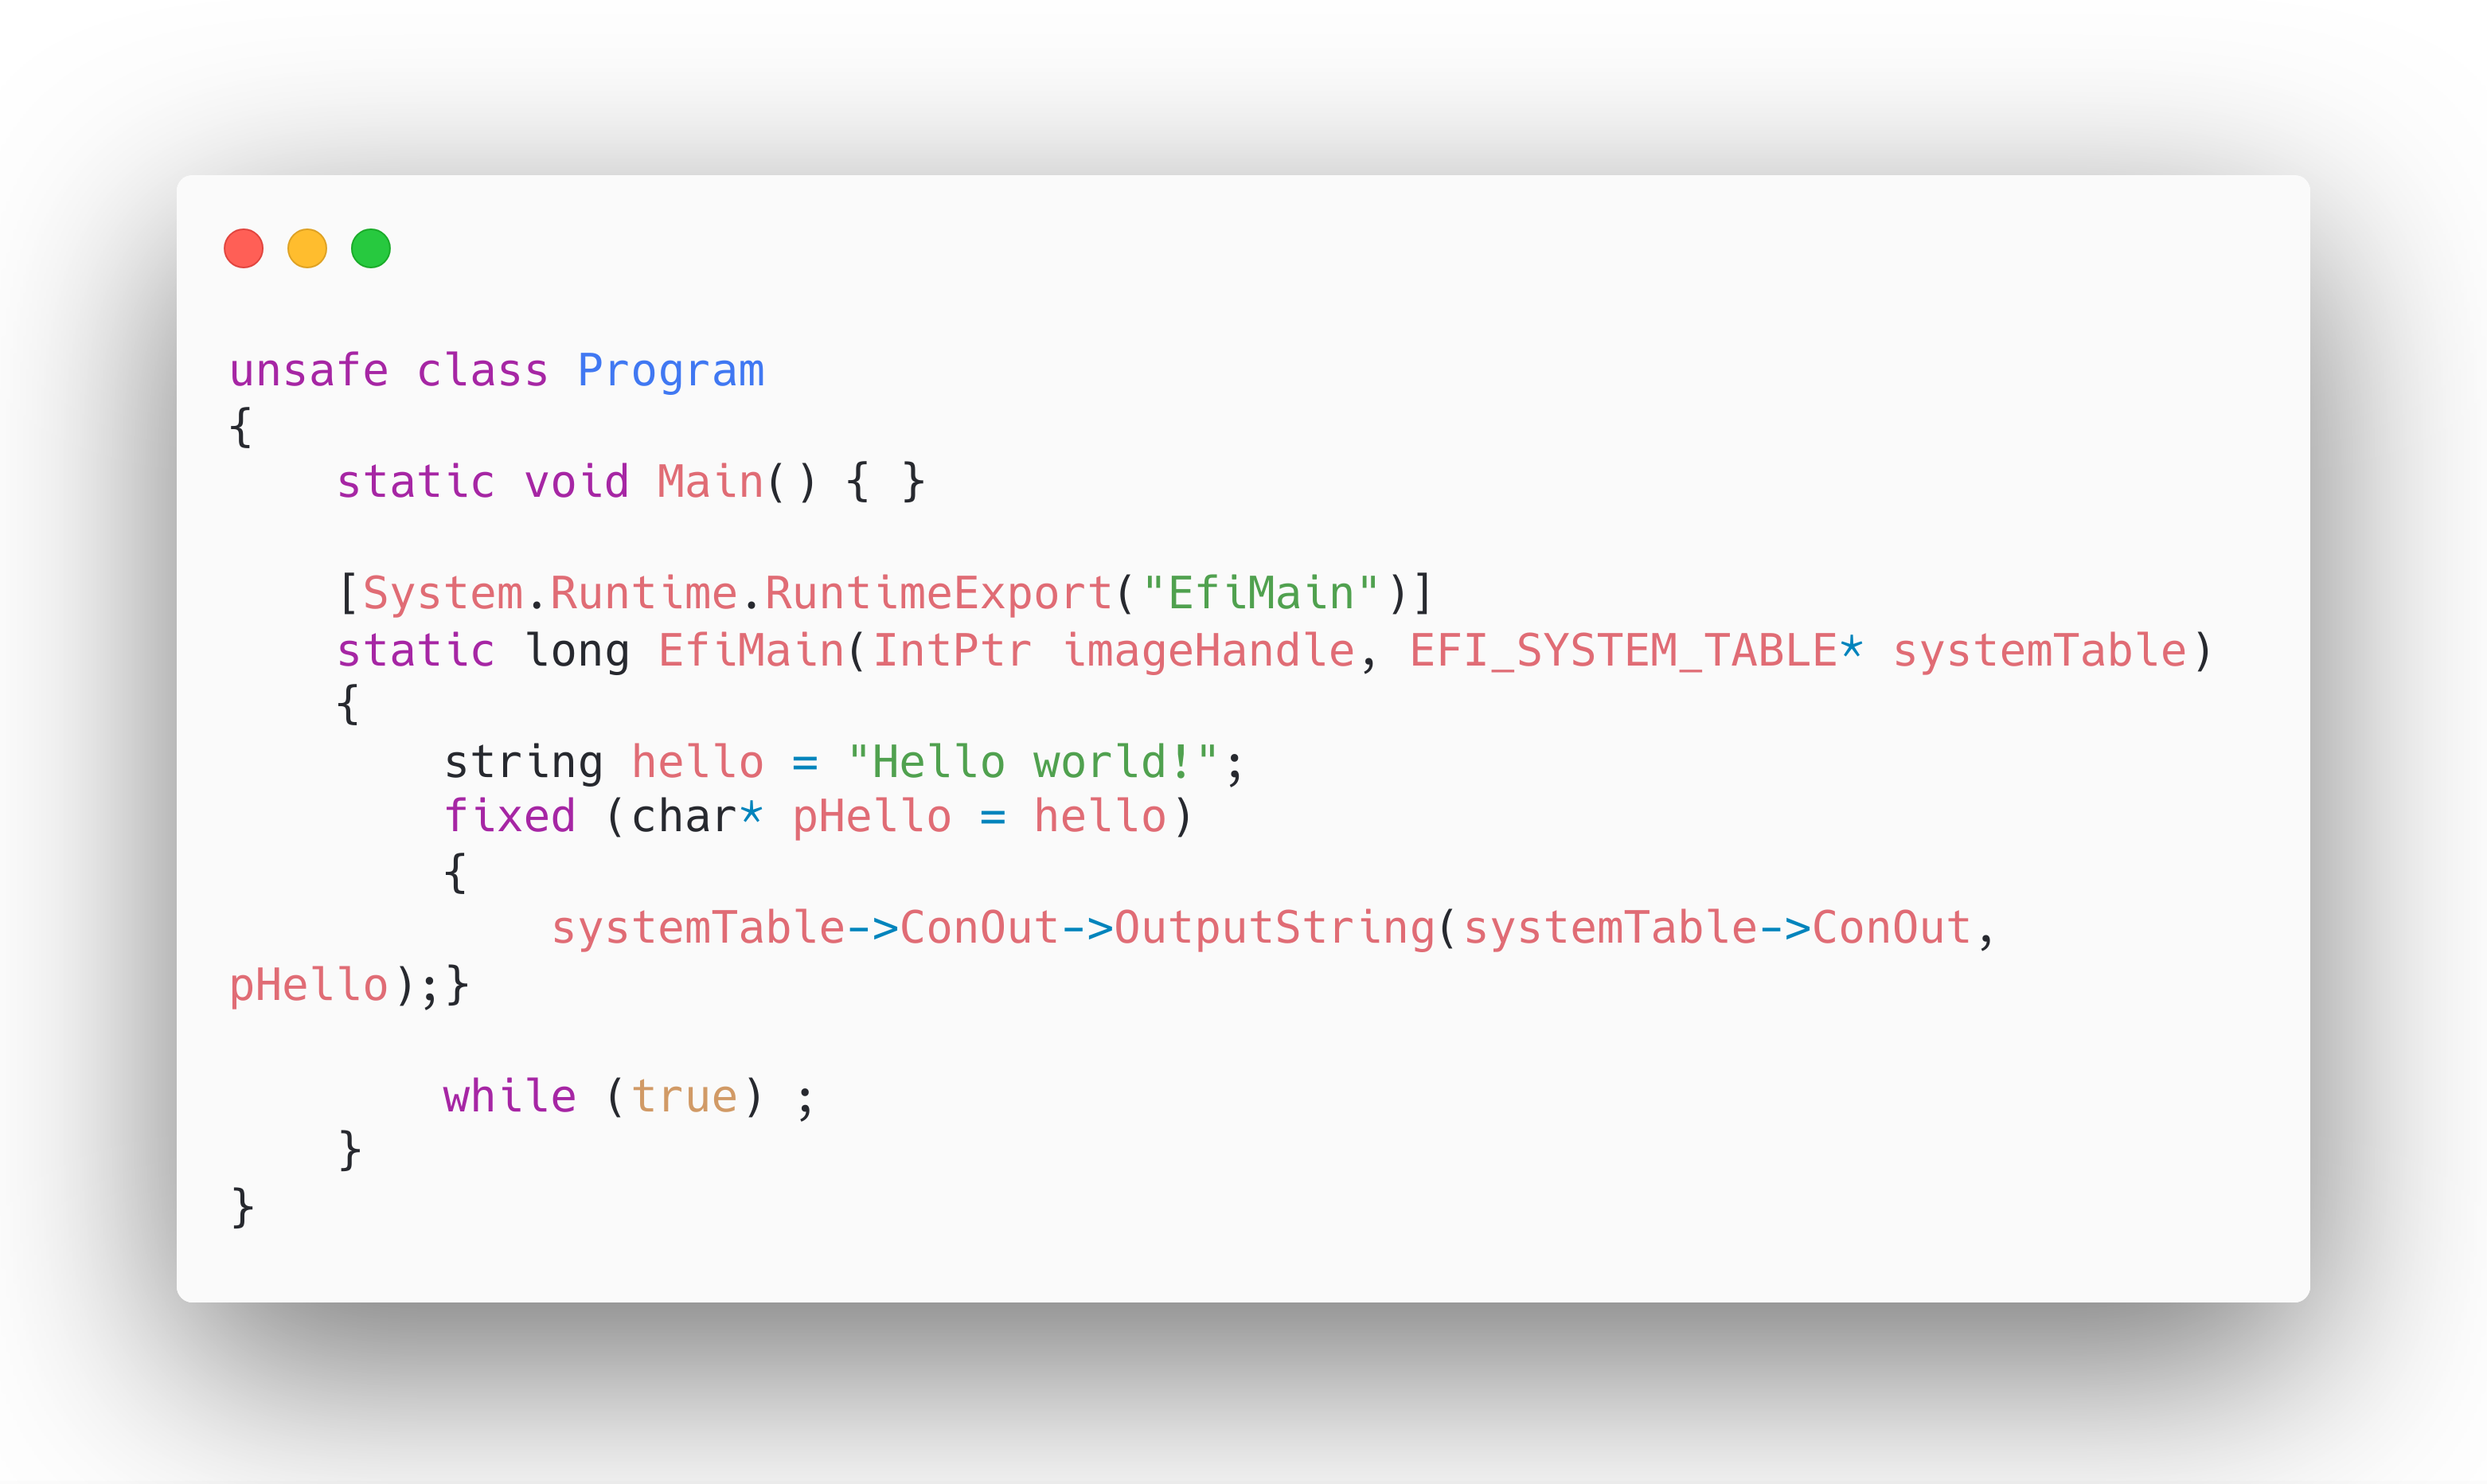
A complete EFI boot application in a single .cs file.
Michal Stehovsky on Twitter
This is seriously impressive and the screenshot says it all:
Have you ever asked yourself what those generations coming after us will know about what was part of our culture when we grew up? As much as computers are a part of my story a bit of gaming also is.
From games on tape to games on floppy disks to CDs to no-media game streaming it has been quite a couple of decades. And with the demise of physical media access to the actual games will become harder for those games never delivered outside of online platforms. Those platforms will die. None of them will remain forever.
Hardware platforms follow the same logic: Today it’s the new hype. Tomorrow the software from yesterday won’t be supported by hardware and/or operating systems. Everything is in constant flux.
Emulation is a great tool for many use-cases. But it probably won’t solve all challenges. Preserving access to software and the knowledge around the required dependencies is the mission of the Video Game History Foundation.

Video game preservation matters because video games matter. Games are deeply ingrained in our culture, and they’re here to stay. They generated an unprecedented $91 billion dollars in revenue in 2016. They’re being collected by the Smithsonian, the Museum of Modern Art, and the Library of Congress. They’ve inspired dozens of feature films and even more books. They’re used as a medium of personal expression, as the means for raising money for charity, as educational tools, and in therapy.
Video Game History Foundation
And yet, despite all this, video game history is disappearing. The majority of games that have been created throughout history are no longer easily accessible to study and play. And even when we can play games, that playable code is only a part of the story.
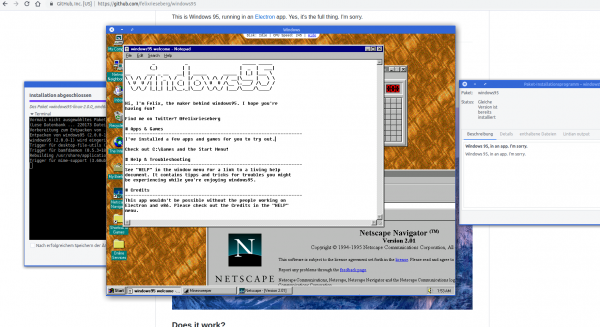
The times of Windows 95 are long gone. But some projects try to keep it alive. This project uses some system virtualization to bring you Windows 95 almost on any platform with almost no dependencies.
This is Windows 95, running in an Electron app. Yes, it’s the full thing. I’m sorry.
Felix Rieseberg
Not a lot of things are more private than your location.
Yet sometimes you wish to share your location with friends and family. May it be during an event or regularly. Maybe you want to
To allow the tech-minded audience to be in full control of what data is aggregated and stored regarding these needs I’ve created Miataru back in 2013 as an open-source project from end-2-end.
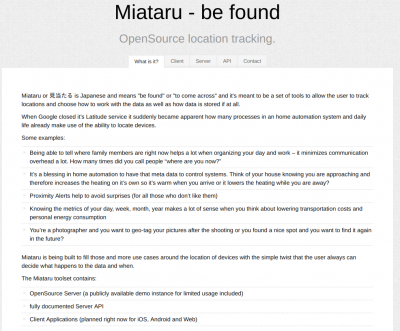
With the protocol being completely open and ready to be integrated into any home automation interested users can either utilize the publicly available (stores-nothing-on-disk) server or host your own.
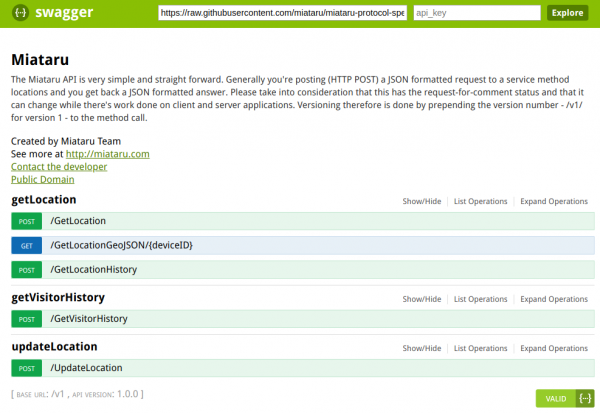
Everything from the server to the clients is available in source and there’s a ready-to-go version of the client app on the AppStore.
I just recently learned about Krita. An open source drawing application that allows you to… oh well… do free-hand drawings.
Krita is a FREE and open source painting tool designed for concept artists, illustrators, matte and texture artists, and the VFX industry. Krita has been in development for over 10 years and has had an explosion in growth recently. It offers many common and innovative features to help the amateur and professional alike. See below for some of the highlighted features.
Krita highlights
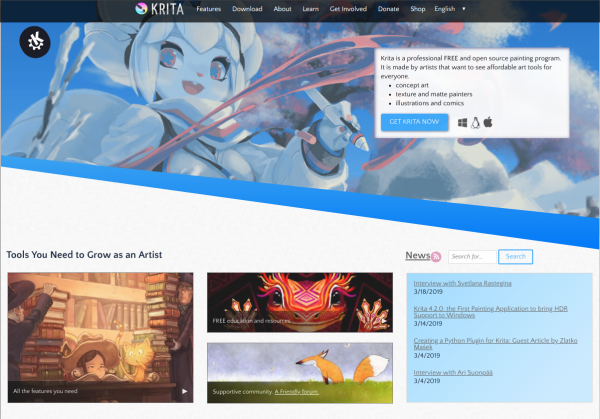
Taking a look at the gallery yields that I cannot draw. Frustration about that is limited because there’s so much nice drawings to gaze at!
Also this is a multi-platform application. It’s available for Windows, macOS and for Linux.
MyFitnessPal is a great online service we are using to track what we eat. It’s well integrated into our daily routine – it works!

Unfortunately MyFitnessPal is not well set-up to interface 3rd party applications with it. In fact it appears they are actively trying to make it harder for externals to utilize the data there.
To access your data there’s an open source project called “python-myfitnesspal” which allows you to interface with MyFitnessPal from the command line. This project uses web-scraping to extract the information from the website and will break everytime MyFitnessPal is changing the design/layout.
Since the output for this would be command line text output it is not of great use for a standardized system. What is needed is to have the data sent in a re-useable way into the automation system.
This is why I wrote the additional tool “myfitnesspal2mqtt“. It takes the output provided by python-myfitnesspal and sends it to an MQTT topic. The message then can be decoded, for example with NodeRed, and further processed.
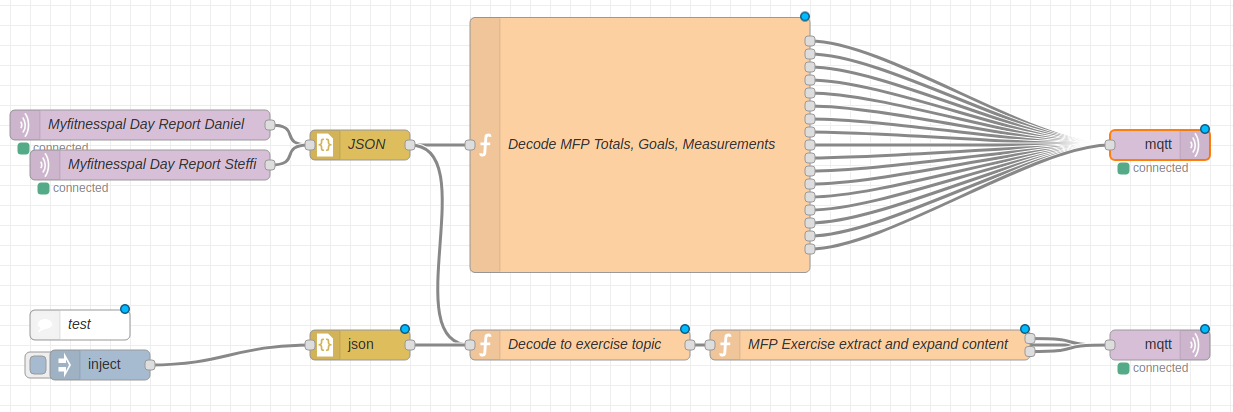
As you can see in the image above I am taking the MQTT message coming from myfitnesspal2mqtt and decoding it with a bit of javascript and outputting it back to MQTT.
![var complete = {};
var sodium = {};
var carbohydrates = {};
var calories = {};
var daydate = {};
var fat = {};
var sugar = {};
var protein = {};
var weight = {};
var bodyfat = {};
var goalsodium = {};
var goalcarbohydrates = {};
var goalcalories = {};
var goalfat = {};
var goalsugar = {};
var goalprotein = {};
var caloriesdiff = {};
var ttopic = msg.topic.toLowerCase();
var firstobject = Object.keys(msg.payload)[0];
complete.payload = msg.payload[firstobject].complete;
complete.topic = ttopic+'/complete';
sodium.payload = msg.payload[firstobject].totals.sodium;
sodium.topic = ttopic+'/total/sodium';
carbohydrates.payload = msg.payload[firstobject].totals.carbohydrates;
carbohydrates.topic = ttopic+'/total/carbohydrates';
calories.payload = msg.payload[firstobject].totals.calories;
calories.topic = ttopic+'/total/calories';
fat.payload = msg.payload[firstobject].totals.fat;
fat.topic = ttopic+'/total/fat';
sugar.payload = msg.payload[firstobject].totals.sugar;
sugar.topic = ttopic+'/total/sugar';
protein.payload = msg.payload[firstobject].totals.protein;
protein.topic = ttopic+'/total/protein';
weight.payload = msg.payload[firstobject].measurements.weight;
weight.topic = ttopic+'/measurement/weight';
bodyfat.payload = msg.payload[firstobject].measurements.bodyfat;
bodyfat.topic = ttopic+'/measurement/bodyfat';
goalsodium.payload = msg.payload[firstobject].goals.sodium;
goalsodium.topic = ttopic+'/goal/sodium';
goalcarbohydrates.payload = msg.payload[firstobject].goals.carbohydrates;
goalcarbohydrates.topic = ttopic+'/goal/carbohydrates';
goalcalories.payload = msg.payload[firstobject].goals.calories;
goalcalories.topic = ttopic+'/goal/calories';
goalfat.payload = msg.payload[firstobject].goals.fat;
goalfat.topic = ttopic+'/goal/fat';
goalsugar.payload = msg.payload[firstobject].goals.sugar;
goalsugar.topic = ttopic+'/goal/sugar';
goalprotein.payload = msg.payload[firstobject].goals.protein;
goalprotein.topic = ttopic+'/goal/protein';
caloriesdiff.payload = msg.payload[firstobject].goals.calories - msg.payload[firstobject].totals.calories;
caloriesdiff.topic = ttopic+'/caloriedeficit';
daydate.payload = firstobject;
daydate.topic = ttopic+"/date";
return [complete, sodium, carbohydrates, calories, fat, sugar, protein, weight, bodyfat, goalsodium, goalcarbohydrates, goalcalories, goalfat, goalsugar, goalprotein, daydate, caloriesdiff];](https://www.schrankmonster.de/wp-content/uploads/2019/03/Bildschirmfoto-zu-2019-03-22-14-13-41.png)
In the end it expands into a multitude of topics with one piece of information per MQTT topic.
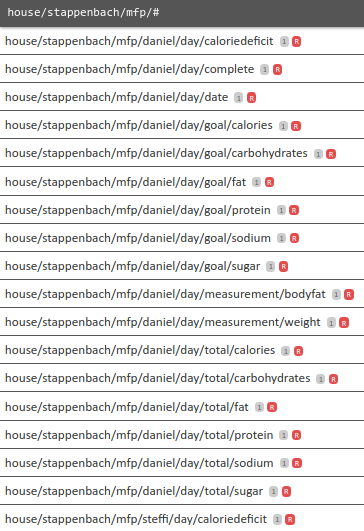
And with just that every time the script is run (which I do in a docker container and with a cronjob) the whole lot of pieces of information about nutrition and health stats are being pushed and stored in the home automation system.
This way they are of course also available to the home automation system to do things with it.
Like locking the fridge.
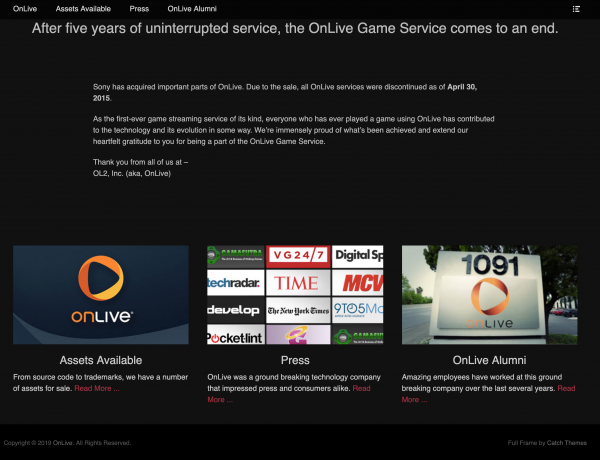
In 2012 I’ve experienced streamed game play for the first time. I was a beta-user of the OnLive service which created a bit of fuzz back then.
Last week Google had announced to step into the game streaming business as well. They’ve announce Google Stadia as the Google powered game streaming platform. It would come with it’s own controller.
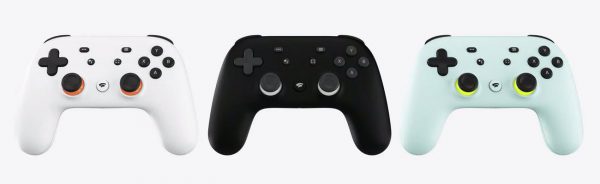
And this controller is the most interesting bit. We have seen video live streaming. We have seen and played streamed games. But every time we needed some piece of software or hardware that brought screen, controller and player together.
The Google Stadia controllers now do not connect to the screen in front of you. The screen, by all it knows, just shows a low-latency video/audio stream.
The controller connects to your wifi and directly to the game session. Everything you input with the controller will be directly sent to the Google Stadia session in a Google datacenter. No dedicated console hardware in between. And this will make a huge difference. Because all of a sudden the screen only is a screen. And the controller will connect to the “cloud-console” far-far away. As if it was sitting right below the screen. This will make a huge difference!
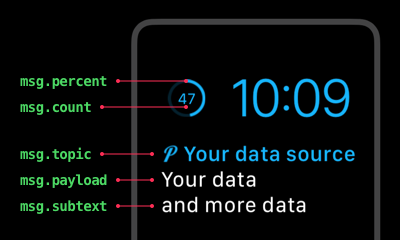
Oh this is so useful for my head-up-display prototype implementation:

This feature replaces numeral glyphs set on glyph-specific (proportional) widths with corresponding glyphs set on uniform (tabular) widths. Note that some fonts may contain tabular figures by default, in which case enabling this feature may not appear to affect the width of glyphs.
tabular figures: tnum

Don’t delay, order today! It’s in store since, actually right now. You won’t even find it through search yet!
Who wants a freebie? Comment and you’ll be given.
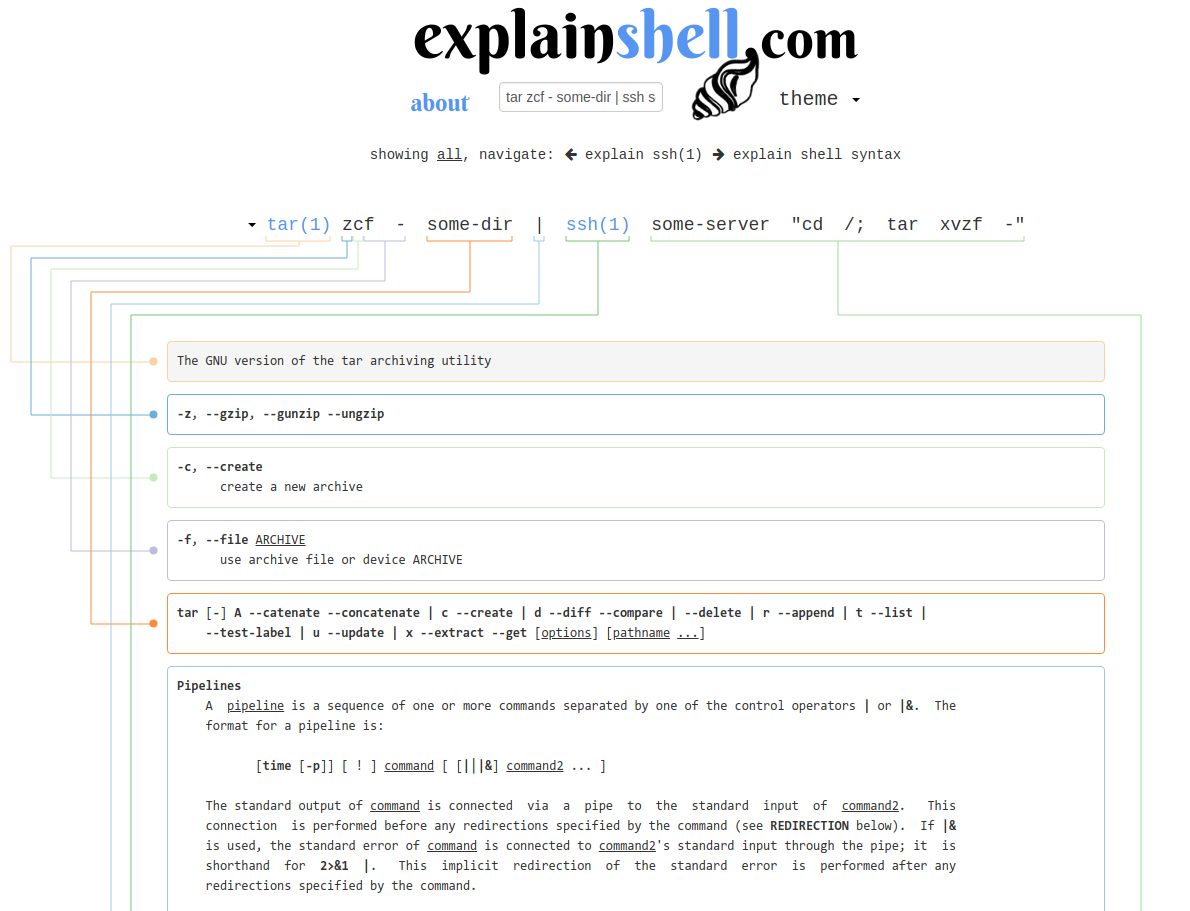
You want or you have to use shells – command line interfaces. And it’s something that always leads to stackoverflow / google sessions. Or you’re studying man-pages for hours.
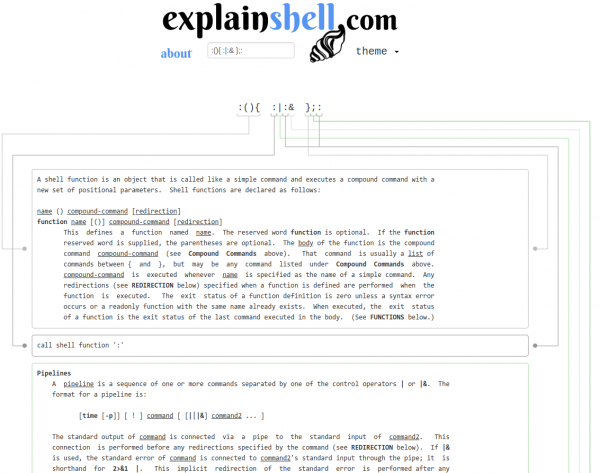
But there’s a better way to view and understand these man-pages. There’s explainshell.com. Here is an example of what it can do:
As you can see it not only takes one command and shows you the meaning/function of a parameter. But it takes complex structured commands and unfolds it for you nicely onto a web page. Even the harder examples:
I own some Android devices as I am actively trying out Android every once in a while when a new version arrives.
While doing so the usability was always what eventually put me off and made me not use it.
This is indicative of my experience:
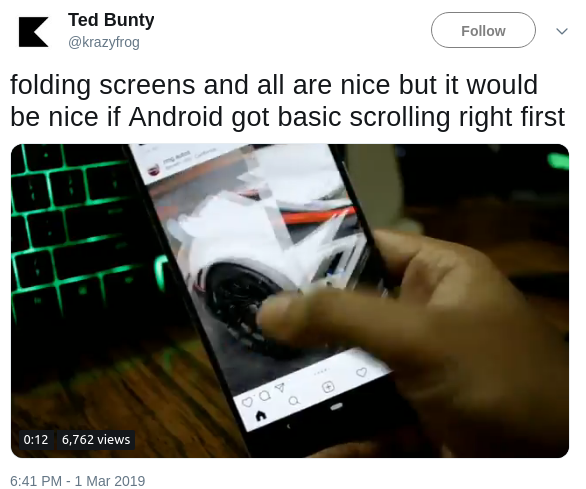
Simple things like the scrolling or tapping never worked for me. Of course it worked after the 2nd or 3rd tap. But not as it “should” feel.
I own Google Nexus devices as well as 3rd party android tablets from Asus. The basics never worked.
Why is that?
My usual twitter use looks like this: I am scrolling through the timeline reading up things and I see an ad. I click block and never again will I see anything from this advertiser. As I’ve written here earlier.
As Twitter is also a place of very disturbing content there are numerous services built around the official block list functionality. One of those services is “Block Together“.
Block Together is designed to reduce the burden of blocking when many accounts are attacking you, or when a few accounts are attacking many people in your community. It uses the Twitter API. If you choose to share your list of blocks, your friends can subscribe to your list so that when you block an account, they block that account automatically. You can also use Block Together without sharing your blocks with anyone.
blocktogether.org
I’ve signed up and apparently this is as easy as it gets when you want to share block lists.
There seem to be more people that use Twitter like I do. For example Volker Weber wrote about his handling of “promoted content”.
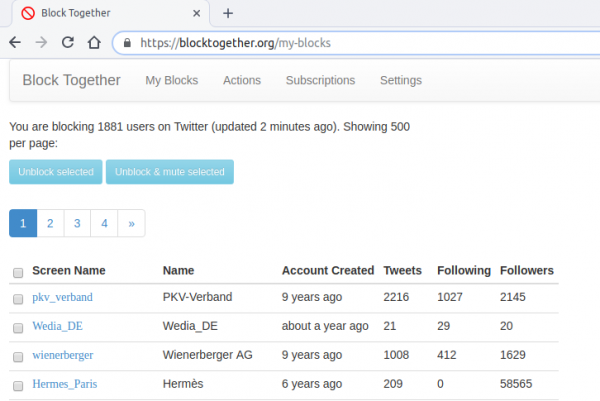
My block list on Twitter currently includes 1881 accounts and these are only accounts that put paid promotions without my request into my timeline.
I’ve read that Volker has such a long list as well – maybe it’s worth sharing as Volker is one person I would trust on his decisions for such a list. (vowe is a good mother!)
I recently wrote about how I am using ThinClients in our house to always have a ready-to-use working environment that get’s shared across different desks and work places.
To complete the zoo of devices I wanted to take the chance and write about another device we’re using when the purpose fits: ChromOS devices.
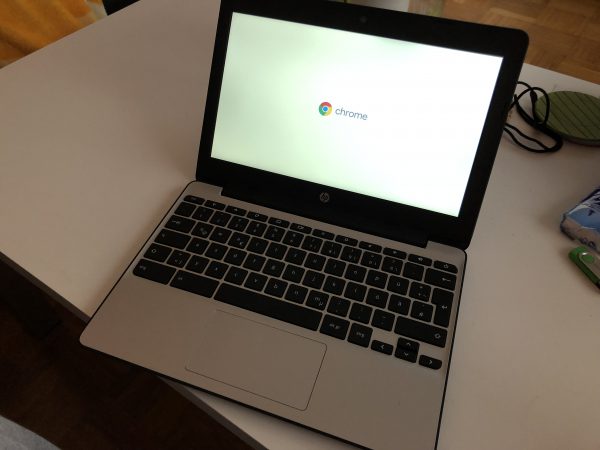
A little bit over a year ago I was given a HP Chromebook 11 G5 and this little thing is in use ever since.
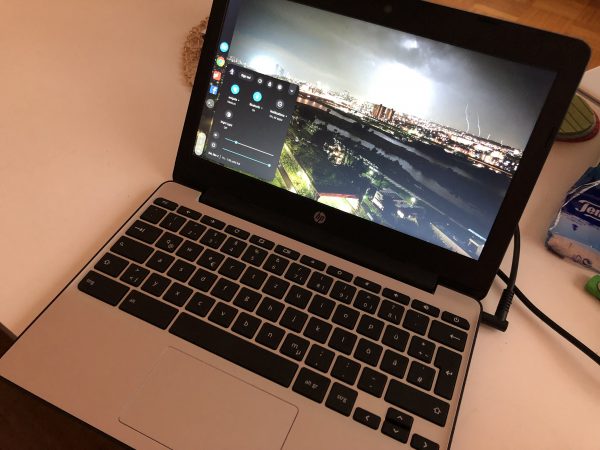
The hardware itself is very average and works just right. The only two things that could be better are the display and the trackpad. With the trackpad you can help yourself with an external mouse.
The display works for the device size but the resolution being 1366×768 is definitely a limiting factor for some tasks.
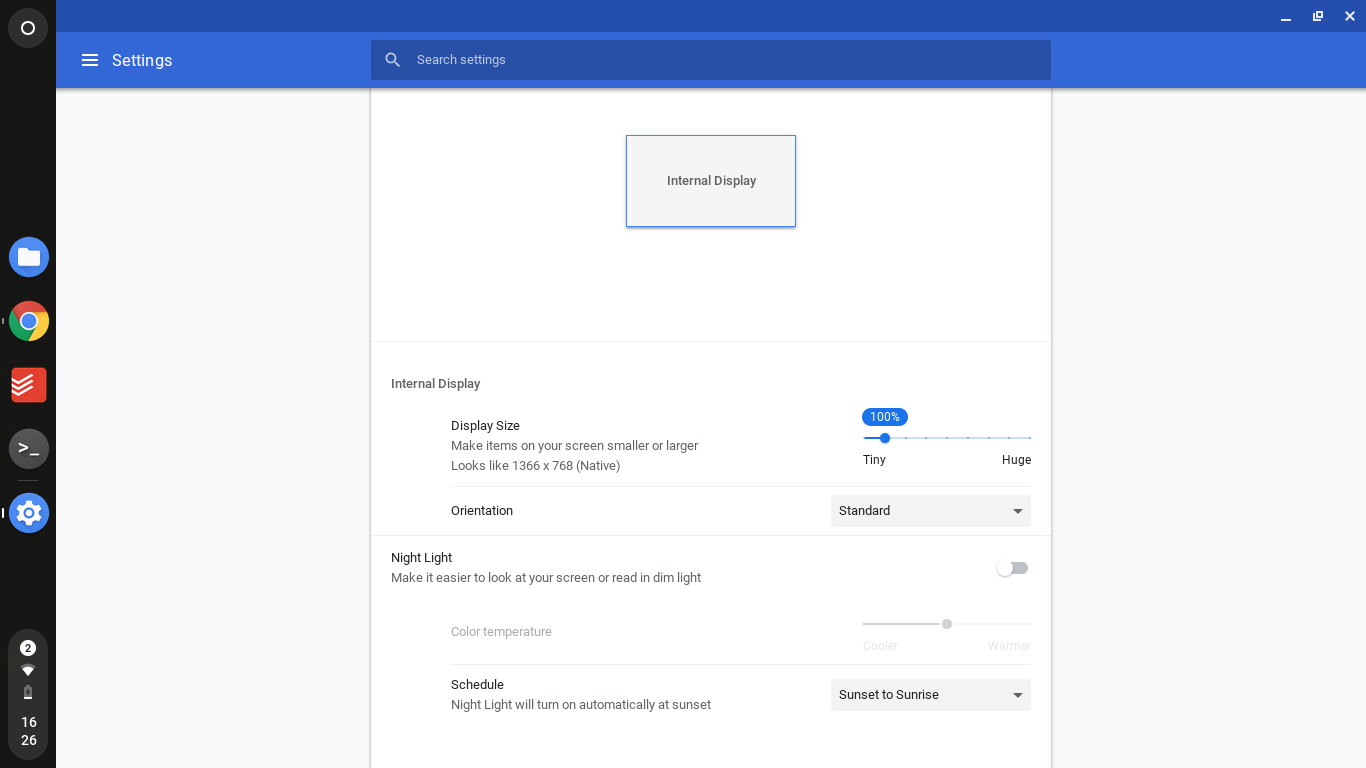
What is not a limiting factor, astonishingly, is the operating system. I did not have any expectations at all when I first started using the Chromebook but everything just fell into place as expected. A device with almost no local storage and everything on the google cloud as well as a device that you can simply pick up and start using with just your google account may not sound crazy innovative. But let me tell you: if you start living that thin client, cloud stored life these Chrome OS devices hit the spot perfectly.
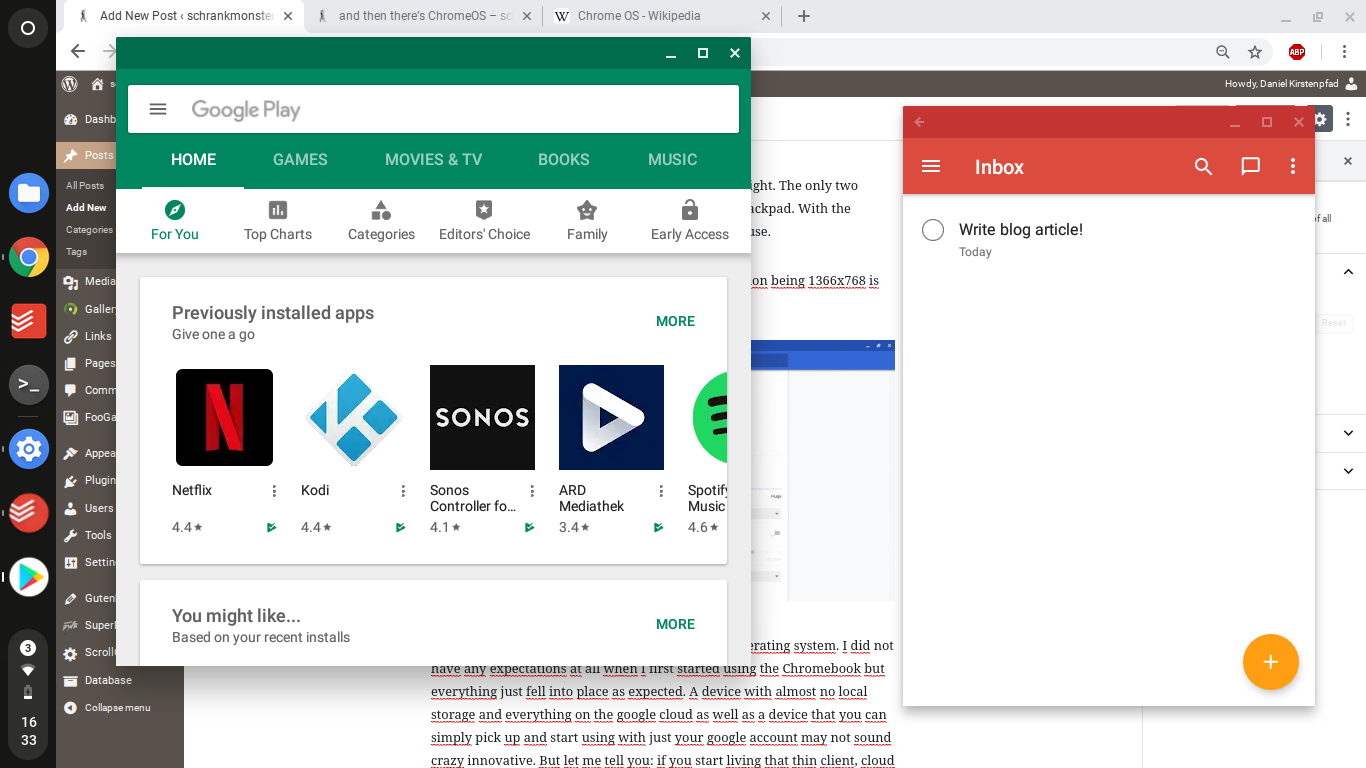
Everything updates in the background and as long as you are okay with web based applications or Android based applications you are good to go.
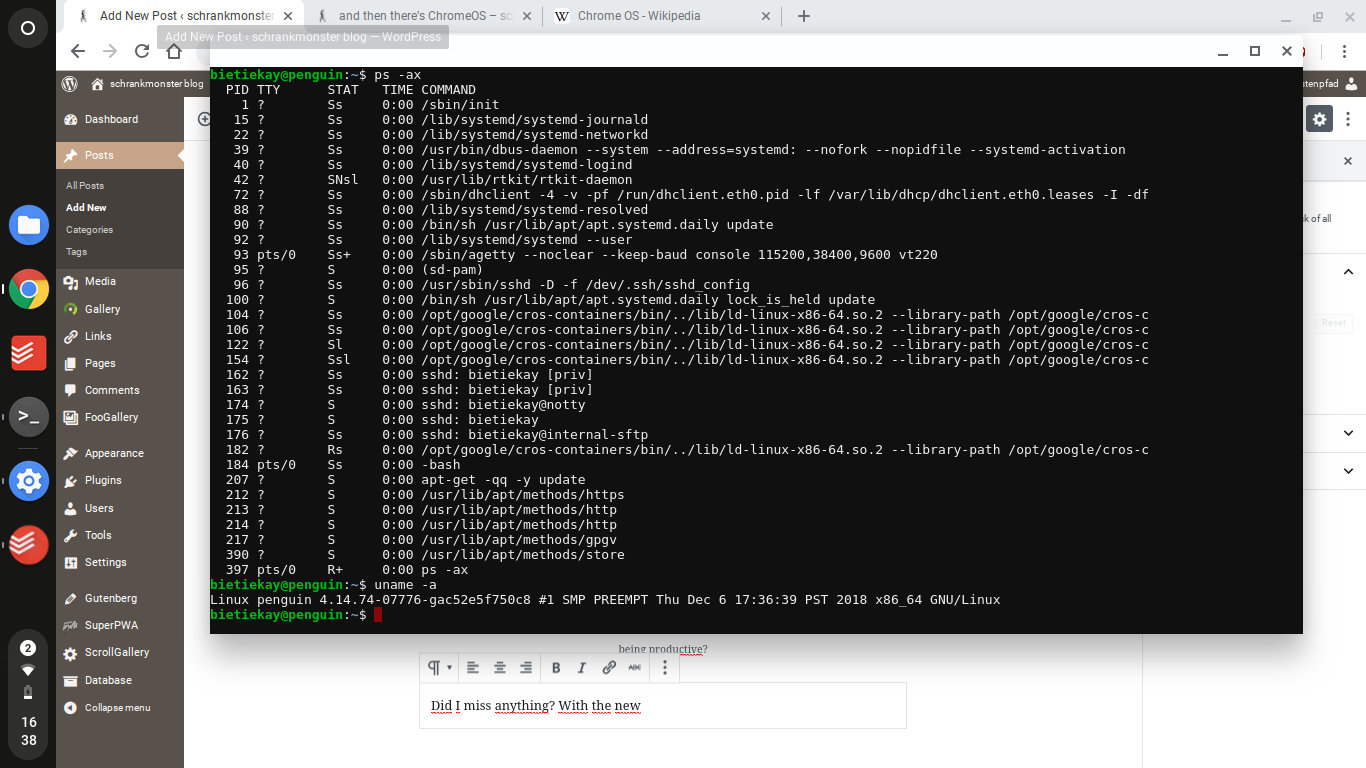
Did I miss anything functionwise? Yes. At the beginning there was no real shell or Linux tools available for Chrome OS natively. This has changed.
Would I buy another one or do I recommend it and for whom? I would buy another one and I would recommend it for certain audiences.
I would recommend it for anyone who does not need to game anything not available in the Google Playstore – anything that can be done on the web can be done with the Chromebook. And as long as there is not the requirement of anything native or higher-spec that requires you to have “Windows-as-a-hobby” or a beefy MacOS device sitting around I guess these inexpensive Chrome OS devices really have their niche.
For kids – I guess this would make a great “my-first-notebook” as it works when you need it and does not lock you in too much if you wanted to start exploring. But then again: what do I know – I do not have kids.
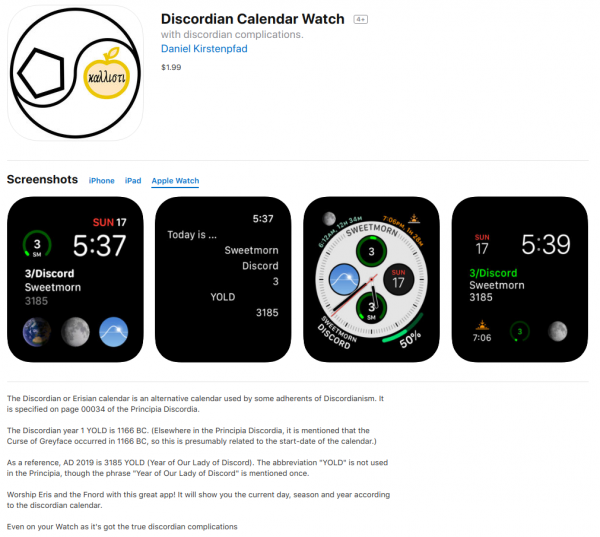
When you want to make things happen on a schedule or log them down when they took place a calendar is a good option. Even more so if you are looking for an intuitive way to interact with your home automation system.
Calendars can be shared and your whole family can have them on their phones, tablets and computers to control the house.
In general I am using the Node-Red integration of Google Calendar to send and receive events between Node-Red and Google. I am using the node-red-node-google package which comes with a lot of different options.

Of course when you are using those nodes you need to configure the credentials
So you got those light switches scattered around. You got lots of things that can be switched on and off and controlled in all sorts of interesting ways.
And now you want to program a timer when things should happen.
For example: You want to control when a light is being switched on and when it’s then again been switched off.
I did create a separate calendar on google calendar in which I am going to add events to in a notation I came up with: those events have a start-datetime and of course an end-datetime.
When I now create an event with the name “test” in the calendar…
And in Node-Red you would configure the “google calendar in”-Node like so:
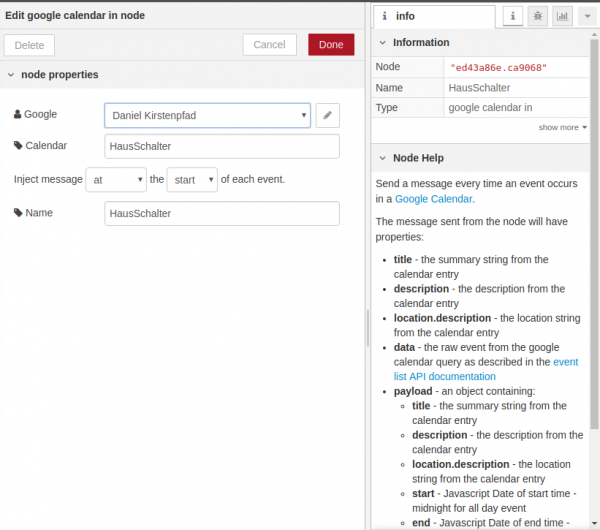
When you did wire this correctly everytime an event in this calendar starts you will get a message with all the details of the event, like so:
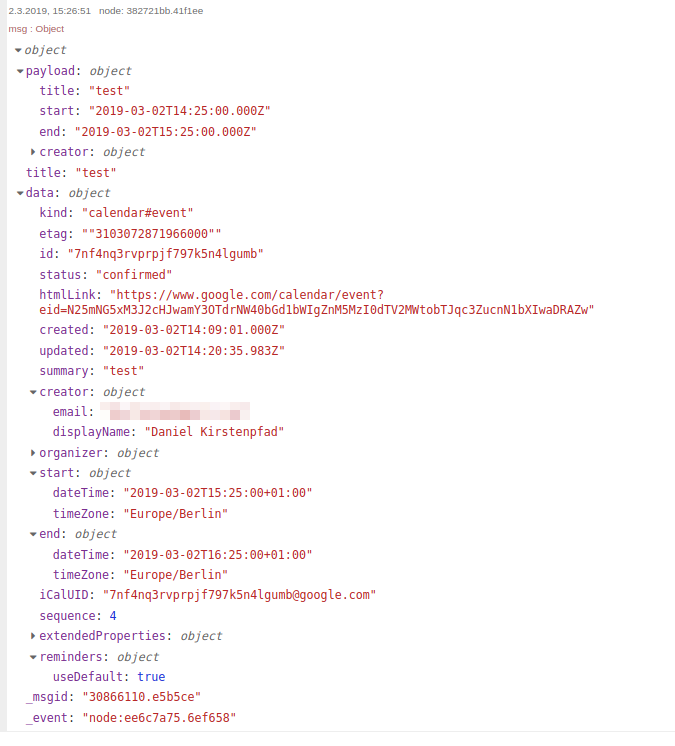
With this you can now go crazy on the actions. Like using the name to identify the switch to switch. Or the description to add extra information to your flow and actions to be taken. This is now fully flexible. And of course you can control it from your phone if you wanted.
So you also may want to have events that happened logged in the calendar rather than a plain logfile. This comes very handy as you can easily see this way for example when people arrived home or left home or when certain long running jobs started/ended.
To achieve this you can use the calendar out nodes for Node-Red and prepare a message using a function node like this:
var event = {
   'summary': msg.payload,
   'location': msg.location,
   'description': msg.payload,
   'start': {
     'dateTime': msg.starttime,//'2015-05-28T09:00:00-07:00',
     'timeZone': 'Europe/Berlin'
   },
   'end': {
     'dateTime': msg.endtime,//'2015-05-28T17:00:00-07:00',
     'timeZone': 'Europe/Berlin'
   },
   'recurrence': [
     //'RRULE:FREQ=DAILY;COUNT=2'
   ],
   'attendees': [
     //{'email': 'lpage@example.com'},
     //{'email': 'sbrin@example.com'}
   ],
   'reminders': {
     'useDefault': true,
     'overrides': [
       //{'method': 'email', 'minutes': 24 * 60},
       //{'method': 'popup', 'minutes': 10}
     ]
   }
 };
msg.payload = event;
return msg;
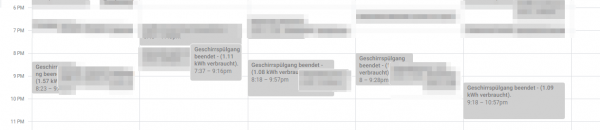
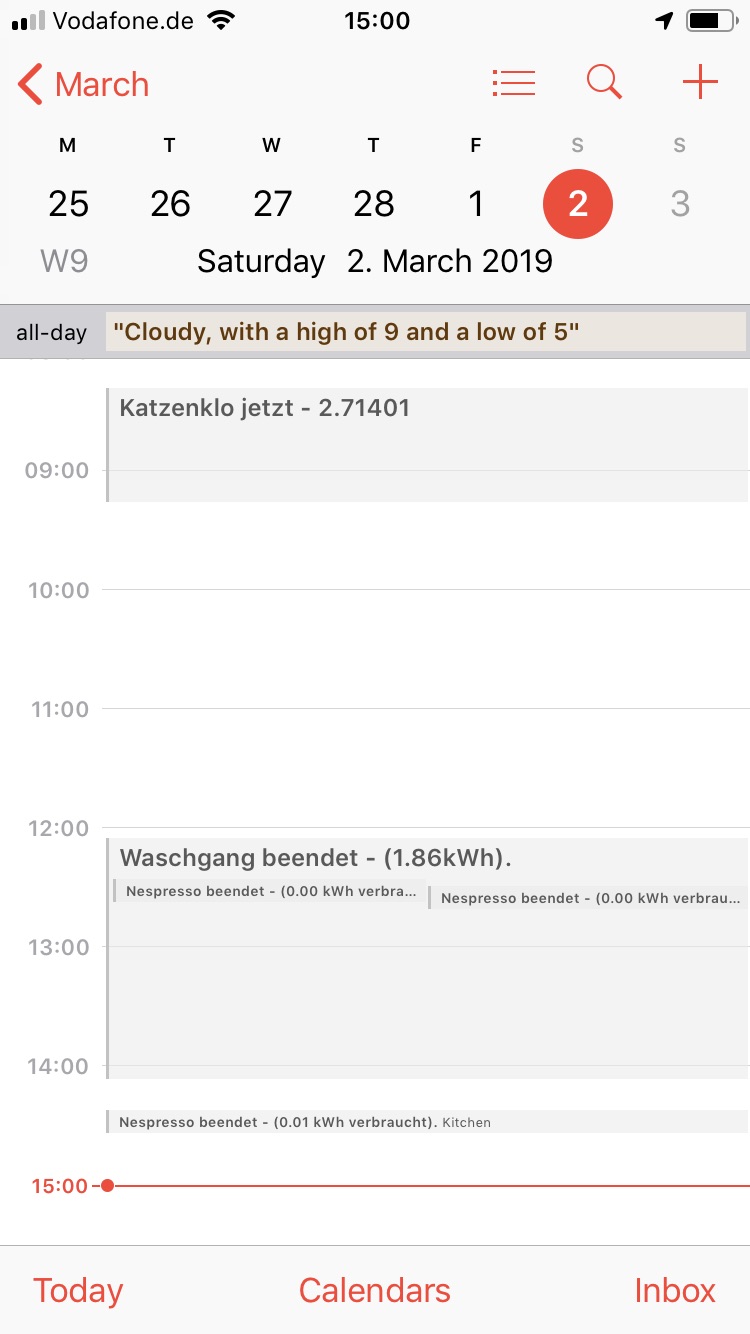
And as said – we are using it for all sorts of things – like when the cat uses her litter box, when the washing machine, dryer, dishwasher starts and finishes. Or simply to count how many Nespresso coffees we’ve made. Things like when members of the household arrive and leave places like work or home. When movement is detected or anything out of order or noteable needs to be written down.
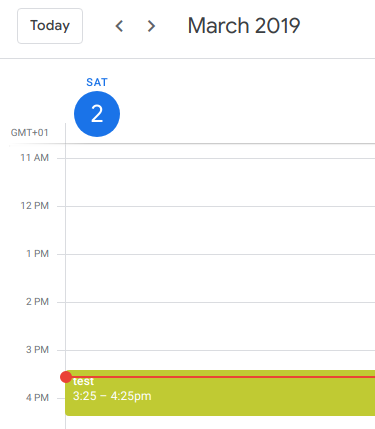
And of course it’s convenient as it can be – here’s the view of a recent saturday:
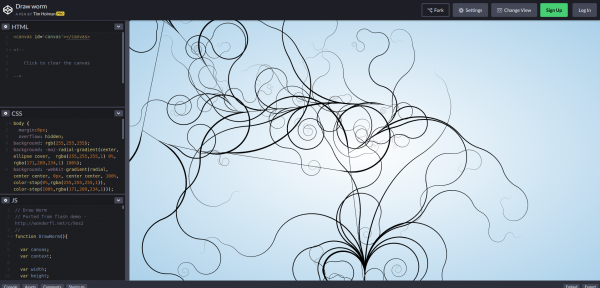
I had redone the header of this blog a while ago but since I was trying around some things on the template I wanted something more dynamic but without any additional dependencies.
So I searched and found:
Tim Holman did a very nice implementation of this “worm generator” with only using the HTML5 canvas tag and some math. I made some very slight changes and integrated it into the header graphic. It will react to your mouse movement and resets if you click anywhere. Give it a go!
I had to solve a problem. The problem was that I did not wanted to have the exact same session and screen shared across different work places/locations simultaneously. From looking at the same screen from a different floor to have the option to just walk over to the lab-desk solder some circuits together and have the very same documents opened already and set on the screens over there.
One option was to use a tablet or notebook and carry it around. But this would not solve the need to have the screen content displayed on several screens simultaneously.
Also I did not want to rely on the computing power of a notebook / tablet alone. Of course those would get more powerful over time. But each step would mean I would have to purchase a new one.
Then in a move of desperation I remembered the “old days” when ThinClients used to be the new-kid in town. And then I tried something:
I just recently had moved all house server infrastructure over to Linux and Docker. So what would keep me from utilizing the computing power of that one beefy server in the basement to host all of my desktop needs?
It turns out: Nothing really. Docker is well prepared to host desktop environments. With a bit of tweaking and TigerVNC Xvnc I was able to pre-configure the most current Ubuntu to start my preferred Mate desktop environment in a container and expose it through VNC.
If you wanted to replicate this I would recommend this repository as a starting point.
Even better I found that the RaspberryPi single board computers come with a free pre-licensed and accelerated version of RealVNC.
So I took one of those RaspberryPis, booted up the Raspbian Desktop lite and connected to the dockers VNC port. It all worked just like that.
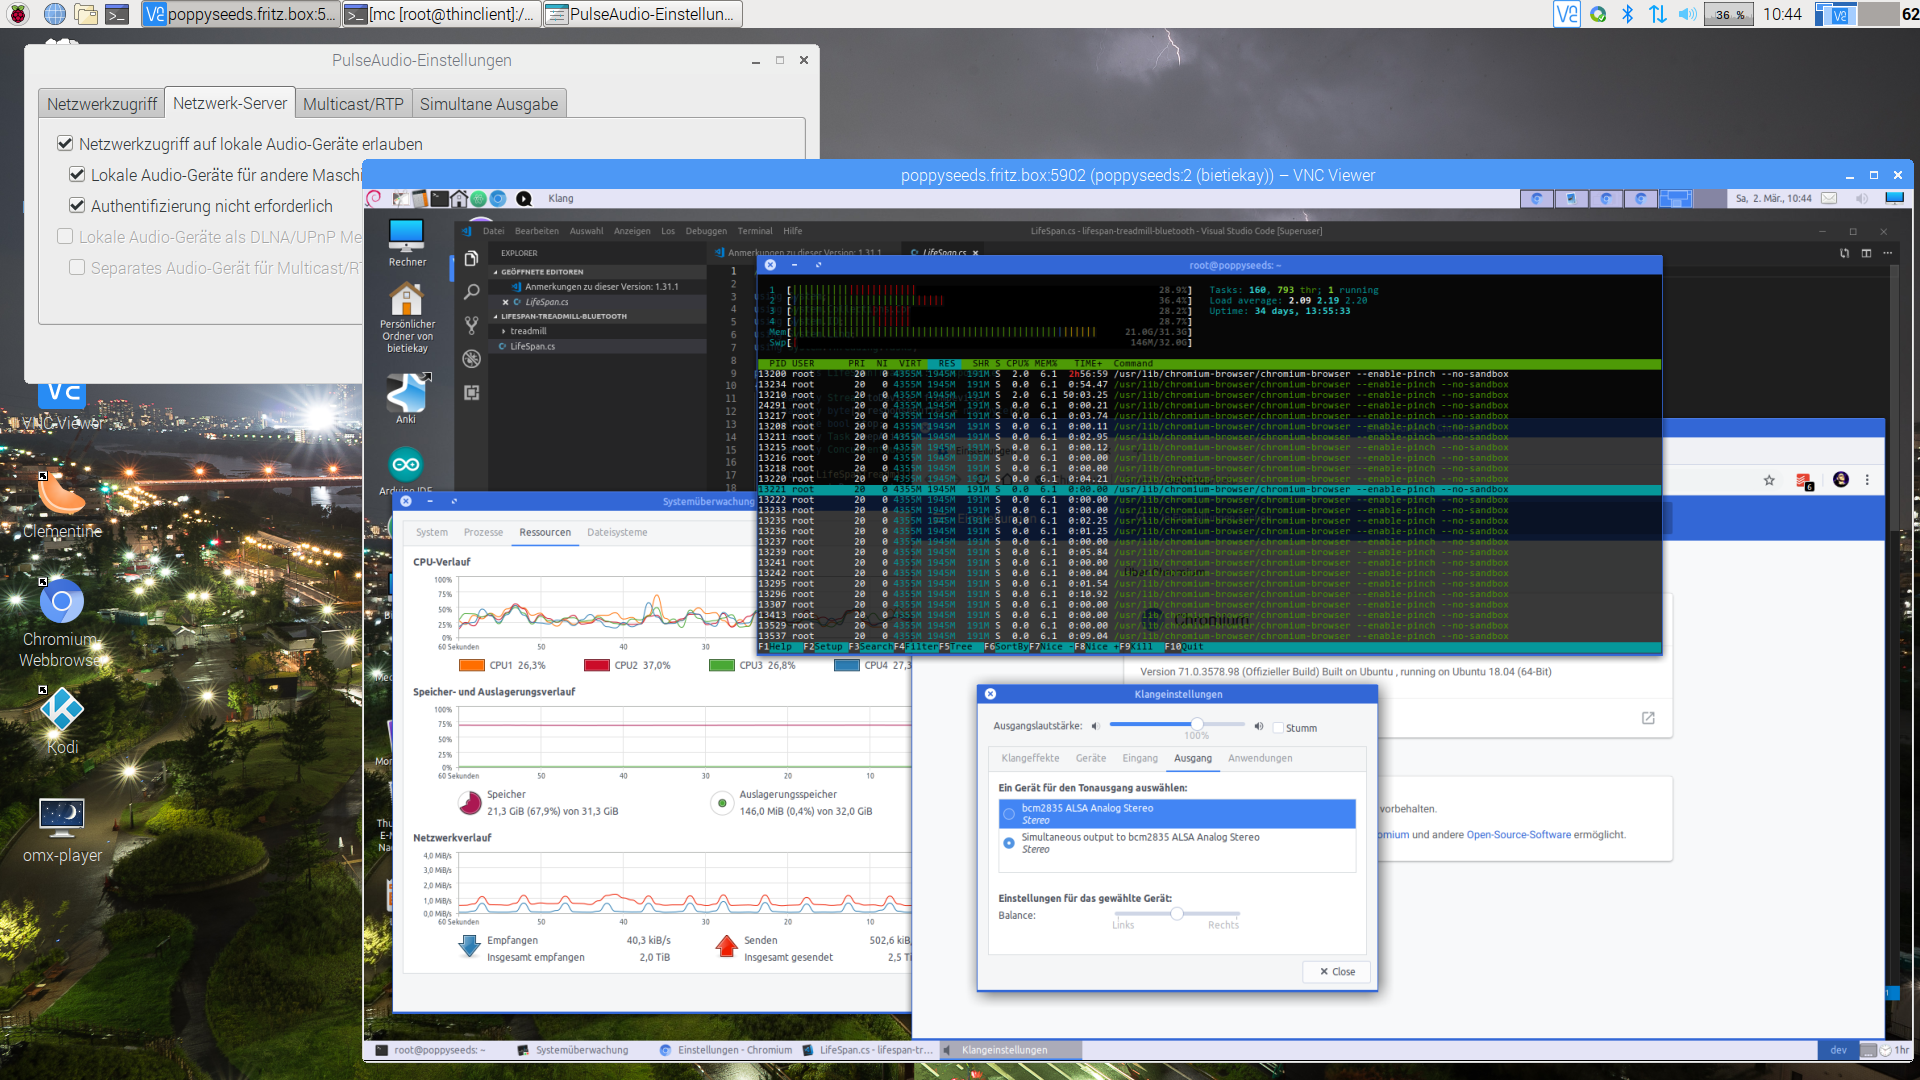
The screenshot above holds an additional information for you. I wanted sound! Video works smooth up to a certain size of the moving video – after all those RaspberryPis only come with sub Gbit/s wired networking. But to get sound working I had to add some additional steps.
First on the RaspberryPI that you want to output the sound to the speakers you need to install and set-up pulseaudio + paprefs. When you configure it to accept audio over the network you can then configure the client to do so.
In the docker container a simple command would then redirect all audio to the network:
pax11publish -e -S thinclient
Just replace “thinclient” with the ip or hostname of your RaspberryPI. After a restart Chrome started to play audio across the network through the speakers of the ThinClient.
Now all my screens got those RaspberryPIs attached to them and with Docker I can even run as many desktop environments in parallel as I wish. And because VNC does not care about how many connections there are made to one session it means that I can have all workplaces across the house connected to the same screen seeing the same content at the same time.
And yes: The UI and overall feel is silky smooth. And since VNC adapts to some extend to the available bandwidth by changing the quality of the image even across the internet the VNC sessions are very much useable. Given that there’s only 1 port for video and 1 port for audio it’s even possible to tunnel those sessions across to anywhere you might need them.
One thing I cannot do without linking to external sources or having control over the content storage is to have videos here on the pages.
There are a couple of options to achieve this and I am evaluating some of them right now. The goal is very clear:
So let’s see some options tried out:
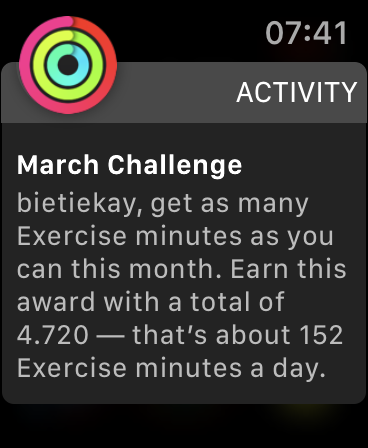
We are using Apples smartwatch to measure some health stats during our workouts. And Apple Watch is doing a great job at that.
With all that polish one would expect better from what Apple has to offer in the software department…
Apple Watch has monthly challenges that get automatically generated from previous measurements. But seeing that an already much above average activities number would have to be doubled to complete the challenge is absurd. To a degree where challenges are arguably health risks…
Ever since we had changed our daily diet we started to weigh everything we eat or cook. Like everything.
Quickly we found that those kitchen scale you can cheaply buy are either not offering the convenience we are looking for or regularly running out of power and need battery replacements.
As we already have all sorts of home automation in place anyway the idea was born to integrate en ESP8266 into two of those cheap scales and – while ripping out most of their electronics – base the new scale functionality on the load cells already in the cheap scale.
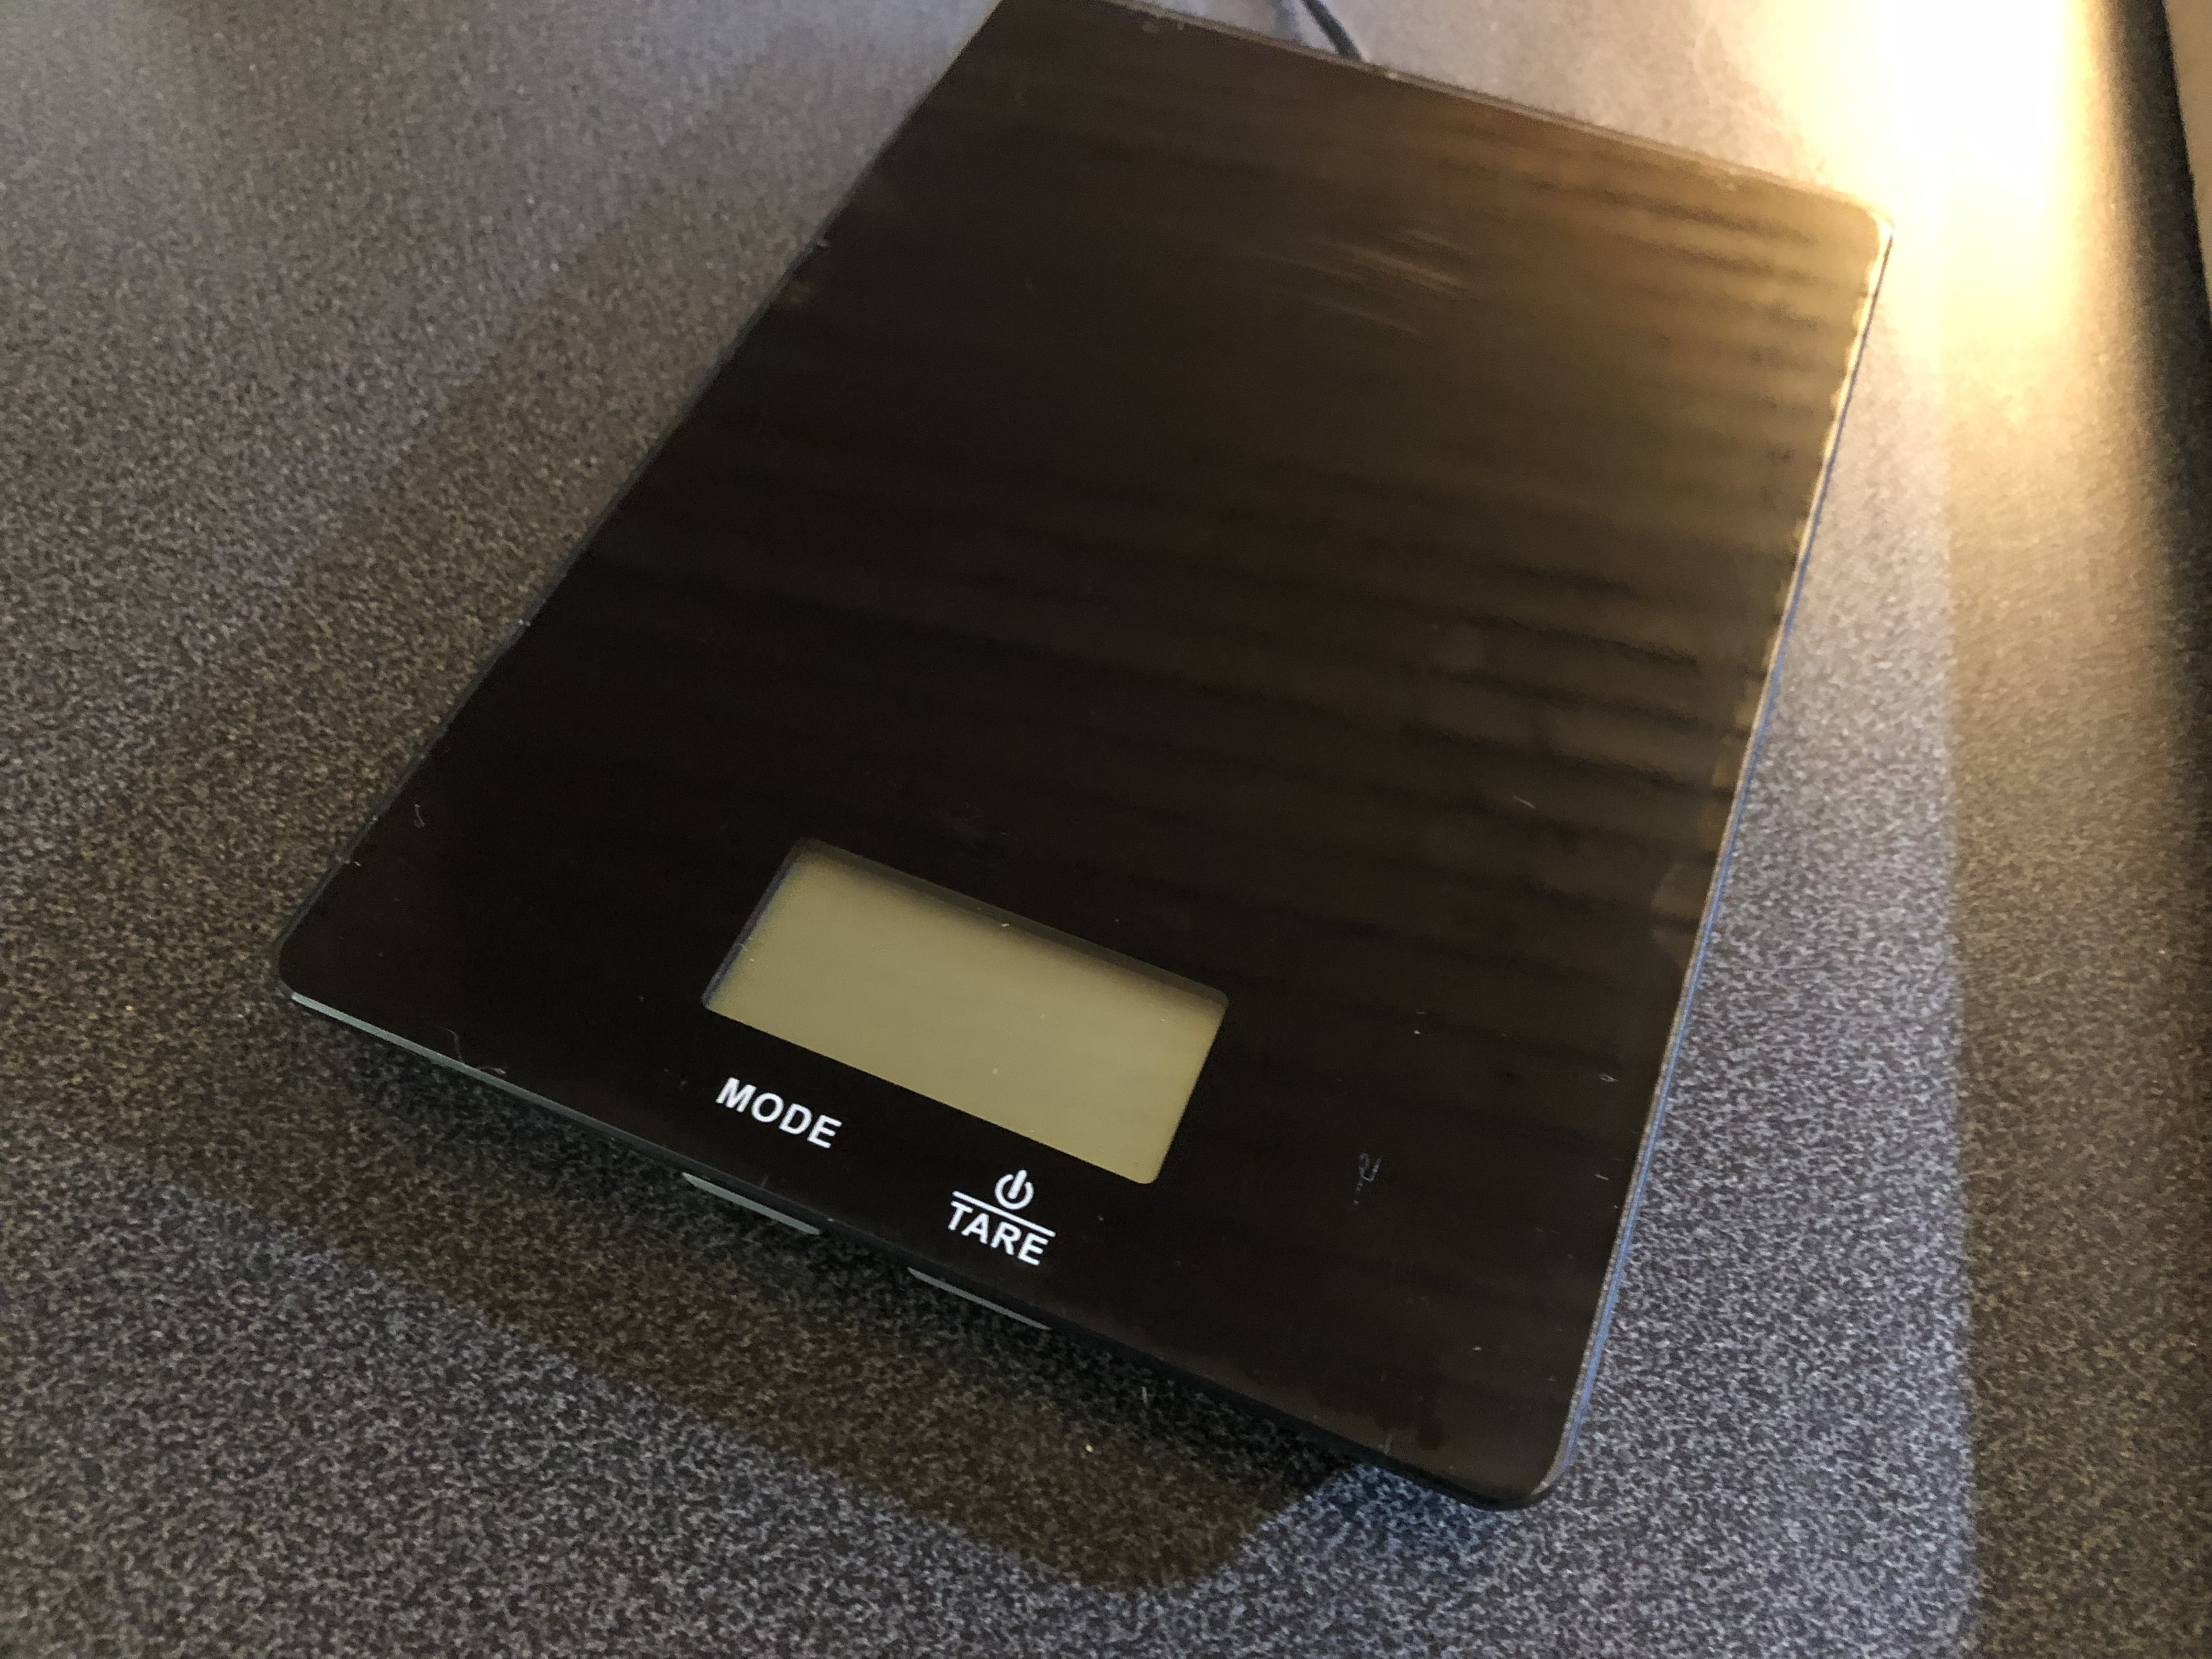
So one afternoon in January 2018 I sat down and put all the parts together:
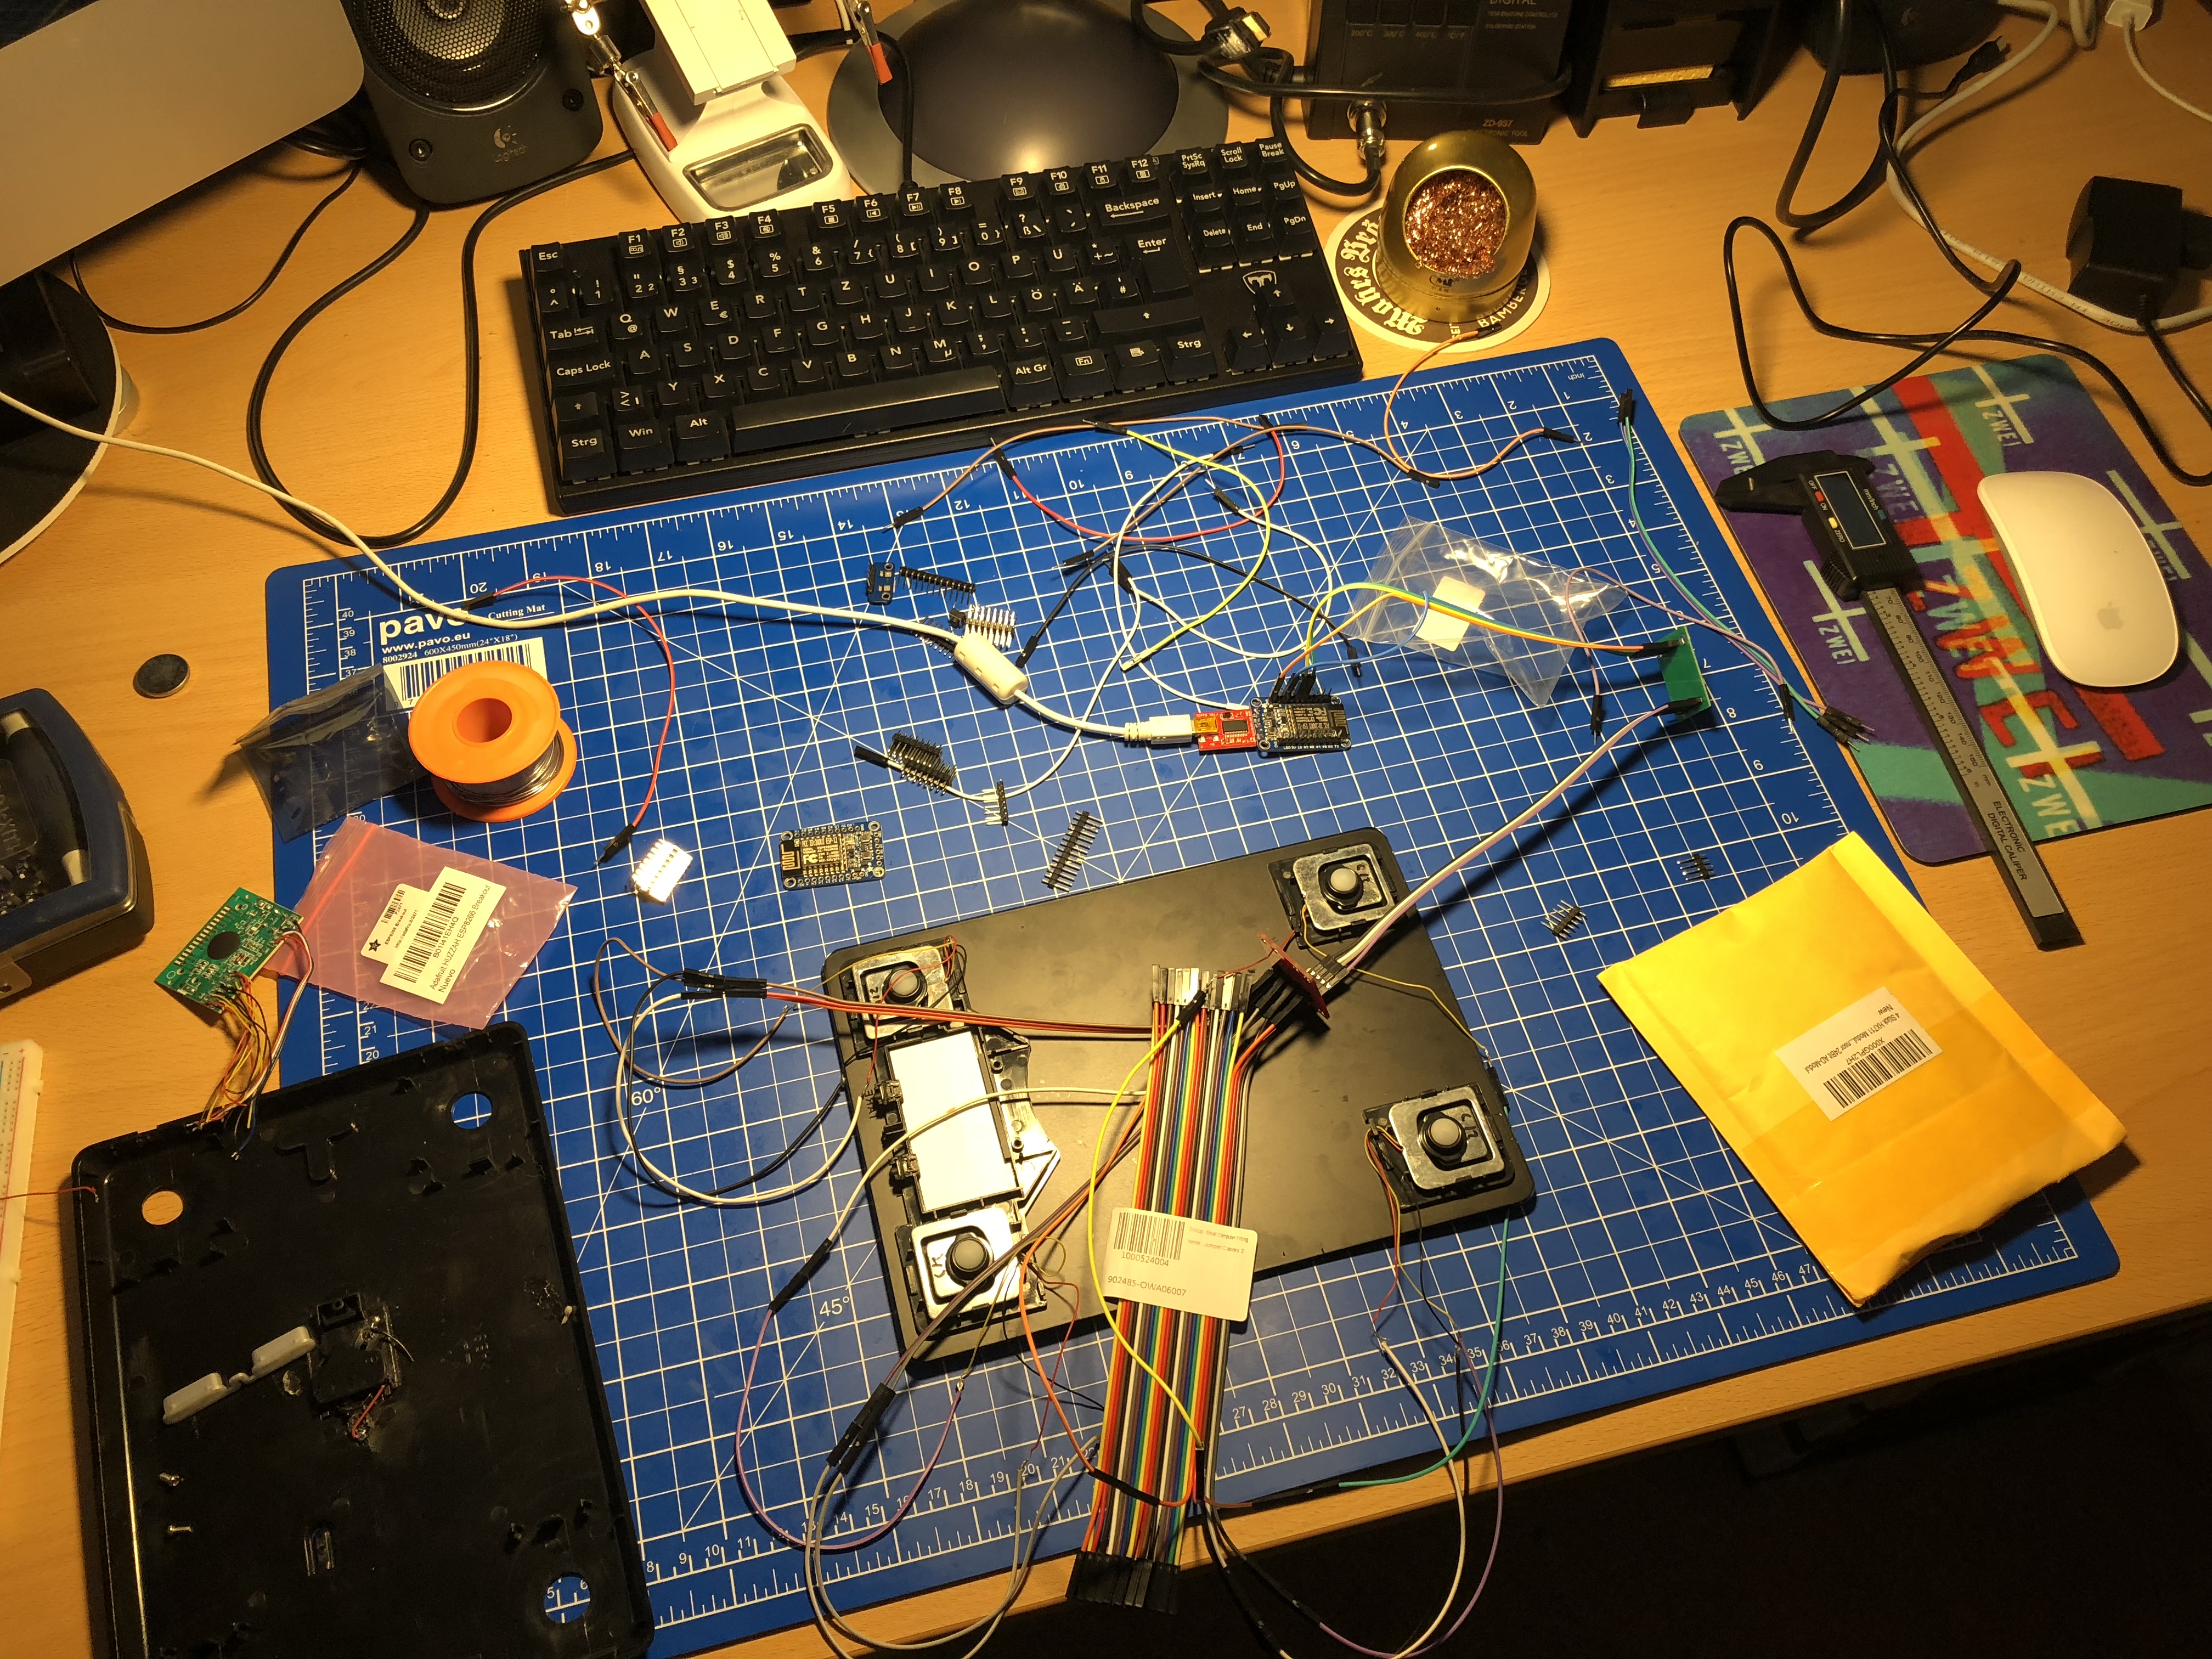

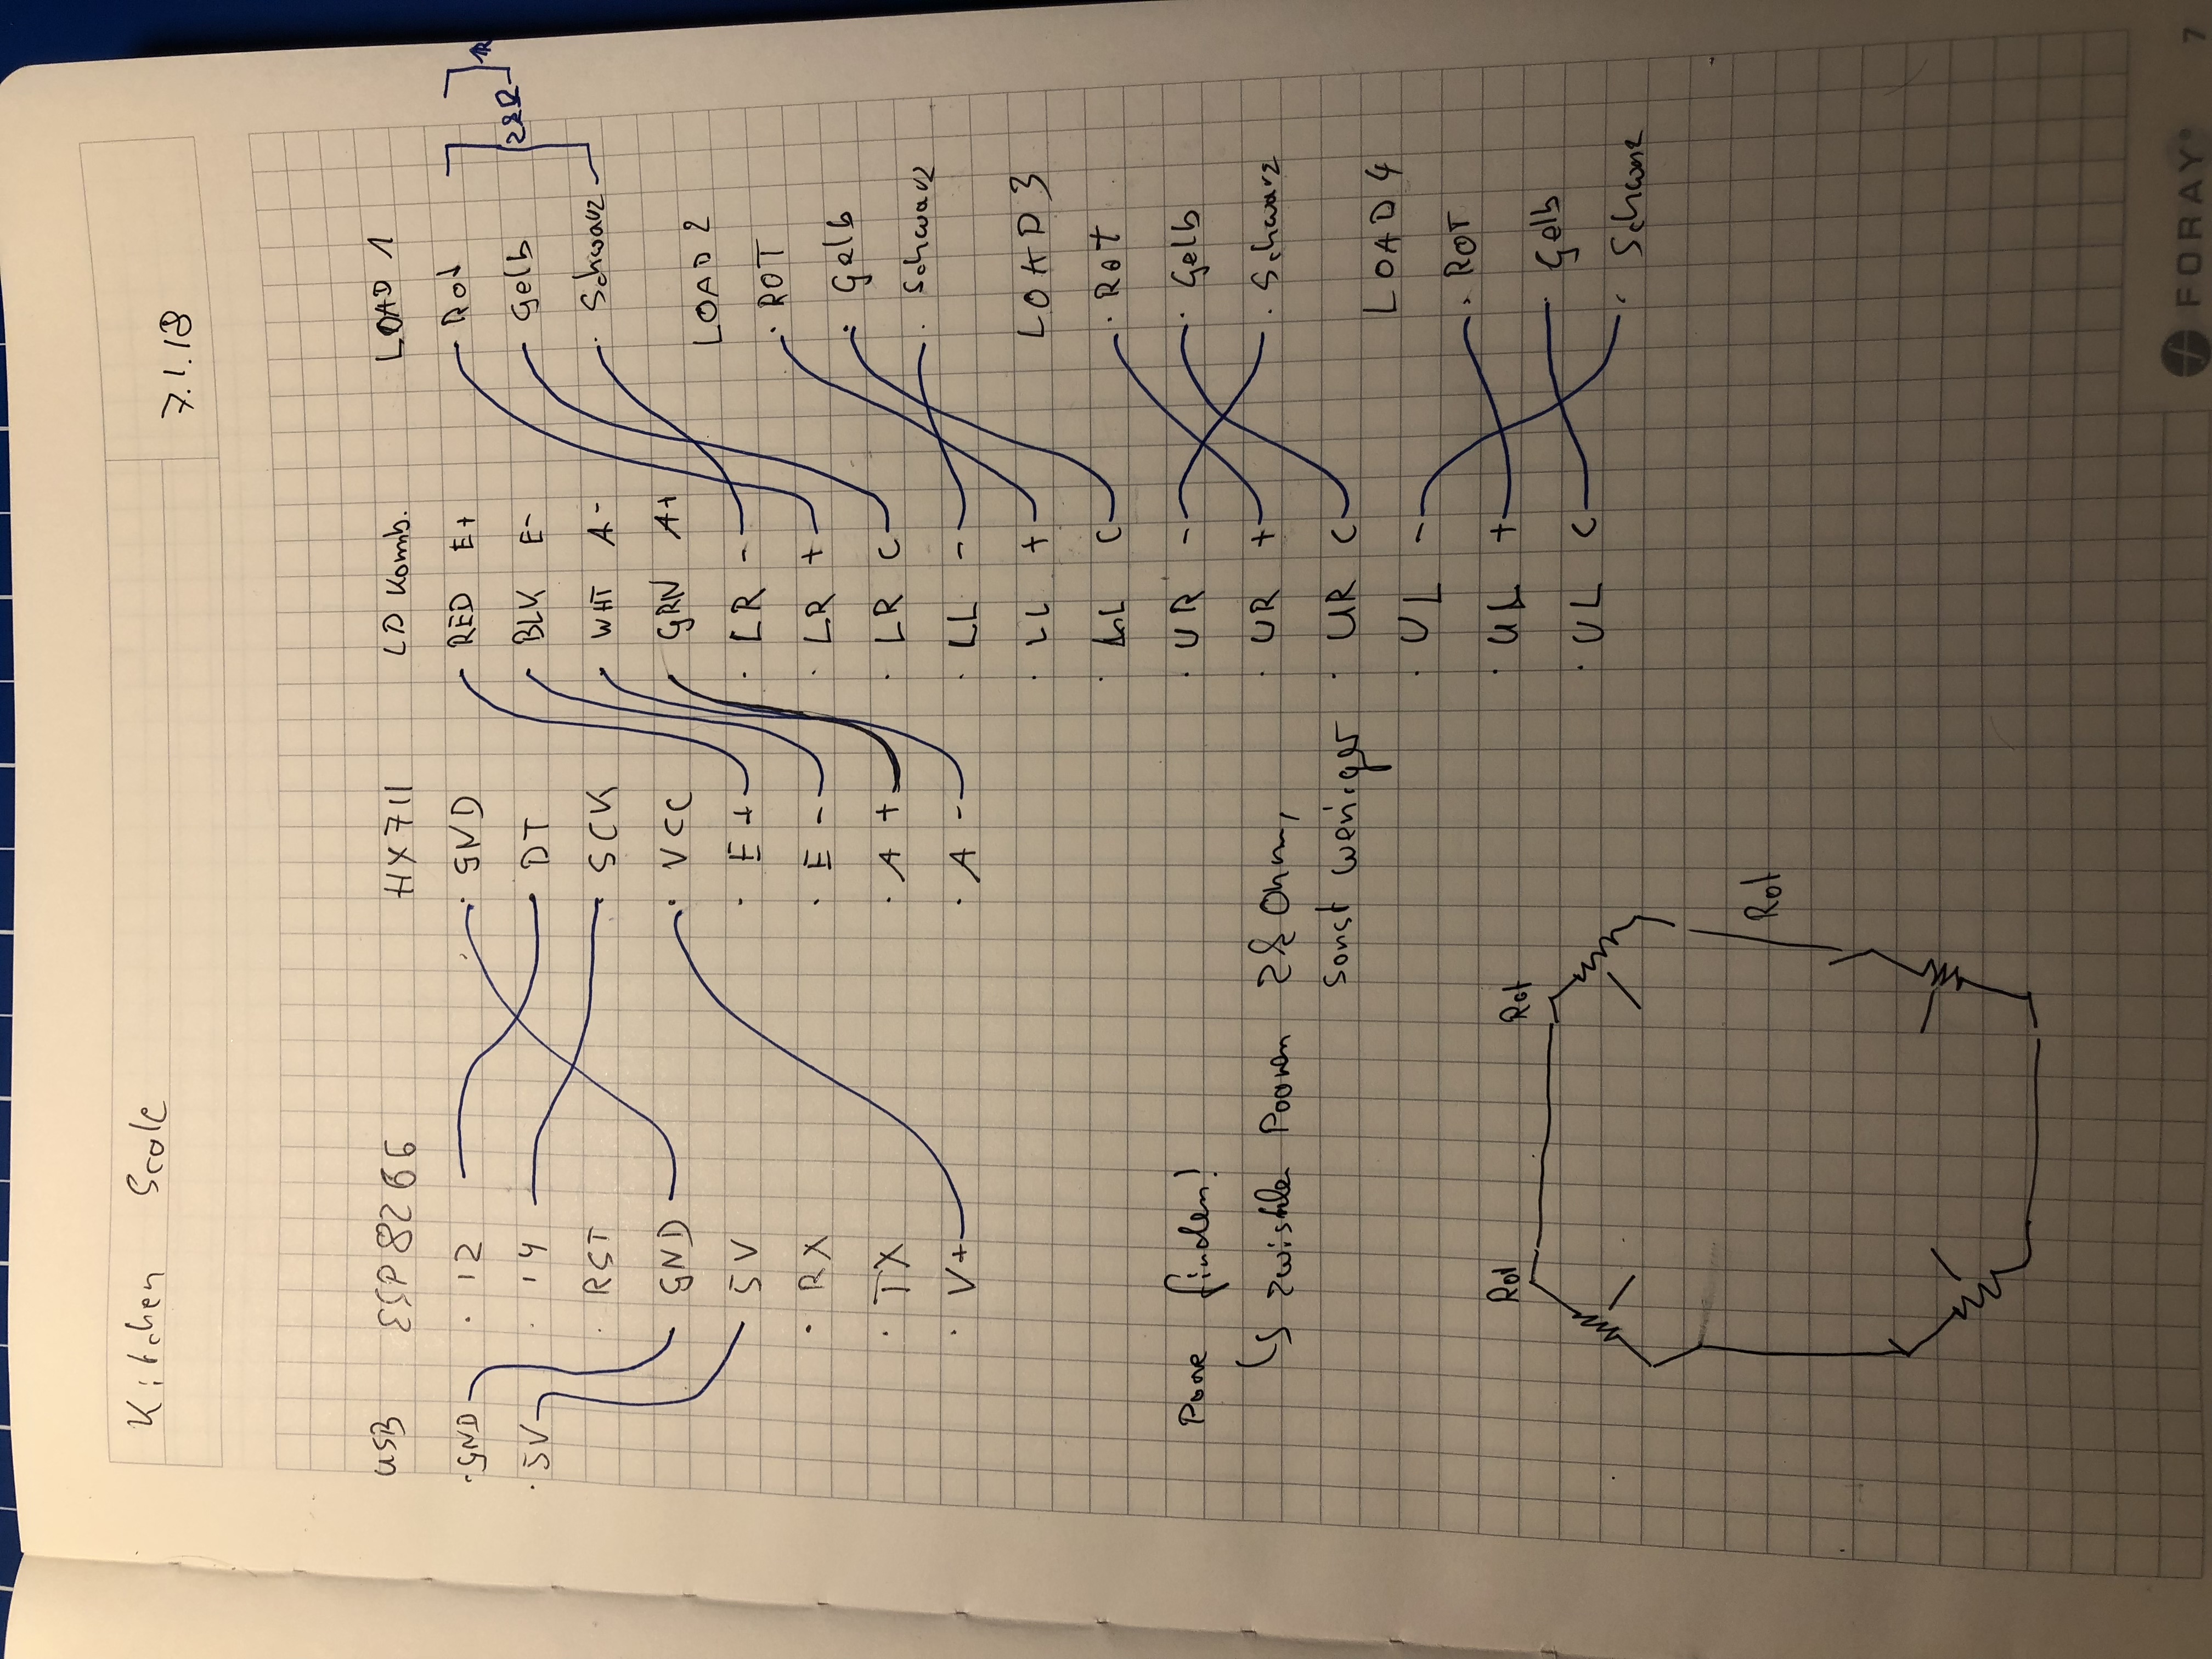
After the hardware portion I sat down and programmed the firmware of the ESP8266. The simple idea: It should connect to wifi and to the house MQTT broker.
It would then send it’s measures into a /raw topic as well as receive commands (tare, calibration) over a /cmd topic.
Now the next step was to get the display of the measured weights sorted. The idea for this: write a web application that would connect to the MQTT brokers websocket and receive the stream of measurements. It would then add some additional logic like a “tare” button in the web interface as well as a list of recent measurements that can be stored for later use.
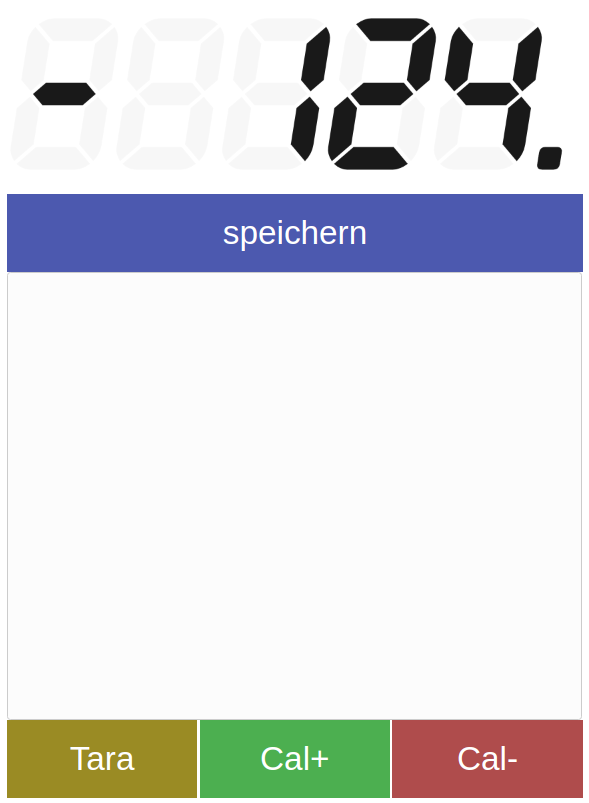
An additional automation would be that if the tare button is pressed and the weight is bigger than 10g the weight would automatically be added to the measurements list in the web app – no matter which of the tare buttons where used. The tare button in the web app or the physical button on the actual scale. Very practical!
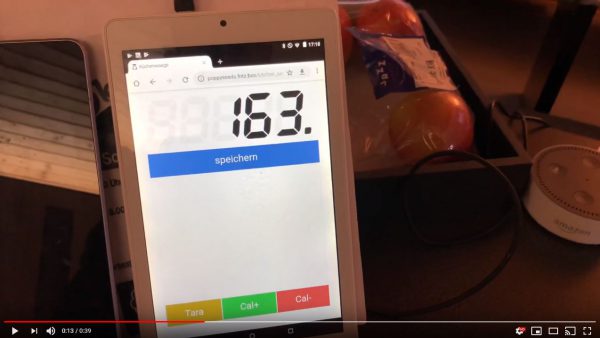
Here’s a short demo of the logic, the scale and the web app in a video:
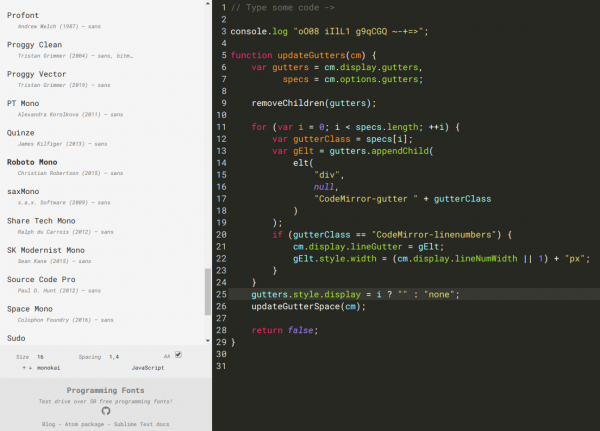
We are looking at our screens more and more time of the day and most of that time we are reading or writing text. Text needs to look pretty for our eyes not to get sore – apart from the obvious “being able to tell what letter that is” there is a big portion of personal taste and preference when it comes to the choice of the font.
Most of the texts I am writing benefit from monospaced fonts.
This blog celebrates monospaced fonts for programming.
programmingfonts.org/about
So many fonts have popped up in recent years.
Of course there’s a nice page available that previews the fonts right in your browser:
In 2017 Texas Instruments had released a line of cheap industry grade LED projectors meant to be used in production lines and alike:
DLP® LightCrafter Display 2000 is an easy-to-use, plug-and-play evaluation platform for a wide array of ultra-mobile and ultra-portable display applications in consumer, wearables, industrial, medical, and Internet of Things (IoT) markets. The evaluation module (EVM) features the DLP2000 chipset comprised of the DLP2000 .2 nHD DMD, DLPC2607 display controller and DLPA1000 PMIC/LED driver. This EVM comes equipped with a production ready optical engine and processor interface supporting 8/16/24-bit RGB parallel video interface in a small-form factor.
Texas Instruments
And of course this got picked up by the makers. In the hands of people like MickMake who designed an adapter PCB for the RaspberryPi Zero W to the smallest projector available from TI.
After I had learned about the existence of those small projectors I had to get a couple and try for myself. There would be so many immediate and potential applications in our house.
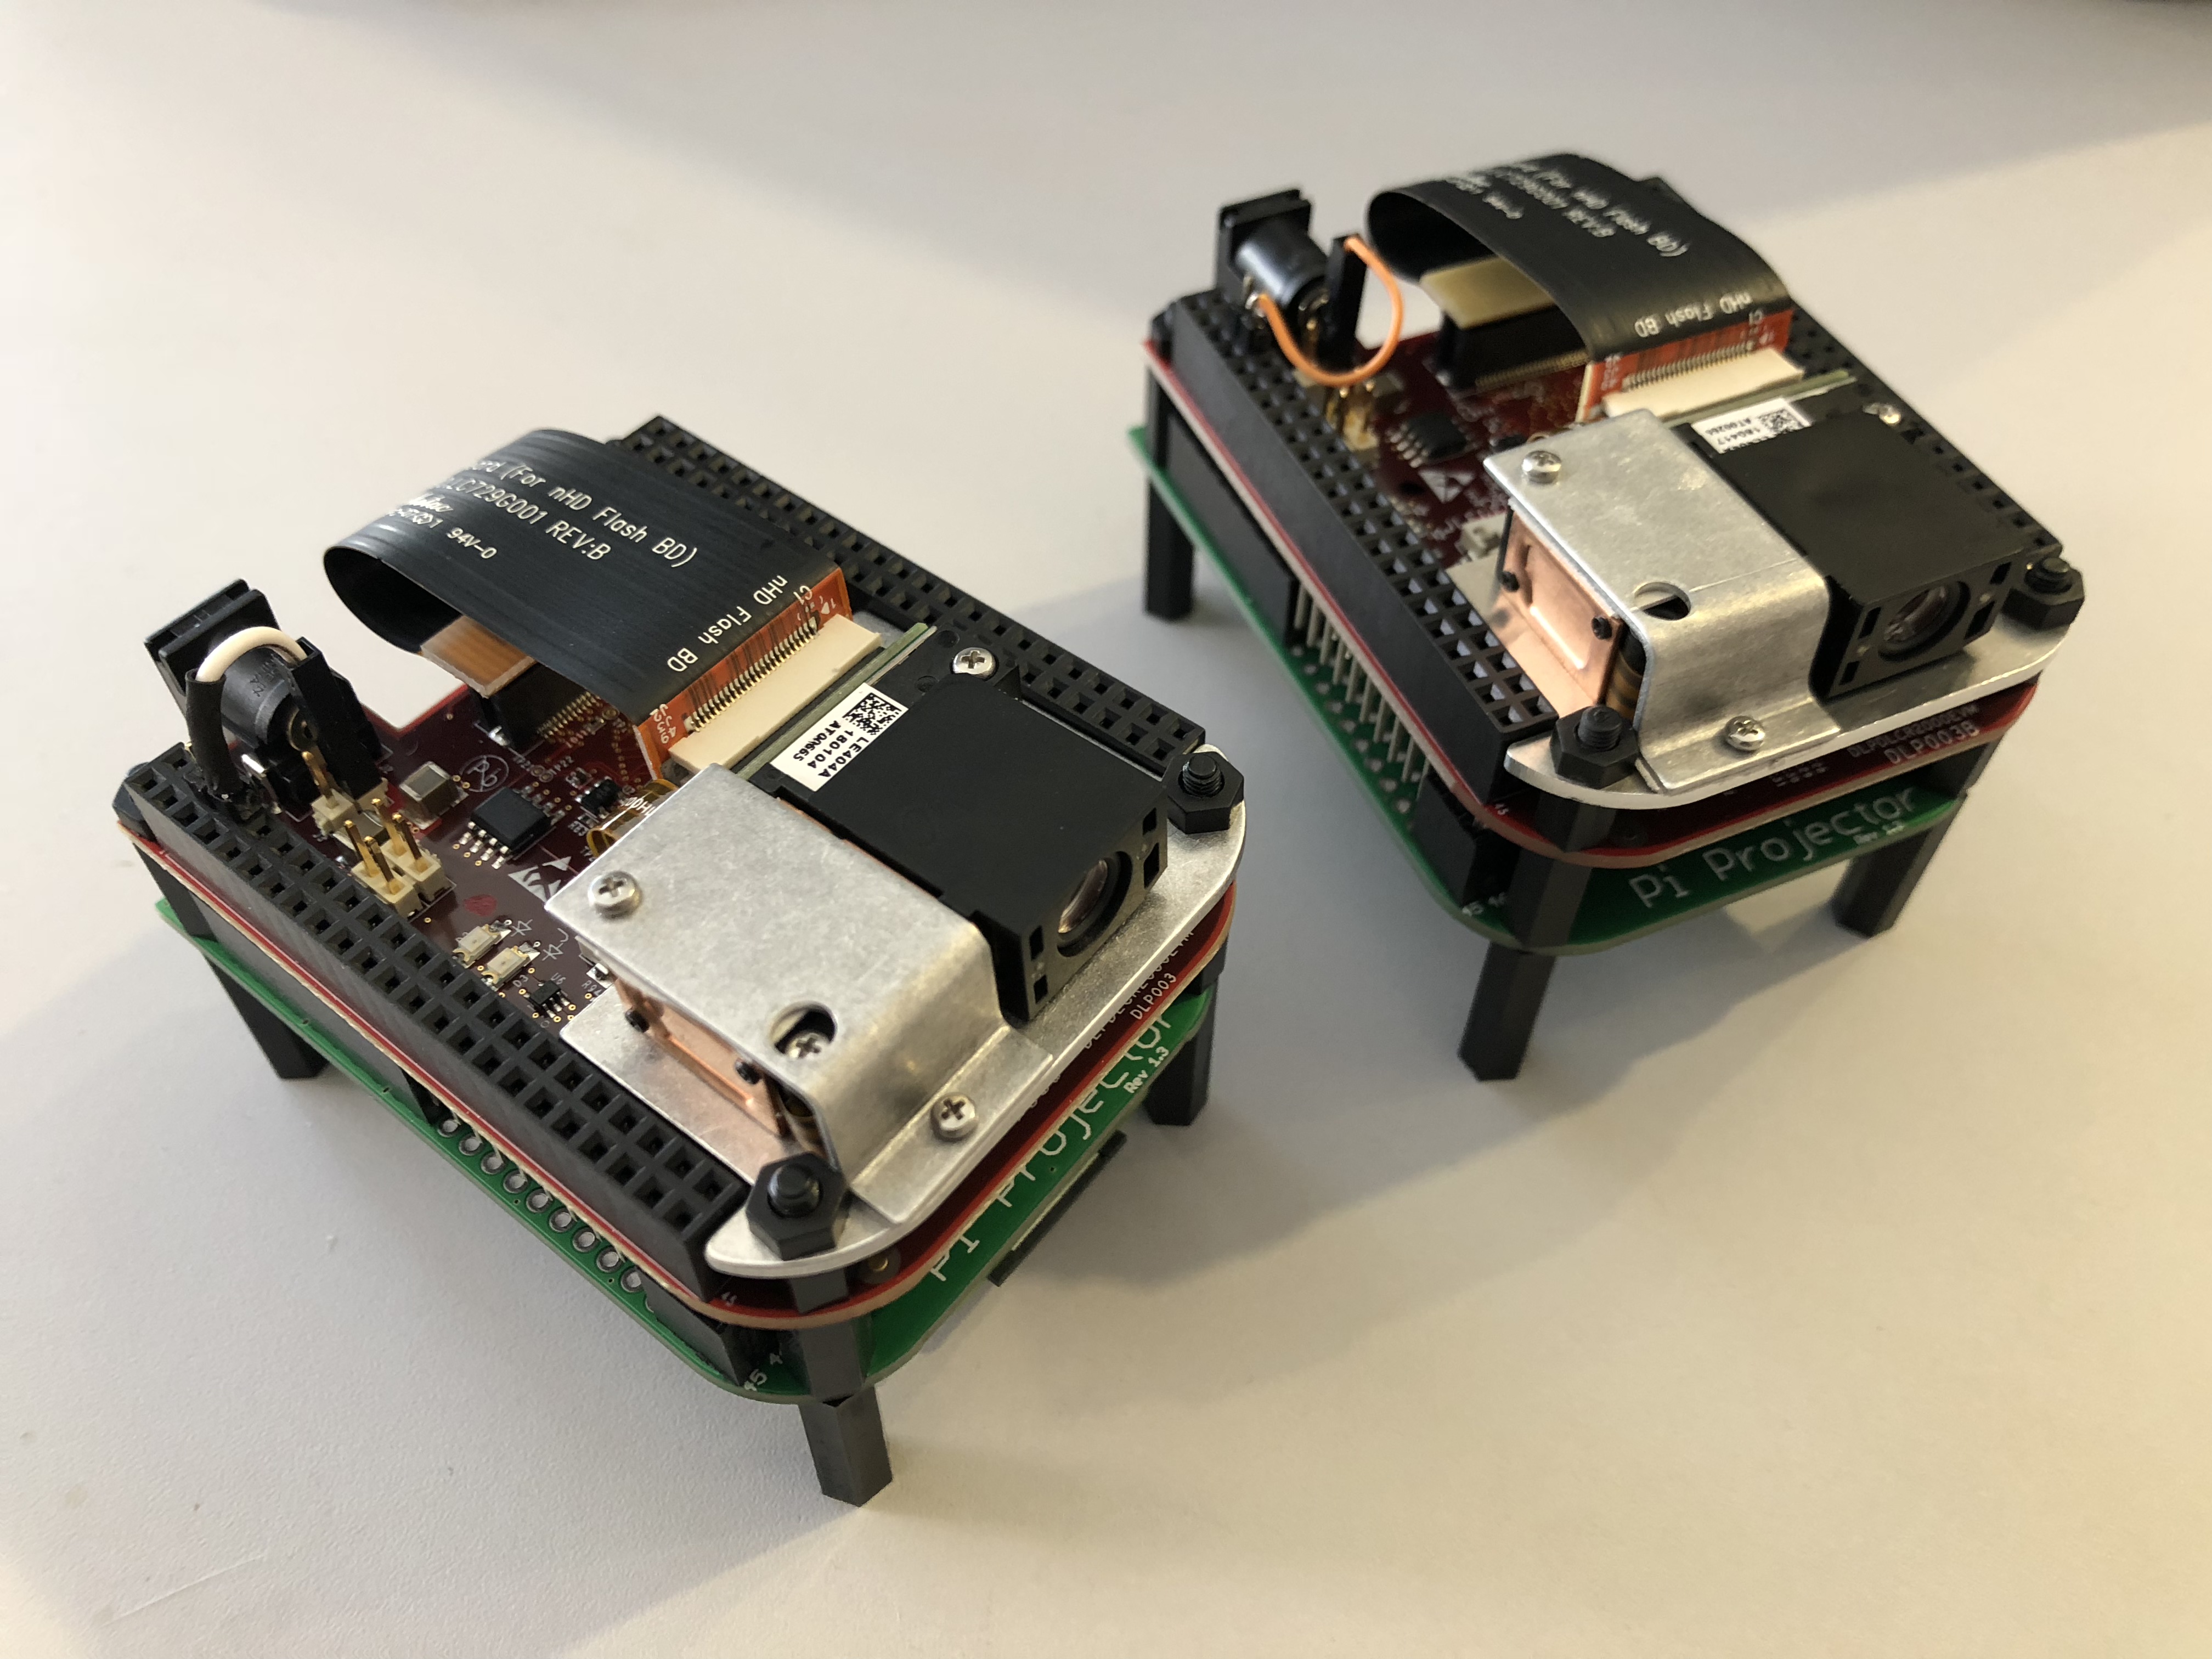
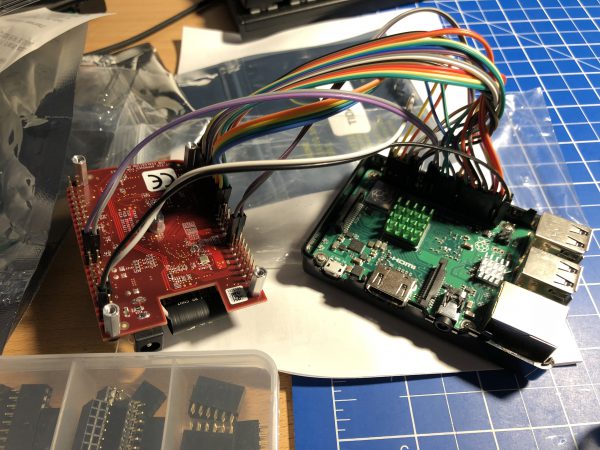
After having them delivered I did the first trial with just a breadboard and the Raspberry Pi 3.
The projector module has a native resolution of 640×360 – so not exactly high-pixel-density. And of course if the image is projected bigger the screen-door effect is quite noticeable. Also it’s not the brightest of images depending on the size. For the usual use-cases the brightness is definitely sufficient.
Downsides
Upsides
So what are these use cases that require such a projector you ask?
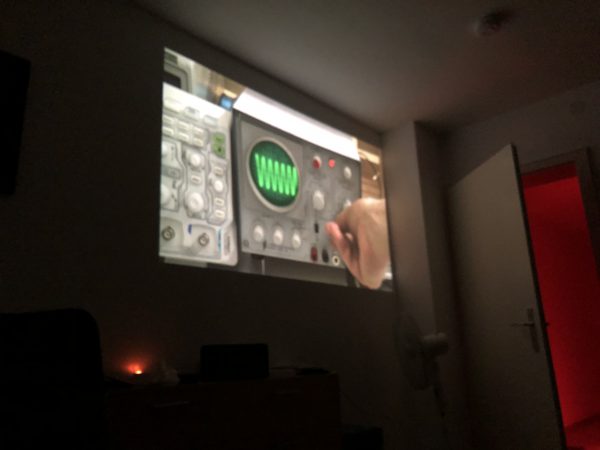
Night status display:
For the last 20+ years I am used to sleep with a “night playlist” running. So far a LED TV was used at the lowest brightness possible. Still it was pretty bright. The projector module allows to dim the brightness down to almost “moon brightness” and also allows to adjust the color balance towards the reds. This means: the perfect night projection is possible! And the power consumption is extremely low. A well watchable lowest brightness red-shifted image also means much lower temperatures on the projector module – it’s crazy how low powered, low temperature.
Season Window Projection:
Because the projector is small, low-powered and bright enough for back-lit projection we tried and succeeded with a Halloween window projection scene the last season.
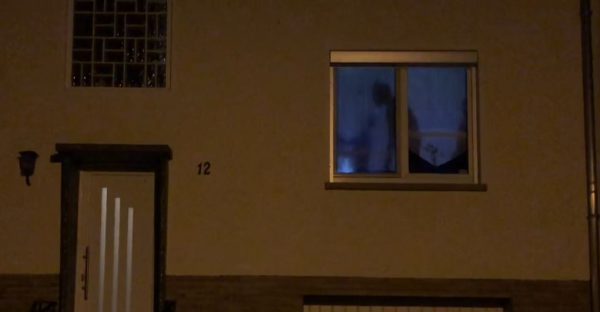
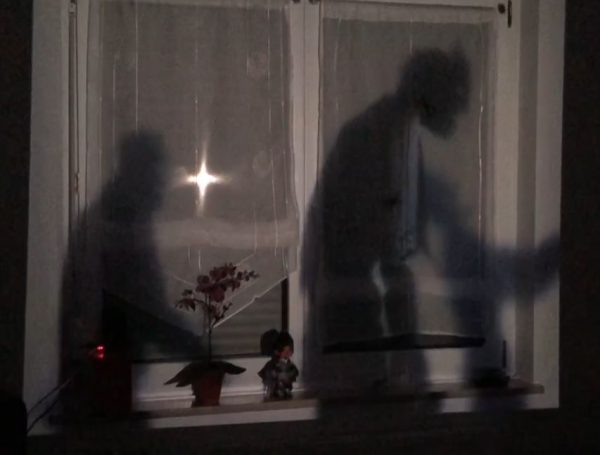
It really looks funky from the outside – funky enough to have several people stop in front of the house and point fingers. All that while power consumption was really
House overall status projections:
When projecting information is that cheap and power efficient it really shines when used to display overall status information like house-alarm status, general switch maps, locations of family members and so on. I’ve left those to your imagination as these kind of status displays are more or less giving away a lot of personal information that isn’t well suited for the internet.
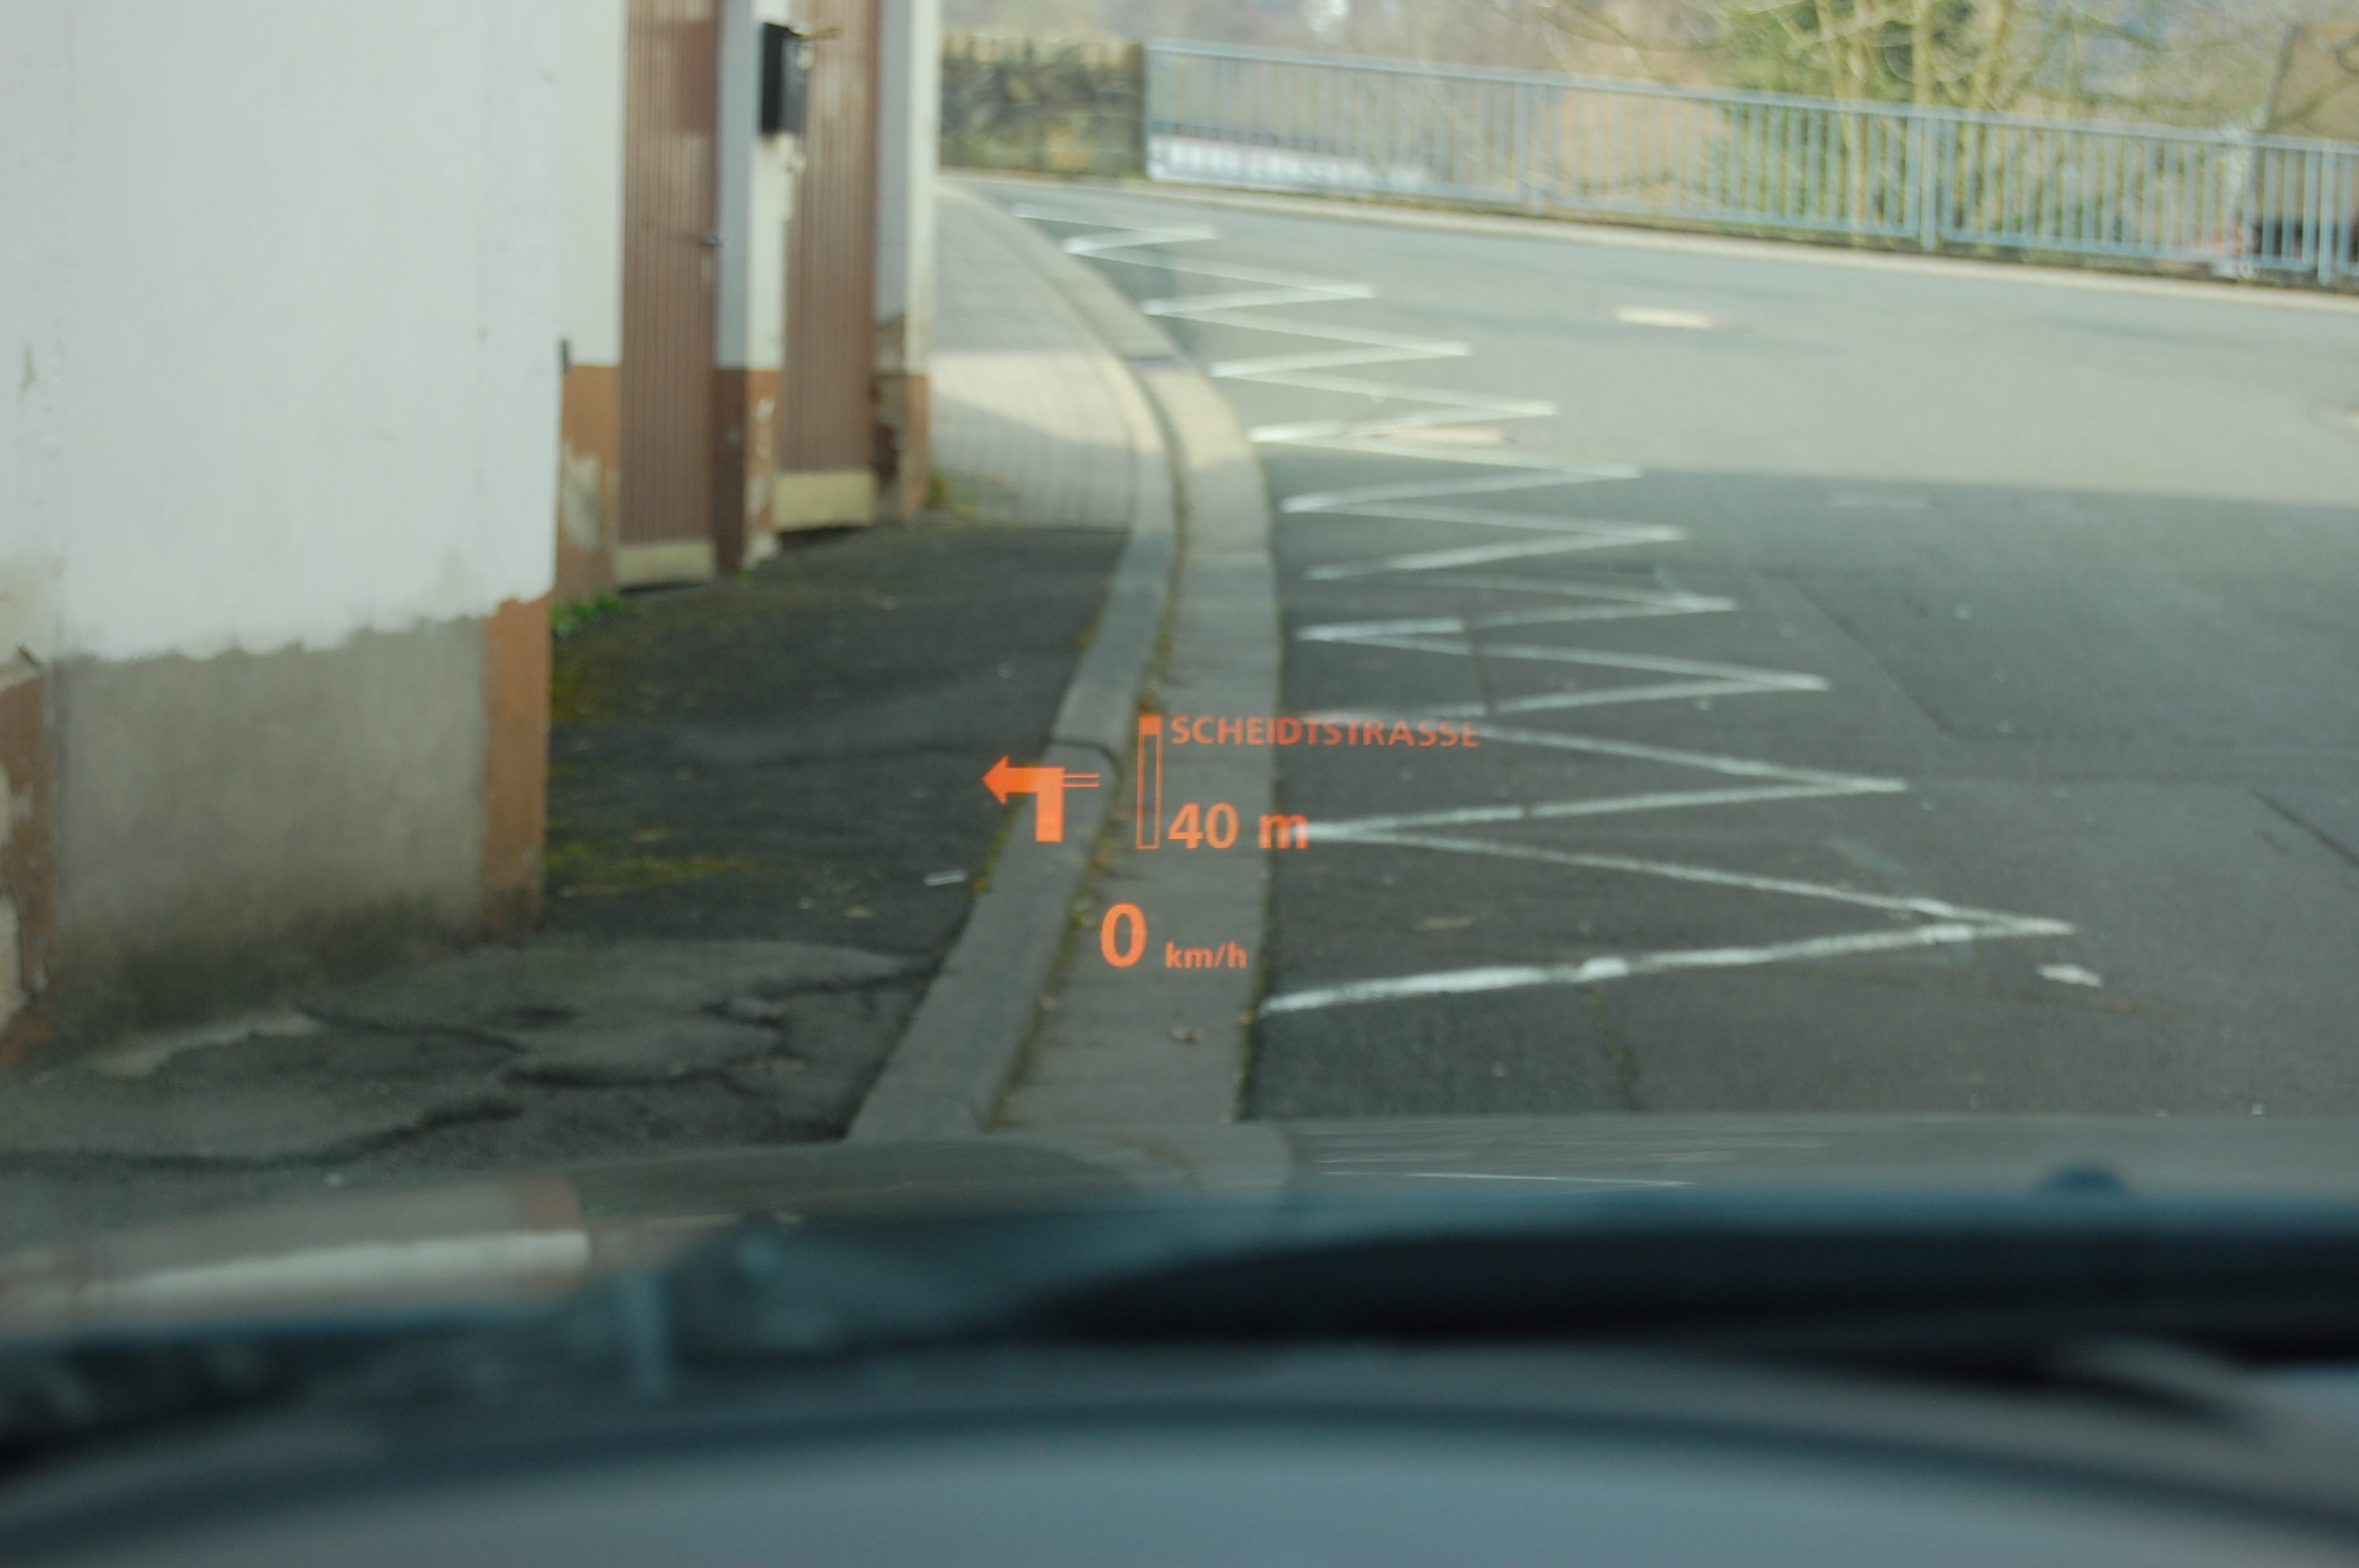
Many cars these days come with head up displays. These kind of displays are used to make information like the current speed appear “floating” over the street ahead right in your field of vision.
This has the clear advantage that the driver can stay focused on the street rather than looking away from the street and to the speedometer.
As practical as it seems these displays are not easy to build and seemingly not easy to design. Every time I came across one it’s built-in functionalities where limited in a way that I only can assume not a lot of thought had gone into what exactly would the driver like to see and how that would be displayed. There was always so much left to desire.
Apparently the technology behind these HUDs is at a point where it’s quite affordable to start playing with some ideas to retrofit a car with a more personal and likeable version.
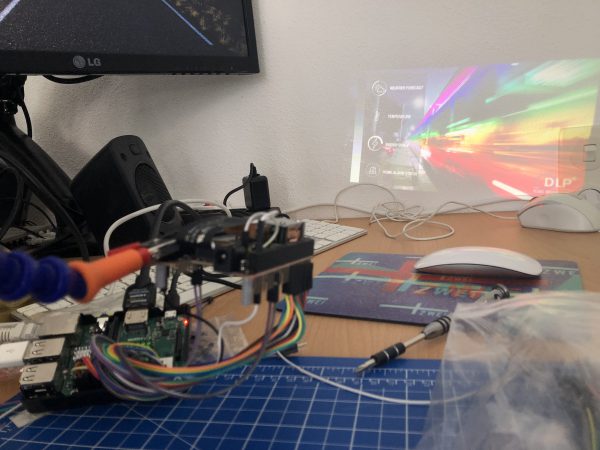
So I started to take a look at what is available – smart phones have bright displays and I had never tried to see what happens when you try to utilize them to project information into the windshield. So I tried.
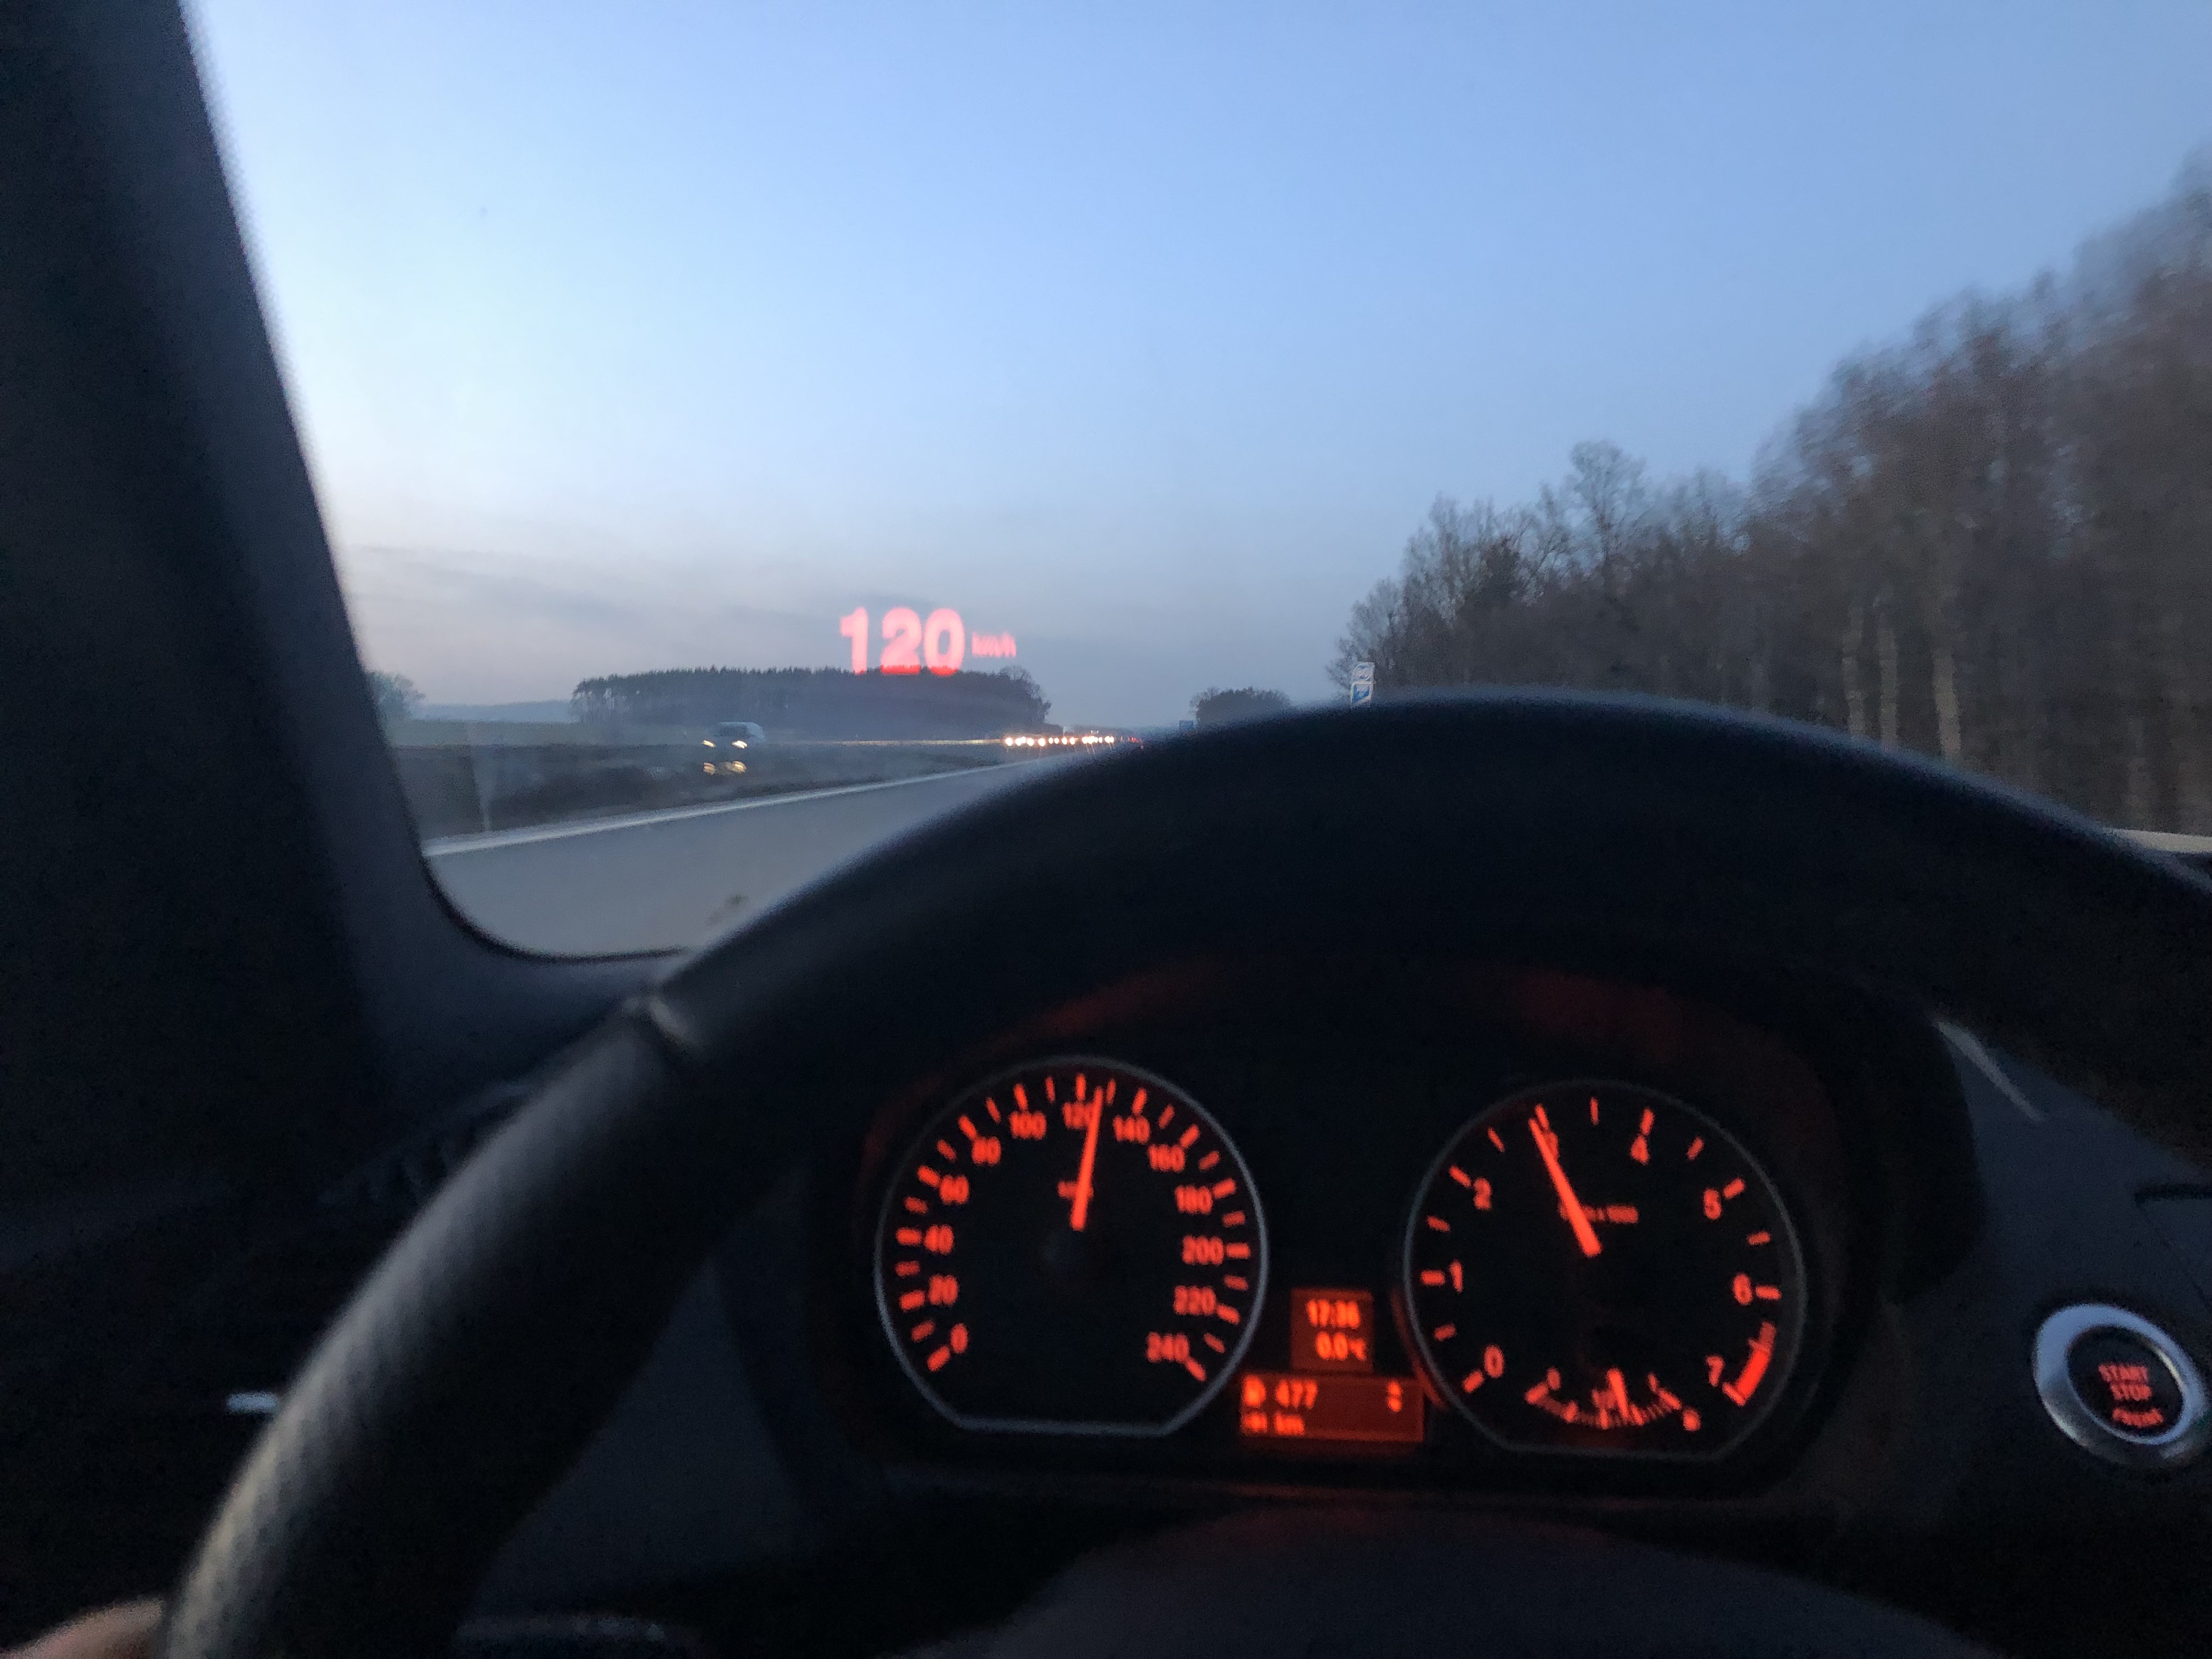
As you can see – bright enough, readable but hazy and not perfectly sharp. The reason is quite simple:
“In the special windshield normally used, the transparent plastic safety material sandwiched in between the two pieces of glass must have a slight and very precise wedge, so that the vehicle operator does not see a HUD double image.”
laserfocusworld
There are some retrofit adhesive film solutions available that claim to help with that. I have not tried any yet. To be honest: to my eye the difference is noticeable but not a deal-breaker.
So I’ve tried apps available. They work. But they do a lot of things different from how I would have expected or done them. They are bearable, but I think it could be done better.
tldr: I started prototyping away and made a list of things that need to be done about the existing HUD applications.
Here’s my list of what I want to achieve:
Navigation is of limited value as the only way I could think of adding value would be a serious AR solution that uses the whole windshield. Now I’ve got these small low-power projectors around… that get’s me thinking…
What would you want to have in such a HUD in your car?
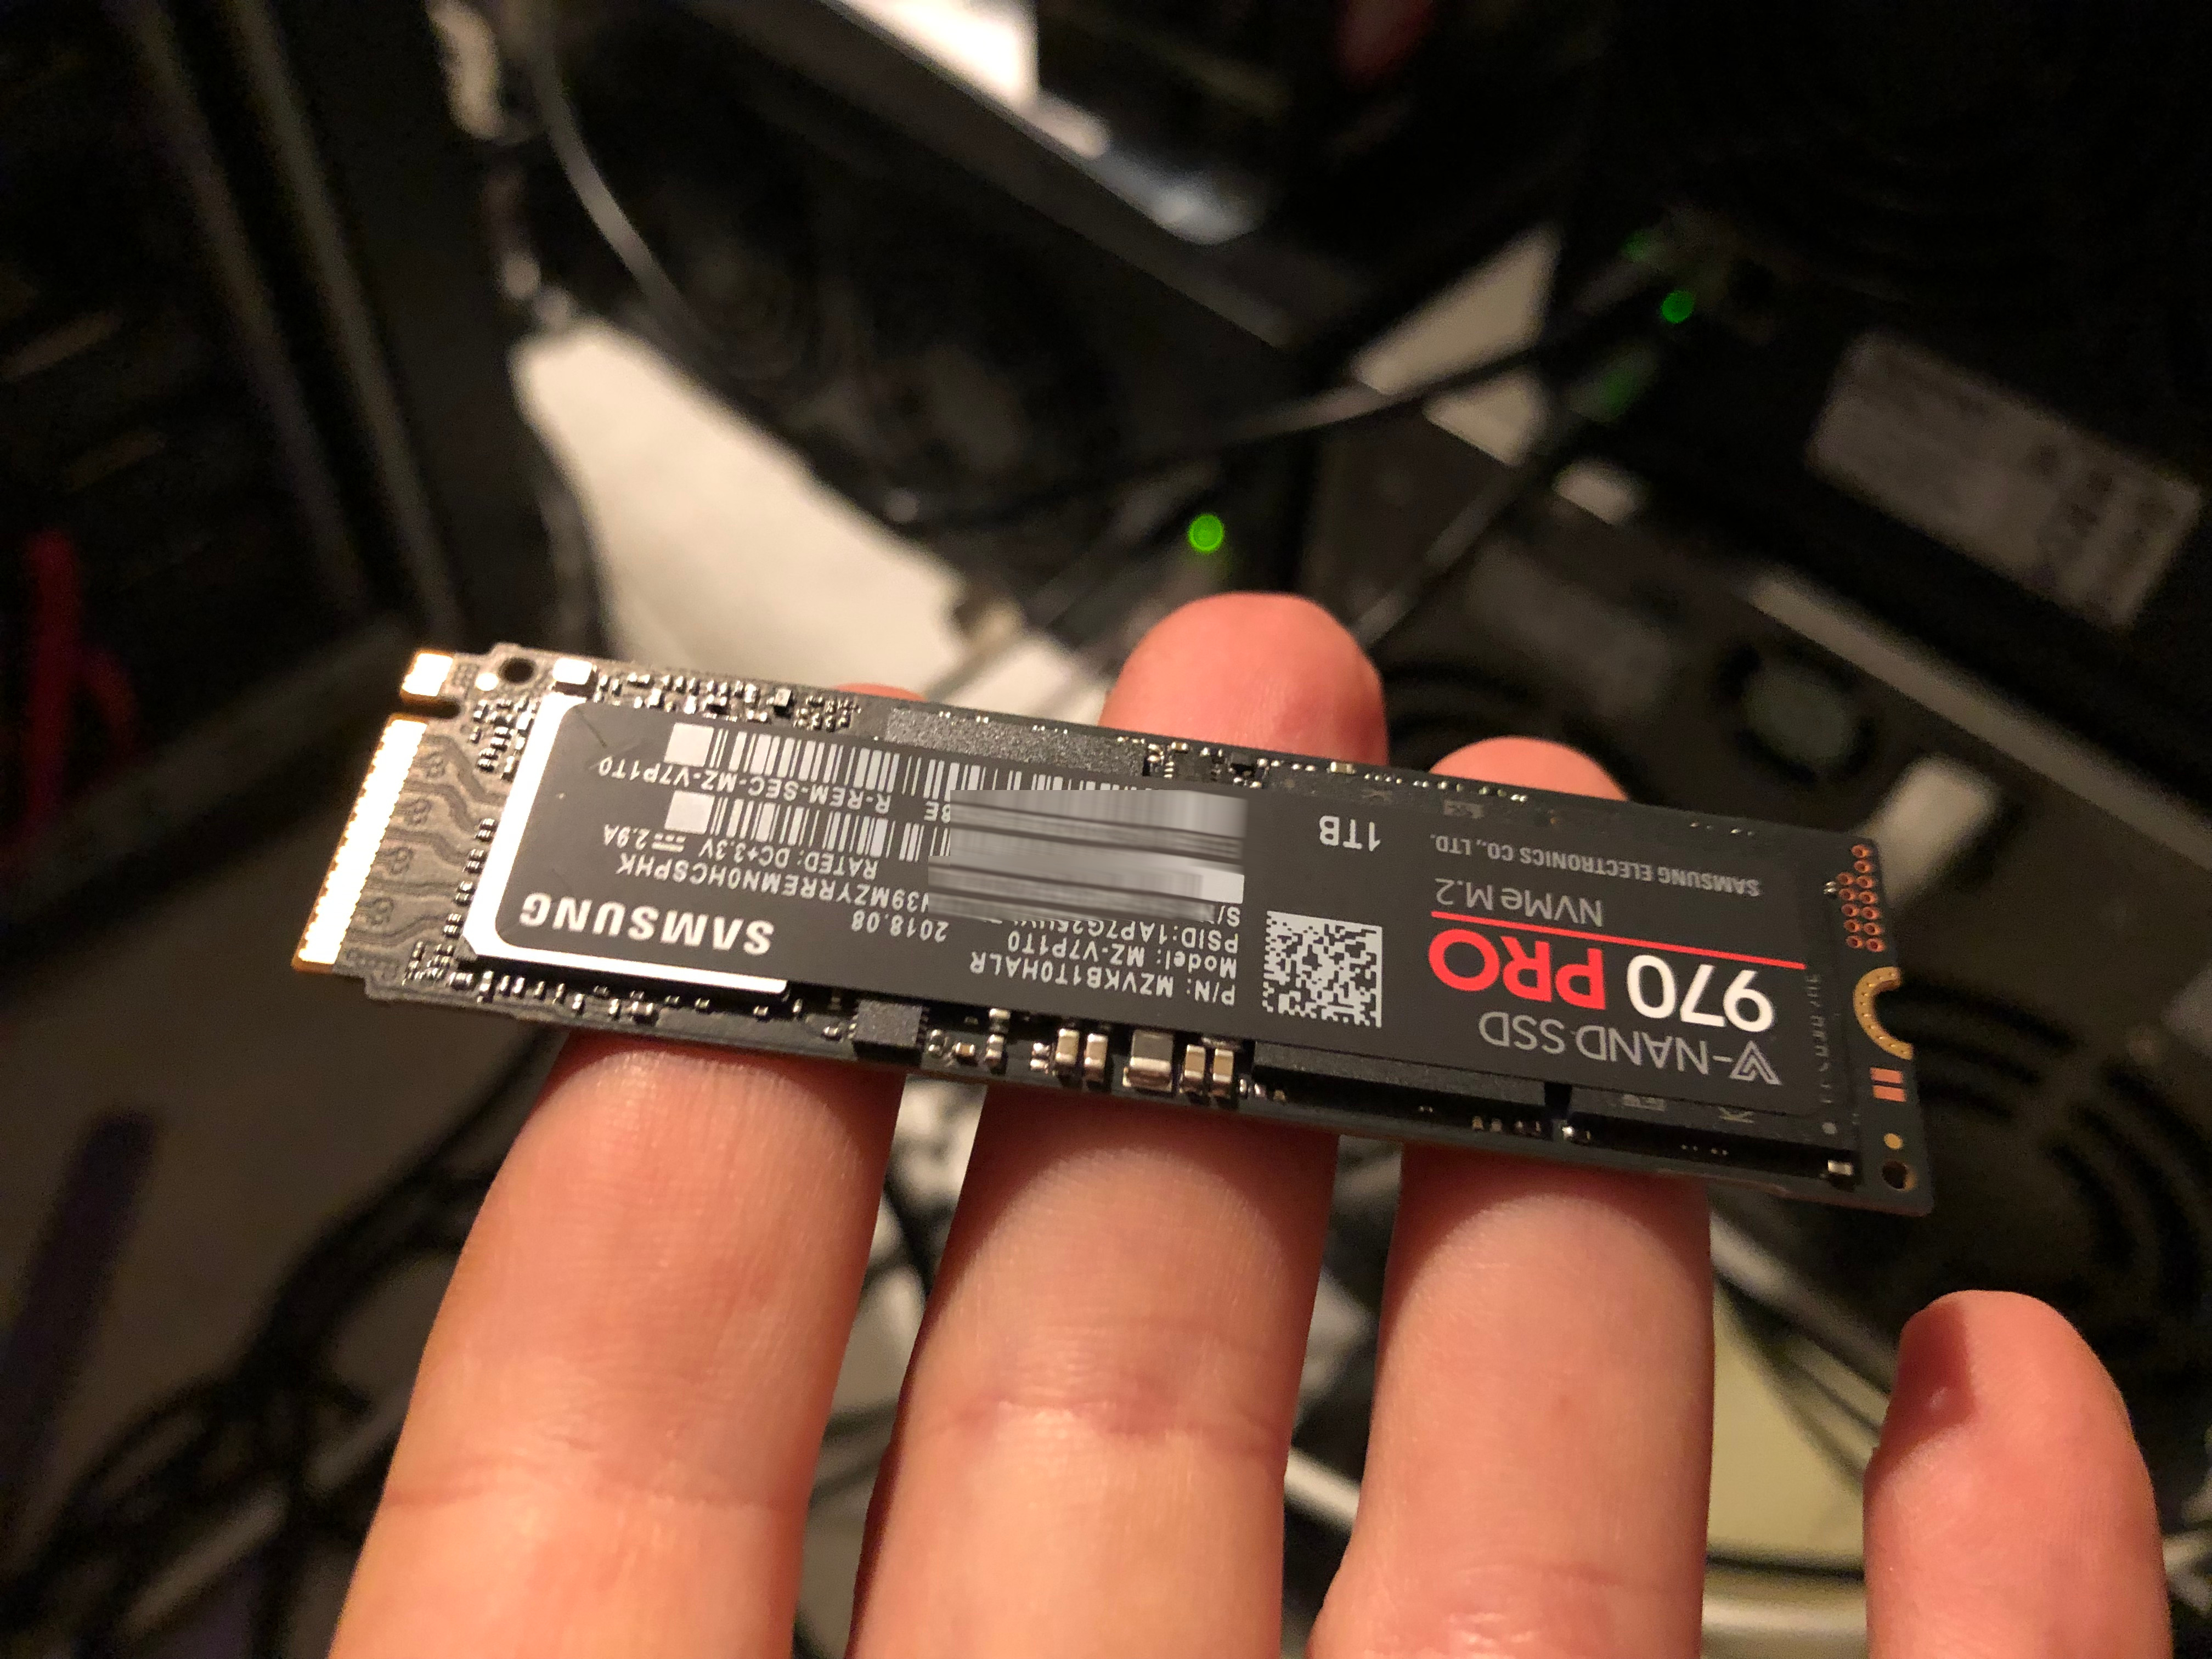
A week ago I had written about another mechanical hard drive that was about to bite the dust in our houses elaborate set-up.
Not having time for a full-day-of-focus I postponed the upgrade to this saturday. With the agreement of the family as they are suffering through the maintenance period as well.
The upgrade would need cautious preparation in order to be doable in one sitting. And this was also meant to be some sort of disaster-recovery-drill. I would restore the house central docker and service infrastructure from scratch along this.
And this would need to happen:
Apart from some hardware/bios related issues and the rather unexpected netplan introduction everything went fairly good. It just takes ages to see data copied.
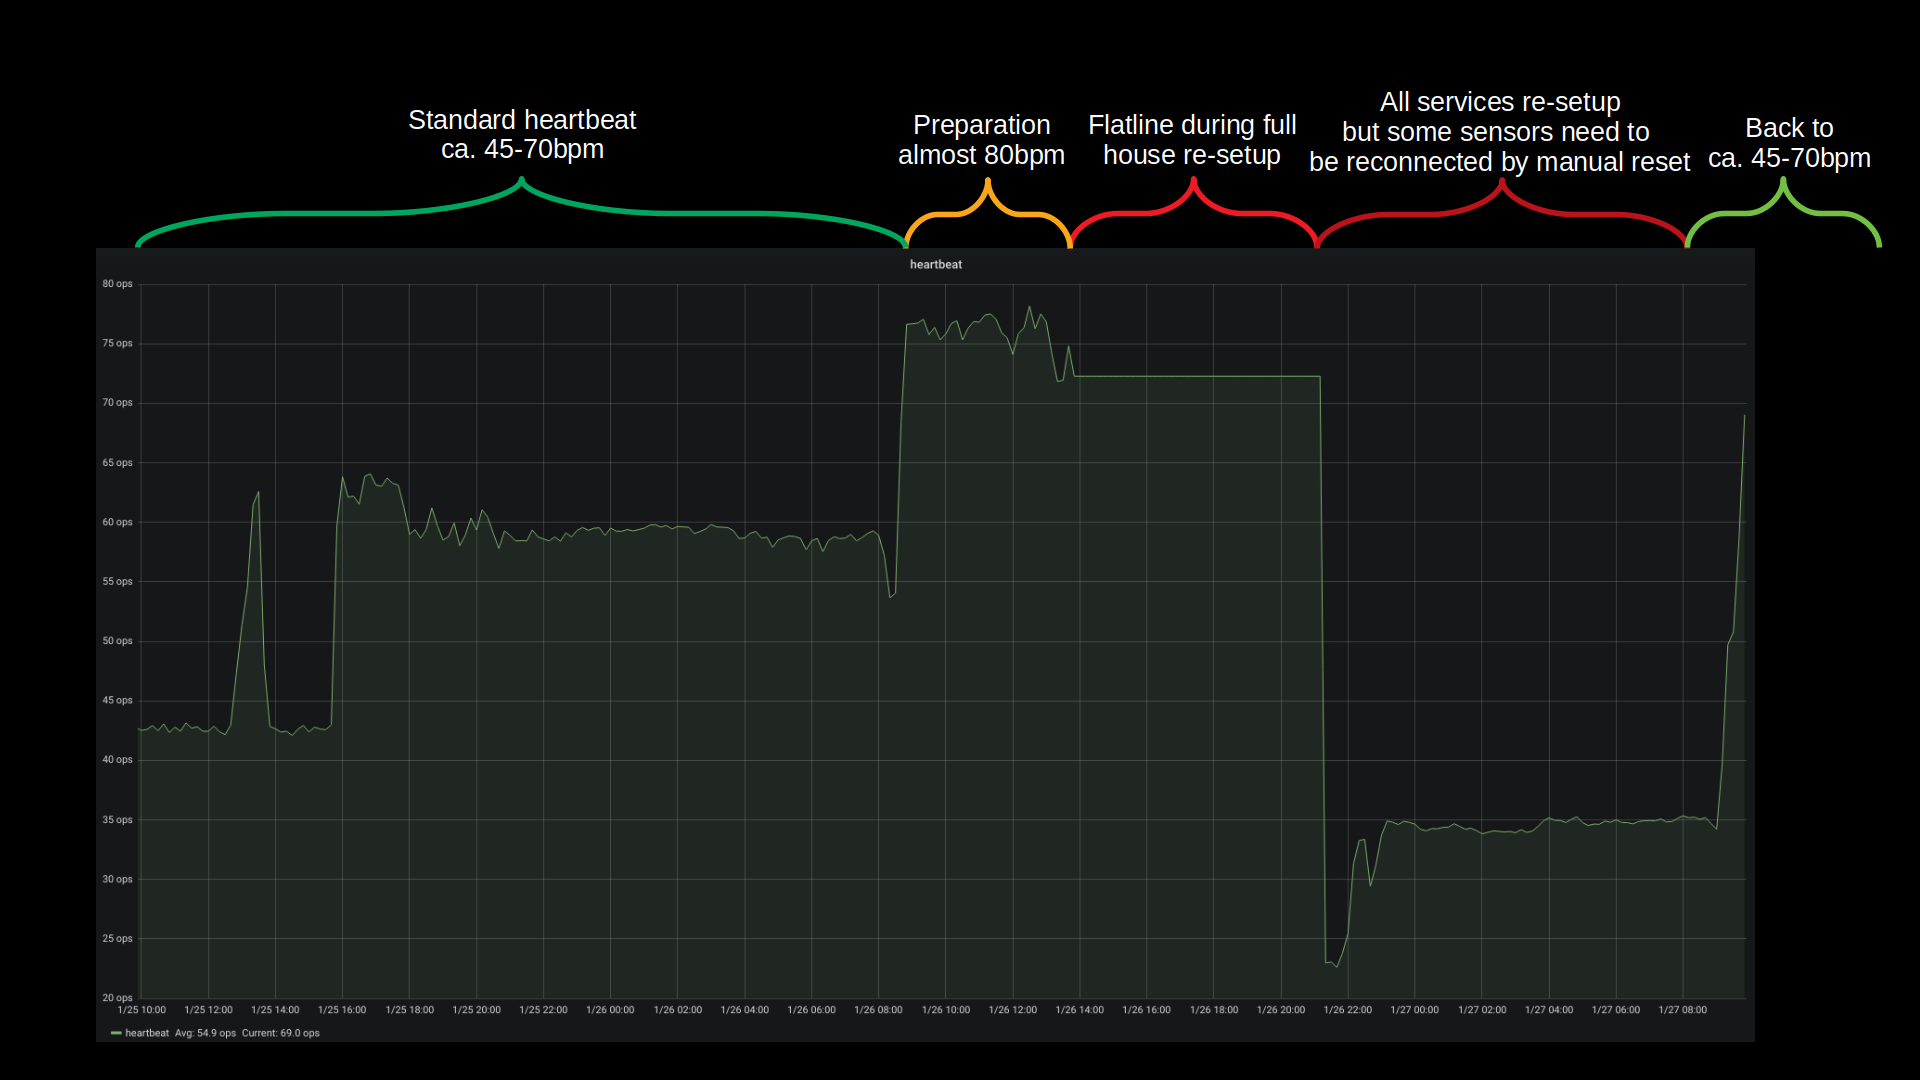
Bandwidth was the only real issue with this disaster recovery. All building blocks seemed to fall into place and no unplanned measure had to be taken. The house systems went partially down at around 12:30 and were back up 10 hours later 22:00. Of course non-automated things like internet kept working and all switches were only manual push-buttons. So everything could be done still but with a lot less convenience.
All in all there are more than 40 vital docker container based services that get started one after the other and interconnect to deliver a full house home automation. With the added SSD performance this whole ship is much much more responsive to activities. And hopefully less prone to mechanical defects.
Backup and Disaster-Preparations showed to be practical and working well. There was no beat missed (except sensor measure values during the 10 hours downtime) and no data lost.
What could be done better: It could be much more straight forward when there were less dependencies on external repositories / docker-hub. Almost all issues that came up with containers where from the fact that the maintainers had just a day before introduced something that kept them from spinning up naturally. Bad luck. But that can be helped! There’s now a multi-page disaster-recovery-procedure document that will be used and updated in the future.
Oh and what speeds am I seeing? The promissed 3 Gbyte/s read and write speeds are real. It’s quite impressive to see 4-digit megabyte/s values in iotop frequently.
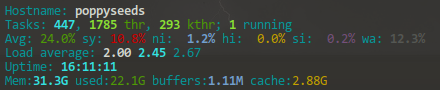
I almost forgot! During this exercise I had been in the server room less than 30 minutes. But I was on a warm and nice work-desk set-up I am using in the house as much as I can – and I will tell you about it in another article. But the major feature of this work-desk set-up is that it is (a) a standing desk and (b) has a treadmill under it. Yes. Treadmill.
You will get pictures of the set-up in that mentioned article, but since I had spent more than 10 hours walking on saturday doing the disaster recovery I want to give you a glimpse of what such a set-up means:
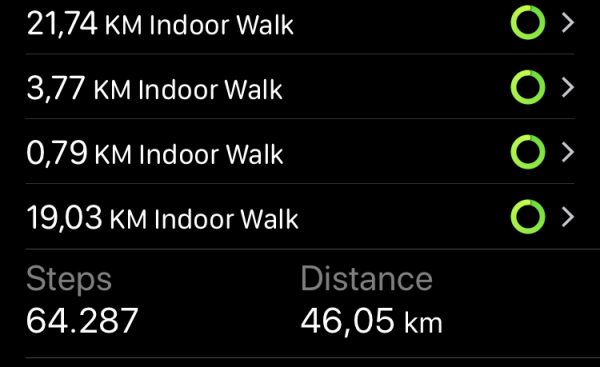
This project uses the same approach that I took for my ESP32 based indoor location tracking system (by tracking BLE signal strength). But this project came up with an actual user interface – NICE!